Small Farm Big Life

  • Gluten Free Recipe Index
  • Subscribe
  • Resources
menu icon
go to homepage
  • Home
  • Gluten Free Recipe Index
  • Subscribe
  • My Story
  • Resources
  • Free Guides
    • Email
    • Facebook
    • Instagram
    • Pinterest
  • subscribe
    search icon
    Homepage link
    • Home
    • Gluten Free Recipe Index
    • Subscribe
    • My Story
    • Resources
    • Free Guides
    • Email
    • Facebook
    • Instagram
    • Pinterest
  • ×

    Gluten Free Strawberry Muffins

    These easy gluten free strawberry muffins are the perfect way to celebrate fresh strawberry season and they come together in just 35 minutes with simple everyday ingredients. Moist and fluffy gluten free muffins loaded with fresh chopped strawberries in every bite, these are the kind of bakery style muffins that make your whole kitchen smell amazing while they are in the oven. Made with a combination of granulated and brown sugar for the perfect balance of sweetness and a rich buttery flavor that makes these the best gluten free strawberry muffins you will ever taste.

    Whether you are making them for a weekend breakfast, a spring brunch, or just because you have a beautiful batch of fresh strawberries on hand these muffins are going to become a seasonal staple in your kitchen.

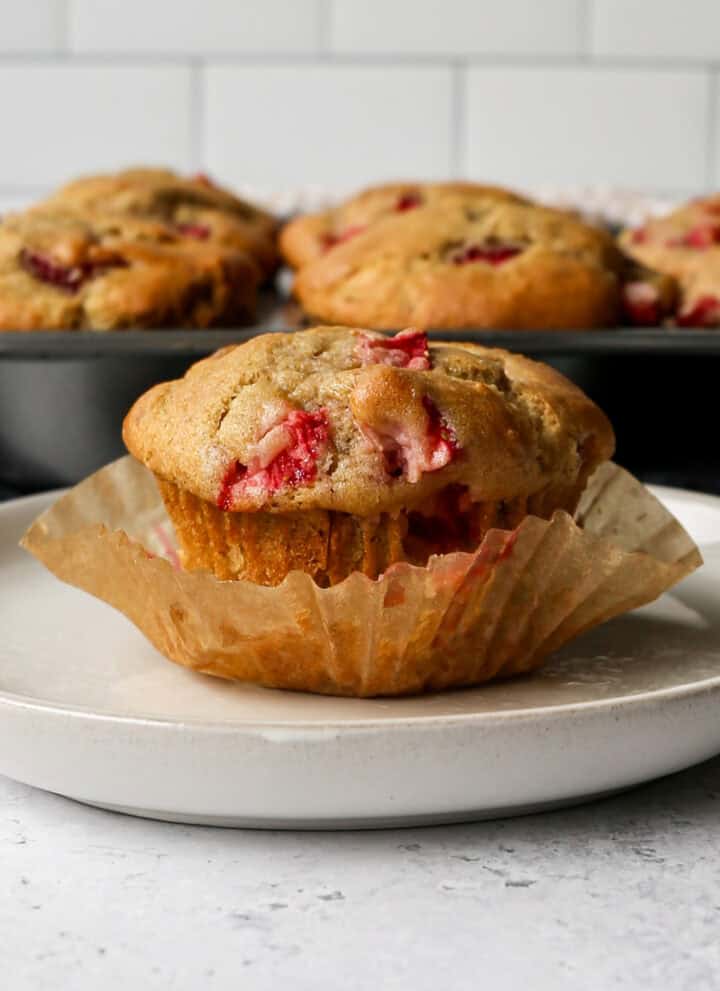
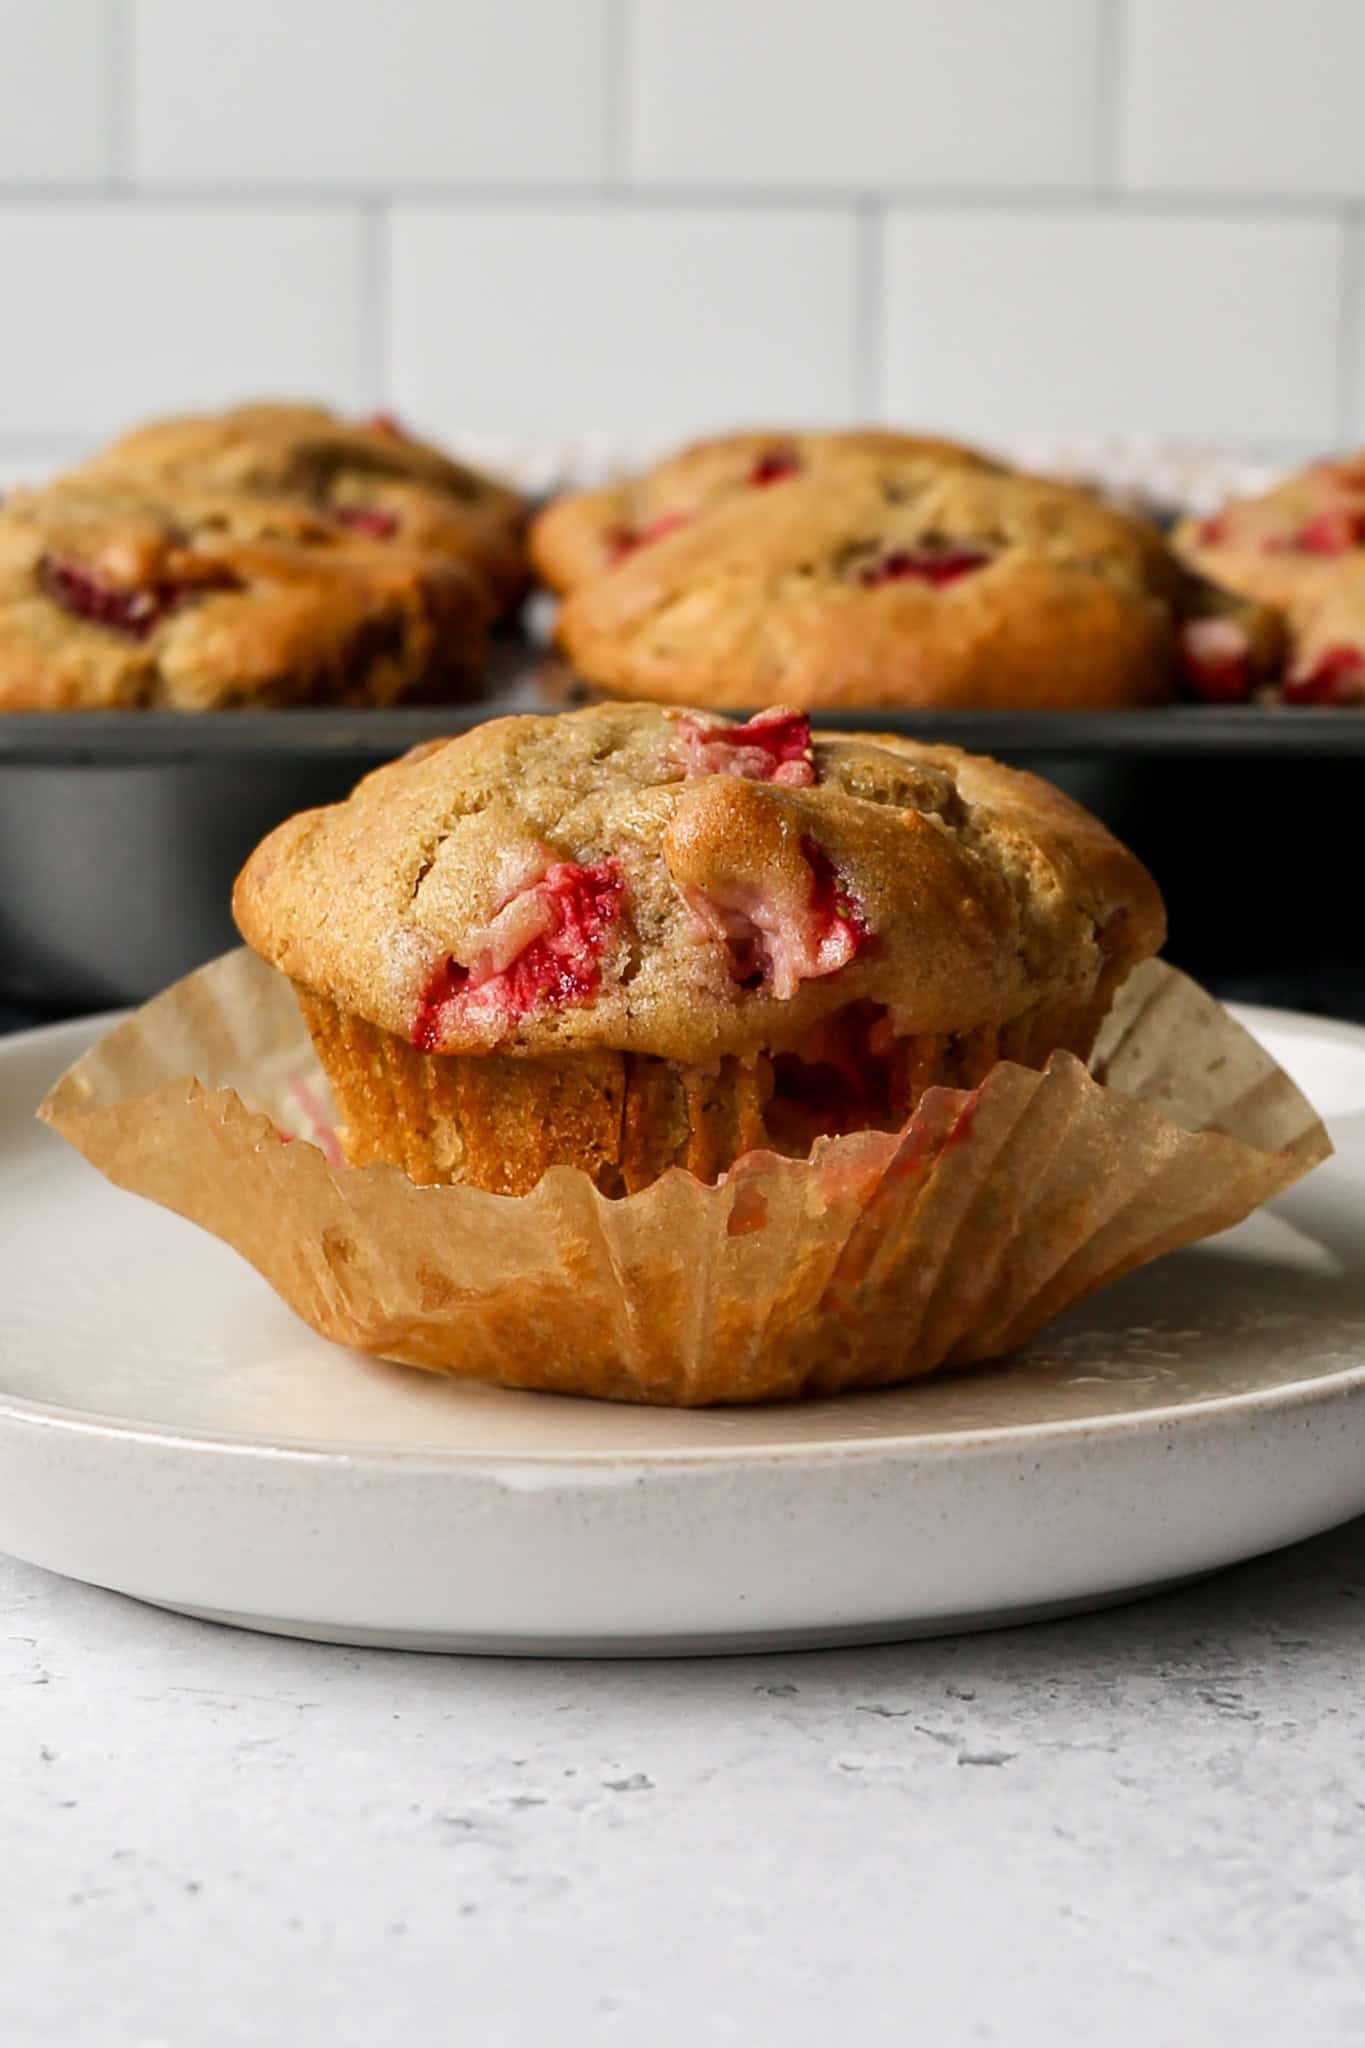
    a gluten free strawberry muffin on a plate with its wrapper pulled away in front of a muffin pan of the same muffins

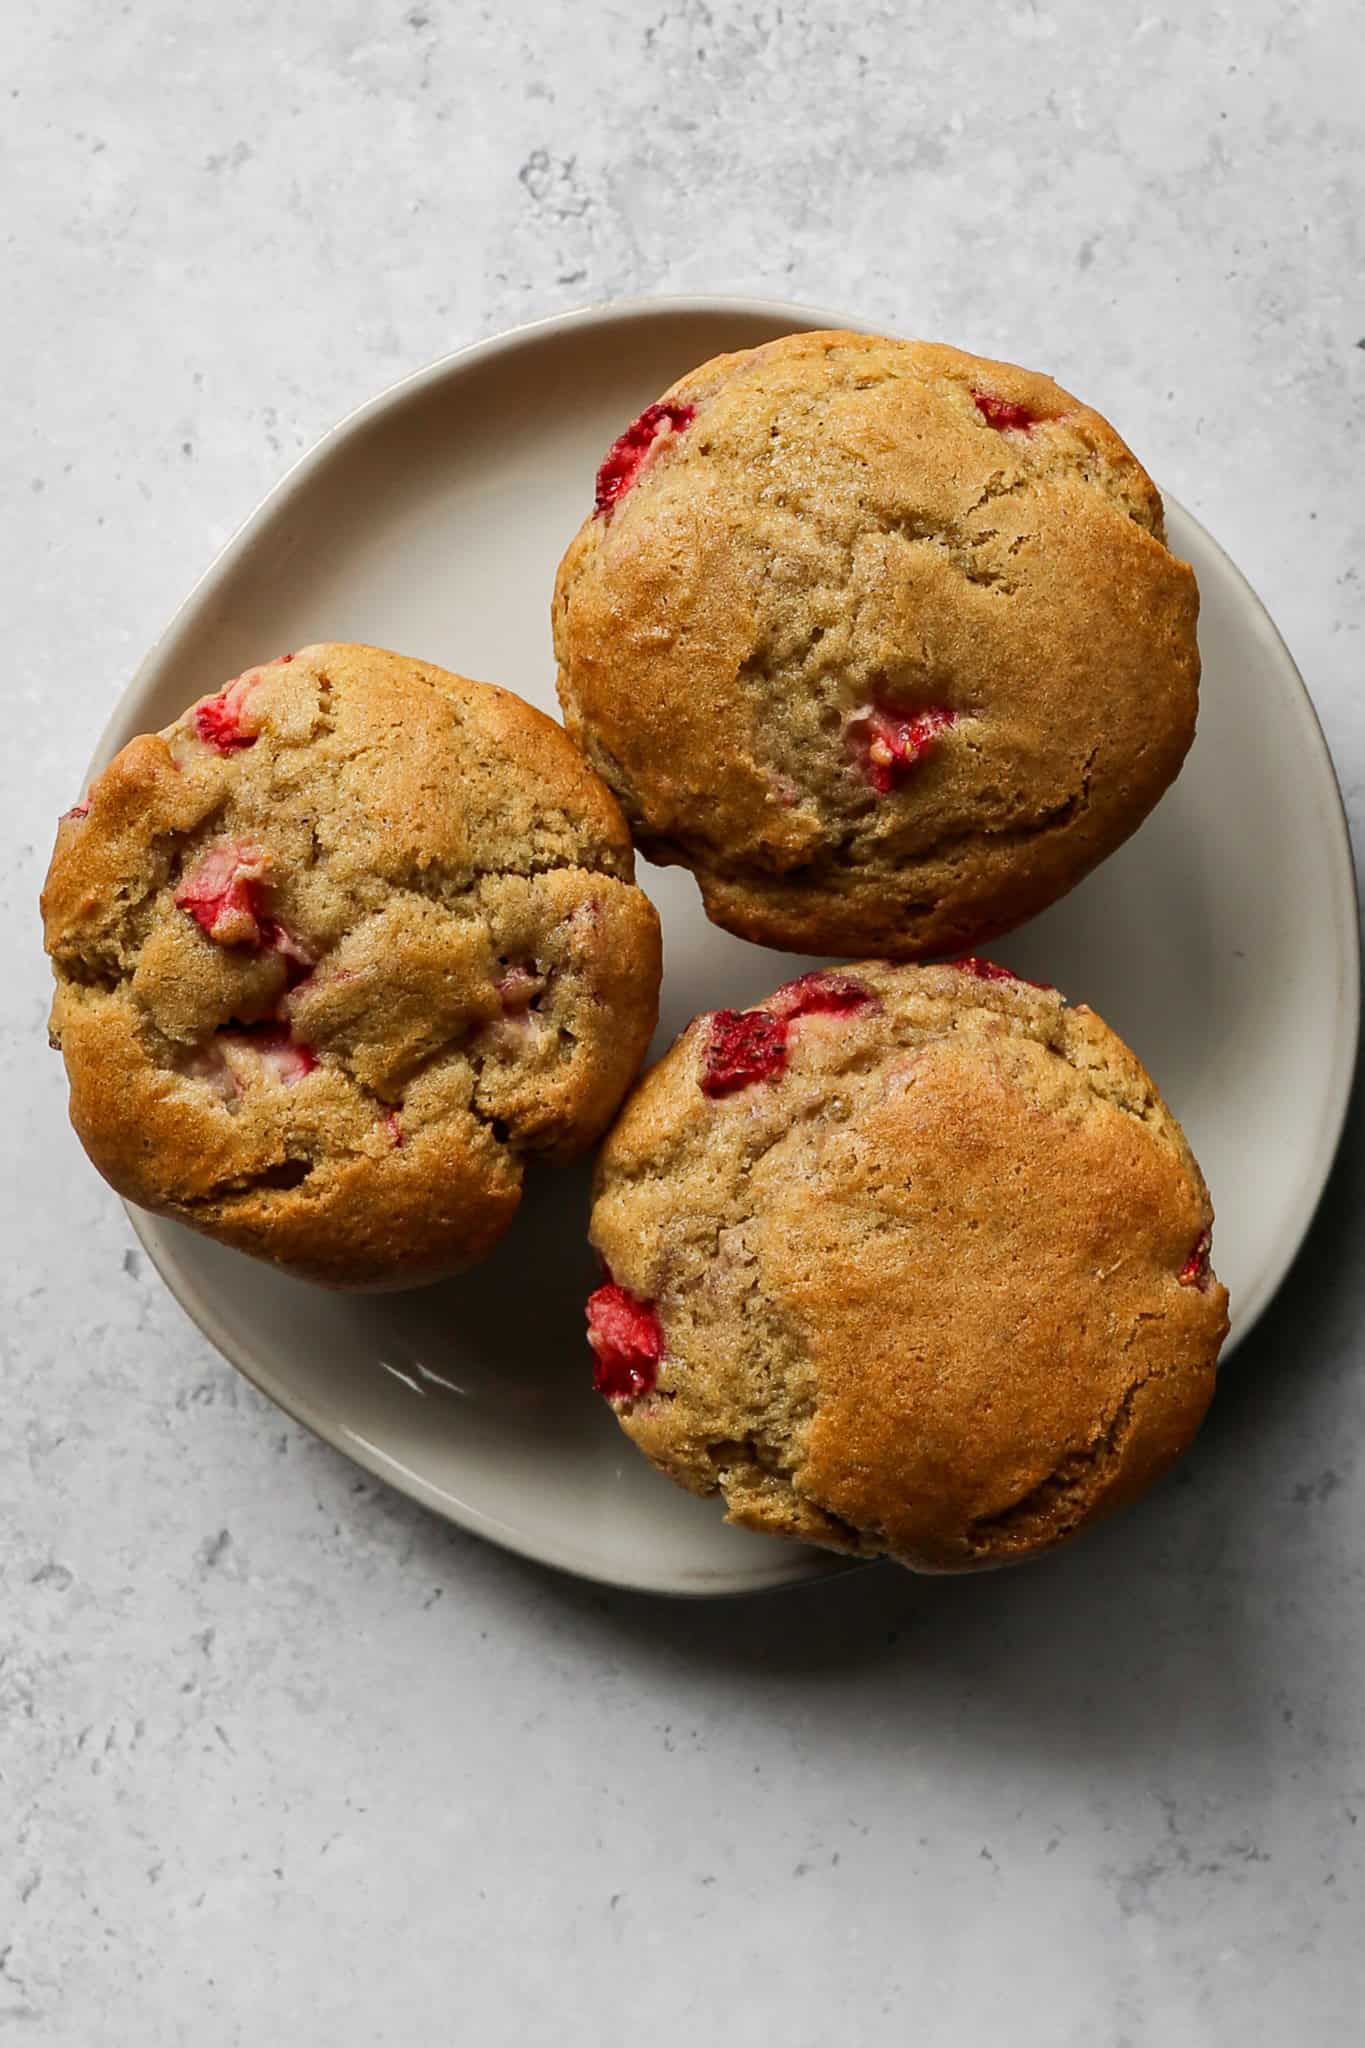
    What makes these gluten free strawberry muffins so special is the generous amount of fresh strawberries folded into the batter. Two full cups of fresh chopped strawberries means every single muffin is loaded with juicy pockets of sweet berry flavor from top to bottom.

    The trick of spacing the muffins out across two pans with only six muffins per pan gives each one plenty of room to rise beautifully in the oven for that gorgeous domed top you want in a really good bakery style muffin.

    These are gluten free from start to finish and the kind of easy gluten free baking recipe that disappears fast at every gathering, potluck, and brunch table they are brought to.

    If you are looking for more gluten free strawberry recipes try my Gluten Free Strawberry Upside Down Cake, my Gluten Free Strawberry Cobbler, my Gluten Free Strawberry Jam Bars or my 3 Ingredient Strawberry Lemonade Mocktail.

    You can find all my breakfast recipes here: Gluten Free Breakfast Recipes

    a cream colored small plate with three gluten free strawberry muffins on it
    [feast_advanced_jump_to]

    Ingredients

    • Gluten Free Flour
    • Baking Powder
    • Salt
    • Baking Soda
    • Eggs
    • Granulated Sugar
    • Brown Sugar
    • Butter
    • Milk
    • Vanilla Extract
    • Fresh Strawberries

    Instructions

    Preheat your oven to 350 degrees. Line two muffin pans with 12 liners (6 liners for each pan). Giving room around the muffins while they bake will help them rise more.

    In a large mixing bowl whisk together the gluten free flour, baking powder, salt and baking soda.

    In the bowl of your stand mixer add the eggs and sugar. Blend until mixed together. Add the melted butter, milk and vanilla. Blend together.

    Add the dry ingredients to the wet ingredients and blend just until combined.

    Remove the bowl from your mixer and fold the chopped strawberries into the batter with a spatula.

    Evenly spoon batter into lined muffin pans.

    Bake at 350 degrees for 25-30 minutes. They will be browned and a toothpick will come out clean when they are done.

    Let them cool completely in the muffin pans and then store in an air tight container.

    Supplies


    More Recipes You Might Enjoy

    • Gluten Free Blueberry Muffins
    • Gluten Free Banana Bread Muffins
    • Gluten Free Zucchini Muffins
    • Gluten Free Lemon Blueberry Muffins

    I get a lot of my ingredients from Thrive Market. Thrive Market has been a game changer for me eating gluten free. They have so many options I can't get at my rural grocery stores! Use this link to get 40% off your first order!

    Print
    clock clock iconcutlery cutlery iconflag flag iconfolder folder iconinstagram instagram iconpinterest pinterest iconfacebook facebook iconprint print iconsquares squares iconheart heart iconheart solid heart solid icon

    Gluten Free Strawberry Muffins


    5 Stars 4 Stars 3 Stars 2 Stars 1 Star

    No reviews

    • Author: Elaine VanVleck
    • Total Time: 45 minutes
    • Yield: 12 muffins 1x
    • Diet: Gluten Free
    Print Recipe
    Pin Recipe

    Description

    These easy gluten free strawberry muffins are moist, fluffy, and loaded with fresh chopped strawberries in every bite! Made with a combination of granulated and brown sugar for the perfect balance of sweetness and a rich buttery flavor, these bakery style gluten free muffins are ready in just 35 minutes. The perfect easy gluten free breakfast muffin for fresh strawberry season!


    Ingredients

    Scale
    • 2 cups Gluten Free Flour
    • 2 tsp Baking Powder
    • ½ tsp Salt
    • ½ tsp Baking Soda
    • 2 Eggs
    • ½ cup Granulated Sugar
    • ½ cup Brown Sugar
    • ½ cup Butter, melted
    • ½ cup Milk
    • 1 tsp Vanilla Extract
    • 2 cups Fresh Strawberries, cored and chopped

    Instructions

    Preheat your oven to 350 degrees. Line two muffin pans with 12 liners (6 liners for each pan). Giving room around the muffins while they bake will help them rise more.

    In a large mixing bowl whisk together the gluten free flour, baking powder, salt and baking soda.

    In the bowl of your stand mixer add the eggs and sugar. Blend until mixed together. Add the melted butter, milk and vanilla. Blend together.

    Add the dry ingredients to the wet ingredients and blend just until combined.

    Remove the bowl from your mixer and fold the chopped strawberries into the batter with a spatula.

    Evenly spoon batter into lined muffin pans.

    Bake at 350 degrees for 25-30 minutes. They will be browned and a toothpick will come out clean when they are done.

    Let them cool completely in the muffin pans and then store in an air tight container.

    If you made this recipe please leave a star rating and comment below. It helps other readers find this recipe and means so much to me.

    • Prep Time: 15 minutes
    • Cook Time: 30 minutes
    • Category: Breakfast, Snacks
    • Method: Baking
    • Cuisine: American

    Did you make this recipe?

    Tag @smallfarmbiglife on Instagram and hashtag it #smallfarmbiglife

    If you make these Gluten Free Strawberry Muffins I would love to hear what you think! Leave a star rating and a comment below and let me know how they turned out.

    Don't forget to save this recipe to your Pinterest boards so you can find it again all strawberry season long!

    Storage

    Store these gluten free strawberry muffins in an airtight container at room temperature for up to 2 days. Because these muffins are made with fresh strawberries they have more moisture than a standard muffin and should not be left out at room temperature for more than two days as the fresh fruit can cause them to spoil faster than a muffin made without fresh fruit.

    For longer storage place the muffins in a sealed airtight container in the refrigerator for up to 5 days. These muffins also freeze beautifully making them a great option for meal prep during peak strawberry season.

    Once completely cooled place individual muffins in a freezer safe bag or airtight container and freeze for up to 3 months. Thaw individual muffins at room temperature for about an hour or warm them in the microwave for 30 to 45 seconds straight from the freezer for a quick and easy gluten free breakfast any morning of the week.

    Top Tip

    Space your muffins out across two pans with only six muffins per pan rather than filling all twelve cups in one pan. This gives each muffin plenty of room for the hot air to circulate around it in the oven which helps the muffins rise taller and develop that beautiful domed top you see at a really good bakery. When muffins are too close together in a full pan they steam each other rather than bake which results in flat tops and a denser texture. Six muffins per pan with empty cups in between is the simple trick that takes these from good to truly bakery worthy every single time.

    Didn't find the answer you're looking for?

    Ask AI to answer based on this recipe:

    ChatGPT
    Google AI
    Perplexity
    Grok
    Claude

    Frequently Asked Questions

    Can I use frozen strawberries instead of fresh?

    Fresh strawberries are strongly recommended for this recipe for the best flavor and texture. Fresh strawberries hold their shape better in the batter and do not release as much excess moisture as frozen strawberries which can make the muffins too wet and dense. If you only have frozen strawberries available thaw them completely and drain off as much excess liquid as possible by patting them dry thoroughly with paper towels before folding them into the batter. The muffins will still be delicious but fresh strawberries during peak strawberry season will always give you the absolute best result.

    Why did my gluten free strawberry muffins turn out flat?

    Flat gluten free muffins are usually caused by one of three things. Over mixing the batter after adding the dry ingredients can deflate the air you worked into the eggs and sugar which leads to flat muffins. Filling all twelve cups in one muffin pan rather than spacing six muffins across two pans prevents proper air circulation and causes flat tops. And opening the oven door too early during baking can cause the muffins to sink before they have had a chance to set. Make sure to follow the tip of using only six liners per pan and resist the urge to open the oven before the 25 minute mark.

    Can I add a streusel topping to these muffins?

    Absolutely! A simple streusel topping made with gluten free flour, brown sugar, butter, and sliced almonds or chopped pecans would be a wonderful addition to these muffins and would give them an even more bakery worthy look and feel. Simply mix together the streusel ingredients with your fingers until crumbly and sprinkle generously over the top of each muffin before baking. The streusel will bake up golden and crispy and add a delicious buttery crunch to every bite. I have a streusel recipe with my GF Strawberry Rhubarb Muffins that works great on any muffin.

    Can I make these muffins dairy free?

    Yes! To make these muffins dairy free substitute your favorite unsweetened dairy free milk for the regular milk and use melted coconut oil or a dairy free butter alternative in place of the melted butter. The texture and flavor will be very similar to the original recipe and the muffins will still be moist and delicious. Both coconut oil and dairy free butter alternatives work well in gluten free muffin recipes without significantly changing the finished result.

    What is the best gluten free flour for strawberry muffins?

    A good all purpose gluten free flour blend works best for this recipe. Look for a blend that contains xanthan gum as it helps bind the batter and gives the muffins the best texture and rise. My favorite brands are Bob's Red Mill 1 to 1 Gluten Free Baking Flour and King Arthur Measure for Measure Gluten Free Flour. Both produce moist and fluffy muffins with a great texture. Keep in mind that different flour blends absorb moisture at different rates so your batter consistency may vary slightly depending on which brand you use.

    Can I double this recipe?

    Yes! This recipe doubles easily to make 24 muffins. Simply double all of the ingredients and bake in four muffin pans with six muffins per pan to ensure even rising and beautiful domed tops. You may need to bake in batches depending on how many muffin pans you have. Making a double batch during peak strawberry season and freezing half for later is a wonderful way to enjoy these muffins well beyond strawberry season.

    Gluten Free High Protein Lemon Blueberry Pancakes

    These gluten free high protein lemon blueberry pancakes are about to become your new favorite weekend breakfast. Fluffy, golden, and bursting with fresh lemon and blueberry flavor in every single bite, these pancakes are made with full fat cottage cheese blended right into the batter for a protein boost that you would never know was there. The cottage cheese completely disappears into the batter and gives these pancakes an incredibly moist and tender texture while adding a significant amount of protein to every stack.

    Made with gluten free flour and ready in just 30 minutes, these are the high protein gluten free pancakes that make you feel good about what you are eating without sacrificing any of the flavor or indulgence of a classic weekend breakfast.

    a white plate of five gluten free high protein lemon blueberry pancakes on a woven trivet next to a tan gingham kitchen towel

    What makes these lemon blueberry cottage cheese pancakes so special is the combination of fresh lemon juice, lemon zest, and juicy blueberries that makes every bite taste bright, fresh, and absolutely delicious.

    The batter comes together in a blender in just minutes and the whole recipe is simple enough for a busy weekday morning but special enough to serve at a weekend brunch or Mother's Day breakfast.

    Each serving is packed with protein from the cottage cheese and eggs which means these pancakes will actually keep you full and satisfied all morning long unlike traditional pancakes that leave you hungry an hour later.

    Serve them warm with a drizzle of maple syrup or a light dusting of powdered sugar for the most perfect gluten free high protein breakfast you will ever make.

    If you are looking for more gluten free blueberry recipes try my Gluten Free Lemon Blueberry Muffins, my Lemon Blueberry Chia Pudding, my Gluten Free Blueberry Muffins or my Gluten Free Oven Baked Pancakes with Blueberry Sauce.

    You can find all of my breakfast recipes here: Gluten Free Breakfast Recipes

    a white plate of five gluten free high protein lemon blueberry pancakes on a woven trivet next to a tan gingham kitchen towel
    [feast_advanced_jump_to]

    Ingredients

    • Full Fat Cottage Cheese
    • Eggs
    • Maple Syrup
    • Lemon Juice
    • Milk
    • Lemon Zest
    • Vanilla Extract
    • Gluten Free Flour
    • Baking Powder
    • Salt
    • Frozen Blueberries or Fresh Blueberries
    • Butter or Coconut Oil
    • Maple Syrup or Powdered Sugar

    Instructions

    In a blender or food processor blend the cottage cheese, eggs, maple syrup, lemon juice, milk, lemon zest and vanilla extract until smooth.

    Pour this mixture into a mixing bowl. Add the gluten free flour, baking powder and salt. Stir just until combined.

    Gently fold in the fresh or frozen blueberries.

    In a skillet over medium low heat add 1-2 tablespoons butter or coconut oil. Once that it melted and the pan is hot add ½ cup of batter per for each pancake. I did four pancakes at a time in my pan.

    Cook 2-3 minutes until bubbles form on the surface the edges are set. Flip and cook another 2-3 minutes until golden brown and cooked through.

    Serve immediately with maple syrup or a dusting of powdered sugar.

    Supplies


    More Recipes You Might Enjoy

    • Gluten Free Lemon Blueberry Muffins
    • Lemon Blueberry Chia Pudding
    • Gluten Free Blueberry Coffee Cake
    • Gluten Free Blueberry Muffins

    I get a lot of my ingredients from Thrive Market. Thrive Market has been a game changer for me eating gluten free. They have so many options I can't get at my rural grocery stores! Use this link to get 40% off your first order!

    Print
    clock clock iconcutlery cutlery iconflag flag iconfolder folder iconinstagram instagram iconpinterest pinterest iconfacebook facebook iconprint print iconsquares squares iconheart heart iconheart solid heart solid icon

    Gluten Free High Protein Lemon Blueberry Pancakes


    5 Stars 4 Stars 3 Stars 2 Stars 1 Star

    No reviews

    • Author: Elaine VanVleck
    • Total Time: 22 minutes
    • Yield: 8 pancakes 1x
    • Diet: Gluten Free
    Print Recipe
    Pin Recipe

    Description

    These easy gluten free high protein lemon blueberry pancakes are fluffy, golden, and packed with protein from full fat cottage cheese blended right into the batter! Fresh lemon juice, lemon zest, and juicy blueberries give every bite a bright and fresh flavor while the cottage cheese adds incredible moisture and a significant protein boost. Ready in just 30 minutes for the most delicious and satisfying gluten free high protein breakfast!


    Ingredients

    Scale
    • 1 cup Full Fat Cottage Cheese
    • 2 large Eggs
    • 2 Tbsp Maple Syrup
    • 2 Tbsp Lemon Juice
    • 2 Tbsp Milk
    • 1 Tbsp Lemon Zest
    • 1 tsp Vanilla Extract
    • ¾ cup Gluten Free Flour
    • 1 tsp Baking Powder
    • ¼ tsp Salt
    • 1 cup Frozen Blueberries or Fresh Blueberries
    • Butter or Coconut Oil for cooking
    • Maple Syrup or Powdered Sugar for topping

    Instructions

    In a blender or food processor blend the cottage cheese, eggs, maple syrup, lemon juice, milk, lemon zest and vanilla extract until smooth.

    Pour this mixture into a mixing bowl. Add the gluten free flour, baking powder and salt. Stir just until combined.

    Gently fold in the fresh or frozen blueberries.

    In a skillet over medium low heat add 1-2 tablespoons butter or coconut oil. Once that it melted and the pan is hot add ½ cup of batter per for each pancake. I did four pancakes at a time in my pan.

    Cook 2-3 minutes until bubbles form on the surface the edges are set. Flip and cook another 2-3 minutes until golden brown and cooked through.

    Serve immediately with maple syrup or a dusting of powdered sugar.

    If you made this recipe please leave a star rating and comment below. It helps other readers find this recipe and means so much to me.

    • Prep Time: 10 minutes
    • Cook Time: 12 minutes
    • Category: Breakfast, Snacks
    • Method: Stove Top
    • Cuisine: American

    Did you make this recipe?

    Tag @smallfarmbiglife on Instagram and hashtag it #smallfarmbiglife

    If you make these Gluten Free High Protein Lemon Blueberry Pancakes I would love to hear what you think! Leave a star rating and a comment below and let me know what you topped them with.

    Don't forget to save this recipe to your Pinterest boards so you can find it again every weekend morning!

    Storage

    Store leftover gluten free high protein lemon blueberry pancakes in an airtight container in the refrigerator for up to 3 days. To reheat individual pancakes warm in the microwave for 30 to 45 seconds or reheat in a skillet over medium low heat for about a minute on each side until warmed through.

    These pancakes also freeze beautifully making them a great option for meal prep. Once completely cooled place individual pancakes in a single layer on a baking sheet and freeze for one hour until solid then transfer to a freezer safe bag or airtight container with parchment paper between each pancake to prevent sticking. Freeze for up to 3 months and reheat straight from the freezer in the microwave for 60 to 90 seconds or in a toaster for a slightly crispier result.

    Top Tip

    Make sure your skillet is fully preheated over medium low heat before adding the batter and do not rush the cooking process by turning the heat up too high. Cottage cheese pancakes are more delicate than traditional pancakes and cooking them too fast over high heat will cause the outside to brown too quickly before the inside is cooked through.

    Medium low heat is the sweet spot for these pancakes. Wait until you see bubbles forming across the entire surface of the pancake and the edges look set and no longer wet before flipping. Flipping too early is the number one reason cottage cheese pancakes fall apart so patience is key to getting that perfect golden flip every single time.

    Didn't find the answer you're looking for?

    Ask AI to answer based on this recipe:

    ChatGPT
    Google AI
    Perplexity
    Grok
    Claude

    Frequently Asked Questions

    Can I taste the cottage cheese in these pancakes?

    No! The cottage cheese is completely undetectable in the finished pancakes. When you blend the cottage cheese with the eggs, lemon juice, milk, and vanilla extract it becomes completely smooth and creamy and blends seamlessly into the batter. It simply adds an incredibly moist and tender texture and a significant protein boost without any cottage cheese flavor whatsoever. If you are skeptical about cottage cheese in pancakes I promise this recipe will change your mind completely.

    How much protein is in these lemon blueberry pancakes?

    The protein content will vary slightly depending on the brand of cottage cheese and gluten free flour you use but full fat cottage cheese is an excellent source of protein with roughly 14 grams of protein per half cup. Combined with the two eggs in this recipe each serving of these pancakes has significantly more protein than traditional pancakes made without cottage cheese. Adding a drizzle of nut butter on top is a great way to boost the protein content even further.

    Can I use fresh blueberries instead of frozen?

    Yes! Both fresh and frozen blueberries work beautifully in this recipe. Fresh blueberries will hold their shape a little better in the batter while frozen blueberries may release more juice and give the pancakes a slightly purple tint around the blueberries as they cook. Both are equally delicious. If you are using frozen blueberries there is no need to thaw them before folding them into the batter. Add them straight from the freezer to help prevent them from bleeding too much color into the batter before cooking.

    Can I make this batter ahead of time?

    Yes! You can make the pancake batter the night before and store it covered in the refrigerator overnight. Give it a gentle stir before cooking as it may thicken slightly as it sits. You may need to add a small splash of milk to loosen the batter back to the right consistency if it has thickened too much overnight. The blueberries are best folded in right before cooking rather than the night before to prevent them from bleeding too much color into the batter.

    Can I substitute the gluten free flour with almond flour or oat flour?

    Almond flour and oat flour both behave very differently from a standard gluten free all purpose flour blend so substituting them directly will change the texture and consistency of the batter significantly. Almond flour will give you a denser and more fragile pancake while oat flour will make the batter thicker and the pancakes chewier. If you want to experiment with either substitute start by using the same amount and adjust the milk quantity as needed to get the right batter consistency. Keep in mind that oat flour is not always gluten free so make sure to use certified gluten free oat flour if you go that route.

    Can I make these pancakes dairy free?

    The cottage cheese is the key ingredient that gives these pancakes their high protein content and moist texture so substituting it is tricky. Dairy free cottage cheese alternatives are available at some specialty grocery stores and would be the best substitute for keeping the recipe as close to the original as possible. You can also substitute the milk with any unsweetened dairy free milk alternative in the same amount (I used unsweetened almond milk).

    Fruit Salad with Honey Lime Dressing

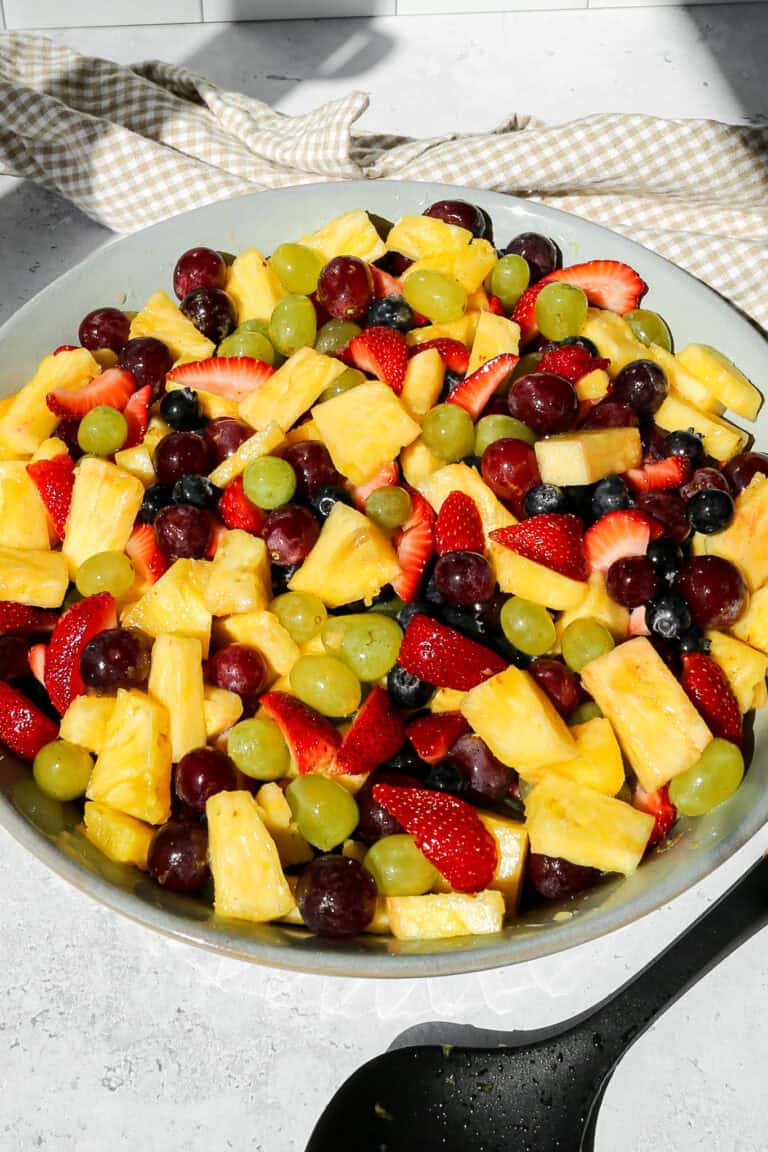
    This easy fruit salad with honey lime dressing is the most refreshing and vibrant summer side dish and it comes together in just 15 minutes with fresh seasonal fruit and a simple three ingredient dressing. Juicy red and green grapes, sweet fresh pineapple, sliced strawberries, and plump blueberries get tossed in a light and zesty dressing made with honey, fresh lime juice, and lime zest that brings all the fruit flavors together beautifully.

    It is naturally gluten free, completely dairy free, and the kind of fresh and colorful dish that looks stunning on any table from a casual weeknight dinner to a summer BBQ, potluck, or holiday gathering.

    a large serving bowl of fruit salad with honey lime dressing nexts to a tan and white gingham kitchen towel

    What sets this honey lime fruit salad apart from a basic fruit salad is the simple step of washing the fruit in a white vinegar and water solution before adding it to the bowl. This method removes any wax, pesticide residue, and bacteria from the surface of the fruit which keeps it fresher longer and actually makes the fruit taste cleaner and more vibrant.

    The honey lime dressing is the perfect finishing touch, light enough to let the natural sweetness of the fruit shine through while adding a bright and citrusy flavor that makes every bite taste fresh and summery.

    Make it ahead and store it in the refrigerator until you are ready to serve for an easy and crowd pleasing gluten free summer dessert or side dish.

    If you're looking for more cold salad recipes try my Pineapple Coleslaw, my Strawberry Spinach Salad with Balsamic Poppyseed Dressing, my Gluten Free Frog Eye Salad or my Easy Apple Slaw with Poppyseed Dressing.

    You can find all of my salad recipes here: Gluten Free Salad Recipes
    a large serving bowl of fruit salad with honey lime dressing nexts to a tan and white gingham kitchen towel
    [feast_advanced_jump_to]

    Ingredients

    • Red Seedless Grapes
    • Fresh Pineapple
    • Fresh Strawberries
    • Fresh Blueberries
    • Green Seedless Grapes
    • Honey
    • Lime Juice
    • Lime Zest

    Instructions

    Wash the grapes, strawberries and blueberries by soaking them in 1 part white vinegar to 3 parts cold water for 5-10 minutes. Rinse them thoroughly with cold water and dry them completely to prevent sogginess.

    While the other fruit it soaking, core and chop the fresh pineapple into bite size pieces. Core and quarter the strawberries. Add your rinsed and prepared fruit to a large serving bowl.

    In a small bowl or measuring cup add the honey, lime juice and lime zest. Whisk together until combined.

    Pour the dressing over your fruit mixture and gently stir to combine.

    Serve immediately or store covered in the refrigerator until ready to serve.

    Supplies


    More Recipes You Might Enjoy

    • Easy Apple Slaw with Poppyseed Dressing
    • Gluten Free Frog Eye Salad
    • Strawberry Spinach Salad with Balsamic Poppyseed Dressing
    • Pineapple Coleslaw

    I get a lot of my ingredients from Thrive Market. Thrive Market has been a game changer for me eating gluten free. They have so many options I can't get at my rural grocery stores! Use this link to get 40% off your first order!

    Print
    clock clock iconcutlery cutlery iconflag flag iconfolder folder iconinstagram instagram iconpinterest pinterest iconfacebook facebook iconprint print iconsquares squares iconheart heart iconheart solid heart solid icon

    Fruit Salad with Honey Lime Dressing


    5 Stars 4 Stars 3 Stars 2 Stars 1 Star

    5 from 1 review

    • Author: Elaine VanVleck
    • Total Time: 20 minutes
    • Yield: 8 servings 1x
    • Diet: Gluten Free
    Print Recipe
    Pin Recipe

    Description

    This easy fruit salad with honey lime dressing is a fresh and vibrant gluten free side dish ready in just 15 minutes! Juicy red and green grapes, sweet fresh pineapple, sliced strawberries, and plump blueberries are tossed in a simple honey, lime juice, and lime zest dressing that brings all the summer fruit flavors together beautifully. The perfect easy gluten free summer side dish for BBQs, potlucks, and warm weather entertaining!


    Ingredients

    Scale
    • 3 cups Red Seedless Grapes
    • 2 cups Fresh Pineapple, chopped into bite size pieces
    • 1 pound Fresh Strawberries, cored and sliced
    • 1 pint Fresh Blueberries
    • 2 cups Green Seedless Grapes
    • 2 Tbsp Honey
    • 2 Tbsp Lime Juice
    • 1 Tbsp Lime Zest

    Instructions

    Wash the grapes, strawberries and blueberries by soaking them in 1 part white vinegar to 3 parts cold water for 5-10 minutes. Rinse them thoroughly with cold water and dry them completely to prevent sogginess.

    While the other fruit it soaking, core and chop the fresh pineapple into bite size pieces. Core and quarter the strawberries. Add your rinsed and prepared fruit to a large serving bowl.

    In a small bowl or measuring cup add the honey, lime juice and lime zest. Whisk together until combined.

    Pour the dressing over your fruit mixture and gently stir to combine.

    Serve immediately or store covered in the refrigerator until ready to serve.

    If you made this recipe please leave a star rating and comment below. It helps other readers find this recipe and means so much to me.

    • Prep Time: 20 minutes
    • Cook Time: 0 minutes
    • Category: Side Dish, Salads
    • Method: Chopped
    • Cuisine: American

    Did you make this recipe?

    Tag @smallfarmbiglife on Instagram and hashtag it #smallfarmbiglife

    If you make this Fruit Salad with Honey Lime Dressing I would love to hear what you think! Leave a star rating and a comment below and let me know what fruit combinations you used.

    Don't forget to save this recipe to your Pinterest boards so you can find it again all summer long!

    Storage

    Store this fruit salad with honey lime dressing in an airtight container or covered tightly with plastic wrap in the refrigerator for up to 3 days. Keep in mind that the fruit will release its natural juices as it sits and the salad will become more liquid over time. Give it a gentle stir before serving and drain off any excess liquid if needed.

    The strawberries tend to soften the fastest so if you are making this salad more than a few hours ahead consider adding the strawberries right before serving to keep them firm and fresh. This fruit salad is not suitable for freezing as the fruit will become mushy and watery once thawed.

    Top Tip

    Make sure your fruit is completely dry before adding it to the serving bowl and tossing it with the honey lime dressing. Any excess water left on the fruit after washing and rinsing will dilute the dressing and make the salad watery and bland rather than bright and flavorful.

    After rinsing the grapes, strawberries, and blueberries spread them out on a clean kitchen towel or paper towels and pat them gently dry before adding them to the bowl. Taking this extra few minutes to dry the fruit thoroughly makes a significant difference in how well the honey lime dressing coats every piece of fruit and how long the salad stays fresh in the refrigerator.

    Didn't find the answer you're looking for?

    Ask AI to answer based on this recipe:

    ChatGPT
    Google AI
    Perplexity
    Grok
    Claude

    Frequently Asked Questions

    Can I make this fruit salad ahead of time?

    Yes! This fruit salad can be made up to 24 hours ahead of time and stored covered in the refrigerator until you are ready to serve. For the best results make the salad and add the honey lime dressing a few hours before serving rather than the day before. If you need to make it the day before I recommend storing the prepared fruit and the dressing separately in the refrigerator and tossing everything together right before serving. You can also prep all of the fruit ahead of time and add the strawberries right before serving since they tend to soften faster than the other fruits in this salad.

    Can I use different fruit in this salad?

    Absolutely! This honey lime fruit salad is very easy to customize with whatever fresh fruit you have on hand or whatever is in season. Fresh raspberries, blackberries, mandarin orange segments, kiwi slices, peach slices, and mango chunks are all wonderful additions or substitutions. Just make sure to cut everything into similar sized bite size pieces so the salad is easy to serve and every bite has a good mix of fruit. The honey lime dressing pairs beautifully with almost any combination of fresh summer fruit.

    How do you keep fruit salad from getting soggy?

    The key to keeping fruit salad from getting soggy is to make sure the fruit is completely dry before adding the dressing and to serve it as close to the time of making it as possible. The honey lime dressing in this recipe is intentionally light so it coats the fruit without making it soggy. Adding the strawberries right before serving also helps since strawberries release more juice than the other fruits in this salad and can contribute to a waterier texture if they sit too long in the dressing.

    Can I substitute lemon juice for the lime juice in the dressing?

    Yes! Fresh lemon juice works beautifully as a substitute for lime juice in this honey dressing. The flavor will be slightly different but equally bright and citrusy. Use the same amount of lemon juice as the lime juice called for in the recipe and substitute lemon zest for the lime zest. A honey lemon dressing is a classic and delicious pairing with fresh summer fruit and works especially well if you are using berries and peaches in your salad.

    Is this fruit salad gluten free?

    Yes! This fruit salad with honey lime dressing is naturally gluten free from start to finish. All of the ingredients including the fresh fruit, honey, lime juice, and lime zest are naturally gluten free with no substitutions needed. It is also naturally dairy free and vegetarian making it a wonderful option for serving a crowd with a variety of dietary needs and preferences. Just make sure your honey is pure honey with no added ingredients to keep the recipe completely gluten free.

    Gluten Free Creamy Peas and Pasta

    This gluten free creamy peas and pasta is the kind of simple and satisfying weeknight dinner that comes together in about 30 minutes with ingredients you probably already have on hand. Gluten free fusilli pasta gets tossed in a rich and velvety cream sauce loaded with sweet peas, sautéed onion, minced garlic, and bright lemon zest for a dish that is fresh, comforting, and completely gluten free from start to finish.

    A generous handful of finely grated parmesan and a squeeze of fresh lemon juice finish the sauce and give it a bold and savory flavor that makes this one of those easy gluten free pasta recipes you will want to make on repeat all spring and summer long.

    a pan of gluten free creamy peas and past next to a tan gingham kitchen towel

    What makes this gluten free peas and pasta so special is how the cream sauce comes together. Sautéing the peas with the onion, garlic, and lemon zest before adding the cream gives the sauce a deep and layered flavor that tastes like you spent a lot more time on it than you actually did.

    The sauce reduces down into the most luxurious and creamy coating that clings to every piece of gluten free fusilli pasta beautifully. It is light enough to feel fresh and seasonal for spring but rich and hearty enough to satisfy the whole family at the dinner table.

    Serve it as a simple main dish or pair it alongside grilled chicken or shrimp for a more substantial gluten free dinner.

    If you're looking for more creamy gluten free pasta recipes try my Gluten Free Chicken Carbonara Pasta Bake, my Gluten Free Chicken and Broccoli Pasta Bake, my Gluten Free Creamy Beef and Mushroom Pasta or my Gluten Free One Pot Hamburger Helper Copycat.

    You can find all my meal recipes here: Gluten Free Meal Recipes

    three white bowls of gluten free creamy peas and pasta
    [feast_advanced_jump_to]

    Ingredients

    • Frozen Peas
    • Yellow Onion
    • Minced Garlic
    • Butter
    • Olive Oil
    • Lemon Zest
    • Heavy Cream
    • Lemon Juice
    • Parmesan Cheese
    • Salt
    • Black Pepper
    • Gluten Free Fusilli Pasta

    Instructions

    In a stock pot cook the gluten free fusilli pasta per the package instructions. When the pasta is done, strain it and then return the pasta to the pot you cooked it in.

    While the pasta is cooking, in a saute pan over medium heat melt the butter with the olive oil. Add the peas, onion, minced garlic and lemon zest. Saute until onions are translucent and the peas are cooked through.

    Pour the cream into the pea mixture and bring to a boil. Lower the temperature and simmer for 5-7 minutes to reduce the sauce.

    Add the lemon juice, cheese, salt and pepper. Stir to combine.

    Add the cooked and drained gluten free pasta to the pea mixture. Stir to coat the pasta and serve immediately.

    Supplies


    More Recipes You Might Enjoy

    • Gluten Free Chicken Carbonara Pasta Bake
    • Gluten Free Chicken and Broccoli Pasta Bake
    • Gluten Free Creamy Beef and Mushroom Pasta
    • Gluten Free One Pot Hamburger Helper Copycat

    I get a lot of my ingredients from Thrive Market. Thrive Market has been a game changer for me eating gluten free. They have so many options I can't get at my rural grocery stores! Use this link to get 40% off your first order!

    Print
    clock clock iconcutlery cutlery iconflag flag iconfolder folder iconinstagram instagram iconpinterest pinterest iconfacebook facebook iconprint print iconsquares squares iconheart heart iconheart solid heart solid icon

    Gluten Free Creamy Peas and Pasta


    5 Stars 4 Stars 3 Stars 2 Stars 1 Star

    No reviews

    • Author: Elaine VanVleck
    • Total Time: 30 minutes
    • Yield: 6 servings 1x
    • Diet: Gluten Free
    Print Recipe
    Pin Recipe

    Description

    This easy gluten free creamy peas and pasta is a fresh and satisfying weeknight dinner ready in just 30 minutes! Gluten free fusilli pasta is tossed in a rich and velvety cream sauce loaded with sweet peas, sautéed onion, minced garlic, lemon zest, and finely grated parmesan for a bright and comforting gluten free pasta recipe the whole family will love. Perfect for spring and summer weeknight dinners!


    Ingredients

    Scale
    • 2 - 12 ounce bags Frozen Peas
    • 1 Yellow Onion, finely chopped
    • 2 Tbsp Minced Garlic
    • 2 Tbsp Butter
    • 1 Tbsp Olive Oil
    • 1 Tbsp Lemon Zest
    • 1 cup Heavy Cream
    • 2 Tbsp Lemon Juice
    • ½ cup Parmesan Cheese, finely grated
    • ½ tsp Salt
    • ¼ tsp Black Pepper
    • 12 ounce package Jovial Gluten Free Brown Rice Fusilli Pasta

    Instructions

    In a stock pot cook the gluten free fusilli pasta per the package instructions. When the pasta is done, strain it and then return the pasta to the pot you cooked it in.

    While the pasta is cooking, in a saute pan over medium heat melt the butter with the olive oil. Add the peas, onion, minced garlic and lemon zest. Saute until onions are translucent and the peas are cooked through.

    Pour the cream into the pea mixture and bring to a boil. Lower the temperature and simmer for 5-7 minutes to reduce the sauce.

    Add the lemon juice, cheese, salt and pepper. Stir to combine.

    Add the cooked and drained gluten free pasta to the pea mixture. Stir to coat the pasta and serve immediately.

    If you made this recipe please leave a star rating and comment below. It helps other readers find this recipe and means so much to me.

    • Prep Time: 15 minutes
    • Cook Time: 15 minutes
    • Category: Meals, Pasta
    • Method: Stove Top
    • Cuisine: American

    Did you make this recipe?

    Tag @smallfarmbiglife on Instagram and hashtag it #smallfarmbiglife

    If you make this Gluten Free Creamy Peas and Pasta I would love to hear what you think! Leave a star rating and a comment below and let me know what you served it with.

    Don't forget to save this recipe to your Pinterest boards so you can find it again on busy weeknights all spring and summer long!

    Storage

    Store leftover gluten free creamy peas and pasta in an airtight container in the refrigerator for up to 3 to 4 days. Keep in mind that gluten free pasta tends to absorb the cream sauce as it sits so the leftovers will be thicker and denser than when freshly made.

    To reheat add a splash of heavy cream or milk to the pasta and warm gently on the stovetop over medium low heat stirring frequently until heated through and the sauce is creamy again. You can also reheat individual portions in the microwave in a covered bowl with a splash of cream stirred in to help loosen the sauce.

    This pasta dish is not suitable for freezing as the cream sauce will separate and the gluten free pasta will become mushy and lose its texture once thawed.

    Top Tip

    Do not drain all of the pasta cooking water before returning the pasta to the pot. Reserve about half a cup of the starchy pasta water before straining and set it aside before adding the pasta to the pea and cream sauce. If the sauce feels too thick or the pasta starts to clump together as you stir everything together you can add a splash of the reserved pasta water to loosen the sauce and help it coat every piece of fusilli evenly. The starch in the pasta water also helps the cream sauce cling to the gluten free pasta better than plain water would and gives the finished dish a silkier and more cohesive texture.

    Didn't find the answer you're looking for?

    Ask AI to answer based on this recipe:

    ChatGPT
    Google AI
    Perplexity
    Grok
    Claude

    Frequently Asked Questions

    Can I use fresh peas instead of frozen?

    Yes! Fresh peas work beautifully in this recipe during spring and early summer when they are in season and at their sweetest. Use the same amount as the frozen peas called for in the recipe and add them to the pan at the same time as you would the frozen peas. Fresh peas may cook slightly faster than frozen so keep an eye on them and taste as you go to make sure they do not get overdone. Frozen peas are a great year round option and are just as delicious and nutritious as fresh so use whatever is most convenient for you.

    Can I make this recipe dairy free?

    Yes! To make this recipe dairy free substitute full fat canned coconut cream for the heavy cream and use a dairy free parmesan alternative or nutritional yeast in place of the parmesan cheese. The flavor will be slightly different but the sauce will still be rich and creamy. Use a dairy free butter alternative in place of the regular butter as well. Keep in mind that coconut cream can add a subtle coconut flavor to the sauce so if you want a more neutral dairy free option look for an unsweetened cashew cream or oat cream instead.

    Can I add protein to this recipe to make it a more complete meal?

    Absolutely! This creamy peas and pasta is wonderful as a simple main dish but it is also delicious with added protein. Grilled or pan seared chicken breast or chicken thighs sliced over the top is a classic pairing. Sautéed shrimp is another beautiful option that works especially well with the lemon and pea flavors in the sauce. You can also stir in cooked crispy bacon or pancetta for a richer and more indulgent version of this dish.

    Can I use a different pasta shape for this recipe?

    Yes! While gluten free fusilli works beautifully because the spiral shape holds onto the creamy sauce so well you can substitute any short gluten free pasta shape you have on hand. Gluten free penne, rotini, rigatoni, or shells all work well in this recipe. Avoid long pasta shapes like spaghetti or fettuccine as they do not hold the creamy pea sauce as well and are harder to mix and serve evenly.

    Can I use half and half instead of heavy cream?

    You can but keep in mind that the sauce will be thinner and less rich than when made with heavy cream. Heavy cream is what gives the sauce its luxurious and velvety texture that coats the pasta so beautifully. If you use half and half you may need to simmer the sauce for a few extra minutes to help it reduce and thicken to the right consistency. Do not substitute whole milk as it does not have enough fat content to create a stable and creamy sauce and may curdle when brought to a boil.

    Can I make this recipe ahead of time?

    This pasta dish is best made fresh and served immediately for the creamiest texture and best flavor. However you can make the pea and cream sauce up to 24 hours ahead of time and store it in a sealed container in the refrigerator. When you are ready to serve simply cook the gluten free pasta fresh, warm the sauce gently on the stovetop, and toss everything together. This is a great option for busy weeknights when you want to get some of the prep work done ahead of time.

    Gluten Free Chicken Carbonara Pasta Bake

    If you love the rich and creamy flavors of a classic carbonara but want something hearty enough to feed the whole family, this gluten free chicken carbonara pasta bake is exactly what you need. Tender chunks of chicken, crispy bacon, sweet peas, and gluten free penne pasta are tossed in the most luxurious cream, egg, and three cheese sauce made with ricotta, mozzarella, and parmesan and then baked in a 9x13 dish until perfectly set with a golden crispy breadcrumb and parmesan topping.

    It has all the indulgent flavors of traditional carbonara in an easy baked pasta format that is completely gluten free from start to finish.

    a serving on a white plate of gluten free chicken carbonara pasta cake in front of the clear 9x13 pan it came from

    This easy gluten free pasta bake comes together with simple steps that anyone can follow and is ready to go into the oven in about 30 minutes.

    It is the kind of hearty and satisfying gluten free dinner recipe that the whole family will love and it is impressive enough to serve to guests without requiring a lot of extra effort.

    Perfect for busy weeknights when you need a filling meal on the table fast, holiday gatherings where you need a crowd pleasing dish everyone can enjoy, or any time you are craving the ultimate gluten free comfort food dinner.

    Leftovers reheat beautifully which makes it a great option for meal prep too.

    If you are looking for more chicken meal recipes try my Gluten Free Chicken Parmesan Pasta Casserole, my Gluten Free Chicken Pot Pie Casserole, my Gluten Free Chicken and Broccoli Pasta Bake or my Gluten Free Instant Pot Chicken & Dumplings.

    You can find all my meal recipes here: Gluten Free Meal Recipes

    a clear glass 9x13 baking pan of gluten free chicken carbonara pasta bake
    [feast_advanced_jump_to]

    Ingredients

    • Gluten Free Penne Pasta
    • Boneless Skinless Chicken Breast
    • Olive Oil
    • Minced Garlic
    • Frozen Peas
    • Bacon
    • Heavy Cream
    • Eggs
    • Ricotta Cheese
    • Mozzarella Cheese
    • Parmesan Cheese
    • Salt
    • Black Pepper
    • Gluten Free Bread Crumbs

    Instructions

    Preheat your oven to 350 degrees.

    Cook your gluten free pasta per the instructions on the package.

    While the pasta is cooking, cut your chicken breast into bite size chunks and cook the chicken in olive oil until lightly browned and cooked through. Add the garlic, peas and bacon. Heat through 2-3 minutes.

    Whisk together the cream, eggs, ricotta cheese. Add the shredded mozzarella cheese, ¼ cup parmesan cheese, salt and pepper. Stir to combine.

    When your gluten free pasta is done, strain it from the water and add the cooked noodles back to the pot.

    Add the cheese mixture and chicken mixture to the pot with the noodles. Stir to combine.

    Pour the noodle mixture into your 9x13 baking dish. Top with a the gluten free bread crumbs and ½ cup finely grated parmesan cheese.

    Bake at 350 degrees for 15-20 minutes. If you would like the top to be crunchy turn your oven to broil and carefully broil the top until it's lightly browned. Watch this process carefully as the top will brown quickly.

    Serve immediately.

    Supplies


    More Recipes You Might Enjoy
    • Gluten Free Chicken Parmesan Pasta Casserole
    • Gluten Free Chicken Pot Pie Casserole
    • Gluten Free Chicken and Broccoli Pasta Bake
    • Gluten Free Instant Pot Chicken & Dumplings

    I get a lot of my ingredients from Thrive Market. Thrive Market has been a game changer for me eating gluten free. They have so many options I can't get at my rural grocery stores! Use this link to get 40% off your first order!
    Print
    clock clock iconcutlery cutlery iconflag flag iconfolder folder iconinstagram instagram iconpinterest pinterest iconfacebook facebook iconprint print iconsquares squares iconheart heart iconheart solid heart solid icon

    Gluten Free Chicken Carbonara Pasta Bake


    5 Stars 4 Stars 3 Stars 2 Stars 1 Star

    No reviews

    • Author: Elaine VanVleck
    • Total Time: 40 minutes
    • Yield: 6 servings 1x
    • Diet: Gluten Free
    Print Recipe
    Pin Recipe

    Description

    This easy gluten free chicken carbonara pasta bake is the ultimate comfort food dinner! Tender chicken, crispy bacon, sweet peas, and gluten free penne pasta are tossed in a rich and creamy three cheese sauce made with ricotta, mozzarella, and parmesan and baked until perfectly set with a golden crispy breadcrumb topping. A hearty and crowd pleasing gluten free baked pasta recipe the whole family will love!


    Ingredients

    Scale
    • 12 ounce package Gluten Free Penne Pasta, cooked
    • 1 pound Boneless, Skinless, Chicken Breast, cubed and cooked
    • 1 Tbsp Olive Oil
    • 1 Tbsp Minced Garlic
    • 1 cup Frozen Peas
    • 8 slices Bacon, cooked and chopped
    • 1 cup Heavy Cream
    • 3 large Eggs
    • 8 ounces Ricotta Cheese
    • 1 cup Mozzarella Cheese, shredded
    • ¾ cup Parmesan Cheese, finely grated (divided)
    • 1 tsp Salt
    • ½ tsp Black Pepper
    • ½ cup Gluten Free Bread Crumbs

    Instructions

    Preheat your oven to 350 degrees.

    Cook your gluten free pasta per the instructions on the package.

    While the pasta is cooking, cut your chicken breast into bite size chunks and cook the chicken in olive oil until lightly browned and cooked through. Add the garlic, peas and bacon. Heat through 2-3 minutes.
    Whisk together the cream, eggs, ricotta cheese. Add the shredded mozzarella cheese, ¼ cup parmesan cheese, salt and pepper. Stir to combine.

    When your gluten free pasta is done, strain it from the water and add the cooked noodles back to the pot.

    Add the cheese mixture and chicken mixture to the pot with the noodles. Stir to combine.

    Pour the noodle mixture into your 9x13 baking dish. Top with a the gluten free bread crumbs and ½ cup finely grated parmesan cheese.

    Bake at 350 degrees for 15-20 minutes. If you would like the top to be crunchy turn your oven to broil and carefully broil the top until it's lightly browned. Watch this process carefully as the top will brown quickly.

    Serve immediately.

    • Prep Time: 20 minutes
    • Cook Time: 20 minutes
    • Category: Meals, Dinner
    • Method: Baking
    • Cuisine: American

    Did you make this recipe?

    Tag @smallfarmbiglife on Instagram and hashtag it #smallfarmbiglife

    If you make this Gluten Free Chicken Carbonara Pasta Bake I would love to hear what you think! Leave a star rating and a comment below and let me know what you served it with.

    Don't forget to save this recipe to your Pinterest boards so you can find it again on busy weeknights!

    Storage

    Store leftover gluten free chicken carbonara pasta bake in an airtight container in the refrigerator for up to 3 to 4 days. Reheat individual portions in the microwave in a covered bowl with a splash of water or cream stirred in to help loosen the sauce and prevent it from drying out.

    You can also reheat the whole dish covered with foil in a 350 degree oven for about 20 minutes until warmed through. Because this recipe contains eggs and dairy it is important to refrigerate leftovers promptly after serving and not leave the dish sitting out at room temperature for more than two hours.

    This pasta bake can be frozen but the creamy egg based sauce may change in texture slightly once thawed. If freezing store in a freezer safe container for up to 2 months and thaw overnight in the refrigerator before reheating.

    Top Tip

    Do not skip the broiling step at the end if you want a truly impressive golden and crispy topping. The 15 to 20 minutes of baking at 350 degrees sets the carbonara sauce and cooks everything through but it will not give you that deeply golden and crunchy breadcrumb and parmesan crust on top. Just a few minutes under the broiler transforms the topping completely.

    The key is to watch it very carefully because the parmesan and breadcrumbs can go from perfectly golden to burnt in less than a minute under high broiler heat. Stay right at the oven and pull it out the moment the top is golden and bubbling.

    Didn't find the answer you're looking for?

    Ask AI to answer based on this recipe:

    ChatGPT
    Google AI
    Perplexity
    Grok
    Claude

    Frequently Asked Questions

    Can I make this gluten free chicken carbonara pasta bake ahead of time?

    Yes! You can assemble the entire pasta bake up to 24 hours ahead of time and store it covered tightly in the refrigerator before baking. When you are ready to bake pull it from the fridge while the oven preheats and add 5 to 10 minutes to the bake time since it will be going in cold. This makes it a great option for holiday entertaining and busy weeknights when you want to get the prep work done ahead of time and just pop it in the oven when you are ready to eat.

    Can I use a different pasta shape for this recipe?

    Yes! While gluten free penne works beautifully in this bake because the tubes hold onto the creamy carbonara sauce so well, you can substitute any short gluten free pasta shape you have on hand. Gluten free rigatoni, rotini, ziti, or shells all work well. Avoid long pasta shapes like spaghetti or fettuccine as they do not hold up as well in a baked pasta dish and are harder to mix and serve.

    Can I leave out the peas?

    Absolutely! The peas add a pop of color and a touch of sweetness that balances the richness of the carbonara sauce beautifully but if you are not a fan you can simply leave them out. You could also substitute frozen corn, chopped spinach, or diced roasted red peppers for a different flavor and color.

    Is this recipe safe to eat with the eggs in the sauce?

    Yes! Unlike traditional carbonara which relies on raw eggs tossed with hot pasta to create a creamy sauce, this recipe bakes the egg and cream mixture in the oven at 350 degrees which fully cooks the eggs through. The baked pasta is completely safe to eat and the eggs are what give the sauce its rich and custardy texture once baked.

    Can I substitute the ricotta cheese in this recipe?

    Yes! If you do not have ricotta on hand you can substitute cottage cheese for a similar creamy texture. Drain the cottage cheese well before using to remove excess liquid. Cream cheese is another option that will give you a slightly richer and denser sauce. Keep in mind that both substitutions will change the flavor slightly but the pasta bake will still be delicious and creamy.

    Can I use store bought rotisserie chicken instead of cooking the chicken from scratch?

    Absolutely and this is actually a great shortcut for busy weeknights! Simply shred or cube your rotisserie chicken and add it directly to the pan with the garlic, peas, and bacon to heat everything through. Using rotisserie chicken cuts down significantly on the prep time and makes this already easy gluten free pasta bake even faster to pull together.

    • « Previous Page
    • 1
    • …
    • 3
    • 4
    • 5
    • 6
    • 7
    • …
    • 100
    • Next Page »

    Welcome! I'm Elaine

    I'm so glad you are here! I share easy gluten free recipes from my small farm in Washington.

    Be sure to sign up for my newsletter to stay up to date on all of my new recipes.

    More about me...
    • Instagram
    • Pinterest
    • Facebook
    • Twitter
    • Mail

    Load up on new recipes, exclusive goodies, + more!
    Sign up below to stay up-to-date on news, events, and special deals.
    Thank you for subscribing!

    Easy Meals Recipes

    • Gluten Free Instant Pot Chili Mac and Cheese
    • Gluten Free Taco Casserole
    • Gluten Free Cowboy Baked Beans
    • Gluten Free Walking Taco Casserole
    • Gluten Free Creamy Beef and Mushroom Pasta
    • Gluten Free Instant Pot Chicken & Dumplings
    • Instant Pot Mexican Style Beef and Rice
    • Gluten Free Chicken Parmesan Pasta Casserole
    • Gluten Free One Pot Hamburger Helper Copycat
    • Gluten Free Salisbury Steak with Mushroom Gravy
    • Gluten Free Air Fryer Fajitas
    • Gluten Free Sloppy Joe Casserole

    Footer

    back to top

    About

    • Privacy Policy
    • Shop my Amazon Page
    • Follow me on LTK

    Newsletter

    • Sign Up! for emails and updates

    Contact

    • Contact
    • Media Kit
    • About Me

    As an Amazon Associate I earn from qualifying purchases.

    I may get commissions for purchases made through links on this site.

    Copyright © 2026 Brunch Pro on the Brunch Pro Theme