Small Farm Big Life

  • Gluten Free Recipe Index
  • Subscribe
  • Resources
menu icon
go to homepage
  • Home
  • Gluten Free Recipe Index
  • Subscribe
  • My Story
  • Resources
  • Free Guides
    • Email
    • Facebook
    • Instagram
    • Pinterest
  • subscribe
    search icon
    Homepage link
    • Home
    • Gluten Free Recipe Index
    • Subscribe
    • My Story
    • Resources
    • Free Guides
    • Email
    • Facebook
    • Instagram
    • Pinterest
  • ×

    Air Fryer Sweet and Salty Roasted Cashew Nuts

    These Air Fryer Sweet and Salty Roasted Cashews are the snack I make on repeat and the one that disappears fastest in our house. Raw cashews get tossed in a coating of honey, real maple syrup, coconut sugar, cinnamon, and a touch of nutritional yeast for a flavor that is so much more complex and delicious than anything you can buy in a store.

    The sweet and salty combination is completely irresistible and the air fryer makes the whole thing happen in just six minutes.
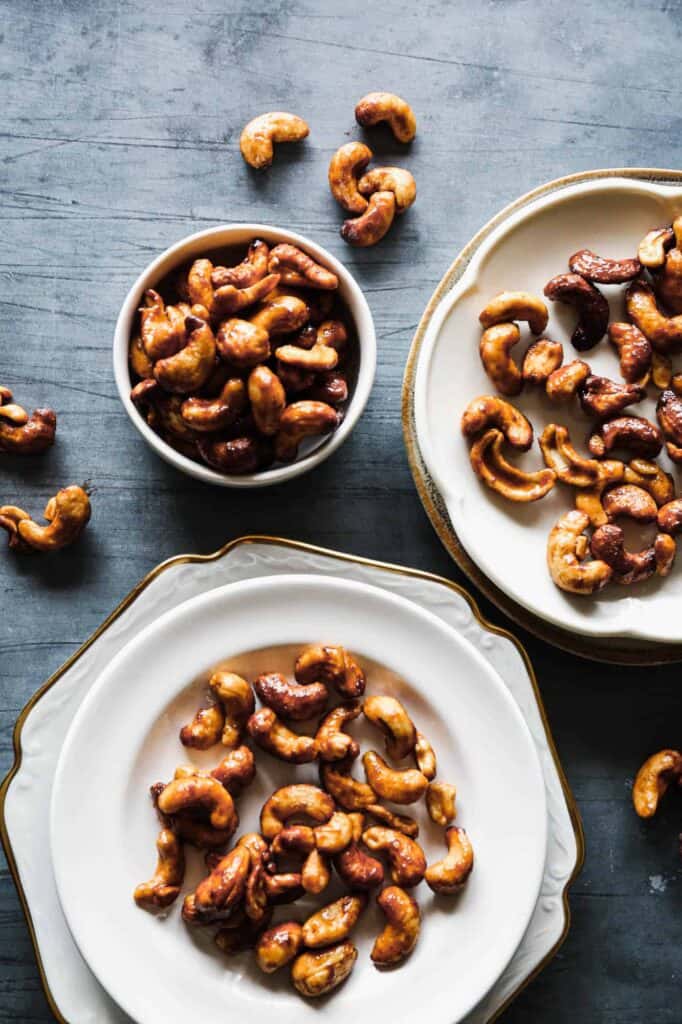
    plates and a bowl of air fryer sweet and salty cashew nuts

    What I love most about making my own roasted cashews is knowing exactly what goes into them. No preservatives, no hidden gluten, and no mystery ingredients. Just real food coated in real flavors.

    I make a big batch at the beginning of the week and we snack on them all week long.

    They also make a beautiful addition to a charcuterie board or a thoughtful homemade gift packed into a pretty jar.

    If you are looking for more air fryer snack recipes try my Gluten Free Air Fryer Chex Mix, my Air Fryer Spicy Roasted Peanuts, my Air Fryer Savory Herb Roasted Nuts or my Air Fryer Salt & Pepper Roasted Cashews.

    You can find all of my snack recipes here: Gluten Free Snack Recipes
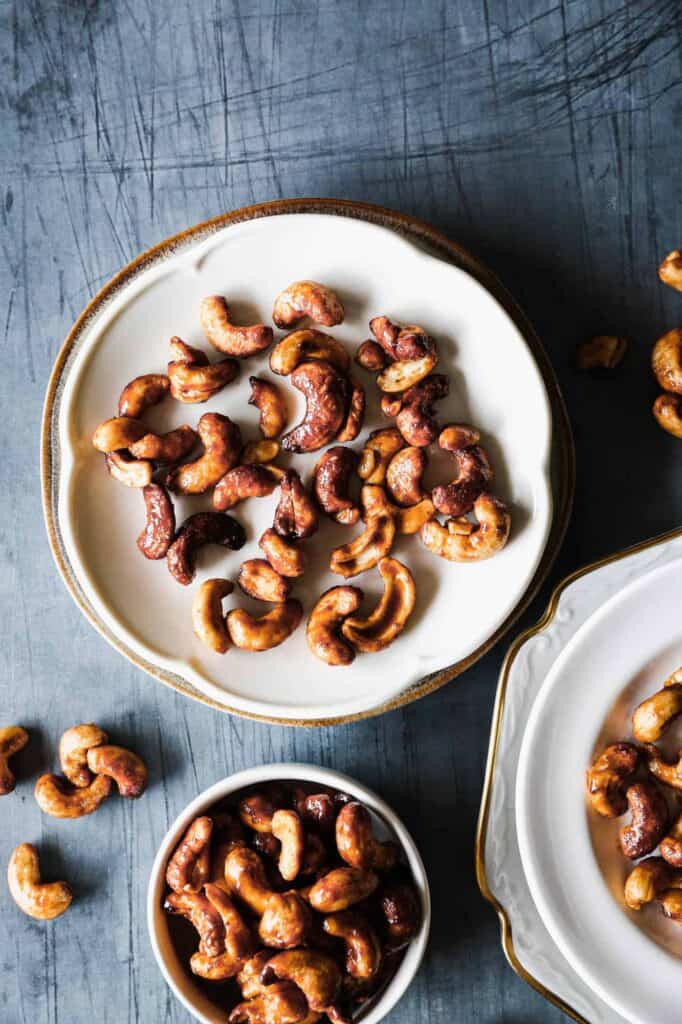
    a plate of air fryer sweet and salty roasted cashew nuts
    [feast_advanced_jump_to]

    Why Raw Unsalted Cashews Matter

    This is the most important ingredient note in this recipe and worth stating clearly. Always start with raw unsalted unroasted cashews. Here is why.

    • Raw cashews absorb the coating most effectively. The honey, maple syrup, and coconut sugar need a porous raw nut surface to adhere to. Pre-roasted cashews have a sealed exterior that the coating slides off of rather than soaking into.
    • Unsalted cashews allow you to control the salt level. This recipe uses half a teaspoon of sea salt which gives you the perfect sweet and salty balance. Starting with salted cashews would make the finished nuts too salty.
    • Roasted cashews will burn in the air fryer. They are already cooked once and a second round of heat at 350 degrees for six minutes will take them well past golden and into bitter and burnt territory.
    • You can find raw unsalted cashews at most grocery stores, at Costco in bulk, and online through retailers like Thrive Market.

    Why the Baking Sheet Step Matters

    Pouring the cashews onto a parchment lined baking sheet immediately after air frying is not optional. Here is why this step is so important.

    • Cashews continue cooking after they come out of the air fryer. If you leave them in the hot basket they will keep cooking from residual heat and can easily go from perfectly golden to overdone in just a minute or two. Spreading them on a cool baking sheet stops the cooking process immediately.
    • Spreading them out prevents clumping. The honey and maple syrup coating is still sticky and liquid when the cashews first come out of the air fryer. If you leave them piled together they will fuse into one big sticky clump as they cool and set. Spreading them out on the baking sheet lets each individual nut cool and set separately so you get perfectly individual coated cashews rather than one big clump.
    • The cashews will crisp up significantly as they cool. They may look slightly soft and underdone when you first pour them out. Do not panic. The coating hardens and crisps as it cools and the finished texture will be perfectly crunchy after about fifteen minutes at room temperature.

    Serving Suggestions

    These sweet and salty cashews are incredibly versatile. Here are some of my favorite ways to enjoy them.

    • Straight from the jar as a snack. This is the most dangerous option because it is almost impossible to eat just a handful. Keep them in a sealed container and grab a small portion when you want something sweet and crunchy.
    • On a charcuterie board. A small bowl of these cashews alongside your favorite gluten free crackers, cheeses, and fruits makes a beautiful and elevated board that guests always comment on.
    • On salads. Sprinkle a small handful over a green salad or grain bowl for a sweet and crunchy topping that takes it to the next level.
    • As a homemade gift. Pack them into a pretty mason jar with a ribbon for a thoughtful and delicious homemade gift for the holidays, hostess gifts, or any occasion.
    • In trail mix. Combine them with dried cranberries, dark chocolate chips, and your favorite seeds for a homemade trail mix that is so much better than anything store bought.

    Storage Instructions

    After the cashews have cooled completely on the baking sheet transfer them to an airtight container. They will stay fresh at room temperature for up to one week. For a longer shelf life store them in the refrigerator for up to six months. The coating may soften slightly in the refrigerator so let them come to room temperature before serving for the best texture.

    Top Tip

    Watch your cashews closely in the final minute of air frying. Cashews have a high natural fat content which makes them brown and caramelize quickly. The difference between perfectly golden and burnt can be less than sixty seconds in the air fryer.

    Start checking at the five minute mark and pull them out the moment they look golden. They will continue to cook slightly on the baking sheet and will darken a little more as they cool.

    Frequently Asked Questions

    Should cashews be roasted?

    Roasting cashews brings out their natural sweet flavor and adds a satisfying crunch. It also gives you the opportunity to coat them with a flavoring like this sweet and salty maple and honey coating. Once you try homemade roasted cashews you will never want to go back to plain store bought ones.

    How long do roasted cashews last?

    After the cashews have cooled completely store them in an airtight container at room temperature for up to one week. For a longer shelf life store them in the refrigerator for up to six months. We go through ours much faster than that!

    Do I have to use raw unsalted cashews?

    Yes. Always start with raw unsalted unroasted cashews for this recipe. Pre-roasted cashews will burn in the air fryer since they are already cooked once. Salted cashews will make the finished nuts too salty since this recipe already includes sea salt for the sweet and salty balance. Raw unsalted cashews are available at most grocery stores, Costco, and online retailers.

    Can I make these in the oven instead of the air fryer?

    Yes. Spread the coated cashews in a single layer on a parchment lined baking sheet and bake at 350 degrees for 8 to 10 minutes, stirring once halfway through. Watch them closely in the final minutes since cashews can go from golden to burnt very quickly. Pour them onto a fresh parchment lined baking sheet immediately after baking to stop the cooking process and let them cool completely before storing.

    Didn't find the answer you're looking for?

    Ask AI to answer based on this recipe:

    ChatGPT
    Google AI
    Perplexity
    Grok
    Claude

    Supplies

    More Recipes To Enjoy

    • Air Fryer Savory Herb Roasted Nuts
    • Gluten Free Air Fryer Chex Mix
    • Air Fryer Salt & Pepper Roasted Cashews
    • Air Fryer Spicy Roasted Peanuts

    I get a lot of my ingredients from Thrive Market. Thrive Market has been a game changer for me eating gluten free. They have so many options I can't get at my rural grocery stores! Use this link to get 40% off your first order!

    Print
    clock clock iconcutlery cutlery iconflag flag iconfolder folder iconinstagram instagram iconpinterest pinterest iconfacebook facebook iconprint print iconsquares squares iconheart heart iconheart solid heart solid icon

    Air Fryer Sweet and Salty Roasted Cashew Nuts


    5 Stars 4 Stars 3 Stars 2 Stars 1 Star

    No reviews

    • Author: Elaine VanVleck
    • Total Time: 16 minutes
    • Yield: 2 cups 1x
    • Diet: Gluten Free
    Print Recipe
    Pin Recipe

    Description

    Raw cashews tossed in a sweet and salty coating made with honey, maple syrup, coconut sugar, cinnamon, and nutritional yeast then air fried at 350 degrees for just six minutes. These gluten free air fryer sweet and salty roasted cashews are the most addictive homemade snack you will ever make.


    Ingredients

    Scale
    • 2 cups Raw Cashew Nuts
    • 2 Tbsp. Honey
    • 2 Tbsp. Real Maple Syrup
    • ¼ cup Coconut Sugar
    • ½ tsp. Sea Salt
    • ½ tsp. Ground Cinnamon
    • 1 tsp. Nutritional Yeast Flakes
    • 1 Tbsp. Brown Rice Flour

    Instructions

    In a large mixing bowl stir together the cashews, honey, maple syrup, coconut sugar, salt, cinnamon, nutritional yeast and brown rice flour. Stir until the nuts are completely coated in the mixture.

    Pour the nut mixture into your air fryer basket. Spread the nuts around to give room for air to circulate around them.

    Roast in your air fryer at 350 degrees for 6 minutes.

    While the nuts are roasting line a baking sheet with parchment paper.

    After the nuts are done roasting pour them onto the baking sheet and spread them around to let them cool.

    After the cashews are completely cooled store them in an air tight container.

    If you made this recipe please leave a star rating and comment below. It helps other readers find this recipe and means so much to me.

    Notes

    Spreading the nuts onto the baking sheet is important so you don't get a large clump of stuck together cashews.

    • Prep Time: 10 minutes
    • Cook Time: 6 minutes
    • Category: Snacks
    • Method: Air Fryer
    • Cuisine: American

    Did you make this recipe?

    Tag @smallfarmbiglife on Instagram and hashtag it #smallfarmbiglife

    If you make these Air Fryer Sweet and Salty Roasted Cashews I would love to hear what you think! Leave a comment below and let me know how they turned out or tag me on Instagram so I can see your batch.

    These are one of those snacks that is impossible to stop eating so save this recipe to your favorite Pinterest board so you always have it ready when you need a quick and easy gluten free snack!

    Ingredients

    Raw Cashew Nuts
    Honey
    Maple Syrup
    Coconut Sugar
    Sea Salt
    Ground Cinnamon
    Nutritional Yeast Flakes
    Brown Rice Flour

    Instructions

    In a large mixing bowl stir together the cashews, honey, maple syrup, coconut sugar, salt, cinnamon, nutritional yeast and brown rice flour. Stir until the nuts are completely coated in the mixture.

    Pour the nut mixture into your air fryer basket. Spread the nuts around to give room for air to circulate around them.

    Roast in your air fryer at 350 degrees for 6 minutes.

    While the nuts are roasting line a baking sheet with parchment paper.

    After the nuts are done roasting pour them onto the baking sheet and spread them around to let them cool.

    After the cashews are completely cooled store them in an air tight container.
    Gluten Free Pumpkin Pie Granola

    Fall mornings call for something warm, crunchy, and full of pumpkin spice, and this gluten free pumpkin pie granola delivers exactly that. It's simple to make from scratch with pantry staples like oats, nuts, and pumpkin puree, and it's completely vegan too. One batch makes enough for breakfast and snacking all week long.

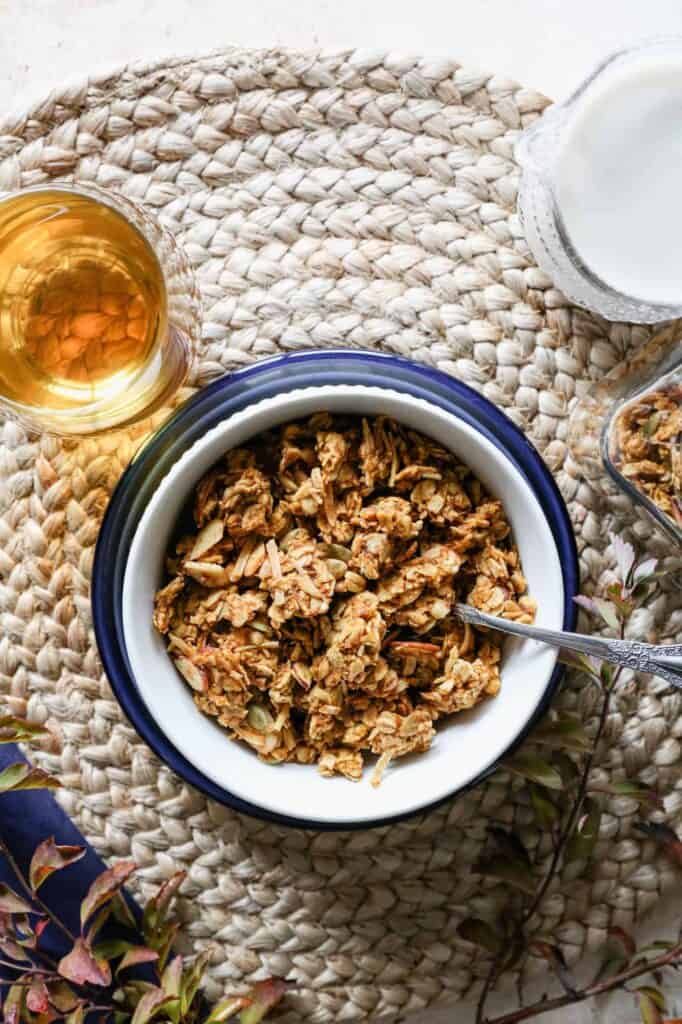
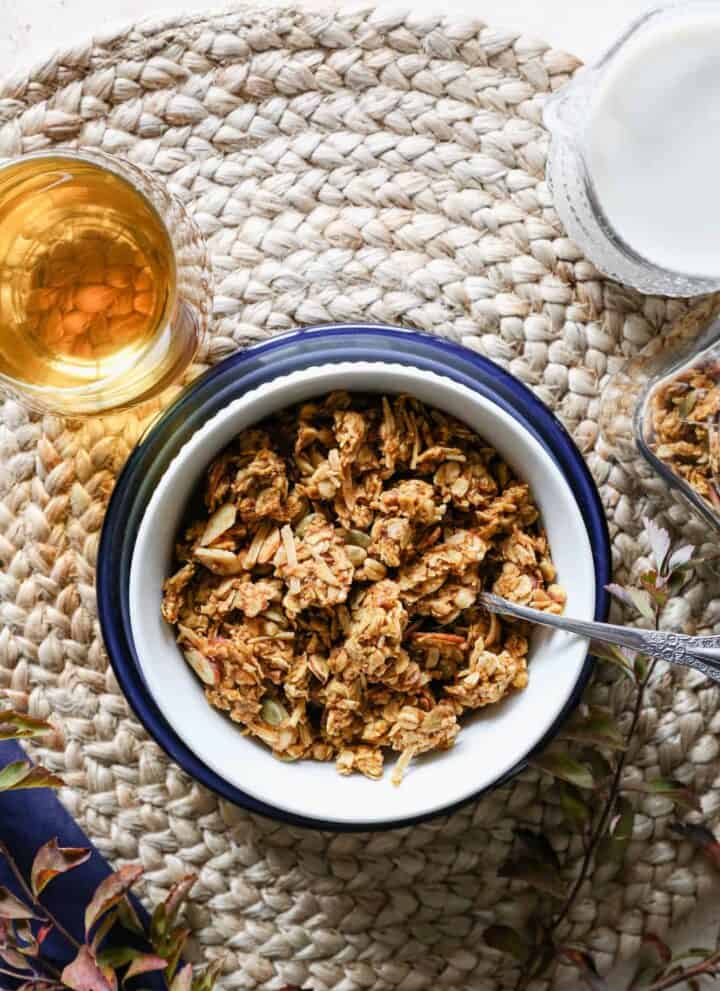
    a bowl of gluten free pumpkin pie granola with a glass of apple juice and a pitcher of milk

    This Gluten Free Pumpkin Pie Granola is the ultimate cozy snack or breakfast blend for fall, with warm pumpkin pie spices and satisfying crunch in every bite.

    Whether you're topping a smoothie bowl, sprinkling over yogurt, or snacking by the handful, this pumpkin spice granola delivers the nostalgic flavors of autumn in a wholesome, homemade way.

    If you are looking for more breakfast recipes try my Gluten Free Salty & Sweet Granola, my Gluten Free Chocolate Chip Oat Granola Bars, my Gluten Free Pumpkin Spice Pancakes or my Pumpkin Apple Baked Oatmeal with Streusel Topping.

    You can find all of my breakfast recipes here: Gluten Free Breakfast Recipes

    You can find all of my pumpkin recipes here: Gluten Free Pumpkin Recipes

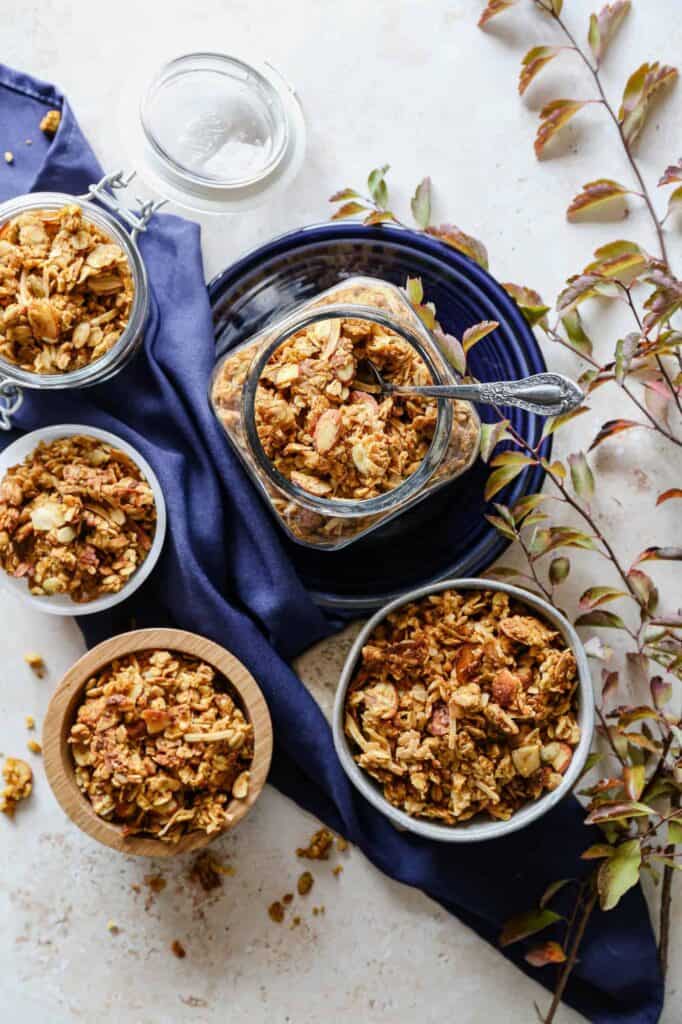
    jars and bowls of gluten free pumpkin pie granola
    [feast_advanced_jump_to]

    Why You'll Love This Recipe

    • It's a big batch that lasts all week
    • Naturally sweetened with maple syrup, no refined sugar
    • Completely vegan and gluten free
    • Simple pantry ingredients, no fancy equipment needed

    Ingredient Notes

    • Be sure to use certified gluten free rolled oats, since regular oats are often processed on the same equipment as wheat.
    • Feel free to swap the almonds or walnuts for pecans or hazelnuts, and the pumpkin seeds for sunflower seeds if that's what you have on hand.
    • Use pure pumpkin puree, not pumpkin pie filling, which contains added sugar and spices that will throw off the recipe.
    • Maple syrup keeps this granola vegan, so there's no need for honey.

    Ways to Enjoy This Granola

    This pumpkin pie granola is great served with milk or a dairy free alternative, sprinkled over yogurt with fresh berries, or layered into a smoothie bowl. It also makes a fun topping for baked oatmeal or a crunchy addition to a bowl of ice cream.

    Storage

    Store the granola in an airtight container at room temperature for up to 2 weeks. To freeze, place cooled granola in a freezer safe container or bag and freeze for up to 3 months. Let it thaw at room temperature before enjoying.

    Top Tip

    We like granola chunks, so I smash the granola down with a metal measuring cup before it goes into the oven. After the granola is browned and done I smash it down with the metal measuring cup again and let it cool completely before breaking it apart.

    I think the key is waiting until it's completely cool before breaking it into pieces. I typically let the gluten free pumpkin pie granola sit in the baking pan overnight and then break up and store in a container the next day.

    Frequently Asked Questions

    What is gluten free granola made of?

    Technically oats are gluten free. The reason you have to make sure the oats you purchase say they are certified gluten free is because most places process their oats on the same equipment as wheat and barley.

    Oats themselves don't contain gluten, but if they aren't processed on a dedicated gluten free equipment they can be contaminated. Thrive Market and Bob's Redmill both make really good gluten free rolled oats.

    Making gluten free granola really comes down to making sure everything you add in is certified gluten free. Since granola can be expensive it's amazing to make at home and really easy to make.

    Is it good to eat granola for breakfast?

    Granola can make an amazing breakfast! I like to mix mine with greek yogurt and some berries. Granola can be high in sugar so I like to stick to a smaller portion and add the yogurt and berries (or a banana) to get a complete breakfast.

    I also like granola as a dessert with some vanilla ice cream!

    Is this granola vegan?

    Yes. This recipe is sweetened with maple syrup instead of honey and contains no dairy or eggs, so it's completely vegan as well as gluten free.

    How long does this granola stay fresh?

    Stored in an airtight container at room temperature, this granola stays fresh for up to 2 weeks. You can also freeze it in a freezer safe bag or container for up to 3 months.

    Didn't find the answer you're looking for?

    Ask AI to answer based on this recipe:

    ChatGPT
    Google AI
    Perplexity
    Grok
    Claude

    Pumpkin Pie Granola Supplies

    More Recipes You Might Enjoy

    • Dunkin Copycat Pumpkin Cream Cold Brew
    • Gluten Free Baked Pumpkin Donuts with Chocolate Glaze
    • Gluten Free Pumpkin Spice Pancakes
    • Dairy Free Pumpkin Pie Smoothie

    I get a lot of my ingredients from Thrive Market. Thrive Market has been a game changer for me eating gluten free. They have so many options I can't get at my rural grocery stores! Use this link to get 40% off your first order!

    Print
    clock clock iconcutlery cutlery iconflag flag iconfolder folder iconinstagram instagram iconpinterest pinterest iconfacebook facebook iconprint print iconsquares squares iconheart heart iconheart solid heart solid icon

    Gluten Free Pumpkin Pie Granola


    5 Stars 4 Stars 3 Stars 2 Stars 1 Star

    No reviews

    • Author: Elaine VanVleck
    • Total Time: 40 minutes
    • Yield: 10 cups (approximately) 1x
    • Diet: Gluten Free
    Print Recipe
    Pin Recipe

    Description

    This gluten free pumpkin pie granola is crunchy, sweetened with maple syrup, and full of warm fall spice. It's completely vegan and comes together with simple pantry staples you can bake in one batch. Enjoy it all week long for breakfast or snacking.


    Ingredients

    Scale
    • 6 cups Gluten Free Rolled Oats
    • 1 cup Sliced Almonds
    • 1 cup Walnuts, roughly chopped
    • 1 cup Coconut Flakes
    • ½ cup Pumpkin Seeds
    • 1 cup Pumpkin Puree
    • 1 cup Maple Syrup
    • ½ cup Coconut Oil, melted
    • ¼ cup Avocado Oil
    • 2 tsp. Sea Salt
    • 2 tsp. Ground Cinnamon
    • ½ tsp. Ground Nutmeg
    • ½ tsp. Allspice

    Instructions

    Preheat your oven to 350 degrees. Line two baking sheets with parchment paper. Set aside.

    Stir together all of the ingredients in a large mixing bowl. Be sure to get the oats and nuts thoroughly coated with the wet ingredients and spices. 

    Spread the mixture between two baking sheets. Smash down with your hands or a metal measuring cup.

    Bake at 350 degrees for 15 minutes.

    Rotate the trays in your oven.

    Bake for another 15 minutes.

    Check to see if the granola is browned and slightly crisp. If the granola is still very wet bake for another 10-15 minutes.

    Remove the granola from the oven. Carefully press it down with a metal measuring cup or mug again. 

    Let the granola cool completely before breaking into chunks and storing in an air tight container. 
    The granola will keep for a week in the air tight container.

    If you made this recipe please leave a star rating and comment below. It helps other readers find this recipe and means so much to me.

    Notes

    I like to leave my granola on the baking sheet overnight to be sure it's completely cooled so it stays in nice chunks when I break it apart.

    • Prep Time: 10 minutes
    • Cook Time: 30 minutes
    • Category: Breakfast
    • Method: Baking
    • Cuisine: American

    Did you make this recipe?

    Tag @smallfarmbiglife on Instagram and hashtag it #smallfarmbiglife

    I'd love to hear what you think of this gluten free pumpkin pie granola! Leave a comment and star rating below, and let me know how you like to enjoy it. Don't forget to pin this recipe so you can find it again all fall long.

    Pumpkin Pie Granola Ingredients

    Gluten Free Rolled Oats
    Sliced Almonds
    Walnuts
    Coconut Flakes
    Pumpkin Seeds
    Pumpkin Puree
    Maple Syrup
    Coconut Oil
    Avocado Oil
    Sea Salt
    Ground Cinnamon
    Ground Nutmeg
    Allspice

    Instructions

    Preheat your oven to 350 degrees. Line two baking sheets with parchment paper. Set aside.

    Stir together all of the ingredients in a large mixing bowl. Be sure to get the oats and nuts thoroughly coated with the wet ingredients and spices. 

    Spread the mixture between two baking sheets. Smash down with your hands or a metal measuring cup.

    Bake at 350 degrees for 15 minutes.

    Rotate the trays in your oven.

    Bake for another 15 minutes.

    Check to see if the granola is browned and slightly crisp. If the granola is still very wet bake for another 10-15 minutes.

    Remove the granola from the oven. Carefully press it down with a metal measuring cup or mug again. 

    Let the granola cool completely before breaking into chunks and storing in an air tight container. 

    The granola will keep for a week in the air tight container.

    Gluten Free Blackberry Oat Muffins

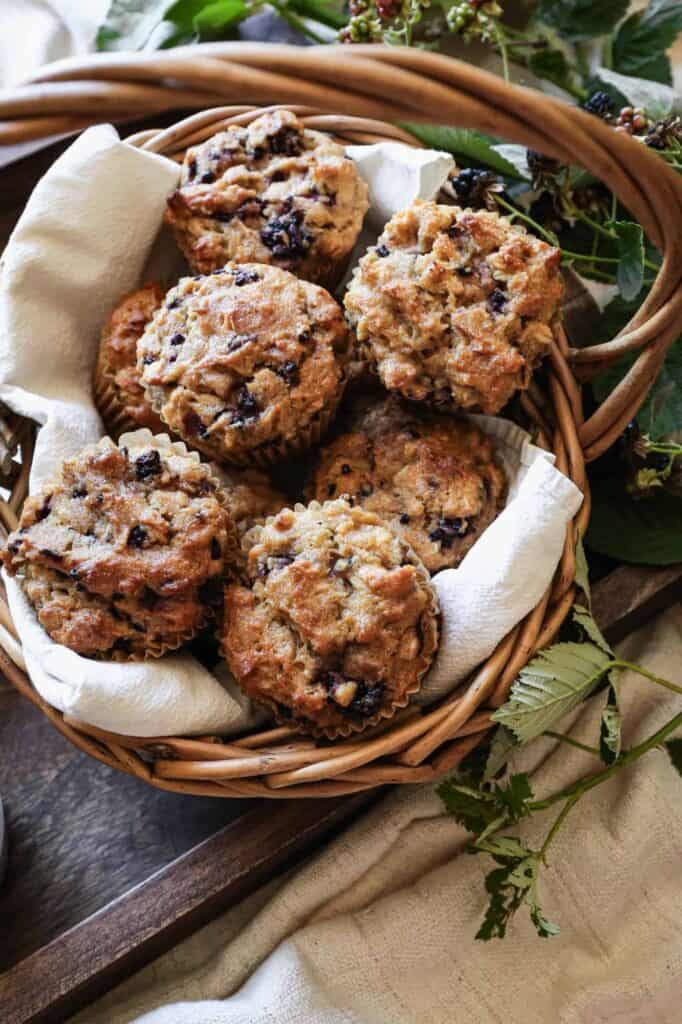
    These gluten free blackberry oat muffins are one of my favorite ways to use up fresh blackberries all summer long. I always get excited for blackberry season here in the Pacific Northwest: it starts in July with small wild blackberries, then picks back up in late August with the bigger Himalayan blackberries that grow all over our property.

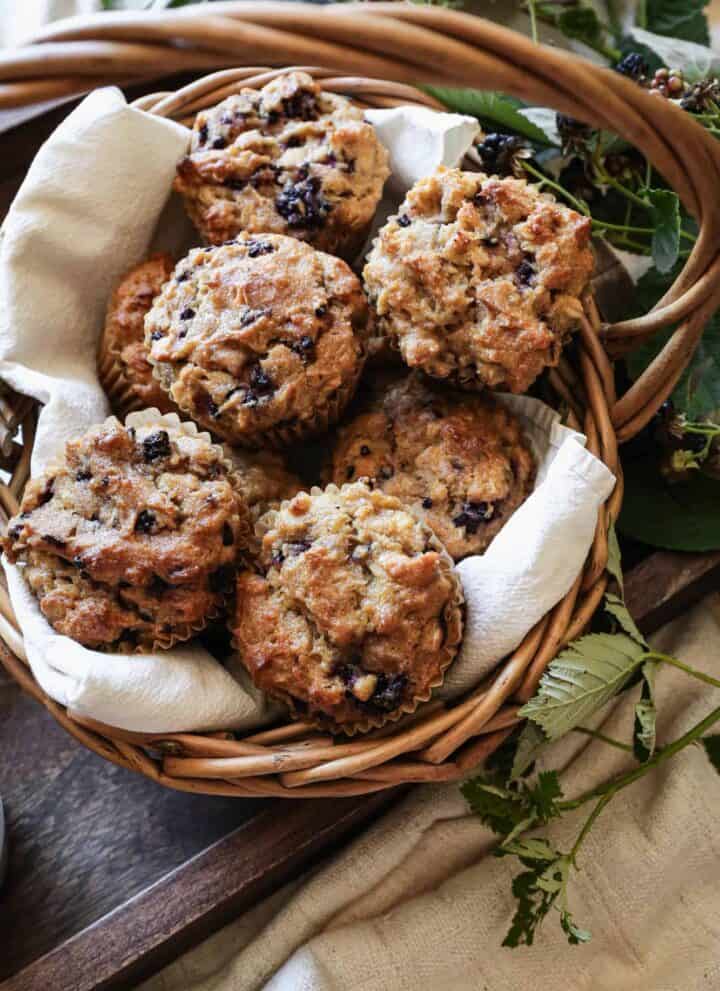
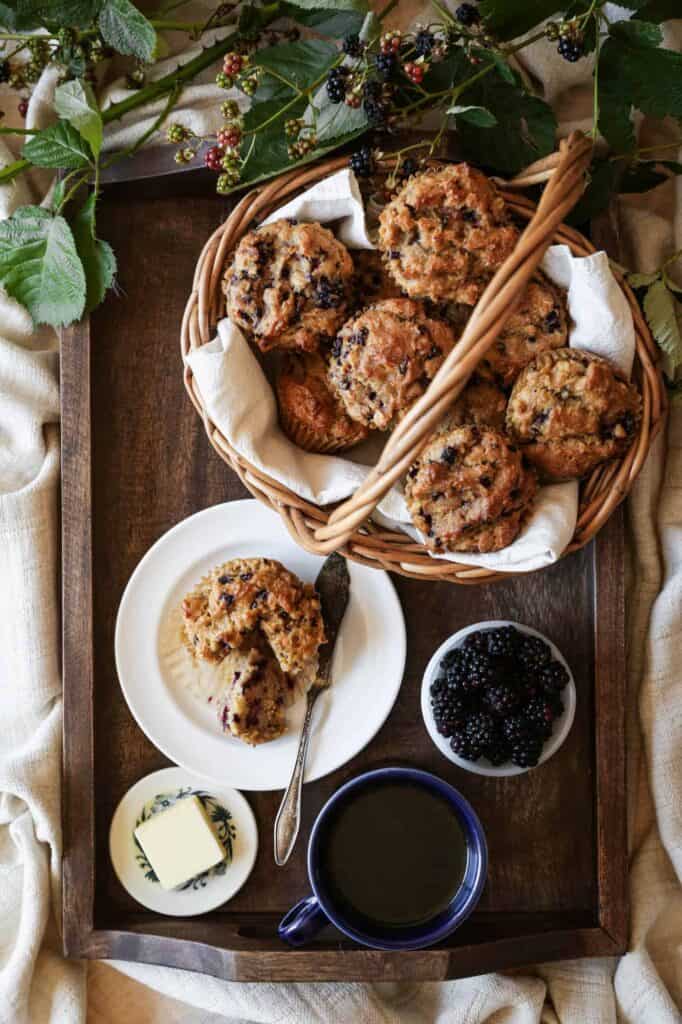
    a basket of gluten free blackberry oat muffins

    These muffins are soft, lightly sweet, and easy to pack for lunches or grab for a quick breakfast with coffee.

    They're made with a mix of gluten free flour, almond flour, and oats for the best texture, and they freeze beautifully, so it's worth making a double batch while blackberries are in season.

    You can find more muffin recipes here: Gluten Free Breakfast Recipes

    a basket of gluten free blackberry oat muffins on a tray with coffee, butter and blackberries
    [feast_advanced_jump_to]

    Why You'll Love This Recipe

    • Made with fresh blackberries, real ingredients, and a touch of honey
    • Freezer friendly, so you can bake a batch and always have breakfast ready to go
    • Easy to pack for lunches or grab on your way out the door
    • A gluten free muffin the whole family will actually ask for again

    Ingredient Notes and Substitutions

    A couple of ingredient notes will help these muffins turn out well every time. For the gluten free flour, I recommend Bob's Red Mill 1 to 1 Baking Flour or King Arthur Measure for Measure flour, both of which give these muffins a soft, tender crumb.

    No fresh blackberries on hand? Frozen work too, just don't thaw them first, and you may want to use slightly less apple sauce since frozen berries release extra moisture as they bake.

    How to Store and Freeze These Muffins

    These muffins keep well for a few days at room temperature and freeze beautifully, which makes them an easy make ahead breakfast or snack. Store them in an airtight container at room temperature for up to 3 days, or in the refrigerator for up to a week. To freeze, let the muffins cool completely, then freeze in a single layer before transferring to a freezer bag for up to 3 months. Thaw at room temperature or warm briefly in the microwave or a 300 degree oven before serving.

    Ways to Customize This Recipe

    This recipe is easy to make your own with a few simple swaps.

    • Swap the blackberries for blueberries or raspberries for a different berry muffin.
    • Add a teaspoon of lemon zest for a brighter, slightly citrusy flavor.
    • Stir in a handful of mini chocolate chips along with the blackberries for a sweeter treat.
    • Top the batter with a simple oat and brown sugar crumble before baking for extra texture.

    Top Tip

    Toss the blackberries in a tablespoon of your gluten free flour before folding them into the batter. This helps coat the berries so they stay suspended throughout the muffin instead of sinking to the bottom as they bake.

    Frequently Asked Questions

    What gluten free flour is best for muffins?

    This is definitely a topic where everyone seems to have a different opinion. My personal favorites are King Arthur Gluten Free Flour and Bob's RedMill Gluten Free Flour. Both are cup for cup replacements that give these muffins a soft texture without any gritty aftertaste.

    How do you make gluten free muffins less dense?

    Adding extra moisture to your recipe will usually help if your muffins came out too dense. This can mean adding some apple sauce, extra oil or butter. If your dough looks dry after you've mixed everything in you likely need a bit more moisture.

    This can happen if the berries aren't very juicy. Any time you are working with a fruit the moisture level can vary. If you use frozen berries you might find that you need a bit less moisture as they will be more moist as they thaw.

    When you are converting a recipe to gluten free you may also find that you need to lengthen the cooking time. If the muffins seems dense and a bit under cooked it likely needed 5-10 more minutes in the oven.

    Can I freeze these muffins?

    Yes. Let the muffins cool completely, then freeze them in a single layer before transferring to a freezer bag for up to 3 months. Thaw at room temperature or warm briefly in the microwave before serving.

    Can I use frozen blackberries instead of fresh?

    Yes. Add them straight to the batter without thawing first. You may want to use slightly less apple sauce, since frozen berries release extra moisture as the muffins bake.

    Didn't find the answer you're looking for?

    Ask AI to answer based on this recipe:

    ChatGPT
    Google AI
    Perplexity
    Grok
    Claude

    Blackberry Oat Muffins Supplies

    More Recipes You Might Enjoy

    • Gluten Free Blackberry Cobbler
    • Gluten Free Strawberry Muffins
    • Gluten Free Blueberry Muffins
    • Gluten Free Banana Bread Muffins

    I get a lot of my ingredients from Thrive Market. Thrive Market has been a game changer for me eating gluten free. They have so many options I can't get at my rural grocery stores! Use this link to get 40% off your first order!

    Print
    clock clock iconcutlery cutlery iconflag flag iconfolder folder iconinstagram instagram iconpinterest pinterest iconfacebook facebook iconprint print iconsquares squares iconheart heart iconheart solid heart solid icon

    Gluten Free Blackberry Oat Muffins


    5 Stars 4 Stars 3 Stars 2 Stars 1 Star

    No reviews

    • Author: Elaine VanVleck
    • Total Time: 50 minutes
    • Yield: 12 1x
    • Diet: Gluten Free
    Print Recipe
    Pin Recipe

    Description

    These gluten free blackberry oat muffins are soft, lightly sweet, and full of fresh blackberry flavor in every bite. They come together in one bowl and are just as good for a quick breakfast as they are packed away for an on the go snack.


    Ingredients

    Scale
    • ½ cup Apple Sauce
    • 1 tsp. Vanilla Extract
    • 2 large Eggs
    • ¼ cup Granulated Sugar
    • ½ cup Brown Sugar
    • 2 Tbsp. Honey
    • 3 Tbsp. Coconut Oil, melted
    • 3 tsp. Baking Powder
    • 1 tsp. Sea Salt
    • ½ tsp. Ground Cinnamon
    • ¾ cup Milk
    • 1 ¼ cup Almond Flour
    • 1 ¼ cup Gluten Free Flour
    • 1 ¼ cup Gluten Free Rolled Oats
    • 1 cup Blackberries

    Instructions

    Preheat your oven to 350 degrees. Line a muffin tin with liners or grease the tin with coconut oil. Set aside.

    In the bowl of your stand mixer add the apple sauce, vanilla, eggs, granulated sugar, brown sugar, honey and melted coconut oil. Blend until mixed together.

    In a separate bowl whisk together the baking powder, salt, cinnamon, almond flour, gluten free flour and oats.

    Add the dry ingredients to the wet ingredients along with the milk. Blend until just combined. Don't over mix!

    Add the blackberries and stir in by hand using a spatula. Don't over stir or you won't have any blackberry chunks left in your muffins.

    Bake at 350 degrees for 35 minutes or until the muffins are golden brown and cooked through.

    If you made this recipe please leave a star rating and comment below. It helps other readers find this recipe and means so much to me.

    Notes

    I used fresh blackberries in this recipe. You can use frozen blackberries, but you may want to reduce the amount of apple sauce you use to about ⅓ cup to account for the moisture frozen blueberries will release when baked.

    • Prep Time: 15 minutes
    • Cook Time: 35 minutes
    • Category: Muffins
    • Method: Baking
    • Cuisine: American

    Did you make this recipe?

    Tag @smallfarmbiglife on Instagram and hashtag it #smallfarmbiglife

    If you make these blackberry oat muffins, I would love to hear how they turned out. Leave a comment and a star rating below, and tag @smallfarmbiglife on Instagram so I can see your batch. Looking for more easy muffin recipes? Check out my full collection of Gluten Free Breakfast Recipes.

    Blackberry Oat Muffins Ingredients

    Unsweetened Apple Sauce
    Vanilla Extract
    Eggs
    Granulated Sugar
    Brown Sugar
    Honey
    Coconut Oil
    Baking Powder
    Sea Salt
    Ground Cinnamon
    Milk
    Almond Flour
    Gluten Free Flour
    Gluten Free Rolled Oats
    Blackberries

    Instructions

    Preheat your oven to 350 degrees. Line a muffin tin with liners or grease the tin with coconut oil. Set aside.

    In the bowl of your stand mixer add the apple sauce, vanilla, eggs, granulated sugar, brown sugar, honey and melted coconut oil. Blend until mixed together.

    In a separate bowl whisk together the baking powder, salt, cinnamon, almond flour, gluten free flour and oats.

    Add the dry ingredients to the wet ingredients along with the milk. Blend until just combined. Don't over mix!

    Add the blackberries and stir in by hand using a spatula. Don't over stir or you won't have any blackberry chunks left in your muffins.

    Bake at 350 degrees for 35 minutes or until the muffins are golden brown and cooked through.

    Refrigerator Bread and Butter Pickles

    If you have never made homemade pickles before, this refrigerator bread and butter pickle recipe is the perfect place to start. Fresh cucumbers and sweet onion get packed into a half gallon jar with a simple sweet and tangy brine made from apple cider vinegar, white vinegar, sugar, mustard seeds, celery seeds, and turmeric. There is no canning equipment required, no special skills needed, and the whole thing comes together in about 20 minutes.

    Just let the jar cool, pop it in the fridge, and in one week you have the most flavorful crunchy homemade pickles you have ever tasted.

    These homemade bread and butter pickles are so much better than anything you can buy at the store and they are a wonderful way to use up an abundance of garden cucumbers at the end of summer.

    The brine is perfectly balanced between sweet and tangy with just the right amount of spice from the mustard seeds and a beautiful golden color from the turmeric.

    I make a few jars every summer and we enjoy them on burgers, sandwiches, snack boards, and straight from the jar all the way into fall. Once you try homemade refrigerator pickles you will never go back to store bought.

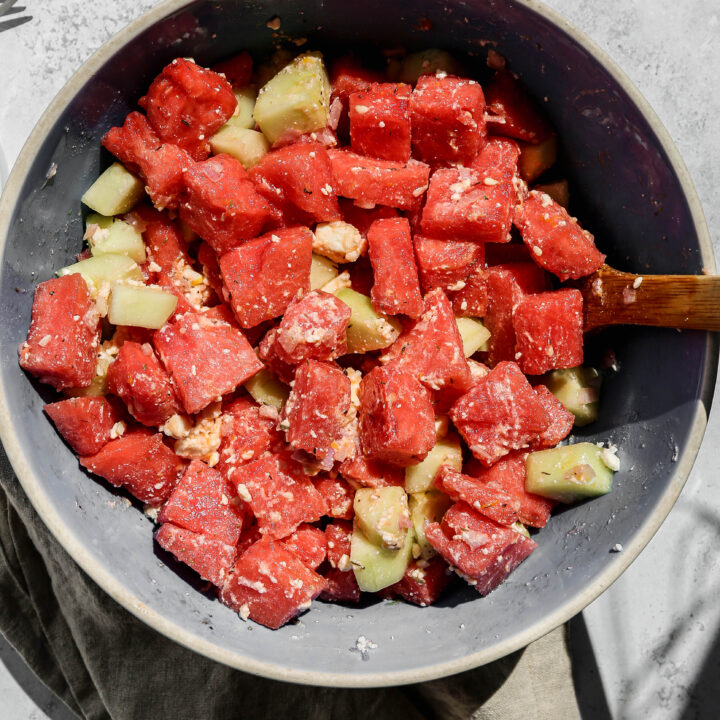
    If you are looking for more cucumber recipes try my Cucumber Salad with Vinegar Dressing, my Creamy Cucumber Salad or my Watermelon Cucumber and Feta Salad.

    You can find all of my snack recipes here: Gluten Free Snack Recipes

    [feast_advanced_jump_to]

    Ingredients

    Cucumbers
    Sweet Onion
    Granulated Sugar
    Brown Sugar
    White Vinegar
    Apple Cider Vinegar
    Sea Salt
    Mustard Seeds
    Celery Seeds
    Ground Turmeric

    Instructions

    This recipe makes one 2 quart or half gallon jar. I slice up the cucumbers and the onions and then layer them into the jar. Be sure to press them in as you go so you can get everything into the jar.

    Next I make the brine in a saucepan on my stovetop. When it's complete I pour it over the jar of pickles and onions. Let the jar set on your counter until it is cooled before placing a lid on and putting it in your refrigerator.

    I like to shake the jar every other day to keep the spices mixed up with the liquid. I let the jar set in the refrigerator for one week before tasting the pickles. At this point they should have a vinegar and spice pickle flavor with a bit of sweet.

    Supplies

    Storage

    Store the pickles in your refrigerator for up to 1-2 months in an air tight jar or container. The pickles will get more flavor the longer they sit in the brine.

    More Recipes You Might Enjoy

    • Cucumber Salad with Vinegar Dressing
    • Easy Refrigerator Pickled Cauliflower
    • Watermelon Cucumber and Feta Salad
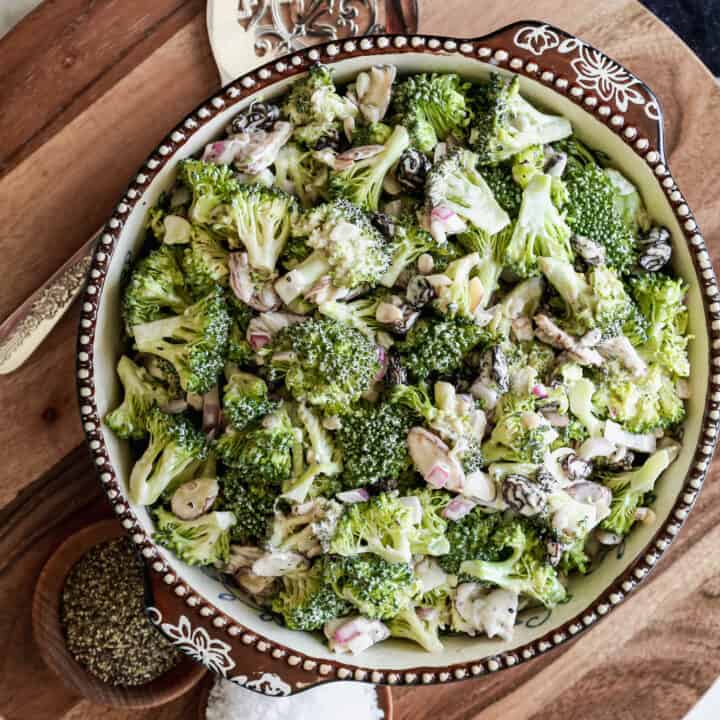
    • Sugar Free Broccoli Salad

    I get a lot of my ingredients from Thrive Market. Thrive Market has been a game changer for me eating gluten free. They have so many options I can't get at my rural grocery stores! Use this link to get 40% off your first order!

    Print
    clock clock iconcutlery cutlery iconflag flag iconfolder folder iconinstagram instagram iconpinterest pinterest iconfacebook facebook iconprint print iconsquares squares iconheart heart iconheart solid heart solid icon

    Refrigerator Bread and Butter Pickles


    5 Stars 4 Stars 3 Stars 2 Stars 1 Star

    1 from 1 review

    • Author: Elaine VanVleck
    • Total Time: 23 minutes
    • Yield: 1 half gallon jar 1x
    • Diet: Gluten Free
    Print Recipe
    Pin Recipe

    Description

    This easy refrigerator bread and butter pickle recipe makes the most crunchy and flavorful homemade pickles with no canning required! Fresh cucumbers and sweet onion are packed into a half gallon jar with a simple sweet and tangy brine made from apple cider vinegar, white vinegar, sugar, mustard seeds, celery seeds, and turmeric. Ready to eat in one week and perfect for burgers, sandwiches, snack boards, and snacking straight from the jar.


    Ingredients

    Scale
    • 6 cups Cucumbers, thinly sliced rounds
    • 2 cups Sweet Onion, thinly sliced
    • ¾ cup Granulated Sugar
    • ¼ cup Brown Sugar
    • 1 cup White Vinegar
    • 1 cup Apple Cider Vinegar
    • 1 tsp. Sea Salt
    • 1 tsp. Mustard Seeds
    • ½ tsp. Celery Seeds
    • ½ tsp. Ground Turmeric

    Instructions

    Make sure your 2 quart jars or half gallon jar is clean and sterilized. I like to run my jar through the dishwasher and the heat dry before using it.

    Slice the cucumber and the sweet onion. Layer the cucumber and sweet onion into your jar or jars.

    On the stovetop in a saucepan heat the granulated sugar, brown sugar, white vinegar, apple cider vinegar, salt, mustard seeds, celery seeds and ground turmeric until the sugar is dissolved. 

    Pour the vinegar mixture over the cucumbers and onions in the jar. This should fill the jars to the top and completely cover the cucumbers and onions. If it doesn't add a bit more apple cider vinegar or water to the jar.

    Let the jar cool completely on your countertop. After the jar has cooled place a lid on the jar and put it in the refrigerator. 

    I shake the jar every other day to keep the spices mixed in. The pickles should be ready to eat in a week.

    Notes

    Refrigerator bread and butter pickles should keep in your refrigerator for 1-2 months. 

    • Prep Time: 15 minutes
    • Cook Time: 8 minutes
    • Category: Condiments
    • Method: Pickling
    • Cuisine: American

    Did you make this recipe?

    Tag @smallfarmbiglife on Instagram and hashtag it #smallfarmbiglife

    If you make these Refrigerator Bread and Butter Pickles I would love to hear how they turned out! Leave a star rating and a comment below and let me know what you served them with.

    Don't forget to save this recipe to your Pinterest boards so you can find it again all cucumber season long!

    Top Tips

    I start using the pickles after a week in the brine, but the flavor gets even better after two weeks.

    These refrigerator bread and butter pickles are perfect for a snack board and on hamburgers. They are a great way to use extra cucumbers from the garden.

    Didn't find the answer you're looking for?

    Ask AI to answer based on this recipe:

    ChatGPT
    Google AI
    Perplexity
    Grok
    Claude

    Frequently Asked Questions

    Can I use pickling cucumbers instead of regular cucumbers?

    Yes and pickling cucumbers are actually a great choice for this recipe! They tend to have thinner skins, fewer seeds, and a firmer flesh than regular slicing cucumbers, which means they stay crunchier longer in the brine. If you are using pickling cucumbers you can slice them the same way as regular cucumbers. Either variety works beautifully in this recipe so use whatever you have on hand or whatever is growing in your garden.

    Do I need to sterilize the jar before making refrigerator pickles?

    Yes, starting with a clean sterilized jar is important for food safety and for keeping your pickles fresh as long as possible. The easiest way to sterilize your jar is to run it through the dishwasher on the hot dry cycle right before you use it. You can also wash it thoroughly with hot soapy water and let it air dry completely. Since these are refrigerator pickles and not shelf stable canned pickles the sterilization process does not need to be as rigorous as traditional canning, but a clean jar makes a big difference.

    Can I make these bread and butter pickles with other vegetables?

    Absolutely! The sweet and tangy brine in this recipe works beautifully with other vegetables too. Cauliflower florets, sliced bell peppers, sliced jalapeños, and green beans are all great options. You can even do a mix of cucumbers and another vegetable in the same jar. If you love pickled cauliflower specifically I also have a dedicated refrigerator pickled cauliflower recipe on the blog that you might enjoy.

    Why did my pickles turn soft instead of staying crunchy?

    A few things can cause soft refrigerator pickles. The most common reason is that the cucumbers sat in the brine too long before being refrigerated. It is important to let the jar cool completely on the counter before putting the lid on and moving it to the fridge, but do not leave it out longer than necessary. Using very fresh cucumbers also makes a big difference in crunch. Older cucumbers that have been sitting in the refrigerator for a while tend to produce softer pickles. Slicing the cucumbers thicker can also help them hold their texture better in the brine.

    Can I reduce the sugar to make these less sweet?

    Yes you can reduce the sugar to suit your taste preferences. Keep in mind that the sugar is what balances the tartness of the vinegar and gives bread and butter pickles their signature sweet and tangy flavor. If you reduce the sugar too much they will taste more like a dill style pickle than a traditional bread and butter pickle. Start by reducing the sugar by a couple of tablespoons and taste the brine before pouring it over the cucumbers to find the right balance for you.

    Can I double this recipe to make more jars?

    Absolutely! This recipe scales up very easily. Simply double or triple all of the ingredients to make two or three half gallon jars at once. Making a few jars at the end of summer when cucumbers are at their peak is a great way to stock your fridge with homemade pickles to enjoy well into the fall months. The flavor only gets better the longer they sit in the brine.

    Homemade Strawberry Banana Popsicles

    This easy recipe for homemade strawberry banana popsicles is a creamy frozen treat! I love ice pops as a perfect summer frozen dessert. This healthy recipe has real fruit and is simple to make.

    Perfect as a popsicle recipe for kids or a light easy summer dessert, these frozen fruit popsicles are a great alternative to store-bought versions.

    With the sweet taste of strawberries and bananas in every bite, they're a go-to healthy strawberry banana popsicle option that fits any warm-weather occasion.

    If you're wondering how to make strawberry banana popsicles that are delicious and guilt-free, this easy fruit popsicle recipe is the answer.

    My favorite popsicle mold is the Norpro Frozen Ice Pop Maker. I like it's sturdy construction and that I can use wooden popsicle sticks with it. After the popsicles are frozen the lid comes off easily. I dip the mold into hot water and the ice pops come out easily.

    You might also like my Gluten Free Strawberry Icebox Bars recipe.

    [feast_advanced_jump_to]

    Ingredients

    Strawberries
    Bananas
    Milk
    Honey
    Heavy Whipping Cream
    Granulated Sugar

    Instructions

    In a saucepan on medium heat cook the strawberries, bananas, milk and honey stirring occasionally until fruit is broken down and the mixture has slightly thickened.

    Let the fruit mixture cool.

    Using a stand mixer on high speed whisk the heavy whipping cream and sugar until stiff peaks form. 

    Reserve one cup of the fruit mixture. Pour the rest of the fruit mixture into a blender and puree.

    Fold the fruit mixture, fruit puree and whipped cream together. 

    Pour or scoop the mixture into the popsicle molds. Place the lid on your mold and the popsicle sticks into the lid. If you don't have a lid you can use plastic wrap or tin foil to hold the popsicle sticks in place.

    Freeze for at least two hours before serving. 

    If you can't get the popsicles out of the mold you can submerge the bottom of the mold in hot water for a few seconds. Be careful not to get water into your popsicles.

    Supplies

    Top Tip

    When I say fold I mean to pour the whipped cream on top of the strawberry mixture, then take a spatula and gently pull strawberry mixture over the whipped cream until they mix together. You want to keep the airiness of the whipped cream so you don't just want to stir them together.

    Frequently Asked Questions

    How long will homemade popsicles last in the freezer?

    I don't like to leave my homemade strawberry banana popsicles in the freezer for longer than one week. This prevents them from getting freezer burnt. Honestly, they get consumed so fast they don't normally last the entire week during the summer.

    More Recipes You Might Enjoy

    • Gluten Free Strawberry Icebox Bars
    • Strawberry Daiquiri Mocktails
    • Gluten Free No Bake Lemon Icebox Pie
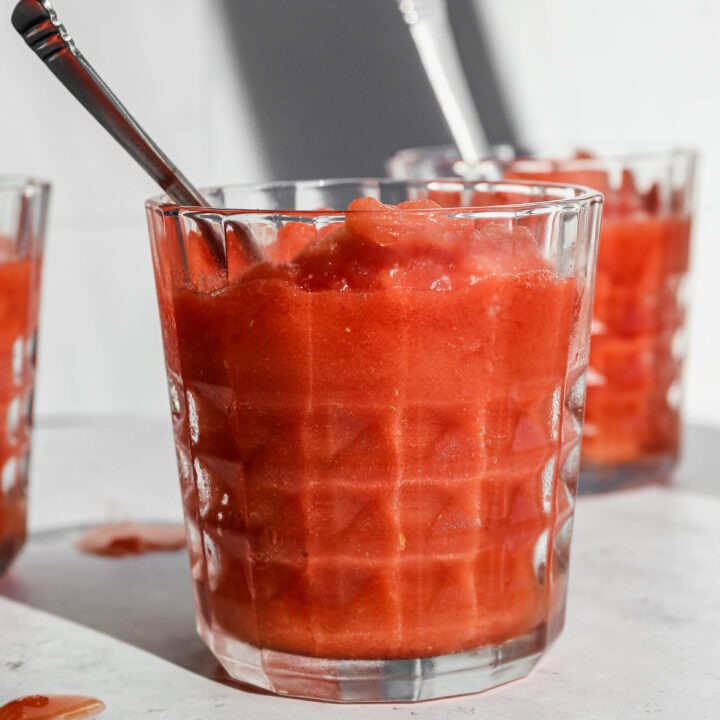
    • Easy Frozen Watermelon Margarita Mocktail

    I get a lot of my ingredients from Thrive Market. Thrive Market has been a game changer for me eating gluten free. They have so many options I can't get at my rural grocery stores! Use this link to get 40% off your first order!

    Print
    clock clock iconcutlery cutlery iconflag flag iconfolder folder iconinstagram instagram iconpinterest pinterest iconfacebook facebook iconprint print iconsquares squares iconheart heart iconheart solid heart solid icon

    Homemade Strawberry Banana Popsicles


    5 Stars 4 Stars 3 Stars 2 Stars 1 Star

    No reviews

    • Author: Elaine VanVleck
    • Total Time: 30 minutes
    • Yield: 10 popsicles 1x
    • Diet: Gluten Free
    Print Recipe
    Pin Recipe

    Description

    This easy recipe for homemade strawberry banana popsicles is a creamy frozen treat! I love ice pops as a perfect summer frozen dessert. This healthy recipe has real fruit and is simple to make.


    Ingredients

    Scale
    • 3 cups Strawberries, hulled and sliced
    • 2 medium ripe Bananas, cut into chunks
    • 2 Tbsp. Milk
    • 2 Tbsp. Honey
    • 1 cup Heavy Whipping Cream
    • 2 Tbsp. Granulated Sugar

    Instructions

    In a saucepan on medium heat cook the strawberries, bananas, milk and honey stirring occasionally until fruit is broken down and the mixture has slightly thickened.

    Let the fruit mixture cool.

    Using a stand mixer on high speed whisk the heavy whipping cream and sugar until stiff peaks form. 

    Reserve one cup of the fruit mixture. Pour the rest of the fruit mixture into a blender and puree.

    Fold the fruit mixture, fruit puree and whipped cream together. 

    Pour or scoop the mixture into the popsicle molds. Place the lid on your mold and the popsicle sticks into the lid. If you don't have a lid you can use plastic wrap or tin foil to hold the popsicle sticks in place.

    Freeze for at least two hours before serving. 

    If you can't get the popsicles out of the mold you can submerge the bottom of the mold in hot water for a few seconds. Be careful not to get water into your popsicles.

    • Prep Time: 20 minutes
    • Cook Time: 10 minutes
    • Category: Ice Cream
    • Method: Frozen
    • Cuisine: Gluten Free

    Did you make this recipe?

    Tag @smallfarmbiglife on Instagram and hashtag it #smallfarmbiglife

    Top Tip

    This is a great way to use strawberries and ripe bananas. I know when it's hot I don't want to turn my oven on for banana bread, so instead I make these delicious popsicles.

    • « Previous Page
    • 1
    • …
    • 8
    • 9
    • 10
    • 11
    • Next Page »

    Welcome! I'm Elaine

    I'm so glad you are here! I share easy gluten free recipes from my small farm in Washington.

    Be sure to sign up for my newsletter to stay up to date on all of my new recipes.

    More about me...
    • Instagram
    • Pinterest
    • Facebook
    • Twitter
    • Mail

    Load up on new recipes, exclusive goodies, + more!
    Sign up below to stay up-to-date on news, events, and special deals.
    Thank you for subscribing!

    Easy Meals Recipes

    • Gluten Free Instant Pot Chili Mac and Cheese
    • Gluten Free Taco Casserole
    • Gluten Free Cowboy Baked Beans
    • Gluten Free Walking Taco Casserole
    • Gluten Free Creamy Beef and Mushroom Pasta
    • Gluten Free Instant Pot Chicken and Dumplings
    • Instant Pot Mexican Style Beef and Rice
    • Gluten Free Chicken Parmesan Pasta Casserole
    • Gluten Free One Pot Hamburger Helper Copycat
    • Gluten Free Salisbury Steak with Mushroom Gravy
    • Gluten Free Air Fryer Fajitas
    • Gluten Free Sloppy Joe Casserole

    Footer

    back to top

    About

    • Privacy Policy
    • Shop my Amazon Page
    • Follow me on LTK

    Newsletter

    • Sign Up! for emails and updates

    Contact

    • Contact
    • Media Kit
    • About Me

    As an Amazon Associate I earn from qualifying purchases.

    I may get commissions for purchases made through links on this site.

    Copyright © 2026 Brunch Pro on the Brunch Pro Theme