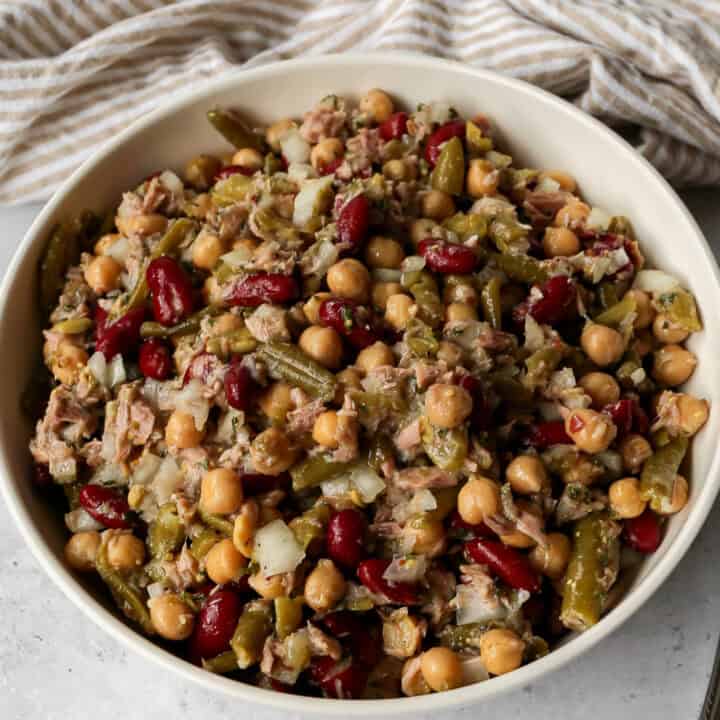
Small Farm Big Life

  • Gluten Free Recipe Index
  • Subscribe
  • Resources
menu icon
go to homepage
  • Home
  • Gluten Free Recipe Index
  • Subscribe
  • My Story
  • Resources
  • Free Guides
    • Email
    • Facebook
    • Instagram
    • Pinterest
  • subscribe
    search icon
    Homepage link
    • Home
    • Gluten Free Recipe Index
    • Subscribe
    • My Story
    • Resources
    • Free Guides
    • Email
    • Facebook
    • Instagram
    • Pinterest
  • ×

    Air Fryer BBQ Chicken Thighs

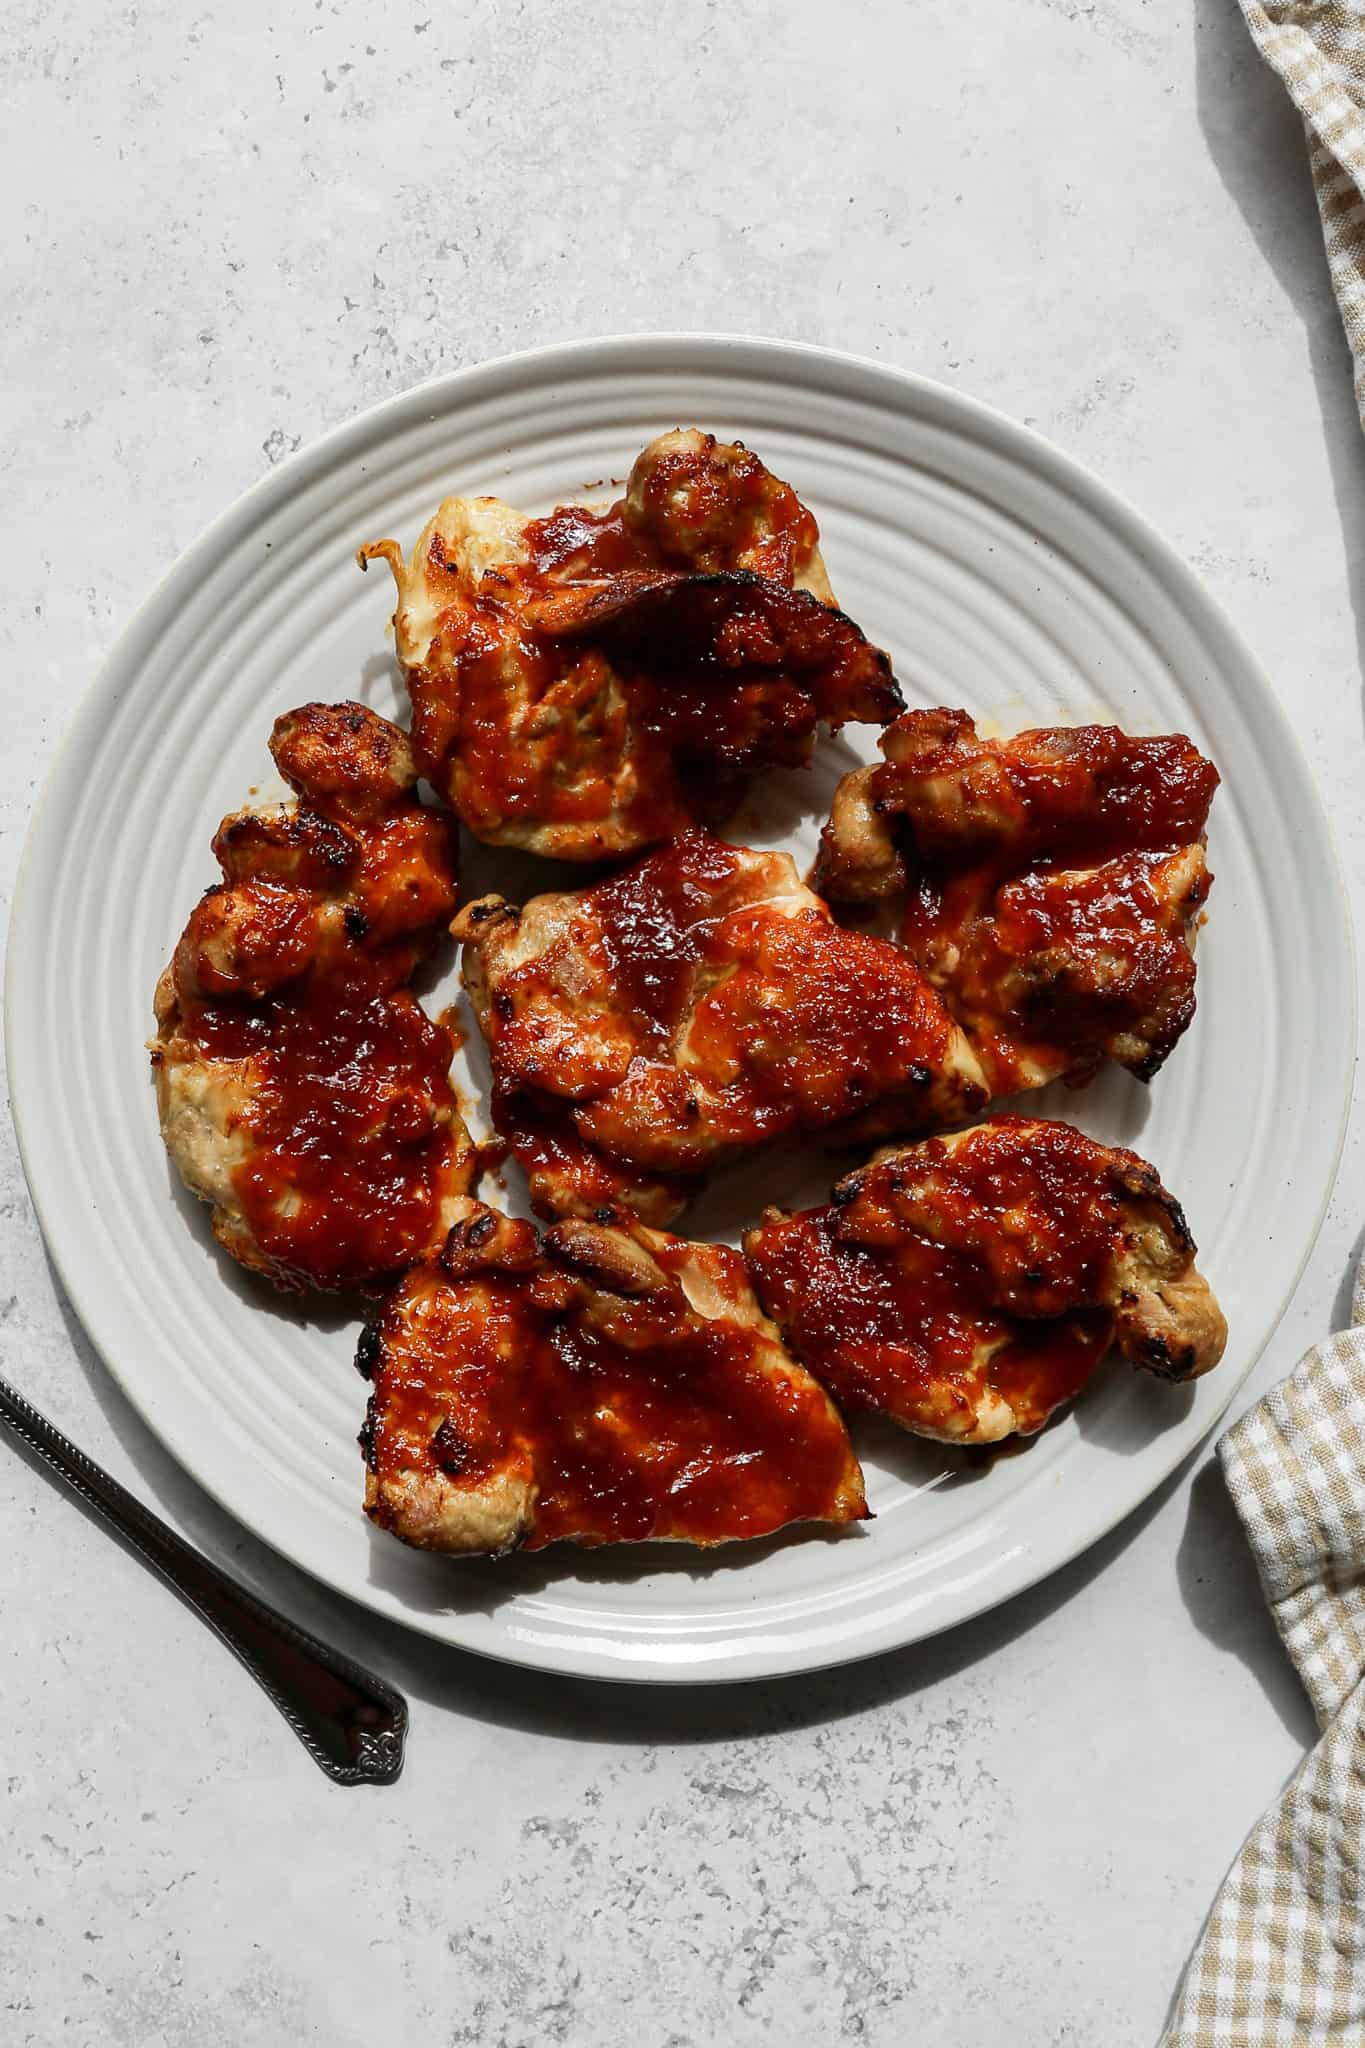
    These gluten free air fryer BBQ chicken thighs are about to become your new weeknight dinner staple. Boneless skinless chicken thighs get coated in a rich and smoky homemade BBQ sauce made from scratch with ketchup, brown sugar, apple cider vinegar, gluten free Worcestershire sauce, yellow mustard, and a perfectly balanced blend of spices, then air fried until tender, juicy, and caramelized to perfection.

    The homemade BBQ sauce comes together in just minutes and is so much better than anything from a bottle, making this one of those easy gluten free dinner recipes that feels impressive without requiring a lot of effort.

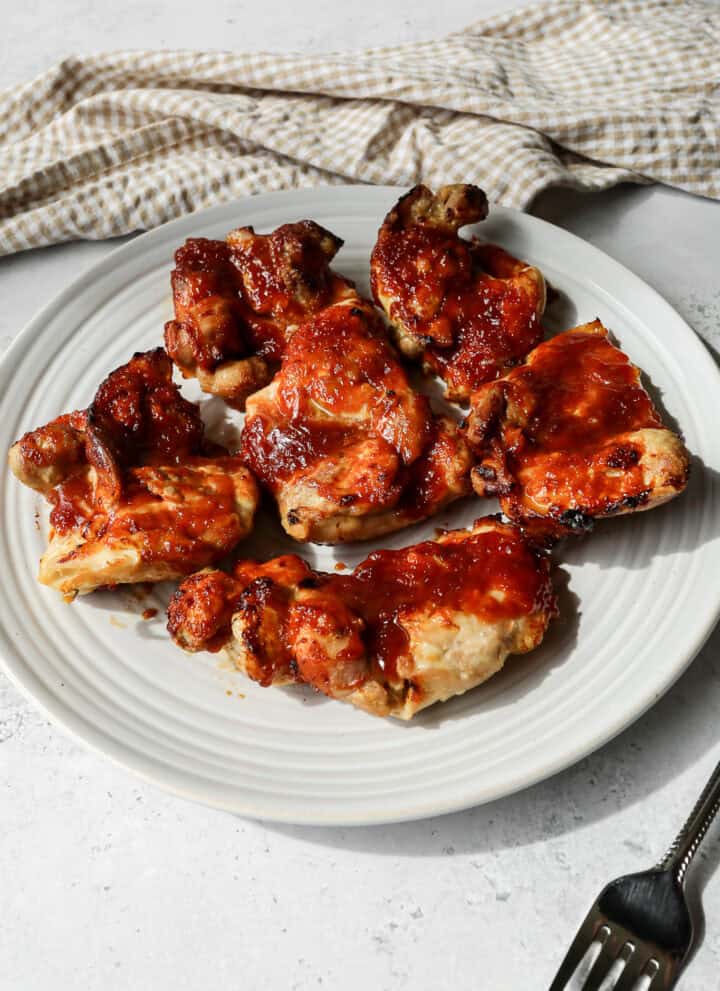
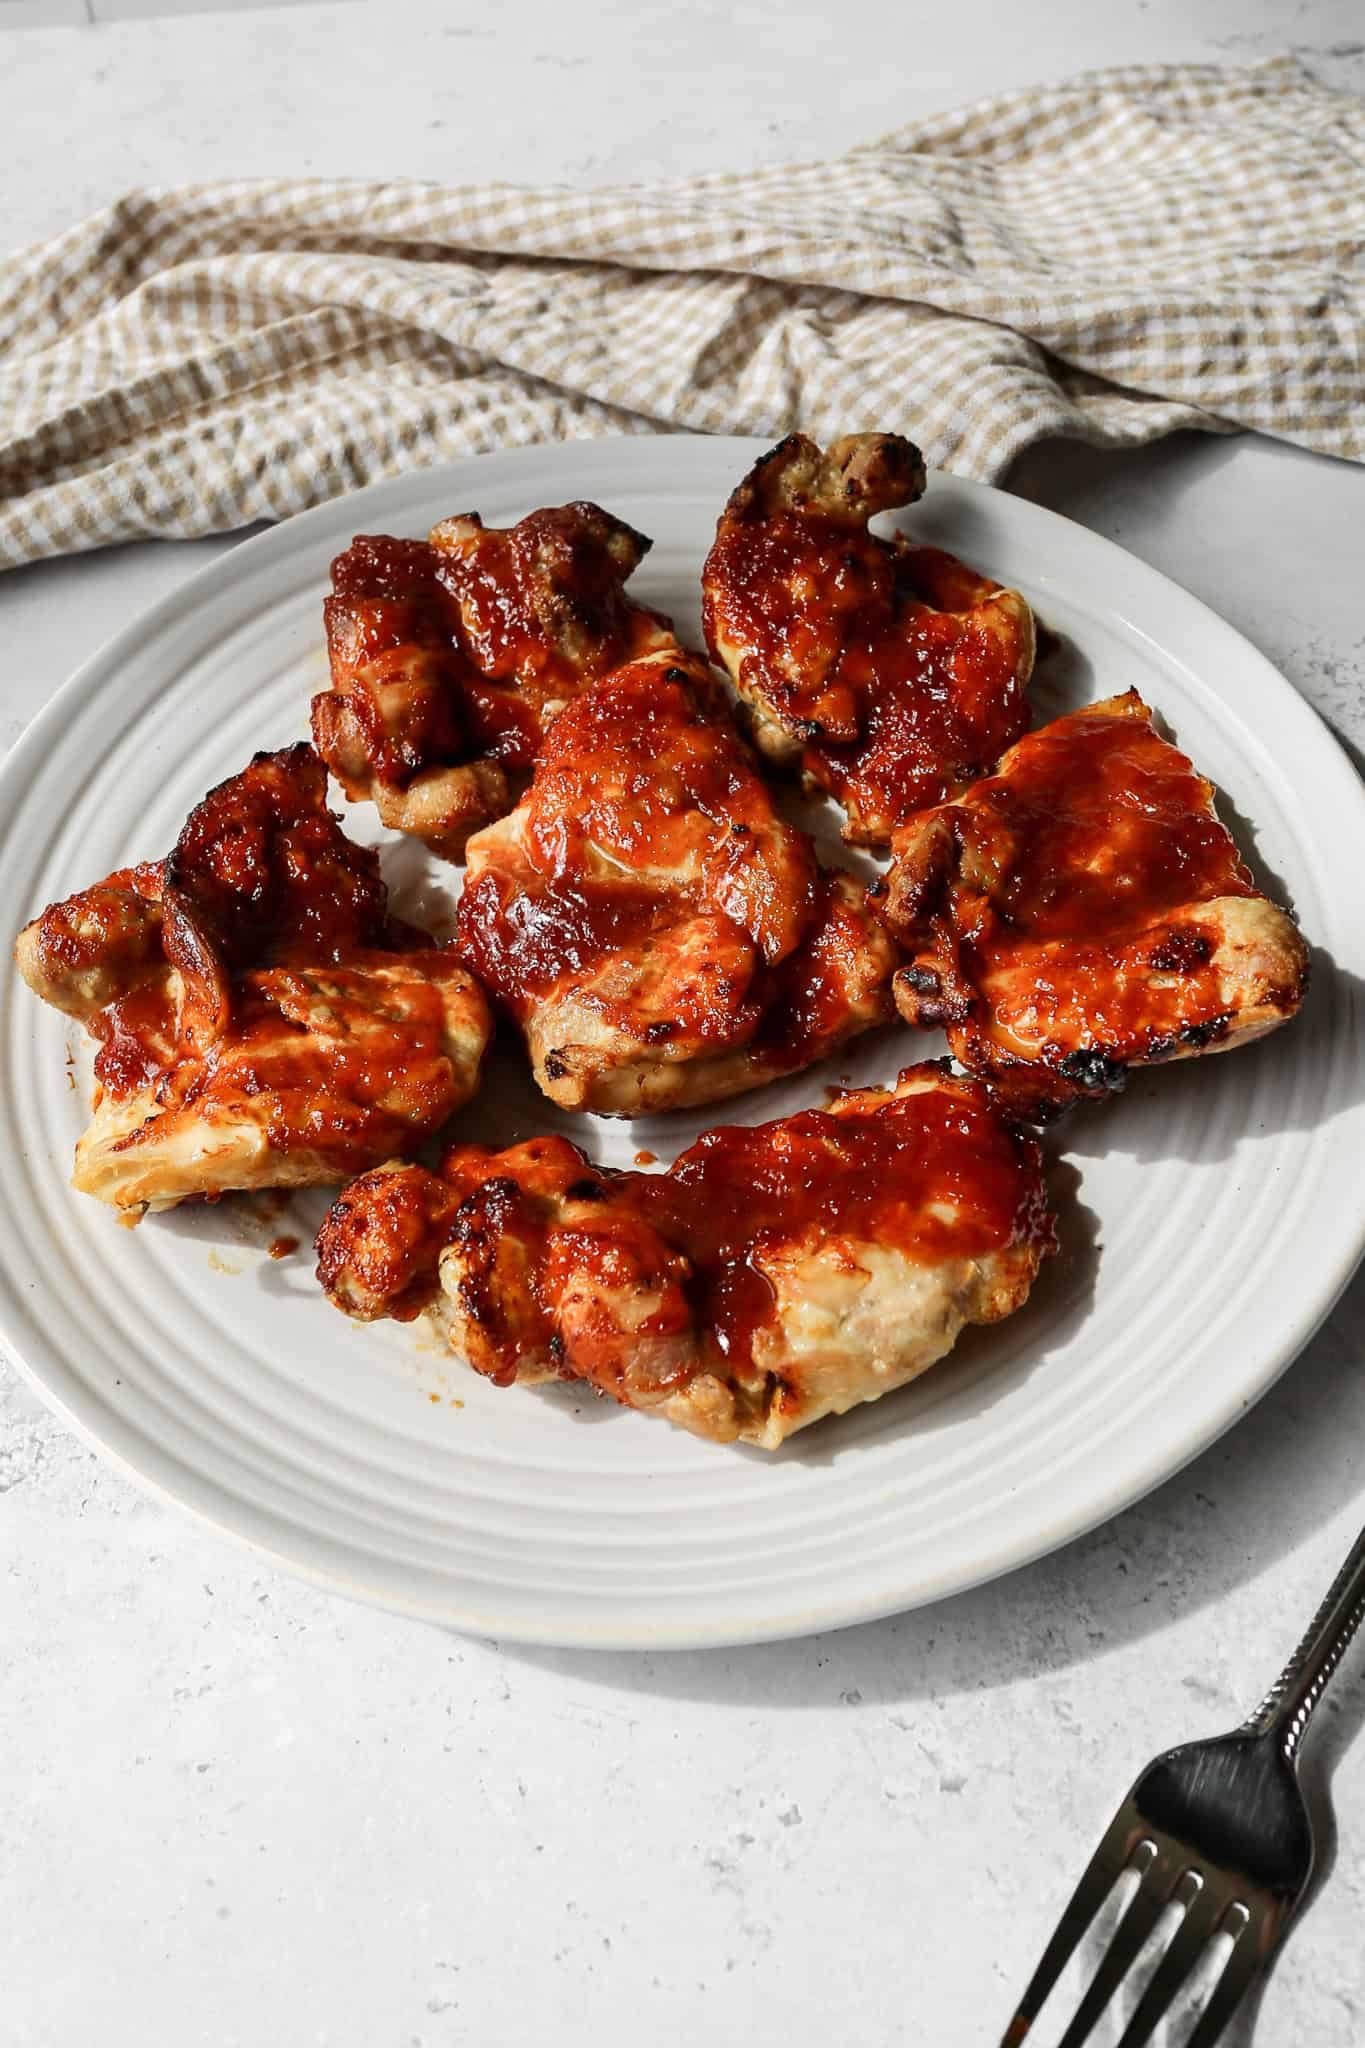
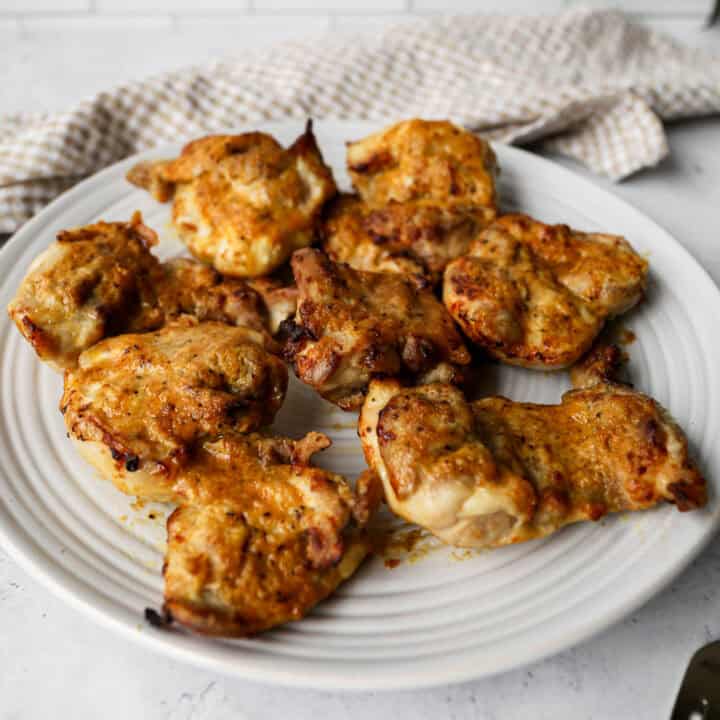
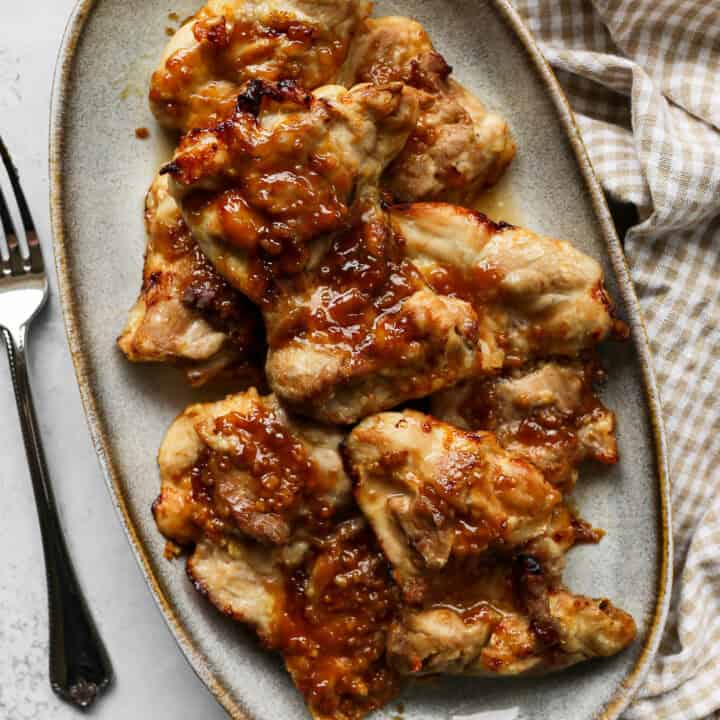
    air fryer barbecue chicken thighs on a white plate next to a tan and white gingham kitchen towel

    The air fryer is the secret weapon here. It cooks the chicken thighs quickly and evenly while creating that gorgeous sticky and caramelized BBQ coating that you normally only get from a grill or oven.

    The whole recipe is ready in under 30 minutes which makes it perfect for busy weeknights when you need a hearty and satisfying gluten free dinner on the table fast.

    Serve these air fryer BBQ chicken thighs with your favorite summer sides like coleslaw, baked beans, or a simple cucumber salad and dinner is done.

    If you are looking for more chicken recipes try my Air Fryer Teriyaki Chicken Thighs, my Air Fryer Honey Mustard Chicken Thighs, my Air Fryer Lemon Garlic Chicken Thighs or my Gluten Free Crispy Air Fryer Chicken Cutlets.

    You can find all my meal recipes here: Gluten Free Meal Recipes

    air fryer barbecue chicken thighs on a white plate next to a tan and white gingham kitchen towel
    [feast_advanced_jump_to]

    Ingredients

    • Boneless Skinless Chicken Thighs
    • Ketchup
    • Brown Sugar
    • Apple Cider Vinegar
    • Gluten Free Worcestershire Sauce
    • Yellow Mustard
    • Salt
    • Onion Powder
    • Ground Cumin
    • Smoked Paprika
    • Garlic Powder

    Instructions

    In a small bowl whisk together the ketchup, brown sugar, apple cider vinegar, gluten free worcestershire sauce, yellow mustard, salt, onion powder, ground cumin, smoked paprika and garlic powder.

    Spray your air fryer basket with some oil to keep the chicken from sticking.

    Place the chicken thighs in a single layer with a little space between each in your air fryer basket.

    Brush half the barbecue sauce over the chicken thighs.

    Air fry at 350 degrees for 14 minutes. At 7 minutes flip the thighs over and brush the other half of the barbecue sauce onto them. Continue to air fry until done.

    Chicken is done when the internal temperature of the thickest part is at least 165 degrees.

    Supplies


    More Recipes You Might Enjoy

    • Air Fryer Teriyaki Chicken Thighs
    • Air Fryer Honey Mustard Chicken Thighs
    • Air Fryer Lemon Garlic Chicken Thighs
    • Gluten Free Crispy Air Fryer Chicken Cutlets

    I get a lot of my ingredients from Thrive Market. Thrive Market has been a game changer for me eating gluten free. They have so many options I can't get at my rural grocery stores! Use this link to get 40% off your first order!

    Print
    clock clock iconcutlery cutlery iconflag flag iconfolder folder iconinstagram instagram iconpinterest pinterest iconfacebook facebook iconprint print iconsquares squares iconheart heart iconheart solid heart solid icon

    Air Fryer BBQ Chicken Thighs


    5 Stars 4 Stars 3 Stars 2 Stars 1 Star

    No reviews

    • Author: Elaine VanVleck
    • Total Time: 19 minutes
    • Yield: 6 servings 1x
    • Diet: Gluten Free
    Print Recipe
    Pin Recipe

    Description

    These gluten free air fryer BBQ chicken thighs are tender, juicy, and coated in a rich homemade BBQ sauce made from scratch with ketchup, brown sugar, apple cider vinegar, and smoky spices. Ready in under 30 minutes and completely gluten free, these easy air fryer chicken thighs are the perfect weeknight dinner served with your favorite summer sides!


    Ingredients

    Scale
    • 6 Boneless Skinless Chicken Thighs
    • ½ cup Ketchup
    • ¼ cup Brown Sugar
    • 2 Tbsp Apple Cider Vinegar
    • 1 Tbsp Gluten Free Worcestershire Sauce
    • 1 Tbsp Yellow Mustard
    • ½ tsp Salt
    • ½ tsp Onion Powder
    • ½ tsp Ground Cumin
    • ½ tsp Smoked Paprika
    • ½ tsp Garlic Powder

    Instructions

    In a small bowl whisk together the ketchup, brown sugar, apple cider vinegar, gluten free worcestershire sauce, yellow mustard, salt, onion powder, ground cumin, smoked paprika and garlic powder.

    Spray your air fryer basket with some oil to keep the chicken from sticking.

    Place the chicken thighs in a single layer with a little space between each in your air fryer basket.

    Brush half the barbecue sauce over the chicken thighs.

    Air fry at 350 degrees for 14 minutes. At 7 minutes flip the thighs over and brush the other half of the barbecue sauce onto them. Continue to air fry until done.

    Chicken is done when the internal temperature of the thickest part is at least 165 degrees.

    • Prep Time: 5 minutes
    • Cook Time: 14 minutes
    • Category: Chicken, Meat
    • Method: Air Fryer
    • Cuisine: American

    Did you make this recipe?

    Tag @smallfarmbiglife on Instagram and hashtag it #smallfarmbiglife

    If you make these Gluten Free Air Fryer BBQ Chicken Thighs I would love to hear what you think! Leave a star rating and a comment below and let me know what you served them with.

    Don't forget to save this recipe to your Pinterest boards so you can find it again on busy weeknights!

    Storage

    Store leftover air fryer BBQ chicken thighs in an airtight container in the refrigerator for up to 3 to 4 days. Reheat individual portions in the air fryer at 350 degrees for 3 to 4 minutes until warmed through and the BBQ sauce is sticky and caramelized again. You can also reheat in the microwave but the air fryer will give you a much better texture and keep the outside from getting rubbery. These chicken thighs also freeze well. Store in a freezer safe container or zip lock bag for up to 3 months and thaw overnight in the refrigerator before reheating.

    Top Tip

    Use a meat thermometer to check the internal temperature of the thickest part of the chicken thigh before pulling it out of the air fryer. Boneless skinless chicken thighs vary in size and thickness which means cooking times can vary slightly from one batch to the next. The chicken is safe to eat when the internal temperature reaches 165 degrees but pulling it out right at 165 degrees and letting it rest for a few minutes will give you the juiciest result every time. Never rely on color alone to determine doneness with chicken thighs as the BBQ sauce can make them look fully cooked before they actually are.

    Didn't find the answer you're looking for?

    Ask AI to answer based on this recipe:

    ChatGPT
    Google AI
    Perplexity
    Grok
    Claude

    Frequently Asked Questions

    Can I use bone in chicken thighs instead of boneless?

    Yes but the cooking time will need to be adjusted. Bone in chicken thighs are thicker and take longer to cook through than boneless so plan on adding 5 to 8 additional minutes to the total cook time. Always check the internal temperature of the thickest part of the thigh away from the bone and make sure it reaches at least 165 degrees before serving. The homemade BBQ sauce works beautifully on bone in thighs so the flavor will be just as delicious.

    Can I use store bought BBQ sauce instead of homemade?

    Absolutely! If you are short on time you can substitute your favorite store bought BBQ sauce for the homemade version in this recipe. Just make sure to check the label and use a certified gluten free BBQ sauce as many store bought versions contain gluten. The homemade BBQ sauce comes together in just minutes though and is so much better than anything from a bottle so I always recommend making it from scratch when you have the time.

    Can I make chicken wings with this recipe instead of chicken thighs?

    Yes! This homemade BBQ sauce works beautifully on chicken wings too. If you are using chicken wings air fry at 400 degrees for 20 to 25 minutes flipping halfway through until the skin is crispy and the internal temperature reaches 165 degrees. The cook time and temperature will be different from the chicken thighs so keep that in mind when making the switch.

    How do I keep the chicken from sticking to the air fryer basket?

    Make sure to spray your air fryer basket generously with oil before adding the chicken thighs. A light coating of avocado oil or olive oil spray works best and prevents the chicken and BBQ sauce from sticking to the basket during cooking. Avoid using aerosol cooking sprays like PAM on your air fryer basket as they can damage the nonstick coating over time. A refillable oil mister filled with avocado oil is a great investment for air fryer cooking.

    Can I make the BBQ sauce ahead of time?

    Yes! The homemade BBQ sauce can be made up to a week in advance and stored in a sealed jar or airtight container in the refrigerator until you are ready to use it. Making the sauce ahead of time makes this recipe even faster on busy weeknights. You can also make a double batch of the sauce and use it on other recipes throughout the week like grilled chicken, burgers, or pulled pork.

    What should I serve with air fryer BBQ chicken thighs?

    These BBQ chicken thighs pair beautifully with so many classic sides. My Gluten Free Cowboy Baked Beans, Pineapple Coleslaw, Gluten Free Macaroni Salad, and Gluten Free BLT Pasta Salad are all perfect alongside this recipe for a complete and satisfying gluten free meal. For a lighter option a simple green salad or air fryer roasted vegetables work great too.

    Gluten Free Strawberry Upside Down Cake

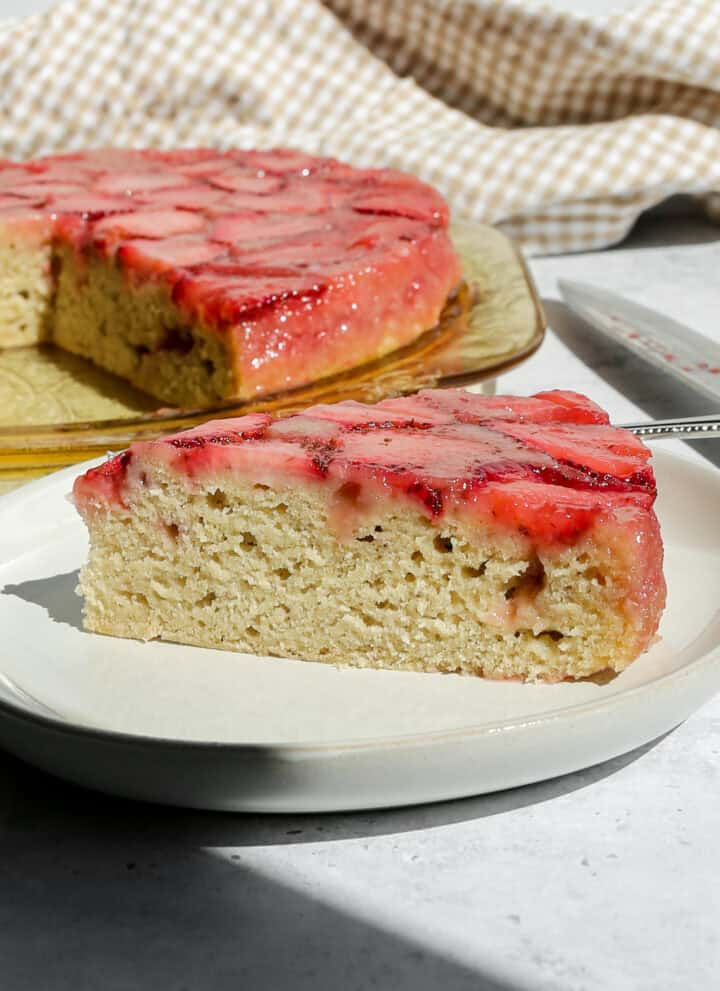
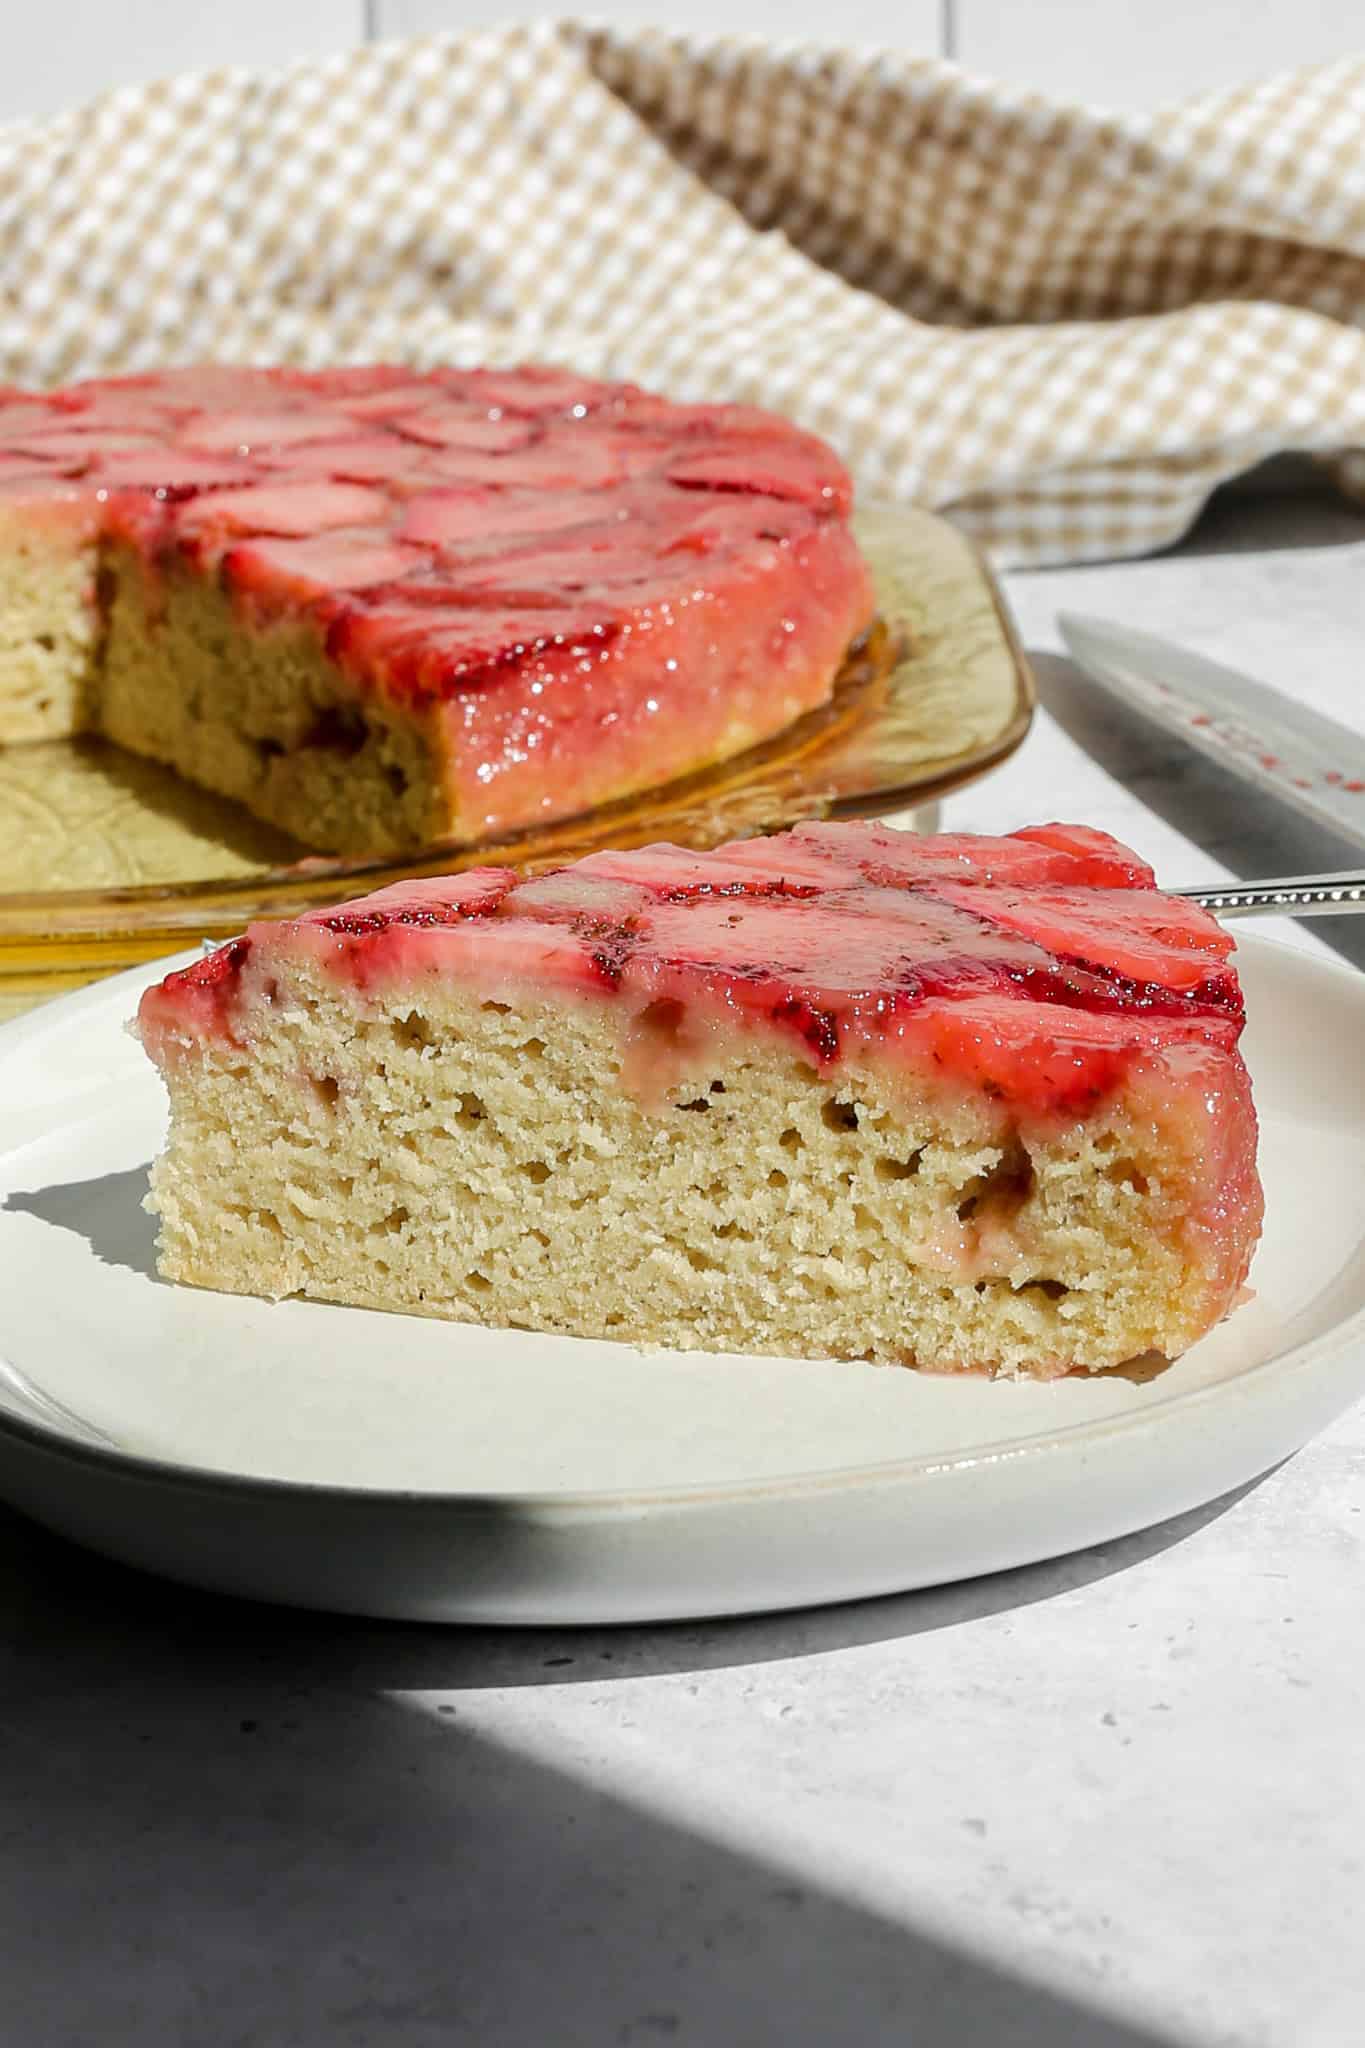
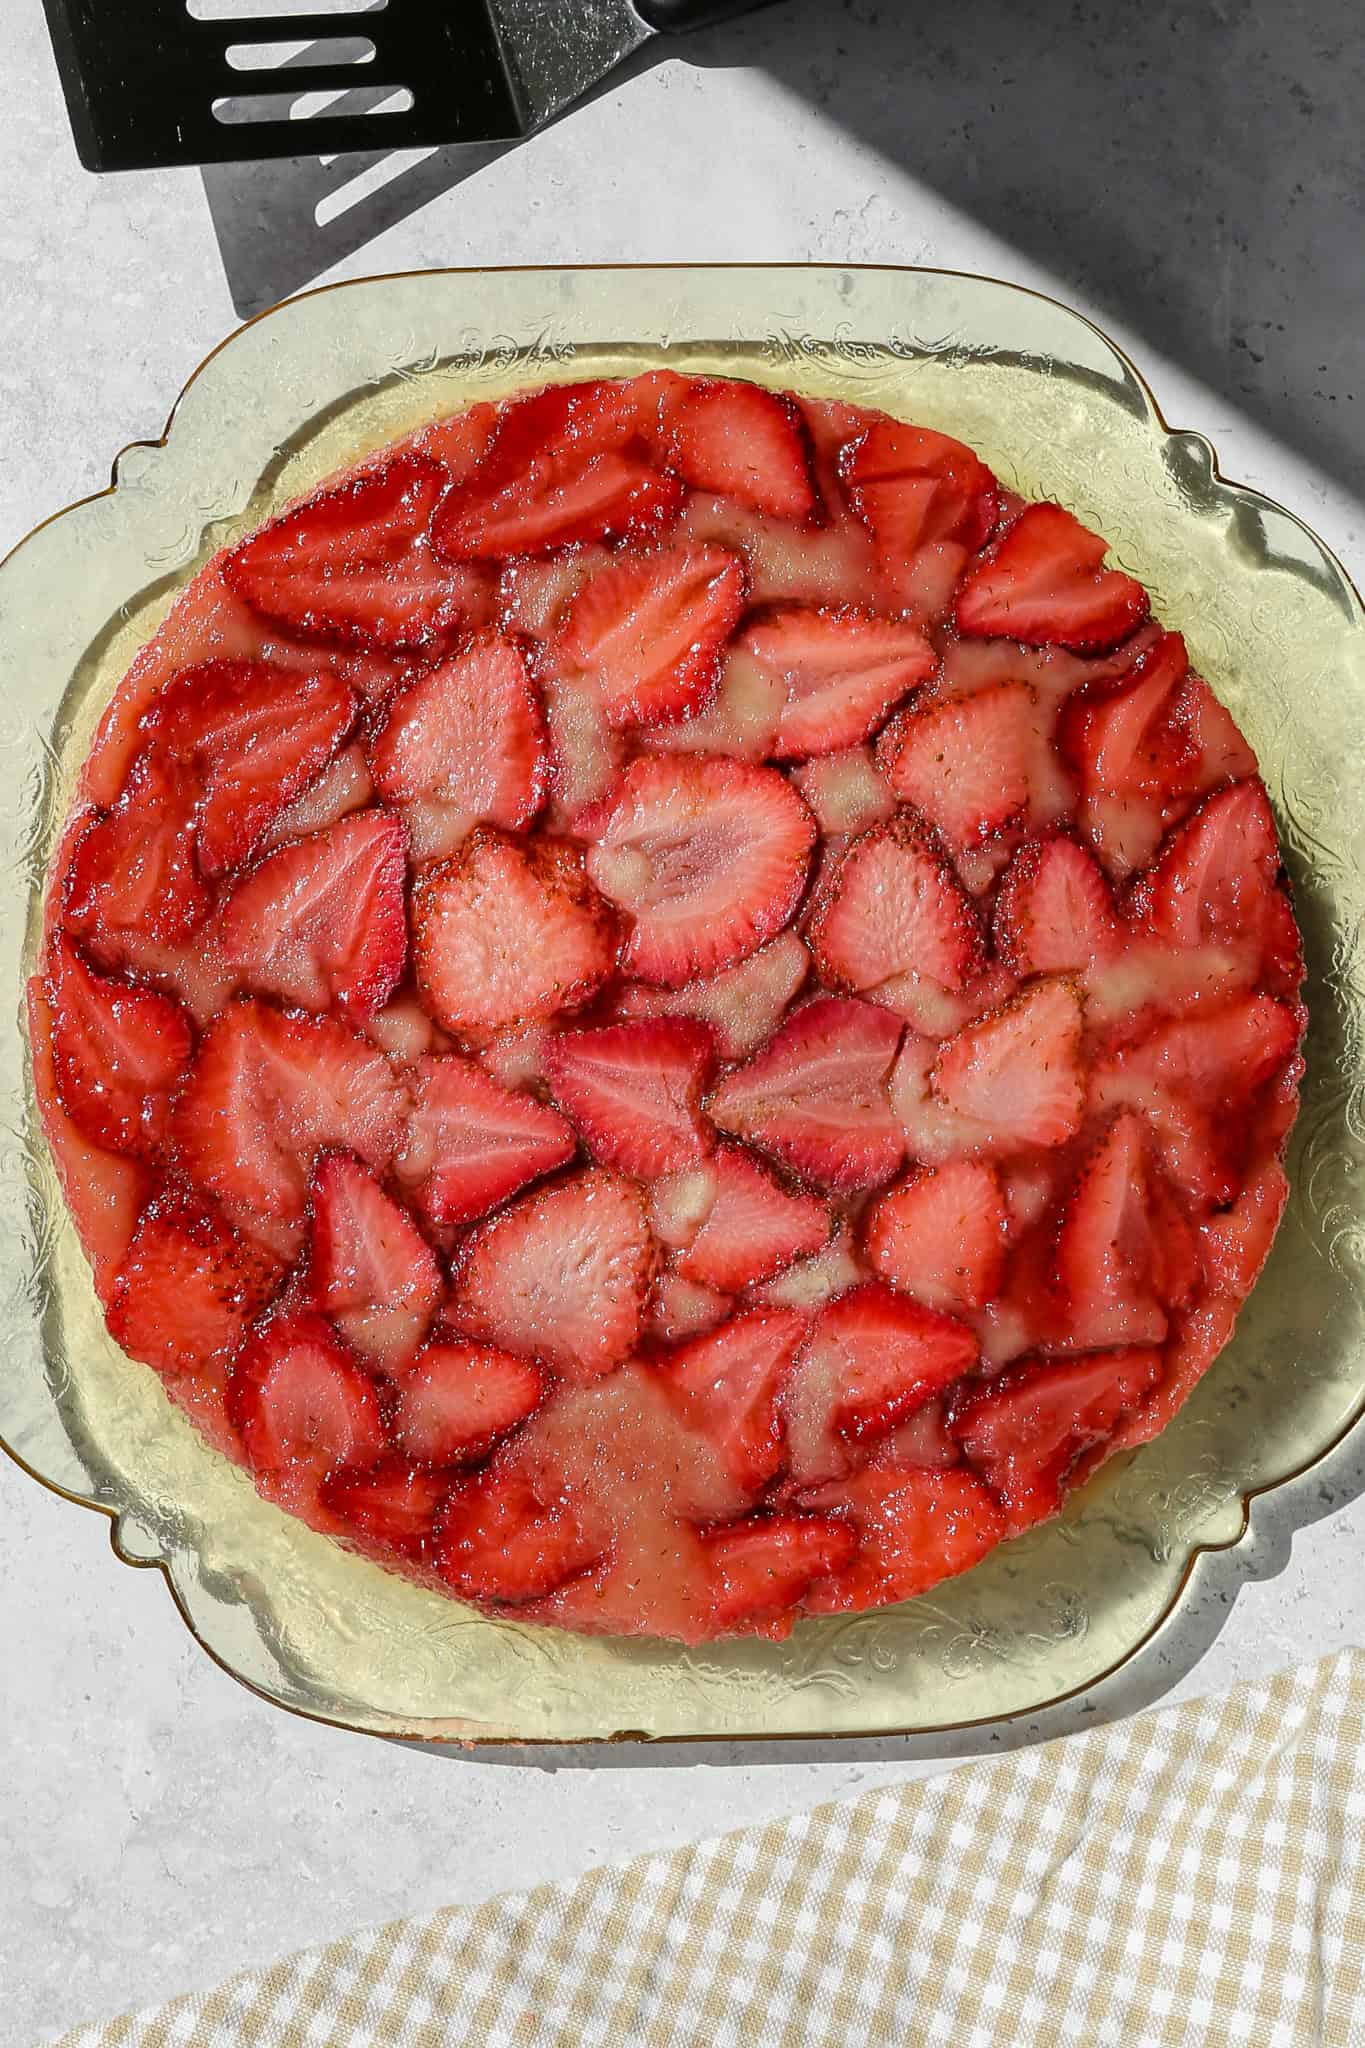
    If you are looking for a showstopper dessert that is secretly one of the easiest cakes you will ever make, this gluten free strawberry upside down cake is it. Fresh strawberries are layered over a buttery caramelized sugar base and topped with a simple from scratch vanilla cake batter, then baked until golden and flipped onto a serving platter to reveal the most beautiful jammy strawberry topping.

    It is the kind of gluten free cake that looks like it came from a bakery but comes together with simple everyday ingredients and one cake pan.

    a slice of gluten free strawberry upside down cake on a beige plate next to the cut cake on a platter

    This easy gluten free strawberry cake is perfect for anyone who wants an impressive dessert without a lot of fuss.

    The batter comes together quickly in a stand mixer and the whole thing bakes in about 30 minutes, making it a great option for spring and summer entertaining, Mother's Day dessert, Easter brunch, or any time fresh strawberries are in season and you want to do something really special with them.

    Whether you are baking for a crowd or just want a beautiful homemade dessert for a weeknight treat, this gluten free upside down cake delivers every single time.

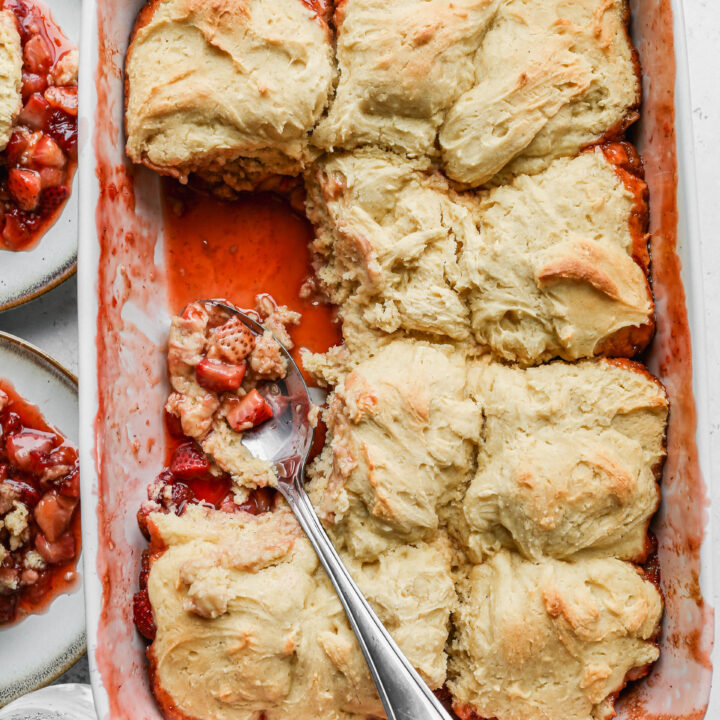
    If you are looking for more gluten free strawberry recipes try my Gluten Free Strawberry Cobbler, my Strawberry Spinach Salad with Balsamic Poppyseed Dressing, my Gluten Free Strawberry Jam Bars or my Gluten Free Strawberry Pretzel Dessert.

    You can find all of my cake recipes here: Gluten Free Cake Recipes

    gluten free strawberry upside down cake on a clear yellow antique platter next to a tan gingham kitchen towel
    [feast_advanced_jump_to]

    Ingredients

    • Butter
    • Granulated Sugar
    • Fresh Strawberries
    • Gluten Free Flour
    • Baking Powder
    • Salt
    • Egg
    • Vanilla Extract
    • Milk

    Instructions

    Preheat your oven to 350 degrees.

    In a 9-inch cake pan place the sliced butter. Put the cake pan in the oven as it heats up to melt the butter. Once the butter has melted carefully remove the pan from the oven.

    Sprinkle the 3 tablespoons of granulated sugar evenly over the melted butter. Core and slice the strawberries. Place the strawberry slices in an even layer in the cake pan.

    In your stand mixer add the butter and sugar. Beat until creamed together. Add the egg, vanilla and milk. Blend to combine. This mixture will be a bit lumpy and not smooth.

    Add the gluten free flour baking powder and salt to the wet ingredients. Blend just until combined. Do not over mix. The batter will be thick and slightly lumpy.

    Spoon the cake batter into the pan over the strawberries. Using a spatula carefully spread the cake batter over top of the strawberries.

    Bake at 350 degrees for 30-35 minutes. The top will be golden brown and a toothpick inserted into the cake portion will come out clean.

    Let the cake cool on the counter for 10-15 minutes and then flip onto a serving platter.

    Supplies


    More Recipes You Might Enjoy

    • Gluten Free Strawberry Cobbler
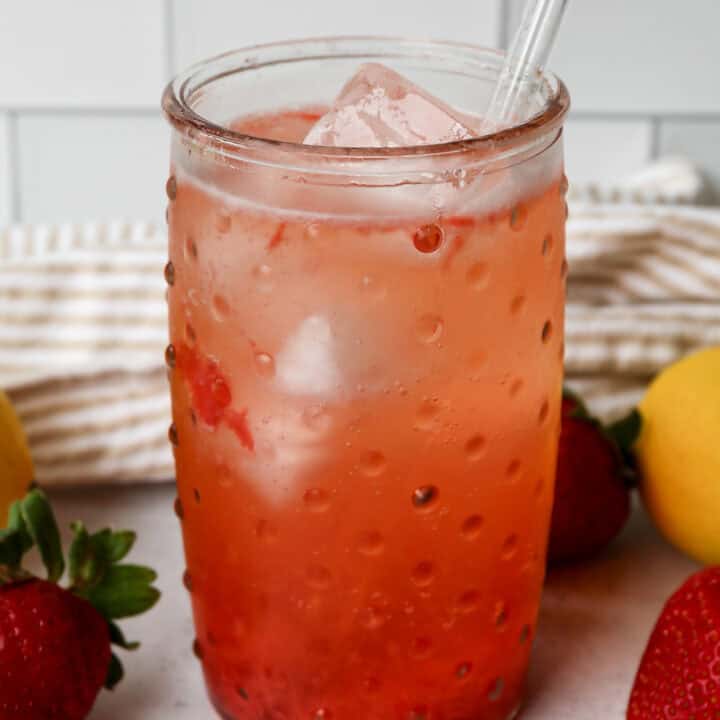
    • 3 Ingredient Strawberry Lemonade Mocktail
    • Strawberry Spinach Salad with Balsamic Poppyseed Dressing
    • Gluten Free Strawberry Icebox Bars

    I get a lot of my ingredients from Thrive Market. Thrive Market has been a game changer for me eating gluten free. They have so many options I can't get at my rural grocery stores! Use this link to get 40% off your first order!

    Print
    clock clock iconcutlery cutlery iconflag flag iconfolder folder iconinstagram instagram iconpinterest pinterest iconfacebook facebook iconprint print iconsquares squares iconheart heart iconheart solid heart solid icon

    Gluten Free Strawberry Upside Down Cake


    5 Stars 4 Stars 3 Stars 2 Stars 1 Star

    No reviews

    • Author: Elaine VanVleck
    • Total Time: 45 minutes
    • Yield: 8 servings 1x
    • Diet: Gluten Free
    Print Recipe
    Pin Recipe

    Description

    This gluten free strawberry upside down cake is a stunning and simple from-scratch dessert made with fresh strawberries, a buttery caramelized sugar base, and a tender homemade vanilla cake. Baked in one pan and flipped onto a serving platter to reveal a gorgeous jammy strawberry topping, this easy gluten free cake is perfect for spring entertaining, Mother's Day, Easter brunch, and any time fresh strawberries are in season.


    Ingredients

    Scale

    Strawberry Layer:

    • 3 Tbsp Butter
    • ⅓ cup Granulated Sugar
    • 1 pound Fresh Strawberries, cored and sliced

    Cake Layer:

    • 1 ½ cups Gluten Free Flour
    • 1 tsp Baking Powder
    • ½ tsp Salt
    • ½ cup Butter, at room temperature
    • ½ cup Granulated Sugar
    • 1 large Egg
    • 1 tsp Vanilla Extract
    • ⅔ cups Milk

    Instructions

    Preheat your oven to 350 degrees.

    In a 9-inch cake pan place the sliced butter. Put the cake pan in the oven as it heats up to melt the butter. Once the butter has melted carefully remove the pan from the oven.

    Sprinkle the 3 tablespoons of granulated sugar evenly over the melted butter. Core and slice the strawberries. Place the strawberry slices in an even layer in the cake pan.

    In your stand mixer add the butter and sugar. Beat until creamed together. Add the egg, vanilla and milk. Blend to combine. This mixture will be a bit lumpy and not smooth.

    Add the gluten free flour baking powder and salt to the wet ingredients. Blend just until combined. Do not over mix. The batter will be thick and slightly lumpy.

    Spoon the cake batter into the pan over the strawberries. Using a spatula carefully spread the cake batter over top of the strawberries.

    Bake at 350 degrees for 30-35 minutes. The top will be golden brown and a toothpick inserted into the cake portion will come out clean.

    Let the cake cool on the counter for 10-15 minutes and then flip onto a serving platter.

    • Prep Time: 15 minutes
    • Cook Time: 30 minutes
    • Category: Cake, Dessert
    • Method: Baking
    • Cuisine: American

    Did you make this recipe?

    Tag @smallfarmbiglife on Instagram and hashtag it #smallfarmbiglife

    If you make this Gluten Free Strawberry Upside Down Cake I would love to see it! Leave a star rating and a comment below and let me know how it turned out. And if you are looking for more easy gluten free desserts to make with fresh summer fruit, be sure to browse my gluten free dessert recipes for more inspiration. Don't forget to save this recipe to your Pinterest boards so you can find it again all strawberry season long!

    Storage

    Store leftover gluten free strawberry upside down cake covered at room temperature for up to 2 days. Because of the fresh strawberry layer, the cake is best eaten within the first day or two for the freshest flavor and best texture. If you need to store it longer, cover tightly and refrigerate for up to 4 days. Keep in mind that refrigeration can cause the cake to dry out slightly, so bring it to room temperature before serving for the best results. This cake is not ideal for freezing as the fresh strawberry layer can become watery once thawed.

    Top Tip

    When you flip the cake onto your serving platter, do not wait too long. The 10 to 15 minute cooling time is the sweet spot. If you flip it too soon the cake will fall apart, and if you wait too long the caramelized strawberry layer will stick to the bottom of the pan and not release cleanly. Run a thin knife or offset spatula around the edges of the pan right before you flip to make sure everything releases perfectly every time.

    Didn't find the answer you're looking for?

    Ask AI to answer based on this recipe:

    ChatGPT
    Google AI
    Perplexity
    Grok
    Claude

    Frequently Asked Questions

    Can I use frozen strawberries instead of fresh?

    Fresh strawberries are strongly recommended for this recipe. Frozen strawberries release a lot of excess moisture as they bake which can make the caramelized layer watery and prevent it from setting up properly. If fresh strawberries are not available, thaw frozen strawberries completely and pat them very dry with paper towels before using. The result will not be quite the same but it will still be delicious.

    What gluten free flour works best for this cake?

    A good all purpose gluten free flour blend works perfectly here. Look for one that contains xanthan gum as it helps bind the batter and gives the cake the best texture. My favorite brands are Bob's Red Mill 1 to 1 Baking Flour and King Arthur Measure for Measure Gluten Free Flour. Both produce a tender, moist cake every time.

    Can I make this cake ahead of time?

    This cake is best made and served the same day for the most beautiful presentation and freshest flavor. If you need to make it ahead, store it covered tightly at room temperature for up to one day.

    Can I use a different fruit?

    Absolutely! This upside down cake works beautifully with other fruits. Peaches, pineapple, blueberries, and raspberries are all wonderful substitutes or additions. Just make sure to slice the fruit evenly and pat it dry before layering it in the pan for the best results.

    Why did my cake stick to the pan when I flipped it?

    This usually happens for one of two reasons. Either the cake cooled too long in the pan before flipping, allowing the caramelized sugar layer to harden and stick, or the pan was not well prepared before adding the butter and strawberries. Running a thin knife or offset spatula around the entire edge of the cake right before flipping helps ensure a clean release every time.

    Do I need a stand mixer to make this cake?

    No, a stand mixer makes it easy but it is not required. A hand mixer works just as well. You can even mix the batter by hand with a whisk and a spatula. Just be careful not to overmix once you add the gluten free flour as overmixing can make the cake dense and tough.

    Cheesy Cauliflower Casserole

    If you are looking for a side dish that feels indulgent but comes together with simple, everyday ingredients, this cheesy cauliflower casserole is exactly what you need. Tender cauliflower florets get a quick blanch to lock in their texture, then nestle into a creamy, from scratch cheddar cheese sauce that is rich, smooth, and packed with flavor.

    A generous layer of gluten free bread crumbs goes on top before it all goes into the oven, baking up golden and bubbling and absolutely irresistible.

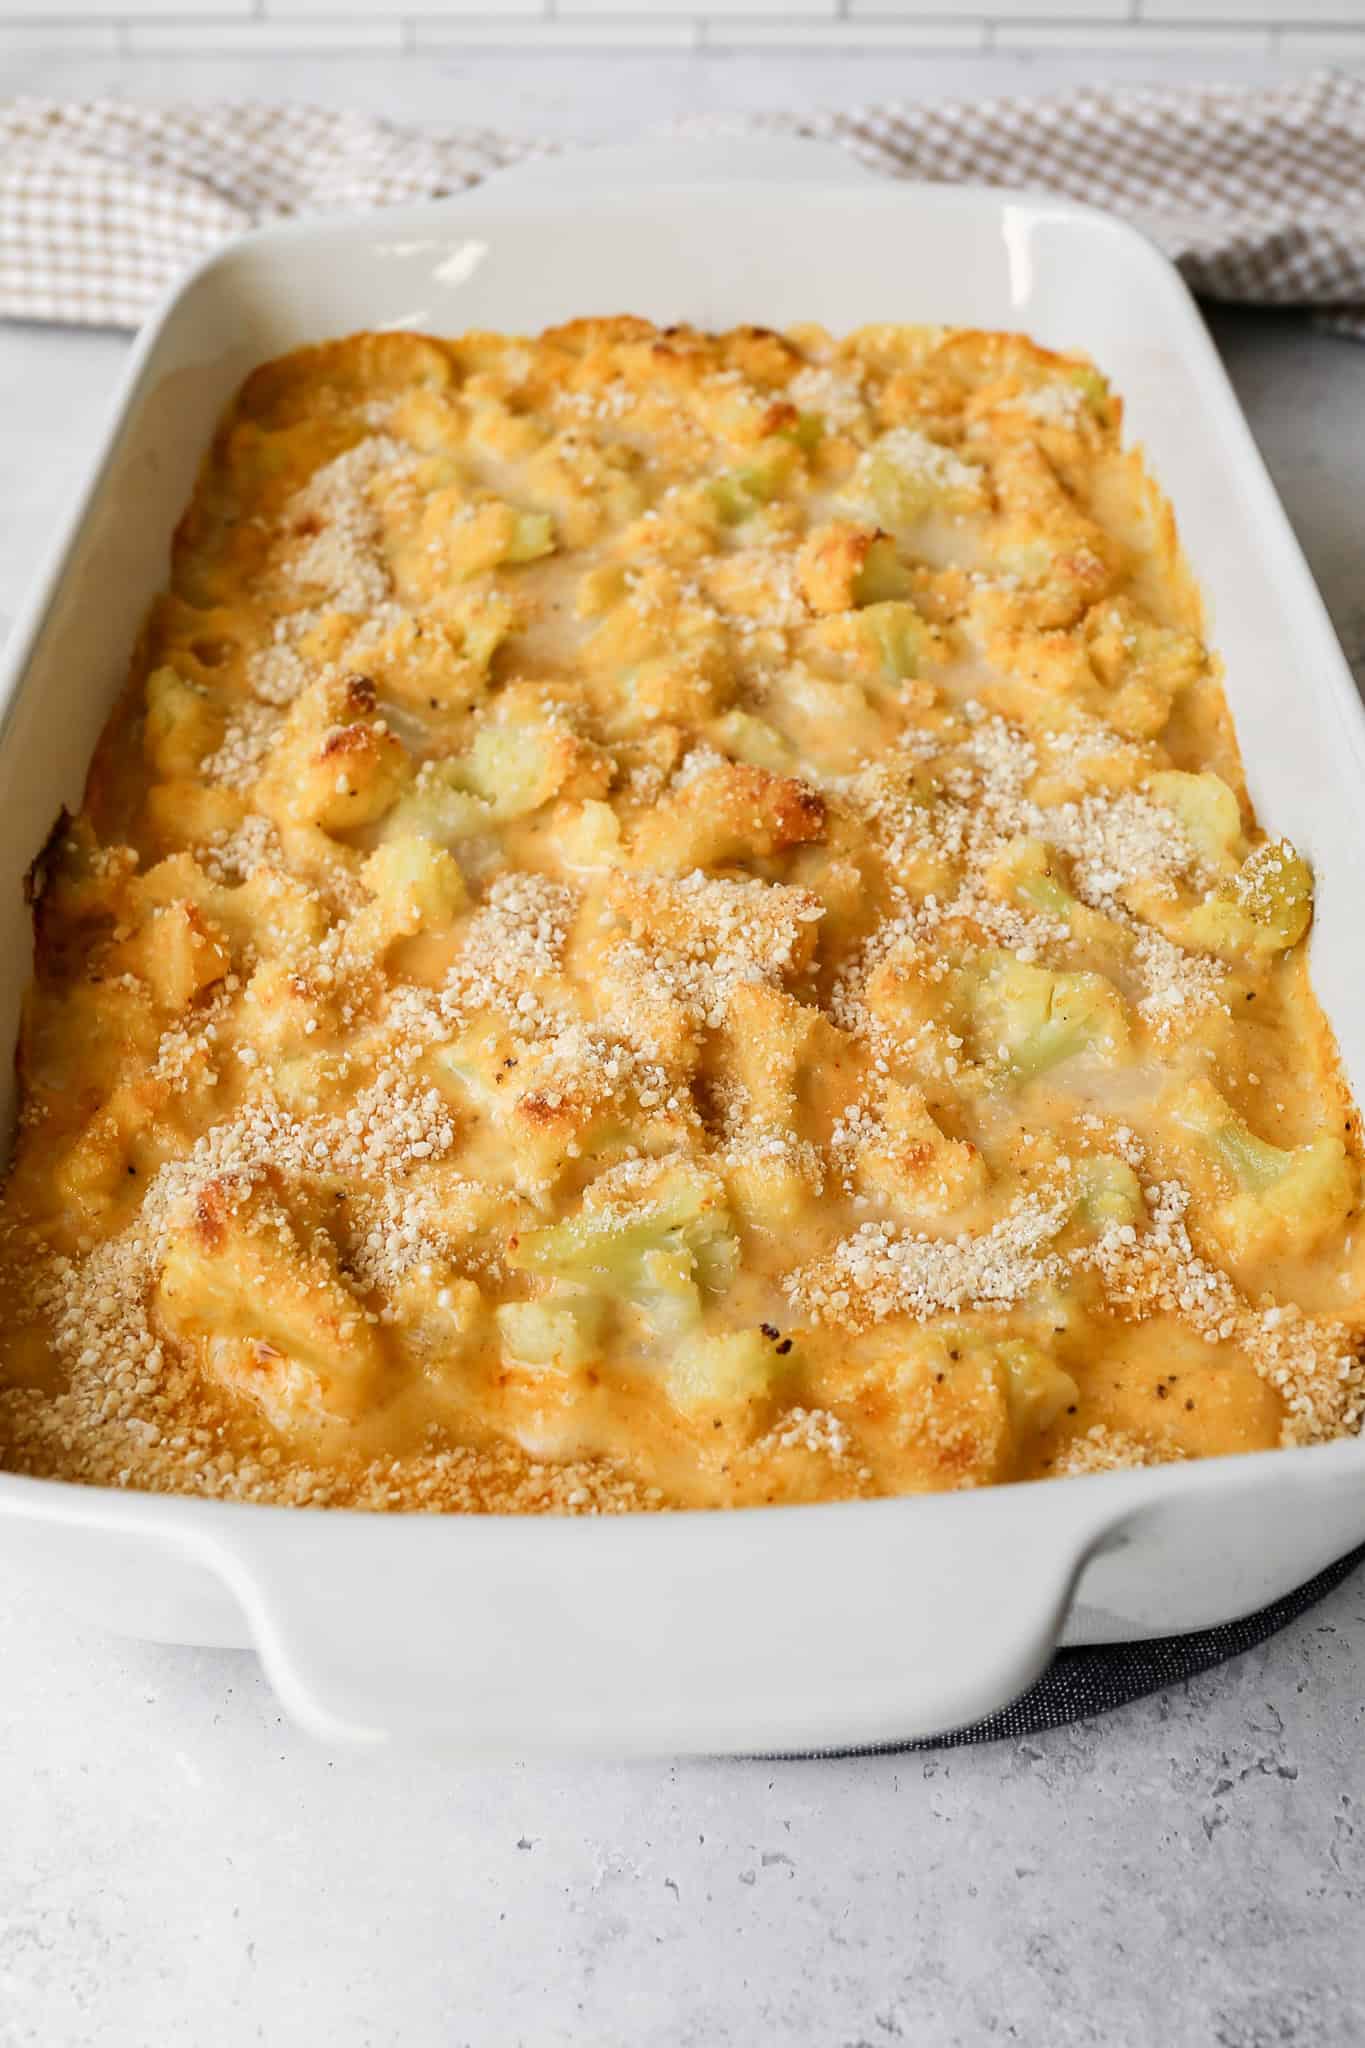
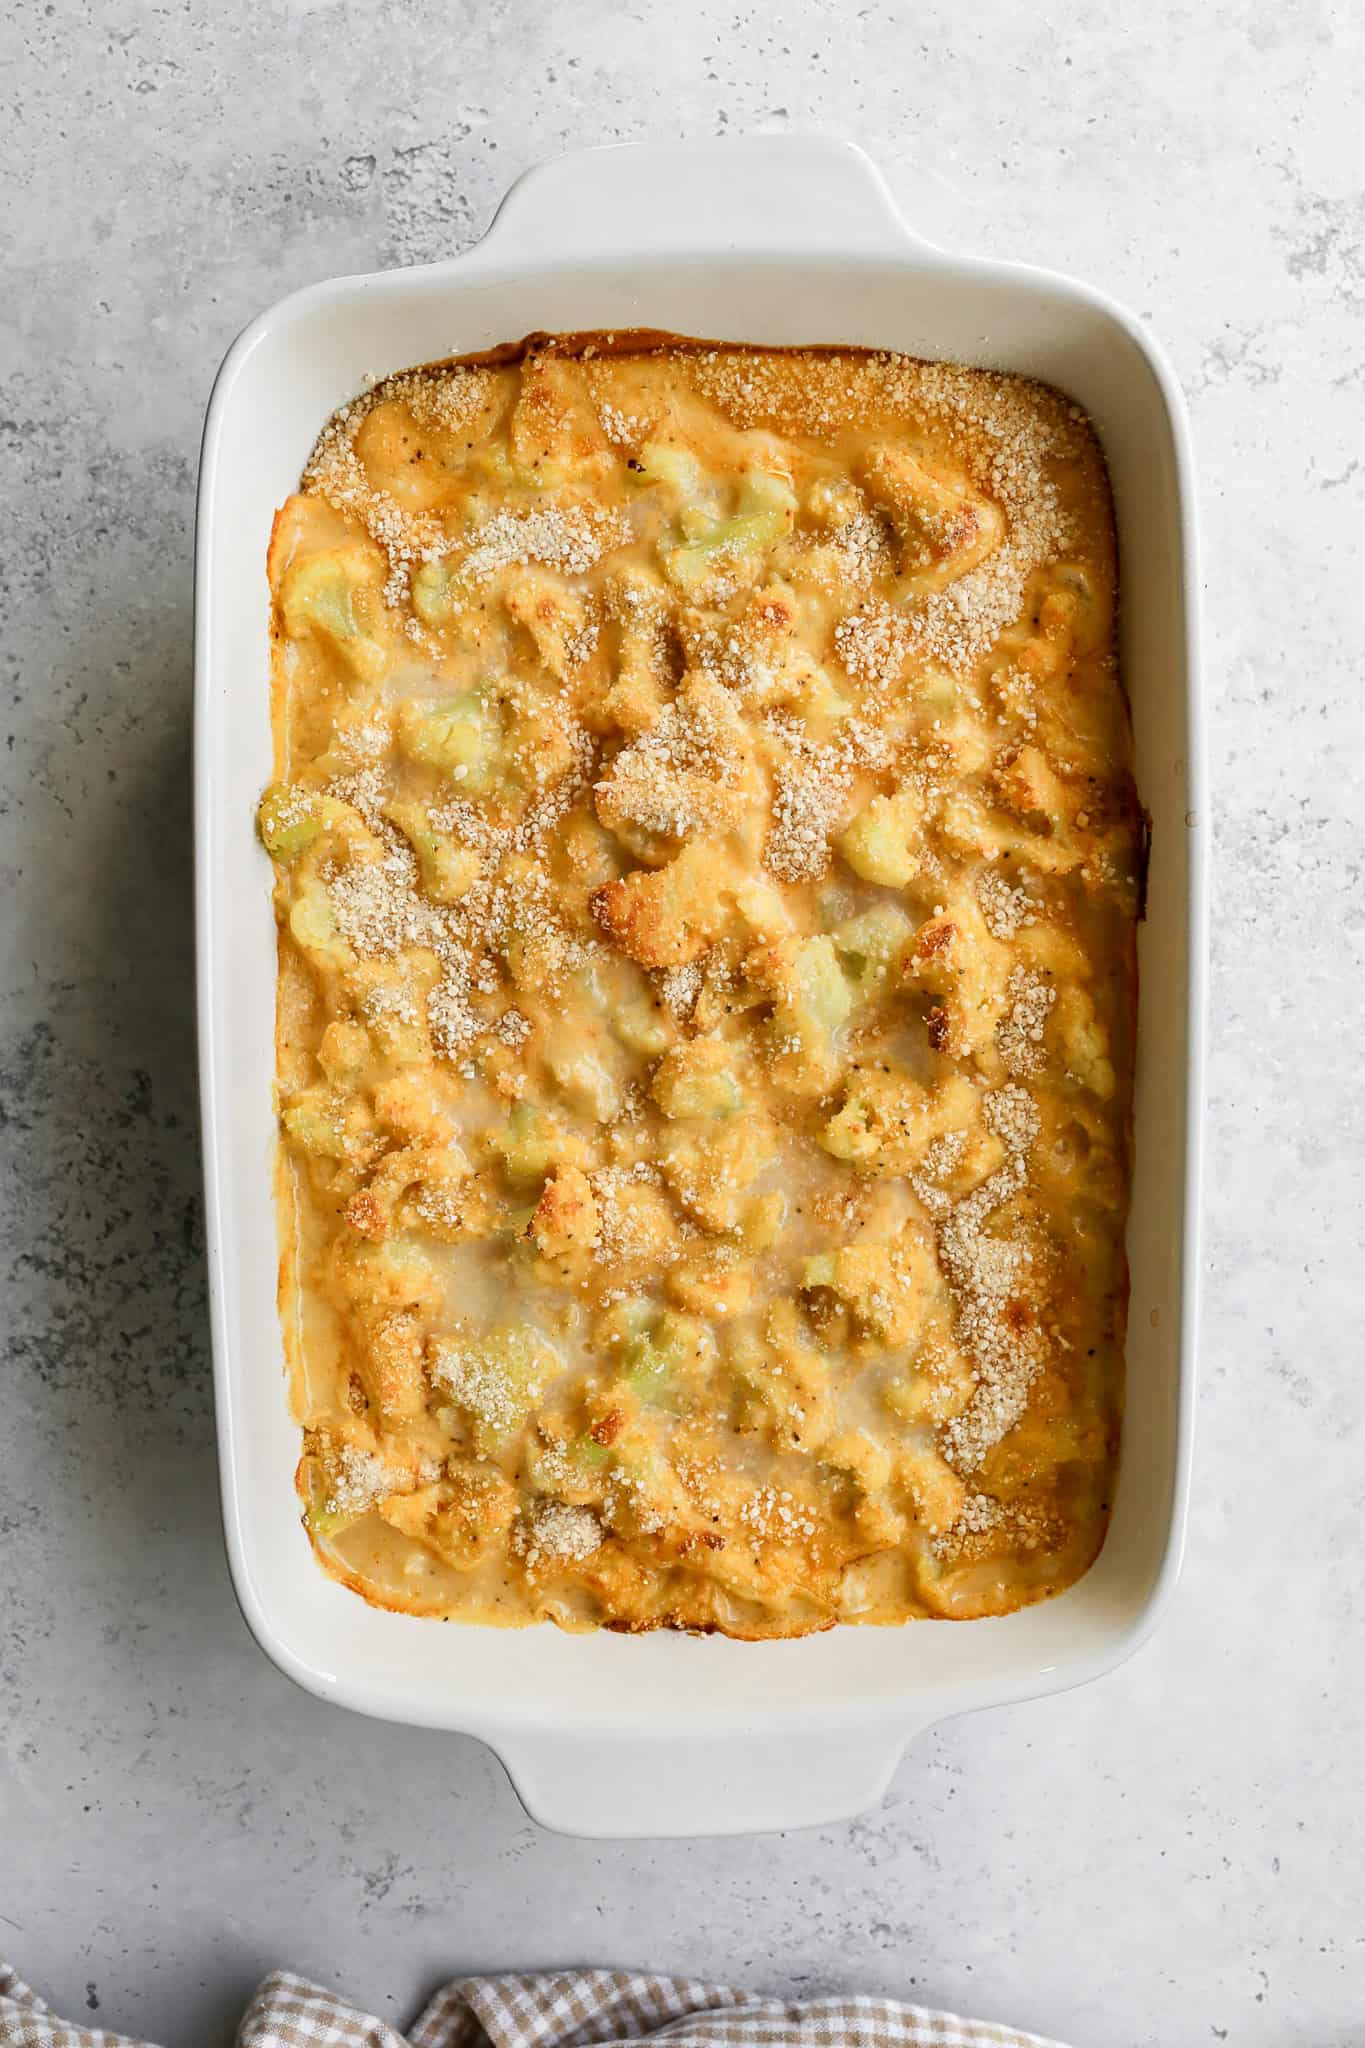
    a white ceramic 9x13 baking dish of cheesy cauliflower casserole

    This is the kind of casserole that disappears fast at the dinner table, whether you are making it for a regular weeknight or bringing it to a holiday spread. It is gluten free from start to finish, and the homemade cheese sauce makes all the difference.

    No canned soup, no shortcuts, just real ingredients that come together in one baking dish for a side everyone will ask you to make again.

    If you are looking for more delicious vegetable side dishes try my Gluten Free Zucchini Squash and Corn Casserole, my Oven Roasted Parmesan Green Beans, my Cheesy Slow Cooker Creamed Corn or my Instant Pot Garlic Ginger Green Beans.

    You can find all of my side dish recipes here: Gluten Free Side Dishes

    a white ceramic 9x13 baking dish of cheesy cauliflower casserole
    [feast_advanced_jump_to]

    Ingredients

    • Cauliflower
    • Butter
    • Minced Garlic
    • Gluten Free Flour
    • Milk
    • Cheddar Cheese
    • Salt
    • Black Pepper
    • Smoked Paprika
    • Onion Powder
    • Gluten Free Bread Crumbs

    Instructions

    Preheat your oven to 350 degrees.

    Fill a large pot halfway with water and bring to a boil. Add the cauliflower for 1-2 minutes to blanch it. The cauliflower will go from matte white to an opaque slightly translucent color when it's blanched.

    Pour the cauliflower into a strainer and rinse with cold water to stop the blanching process.

    Pour the blanched cauliflower into a 9x13 baking dish and set aside.

    In a 2 quart saucepan melt the butter and add the minced garlic. Cook 1-2 minutes and then sprinkle the gluten free flour in and whisk together.

    Next pour the milk slowly in while whisking to you don't get clumps. Simmer the mixture over medium heat 5-7 minutes until it thickens. Add the shredded cheese one cup at a time whisking it until it melts.

    Add the salt, pepper, smoked paprika and onion powder. Stir to combine.

    Pour the cheese mixture over the blanched cauliflower in the 9x13 baking dish. Sprinkle the gluten free bread crumbs over top.

    Bake at 350 degrees for 25-30 minutes until the top is golden brown.

    Supplies


    More Recipes You Might Enjoy

    • Gluten Free Zucchini Squash and Corn Casserole
    • Oven Roasted Parmesan Green Beans
    • Easy Refrigerator Pickled Cauliflower
    • Cheesy Gluten Free Summer Squash Casserole

    I get a lot of my ingredients from Thrive Market. Thrive Market has been a game changer for me eating gluten free. They have so many options I can't get at my rural grocery stores! Use this link to get 40% off your first order!

    Print
    clock clock iconcutlery cutlery iconflag flag iconfolder folder iconinstagram instagram iconpinterest pinterest iconfacebook facebook iconprint print iconsquares squares iconheart heart iconheart solid heart solid icon

    Cheesy Cauliflower Casserole


    5 Stars 4 Stars 3 Stars 2 Stars 1 Star

    No reviews

    • Author: Elaine VanVleck
    • Total Time: 50 minutes
    • Yield: 8 servings 1x
    • Diet: Gluten Free
    Print Recipe
    Pin Recipe

    Description

    This gluten free cheesy cauliflower casserole is pure comfort food. Tender cauliflower florets are smothered in a rich, homemade cheddar cheese sauce and topped with crispy gluten free bread crumbs, then baked until golden and bubbly. It's the perfect easy side dish for weeknight dinners, holidays, and potlucks.


    Ingredients

    Scale
    • 1 large head Cauliflower, cut into bite size florets blanched
    • 2 Tbsp Butter
    • 1 Tbsp Minced Garlic
    • ¼ cup Gluten Free Flour
    • 2 ½ cups Milk
    • 2 cups Cheddar Cheese, shredded
    • 1 tsp Salt
    • ½ tsp Black Pepper
    • ½ tsp Onion Powder
    • ¼ tsp Smoked Paprika
    • 1 cup Gluten Free Plain Bread Crumbs

    Instructions

    Preheat your oven to 350 degrees.

    Fill a large pot halfway with water and bring to a boil. Add the cauliflower for 1-2 minutes to blanch it. The cauliflower will go from matte white to an opaque slightly translucent color when it's blanched.

    Pour the cauliflower into a strainer and rinse with cold water to stop the blanching process.

    Pour the blanched cauliflower into a 9x13 baking dish and set aside.

    In a 2 quart saucepan melt the butter and add the minced garlic. Cook 1-2 minutes and then sprinkle the gluten free flour in and whisk together.

    Next pour the milk slowly in while whisking to you don't get clumps. Simmer the mixture over medium heat 5-7 minutes until it thickens. Add the shredded cheese one cup at a time whisking it until it melts.

    Add the salt, pepper, smoked paprika and onion powder. Stir to combine.

    Pour the cheese mixture over the blanched cauliflower in the 9x13 baking dish. Sprinkle the gluten free bread crumbs over top.

    Bake at 350 degrees for 25-30 minutes until the top is golden brown.

    • Prep Time: 20 minutes
    • Cook Time: 30 minutes
    • Category: Side Dish, Casserole
    • Method: Baking
    • Cuisine: American

    Did you make this recipe?

    Tag @smallfarmbiglife on Instagram and hashtag it #smallfarmbiglife

    If you make this Cheesy Cauliflower Casserole, I would love to hear how it turns out! Leave a comment below and let me know what you served it with. And if you are looking for more easy gluten free side dishes, don't forget to check out my other recipes!

    Storage

    Store leftover cheesy cauliflower casserole in an airtight container in the refrigerator for up to 4 days. Reheat individual portions in the microwave or warm the whole dish covered with foil in a 350°F oven for about 15 minutes. The bread crumb topping will soften after refrigeration. To bring back some crunch, uncover the dish for the last 5 minutes of reheating. This casserole is not ideal for freezing, as the cheese sauce can separate and the cauliflower can become watery once thawed.

    Top Tip

    Rinse your blanched cauliflower with cold water and let it drain thoroughly before adding it to the baking dish. Excess moisture is the number one reason a cheese sauce turns watery in the oven. Well drained cauliflower means a thick, creamy sauce every single time.

    Didn't find the answer you're looking for?

    Ask AI to answer based on this recipe:

    ChatGPT
    Google AI
    Perplexity
    Grok
    Claude

    Frequently Asked Questions

    Can I make this cheesy cauliflower casserole ahead of time?

    Yes. Assemble the casserole without the bread crumb topping, cover tightly, and refrigerate for up to 24 hours before baking. When you are ready to bake, pull it from the fridge while the oven preheats, top with gluten free bread crumbs and add 5 to 10 minutes to the bake time.

    Do I have to blanch the cauliflower first?

    Blanching is an important step and worth the few extra minutes. It partially cooks the cauliflower so it becomes perfectly tender in the oven without releasing excess moisture into the cheese sauce. Skipping it can leave you with undercooked cauliflower or a watery casserole.

    What gluten free flour works best for the cheese sauce?

    A good all purpose gluten free flour blend works well here. Look for one that contains xanthan gum for the best thickening results. My favorite gluten free flour is King Arthur Measure for Measure Gluten-Free Flour.

    Can I use a different cheese?

    Cheddar gives you the sharpest, most classic flavor, but you can swap in Gruyere, Monterey Jack, or a combination. Just make sure to shred the cheese yourself from a block rather than using pre shredded for the smoothest melt.

    Can I add protein to make this a main dish?

    Absolutely. Stir in cooked diced chicken, crumbled cooked bacon, or diced ham before pouring the cheese sauce over the cauliflower. It turns this side dish into a hearty, satisfying main course.

    Oven Roasted Parmesan Green Beans

    These Oven Roasted Parmesan Green Beans are the easy vegetable side dish that is going to earn a permanent spot on your weeknight dinner rotation. Fresh green beans are roasted on a baking sheet until perfectly tender with beautifully crispy edges. They are coated with a generous portion of parmesan cheese that creates the most irresistible cheesy, golden crust.

    It is a simple and flavorful way to cook fresh green beans that makes even the pickiest eaters excited about eating their vegetables.

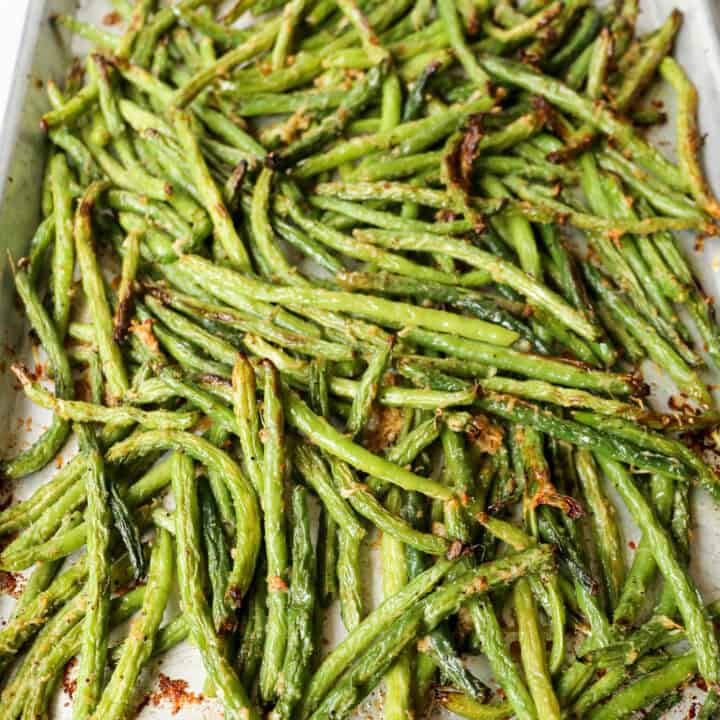
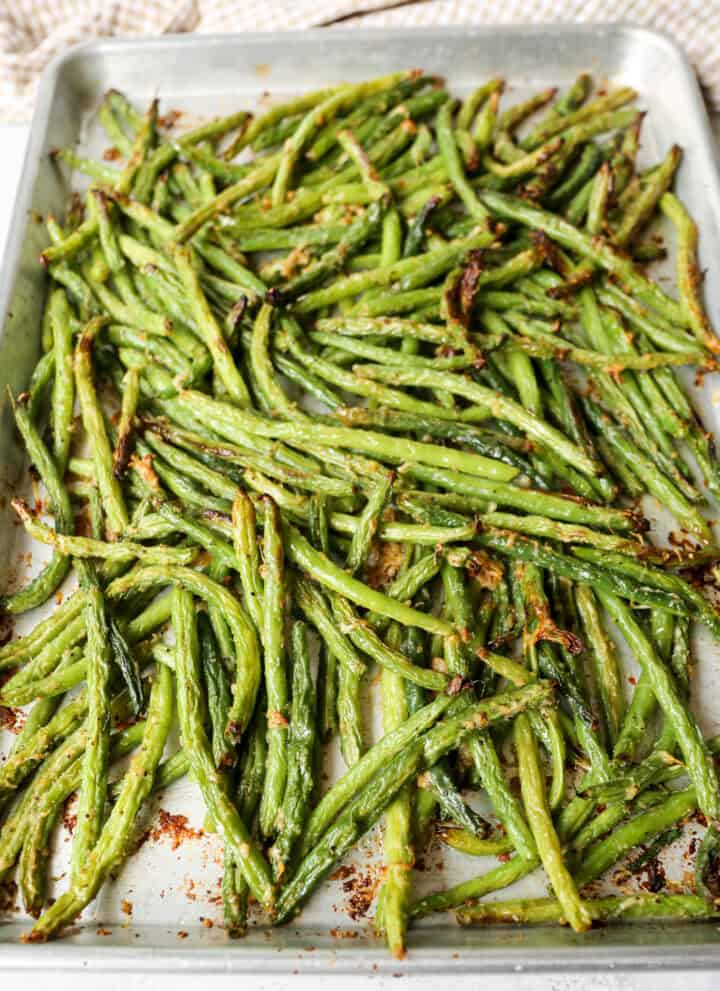
    a silver baking pan of oven roasted parmesan green beans next to a tan and white gingham kitchen towel

    This roasted parmesan green bean recipe comes together with minimal prep, minimal cleanup, and maximum flavor! That makes it the perfect quick side dish for busy nights when you need something delicious on the table fast.

    The high oven heat does all the work, transforming simple fresh green beans into a crispy, cheesy, golden veggie side that pairs beautifully with just about any main dish.

    Once you try this easy green bean recipe you will never want to cook them any other way.

    If you are looking for more bean recipes try my Instant Pot Garlic Ginger Green Beans, my Zesty Three Bean Salad with Tuna, my Black Beans and Corn Salad or my Creamy Sausage Bean Dip.

    You can find all my side dishes here: Gluten Free Side Dishes

    a silver baking pan of oven roasted parmesan green beans next to a tan and white gingham kitchen towel
    [feast_advanced_jump_to]

    Ingredients

    • Fresh Green Beans
    • Olive Oil
    • Parmesan Cheese
    • Onion Powder
    • Garlic Powder
    • Salt
    • Pepper

    Instructions

    Preheat your oven to 425 degrees. Lightly coat a baking sheet with olive oil and set aside.

    In a large mixing bowl add the green beans, olive oil, parmesan cheese, onion powder, garlic powder, salt and pepper. Stir to coat the green beans.

    Pour the green beans in an even layer onto the oiled baking sheet.

    Bake at 425 degrees for 15 minutes. Using a spatula, flip the green beans and then bake them for another 10 minutes. The green beans are done when they are tender when you prick them with a fork.

    Supplies


    More Recipes You Might Enjoy

    • Instant Pot Garlic Ginger Green Beans
    • Zesty Three Bean Salad with Tuna
    • Black Beans and Corn Salad
    • Easy Fried Frozen Corn

    I get a lot of my ingredients from Thrive Market. Thrive Market has been a game changer for me eating gluten free. They have so many options I can't get at my rural grocery stores! Use this link to get 40% off your first order!

    Print
    clock clock iconcutlery cutlery iconflag flag iconfolder folder iconinstagram instagram iconpinterest pinterest iconfacebook facebook iconprint print iconsquares squares iconheart heart iconheart solid heart solid icon

    Oven Roasted Parmesan Green Beans


    5 Stars 4 Stars 3 Stars 2 Stars 1 Star

    No reviews

    • Author: Elaine VanVleck
    • Total Time: 30 minutes
    • Yield: 6 servings 1x
    • Diet: Gluten Free
    Print Recipe
    Pin Recipe

    Description

    These Oven Roasted Parmesan Green Beans are the easy vegetable side dish that is going to earn a permanent spot on your weeknight dinner rotation. Fresh green beans are roasted on a baking sheet until perfectly tender with beautifully crispy edges. They are coated with a generous portion of parmesan cheese that creates the most irresistible cheesy, golden crust. 


    Ingredients

    Scale
    • 32 ounces Fresh Green Beans
    • 2 Tbsp Olive Oil
    • ½ cup Parmesan Cheese, finely grated
    • 1 tsp Onion Powder
    • 1 tsp Garlic Powder
    • 1 tsp Salt
    • ½ tsp Coarse Ground Black Pepper

    Instructions

    Preheat your oven to 425 degrees. Lightly coat a baking sheet with olive oil and set aside.

    In a large mixing bowl add the green beans, olive oil, parmesan cheese, onion powder, garlic powder, salt and pepper. Stir to coat the green beans.

    Pour the green beans in an even layer onto the oiled baking sheet.

    Bake at 425 degrees for 15 minutes. Using a spatula, flip the green beans and then bake them for another 10 minutes. The green beans are done when they are tender when you prick them with a fork.

    • Prep Time: 5 minutes
    • Cook Time: 25 minutes
    • Category: Side Dish, Vegetables
    • Method: Baking
    • Cuisine: Gluten Free

    Did you make this recipe?

    Tag @smallfarmbiglife on Instagram and hashtag it #smallfarmbiglife

    Top Tip

    You can also use avocado oil with this recipe if that's what you have. Be sure to finely grate the parmesan cheese so it melts easily on the green beans.

    Didn't find the answer you're looking for?

    Ask AI to answer based on this recipe:

    ChatGPT
    Google AI
    Perplexity
    Grok
    Claude

    Frequently Asked Questions

    Can I use frozen green beans instead of fresh for this recipe?

    Fresh green beans are strongly recommended for this recipe as they roast up with the best texture and those beautiful crispy edges that make this dish so good. Frozen green beans tend to release too much moisture in the oven which can make them steam rather than roast, resulting in a softer and less flavorful result. Fresh green beans will give you the best outcome every time.

    How do I keep my roasted green beans from getting soggy?

    The key to perfectly crispy oven roasted green beans is making sure they are completely dry before they go on the baking sheet. Pat them thoroughly with a paper towel after washing.

    Can I make these Parmesan Roasted Green Beans ahead of time?

    These green beans are best enjoyed fresh out of the oven when the parmesan crust is at its crispiest and most delicious. If you do need to make them ahead you can prep and trim the green beans in advance and store them in the refrigerator until you are ready to roast. Leftovers can be stored in an airtight container in the refrigerator for up to three days and reheated in the oven or air fryer to bring back some of that crispiness.

    Honey Dijon Carrot Salad

    This Honey Dijon Carrot Salad is a fresh, simple side dish inspired by classic French carrot salad. The crisp shredded carrots are tossed in a light honey dijon dressing that adds the perfect balance of sweetness and tangy flavor.

    With fresh herbs and a bright vinaigrette, this easy carrot salad recipe comes together quickly and makes a refreshing addition to any meal.

    a cream serving bowl of honey dijon carrot salad with a parsley garnish next to a tan and white striped kitchen towel

    This French shredded carrot salad is the kind of recipe that feels both simple and elegant. It's a quick salad recipe that works beautifully as a healthy side dish for lunch or dinner and is naturally gluten free.

    If you're looking for the best carrot salad ever, this honey dijon carrot salad is a fresh and flavorful way to enjoy carrots.

    If you are looking for more simple salad recipes try my Creamy Cucumber Salad, my Cucumber Salad with Vinegar Dressing, my Sugar Free Broccoli Salad or my Easy Pea Salad.

    You can find all of my salad recipes here: Gluten Free Salad Recipes
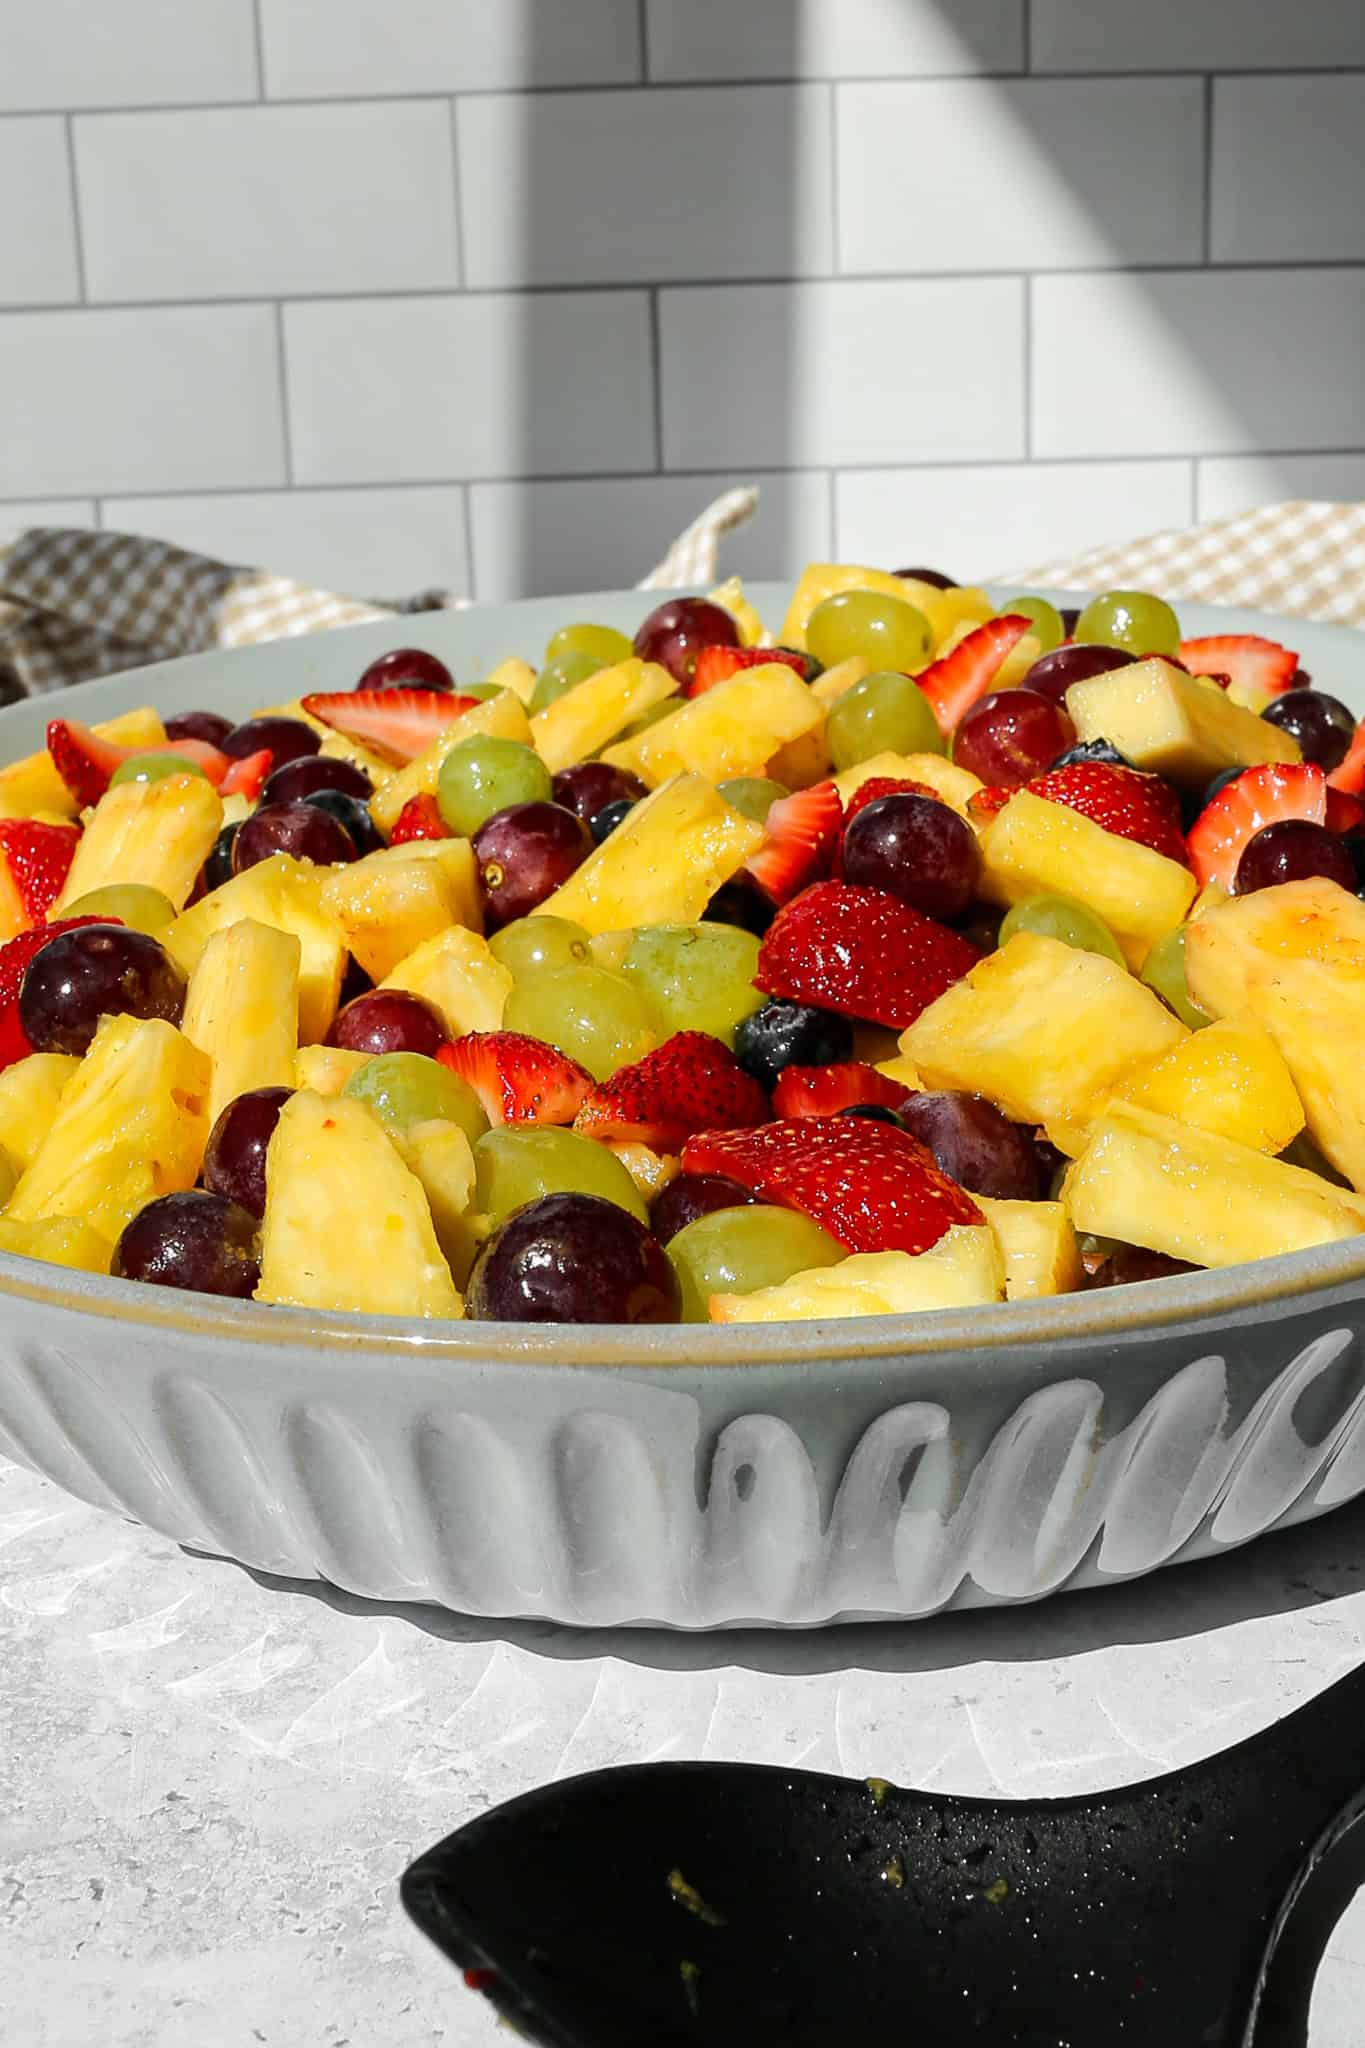
    a cream serving bowl of honey dijon carrot salad with a parsley garnish next to a tan and white striped kitchen towel
    [feast_advanced_jump_to]

    Ingredients

    • Carrots
    • Green Onions
    • Parsley
    • Dijon Mustard
    • Lemon Juice
    • Olive Oil
    • Honey
    • Salt
    • Black Pepper

    Instructions

    Peel and then grate the carrots using a box grater or your food processor.

    Finely chop the green onions and parsley.

    Add the carrots, green onions and parsley to a large mixing bowl.

    In a small bowl with a whisk or in a jar with your immersion blender add the dijon mustard, lemon juice, olive oil, honey, salt and pepper. Whisk or blend together.

    Pour the dressing over the carrot mixture and stir to coat the salad.

    Serve immediately or store in the refrigerator in an air tight container until you're ready to serve it.

    Supplies


    More Recipes You Might Enjoy

    • Gluten Free Frog Eye Salad
    • Creamy Cucumber Salad
    • Seven Layer Salad
    • Easy Pea Salad

    I get a lot of my ingredients from Thrive Market. Thrive Market has been a game changer for me eating gluten free. They have so many options I can't get at my rural grocery stores! Use this link to get 40% off your first order!
    Print
    clock clock iconcutlery cutlery iconflag flag iconfolder folder iconinstagram instagram iconpinterest pinterest iconfacebook facebook iconprint print iconsquares squares iconheart heart iconheart solid heart solid icon

    Honey Dijon Carrot Salad


    5 Stars 4 Stars 3 Stars 2 Stars 1 Star

    No reviews

    • Author: Elaine VanVleck
    • Total Time: 15 minutes
    • Yield: 8 servings 1x
    • Diet: Gluten Free
    Print Recipe
    Pin Recipe

    Description

    This Honey Dijon Carrot Salad is a fresh, simple side dish inspired by classic French carrot salad. The crisp shredded carrots are tossed in a light honey dijon dressing that adds the perfect balance of sweetness and tangy flavor. 


    Ingredients

    Scale
    • 2 pounds Carrots, peeled and grated
    • 5 Green Onions, finely chopped
    • ½ cup Fresh Parsley, finely chopped
    • 6 Tbsp Olive Oil
    • 2 Tbsp Dijon Mustard
    • 2 Tbsp Lemon Juice
    • 2 Tbsp Honey
    • 1 tsp Salt
    • 1 tsp Coarse Black Pepper

    Instructions

    Peel and then grate the carrots using a box grater or your food processor.

    Finely chop the green onions and parsley.

    Add the carrots, green onions and parsley to a large mixing bowl.

    In a small bowl with a whisk or in a jar with your immersion blender add the dijon mustard, lemon juice, olive oil, honey, salt and pepper. Whisk or blend together.

    Pour the dressing over the carrot mixture and stir to coat the salad.

    Serve immediately or store in the refrigerator in an air tight container until you're ready to serve it.

    • Prep Time: 15 minutes
    • Category: Side Dish, Salads
    • Method: Chopped
    • Cuisine: Gluten Free

    Did you make this recipe?

    Tag @smallfarmbiglife on Instagram and hashtag it #smallfarmbiglife

    Top Tip

    This salad is the easiest to make with a food processor. I like to send everything through the shredder blade, pour into a bowl and stir the sauce in. Makes it so quick to have this salad on the table for dinner.

    Didn't find the answer you're looking for?

    Ask AI to answer based on this recipe:

    ChatGPT
    Google AI
    Perplexity
    Grok
    Claude

    Frequently Asked Questions

    Can I make honey dijon carrot salad ahead of time?

    Yes, this carrot salad can be made ahead of time and actually tastes even better after it sits for a bit. The honey dijon dressing soaks into the shredded carrots and helps the flavors develop. For the best flavor, refrigerate the salad for about 30 minutes before serving.

    What is the best way to shred carrots for carrot salad?

    The easiest way to make this French carrot salad is to use a food processor to create fresh grated carrots. Freshly shredded carrots have the best texture and absorb the honey dijon dressing better than preshredded carrots. This helps the salad stay crisp and flavorful.

    How long does carrot salad last in the refrigerator?

    This honey dijon carrot salad will keep well in an airtight container in the refrigerator for about 4-5 days. The flavors continue to blend as it sits, making it a great make ahead salad recipe. If the salad releases a little liquid, simply stir it before serving.

    • « Previous Page
    • 1
    • 2
    • 3
    • 4
    • 5
    • 6
    • …
    • 30
    • Next Page »

    Welcome! I'm Elaine

    I'm so glad you are here! I share easy gluten free recipes from my small farm in Washington.

    Be sure to sign up for my newsletter to stay up to date on all of my new recipes.

    More about me...
    • Instagram
    • Pinterest
    • Facebook
    • Twitter
    • Mail

    Load up on new recipes, exclusive goodies, + more!
    Sign up below to stay up-to-date on news, events, and special deals.
    Thank you for subscribing!

    Easy Meals Recipes

    • Gluten Free Instant Pot Chili Mac and Cheese
    • Gluten Free Taco Casserole
    • Gluten Free Cowboy Baked Beans
    • Gluten Free Walking Taco Casserole
    • Gluten Free Creamy Beef and Mushroom Pasta
    • Gluten Free Instant Pot Chicken and Dumplings
    • Instant Pot Mexican Style Beef and Rice
    • Gluten Free Chicken Parmesan Pasta Casserole
    • Gluten Free One Pot Hamburger Helper Copycat
    • Gluten Free Salisbury Steak with Mushroom Gravy
    • Gluten Free Air Fryer Fajitas
    • Gluten Free Sloppy Joe Casserole

    Footer

    back to top

    About

    • Privacy Policy
    • Shop my Amazon Page
    • Follow me on LTK

    Newsletter

    • Sign Up! for emails and updates

    Contact

    • Contact
    • Media Kit
    • About Me

    As an Amazon Associate I earn from qualifying purchases.

    I may get commissions for purchases made through links on this site.

    Copyright © 2026 Brunch Pro on the Brunch Pro Theme