Small Farm Big Life

  • Gluten Free Recipe Index
  • Subscribe
  • Resources
menu icon
go to homepage
  • Home
  • Gluten Free Recipe Index
  • Subscribe
  • My Story
  • Resources
  • Free Guides
    • Email
    • Facebook
    • Instagram
    • Pinterest
  • subscribe
    search icon
    Homepage link
    • Home
    • Gluten Free Recipe Index
    • Subscribe
    • My Story
    • Resources
    • Free Guides
    • Email
    • Facebook
    • Instagram
    • Pinterest
  • ×

    Honey Dijon Carrot Salad

    This Honey Dijon Carrot Salad is a fresh, simple side dish inspired by classic French carrot salad. The crisp shredded carrots are tossed in a light honey dijon dressing that adds the perfect balance of sweetness and tangy flavor.

    With fresh herbs and a bright vinaigrette, this easy carrot salad recipe comes together quickly and makes a refreshing addition to any meal.

    a cream serving bowl of honey dijon carrot salad with a parsley garnish next to a tan and white striped kitchen towel

    This French shredded carrot salad is the kind of recipe that feels both simple and elegant. It's a quick salad recipe that works beautifully as a healthy side dish for lunch or dinner and is naturally gluten free.

    If you're looking for the best carrot salad ever, this honey dijon carrot salad is a fresh and flavorful way to enjoy carrots.

    If you are looking for more simple salad recipes try my Creamy Cucumber Salad, my Cucumber Salad with Vinegar Dressing, my Sugar Free Broccoli Salad or my Easy Pea Salad.

    You can find all of my salad recipes here: Gluten Free Salad Recipes

    a cream serving bowl of honey dijon carrot salad with a parsley garnish next to a tan and white striped kitchen towel
    [feast_advanced_jump_to]

    Ingredients

    • Carrots
    • Green Onions
    • Parsley
    • Dijon Mustard
    • Lemon Juice
    • Olive Oil
    • Honey
    • Salt
    • Black Pepper

    Instructions

    Peel and then grate the carrots using a box grater or your food processor.

    Finely chop the green onions and parsley.

    Add the carrots, green onions and parsley to a large mixing bowl.

    In a small bowl with a whisk or in a jar with your immersion blender add the dijon mustard, lemon juice, olive oil, honey, salt and pepper. Whisk or blend together.

    Pour the dressing over the carrot mixture and stir to coat the salad.

    Serve immediately or store in the refrigerator in an air tight container until you're ready to serve it.

    Supplies


    More Recipes You Might Enjoy
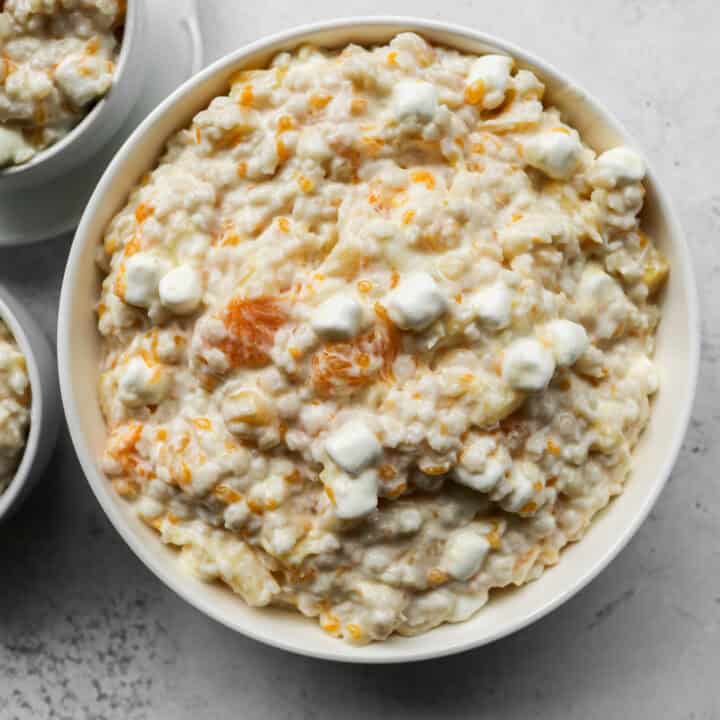
    • Gluten Free Frog Eye Salad
    • Creamy Cucumber Salad
    • Seven Layer Salad
    • Easy Pea Salad

    I get a lot of my ingredients from Thrive Market. Thrive Market has been a game changer for me eating gluten free. They have so many options I can't get at my rural grocery stores! Use this link to get 40% off your first order!

    Print
    clock clock iconcutlery cutlery iconflag flag iconfolder folder iconinstagram instagram iconpinterest pinterest iconfacebook facebook iconprint print iconsquares squares iconheart heart iconheart solid heart solid icon

    Honey Dijon Carrot Salad


    5 Stars 4 Stars 3 Stars 2 Stars 1 Star

    No reviews

    • Author: Elaine VanVleck
    • Total Time: 15 minutes
    • Yield: 8 servings 1x
    • Diet: Gluten Free
    Print Recipe
    Pin Recipe

    Description

    This Honey Dijon Carrot Salad is a fresh, simple side dish inspired by classic French carrot salad. The crisp shredded carrots are tossed in a light honey dijon dressing that adds the perfect balance of sweetness and tangy flavor. 


    Ingredients

    Scale
    • 2 pounds Carrots, peeled and grated
    • 5 Green Onions, finely chopped
    • ½ cup Fresh Parsley, finely chopped
    • 6 Tbsp Olive Oil
    • 2 Tbsp Dijon Mustard
    • 2 Tbsp Lemon Juice
    • 2 Tbsp Honey
    • 1 tsp Salt
    • 1 tsp Coarse Black Pepper

    Instructions

    Peel and then grate the carrots using a box grater or your food processor.

    Finely chop the green onions and parsley.

    Add the carrots, green onions and parsley to a large mixing bowl.

    In a small bowl with a whisk or in a jar with your immersion blender add the dijon mustard, lemon juice, olive oil, honey, salt and pepper. Whisk or blend together.

    Pour the dressing over the carrot mixture and stir to coat the salad.

    Serve immediately or store in the refrigerator in an air tight container until you're ready to serve it.

    • Prep Time: 15 minutes
    • Category: Side Dish, Salads
    • Method: Chopped
    • Cuisine: Gluten Free

    Did you make this recipe?

    Tag @smallfarmbiglife on Instagram and hashtag it #smallfarmbiglife

    Top Tip

    This salad is the easiest to make with a food processor. I like to send everything through the shredder blade, pour into a bowl and stir the sauce in. Makes it so quick to have this salad on the table for dinner.

    Didn't find the answer you're looking for?

    Ask AI to answer based on this recipe:

    ChatGPT
    Google AI
    Perplexity
    Grok
    Claude

    Frequently Asked Questions

    Can I make honey dijon carrot salad ahead of time?

    Yes, this carrot salad can be made ahead of time and actually tastes even better after it sits for a bit. The honey dijon dressing soaks into the shredded carrots and helps the flavors develop. For the best flavor, refrigerate the salad for about 30 minutes before serving.

    What is the best way to shred carrots for carrot salad?

    The easiest way to make this French carrot salad is to use a food processor to create fresh grated carrots. Freshly shredded carrots have the best texture and absorb the honey dijon dressing better than preshredded carrots. This helps the salad stay crisp and flavorful.

    How long does carrot salad last in the refrigerator?

    This honey dijon carrot salad will keep well in an airtight container in the refrigerator for about 4-5 days. The flavors continue to blend as it sits, making it a great make ahead salad recipe. If the salad releases a little liquid, simply stir it before serving.

    3 Ingredient Strawberry Lemonade Mocktail

    This 3 Ingredient Strawberry Lemonade Mocktail is a refreshing, fruity drink that's perfect when you want something bright and simple. The sweet strawberry flavor paired with fresh lemon creates a delicious strawberry lemonade mocktail that feels light, bubbly, and incredibly refreshing.

    This easy mocktail recipe comes together in just minutes and makes a perfect sparkling drink for warm days or casual gatherings.

    a clear hobnail beverage glass of 3 ingredient Strawberry Lemonade Mocktail next to fresh strawberries and lemons

    This strawberry lemonade spritzer is a fun non alcoholic drink with strawberries that works well for parties, afternoon refreshers, or a quick homemade treat.

    The combination of strawberry and lemon creates a balanced fruity drink that's both refreshing and flavorful.

    If you're looking for an easy strawberry lemonade mocktail or a simple mocktail drink to enjoy anytime, this recipe is a perfect choice.

    If you're looking for more delicious mocktails try my Classic Margarita Mocktail, my Long Island Iced Tea Mocktails, my Strawberry Daiquiri Mocktails or my Pina Colada Mocktail.

    You can find all of my drink recipes here: Gluten Free Drink Recipes

    a clear hobnail beverage glass of 3 ingredient Strawberry Lemonade Mocktail next to fresh strawberries and lemons
    [feast_advanced_jump_to]

    Ingredients

    • Frozen Strawberries
    • Lemon Juice
    • Lemon Zest
    • Honey
    • Strawberry Sparkling Water
    • Ice

    Instructions

    Add the frozen strawberries, lemon juice, lemon zest and honey to a saucepan over medium heat.

    Cook stirring occasionally for 5-7 minutes. The strawberries will thaw and release their juices.

    Mash the berries with a spoon to make a chunky strawberry lemon sauce.

    Remove the pan from heat and let the sauce cool.

    To serve, fill two glasses with ice and then spoon 3 tablespoons of the strawberry lemon sauce over ice.

    Pour the strawberry sparkling water over top.

    Stir gently to combine. Serve immediately.

    Supplies


    More Recipes You Might Enjoy

    • Homemade Blueberry Lemonade made with Frozen Blueberries
    • Watermelon Lemonade
    • Homemade Blackberry Lemonade
    • Homemade Raspberry Lemonade

    I get a lot of my ingredients from Thrive Market. Thrive Market has been a game changer for me eating gluten free. They have so many options I can't get at my rural grocery stores! Use this link to get 40% off your first order!

    Print
    clock clock iconcutlery cutlery iconflag flag iconfolder folder iconinstagram instagram iconpinterest pinterest iconfacebook facebook iconprint print iconsquares squares iconheart heart iconheart solid heart solid icon

    3 Ingredient Strawberry Lemonade Mocktail


    5 Stars 4 Stars 3 Stars 2 Stars 1 Star

    No reviews

    • Author: Elaine VanVleck
    • Total Time: 15 minutes
    • Yield: 2 servings 1x
    • Diet: Gluten Free
    Print Recipe
    Pin Recipe

    Description

    This 3 Ingredient Strawberry Lemonade Mocktail is a refreshing, fruity drink that's perfect when you want something bright and simple. The sweet strawberry flavor paired with fresh lemon creates a delicious strawberry lemonade mocktail that feels light, bubbly, and incredibly refreshing.


    Ingredients

    Scale
    • 1 cup Frozen Strawberries
    • Juice of 1 Lemon, about 2 tablespoons
    • Zest of 1 Lemon, about 1 tablespoon
    • 1 Tbsp Honey
    • 2 - 12 ounce cans Strawberry Sparkling Water
    • Ice

    Instructions

    Add the frozen strawberries, lemon juice, lemon zest and honey to a saucepan over medium heat.

    Cook stirring occasionally for 5-7 minutes. The strawberries will thaw and release their juices.

    Mash the berries with a spoon to make a chunky strawberry lemon sauce.

    Remove the pan from heat and let the sauce cool.

    To serve, fill two glasses with ice and then spoon 3 tablespoons of the strawberry lemon sauce over ice.

    Pour the strawberry sparkling water over top.

    Stir gently to combine. Serve immediately.

    Notes

    This sauce can be made ahead of time and stored in the refrigerator in an air tight container until you're ready to use it. It should last in the fridge for up to 5 days.

    • Prep Time: 10 minutes
    • Cook Time: 5 minutes
    • Category: Drinks
    • Method: Stove Top
    • Cuisine: Gluten Free

    Did you make this recipe?

    Tag @smallfarmbiglife on Instagram and hashtag it #smallfarmbiglife

    Top Tip

    This sauce can be made ahead of time and stored in the refrigerator in an air tight container until you're ready to use it. It should last in the fridge for up to 5 days.

    Didn't find the answer you're looking for?

    Ask AI to answer based on this recipe:

    ChatGPT
    Google AI
    Perplexity
    Grok
    Claude

    Frequently Asked Questions

    Can I use frozen strawberries to make a strawberry lemonade mocktail?

    Yes, frozen strawberries work well for this refreshing strawberry lemonade mocktail. When blended or mashed, they release plenty of flavor and help create a cold, refreshing drink.

    Can I make this strawberry lemonade mocktail ahead of time?

    You can prepare the strawberry and lemon mixture ahead of time and keep it in the refrigerator for up to 5 days. When you're ready to serve, simply add the sparkling component so the drink stays bubbly and fresh. This makes it a great option for a mocktail party or entertaining guests.

    How can I make this mocktail sweeter or more tart?

    You can easily adjust the flavor of this strawberry lemonade mocktail to your taste. Add a little extra lemon juice for a more tart lemon strawberry drink or a touch more honey for a sweeter strawberry mocktail. Adjusting the balance lets you create the perfect refreshing drink for your preference.

    Pineapple Jam

    This Pineapple Jam is a quick and easy homemade jam that's perfect if you're looking for a simple pineapple jam recipe without pectin. Made from scratch using canned pineapple, this easy homemade pineapple jam comes together fast with a bright tropical flavor.

    If you've ever wondered how to make pineapple jam, this no pectin method is an approachable way to create a delicious homemade jam without complicated steps.

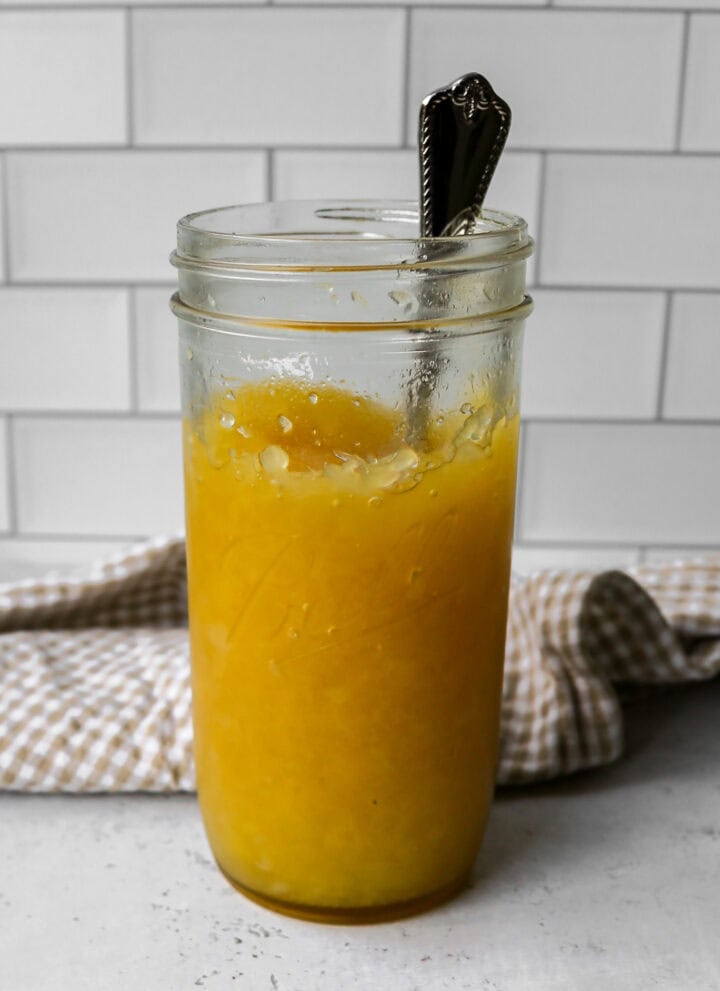
    a Ball jar of pineapple jam with a spoon in it

    Perfect for toast, biscuits, yogurt, or desserts, this pineapple jam recipe is a versatile addition to your kitchen. The tropical pineapple flavor makes it feel special while still being an easy jam recipe you can make anytime.

    Whether you're new to homemade jams and jellies or looking for a reliable pineapple preserves recipe, this homemade pineapple jam is a great place to start.

    If you are looking for more pineapple recipes try my Pineapple Coleslaw, my Easy Fresh Pineapple Salsa, my Gluten Free Pineapple Bars or my Gluten Free Pineapple Upside Down Cake.

    an overhead view of the pineapple jam in a jar with a spoon scoop of it on top
    [feast_advanced_jump_to]

    Ingredients

    • Canned Crushed Pineapple
    • Granulated Sugar

    Instructions

    In a small saucepan add the crushed pineapple with the juice from the can and the sugar. Stir together.

    Bring this mixture to a boil and simmer for 20-25 minutes until jam is thickened. Stirring occasionally to keep jam from sticking to the bottom of your saucepan. The jam will still be a little bit runny at this point but will thicken more once it cools.

    Pour the jam into a jar and cool completely. Store in a sealed jar in the refrigerator for up to one month.

    Supplies


    More Recipes You Might Enjoy

    • Gluten Free Cranberry Jam
    • Gluten Free Frog Eye Salad
    • Gluten Free Pineapple Upside Down Cake
    • Gluten Free Pineapple Bars

    I get a lot of my ingredients from Thrive Market. Thrive Market has been a game changer for me eating gluten free. They have so many options I can't get at my rural grocery stores! Use this link to get 40% off your first order!

    Print
    clock clock iconcutlery cutlery iconflag flag iconfolder folder iconinstagram instagram iconpinterest pinterest iconfacebook facebook iconprint print iconsquares squares iconheart heart iconheart solid heart solid icon

    Pineapple Jam


    5 Stars 4 Stars 3 Stars 2 Stars 1 Star

    No reviews

    • Author: Elaine VanVleck
    • Total Time: 25 minutes
    • Yield: 2 cups 1x
    • Diet: Gluten Free
    Print Recipe
    Pin Recipe

    Description

    This Pineapple Jam is a quick and easy homemade jam that's perfect if you're looking for a simple pineapple jam recipe without pectin. Made from scratch using canned pineapple, this easy homemade pineapple jam comes together fast with a bright tropical flavor. 


    Ingredients

    Scale
    • 1 - 20 ounce can Crushed Pineapple, with juice from can
    • ¾ cup Granulated Sugar

    Instructions

    In a small saucepan add the crushed pineapple with the juice from the can and the sugar. Stir together.

    Bring this mixture to a boil and simmer for 20-25 minutes until jam is thickened. Stirring occasionally to keep jam from sticking to the bottom of your saucepan. The jam will still be a little bit runny at this point but will thicken more once it cools.

    Pour the jam into a jar and cool completely. Store in a sealed jar in the refrigerator for up to one month.

    • Prep Time: 5 minutes
    • Cook Time: 20 minutes
    • Category: Jam
    • Method: Stove Top
    • Cuisine: Gluten Free

    Did you make this recipe?

    Tag @smallfarmbiglife on Instagram and hashtag it #smallfarmbiglife

    Top Tip

    In a good nonstick saucepan this jam can cook with very little stirring required. I put the jam on the stove and then cleaned my kitchen and did other chores while I wait for it to thicken.

    Didn't find the answer you're looking for?

    Ask AI to answer based on this recipe:

    ChatGPT
    Google AI
    Perplexity
    Grok
    Claude

    Frequently Asked Questions

    Can I make pineapple jam without pectin?

    Yes, this pineapple jam recipe is made without pectin, using a simple method that allows the jam to thicken naturally as it cooks. This makes it an easy option for homemade jam, especially if you don't usually keep pectin on hand.

    Can I use canned pineapple to make pineapple jam?

    Absolutely. Using canned pineapple is a convenient way to make homemade pineapple jam quickly and easily. It saves prep time while still giving you a smooth, flavorful jam with a bright pineapple taste.

    How should I store homemade pineapple jam?

    Store homemade pineapple jam in an airtight container in the refrigerator for up to one month. Because this is a no pectin, quick jam recipe, it's best enjoyed fresh and can't be stored long term like shelf stable preserves.

    Gluten Free Vanilla Buttermilk Poke Cake

    This Gluten Free Vanilla Buttermilk Poke Cake is one of the most uniquely delicious cakes I have ever made and the best way I can describe it is that it tastes exactly like a glazed donut in cake form. A fluffy gluten free vanilla cake made with real buttermilk is poked all over while still warm and then a homemade butter and buttermilk glaze is poured over the top so it soaks deep into every single hole.

    The result is the most incredibly moist and tender cake that is rich with vanilla flavor and just sweet enough in every bite.

    a slice of gluten free vanilla buttermilk poke cake on a white plate next to the glass 9x13 baking dish of the cake

    What makes this cake special is the homemade buttermilk glaze which is made with butter, brown sugar, buttermilk, and powdered sugar and comes together in about five minutes on the stovetop.

    It is not complicated at all but it makes this cake taste like something from a really good bakery. This cake actually gets better as it sits which makes it the perfect make ahead dessert for any occasion.

    I have made this for birthday gatherings and potlucks and it always disappears completely. It is one of those recipes that people ask for every single time.

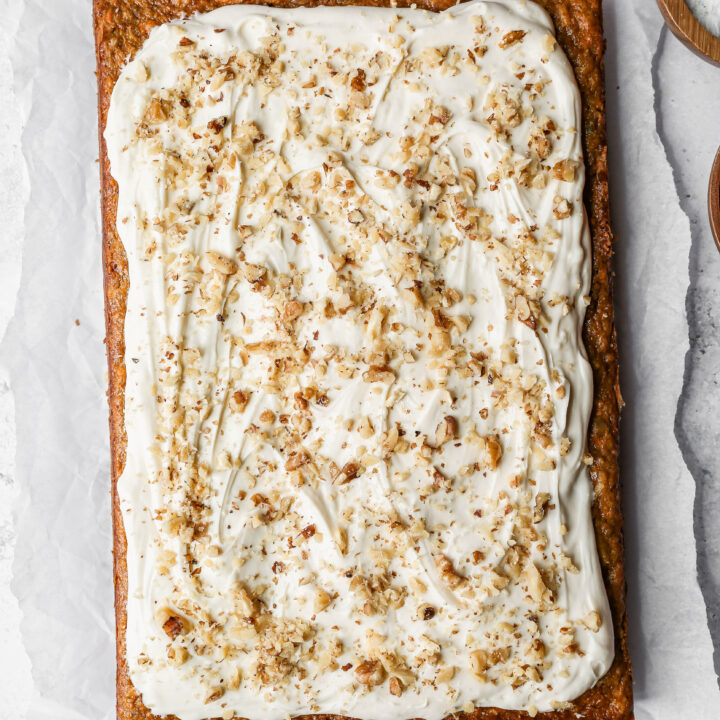
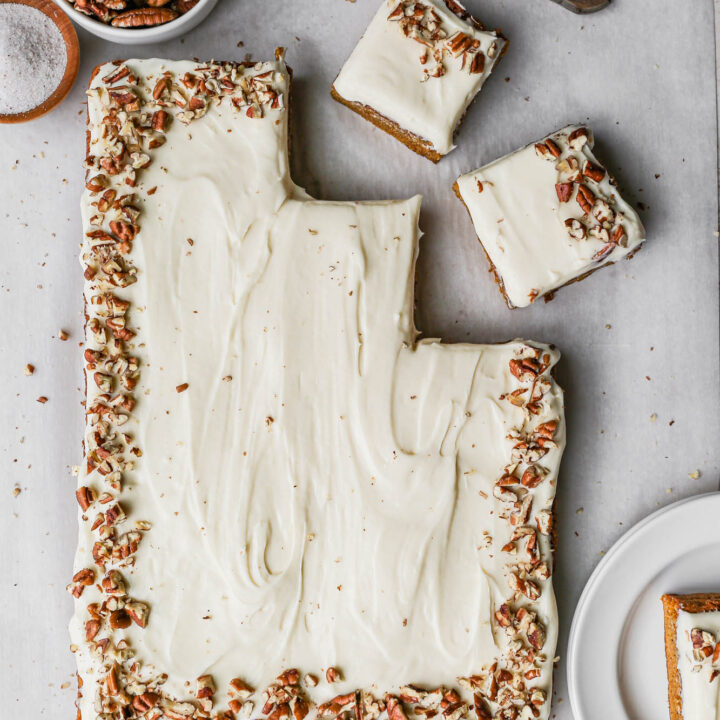
    If you are looking for more sheet cake recipes try my Gluten Free Vanilla Pudding Poke Cake, my Gluten Free Carrot Sheet Cake with Cream Cheese Frosting, my Gluten Free Banana Cake or my Gluten Free Sweet Potato Cake with Cream Cheese Frosting.

    You can find all of my cake recipes here: Gluten Free Cake Recipes

    a glass 9x13 baking dish of gluten free vanilla buttermilk poke cake with two slice cut and on white plates sitting next to it
    [feast_advanced_jump_to]

    Ingredients

    • Gluten Free Flour
    • Granulated Sugar
    • Baking Powder
    • Salt
    • Baking Soda
    • Butter
    • Buttermilk
    • Eggs
    • Vanilla Extract
    • Brown Sugar
    • Powdered Sugar

    Instructions

    Preheat your oven to 350 degrees. Grease a 9x13 baking pan with butter or coconut oil. Set aside.

    In the bowl of your stand mixer blend together the gluten free flour, granulated sugar, baking powder, salt and baking soda. Add the room temperature cubed butter and mix on medium speed until the mixture is crumbly. This will take 2-3 minutes and a little more if your butter is cold.

    Add the buttermilk, eggs and vanilla extract to your crumbly mixture. Blend until combined.

    Pour the cake batter into your greased 9x13 baking dish and spread evenly.

    Bake at 350 degrees for 40-45 minutes. The top of the cake should be browned slightly and a toothpick should come out clean when the cake is done.

    When the cake has about 20 minutes left to bake make the glaze.

    In a 2 quart saucepan over medium heat melt the butter. Add the brown sugar, buttermilk and vanilla. Whisk until the sugar is dissolved and don't let the mixture boil.

    Take the saucepan off of heat and add the powdered sugar. Whisk until there are no lumps and you have a smooth glaze.

    When the cake comes out of the oven let it cool slightly and then use a skewer, chopstick or something similar to poke holes in the cake. Poke the holes from the top all the way to the bottom.

    Pour the glaze evenly over the cake.

    Let the cake cool completely and then cut to serve.

    Supplies


    More Recipes You Might Enjoy

    • Gluten Free Vanilla Pudding Poke Cake
    • Gluten Free Carrot Sheet Cake with Cream Cheese Frosting
    • Gluten Free Banana Cake
    • Gluten Free Sweet Potato Cake with Cream Cheese Frosting

    I get a lot of my ingredients from Thrive Market. Thrive Market has been a game changer for me eating gluten free. They have so many options I can't get at my rural grocery stores! Use this link to get 40% off your first order!

    Print
    clock clock iconcutlery cutlery iconflag flag iconfolder folder iconinstagram instagram iconpinterest pinterest iconfacebook facebook iconprint print iconsquares squares iconheart heart iconheart solid heart solid icon

    Gluten Free Vanilla Buttermilk Poke Cake


    5 Stars 4 Stars 3 Stars 2 Stars 1 Star

    No reviews

    • Author: Elaine VanVleck
    • Total Time: 1 hour
    • Yield: 12 servings 1x
    • Diet: Gluten Free
    Print Recipe
    Pin Recipe

    Description

    This Gluten Free Vanilla Buttermilk Poke Cake is the most moist, tender, and deeply flavored vanilla sheet cake you will ever make and the homemade buttermilk glaze that soaks into every hole makes it taste like the most incredible glazed donut in cake form. Made from scratch with real buttermilk in both the cake and the glaze this easy gluten free poke cake is perfectly soft and tender in every single slice and gets even better as it sits. Naturally gluten free and perfect for birthdays, gatherings, potlucks, and any occasion that calls for a stunning and easy sheet cake!


    Ingredients

    Scale
    • 2 ¼ cups Gluten Free Flour
    • 1 cup Granulated Sugar
    • 2 tsp Baking Powder
    • 1 tsp Salt
    • ½ tsp Baking Soda
    • 1 cup Unsalted Butter, at room temperature cut into small cubes
    • 1 ½ cups Buttermilk
    • 3 large Eggs
    • 1 Egg Yolk
    • 2 tsp Vanilla Extract

    Glaze:

    • ½ cup Butter
    • ¼ cup Brown Sugar
    • ¼ cup Buttermilk
    • 1 tsp Vanilla Extract
    • 2 cups Powdered Sugar

    Instructions

    Preheat your oven to 350 degrees. Grease a 9x13 baking pan with butter or coconut oil. Set aside.

    In the bowl of your stand mixer blend together the gluten free flour, granulated sugar, baking powder, salt and baking soda. Add the room temperature cubed butter and mix on medium speed until the mixture is crumbly. This will take 2-3 minutes and a little more if your butter is cold.

    Add the buttermilk, eggs and vanilla extract to your crumbly mixture. Blend until combined.

    Pour the cake batter into your greased 9x13 baking dish and spread evenly.

    Bake at 350 degrees for 40-45 minutes. The top of the cake should be browned slightly and a toothpick should come out clean when the cake is done.

    When the cake has about 20 minutes left to bake make the glaze.

    In a 2 quart saucepan over medium heat melt the butter. Add the brown sugar, buttermilk and vanilla. Whisk until the sugar is dissolved and don't let the mixture boil.

    Take the saucepan off of heat and add the powdered sugar. Whisk until there are no lumps and you have a smooth glaze.

    When the cake comes out of the oven let it cool slightly and then use a skewer, chopstick or something similar to poke holes in the cake. Poke the holes from the top all the way to the bottom.

    Pour the glaze evenly over the cake.

    Let the cake cool completely and then cut to serve.

    • Prep Time: 20 minutes
    • Cook Time: 40 minutes
    • Category: Cake, Dessert
    • Method: Baking
    • Cuisine: American

    Did you make this recipe?

    Tag @smallfarmbiglife on Instagram and hashtag it #smallfarmbiglife

    If you made this Gluten Free Vanilla Buttermilk Poke Cake I would love to hear what you thought! Please leave a star rating and a comment below. This is one of my favorite easy gluten free cake recipes and I hope it becomes one of yours too!

    Storage

    Store this gluten free vanilla buttermilk poke cake covered at room temperature for up to 2 days. For longer storage cover tightly and refrigerate for up to 5 days. The cake actually gets more moist and flavorful as it sits because the buttermilk glaze continues to soak into the crumb over time. Let refrigerated slices come to room temperature for about 15 minutes before serving for the best texture and flavor.

    Top Tip

    If you don't have or can't get fresh buttermilk you can use buttermilk powder and water to make it! I love having this buttermilk blend in my fridge for when I need some buttermilk for a recipe.

    Didn't find the answer you're looking for?

    Ask AI to answer based on this recipe:

    ChatGPT
    Google AI
    Perplexity
    Grok
    Claude

    Frequently Asked Questions

    What is a poke cake?

    A poke cake is a baked cake that is poked all over with holes while still warm allowing a glaze, sauce, or pudding to soak deep into the cake for extra moisture and flavor in every single slice. The holes allow the filling to penetrate all the way through the cake so you get that incredible moist and flavorful result in every bite rather than just on the surface.

    When should I poke the holes in the cake?

    Poke the holes while the cake is still warm but not straight out of the oven. Let it cool for about 5 to 10 minutes first so it holds together when you poke it. Use a skewer, chopstick, or the handle of a wooden spoon to poke holes all the way from the top to the bottom of the cake about one inch apart across the entire surface. Then pour the glaze over immediately while the cake is still warm so it absorbs as deeply as possible.

    Can I make this recipe ahead of time?

    Yes and I actually recommend it. This cake gets better as it sits because the buttermilk glaze continues to soak into the cake over time making it more moist and flavorful the next day. You can make this cake up to two days ahead of time and store it covered at room temperature or up to five days in the refrigerator.

    Can I add toppings to this poke cake?

    Yes toppings like homemade whipped cream, fresh berries, or sprinkles all pair beautifully with this vanilla poke cake. That said I personally love it completely plain because I think it tastes just like an old fashioned glazed donut and adding toppings almost feels like it would get in the way of that perfect simple flavor.

    Gluten Free Blueberry Coffee Cake

    This Gluten Free Blueberry Coffee Cake is an easy, homemade recipe that works just as well for breakfast as it does for dessert. With juicy blueberries throughout and a soft, moist crumb, it's the kind of blueberry breakfast cake that feels special without being complicated.

    Whether you're serving it for brunch, a casual morning treat, or an afternoon coffee break, this easy blueberry coffee cake delivers classic comfort in every slice.

    This recipe is designed with beginner bakers in mind. This gluten free blueberry coffee cake recipe comes together simply and bakes up beautifully every time. It's a reliable gluten free breakfast cake that doubles as a fruity dessert option, making it perfect for entertaining or everyday baking.

    Moist, delicious, and full of blueberry flavor, this coffee cake is one of those easy recipes you'll come back to again and again.

    If you are looking for more blueberry recipes try my Gluten Free Blueberry Oat Muffins, my Gluten Free Oven Baked Pancakes with Blueberry Sauce or my Homemade Blueberry Lemonade made with Frozen Blueberries.

    You can find all of my cake recipes here: Gluten Free Cake Recipes

    a gluten free blueberry coffee cake on a dark blue plate with glaze drizzled on it in front of a white bowl of glaze
    [feast_advanced_jump_to]

    Ingredients

    • Gluten Free Flour
    • Baking Powder
    • Salt
    • Butter
    • Avocado Oil or Vegetable Oil
    • Granulated Sugar
    • Eggs
    • Vanilla Extract
    • Milk
    • Fresh Blueberries or Frozen Blueberries
    • Powdered Sugar

    Instructions

    Preheat your oven to 350 degrees. Grease a 9" cake pan or 9"x9" baking pan with butter or coconut oil and set aside.

    In the bowl of your stand mixer add the softened butter, vegetable oil and sugar. Blend until combined. Add the eggs, vanilla and milk. Blend until combined.

    In a mixing bowl whisk together the gluten free flour, baking powder and salt. Add these dry ingredients to the wet ingredients in your stand mixer. Blend just until combined.

    Remove the bowl from your stand mixer and add the blueberries. Using a spatula stir the blueberries into the cake batter.

    Pour the cake batter into your grease 9" cake pan or 9"x9" baking pan and spread evenly.

    Bake at 350 degrees for 30-35 minutes. The top of the cake will be browned and when you insert a toothpick it will come out clean when the cake is done.

    Let cool for 15 minutes before removing from the cake onto a plate.

    After the cake has cooled in a small bowl whisk together the sifted powdered sugar and milk. Drizzle the glaze over your cake and serve.

    Supplies


    More Recipes You Might Enjoy

    • Gluten Free Cinnamon Coffee Cake
    • Gluten Free Sock It To Me Cake
    • Gluten Free Cream Cheese Pound Cake
    • Gluten Free Cherry Almond Cake

    I get a lot of my ingredients from Thrive Market. Thrive Market has been a game changer for me eating gluten free. They have so many options I can't get at my rural grocery stores! Use this link to get 40% off your first order!

    Print
    clock clock iconcutlery cutlery iconflag flag iconfolder folder iconinstagram instagram iconpinterest pinterest iconfacebook facebook iconprint print iconsquares squares iconheart heart iconheart solid heart solid icon

    Gluten Free Blueberry Coffee Cake


    5 Stars 4 Stars 3 Stars 2 Stars 1 Star

    No reviews

    • Author: Elaine VanVleck
    • Total Time: 45 minutes
    • Yield: 8 servings 1x
    • Diet: Gluten Free
    Print Recipe
    Pin Recipe

    Description

    This Gluten Free Blueberry Coffee Cake is an easy, homemade recipe that works just as well for breakfast as it does for dessert. With juicy blueberries throughout and a soft, moist crumb, it's the kind of blueberry breakfast cake that feels special without being complicated. 


    Ingredients

    Scale
    • 2 cups Gluten Free Flour
    • 2 tsp Baking Powder
    • 1 tsp Salt
    • ½ cup Butter, softened
    • ¼ cup Avocado Oil or Vegetable Oil
    • 1 cup Granulated Sugar
    • 2 large Eggs
    • 1 tsp Vanilla Extract
    • ¼ cup Milk
    • 2 cups Fresh Blueberries or Frozen Blueberries (do not defrost)

    Glaze:

    • 1 cup Powdered Sugar
    • 1-2 tablespoon Milk

    Instructions

    Preheat your oven to 350 degrees. Grease a 9" cake pan or 9"x9" baking pan with butter or coconut oil and set aside.

    In the bowl of your stand mixer add the softened butter, vegetable oil and sugar. Blend until combined. Add the eggs, vanilla and milk. Blend until combined.

    In a mixing bowl whisk together the gluten free flour, baking powder and salt. Add these dry ingredients to the wet ingredients in your stand mixer. Blend just until combined.

    Remove the bowl from your stand mixer and add the blueberries. Using a spatula stir the blueberries into the cake batter.

    Pour the cake batter into your grease 9" cake pan or 9"x9" baking pan and spread evenly.

    Bake at 350 degrees for 30-35 minutes. The top of the cake will be browned and when you insert a toothpick it will come out clean when the cake is done.

    Let cool for 15 minutes before removing from the cake onto a plate.

    After the cake has cooled in a small bowl whisk together the sifted powdered sugar and milk. Drizzle the glaze over your cake and serve.

    • Prep Time: 15 minutes
    • Cook Time: 30 minutes
    • Category: Cake, Dessert
    • Method: Baking
    • Cuisine: Gluten Free

    Did you make this recipe?

    Tag @smallfarmbiglife on Instagram and hashtag it #smallfarmbiglife

    Top Tip

    You can use fresh or frozen blueberries for this recipe. If you are going to use frozen blueberries do not defrost them. Stir them into the cake batter frozen. This may lead to the cake needing to bake a few extra minutes.

    Didn't find the answer you're looking for?

    Ask AI to answer based on this recipe:

    ChatGPT
    Google AI
    Perplexity
    Grok
    Claude

    Frequently Asked Questions

    Can I make this gluten free blueberry coffee cake ahead of time?

    Yes! This gluten free blueberry coffee cake can be made a day in advance and stored tightly covered at room temperature or in the refrigerator. The cake stays moist and the blueberry flavor actually develops even more overnight, making it perfect for breakfast, brunch, or entertaining.

    How do I store and freeze gluten free blueberry coffee cake?

    Store leftover coffee cake in an airtight container at room temperature for up to 2 days or in the refrigerator for up to 5 days. To freeze, wrap individual slices tightly and freeze for up to 3 months. When you are ready to eat the cake thaw at room temperature or gently warm before serving for the best texture.

    • « Previous Page
    • 1
    • …
    • 3
    • 4
    • 5
    • 6
    • 7
    • …
    • 31
    • Next Page »

    Welcome! I'm Elaine

    I'm so glad you are here! I share easy gluten free recipes from my small farm in Washington.

    Be sure to sign up for my newsletter to stay up to date on all of my new recipes.

    More about me...
    • Instagram
    • Pinterest
    • Facebook
    • Twitter
    • email

    Free gluten free recipe ebook
    My most loved recipes in one download, plus new recipes every Friday.
    Check your inbox! Your ebook is on its way.

    Easy Meals Recipes

    • Gluten Free Instant Pot Chili Mac and Cheese
    • Gluten Free Taco Casserole
    • Gluten Free Cowboy Baked Beans
    • Gluten Free Walking Taco Casserole
    • Gluten Free Creamy Beef and Mushroom Pasta
    • Gluten Free Instant Pot Chicken and Dumplings
    • Instant Pot Mexican Style Beef and Rice
    • Gluten Free Chicken Parmesan Pasta Casserole
    • Gluten Free One Pot Hamburger Helper Copycat
    • Gluten Free Salisbury Steak with Mushroom Gravy
    • Gluten Free Air Fryer Fajitas
    • Gluten Free Sloppy Joe Casserole

    Footer

    back to top

    About

    • Privacy Policy
    • Shop my Amazon Page
    • Follow me on LTK

    Newsletter

    • Sign Up! for emails and updates

    Contact

    • Contact
    • Media Kit
    • About Me

    As an Amazon Associate I earn from qualifying purchases.

    I may get commissions for purchases made through links on this site.

    Copyright © 2026 Brunch Pro on the Brunch Pro Theme