Small Farm Big Life

  • Gluten Free Recipe Index
  • Subscribe
  • Resources
menu icon
go to homepage
  • Home
  • Gluten Free Recipe Index
  • Subscribe
  • My Story
  • Resources
  • Free Guides
    • Email
    • Facebook
    • Instagram
    • Pinterest
  • subscribe
    search icon
    Homepage link
    • Home
    • Gluten Free Recipe Index
    • Subscribe
    • My Story
    • Resources
    • Free Guides
    • Email
    • Facebook
    • Instagram
    • Pinterest
  • ×

    Refrigerator Quick Pickled Red Onions

    These refrigerator quick pickled red onions take one pan, five ingredients, and about five minutes of hands on time. Instead of pouring hot tap water over the onions and hoping the sugar and salt fully dissolve, I bring the brine to a real boil on the stove first.

    It only takes a minute or two, and it means every batch turns out perfectly balanced instead of leaving grainy bits of sugar at the bottom of the jar.

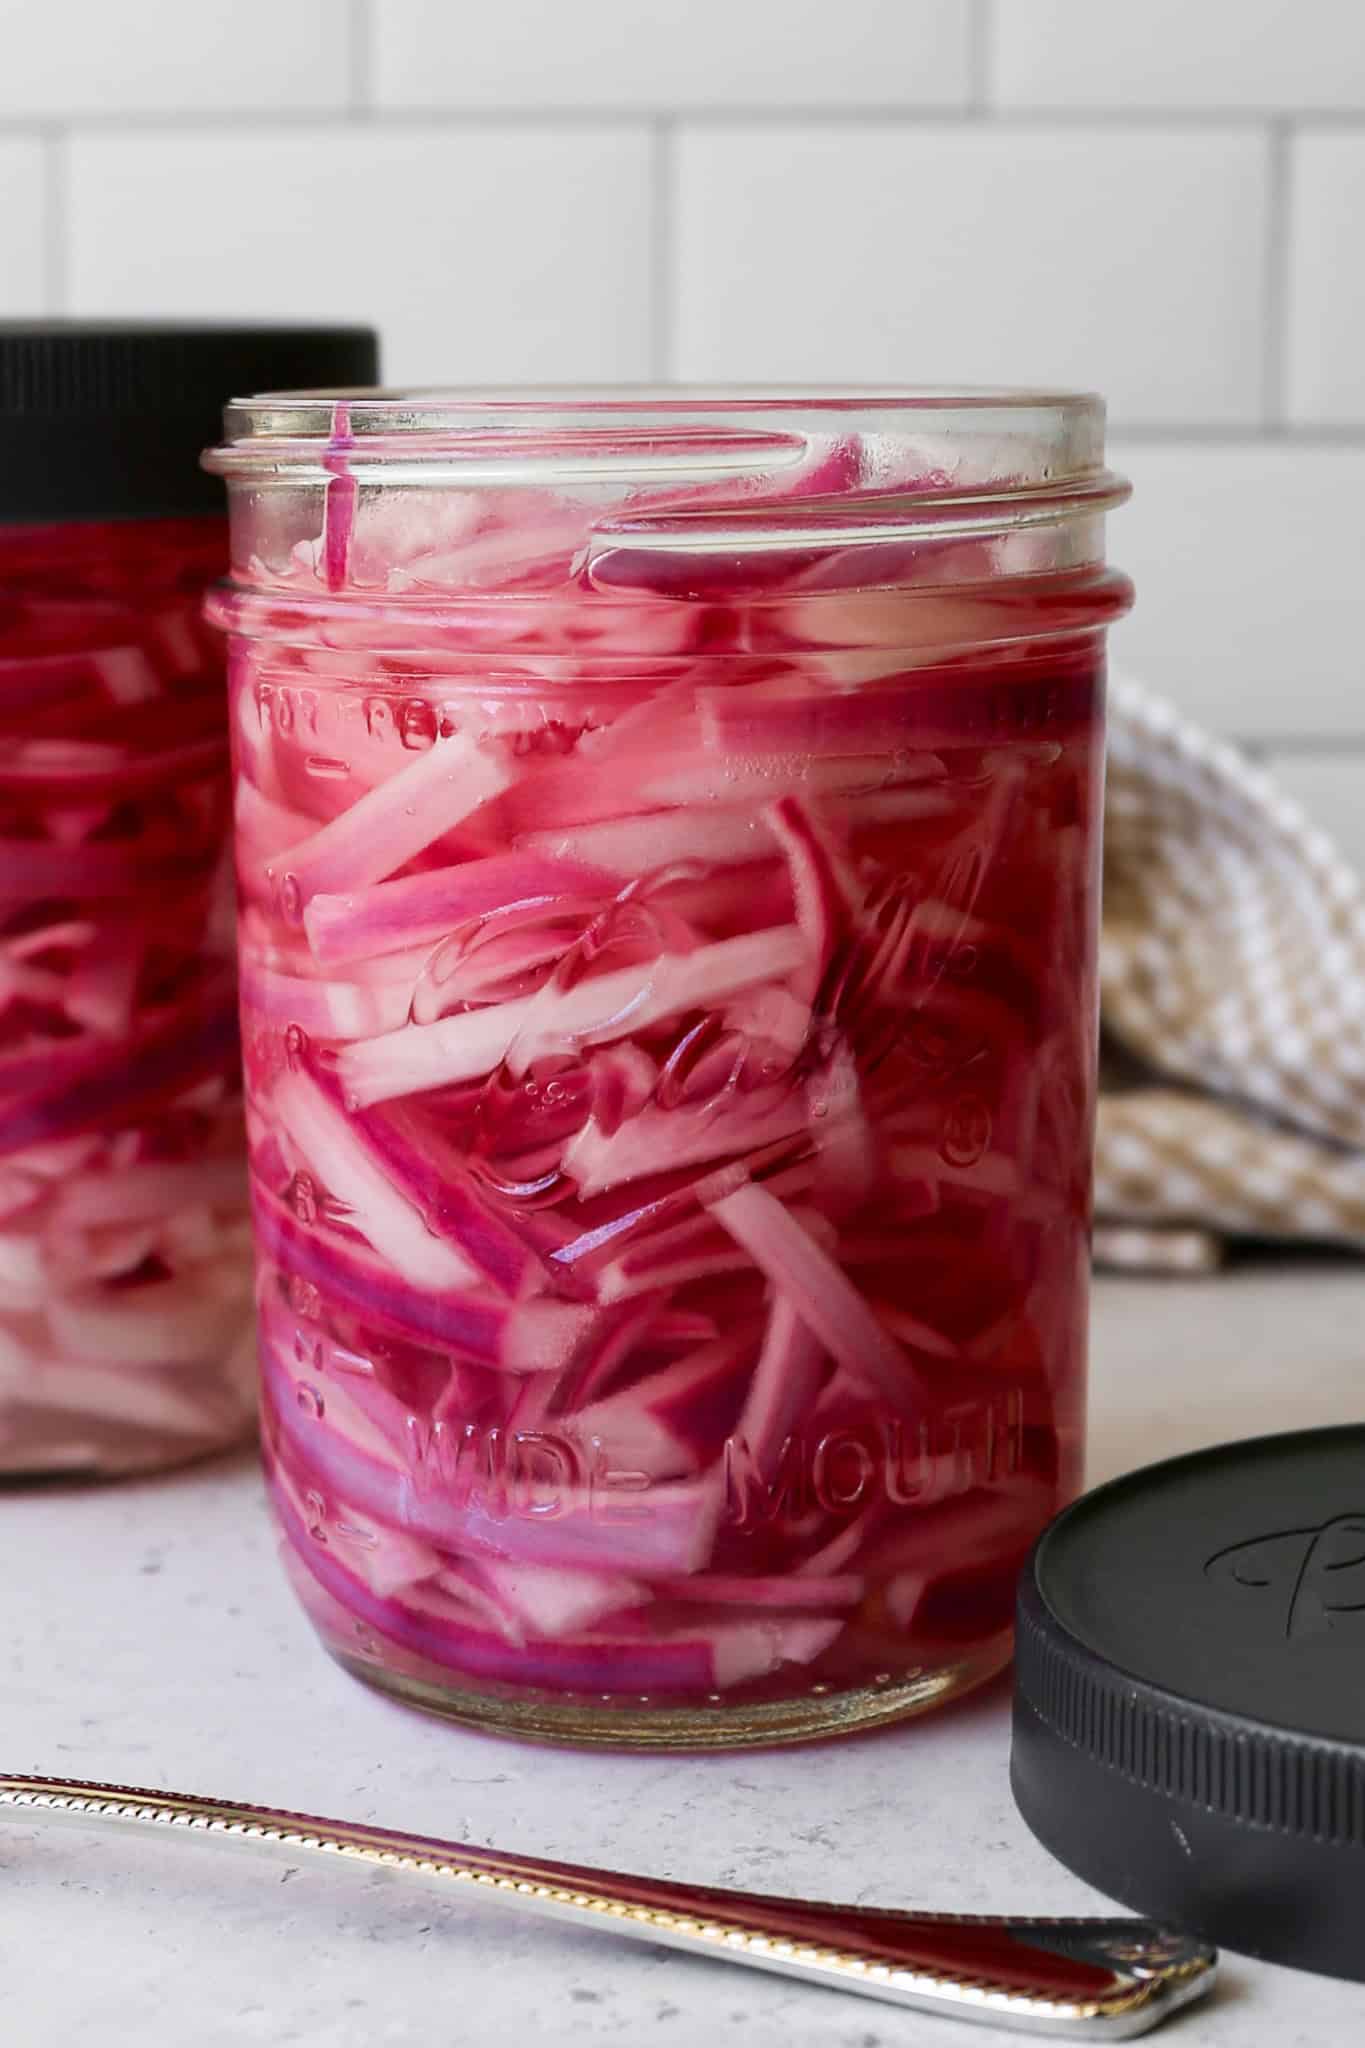
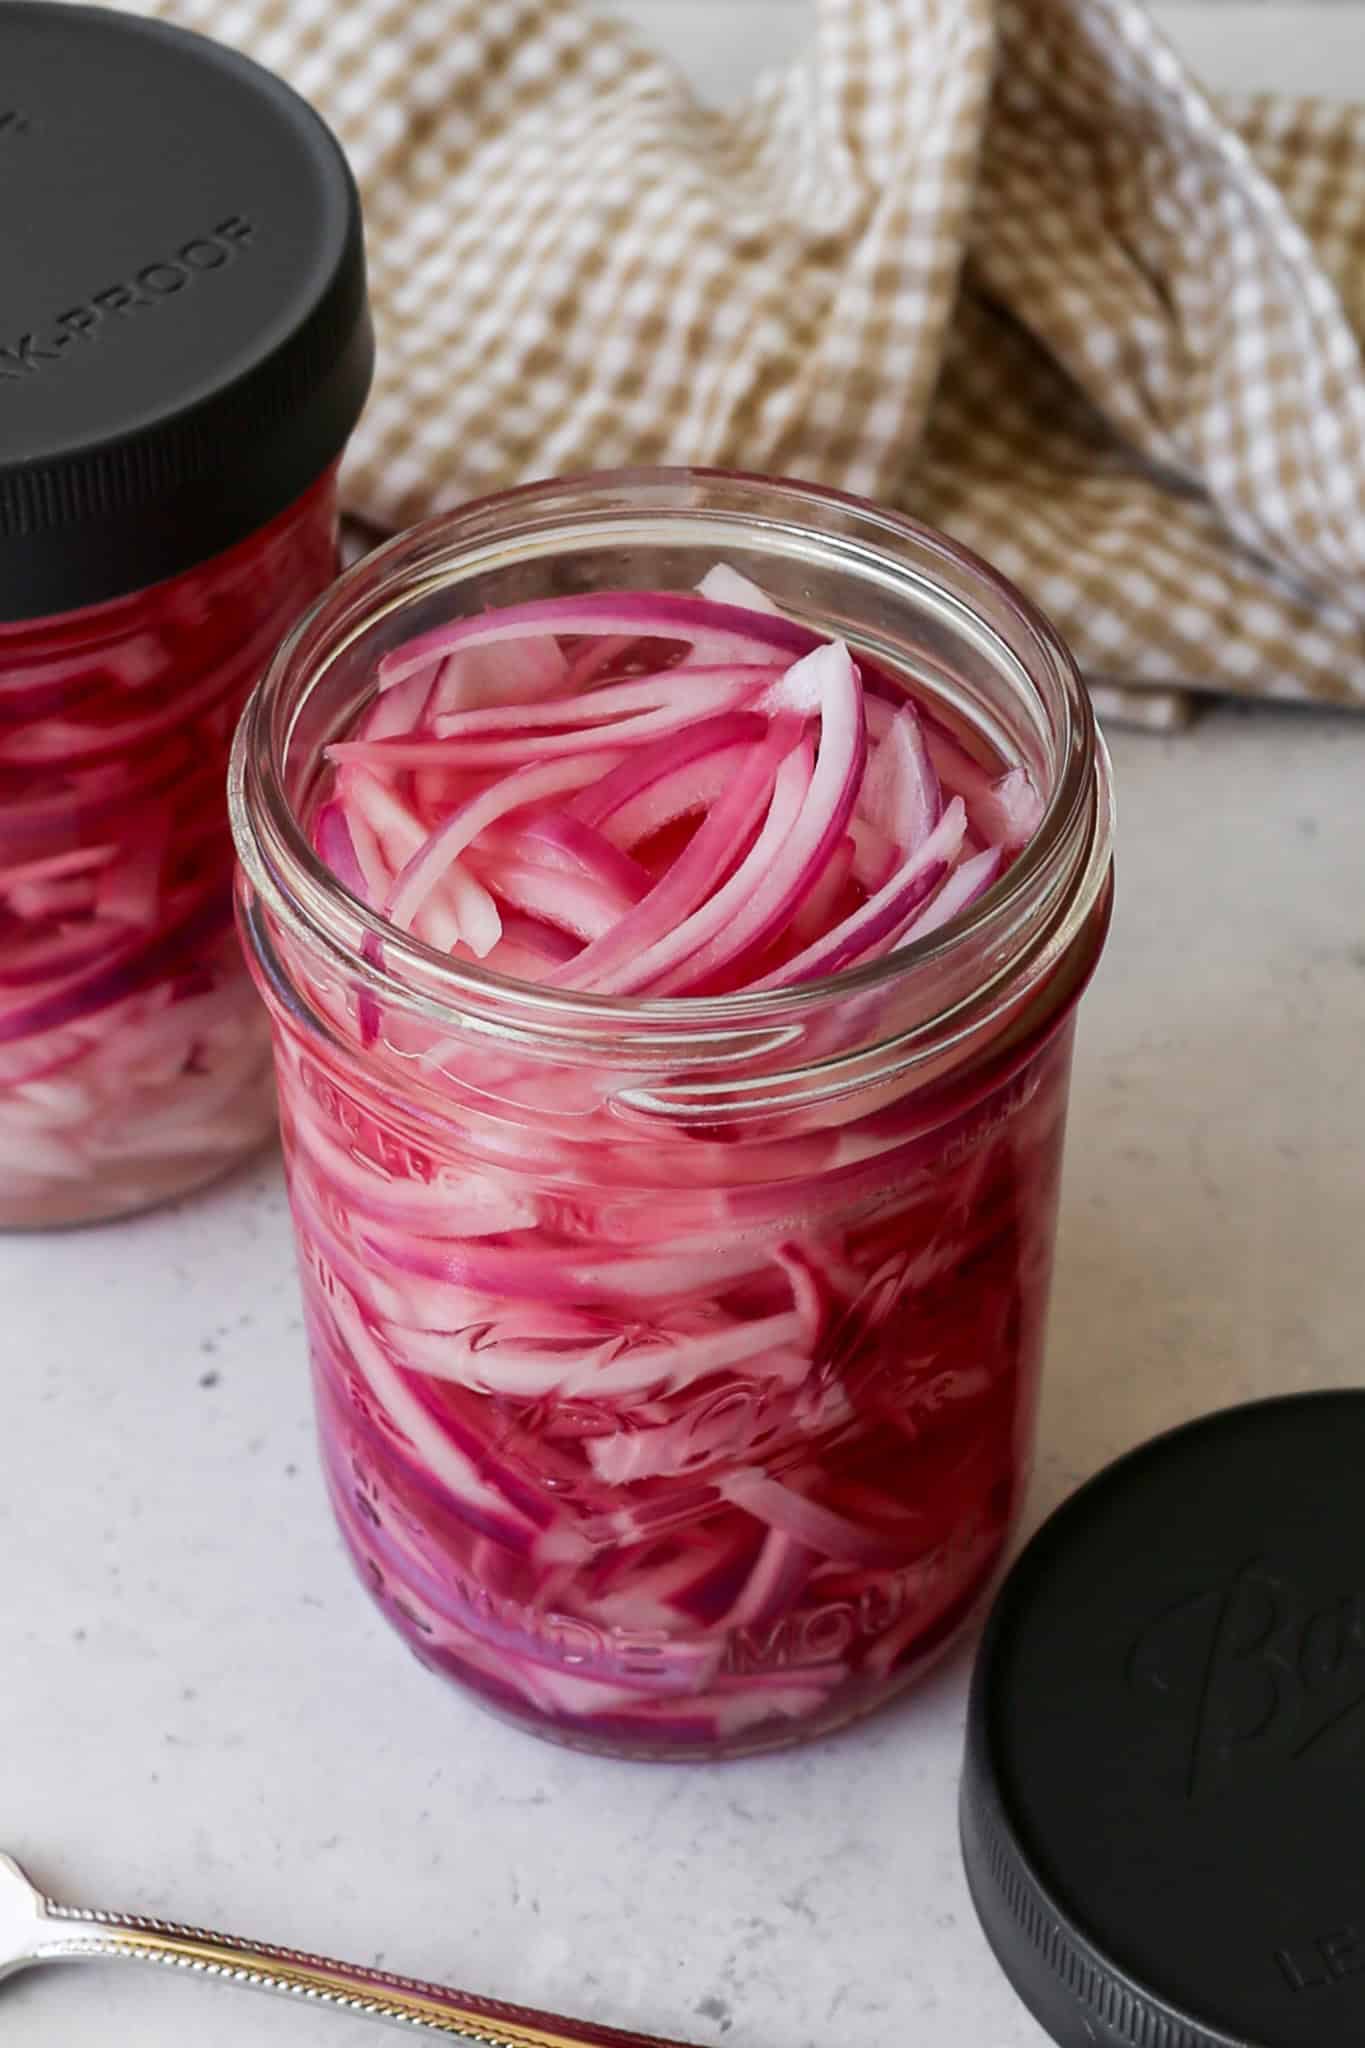
    a sixteen ounce Ball canning jar of refrigerator quick pickled red onions next to a Ball sealable lid

    Once the brine is ready, all that's left to do is pour it over the sliced onions, let the jar cool on the counter, and refrigerate.

    These are naturally gluten free, since white vinegar, water, salt, and sugar don't contain any gluten to begin with, so you can add them to tacos, sandwiches, salads, and burgers without a second thought.

    Give them a full 2 to 3 days in the fridge for the best flavor, though they are perfectly good to eat much sooner if you can't wait.

    If you are looking for more gluten free pickling recipes try my Refrigerator Bread and Butter Pickles, my Easy Refrigerator Pickled Cauliflower or my Refrigerator Dill Pickle Chips.

    You can find all of my snack recipes here: Gluten Free Snack Recipes

    a sixteen ounce Ball canning jar of refrigerator quick pickled red onions next to a Ball sealable lid
    [feast_advanced_jump_to]

    Why a Stovetop Brine Instead of Hot Water

    A lot of pickled onion recipes tell you to just pour hot tap water over the onions and call it done. The problem is that hot tap water isn't always hot enough to fully dissolve the sugar and salt, which can leave you with grainy bits at the bottom of the jar instead of a smooth, balanced brine.

    Bringing the brine to a real boil on the stove only takes a minute or two longer, and it guarantees the sugar and salt dissolve completely every single time. It's a small extra step that makes a real difference in the final flavor.

    Are Pickled Red Onions Gluten Free?

    Yes. White vinegar, water, salt, and granulated sugar are all naturally gluten free, so this recipe is safe to make exactly as written for a gluten free or celiac diet. There's no substituting or double checking labels required here, just straightforward, naturally gluten free ingredients.

    Ways to Use Pickled Red Onions

    These pickled onions add a bright, tangy crunch to almost anything. Try them on:

    • Tacos, burrito bowls, and nachos
    • Sandwiches, burgers, and wraps
    • Salads and grain bowls
    • Avocado toast
    • Charcuterie boards

    Troubleshooting Your Pickled Onions

    If your onions turn out soft or mushy instead of crisp, the brine was likely still at a rolling boil when it hit the onions. Let the brine sit off the heat for a minute or two before pouring next time.

    A little cloudiness in the brine is normal from the salt and sugar settling, but if you notice an off smell or the onions look slimy, it's time to toss the batch and start a fresh one.

    Supplies

    Storage Instructions

    Store the pickled onions in their sealed jar in the refrigerator for up to 3 weeks. For the best flavor and texture, plan to use them within the first 2 weeks.

    Top Tip

    Bring the brine to a full boil rather than just using hot water. This guarantees the salt and sugar are completely dissolved, so every batch has the same balanced, tangy flavor.

    Frequently Asked Questions

    Do I have to boil the brine, or can I use hot water instead?

    You can use very hot water, but boiling the brine on the stove guarantees the salt and sugar fully dissolve every time. Hot tap water can sometimes leave a bit of undissolved sugar or salt at the bottom of the jar, so a quick simmer is the more reliable method.

    Are these pickled onions gluten free?

    Yes. White vinegar, water, salt, and sugar are all naturally gluten free, so this recipe is completely safe for a gluten free or celiac diet with no substitutions needed.

    Why are my pickled onions mushy instead of crisp?

    This usually happens when the brine is poured over the onions while it's still at a rolling boil. Let the brine come off the heat for a minute or two before pouring so the onions stay crisp instead of softening too much.

    Can I can these to make them shelf stable?

    No. This is a refrigerator pickle recipe only and has not been tested for safe canning. Always store these in the refrigerator, and use a recipe specifically designed for canning if you want a shelf stable version.

    Why did my brine turn cloudy?

    A little cloudiness is normal, especially if some of the salt or sugar settles. If the brine looks cloudy along with an off smell or the onions look slimy, it's time to toss the batch and start fresh.

    Didn't find the answer you're looking for?

    Ask AI to answer based on this recipe:

    ChatGPT
    Google AI
    Perplexity
    Grok
    Claude

    More Recipes You Might Enjoy

    • Refrigerator Dill Pickle Chips
    • Easy Refrigerator Pickled Cauliflower
    • Refrigerator Bread and Butter Pickles
    • Easy Fresh Pineapple Salsa

    I get a lot of my ingredients from Thrive Market. Thrive Market has been a game changer for me eating gluten free. They have so many options I can't get at my rural grocery stores! Use this link to get 40% off your first order!

    Print
    clock clock iconcutlery cutlery iconflag flag iconfolder folder iconinstagram instagram iconpinterest pinterest iconfacebook facebook iconprint print iconsquares squares iconheart heart iconheart solid heart solid icon

    Refrigerator Quick Pickled Red Onions


    5 Stars 4 Stars 3 Stars 2 Stars 1 Star

    No reviews

    • Author: Elaine VanVleck
    • Total Time: 10 minutes
    • Yield: 8 servings 1x
    • Diet: Gluten Free
    Print Recipe
    Pin Recipe

    Description

    These refrigerator quick pickled red onions come together with a foolproof stovetop brine and just five simple ingredients, naturally gluten free and ready to top almost anything.


    Ingredients

    Units Scale
    • 1 large Red Onion, thinly sliced
    • ¼ cup Water
    • ¾ cup White Vinegar
    • 2 tsp Salt
    • 2 tsp Granulated Sugar

    Instructions

    Thinly slice the red onion. Break the pieces apart and pack them into a 16 ounce wide mouth jar.

    In a small saucepan over medium heat add the water, vinegar, salt and sugar. Stir to combine and bring to a boil, stirring occasionally until the salt and sugar fully dissolve.

    Pour about half of the hot vinegar mixture over the onions in the jar. Use a spoon to press the onions down, then pour in the remaining vinegar mixture until the onions are fully submerged.

    Let the jar cool for 30 minutes on your counter and then place a lid on the jar and refrigerate.

    These are best after 2 to 3 days in the refrigerator, but can be enjoyed right away if you can't wait.

    • Prep Time: 5 minutes
    • Cook Time: 5 minutes
    • Category: Snacks, Side Dishes
    • Method: Stove Top
    • Cuisine: American

    Did you make this recipe?

    Tag @smallfarmbiglife on Instagram and hashtag it #smallfarmbiglife

    Keep a jar of these refrigerator quick pickled red onions on hand and add them to your next taco night, sandwich, or salad. Let me know in the comments what you topped them on.

    Ingredients

    • Red Onion
    • Salt
    • Granulated Sugar
    • Water
    • White Vinegar

    Instructions

    Thinly slice the red onion. Break the pieces apart and pack them into a 16 ounce wide mouth jar.

    In a small saucepan over medium heat add the water, vinegar, salt and sugar. Stir to combine and bring to a boil, stirring occasionally until the salt and sugar fully dissolve.

    Pour about half of the hot vinegar mixture over the onions in the jar. Use a spoon to press the onions down, then pour in the remaining vinegar mixture until the onions are fully submerged.

    Let the jar cool for 30 minutes on your counter and then place a lid on the jar and refrigerate.

    These are best after 2 to 3 days in the refrigerator, but can be enjoyed right away if you can't wait.

    Refrigerator Dill Pickle Chips

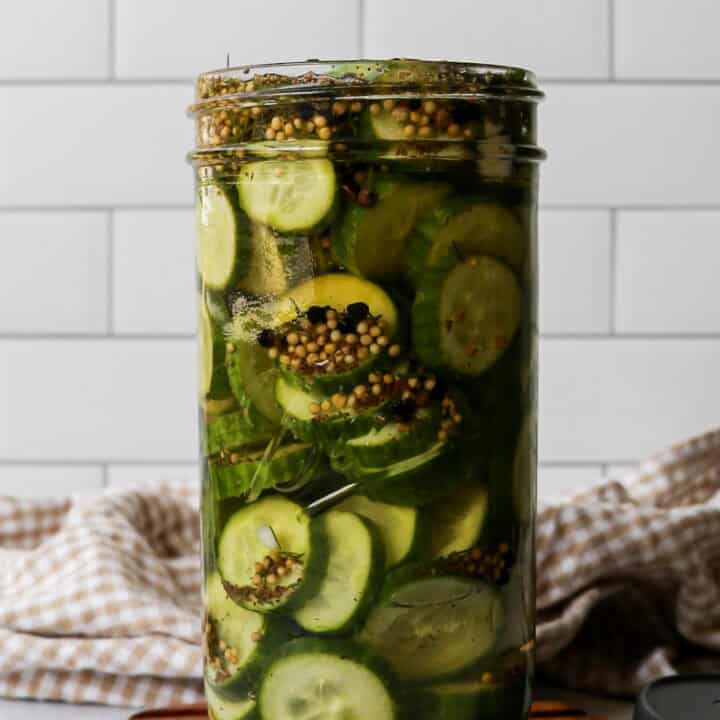
    Once you make your own refrigerator dill pickle chips you will never go back to store bought. These homemade dill pickles are tangy, garlicky, crunchy, and packed with fresh dill flavor from a simple brine made with whole spices right on your stovetop. No canning equipment, no water bath, and no special skills required.

    Just a handful of simple ingredients, a wide mouth mason jar, and a couple of days of patience while the cucumbers soak up all that delicious brine.

    a Ball wide mouth jar of refrigerator dill pickle chips next to a tan gingham kitchen towel and a Ball leak proof plastic lid

    What I love most about this recipe is how completely customizable and safe it is for anyone with celiac disease. The brine is made with white distilled vinegar which is confirmed gluten free even when made from gluten containing grains.

    Every spice in this recipe is a whole spice with no hidden additives or blends to worry about.

    These pickle chips are so much better than anything you can buy at the store.

    If you are looking for more pickle recipes try my Refrigerator Bread and Butter Pickles, my Easy Refrigerator Pickled Cauliflower or my Gluten Free High Protein Dill Pickle Pasta Salad.

    You can find all of my side dish recipes here: Gluten Free Side Dishes

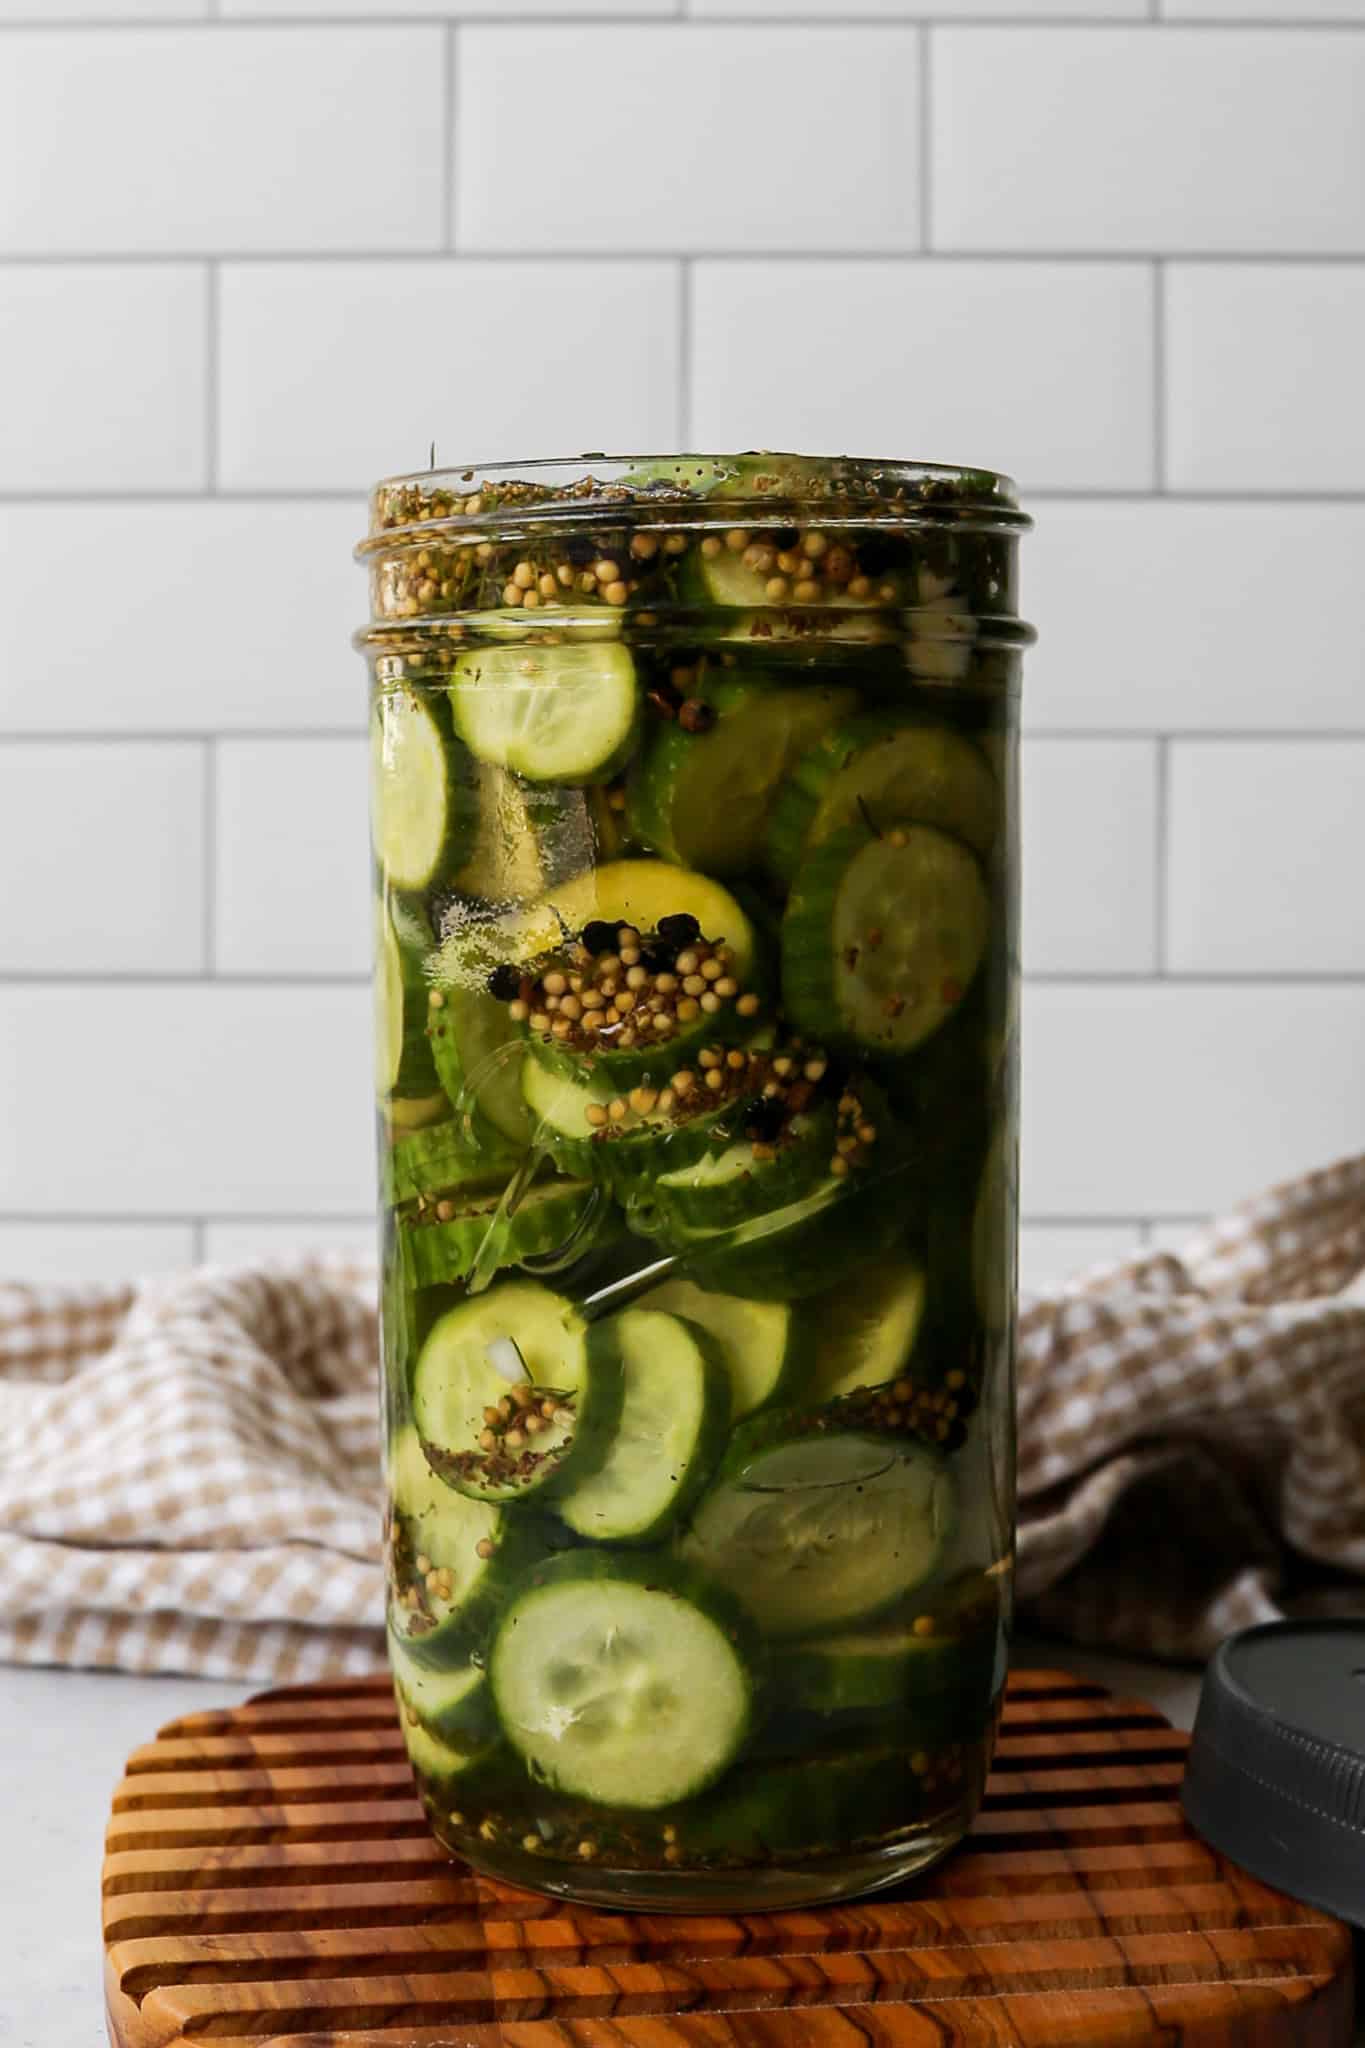
    a Ball wide mouth jar of refrigerator dill pickle chips sitting on a wooden trivet next to a tan gingham kitchen towel and a Ball leak proof plastic lid
    [feast_advanced_jump_to]

    What Makes a Crispy Refrigerator Pickle

    Crispy pickles are the goal and a few simple techniques make all the difference between a crunchy pickle and a limp one.

    • Slice your cucumbers to a consistent quarter inch thickness. Thinner slices go limp quickly after sitting in the brine. A quarter inch slice absorbs the brine beautifully while staying firm and crisp for weeks.
    • Use mini cucumbers or Persian cucumbers rather than large garden cucumbers. Mini cucumbers have thinner skins, fewer seeds, and a naturally crisp texture that holds up much better in the brine than larger cucumber varieties.
    • Pack the cucumbers snugly in the jar. Cucumbers packed tightly together stay firmer than loosely packed ones since they support each other in the brine.
    • Pour the hot brine over the cucumbers immediately after removing it from the heat. The heat briefly softens the outer skin of the cucumber which actually helps the brine penetrate more quickly and evenly.

    About the Spice Blend

    This recipe uses three whole spices in the brine: black peppercorns, yellow mustard seeds, and celery seeds. Each one plays a specific role in the finished pickle.

    • Black peppercorns add a subtle heat and depth that you taste in the background of every bite without being overpowering.
    • Yellow mustard seeds are a classic pickling spice that adds a warm slightly tangy flavor and that distinctive homemade pickle taste that store bought pickles can never quite replicate.
    • Celery seeds add an herbal and slightly earthy note that rounds out the brine and gives these pickles a more complex flavor than a basic peppercorn and dill recipe. This is the ingredient that makes people ask what your secret is.
    • Using whole spices rather than ground spices is important. Whole spices release their flavor slowly into the brine over several days which produces a cleaner and more balanced pickle flavor than ground spices which can make the brine cloudy and overpowering.

    Serving Suggestions

    These dill pickle chips are incredibly versatile. Here are some of my favorite ways to use them.

    • On burgers. A generous pile of homemade dill pickle chips on a burger is one of the best things you can make with this recipe. The tangy crunch is so much better than any store bought pickle.
    • On sandwiches. Layer them on gluten free bread with deli meat and cheese for the best sandwich upgrade.
    • In pasta salad. These pickles can be used in my Gluten Free High Protein Dill Pickle Pasta Salad. The homemade pickles make the salad taste significantly better than store bought.
    • As a snack. Straight from the jar is honestly one of the best ways to eat these. They are incredibly addictive.
    • On a charcuterie board. Arrange them alongside your favorite gluten free crackers, cheeses, and meats for a beautiful and impressive spread.

    Variations

    Once you have the base recipe mastered there are several fun ways to customize your refrigerator dill pickle chips.

    • Spicy dill pickles. Add one or two dried red chili peppers or a pinch of red pepper flakes to the jar before pouring in the brine for a spicy kick that pairs beautifully with the dill and garlic.
    • Garlic lovers version. Double the garlic to six cloves for an extra bold and garlicky pickle that pickle lovers will go crazy for.
    • Add other vegetables. Sliced carrots, cauliflower florets, green beans, and sliced radishes all pickle beautifully in this same brine. Add them to the jar alongside the cucumbers or make a separate jar of mixed pickled vegetables.

    Storage Instructions

    Store your refrigerator dill pickle chips in the sealed jar in the refrigerator for up to four weeks. Make sure the cucumber slices stay fully submerged in the brine at all times for the best texture and flavor. These pickles are not shelf stable and must be kept refrigerated. They are not suitable for canning or pantry storage.

    A note on vinegar for celiac disease:

    This recipe calls for white distilled vinegar which is safe for celiac disease. The distillation process removes all gluten proteins making it completely safe even when it is made from gluten containing grains. The one vinegar to avoid if you have celiac disease is malt vinegar which is fermented rather than distilled and contains barley. As long as you use white distilled vinegar you are good to go.

    Top Tip

    Wait the full two to three days before opening the jar. It is incredibly tempting to try them after just one day and they will taste good after 24 hours but they will not taste like the real thing yet.

    After two to three days in the refrigerator the cucumbers have fully absorbed the brine, the garlic has mellowed and deepened, and the whole spices have had time to fully infuse the liquid. The difference between a one day pickle and a three day pickle is significant and worth the wait.

    Frequently Asked Questions

    Do I have to use mini cucumbers for this recipe?

    Mini cucumbers and Persian cucumbers work best for refrigerator pickle chips because they have thinner skins, fewer seeds, and a naturally crisp texture that holds up well in the brine. Large garden cucumbers can work but they tend to have more seeds and a thicker skin which can result in a softer pickle.

    How long do refrigerator dill pickle chips last?

    Store your pickle chips in a sealed jar in the refrigerator for up to four weeks. Make sure the cucumber slices stay fully submerged in the brine at all times for the best texture and flavor. These are refrigerator pickles and are not shelf stable so they must be kept refrigerated at all times.

    Can I use dried dill instead of fresh dill?

    Fresh dill gives you the best and most vibrant dill flavor in this recipe. If you cannot find fresh dill you can substitute one tablespoon of dried dill weed but the flavor will be noticeably milder. Fresh dill is widely available in the produce section of most grocery stores and is worth seeking out for the best results.

    Can I make a larger batch of refrigerator dill pickle chips?

    Yes. Simply double or triple the recipe and use additional 16 ounce wide mouth jars. Make sure each jar gets an equal amount of garlic, fresh dill, and whole spices so every jar has the same bold flavor. The brine scales up easily and the process is exactly the same regardless of how many jars you make. This is a great option if you have a lot of cucumbers from your garden or farmers market.

    Didn't find the answer you're looking for?

    Ask AI to answer based on this recipe:

    ChatGPT
    Google AI
    Perplexity
    Grok
    Claude

    Supplies


    More Recipes You Might Enjoy

    • Refrigerator Bread and Butter Pickles
    • Easy Refrigerator Pickled Cauliflower
    • Gluten Free High Protein Dill Pickle Pasta Salad
    • Easy Gluten Free Cookout Side Dishes

    I get a lot of my ingredients from Thrive Market. Thrive Market has been a game changer for me eating gluten free. They have so many options I can't get at my rural grocery stores! Use this link to get 40% off your first order!

    Print
    clock clock iconcutlery cutlery iconflag flag iconfolder folder iconinstagram instagram iconpinterest pinterest iconfacebook facebook iconprint print iconsquares squares iconheart heart iconheart solid heart solid icon

    Refrigerator Dill Pickle Chips


    5 Stars 4 Stars 3 Stars 2 Stars 1 Star

    No reviews

    • Author: Elaine VanVleck
    • Total Time: 10 minutes
    • Yield: 8 servings 1x
    • Diet: Gluten Free
    Print Recipe
    Pin Recipe

    Description

    Easy refrigerator dill pickle chips made with mini cucumbers, fresh dill, garlic, and whole spices in a simple white vinegar brine. No canning required and no special equipment needed. Ready to eat in two to three days and store in the refrigerator for up to four weeks. Completely gluten free and safe for celiac disease.


    Ingredients

    Units Scale
    • 5-6 Mini Cucumbers, sliced into rounds
    • 1 cup Water
    • 1 cup White Vinegar
    • 1 Tbsp Salt
    • 2 tsp Whole Black Peppercorns
    • 2 tsp Whole Yellow Mustard Seeds
    • 1 tsp Celery Seeds
    • 3 Garlic Cloves, roughly chopped
    • 2 large Fresh Dill Sprigs, finely chopped

    Instructions

    Slice the mini cucumbers into quarter inch rounds. Pack the cucumber slices snugly into a 16 ounce wide mouth jar. Set aside.

    In a small saucepan over medium heat add the water, white vinegar, salt, peppercorns, celery seeds, and mustard seeds. Stir to combine. Bring the mixture to a boil then remove from heat.

    Add the roughly chopped garlic and finely chopped fresh dill to the jar on top of the cucumber slices.

    Carefully pour the hot vinegar mixture over the cucumbers, garlic, and dill. Make sure the cucumbers are fully submerged in the brine. If needed press them down gently with a spoon.

    Let the jar cool on the counter for 30 minutes. Place the lid on the jar and refrigerate.

    These refrigerator dill pickle chips are best after two to three days in the refrigerator when the cucumbers have had time to fully absorb the brine and develop their flavor. Store in the refrigerator for up to four weeks.

    Note: These are refrigerator pickles and are not shelf stable. They must be stored in the refrigerator at all times and are not suitable for canning or pantry storage.

    If you made this recipe please leave a star rating and comment below. It helps other readers find this recipe and means so much to me.

    • Prep Time: 5 minutes
    • Cook Time: 5 minutes
    • Category: Side Dish, Snack
    • Method: Stove Top
    • Cuisine: American

    Did you make this recipe?

    Tag @smallfarmbiglife on Instagram and hashtag it #smallfarmbiglife

    If you make these Refrigerator Dill Pickle Chips I would love to hear what you think! Leave a comment below and let me know how they turned out or tag me on Instagram so I can see your jar.

    Once you make homemade pickles you will never want to go back to store bought so save this recipe to your favorite Pinterest board so you always have it ready when your cucumber supply is overflowing!

    Ingredients

    • Mini Cucumbers
    • Water
    • White Vinegar
    • Salt
    • Black Peppercorns
    • Celery Seeds
    • Whole Yellow Mustard Seeds
    • Garlic Cloves
    • Fresh Dill

    Instructions

    Slice the mini cucumbers into quarter inch rounds. Pack the cucumber slices snugly into a 16 ounce wide mouth jar. Set aside.

    In a small saucepan over medium heat add the water, white vinegar, salt, peppercorns, celery seeds, and mustard seeds. Stir to combine. Bring the mixture to a boil then remove from heat.

    Add the roughly chopped garlic and finely chopped fresh dill to the jar on top of the cucumber slices.

    Carefully pour the hot vinegar mixture over the cucumbers, garlic, and dill. Make sure the cucumbers are fully submerged in the brine. If needed press them down gently with a spoon.

    Let the jar cool on the counter for 30 minutes. Place the lid on the jar and refrigerate.

    These refrigerator dill pickle chips are best after two to three days in the refrigerator when the cucumbers have had time to fully absorb the brine and develop their flavor. Store in the refrigerator for up to four weeks.

    Note: These are refrigerator pickles and are not shelf stable. They must be stored in the refrigerator at all times and are not suitable for canning or pantry storage.

    Gluten Free Corn Salad with Bacon

    This Gluten Free Corn Salad with Bacon is one of those recipes that is impossible to stop eating once you start. Creamy, cheesy, salty, and loaded with crispy bacon, it is the kind of salad that disappears at every cookout, potluck, and summer gathering before anything else on the table.

    What makes it even better is that it works two ways: serve it as a side salad with a fork or set it out as a dip with a bowl of gluten free corn chips and watch it vanish in minutes.

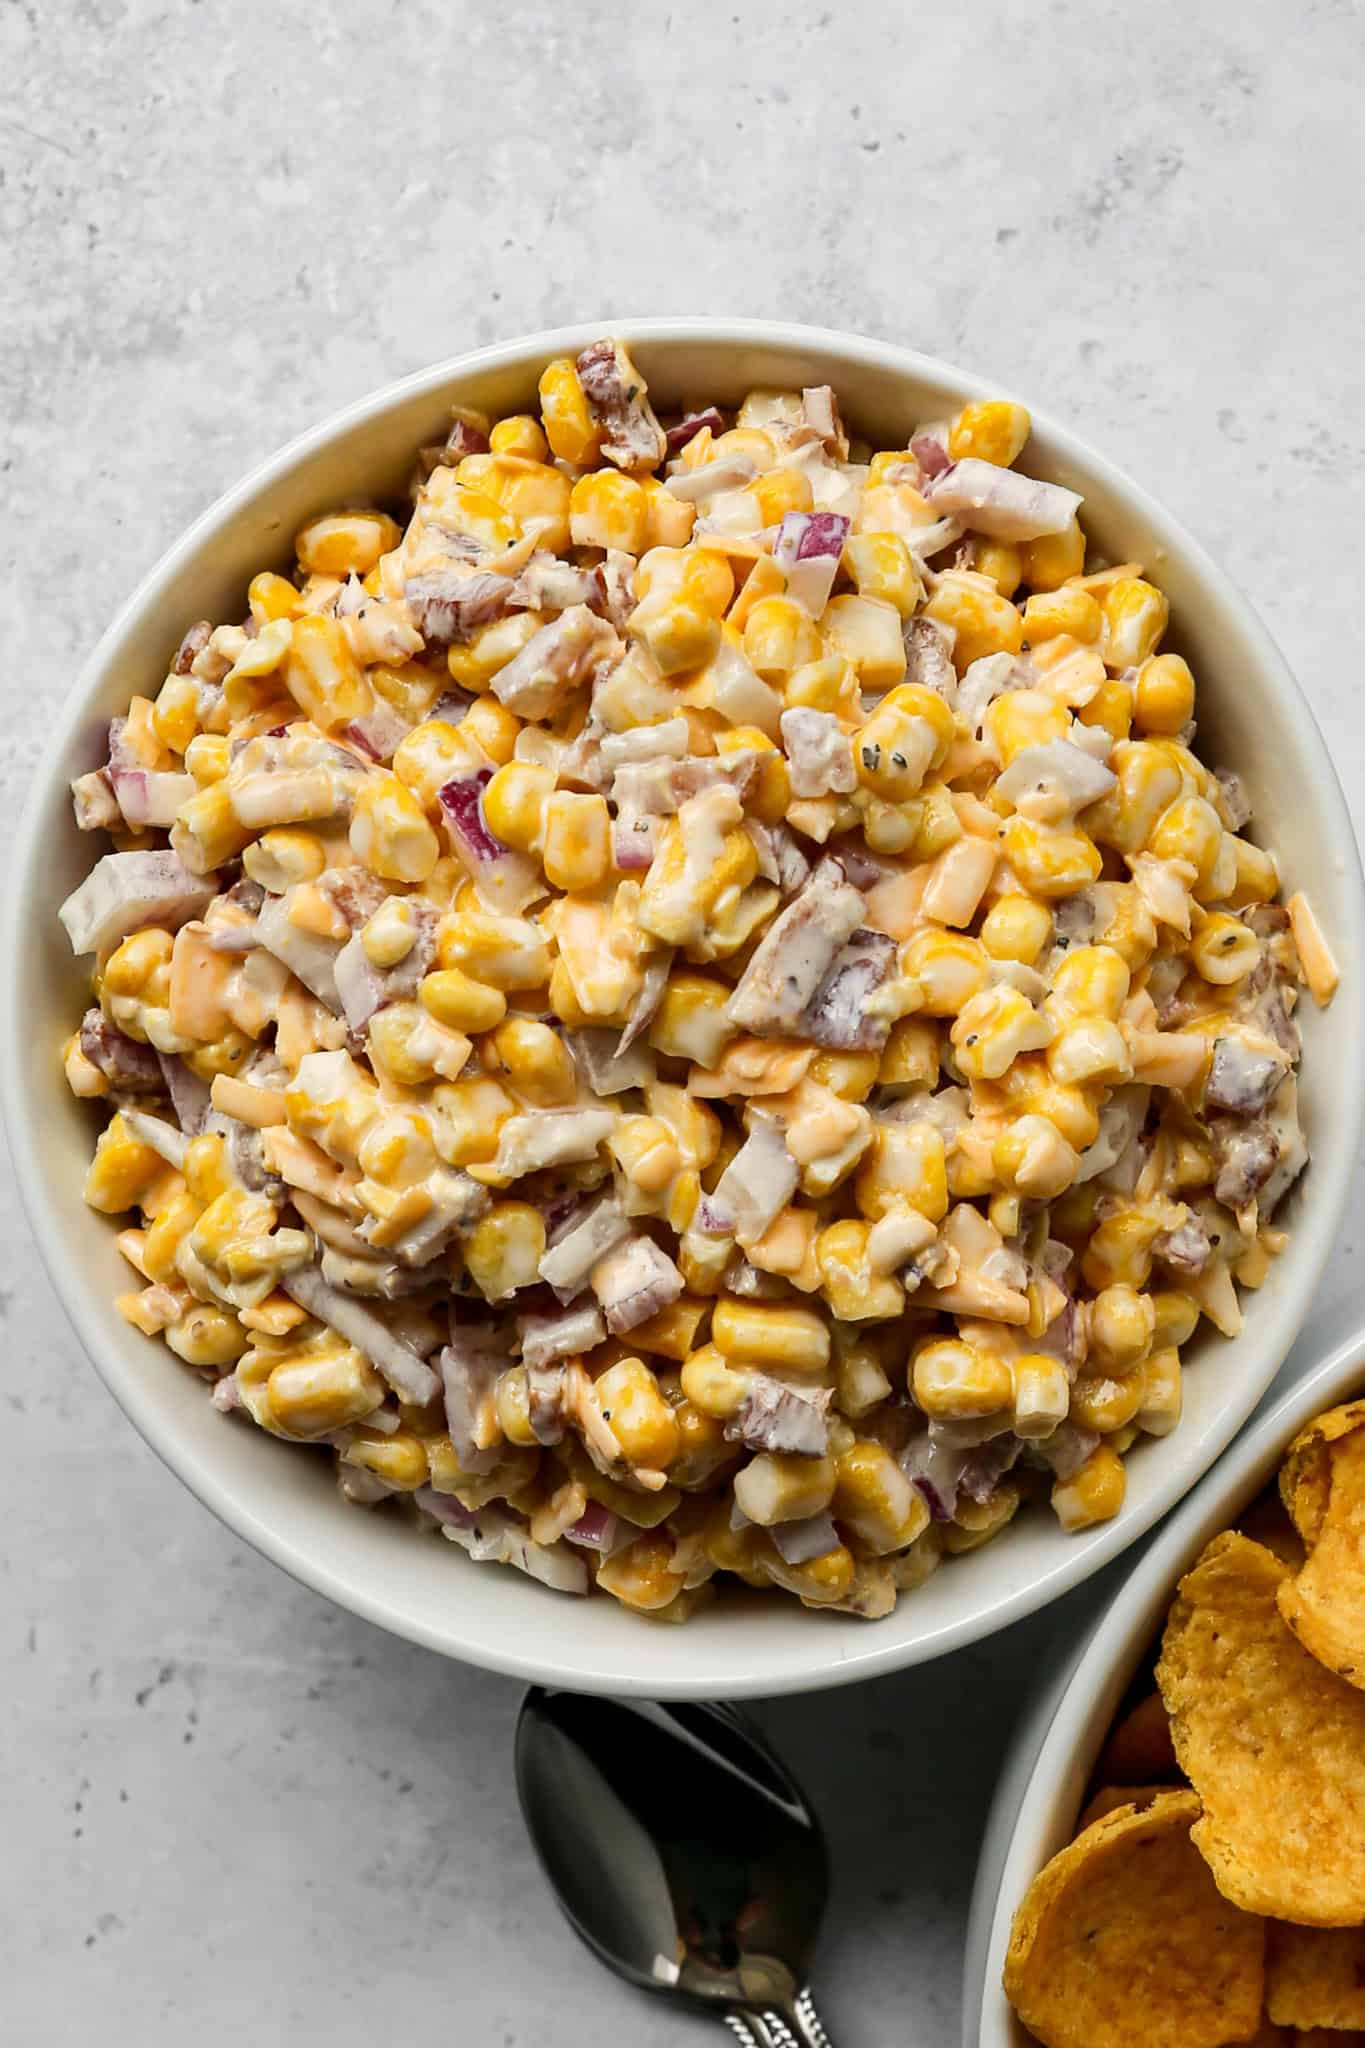
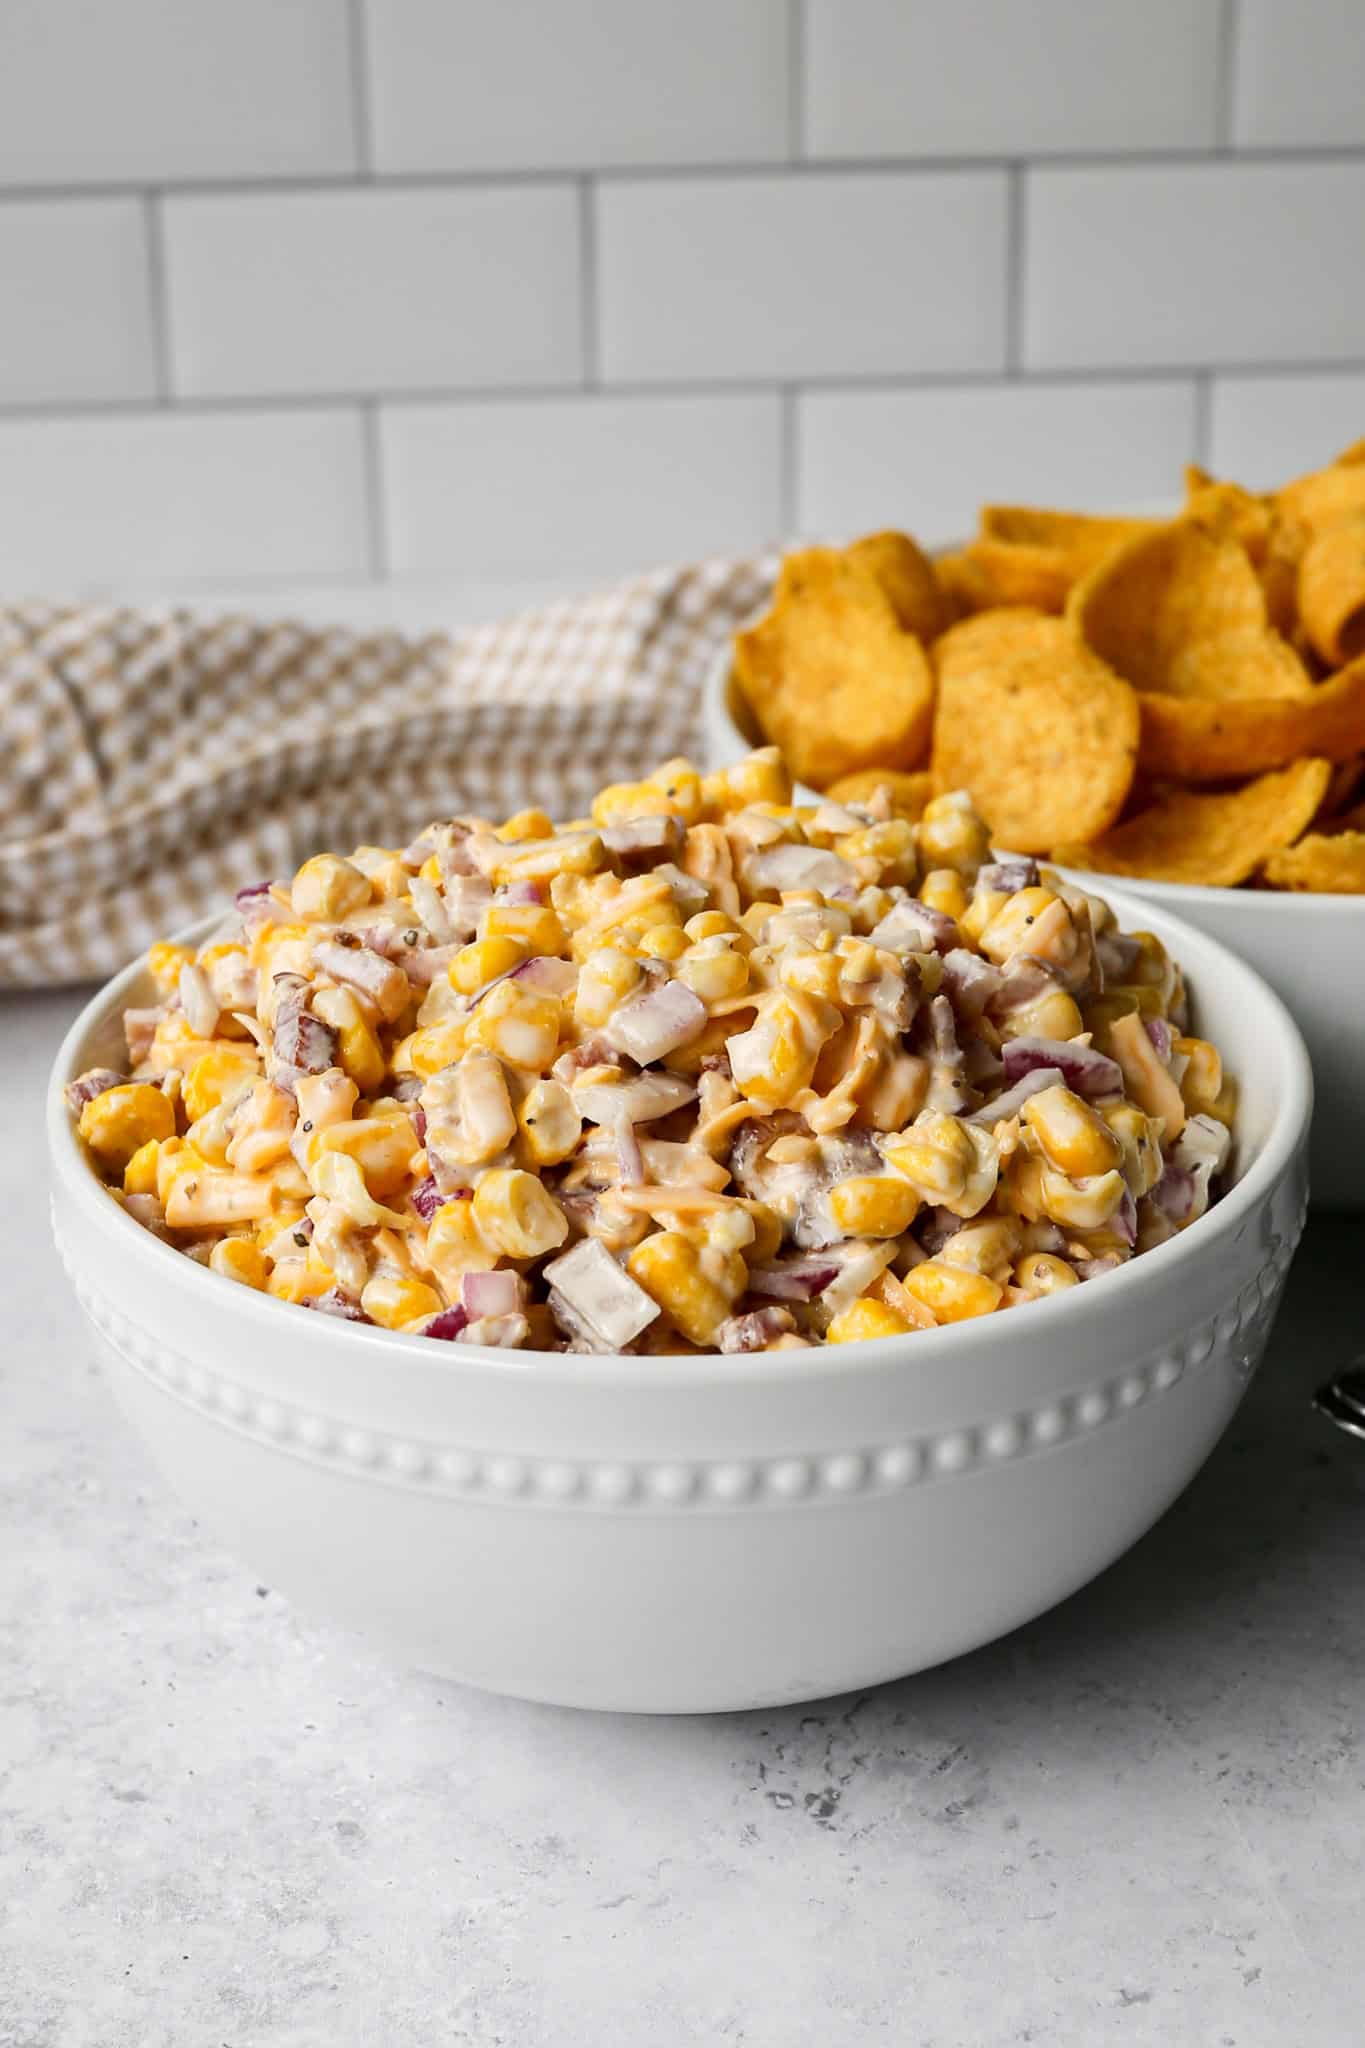
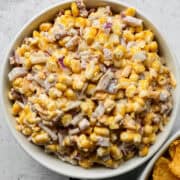
    a white bowl of gluten free corn salad with bacon next to a white bowl of corn chips.

    This recipe is made with canned corn which means it comes together in about ten minutes of hands on work and can be made completely ahead of time. In fact it gets better as it sits in the refrigerator, so making it the night before is not just convenient, it is the right move.

    The creamy dressing is a combination of mayonnaise and plain Greek yogurt which adds a protein boost and a lighter tang than sour cream without losing any of the richness.

    If you are looking for an easy make ahead side dish that works for everything from backyard barbecues to Fourth of July spreads, this is the one to make.

    If you are looking for more gluten free corn recipes try my Easy Fried Frozen Corn, my Cheesy Slow Cooker Creamed Corn, my Healthy Mexican Street Corn Salad or my Gluten Free Zucchini Squash and Corn Casserole.

    You can find all of my salad recipes here: Gluten Free Salad Recipes

    a white bowl of gluten free corn salad with bacon next to a white bowl of corn chips and a tan gingham kitchen towel
    [feast_advanced_jump_to]

    Canned vs Fresh vs Frozen Corn

    This recipe uses canned corn for maximum convenience and year round availability. Here is how each option compares.

    • Canned corn is the most convenient option and what this recipe is written for. Drain it well before adding to the salad to keep the dressing from becoming watery. Two 15 ounce cans give you the right amount for this recipe.
    • Fresh corn cut from the cob is a beautiful option during summer when corn is at its peak. You will need about four ears of fresh corn to replace the two cans. You can use it raw for a crisp fresh texture or quickly char it in a hot skillet for a slightly smoky flavor.
    • Frozen corn works well and is a great option when fresh corn is out of season. Thaw it completely and pat it dry with paper towels before adding to the salad to prevent excess moisture in the dressing.

    How to Cook Bacon for This Salad

    Crispy bacon makes all the difference in this recipe. Here is the easiest way to get perfectly crispy bacon every time.

    • Line a large baking sheet with aluminum foil and lay the bacon strips out in a single layer with no overlapping. Bake at 375 degrees for 25 to 30 minutes until the bacon is as crispy as you want it. The foil makes cleanup nearly effortless and the oven method gives you evenly cooked bacon without standing over a stovetop.
    • Let the bacon cool completely on the baking sheet before chopping it into small pieces. Chopping warm bacon can cause it to tear unevenly. Fully cooled bacon chops cleanly and stays crispy longer in the salad.
    • Cook your bacon the night before you plan to make this salad. Chopped cooked bacon stores well in an airtight container in the refrigerator for up to five days which makes it a great make ahead component.

    Serving Suggestions

    This salad works beautifully in two different ways depending on your occasion.

    • As a side salad serve it chilled alongside grilled burgers, grilled chicken, air fryer steak bites, or your Gluten Free Buttermilk Cornbread for a complete summer spread.
    • As a dip transfer it to a serving bowl and surround it with gluten free corn chips for scooping. This is the version that always generates the most conversation at a party because nobody expects a corn salad to double as one of the best dips on the table.
    • For a potluck or cookout make it the night before and transport it in a covered bowl. It holds up beautifully for several hours at room temperature and tastes even better after chilling overnight.

    Variations

    This recipe is easy to customize based on what you have on hand or what flavors you are in the mood for.

    • Add jalapeño. Finely dice one jalapeño and stir it into the salad for a subtle kick that pairs beautifully with the sweet corn and salty bacon.
    • Add green onions. Thinly sliced green onions add a fresh mild onion flavor that is slightly different from the red onion in the base recipe.
    • Swap the cheese. Pepper jack gives the salad a spicy kick. Monterey Jack gives it a milder and creamier flavor. Colby Jack is another great option.
    • Add black beans. One drained and rinsed can of black beans adds fiber and makes the salad more substantial as a standalone dish.

    Supplies

    Storage Instructions

    Store leftover corn salad in an airtight container in the refrigerator for up to four days. Stir before serving since the dressing may settle slightly as it sits. This salad does not freeze well since the mayonnaise and Greek yogurt dressing will separate after thawing.

    Top Tip

    Make this salad the night before you plan to serve it. The dressing absorbs into the corn and the flavors of the bacon, cheddar, and red onion meld together as the salad chills overnight. A freshly made corn salad is good but a salad that has rested in the refrigerator overnight is significantly better. This also makes it one of the most stress free dishes you can bring to a cookout since all the work is done the day before.

    Frequently Asked Questions

    Can I use fresh or frozen corn instead of canned corn?

    Yes, both work well in this recipe. For fresh corn you will need about four ears to replace the two cans. Cut the kernels off the cob and use them raw for a crisp texture or quickly char them in a hot skillet for a slightly smoky flavor. For frozen corn thaw it completely and pat it dry with paper towels before adding to the salad to prevent excess moisture in the dressing.

    Can I make this corn salad ahead of time?

    Yes and I strongly recommend it. This salad gets significantly better after chilling in the refrigerator overnight. The dressing absorbs into the corn and all the flavors meld together beautifully. Make it the night before your cookout or gathering and it will be ready to serve with no last minute work required.

    Can I use sour cream instead of Greek yogurt in the dressing?

    es. Sour cream is a one to one substitute for the Greek yogurt in this recipe and gives the dressing a slightly richer and more traditional flavor. Greek yogurt is my preference because it adds a protein boost and a lighter tang but either option produces a delicious creamy dressing.

    How long does corn salad with bacon last in the refrigerator?

    Store this salad in an airtight container in the refrigerator for up to four days. Stir before each serving since the dressing may settle slightly as it sits. This salad does not freeze well since the mayonnaise and Greek yogurt dressing will separate after thawing.

    Didn't find the answer you're looking for?

    Ask AI to answer based on this recipe:

    ChatGPT
    Google AI
    Perplexity
    Grok
    Claude

    More Recipes You Might Enjoy

    • Easy Fried Frozen Corn
    • Cheesy Slow Cooker Creamed Corn
    • Black Beans and Corn Salad
    • Healthy Mexican Street Corn Salad

    I get a lot of my ingredients from Thrive Market. Thrive Market has been a game changer for me eating gluten free. They have so many options I can't get at my rural grocery stores! Use this link to get 40% off your first order!

    Print
    clock clock iconcutlery cutlery iconflag flag iconfolder folder iconinstagram instagram iconpinterest pinterest iconfacebook facebook iconprint print iconsquares squares iconheart heart iconheart solid heart solid icon

    Gluten Free Corn Salad with Bacon


    5 Stars 4 Stars 3 Stars 2 Stars 1 Star

    No reviews

    • Author: Elaine VanVleck
    • Total Time: 40 minutes
    • Yield: 8 servings 1x
    • Diet: Gluten Free
    Print Recipe
    Pin Recipe

    Description

    Creamy gluten free corn salad made with canned corn, crispy bacon, cheddar cheese, red onion, and a tangy mayonnaise and Greek yogurt dressing. Serve it as a side salad or set it out as a dip with gluten free corn chips. The perfect make ahead summer side dish for cookouts, potlucks, and Fourth of July gatherings.


    Ingredients

    Scale
    • 2 - 15 ounce cans Whole Kernel Corn, drained
    • 6 slices Bacon, cooked and chopped
    • 1 small Red Onion, finely diced
    • 2 cups Cheddar Cheese, shredded
    • ½ cup Mayonnaise
    • ½ cup Plain Greek Yogurt
    • ½ tsp Salt
    • ½ tsp Black Pepper
    • Gluten Free Corn Chips, for serving

    Instructions

    Cook your bacon the day before so it is ready to chop up and use in the salad. I like to cook my bacon in the oven. I line a baking sheet with aluminum foil and then lay out the bacon in a single layer. I bake at 375 degrees for 25-30 minutes until the bacon get as crispy as I want it. Let the bacon cool completely and then chop it into small pieces. Set aside.

    Open and drain the canned corn using a colander.

    In a large mixing bowl add the cans of drained corn, chopped bacon, red onion, cheddar cheese, mayonnaise, greek yogurt, salt and pepper. Stir to combine.

    Cover the bowl and chill the salad in the refrigerator for at least 30 minutes before serving.

    Serve this salad on it's own or with gluten free corn chips for dipping.

    If you made this recipe please leave a star rating and comment below. It helps other readers find this recipe and means so much to me.

    • Prep Time: 10 minutes
    • Cook Time: 30 minutes
    • Category: Side Dish, Salads
    • Method: Mixing
    • Cuisine: American

    Did you make this recipe?

    Tag @smallfarmbiglife on Instagram and hashtag it #smallfarmbiglife

    If you make this Gluten Free Corn Salad with Bacon I would love to hear what you think! Leave a comment below and let me know how it turned out or tag me on Instagram so I can see your bowl.

    This is one of those recipes that works equally well as a side salad and a dip so save it to your favorite Pinterest board so you always have it ready for your next cookout, potluck, or summer gathering!

    Ingredients

    • Canned Whole Kernel Corn
    • Bacon
    • Red Onion
    • Cheddar Cheese
    • Mayonnaise
    • Plain Greek Yogurt
    • Salt
    • Black Pepper
    • Gluten Free Corn Chips

    Instructions

    Cook your bacon the day before so it is ready to chop up and use in the salad. I like to cook my bacon in the oven. I line a baking sheet with aluminum foil and then lay out the bacon in a single layer. I bake at 375 degrees for 25-30 minutes until the bacon get as crispy as I want it. Let the bacon cool completely and then chop it into small pieces. Set aside.

    Open and drain the canned corn using a colander.

    In a large mixing bowl add the cans of drained corn, chopped bacon, red onion, cheddar cheese, mayonnaise, greek yogurt, salt and pepper. Stir to combine.

    Cover the bowl and chill the salad in the refrigerator for at least 30 minutes before serving.

    Serve this salad on it's own or with gluten free corn chips for dipping.

    Gluten Free Buttermilk Cornbread

    Sometimes the simplest recipes are the best ones and this Gluten Free Buttermilk Cornbread is proof of that. It uses eight ingredients, one 8x8 pan, and takes about 30 minutes from start to finish. The buttermilk gives this cornbread a subtle tang and keeps the crumb incredibly moist and tender. The butter makes every bite rich and satisfying. And the touch of sugar gives it just the right amount of sweetness without tipping into dessert territory.

    This is the cornbread I make on repeat and it comes together so easily that I never reach for a boxed mix.

    a stack of four pieces of gluten free buttermilk cornbread on a cream plate next to a tan gingham kitchen towel

    What I love most about this recipe is how reliably it turns out. Gluten free baking can be unpredictable but this cornbread is consistently moist, golden, and perfectly textured every single time.

    I use Bob's Red Mill 1 to 1 Gluten Free Baking Flour or King Arthur Measure for Measure Gluten Free Flour and both work beautifully.

    Serve it warm alongside a bowl of chili, gluten free baked beans, or soup and watch it disappear before anything else on the table.

    If you are looking for more biscuit recipes try my Gluten Free Cornbread, my Gluten Free Buttermilk Drop Biscuits, my Gluten Free Millet Drop Biscuits or my Gluten Free Sweet Potato Biscuits.

    You can find all my bread recipes here: Gluten Free Bread Recipes

    a piece of gluten free buttermilk cornbread on a cream plate
    [feast_advanced_jump_to]

    Which Gluten Free Flour Works Best

    Not all gluten free flours behave the same way in cornbread. For this recipe you want a one to one gluten free flour blend that already contains xanthan gum so you do not need to add any extra binders.

    Bob's Red Mill 1 to 1 Gluten Free Baking Flour and King Arthur Measure for Measure Gluten Free Flour are both tested and approved for this recipe. Both produce a moist and tender cornbread with a beautiful golden top and a crumb that holds together when sliced.

    Why Cornmeal Matters

    Coarser cornmeal results in a very gritty cornbread that most people do not enjoy so the grind of your cornmeal makes a real difference in the finished texture. Use a fine or medium grind certified gluten free cornmeal for the best results. Coarse ground cornmeal and polenta style cornmeal will give you a grittier texture that does not bake up as smoothly.

    Why Buttermilk Makes Better Cornbread

    Buttermilk is not just a liquid in this recipe. It is doing important work. The acidity in buttermilk reacts with the baking soda to give the cornbread lift, making it light and fluffy rather than dense. It also adds moisture and a subtle tangy flavor that makes this cornbread taste more complex than its short ingredient list suggests.

    No buttermilk on hand? Make your own in two minutes. Add one tablespoon of white vinegar or lemon juice to a measuring cup and fill it to the one cup line with regular milk. Stir and let it sit for five minutes. It will thicken slightly and you can use it exactly as you would store bought buttermilk.

    Cornbread Muffin Variation

    This batter makes beautiful gluten free cornbread muffins. Line a standard 12 cup muffin tin with parchment liners or grease it well. Fill each cup about three quarters full and bake at 375 degrees for 12 to 15 minutes until a toothpick inserted in the center comes out clean. Muffins are a great option for portion control and freeze beautifully for quick weeknight sides.

    Serving Suggestions

    Warm gluten free buttermilk cornbread pairs beautifully with so many dishes.

    • With chili. This is the classic pairing and for good reason. The slightly sweet and buttery cornbread is the perfect contrast to a bowl of hearty spiced chili.
    • With gluten free baked beans. Serve warm cornbread alongside my Gluten Free Baked Beans with Ground Beef for a complete and satisfying comfort food meal.
    • With soup. A warm slice of cornbread alongside a bowl of soup is one of the easiest and most satisfying weeknight dinners.
    • With honey butter. Serve warm slices with softened butter mixed with a little honey for the most simple and delicious side dish.
    • For breakfast. Leftover cornbread warmed up with butter and a drizzle of honey makes a wonderful quick breakfast the next morning.

    Storage Instructions

    Store leftover cornbread in an airtight container at room temperature for up to two days or in the refrigerator for up to five days. To freeze, wrap individual slices in foil and store in a freezer safe bag for up to three months. Defrost at room temperature or warm in a 350 degree oven for five to ten minutes until heated through.

    Top Tip

    Do not over mix the batter. Once you add the dry ingredients to the wet ingredients stir just until everything is combined. The batter will have some lumps and will not be completely smooth and that is exactly right. Over mixing activates the gluten free flour too much and produces a dense and tough cornbread instead of a light and tender one.

    Frequently Asked Questions

    Can I make gluten free cornbread without buttermilk?

    Yes. Make your own buttermilk substitute in two minutes by adding one tablespoon of white vinegar or lemon juice to a measuring cup and filling it to the one cup line with regular milk. Stir and let it sit for five minutes until it thickens slightly. Use it exactly as you would store bought buttermilk in this recipe.

    Can I make gluten free cornbread muffins with this recipe?

    Yes. Line a standard 12 cup muffin tin with parchment liners or grease it well. Fill each cup about three quarters full and bake at 375 degrees for 12 to 15 minutes until a toothpick inserted in the center comes out clean. Muffins freeze beautifully and are great for quick weeknight sides.

    Which gluten free flour works best for cornbread?

    Use a one to one gluten free flour blend that already contains xanthan gum. Bob's Red Mill 1 to 1 Gluten Free Baking Flour and King Arthur Measure for Measure Gluten Free Flour are both tested and work beautifully in this recipe. Avoid flour blends that contain bean flour since those can produce a gritty or off flavored result.

    Can I freeze gluten free cornbread?

    Yes. Wrap individual slices in foil and store in a freezer safe bag for up to three months. Defrost at room temperature or warm in a 350 degree oven for five to ten minutes until heated through. Frozen and reheated cornbread tastes just as good as fresh baked.

    Didn't find the answer you're looking for?

    Ask AI to answer based on this recipe:

    ChatGPT
    Google AI
    Perplexity
    Grok
    Claude

    Supplies


    More Recipes You Might Enjoy

    • Gluten Free Cornbread
    • Gluten Free Cornbread Stuffing
    • Easy Gluten Free Bread Recipes
    • Gluten Free Buttermilk Drop Biscuits

    I get a lot of my ingredients from Thrive Market. Thrive Market has been a game changer for me eating gluten free. They have so many options I can't get at my rural grocery stores! Use this link to get 40% off your first order!

    Print
    clock clock iconcutlery cutlery iconflag flag iconfolder folder iconinstagram instagram iconpinterest pinterest iconfacebook facebook iconprint print iconsquares squares iconheart heart iconheart solid heart solid icon

    Gluten Free Buttermilk Cornbread


    5 Stars 4 Stars 3 Stars 2 Stars 1 Star

    No reviews

    • Author: Elaine VanVleck
    • Total Time: 30 minutes
    • Yield: 12 pieces 1x
    • Diet: Gluten Free
    Print Recipe
    Pin Recipe

    Description

    A moist and tender gluten free buttermilk cornbread made with Bob's Red Mill 1 to 1 or King Arthur Measure for Measure Gluten Free Flour, gluten free cornmeal, real butter, and buttermilk. Lightly sweetened and ready in about 30 minutes. The perfect side dish for chili, soup, and baked beans.


    Ingredients

    Scale
    • 1 cup Gluten Free Flour
    • 1 cup Gluten Free Cornmeal
    • ½ tsp Baking Soda
    • ½ tsp Salt
    • ¼ cup Granulated Sugar
    • ½ cup Butter, melted
    • 2 Eggs
    • 1 cup Buttermilk

    Instructions

    Preheat your oven to 375 degrees. Grease a 8x8 baking pan with coconut oil or butter. Set aside.

    In the bowl of your stand mixer add the melted butter and sugar. Blend until combined. Add the eggs and blend just until combined.

    Add the buttermilk, gluten free flour, gluten free cornmeal, baking soda and salt. Blend just until combined. Don't over mix. The batter may have some lumps and will not be completely smooth.

    Pour the batter into the greased 8x8 baking dish and spread out evenly.

    Bake at 375 degrees for 20-25 minutes or until the top starts to brown and a toothpick inserted in the center comes out clean.

    Let cool before slicing and serving.

    If you made this recipe please leave a star rating and comment below. It helps other readers find this recipe and means so much to me.

    Notes

    If you can't find buttermilk you can use this buttermilk powder to make buttermilk for the recipe.

    • Prep Time: 10 minutes
    • Cook Time: 20 minutes
    • Category: Breads, Side Dishes
    • Method: Baking
    • Cuisine: American

    Did you make this recipe?

    Tag @smallfarmbiglife on Instagram and hashtag it #smallfarmbiglife

    If you make this Gluten Free Buttermilk Cornbread I would love to hear what you think! Leave a comment below and let me know how it turned out or tag me on Instagram so I can see your pan.

    This is one of those easy gluten free side dishes that goes with everything so save it to your favorite Pinterest board so you always have it ready for your next bowl of chili, baked beans, or soup!

    Ingredients

    • Gluten Free Flour
    • Gluten Free Cornmeal
    • Baking Soda
    • Salt
    • Granulated Sugar
    • Butter
    • Eggs
    • Buttermilk

    Instructions

    Preheat your oven to 375 degrees. Grease a 8x8 baking pan with coconut oil or butter. Set aside.

    In the bowl of your stand mixer add the melted butter and sugar. Blend until combined. Add the eggs and blend just until combined.

    Add the buttermilk, gluten free flour, gluten free cornmeal, baking soda and salt. Blend just until combined. Don't over mix. The batter may have some lumps and will not be completely smooth.

    Pour the batter into the greased 8x8 baking dish and spread out evenly.

    Bake at 375 degrees for 20-25 minutes or until the top starts to brown and a toothpick inserted in the center comes out clean.

    Let cool before slicing and serving.

    Gluten Free High Protein Dill Pickle Pasta Salad

    If you love dill pickles, this is the pasta salad you have been waiting for. This Gluten Free High Protein Dill Pickle Pasta Salad is loaded with chopped dill pickles, fresh dill, cheddar cheese cubes, and a creamy tangy dressing made with both mayonnaise and Greek yogurt. The dill pickle juice goes right into the dressing for the most bold and briny flavor in every single bite.

    Make it the night before and let it chill overnight for the best flavor of all.

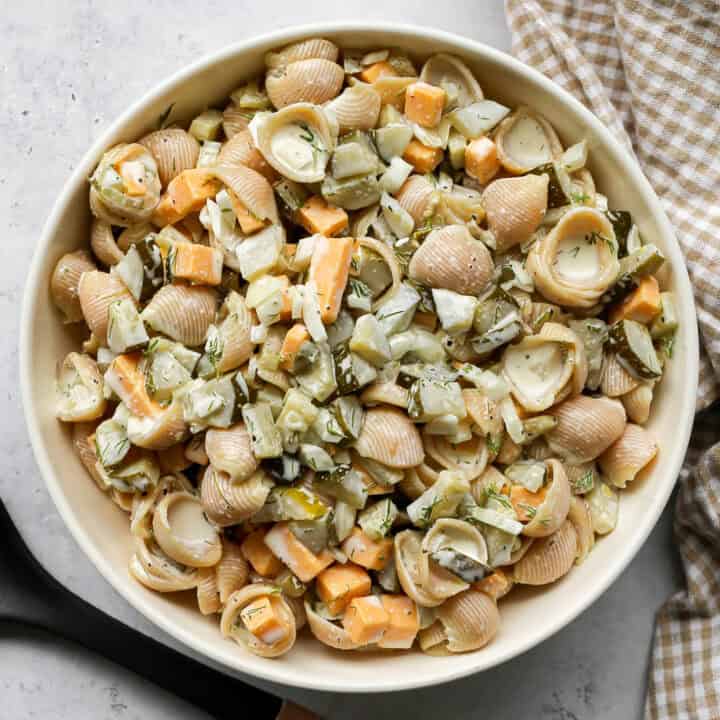
    a cream serving bowl of gluten free dill pickle pasta salad next to a black serving spoon and tan gingham kitchen towel

    What makes this version stand apart is the pasta. I use high protein chickpea shell pasta which packs in significantly more protein per serving than regular gluten free pasta and holds up beautifully in pasta salads without getting mushy.

    If you prefer a more traditional texture, gluten free brown rice shell pasta works just as well.

    Either way this salad is creamy, crunchy, tangy, and one of the best make ahead side dishes you can bring to a summer cookout, potluck, or Fourth of July gathering.

    If you're looking for more gluten free cold pasta salad recipes try my Gluten Free High Protein Deviled Egg Pasta Salad, my Gluten Free Lime Cilantro Pasta Salad, my Easy Gluten Free Bow Tie Pasta Salad or my Easy Gluten Free Macaroni Salad.

    You can find all of my salad recipes here: Gluten Free Salad Recipes

    a cream serving bowl of gluten free dill pickle pasta salad next to a black serving spoon and tan gingham kitchen towel
    [feast_advanced_jump_to]

    Why Chickpea Pasta Makes This High Protein

    Not all gluten free pasta is created equal when it comes to protein. Regular gluten free pasta made from rice or corn has very little protein per serving. Chickpea pasta changes that significantly.

    A serving of gluten free chickpea shell pasta has roughly twice the protein of regular gluten free pasta. It also has more fiber which helps you feel full longer. The flavor is mild and slightly nutty and it holds its shape beautifully in pasta salads without turning mushy overnight.

    If you want a more traditional pasta salad texture and flavor, gluten free brown rice shell pasta works equally well in this recipe. The protein content will be lower but the salad will still be delicious.

    Why Shell Pasta Works Best

    Shell pasta is the best shape for this salad because the curved shell shape scoops up the creamy dressing inside each piece so you get a little pocket of flavor in every bite. The shells are also similar in size to the chopped pickle pieces and cubed cheddar which means you get pasta, pickle, cheddar and dressing in every single forkful.

    Rotini and elbow macaroni are the next best options if you cannot find shell pasta in a gluten free or high protein version.

    Cheddar Cubes vs Shredded Cheese

    This recipe calls for cheddar cheese cut into small cubes rather than shredded and the difference matters. Shredded cheddar tends to clump together and dissolve into the dressing as the salad sits in the refrigerator. Cubed cheddar holds its shape, stays firm, and gives you a satisfying cheesy bite in every forkful even after the salad has been chilling overnight.

    Cut your cheddar into small quarter inch cubes so they are easy to scoop up with the pasta on a fork.

    Greek Yogurt vs Sour Cream

    This recipe gives you the option of using either plain Greek yogurt or sour cream in the dressing and both work well. Here is how they compare.

    • Greek yogurt gives the dressing a slightly tangier flavor and adds a meaningful protein boost to each serving. It is a little lighter than sour cream and blends beautifully with the mayonnaise for a creamy finish.
    • Sour cream gives the dressing a richer and more traditional pasta salad flavor. It is slightly thicker than Greek yogurt and produces a creamier and more indulgent dressing.
    • I use Greek yogurt in this recipe to keep the protein content high but sour cream is a great option if you want a more classic flavor.

    Make Ahead Instructions

    This salad gets significantly better as it sits. The pasta absorbs the dressing, the pickle flavor deepens, and everything comes together in a way that a freshly made salad simply cannot replicate.

    Make it the night before you plan to serve it and refrigerate it overnight. Give it a good stir before serving. If the dressing has been absorbed and the salad looks a little dry add a small spoonful of mayonnaise and a splash of pickle juice and stir to refresh it.

    Serving Suggestions

    This pasta salad is a natural companion to anything coming off the grill.

    • With burgers. The tangy pickle flavor pairs perfectly with a juicy burger and makes this the ideal cookout side dish.
    • With grilled chicken. Serve alongside grilled lemon garlic chicken thighs or air fryer chicken for a complete and satisfying summer meal.
    • At a potluck or cookout. This salad travels well and can be made completely ahead of time. It holds up beautifully in the refrigerator for the whole event.
    • For Fourth of July. A must make for your holiday spread. The make ahead nature makes it perfect for entertaining.
    • As a meal prep lunch. Portion into individual containers on Sunday and enjoy as a protein packed lunch all week long.

    Storage

    Store leftover dill pickle pasta salad in an airtight container in the refrigerator for up to four days. The pasta will absorb some of the dressing as it sits so give it a good stir before serving each time. If it looks a little dry add a small spoonful of mayonnaise and a splash of dill pickle juice and stir to refresh the dressing. Do not freeze this salad as the pasta and dressing do not hold up well after thawing.

    Top Tip

    Do not skip the overnight chill. This pasta salad is good after 30 minutes in the refrigerator but it is absolutely incredible the next day. The pasta absorbs the dill pickle dressing, the flavors meld together, and the pickle flavor deepens into every bite. Make it the night before your cookout or gathering and thank yourself later.

    Frequently Asked Questions

    Can I make this dill pickle pasta salad ahead of time?

    Yes and I strongly recommend it. Make it the night before and refrigerate it overnight. The pasta absorbs the dressing and the pickle flavor deepens significantly as it chills. Give it a good stir before serving and add a splash of pickle juice if it needs refreshing.

    Can I use regular gluten free pasta instead of chickpea pasta?

    Yes. Gluten free brown rice shell pasta works beautifully in this recipe. The texture and flavor of the salad will still be delicious. Keep in mind that the protein content will be lower since chickpea pasta has roughly twice the protein of regular gluten free pasta.

    What type of pickles work best in this recipe?

    Use dill pickles only. Sweet pickles and bread and butter pickles are too sweet for this salad and will change the flavor significantly. Baby dill pickles, kosher dill pickles, and homemade refrigerator dill pickles all work beautifully. Whatever dill pickle you love eating straight from the jar is the right one for this recipe.

    How long does dill pickle pasta salad last in the refrigerator?

    Store in an airtight container in the refrigerator for up to four days. The pasta will absorb some of the dressing as it sits so stir before each serving and add a small spoonful of mayonnaise and a splash of pickle juice if the salad needs refreshing.

    Didn't find the answer you're looking for?

    Ask AI to answer based on this recipe:

    ChatGPT
    Google AI
    Perplexity
    Grok
    Claude

    Supplies


    More Recipes You Might Enjoy

    • Easy Gluten Free Macaroni Salad
    • Gluten Free Lime Cilantro Pasta Salad
    • Easy Gluten Free Bow Tie Pasta Salad
    • Gluten Free High Protein Deviled Egg Pasta Salad

    I get a lot of my ingredients from Thrive Market. Thrive Market has been a game changer for me eating gluten free. They have so many options I can't get at my rural grocery stores! Use this link to get 40% off your first order!
    Print
    clock clock iconcutlery cutlery iconflag flag iconfolder folder iconinstagram instagram iconpinterest pinterest iconfacebook facebook iconprint print iconsquares squares iconheart heart iconheart solid heart solid icon

    Gluten Free Dill Pickle Pasta Salad


    5 Stars 4 Stars 3 Stars 2 Stars 1 Star

    No reviews

    • Author: Elaine VanVleck
    • Total Time: 25 minutes
    • Yield: 8 servings 1x
    • Diet: Gluten Free
    Print Recipe
    Pin Recipe

    Description

    Gluten free chickpea shell pasta tossed with chopped dill pickles, fresh dill, cheddar cheese cubes, and a creamy tangy dressing made with mayonnaise, Greek yogurt, and dill pickle juice. This high protein gluten free dill pickle pasta salad is a make ahead summer side dish perfect for cookouts, potlucks, and Fourth of July gatherings.


    Ingredients

    Scale
    • 8 ounce box High Protein Shell Pasta or 12 ounce Gluten Free Brown Rice Shell Pasta
    • 1 cup Dill Pickles, chopped
    • 1 cup Cheddar Cheese, cut into small cubes
    • ½ Yellow Onion, finely diced
    • 2 Tbsp Fresh Dill, minced
    • 2 Tbsp Dill Pickle Juice
    • ½ cup Mayonnaise
    • ½ cup Full Fat Plain Greek Yogurt or Sour Cream
    • 1 tsp Salt
    • ½ tsp Garlic Powder
    • ½ tsp Black Pepper

    Instructions

    Cook the pasta per the instructions on the package. Drain and rinse under cold water until cool. Pour into a large mixing bowl.

    Add the chopped pickles, cheddar cheese cubes, onion, dill, dill pickle juice, mayonnaise, yogurt, salt and pepper to the mixing bowl. Stir to combine.

    Chill in the refrigerator for at least 30 minutes before serving. I like this salad best the next day, so if you can make it the day before you want to serve it.

    If you made this recipe please leave a star rating and comment below. It helps other readers find this recipe and means so much to me.

    • Prep Time: 15 minutes
    • Cook Time: 10 minutes
    • Category: Side Dish, Salads
    • Method: Mixing
    • Cuisine: American

    Did you make this recipe?

    Tag @smallfarmbiglife on Instagram and hashtag it #smallfarmbiglife

    If you make this Gluten Free High Protein Dill Pickle Pasta Salad I would love to hear what you think! Leave a comment below and let me know how it turned out or tag me on Instagram so I can see your bowl.

    This is one of those summer pasta salads that earns a permanent spot in your cookout rotation so save it to your favorite Pinterest board so you always have it ready for your next potluck or Fourth of July gathering!

    Ingredients

    • Gluten Free High Protein Shell Pasta or Gluten Free Brown Rice Shell Pasta
    • Dill Pickles
    • Cheddar Cheese
    • Yellow Onion
    • Fresh Dill
    • Dill Pickle Juice
    • Mayonnaise
    • Full Fat Plain Greek Yogurt or Sour Cream
    • Salt
    • Garlic Powder
    • Black Pepper

    Instructions

    Cook the pasta per the instructions on the package. Drain and rinse under cold water until cool. Pour into a large mixing bowl.

    Add the chopped pickles, cheddar cheese cubes, onion, dill, dill pickle juice, mayonnaise, yogurt, salt and pepper to the mixing bowl. Stir to combine.

    Chill in the refrigerator for at least 30 minutes before serving. I like this salad best the next day, so if you can make it the day before you want to serve it.

    • 1
    • 2
    • 3
    • …
    • 30
    • Next Page »

    Welcome! I'm Elaine

    I'm so glad you are here! I share easy gluten free recipes from my small farm in Washington.

    Be sure to sign up for my newsletter to stay up to date on all of my new recipes.

    More about me...
    • Instagram
    • Pinterest
    • Facebook
    • Twitter
    • Mail

    Load up on new recipes, exclusive goodies, + more!
    Sign up below to stay up-to-date on news, events, and special deals.
    Thank you for subscribing!

    Easy Meals Recipes

    • Gluten Free Instant Pot Chili Mac and Cheese
    • Gluten Free Taco Casserole
    • Gluten Free Cowboy Baked Beans
    • Gluten Free Walking Taco Casserole
    • Gluten Free Creamy Beef and Mushroom Pasta
    • Gluten Free Instant Pot Chicken & Dumplings
    • Instant Pot Mexican Style Beef and Rice
    • Gluten Free Chicken Parmesan Pasta Casserole
    • Gluten Free One Pot Hamburger Helper Copycat
    • Gluten Free Salisbury Steak with Mushroom Gravy
    • Gluten Free Air Fryer Fajitas
    • Gluten Free Sloppy Joe Casserole

    Footer

    back to top

    About

    • Privacy Policy
    • Shop my Amazon Page
    • Follow me on LTK

    Newsletter

    • Sign Up! for emails and updates

    Contact

    • Contact
    • Media Kit
    • About Me

    As an Amazon Associate I earn from qualifying purchases.

    I may get commissions for purchases made through links on this site.

    Copyright © 2026 Brunch Pro on the Brunch Pro Theme