Small Farm Big Life

  • Gluten Free Recipe Index
  • Subscribe
  • Resources
menu icon
go to homepage
  • Home
  • Gluten Free Recipe Index
  • Subscribe
  • My Story
  • Resources
  • Free Guides
    • Email
    • Facebook
    • Instagram
    • Pinterest
  • subscribe
    search icon
    Homepage link
    • Home
    • Gluten Free Recipe Index
    • Subscribe
    • My Story
    • Resources
    • Free Guides
    • Email
    • Facebook
    • Instagram
    • Pinterest
  • ×

    Gluten Free Pie Crust

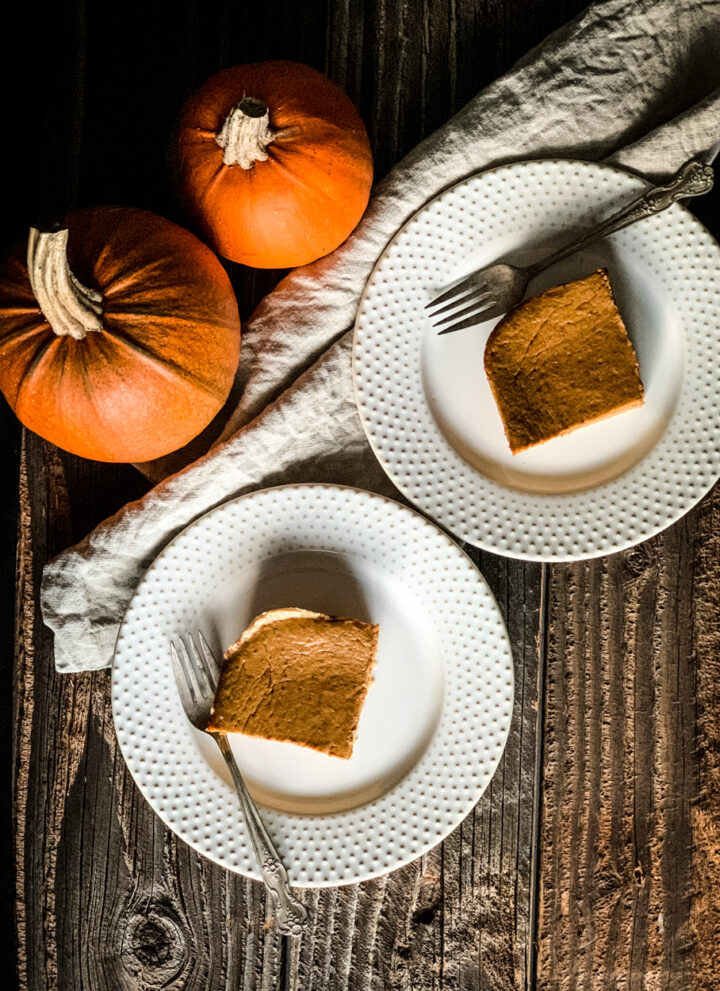
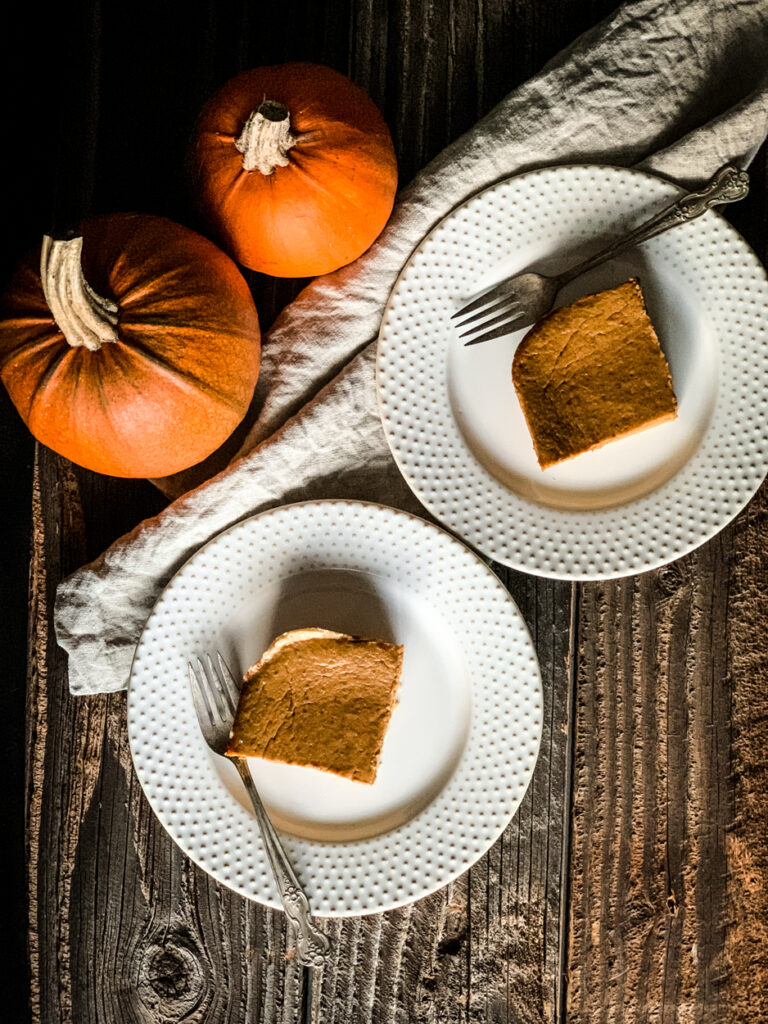
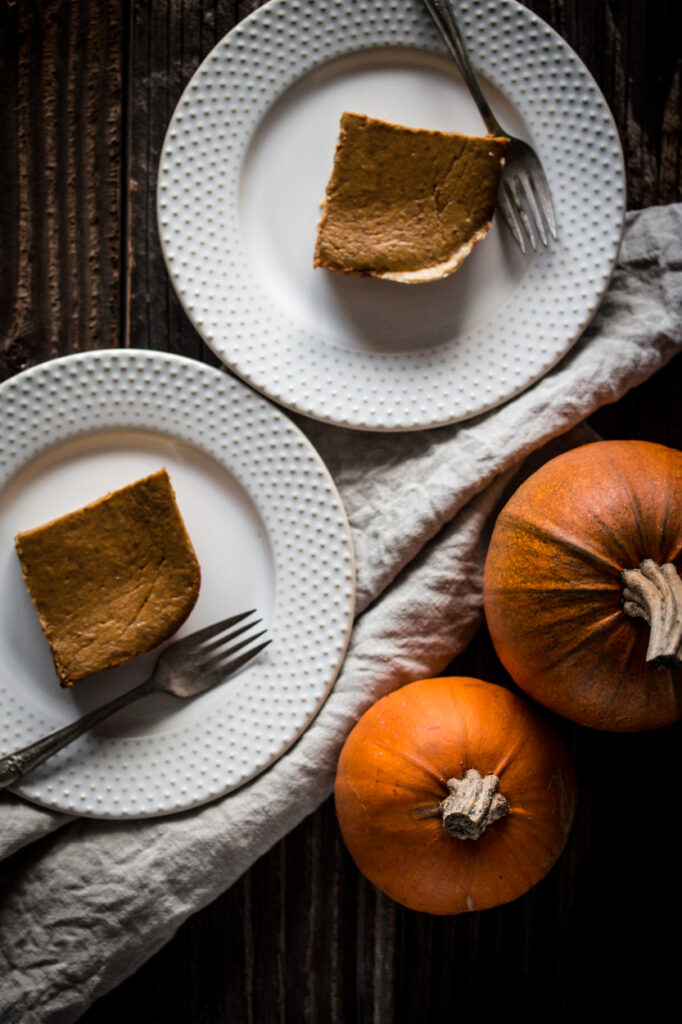
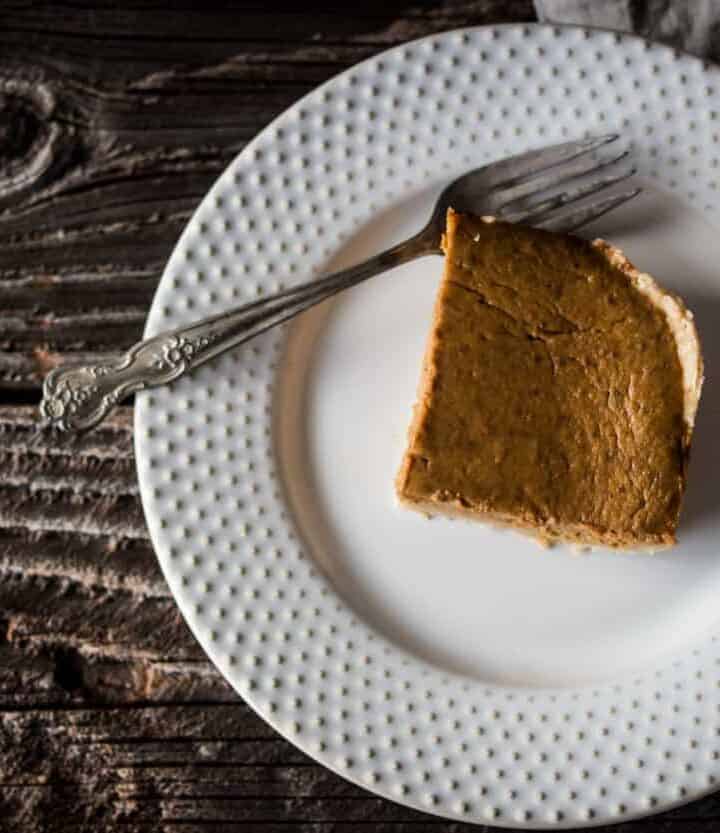
    a slice of pumpkin pie using gluten free pie crust on a plate

    This gluten free pie crust recipe is really easy to make. I walk you through the steps of how to make the best gluten free pie crust. It is simple to make in the food processor and to roll out between parchment paper or hand press into your pan.

    I love pies, but I'm not always a fan of making my own pie crust. However, this pie crust is very easy to make and then I decide if I want to press the crust into a 9x13 pan or roll it out between parchment paper for a 9 inch pie plate.

    Why is my gluten free pie crust crumbly?

    If your pie crust is too crumbly to work with you didn't add enough water. Place the dough back into the food processor and add a tablespoon or two more of water. There should be a dough ball in your food processor when you've added enough water.

    If the pie crust is sticking to your hands rub some gluten free flour onto the dough ball and your hands.

    Can gluten free pie crust be frozen?

    Yes! You can make the dough ahead of time and freeze it. You can either place the dough into a sealed container or you can roll the dough out and place it in your pie plates and freeze the dough in the pie plate.

    Take the dough or pie plates our and let them thaw completely before using them. I would suggest taking them out and placing them in the fridge the day before you need them.

    If you like this recipe, you might also enjoy:

    Gluten Free Pumpkin Cake with Cream Cheese Frosting
    Gluten Free Lemon Bars

    I get my baking supplies from Thrive Market. Thrive Market has been a game changer for me eating gluten free. They have so many options I can't get at my rural grocery stores!

    Print
    clock clock iconcutlery cutlery iconflag flag iconfolder folder iconinstagram instagram iconpinterest pinterest iconfacebook facebook iconprint print iconsquares squares iconheart heart iconheart solid heart solid icon

    Gluten Free Pie Crust


    5 Stars 4 Stars 3 Stars 2 Stars 1 Star

    No reviews

    • Author: Elaine VanVleck
    • Total Time: 30 minutes
    • Yield: 2 - 9 inch 1x
    • Diet: Gluten Free
    Print Recipe
    Pin Recipe

    Description

    This gluten free pie crust recipe is really easy to make. I walk you through the steps of how to make the best gluten free pie crust. It is simple to make in the food processor and to roll out between parchment paper or hand press into your pan.


    Ingredients

    Scale

    2 cups Gluten Free Flour
    ½ cup Unsalted Butter, cubed
    1 large Egg
    6-8 tablespoon Water
    ½ tsp. Sea Salt
    2 tsp. Granulated Sugar


    Instructions

    Preheat your oven to 400 degrees.

    In your 6 or 8 cup food processor place the flour, cubed butter, egg, sea salt and sugar. Run the food processor on high until a crumbly mixture forms.

    Add the water 2 tablespoons at a time while the food processor is running on low until a dough ball forms. If you add too much water and the dough is sticky add a couple of tablespoons of gluten free flour.

    If you are using a 9x13 pan place the dough into the greased pan and press out evenly with your hands. If you want two 9 inch pie crusts, divide the dough and roll each disc out between two sheets of parchment paper. Prick the dough with a fork and place pie beads or beans onto the pie crust to keep it from rising.

    Bake at 400 degrees for 15 to 20 minutes. The pie crust will be lightly browned. Let the crust cool slightly before placing your pie ingredients in and cooking according to the pie recipe's directions.

    • Prep Time: 10 minutes
    • Cook Time: 20 minutes
    • Category: Dessert
    • Method: Baking
    • Cuisine: Gluten Free

    Did you make this recipe?

    Tag @smallfarmbiglife on Instagram and hashtag it #smallfarmbiglife

    Gluten Free Cornbread

    This easy gluten free cornbread is one of those recipes that belongs in every gluten free kitchen and once you make it from scratch you will never go back to a box mix. Made with gluten free cornmeal and gluten free flour, this homemade cornbread bakes up perfectly golden on the edges with a soft and tender center that is slightly sweet and absolutely delicious.

    It comes together in just 40 minutes with simple everyday ingredients and a 9x13 baking dish which means you get 15 generous squares of the best gluten free cornbread you have ever tasted.

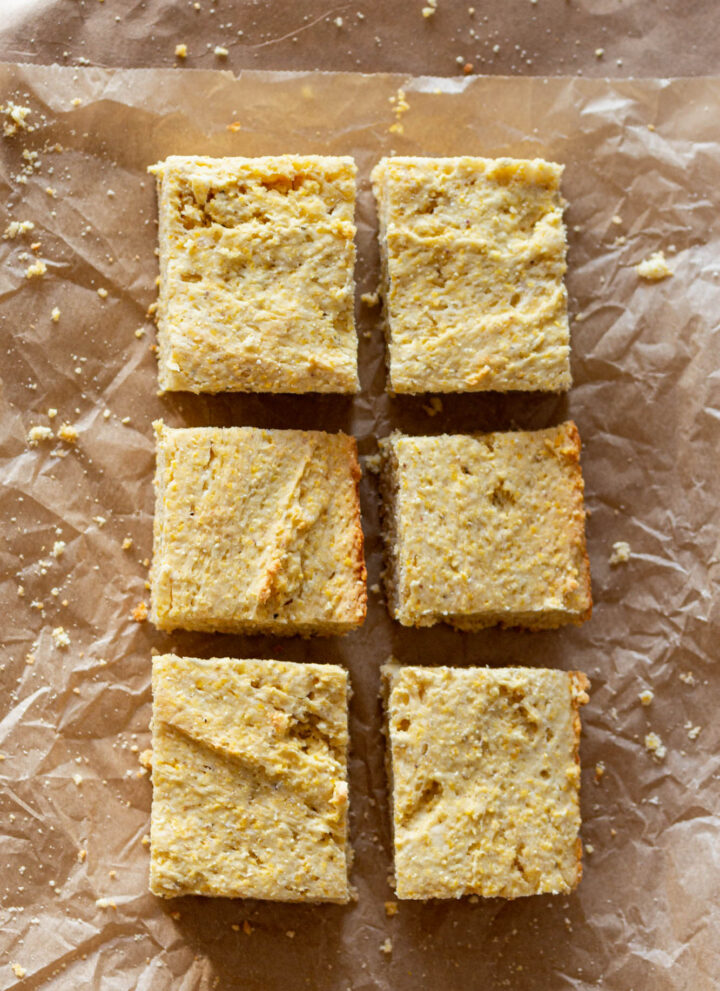
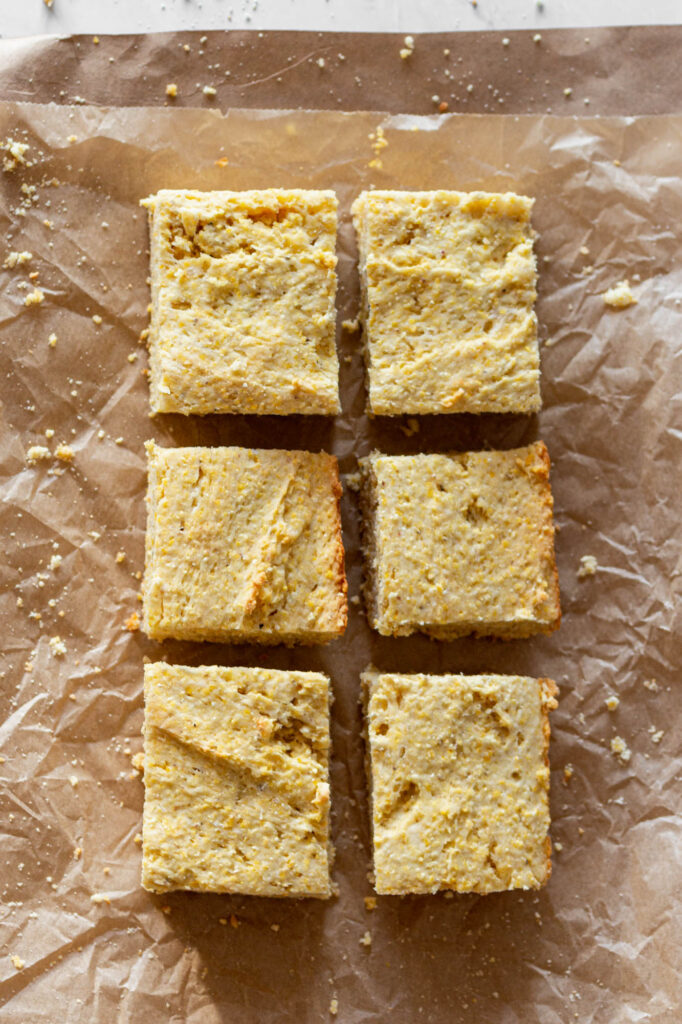
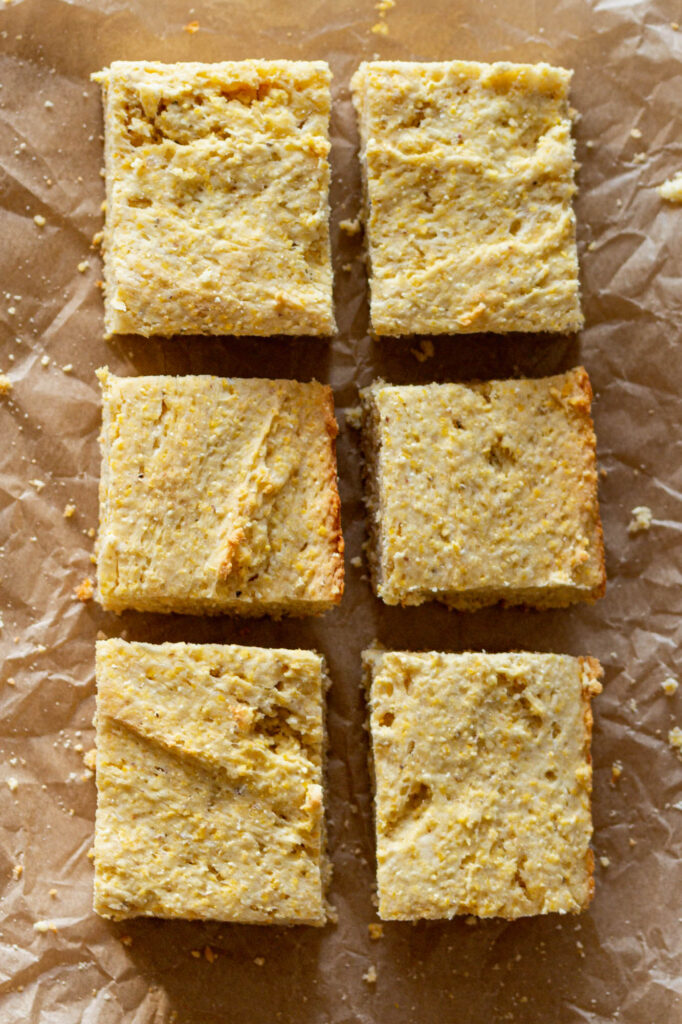
    six cornbread squares on natural parchment paper with crumbs around them

    This gluten free cornbread recipe is incredibly versatile and works for so many different occasions. It is the perfect side dish for a cozy bowl of gluten free chili on a weeknight, a crowd pleasing addition to a holiday dinner table at Thanksgiving or Christmas. It's an absolute must make alongside my Gluten Free Cowboy Baked Beans at a summer BBQ.

    I love serving it straight out of the oven with a generous pat of butter melting right into the top and a drizzle of honey for a little extra sweetness.

    You can also use leftover squares to make my Gluten Free Cornbread Stuffing which is one of my favorite things to do with any cornbread that does not get eaten the first day.

    If you are looking for more biscuits and bread recipes try my Gluten Free Buttermilk Drop Biscuits, my Gluten Free Sweet Potato Biscuits, my Gluten Free Millet Drop Biscuits or my Gluten Free Sourdough Bread.

    You can find all of my side dish recipes here: Gluten Free Side Dishes Recipes

    six cornbread squares on natural parchment paper with crumbs around them
    [feast_advanced_jump_to]

    Ingredients

    • Unsalted Butter
    • Milk
    • Eggs
    • Gluten Free Cornmeal
    • Gluten Free Flour
    • Granulated Sugar
    • Baking Powder
    • Sea Salt

    Instructions

    Preheat your oven to 400 degrees. Grease a 9x13 baking dish with butter or coconut oil. Set aside.

    In the bowl of your stand mixer add the softened butter, milk, eggs, gluten free cornmeal, gluten free flour, sugar, baking powder and salt. Blend the ingredients together. Do not over blend. The mixture will be a bit lumpy.

    Pour the mixture into your greased 9x13 baking dish.

    Bake at 400 degrees for 20 to 25 minutes or until the edges of the cornbread are golden brown.

    Wait for the cornbread to cool before slicing into squares.

    Supplies

    More Recipes You Might Enjoy

    • Gluten Free Buttermilk Drop Biscuits
    • Gluten Free Cornbread Stuffing
    • Gluten Free Italian Almond Flour Bread
    • Gluten Free Sweet Potato Biscuits

    I get a lot of my ingredients from Thrive Market. Thrive Market has been a game changer for me eating gluten free. They have so many options I can't get at my rural grocery stores! Use this link to get 40% off your first order!

    Print
    clock clock iconcutlery cutlery iconflag flag iconfolder folder iconinstagram instagram iconpinterest pinterest iconfacebook facebook iconprint print iconsquares squares iconheart heart iconheart solid heart solid icon

    Gluten Free Cornbread


    5 Stars 4 Stars 3 Stars 2 Stars 1 Star

    No reviews

    • Author: Elaine VanVleck
    • Total Time: 40 minutes
    • Yield: 15 large pieces 1x
    • Diet: Gluten Free
    Print Recipe
    Pin Recipe

    Description

    This easy gluten free cornbread is made completely from scratch with gluten free cornmeal and gluten free flour for a moist and tender homemade cornbread that bakes up perfectly golden in just 40 minutes. Slightly sweet with crispy golden edges and a soft and fluffy center, this is the best gluten free cornbread recipe for serving alongside chili, soups, BBQ, and holiday dinners!


    Ingredients

    Scale
    • ½ cup Unsalted Butter, softened
    • 2 cups Milk
    • 2 large Eggs
    • 2 ½ cups Gluten Free Cornmeal
    • 2 cups Gluten Free Flour
    • ¼ cup Granulated Sugar
    • 2 Tbsp. Baking Powder
    • 1 tsp. Sea Salt

    Instructions

    Preheat your oven to 400 degrees. Grease a 9x13 baking dish with butter or coconut oil. Set aside.

    In the bowl of your stand mixer add the softened butter, milk, eggs, gluten free cornmeal, gluten free flour, sugar, baking powder and salt. Blend the ingredients together. Do not over blend. The mixture will be a bit lumpy.

    Pour the mixture into your greased 9x13 baking dish.

    Bake at 400 degrees for 20 to 25 minutes or until the edges of the cornbread are golden brown.

    Wait for the cornbread to cool before slicing into squares.

    If you made this recipe please leave a star rating and comment below. It helps other readers find this recipe and means so much to me.

    Notes

    I have used both whole milk and almond milk in this recipe with success.

    • Prep Time: 15 minutes
    • Cook Time: 25 minutes
    • Category: Breads
    • Method: Baking
    • Cuisine: American

    Did you make this recipe?

    Tag @smallfarmbiglife on Instagram and hashtag it #smallfarmbiglife

    If you make this Gluten Free Cornbread I would love to hear what you think! Leave a star rating and a comment below and let me know what you served it with.

    Don't forget to save this recipe to your Pinterest boards so you can find it again every time a cornbread craving hits!

    Storage

    Store leftover gluten free cornbread in an airtight container or wrapped tightly in plastic wrap at room temperature for up to 2 days. For longer storage place the cornbread in a sealed airtight container in the refrigerator for up to 5 days.

    To reheat individual squares warm in the microwave for 20 to 30 seconds or wrap in foil and warm in a 350 degree oven for about 10 minutes until heated through.

    This cornbread also freezes beautifully. Once completely cooled wrap individual squares tightly in plastic wrap and place them in a freezer safe bag or airtight container and freeze for up to 3 months. Thaw at room temperature for about an hour or warm individual squares in the microwave straight from the freezer for 45 to 60 seconds. This is a great recipe to make a double batch of and freeze so you always have homemade gluten free cornbread on hand.

    Top Tip

    Do not over mix the cornbread batter once all of the ingredients are combined. Over mixing gluten free batters can cause the starches in the gluten free flour to break down and result in a gummy and dense texture instead of the light and tender crumb you are going for.

    Mix just until everything is incorporated and the batter is evenly combined then stop. A few small lumps in the batter are completely fine and actually a sign that you have not over mixed. The batter will be thicker than a traditional cake batter and that is exactly what you want for a moist and tender gluten free cornbread with a beautiful golden crust.

    Didn't find the answer you're looking for?

    Ask AI to answer based on this recipe:

    ChatGPT
    Google AI
    Perplexity
    Grok
    Claude

    Frequently Asked Questions

    Does cornbread have gluten in it?

    Traditional cornbread can contain gluten depending on how it is made. While cornmeal itself is naturally gluten free many cornbread recipes also call for all purpose wheat flour which contains gluten. Store bought cornbread mixes almost always contain wheat flour as well. This recipe uses gluten free flour in place of all purpose flour to make a completely gluten free cornbread that is safe for anyone avoiding gluten. It is also important to make sure your cornmeal is certified gluten free as regular cornmeal is often processed in facilities that also process wheat and can be cross contaminated.

    What is the best gluten free cornmeal for this recipe?

    Bob's Red Mill Gluten Free Cornmeal is my top recommendation for this recipe. It is a coarser ground cornmeal which gives the cornbread a wonderful texture and a classic cornbread bite. It is certified gluten free and widely available at most grocery stores and online. Make sure to always check the label and look for a certified gluten free seal on whatever cornmeal you purchase to ensure it has not been cross contaminated during processing.

    Can I add mix ins to this cornbread recipe?

    Absolutely! This gluten free cornbread recipe is a wonderful base for all kinds of delicious mix ins. Shredded cheddar cheese and diced jalapenos make a savory and spicy version that is amazing alongside chili and BBQ. Creamed corn stirred into the batter adds extra moisture and a sweeter corn flavor. Fresh or frozen blueberries make a wonderful sweet breakfast version. Simply fold your mix ins into the batter right before pouring it into the baking dish.

    What do you serve with gluten free cornbread?

    This gluten free cornbread pairs beautifully with so many different dishes. It is the classic companion to a bowl of gluten free chili and absolutely perfect alongside my Gluten Free Cowboy Baked Beans for a summer BBQ. It is also wonderful served with gluten free soups and stews on a cozy weeknight and makes a beautiful addition to a holiday dinner table at Thanksgiving and Christmas. Any leftover squares can be used to make my Gluten Free Cornbread Stuffing which is one of the most delicious things you can do with day old cornbread.

    Gluten Free White Chocolate Blondies

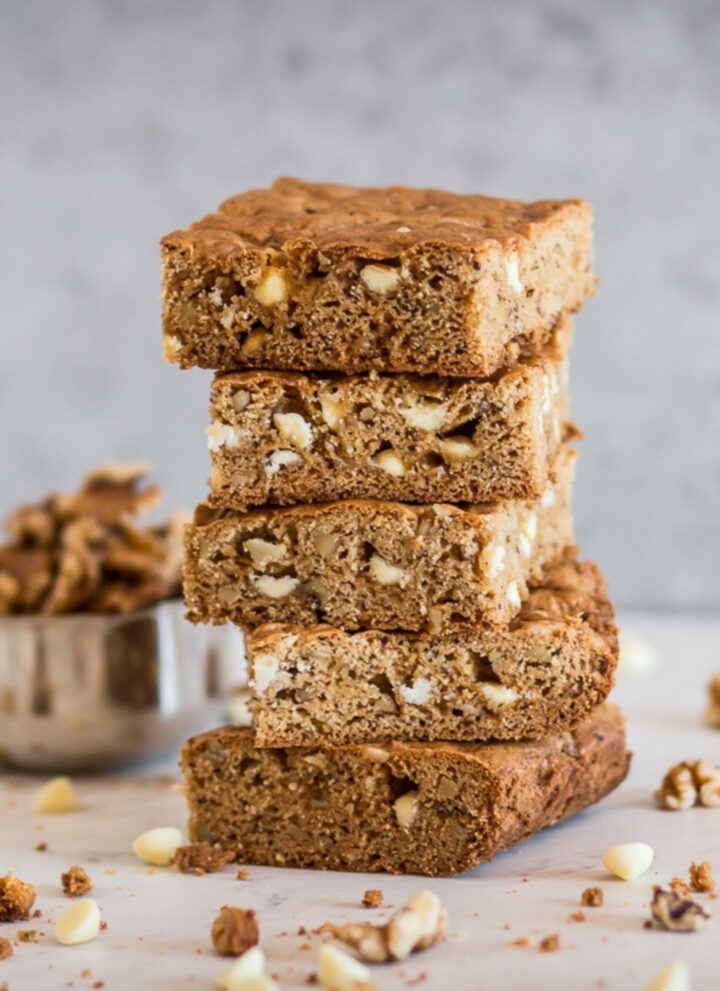
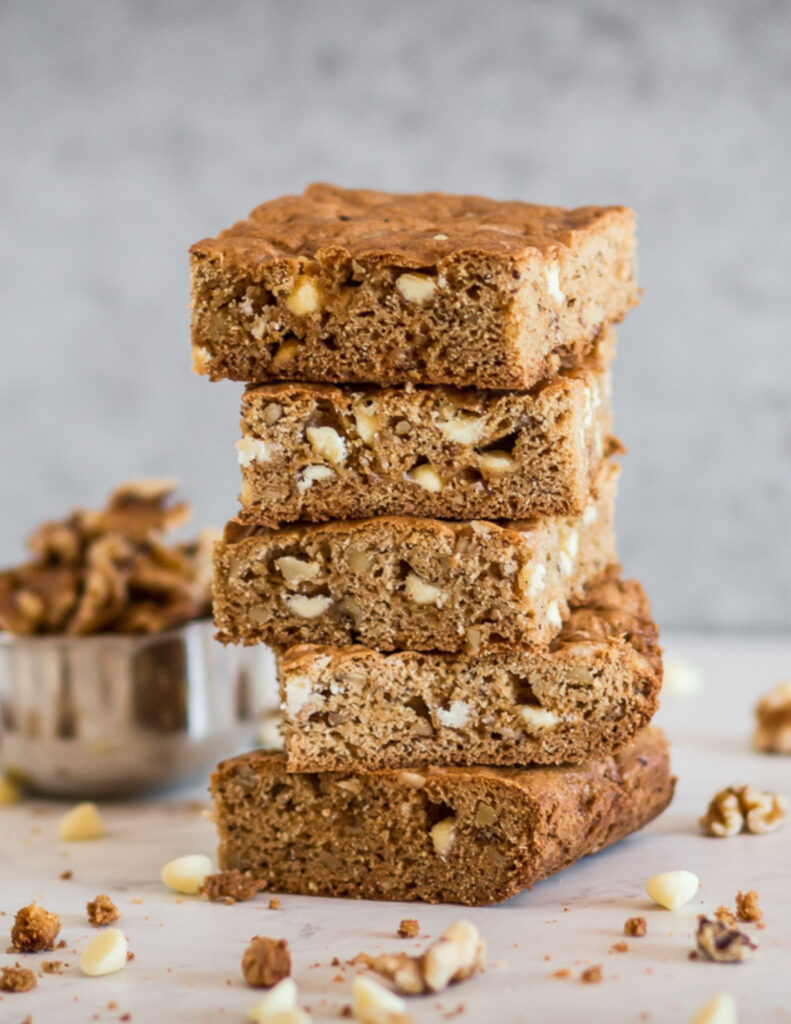
    gluten free white chocolate blondies cut into square bars and stacked on each other with walnuts and white chocolate chips spread around them

    These gluten free white chocolate blondies are easy to make for something quick to bring to a gathering. This recipe makes the best blonde brownies! They are chewy and delicious with the addition of white chocolate chips and walnuts.

    One of my favorite desserts before I went gluten free was the blondies from Applebee's. I think these have a similar texture and I've added the white chocolate chips from Trader Joe's to make them even better!

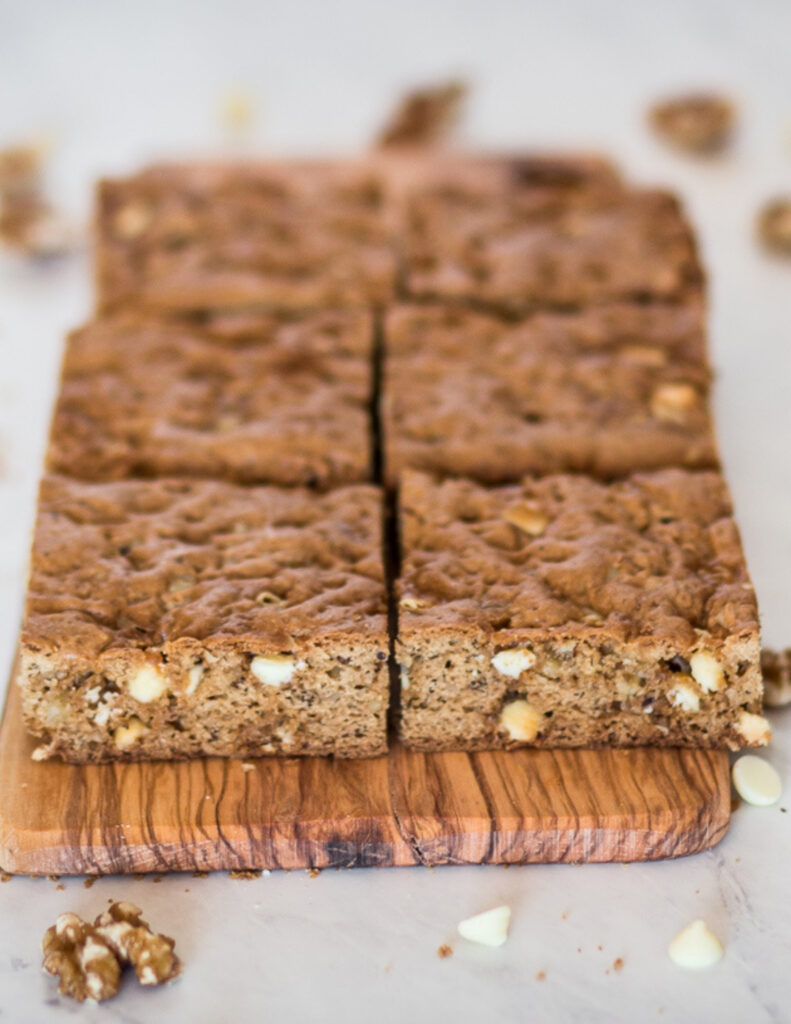
    gluten free white chocolate blondies cut into square bars and laid on a wooden cutting board

    How do I make blondies from scratch?

    Gluten free white chocolate blondies are super easy to make from scratch. You just blend together the wet ingredients, add in your dry ingredients and mix together and then add the white chocolate chips and walnuts and stir in. This is a really easy recipe to make!

    Gluten Free White Chocolate Blondies Supplies

    What are blondies?

    These gluten free white chocolate blondies are very similar to a brownie. They are essentially brownies without the cocoa powder. They have a dense, chewy texture much like a brownie.

    Can you freeze blondies?

    I have frozen these for a few days with success. Sometimes we have a lot of baked goods around here so I will freeze some to pack in lunches the next week. It is always a weight lifted to know I have the sweets portion of lunches done for the following week.

    Gluten Free White Chocolate Blondies Ingredients

    • Unsalted Butter
    • Brown Sugar
    • Vanilla Extract
    • Eggs
    • Gluten Free Flour
    • Baking Soda
    • Baking Powder
    • Sea Salt
    • White Chocolate Chips
    • Walnuts

    If you like this recipe you might also enjoy:

    Gluten Free Triple Chocolate Brownies
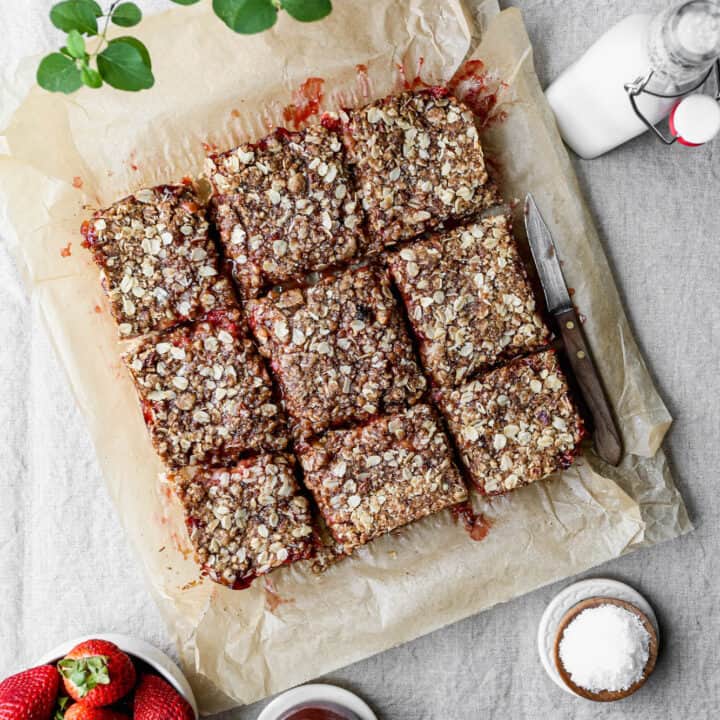
    Gluten Free Strawberry Jam Bars
    Gluten Free Strawberry Icebox Bars
    Gluten Free Strawberry Rhubarb Bars
    Gluten Free Chocolate Chip Oat Granola Bars

    I get a lot of my ingredients from Thrive Market. Thrive Market has been a game changer for me eating gluten free. They have so many options I can't get at my rural grocery stores! Use this link to get 25% off your first order!

    Print
    clock clock iconcutlery cutlery iconflag flag iconfolder folder iconinstagram instagram iconpinterest pinterest iconfacebook facebook iconprint print iconsquares squares iconheart heart iconheart solid heart solid icon

    Gluten Free White Chocolate Blondies


    5 Stars 4 Stars 3 Stars 2 Stars 1 Star

    No reviews

    • Author: Elaine VanVleck
    • Total Time: 45 minutes
    • Yield: 15 bars 1x
    • Diet: Gluten Free
    Print Recipe
    Pin Recipe

    Description

    These gluten free white chocolate blondies are easy to make for something quick to bring to a gathering. This recipe makes the best blonde brownies! They are chewy and delicious with the addition of white chocolate chips and walnuts.


    Ingredients

    Scale

    ½ cup Unsalted Butter, melted
    ½ cup Brown Sugar
    1 Tbsp. Vanilla Extract
    2 large Eggs
    1 ½ cups Gluten Free Flour
    1 tsp. Baking Soda
    ½ tsp. Baking Powder
    ½ tsp. Sea Salt
    ¾ cup White Chocolate Chips
    1 cup Walnuts, chopped


    Instructions

    Preheat oven to 350 degrees. Grease with butter or coconut oil or line a 9x13 baking dish with parchment paper.

    Combine dry ingredients (gluten free flour, baking soda, baking powder, sea salt) in a bowl and mix together. Set aside.

    In a small sauce pan melt the butter and add the brown sugar to blend. Pour mixture into the bowl of a stand mixer. Add the vanilla and eggs and blend them into the mixture.

    Add the dry ingredients to the wet ingredients and blend until just mixed together. Add the white chocolate chips and the chopped walnuts. Blend until they are just mixed in.

    Pour dough into the 9x13 baking pan and press until spread evenly.

    Bake at 350 degrees for 20 to 25 minutes or until bars are golden brown.

    Let the bars cool before you cut them.

    Notes

    My favorite white chocolate chips are from Trader Joe's but they only have them in the Fall. You could omit the walnut or replace them with pecans.

    • Prep Time: 20 minutes
    • Cook Time: 25 minutes
    • Category: Bars
    • Method: Baking
    • Cuisine: Gluten Free

    Did you make this recipe?

    Tag @smallfarmbiglife on Instagram and hashtag it #smallfarmbiglife

    Gluten Free Apple Pie Cookies

    These gluten free apple pie cookies taste like a slice of apple pie in cookie form. They're soft, cake like, and packed with shredded apple and warm fall spices. There's no chilling required here, just mix the dough, scoop it onto your cookie sheet, and bake. I

    f you like a flatter, chewier cookie, gently flatten the dough before baking, otherwise leave it as is for a softer, more cake like bite.

    a cookie sheet lined with parchment paper of gluten free apple pie cookies frosted with brown sugar frosting

    The real star of this recipe is the homemade brown sugar frosting. It's made right on the stovetop and spread over the cookies while it's still warm.

    I like to bake the cookies one day and frost them the next. Since the frosting sets up hard once it cools and needs to go on cookies that are fully cooled first.

    It's a small extra step, but it's worth it for that rich, caramel like finish on top.

    If you are looking for more apple recipes try my Overnight Apple Pie Chia Pudding, my Gluten Free Air Fryer Apple Fritters, my Gluten Free Apple Spice Cookies or my Gluten Free Apple Almond Cake.

    You can find all my gluten free cookie recipes here: Gluten Free Cookie Recipes

    six gluten free apple pie cookies with brown sugar frosting sitting on a marble countertop
    [feast_advanced_jump_to]

    What Apples to Use

    I like using a sweet apple variety like Fuji for this recipe, since it shreds easily and adds natural sweetness that pairs perfectly with the brown sugar frosting.

    Honeycrisp or Gala would both work well too. Just stick with a sweet variety rather than a tart one.

    The apple juice in the batter and the frosting on top already lean sweet, so a tart apple could throw off the balance.

    Why Frost the Next Day

    This frosting is cooked on the stovetop and needs to be spread while it's still warm. Which means the cookies underneath need to be completely cool before you start, otherwise the frosting won't set properly. I like to bake the cookies one day and frost them the next so I'm not rushing to cool a whole batch before the frosting hardens in the pan.

    If you're short on time, you can frost the same day as long as the cookies have had a couple of hours to cool completely first.

    Storage

    Store frosted cookies in a single layer in an airtight container at room temperature for up to 3 days, since the frosting can stick to unfrosted cookies stacked on top. Unfrosted cookies keep well in an airtight container for up to 5 days, or in the freezer for up to 2 months, making them easy to bake ahead and frost closer to when you plan to serve them.

    Top Tip

    Work quickly once the frosting is made, it starts to set up and harden as soon as it comes off the heat. Have all of your cooled cookies laid out and ready to go before you start the frosting so you can spread it while it's still warm and easy to work with.

    Frequently Asked Questions

    Do gluten free apple pie cookies take longer to bake?

    Yes, gluten free apple pie cookies do tend to take longer to bake than cookies made with a gluten flour. The outside of the cookie will be browned, but they may not be cooked through in the center. 

    If you are having this issue you can lower the oven temperature and bake the cookies a bit longer. I also only bake one baking sheet at a time of gluten free cookies. They need to be evenly heated to cook correctly.

    Why are my gluten free cookies gritty?

    The gluten free flour you use is really important for the texture of your cookies. If you use a coarse ground gluten free flour your cookies will have a gritty texture. It's important that you choose a flour that is specifically for baking.

    I like Bob's Red Mill 1 to 1 Baking Flour and King Arthur Measure for Measure Gluten Free Flour. Both have consistently given me good texture and rise in my baked goods.

    Can I reheat the frosting if it hardens before I finish frosting all the cookies?

    Yes. Return it to the saucepan over low heat, stirring constantly so it doesn't burn, until it's smooth and spreadable again.

    Do I need to flatten the cookies before baking?

    No, flattening is optional. Left as is, the cookies bake up soft and cake like. If you prefer a flatter, chewier cookie, gently flatten the dough with your palm or the bottom of a glass before baking.

    Didn't find the answer you're looking for?

    Ask AI to answer based on this recipe:

    ChatGPT
    Google AI
    Perplexity
    Grok
    Claude

    Apple Pie Cookies Supplies

    More Recipes You Might Enjoy

    • Gluten Free Apple Spice Cookies
    • Gluten Free Old Fashioned Iced Oatmeal Cookies
    • Gluten Free Ginger Cookies
    • Gluten Free Monster Cookies

    I get a lot of my ingredients from Thrive Market. Thrive Market has been a game changer for me eating gluten free. They have so many options I can't get at my rural grocery stores! Use this link to get 40% off your first order!
    Print
    clock clock iconcutlery cutlery iconflag flag iconfolder folder iconinstagram instagram iconpinterest pinterest iconfacebook facebook iconprint print iconsquares squares iconheart heart iconheart solid heart solid icon

    Gluten Free Apple Pie Cookies


    5 Stars 4 Stars 3 Stars 2 Stars 1 Star

    No reviews

    • Author: Elaine VanVleck
    • Total Time: 40 minutes
    • Yield: 2 dozen cookies 1x
    • Diet: Gluten Free
    Print Recipe
    Pin Recipe

    Description

    These soft, cake like cookies are packed with shredded apple and warm fall spices, then finished with a simple homemade brown sugar frosting. No chilling required, just mix, scoop, and bake.


    Ingredients

    Scale
    • ½ cup Unsalted Butter, softened
    • 1 cup Brown Sugar, packed
    • 1 large Egg
    • 1 tsp. Vanilla Extract
    • ½ cup Apple Juice
    • 2 ½ cups Gluten Free Flour
    • 1 tsp. Baking Soda
    • 1 ½ tsp. Xanthum Gum
    • 1 tsp. Apple Pie Spice
    • 1 tsp. Ground Cinnamon
    • ½ tsp. Ground Nutmeg
    • ½ tsp. Sea Salt
    • 1 large Apple, peeled & coarsely shredded

    Frosting:

    • ½ cup Brown Sugar, packed
    • 4 Tbsp. Unsalted Butter
    • 3 Tbsp. Apple Juice
    • 2 cups Powdered Sugar

    Instructions

    Preheat oven to 350 degrees.

    In a stand mixer blend together the butter, brown sugar, egg, vanilla, and apple juice. Blend until smooth and completely combined. 

    In a separate bowl mix the flour, baking soda, xanthan gum, apple pie spice, cinnamon, nutmeg and sea salt together. Add ½ cup at a time to the wet mixture until all is just combined.

    Peel and shred the apple. Add to the cookie mixture and blend until just combined. 

    Using a cookie scoop place dough on lined cookie sheets. I put a dozen cookies on each large cookie sheet.

    Bake for 20 minutes or until slightly browned and spongy when you touch them.

    After all the cookies are baked and cooled (I usually wait until the next day). Make the frosting by combing the brown sugar, butter and apple juice in a 2 quart saucepan. On medium low heat and stir until the butter is melted and all ingredients are combined. Remove from heat and add the powdered sugar. Beat with a hand mixer or whisk until the frosting is smooth. Immediately frost the cookies. The frosting will get hard once it cools!

    If you made this recipe please leave a star rating and comment below. It helps other readers find this recipe and means so much to me.

    Notes

    The frosting gets hard when it cools. If this happens you can reheat on the stove top. Stir constantly so it doesn't burn.

    • Prep Time: 20 minutes
    • Cook Time: 20 minutes
    • Category: Cookies
    • Method: Baking
    • Cuisine: American

    Did you make this recipe?

    Tag @smallfarmbiglife on Instagram and hashtag it #smallfarmbiglife

    Give these gluten free apple pie cookies a try this fall, and let me know how they turn out in the comments below.

    Ingredients

    • Unsalted Butter
    • Brown Sugar
    • Egg
    • Vanilla Extract
    • Apple Juice
    • Gluten Free Flour
    • Baking Soda
    • Xanthan Gum
    • Apple Pie Spice
    • Ground Cinnamon
    • Ground Nutmeg
    • Sea Salt
    • Apple
    • Powdered Sugar

    Instructions

    Preheat oven to 350 degrees.

    In a stand mixer blend together the butter, brown sugar, egg, vanilla, and apple juice. Blend until smooth and completely combined. 

    In a separate bowl mix the flour, baking soda, xanthan gum, apple pie spice, cinnamon, nutmeg and sea salt together. Add ½ cup at a time to the wet mixture until all is just combined.

    Peel and shred the apple. Add to the cookie mixture and blend until just combined. 

    Using a cookie scoop place dough on lined cookie sheets. I put a dozen cookies on each large cookie sheet.

    Bake for 20 minutes or until slightly browned and spongy when you touch them.

    After all the cookies are baked and cooled (I usually wait until the next day). Make the frosting by combing the brown sugar, butter and apple juice in a 2 quart saucepan. On medium low heat and stir until the butter is melted and all ingredients are combined. Remove from heat and add the powdered sugar. Beat with a hand mixer or whisk until the frosting is smooth. Immediately frost the cookies. The frosting will get hard once it cools!

    Gluten Free Cinnamon Sugar Baked Donuts

    These gluten free cinnamon sugar baked donuts are really easy to make. This recipe allows you to make homemade donuts without having to fry them. The maple glaze is delicious too!

    a cooling rack of gluten free cinnamon sugar baked donuts with brown sugar glaze on top

    The cinnamon sugar gluten-free donuts can be stored in an air tight container up to a week. Gluten-free donuts are perfect with a cup of coffee or tea and will be on heavy rotation at our house this Fall.

    If you are looking for more gluten free treat recipes try my Gluten Free Baked Pumpkin Donuts with Chocolate Glaze, my Gluten Free Gingerbread Scones, my Gluten Free Air Fryer Apple Fritters or my Gluten Free Bagels.

    You can find all of my dessert recipes here: Gluten Free Dessert Recipes

    a cooling rack of gluten free cinnamon sugar baked donuts with brown sugar glaze on top
    [feast_advanced_jump_to]

    Ingredients

    • Gluten Free Flour
    • Baking Powder
    • Xanthan Gum
    • Sea Salt
    • Ground Cinnamon
    • Ground Nutmeg
    • Granulated Sugar
    • Unsweetened Applesauce
    • Almond Milk
    • Vanilla Extract
    • Eggs
    • Coconut Oil
    • Brown Sugar
    • Unsalted Butter
    • Apple Juice
    • Powdered Sugar

    Instructions

    Preheat oven to 425 degrees.

    Grease donut pans with butter or coconut oil.

    Place sugar, apple sauce, almond milk, vanilla, eggs and coconut oil in the bowl of a stand mixer and blend together. 

    In a separate bowl whisk together flour, baking powder, xanthum gum, sea salt, cinnamon and nutmeg. Then slowly add to the wet mixture. Blend all ingredients together until smooth.

    Bake donuts for 18 minutes or until they are golden brown and spring back when you touch them.

    Let donuts stand for 10 minutes and then remove from the pans. Let cool completely before glazing.

    To make the glaze in a saucepan heat the brown sugar, butter (or coconut oil), and apple juice on medium heat until melted together. Add these melted ingredients to the powdered sugar and beat until smooth. Use this glaze immediately! If you let it stand for too long it will harden and you won't be able to get it on the donuts. If this happens you can reheat the glaze over a water bath on the stove top.

    Supplies

    Frequently Asked Questions

    What do baked donuts taste like?

    Baked donuts have a cake like texture. Since they aren't deep fried they aren't crispy, but are soft and dense. I like baked donuts best with frosting.

    Can I freeze baked donuts?

    Yes! You can definitely freeze baked donuts. I would freeze them without frosting and frost them later. Frosting will break apart and fall off the donuts in the freezer.

    How do you get the donut batter into the pans?

    First, make sure you've greased your donuts pans with butter or coconut oil so the donuts come out of them easily.
     
    Spoon the gluten free cinnamon sugar baked donut batter into a gallon plastic bag. Snip the corner of the bag with scissors. Press the batter out into the donut pans like you are frosting a cake. 

    This method will allow you to get nice circles into the donut pans. I've also tried spooning the batter into he donut pans, but it's time consuming, messy and you don't always get a nice donut shape.

    Are cake donuts the same as baked donuts?

    Yes. Baked donuts are made with a cake type recipe that will rise in a donut pan in the oven. They aren't fried like donuts you may purchase from the store.
     
    Skipping the frying makes baked or cake donuts a healthier option. They still have a great donut flavor, but with fewer calories. Plus there isn't an oil mess to clean up either.

    More Recipes You Might Enjoy

    • Gluten Free Baked Pumpkin Donuts with Chocolate Glaze
    • Gluten Free Gingerbread Scones
    • Gluten Free Orange Cranberry Biscotti
    • Gluten Free Air Fryer Apple Fritters

    I get a lot of my ingredients from Thrive Market. Thrive Market has been a game changer for me eating gluten free. They have so many options I can't get at my rural grocery stores! Use this link to get 25% off your first order!

    If you don't have a baked donut pan I like this one: Wilton Donut Baking Pan

    Print
    clock clock iconcutlery cutlery iconflag flag iconfolder folder iconinstagram instagram iconpinterest pinterest iconfacebook facebook iconprint print iconsquares squares iconheart heart iconheart solid heart solid icon

    Gluten-Free Cinnamon Sugar Baked Donuts (GF, DF)


    5 Stars 4 Stars 3 Stars 2 Stars 1 Star

    No reviews

    • Author: Elaine VanVleck
    • Total Time: 33 minutes
    • Yield: 9 1x
    • Diet: Gluten Free
    Print Recipe
    Pin Recipe

    Description

    These gluten free cinnamon sugar baked donuts are really easy to make. This recipe allows you to make homemade donuts without having to fry them. The maple glaze is delicious too! 


    Ingredients

    Scale
    • 1 ½ cups Gluten Free Flour
    • 2 tsp. Baking Powder
    • 1 tsp. Xanthan Gum
    • ½ tsp. Sea Salt
    • 2 tsp. Ground Cinnamon
    • ½ tsp. Ground Nutmeg
    • ½ cup Granulated Sugar
    • ⅓ cup Unsweetened Apple Sauce
    • ⅓ cup Almond Milk
    • 1 tsp. Vanilla Extract
    • 2 large Eggs
    • ¼ cup Coconut Oil, melted

    Glaze:

    • ½ cup Brown Sugar, packed
    • 4 Tbsp. Unsalted Butter (coconut oil for dairy-free)
    • 3 Tbsp. Apple Juice
    • 2 cups Powdered Sugar

    Instructions

    Preheat oven to 425 degrees.

    Grease donut pans with butter or coconut oil.

    Place sugar, apple sauce, almond milk, vanilla, eggs and coconut oil in the bowl of a stand mixer and blend together. 

    In a separate bowl whisk together flour, baking powder, xanthum gum, sea salt, cinnamon and nutmeg. Then slowly add to the wet mixture. Blend all ingredients together until smooth.

    Bake donuts for 18 minutes or until they are golden brown and spring back when you touch them.

    Let donuts stand for 10 minutes and then remove from the pans. Let cool completely before glazing.

    To make the glaze in a saucepan heat the brown sugar, butter (or coconut oil), and apple juice on medium heat until melted together. Add these melted ingredients to the powdered sugar and beat until smooth. Use this glaze immediately! If you let it stand for too long it will harden and you won't be able to get it on the donuts. If this happens you can reheat the glaze over a water bath on the stove top.

    Notes

    For a dairy free version replace the unsalted butter with coconut oil in the glaze.

    If the glaze hardens reheat it over a water bath on the stove top until it is spreadable.

    • Prep Time: 15 minutes
    • Cook Time: 18 minutes
    • Category: Dessert
    • Method: Baking
    • Cuisine: Gluten Free

    Did you make this recipe?

    Tag @smallfarmbiglife on Instagram and hashtag it #smallfarmbiglife

    Top Tip

    The glaze doesn't have maple syrup in the ingredients list, but tastes very close to a maple bar. One warning though, this glaze needs to be used while it's warm or it will harden and be impossible to work with. Prepare the glaze when you are ready to frost the cinnamon sugar baked donuts. Be sure to use the glaze fairly quickly.

    • « Previous Page
    • 1
    • …
    • 94
    • 95
    • 96
    • 97
    • 98
    • …
    • 100
    • Next Page »

    Welcome! I'm Elaine

    I'm so glad you are here! I share easy gluten free recipes from my small farm in Washington.

    Be sure to sign up for my newsletter to stay up to date on all of my new recipes.

    More about me...
    • Instagram
    • Pinterest
    • Facebook
    • Twitter
    • Mail

    Load up on new recipes, exclusive goodies, + more!
    Sign up below to stay up-to-date on news, events, and special deals.
    Thank you for subscribing!

    Easy Meals Recipes

    • Gluten Free Instant Pot Chili Mac and Cheese
    • Gluten Free Taco Casserole
    • Gluten Free Cowboy Baked Beans
    • Gluten Free Walking Taco Casserole
    • Gluten Free Creamy Beef and Mushroom Pasta
    • Gluten Free Instant Pot Chicken & Dumplings
    • Instant Pot Mexican Style Beef and Rice
    • Gluten Free Chicken Parmesan Pasta Casserole
    • Gluten Free One Pot Hamburger Helper Copycat
    • Gluten Free Salisbury Steak with Mushroom Gravy
    • Gluten Free Air Fryer Fajitas
    • Gluten Free Sloppy Joe Casserole

    Footer

    back to top

    About

    • Privacy Policy
    • Shop my Amazon Page
    • Follow me on LTK

    Newsletter

    • Sign Up! for emails and updates

    Contact

    • Contact
    • Media Kit
    • About Me

    As an Amazon Associate I earn from qualifying purchases.

    I may get commissions for purchases made through links on this site.

    Copyright © 2026 Brunch Pro on the Brunch Pro Theme