Small Farm Big Life

  • Gluten Free Recipe Index
  • Subscribe
  • Resources
menu icon
go to homepage
  • Home
  • Gluten Free Recipe Index
  • Subscribe
  • My Story
  • Resources
  • Free Guides
    • Email
    • Facebook
    • Instagram
    • Pinterest
  • subscribe
    search icon
    Homepage link
    • Home
    • Gluten Free Recipe Index
    • Subscribe
    • My Story
    • Resources
    • Free Guides
    • Email
    • Facebook
    • Instagram
    • Pinterest
  • ×

    High Protein Vanilla Iced Espresso

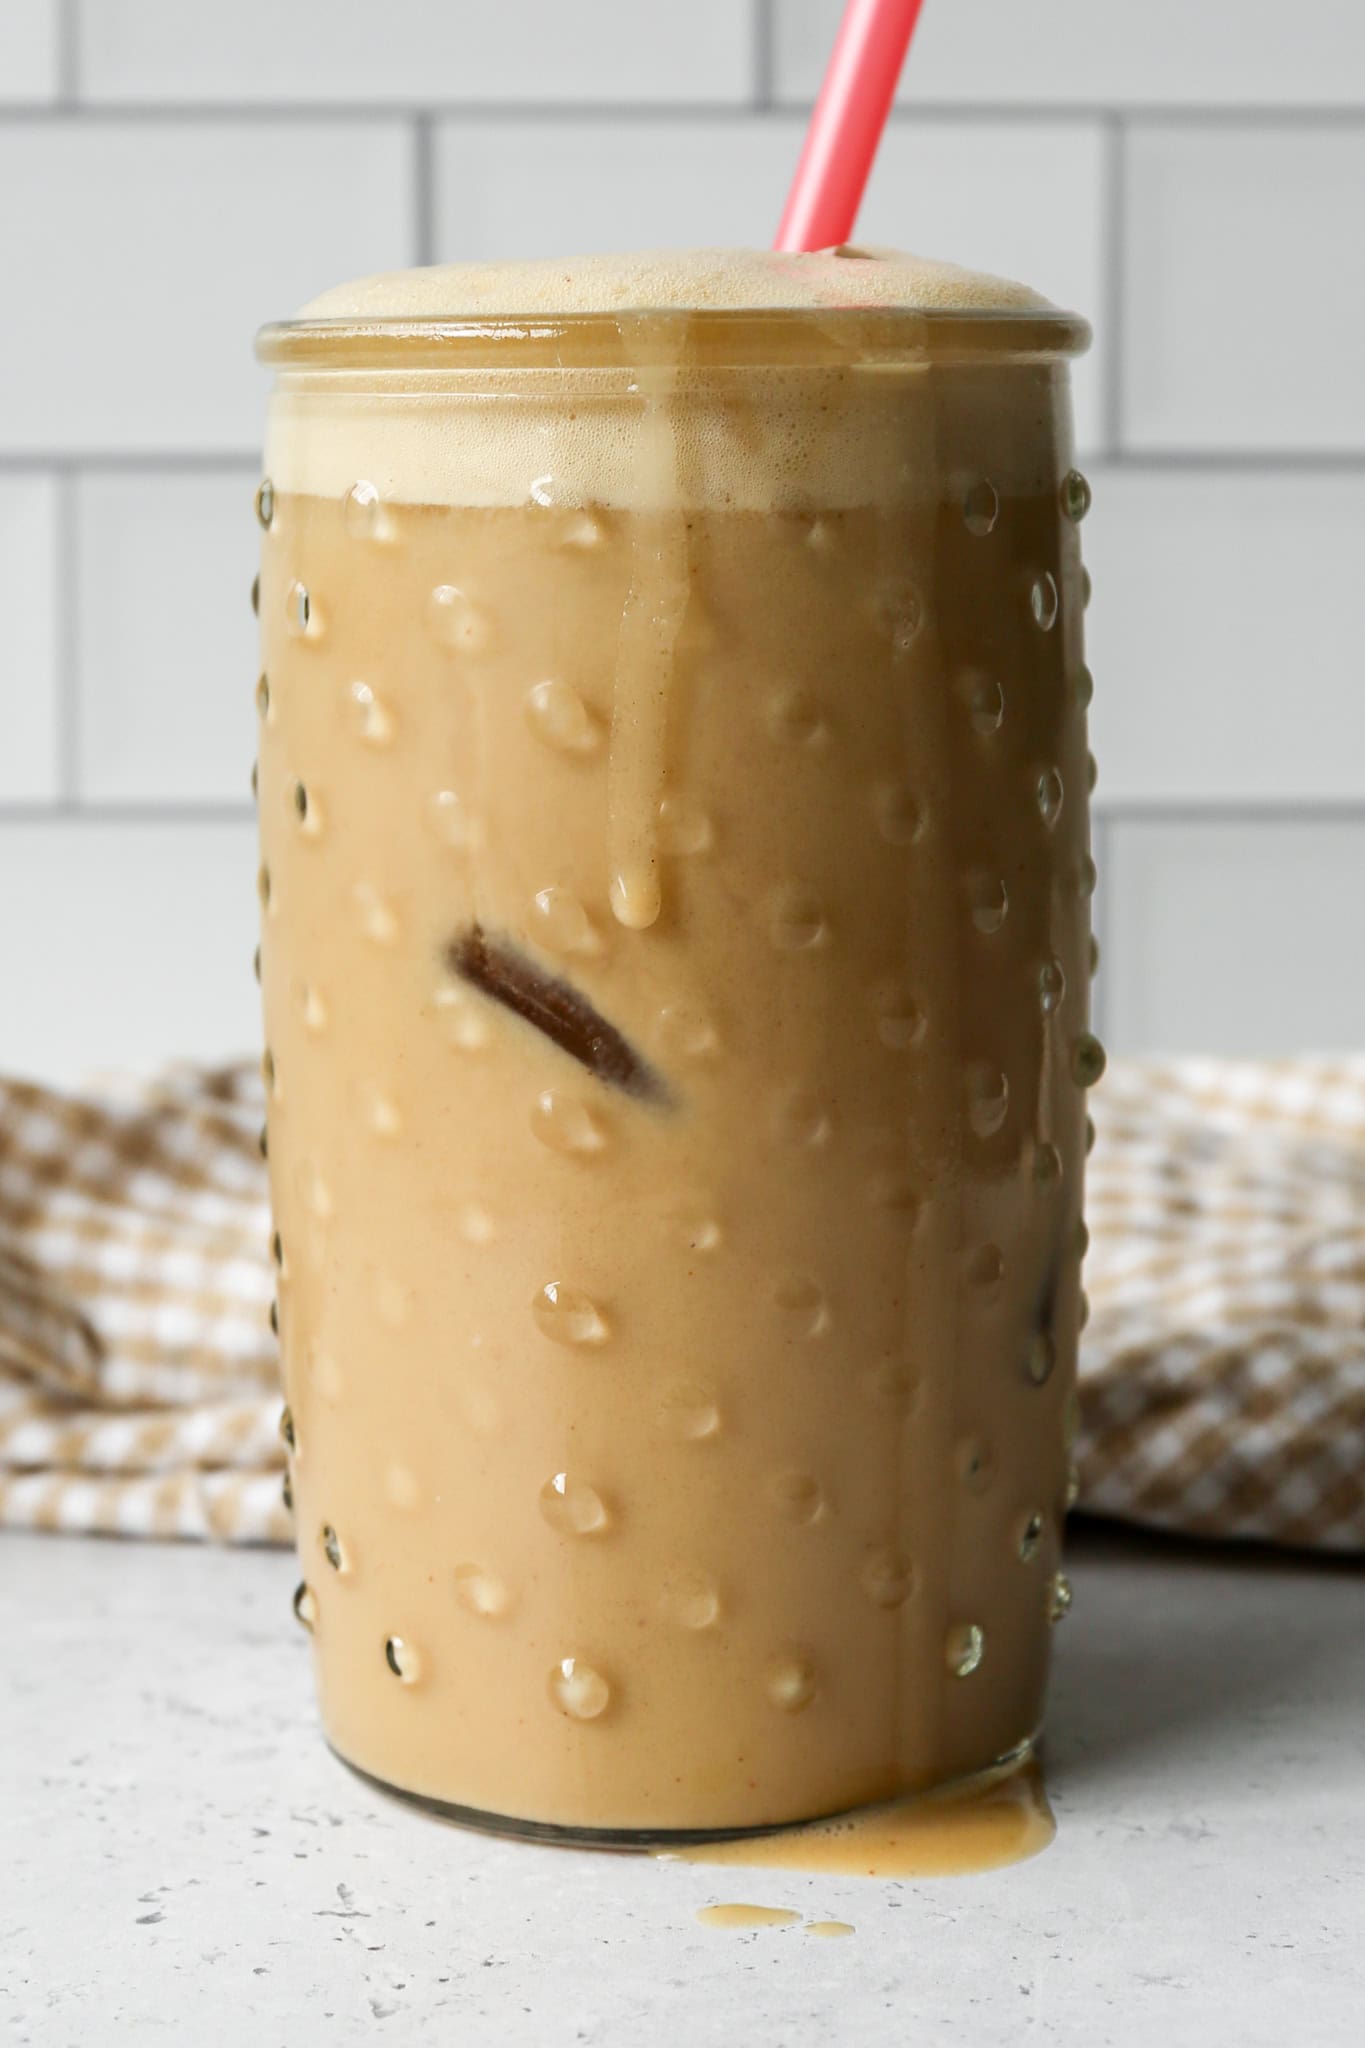
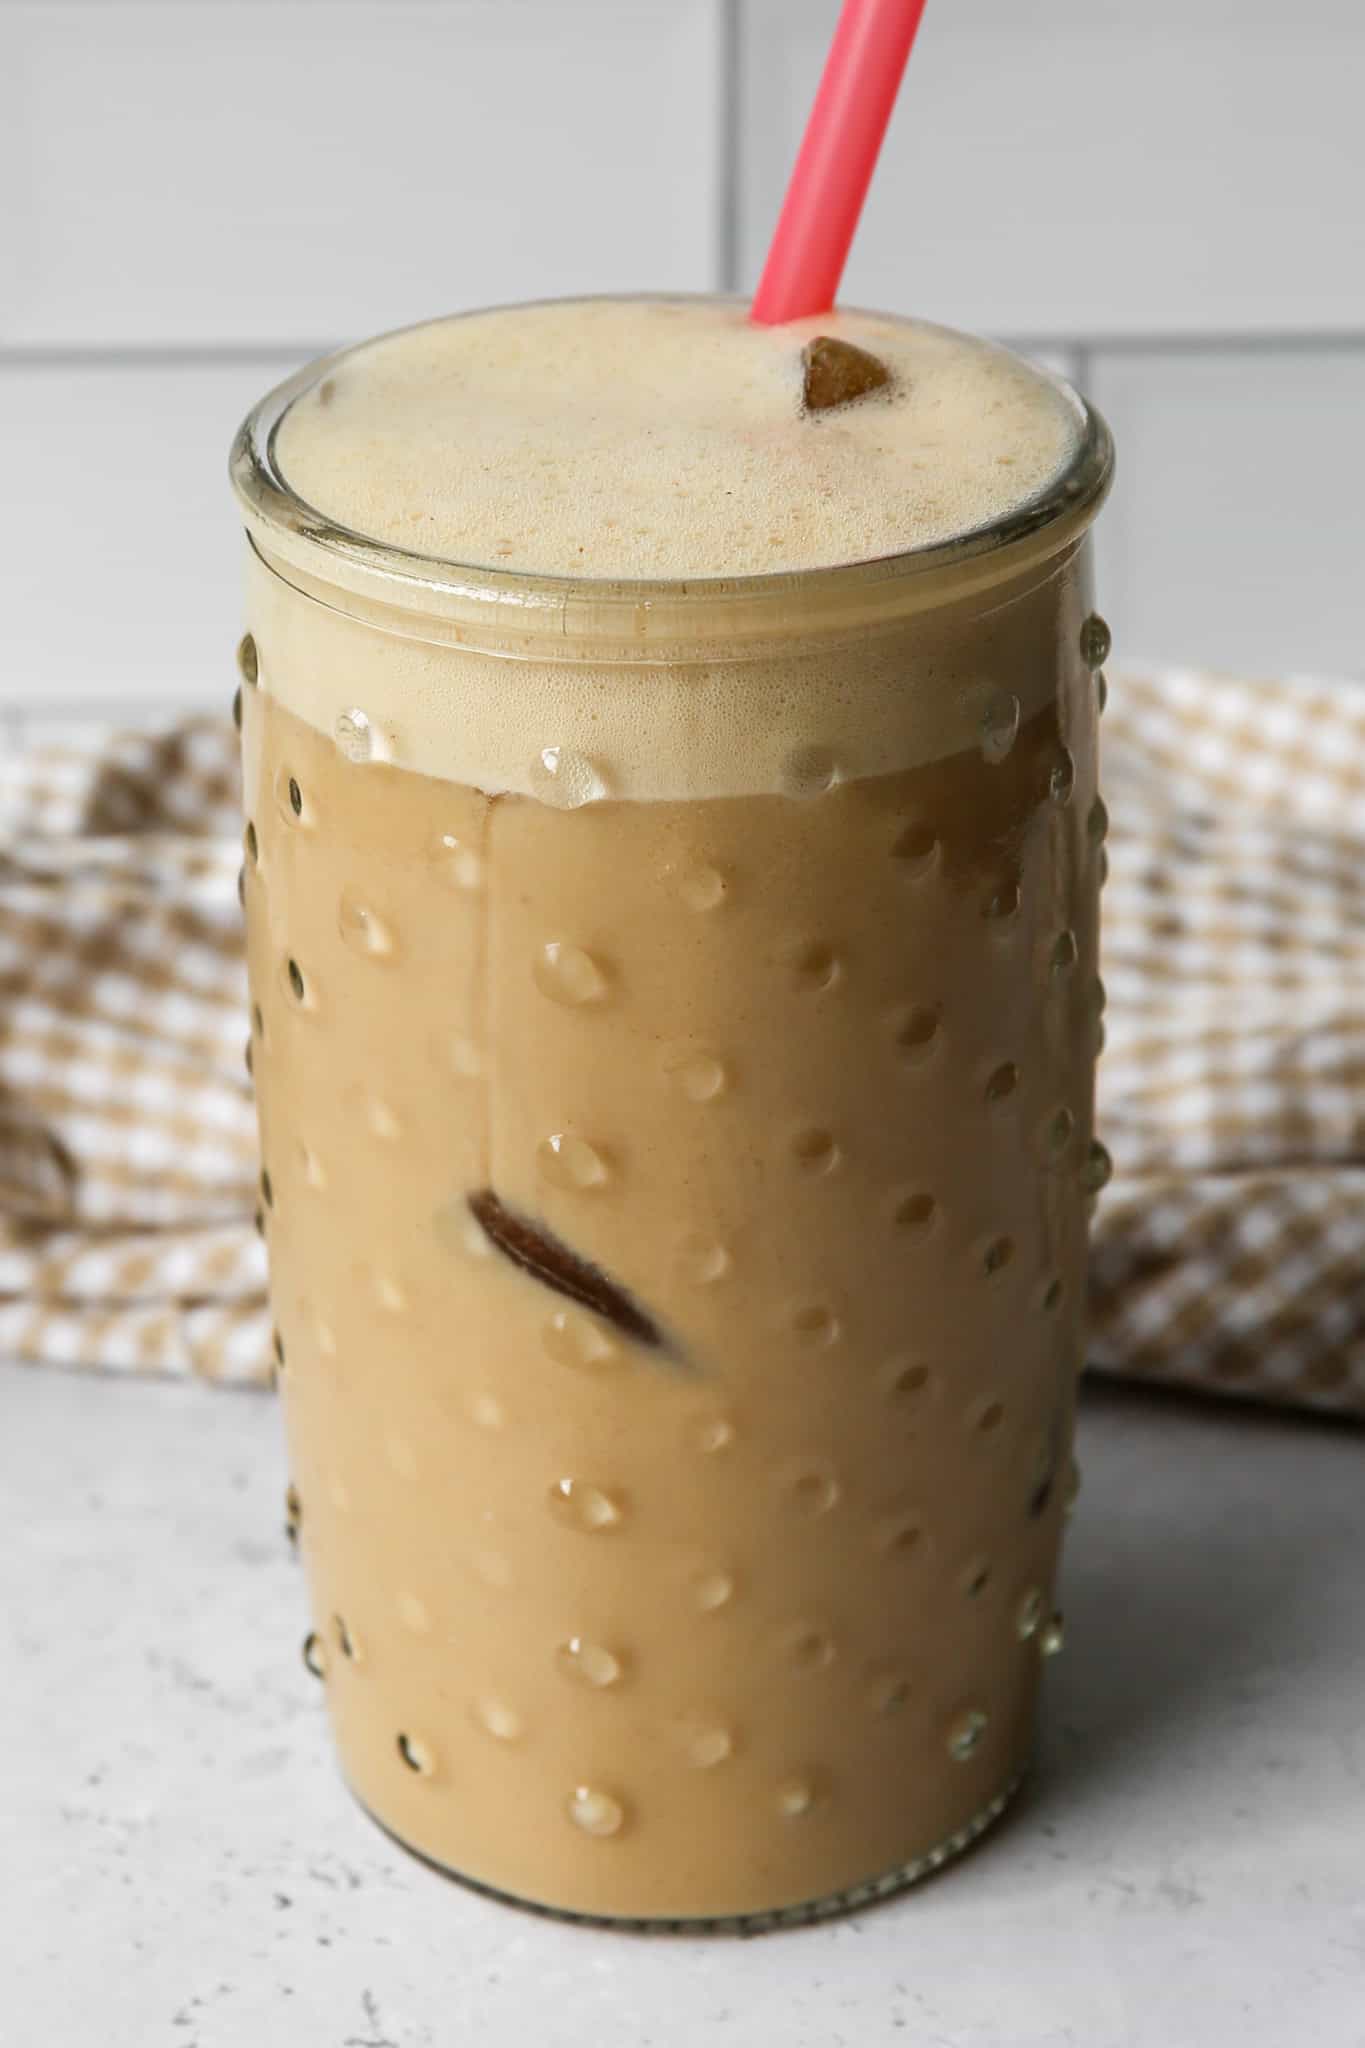
    This High Protein Vanilla Iced Espresso has become part of my daily morning routine and I look forward to it every single day. It takes about 5 minutes to pull together, it tastes creamy and delicious, and it actually keeps me full well into the morning which is something a regular iced coffee definitely does not do.

    The combination of Nescafe espresso powder, vanilla protein powder, and milk over ice is so simple but so satisfying and I love that I can make it at home for a fraction of what I would spend at a coffee shop.

    a clear hobnail drinking glass of high protein vanilla iced espresso over ice dripping down the side

    I use Sunwarrior Warrior Blend Vanilla Protein Powder in this recipe because it blends beautifully without any chalky texture and the vanilla flavor is natural and not overly sweet.

    If you use a different protein powder the results may vary slightly but the basic formula works with most vanilla protein powders. A shaker bottle, blender, or handheld frother all work great for this recipe.

    Just make sure you do not try to just stir the protein powder in with a spoon or you will end up with clumps. This is a 5 minute recipe that is worth making every single morning.

    If you're looking for more drink recipes try my Iced Chai Tea Latte Concentrate, my Dunkin Copycat Pumpkin Cream Cold Brew, my Dunkin Copycat Brown Sugar Cream Cold Brew or my Coconut Milk Iced Latte.

    You can find all my drink recipes here: Gluten Free Drink Recipes

    a clear hobnail drinking glass of high protein vanilla iced espresso over ice with a pink color change straw
    [feast_advanced_jump_to]

    Ingredients

    • Nescafe Gold Espresso Powder Blonde, Intense or Decaf
    • Hot Water
    • Sunwarrior Warrior Blend Vanilla Protein Powder
    • Milk of choice
    • Ice
    • Ground Cinnamon
    • Sea Salt

    Instructions

    Dissolve the espresso powder in the hot water.

    In a shaker bottle, blender or using a frother combine the espresso mixture, protein powder, milk and if you're adding them the cinnamon and salt.

    Shake, blend or froth until smooth and creamy.

    Pour over a tall glass of ice.

    If you like you can sprinkle a bit of cinnamon on top.

    Supplies


    More Recipes You Might Enjoy

    • Dunkin Copycat Pumpkin Cream Cold Brew
    • Iced Chai Tea Latte Concentrate
    • Dunkin Copycat Brown Sugar Cream Cold Brew
    • Coconut Milk Iced Latte

    I get a lot of my ingredients from Thrive Market. Thrive Market has been a game changer for me eating gluten free. They have so many options I can't get at my rural grocery stores! Use this link to get 40% off your first order!

    Print
    clock clock iconcutlery cutlery iconflag flag iconfolder folder iconinstagram instagram iconpinterest pinterest iconfacebook facebook iconprint print iconsquares squares iconheart heart iconheart solid heart solid icon

    High Protein Vanilla Iced Espresso


    5 Stars 4 Stars 3 Stars 2 Stars 1 Star

    No reviews

    • Author: Elaine VanVleck
    • Total Time: 5 minutes
    • Yield: 1 serving 1x
    • Diet: Gluten Free
    Print Recipe
    Pin Recipe

    Description

    This High Protein Vanilla Iced Espresso is the easiest way to start your morning with a boost of protein and caffeine in just 5 minutes with no fancy equipment required. Nescafe espresso powder dissolved in hot water is shaken or blended with vanilla protein powder and your milk of choice and poured over ice for the most creamy and satisfying high protein iced coffee. Naturally gluten free and perfect as a quick breakfast, pre workout drink, or afternoon pick me up that actually keeps you full!


    Ingredients

    Units Scale
    • 1 tsp Nescafe Gold Espresso Powder Blonde, Intense or Decaf
    • ½ cup Hot Water
    • 1 scoop Sunwarrior Warrior Blend Vanilla Protein Powder
    • 1 cup Milk of choice
    • Ice
    • Optional: dash of Ground Cinnamon & pinch of Sea Salt

    Instructions

    Dissolve the espresso powder in the hot water.

    In a shaker bottle, blender or using a frother combine the espresso mixture, protein powder, milk and if you're adding them the cinnamon and salt.

    Shake, blend or froth until smooth and creamy.

    Pour over a tall glass of ice.

    If you like you can sprinkle a bit of cinnamon on top.

    • Prep Time: 5 minutes
    • Cook Time: 0 minutes
    • Category: Drinks
    • Method: Blending
    • Cuisine: American

    Did you make this recipe?

    Tag @smallfarmbiglife on Instagram and hashtag it #smallfarmbiglife

    If you made this High Protein Vanilla Iced Espresso I would love to hear what you thought! Please leave a star rating and a comment below. This is one of my favorite easy morning drink recipes and I hope it becomes part of your routine too!

    Storage

    This high protein vanilla iced espresso is best made fresh and served immediately over ice. If you want to prep ahead you can dissolve the espresso powder in hot water and store it in a sealed jar in the refrigerator for up to 3 days. When you are ready to serve just shake or blend the cold espresso mixture with the protein powder and milk and pour over fresh ice. Do not mix the protein powder ahead of time as it can become gummy and unpleasant in texture when stored.

    Top Tip

    Protein powder can get chalky if just stirred. For the best results use a shaker bottle, blender or frother to get a nice creamy texture.

    Didn't find the answer you're looking for?

    Ask AI to answer based on this recipe:

    ChatGPT
    Google AI
    Perplexity
    Grok
    Claude

    Frequently Asked Questions

    Can I make this high protein iced coffee without a blender?

    Yes! You don't need any fancy equipment to make this protein iced coffee recipe. Simply shake the espresso and vanilla protein powder together in a shaker bottle until smooth and creamy, then pour over ice. If you don't have a shaker, you can stir well in a tall glass, but shaking helps prevent clumps for the best protein iced coffee texture.

    Can I make this protein coffee dairy free?

    Absolutely. This healthy coffee drink works perfectly with any dairy free milk alternative. Just use your favorite plant based milk to create a creamy protein vanilla latte that fits your dietary needs. It's an easy high protein coffee recipe that can be customized without sacrificing flavor.

    Is protein iced coffee good for breakfast or pre workout?

    Yes, this high protein iced coffee is ideal as a quick breakfast or pre workout coffee. The combination of caffeine and protein makes it a balanced, energizing option that helps keep you full longer. It's also a great afternoon pick me up when you want something satisfying without a heavy meal.

    What protein powder works best in this recipe?

    I use Sunwarrior Warrior Blend Vanilla Protein Powder in this recipe because it blends beautifully and has a natural vanilla flavor that is not overly sweet or artificial tasting. Any vanilla protein powder will work in this recipe but plant based protein powders tend to blend more smoothly in cold drinks than whey based powders in my experience. If your protein powder tends to clump use a blender or shaker bottle rather than a frother for the best results.

    Can I use a different type of espresso or coffee in this recipe?

    Yes! If you have an espresso machine you can use 1 to 2 shots of fresh espresso in place of the espresso powder and hot water. Strong brewed coffee also works well as a substitute. If you prefer a less intense coffee flavor use the blonde espresso powder or reduce the amount of espresso powder slightly. For a decaf version the Nescafe Gold Decaf espresso powder works beautifully and gives you the same creamy result without the caffeine.

    Zesty Three Bean Salad with Tuna

    This Zesty Three Bean Salad with Tuna is a fresh, flavor packed twist on a classic three bean salad. Made with hearty beans and protein rich tuna, this high protein and high fiber salad is both satisfying and incredibly easy to throw together.

    If you're looking for a healthy tuna bean salad that's bright, zesty, and full of texture, this no cook dish delivers big flavor with minimal effort.

    zesty three bean salad with tuna in a cream serving bowl next to a tan and white striped kitchen towel

    Perfect for weekly lunch meal prep, this tuna and bean salad is a balanced option that keeps you full and energized. It's a simple easy weekday meal that works as a side dish or main course, and it fits beautifully into a healthy lifestyle.

    Whether you call it a bean tuna salad, mixed bean salad with tuna, or your new favorite 3 bean salad, this homemade recipe is one you'll come back to again and again.

    If you're looking for more bean recipes try my Chopped Wedge Layer Salad, my Gluten Free Pesto Pasta Salad, my Instant Pot Garlic Ginger Green Beans or my Black Beans and Corn Salad.

    You can find all of my salad recipes here: Gluten Free Salad Recipes

    a cream serving bowl of zesty three bean salad with tuna next to a tan and white striped kitchen towel
    [feast_advanced_jump_to]

    Ingredients

    • Kidney Beans
    • Garbanzo Beans
    • Green Beans
    • Tuna in Water
    • Yellow Onion
    • Dried Parsley
    • Apple Cider Vinegar
    • Avocado Oil
    • Stone Ground Mustard
    • Salt
    • Coarse Ground Black Pepper

    Instructions

    In a large mixing bowl add the drained kidney beans, drained garbanzo beans, drained green beans, drained tuna, onion, parsley, apple cider vinegar, avocado oil, mustard, salt and pepper.

    Stir to combine. Refrigerate in an air tight container for at least 2 hours before serving.

    Supplies


    More Recipes You Might Enjoy

    • Instant Pot Garlic Ginger Green Beans
    • Black Beans and Corn Salad
    • Chopped Wedge Layer Salad
    • Gluten Free Pesto Pasta Salad

    I get a lot of my ingredients from Thrive Market. Thrive Market has been a game changer for me eating gluten free. They have so many options I can't get at my rural grocery stores! Use this link to get 40% off your first order!

    Print
    clock clock iconcutlery cutlery iconflag flag iconfolder folder iconinstagram instagram iconpinterest pinterest iconfacebook facebook iconprint print iconsquares squares iconheart heart iconheart solid heart solid icon

    Zesty Three Bean Salad with Tuna


    5 Stars 4 Stars 3 Stars 2 Stars 1 Star

    No reviews

    • Author: Elaine VanVleck
    • Total Time: 10 minutes
    • Yield: 5 servings 1x
    • Diet: Gluten Free
    Print Recipe
    Pin Recipe

    Description

    This Zesty Three Bean Salad with Tuna is a fresh, flavor packed twist on a classic three bean salad. Made with hearty beans and protein rich tuna, this high protein and high fiber salad is both satisfying and incredibly easy to throw together. 


    Ingredients

    Scale
    • 1 - 15.5 ounce can Dark Red Kidney Beans, drained
    • 1 - 15.5 ounce can Garbanzo Beans (chick peas), drained
    • 1 - 14.5 ounce can Green Beans, drained
    • 1 - 7 ounce can Tuna in Water, drained
    • 1 small Yellow Onion, finely chopped
    • 1 Tbsp Dried Parsley
    • 2 Tbsp Apple Cider Vinegar
    • 2 Tbsp Avocado Oil
    • 1 Tbsp Stone Ground Mustard
    • ½ tsp Salt
    • ½ tsp Coarse Ground Black Pepper

    Instructions

    In a large mixing bowl add the drained kidney beans, drained garbanzo beans, drained green beans, drained tuna, onion, parsley, apple cider vinegar, avocado oil, mustard, salt and pepper.

    Stir to combine. Refrigerate in an air tight container for at least 2 hours before serving.

    • Prep Time: 10 minutes
    • Category: Side Dish, Salads
    • Method: Mixing
    • Cuisine: Gluten Free

    Did you make this recipe?

    Tag @smallfarmbiglife on Instagram and hashtag it #smallfarmbiglife

    Top Tip

    I like this salad with one can of tuna, but my husband prefers it with two cans of tuna and takes that as his lunch occasionally. Either way, the salad is packed with protein and delicious.

    Didn't find the answer you're looking for?

    Ask AI to answer based on this recipe:

    ChatGPT
    Google AI
    Perplexity
    Grok
    Claude

    Frequently Asked Questions

    Can I make three bean salad with tuna ahead of time?

    Yes! This zesty three bean salad with tuna is perfect for lunch meal prep. Because it's a no cooking recipe, the flavors actually improve after a few hours in the fridge, making it an ideal high protein salad to prepare in advance.

    How long does tuna bean salad last in the refrigerator?

    When stored in an airtight container, this bean and tuna salad recipe will stay fresh for 4-5 days. It's a convenient easy lunch option that holds up well, making it perfect for busy weeks and quick grab and go meals.

    Air Fryer Pork Tenderloin Bites

    These Air Fryer Pork Tenderloin Bites are the ultimate quick and easy weeknight dinner that doesn't sacrifice flavor. Juicy, tender chunks of pork tenderloin in the air fryer cook up perfectly golden on the outside while staying moist and flavorful inside.

    If you're looking for a delicious air fryer dinner recipe, this simple pork air fryer recipe delivers big results with minimal effort.

    a cream colored serving bowl of air fryer pork tenderloin bites next to a tan gingham kitchen towel

    Perfect for busy evenings, these pork tenderloin bites in the air fryer are high in protein and ready in no time. Whether you call them air fried pork bites, air fryer pork chunks, or your new favorite easy pork tenderloin recipe, they're a reliable option for family dinner.

    This is one of the best pork tenderloin recipes in the air fryer when you want something fast, satisfying, and full of flavor.

    If you are looking for more protein recipes try my Air Fryer Garlic Steak Bites, my Gluten Free Air Fryer Turkey Breast, my Oven Baked Marinated Steak Kabobs or my Gluten Free Air Fryer Fajitas.

    You can find all of my meal recipes here: Gluten Free Meal Recipes

    a cream colored serving bowl of air fryer pork tenderloin bites on a tan pot holder next to a silver fork and a tan gingham kitchen towel
    [feast_advanced_jump_to]

    Ingredients

    • Pork Tenderloin
    • Olive Oil
    • Minced Garlic
    • Onion Powder
    • Dried Parsley
    • Dried Thyme
    • Dried Crushed Rosemary
    • Salt
    • Coarse Ground Black Pepper

    Instructions

    In a large mixing bowl add the chopped pork tenderloin, olive oil, minced garlic, onion powder, dried parsley, dried thyme, dried rosemary, salt and pepper. Stir to coat the pork cubes.

    Pour an even layer of pork cubes into the basket of your air fryer.

    Air fry at 400 degrees for 12 minutes. At 6 minutes break the pork apart in the basket with a fork and shake the basket to separate all of the pieces. Continue cooking for another 6 minutes.

    Be sure the internal temperature of the pork pieces are at least 145 degrees.

    Supplies


    More Recipes You Might Enjoy

    • Air Fryer Chicken Bites
    • Gluten Free Air Fryer Turkey Breast
    • Air Fryer Garlic Steak Bites
    • Gluten Free Air Fryer Fajitas

    I get a lot of my ingredients from Thrive Market. Thrive Market has been a game changer for me eating gluten free. They have so many options I can't get at my rural grocery stores! Use this link to get 40% off your first order!

    Print
    clock clock iconcutlery cutlery iconflag flag iconfolder folder iconinstagram instagram iconpinterest pinterest iconfacebook facebook iconprint print iconsquares squares iconheart heart iconheart solid heart solid icon

    Air Fryer Pork Tenderloin Bites


    5 Stars 4 Stars 3 Stars 2 Stars 1 Star

    No reviews

    • Author: Elaine VanVleck
    • Total Time: 22 minutes
    • Yield: 6 servings 1x
    • Diet: Gluten Free
    Print Recipe
    Pin Recipe

    Description

    These Air Fryer Pork Tenderloin Bites are the ultimate quick and easy weeknight dinner that doesn't sacrifice flavor. Juicy, tender chunks of pork tenderloin in the air fryer cook up perfectly golden on the outside while staying moist and flavorful inside. 


    Ingredients

    Scale
    • 2-3 lbs Pork Tenderloin, chopped into bite size chunks
    • 2 Tbsp Olive Oil
    • 1 Tbsp Minced Garlic
    • 1 tsp Onion Powder
    • 1 tsp Dried Parsley
    • ½ tsp Dried Thyme
    • ½ tsp Dried Crushed Rosemary
    • ½ tsp Salt
    • ½ tsp Coarse Ground Black Pepper

    Instructions

    In a large mixing bowl add the chopped pork tenderloin, olive oil, minced garlic, onion powder, dried parsley, dried thyme, dried rosemary, salt and pepper. Stir to coat the pork cubes.

    Pour an even layer of pork cubes into the basket of your air fryer.

    Air fry at 400 degrees for 12 minutes. At 6 minutes break the pork apart in the basket with a fork and shake the basket to separate all of the pieces. Continue cooking for another 6 minutes.

    Be sure the internal temperature of the pork pieces are at least 145 degrees.

    • Prep Time: 10 minutes
    • Cook Time: 12 minutes
    • Category: Meat
    • Method: Air Fryer
    • Cuisine: Gluten Free

    Did you make this recipe?

    Tag @smallfarmbiglife on Instagram and hashtag it #smallfarmbiglife

    Top Tip

    This recipe cooks for 12 minutes. It's important that you break apart the pork bites at 6 minutes. If you don't do this step they will stick together and not get nicely browned.

    Didn't find the answer you're looking for?

    Ask AI to answer based on this recipe:

    ChatGPT
    Google AI
    Perplexity
    Grok
    Claude

    Frequently Asked Questions

    How do I keep air fryer pork tenderloin bites juicy?

    To get juicy pork bites, avoid overcooking and cut the pork tenderloin into even pieces for consistent cooking. Air fryer pork tenderloin cooks fast, so checking it early helps prevent drying out.

    Can I use pork loin instead of pork tenderloin in the air fryer?

    Yes, but pork loin in the air fryer may need slightly longer cook time since it's typically leaner and thicker. Pork tenderloin is naturally more tender, which makes it ideal for air fried pork bites. If substituting, monitor the internal temperature closely for best results.

    Gluten Free Lemon Blueberry Muffins

    These Gluten Free Lemon Blueberry Muffins are bright, fresh, and bursting with flavor in every bite. This recipe creates soft, moist muffins with a tender crumb and the perfect balance of citrus and sweet berries.

    If you're looking for the best lemon blueberry muffins, this easy, homemade version is fluffy, delicious, and ideal for everyday baking.

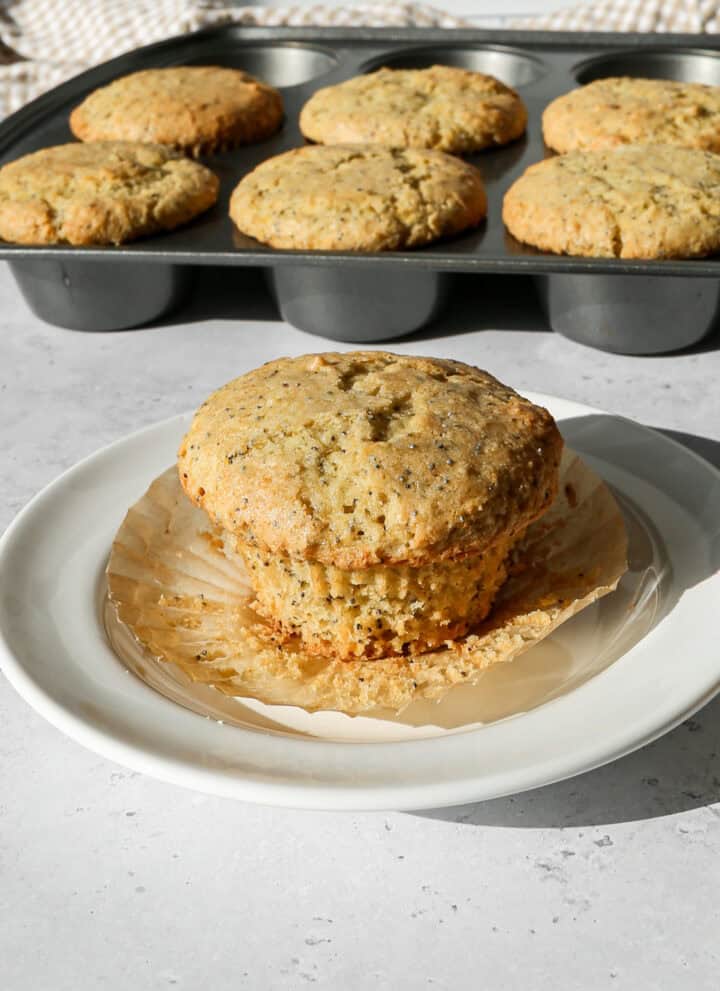
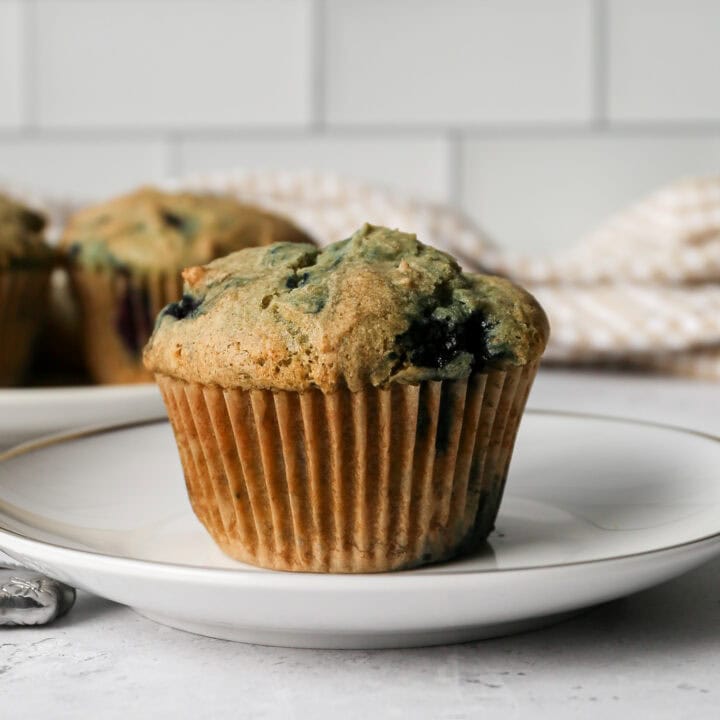
    a gluten free lemon blueberry muffins with its baking liner pulled away sitting on a small plate next to the muffin pan of muffins

    Perfect as a morning treat, quick snack, or part of your weekend mornings, these gluten free muffins fit seamlessly into any breakfast routine.

    Whether you call them gf lemon blueberry muffins, lemon and blueberry muffins, or your new favorite easy gluten free muffin recipe, they're simple to make and irresistibly good.

    These homemade muffins are the kind of yummy breakfast you'll want to make again and again.

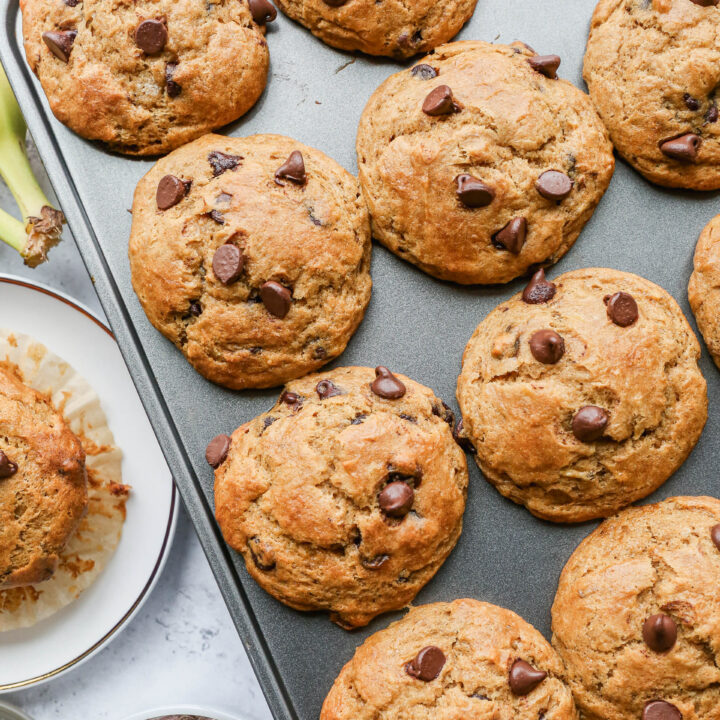
    If you are looking for more muffin recipes try my Gluten Free Banana Bread Muffins, my Gluten Free Blueberry Muffins, my Gluten Free Zucchini Muffins or my Gluten Free Chocolate Chip Banana Muffins.

    You can find all of my breakfast recipes here: Gluten Free Breakfast Recipes

    a wilton muffin pan with eight gluten free lemon blueberry muffins in it next to two small plates of muffins
    [feast_advanced_jump_to]

    Ingredients

    • Gluten Free Flour
    • Baking Powder
    • Salt
    • Baking Soda
    • Granulated Sugar
    • Butter
    • Greek Yogurt
    • Milk
    • Eggs
    • Lemon Juice
    • Lemon Zest
    • Vanilla Extract
    • Frozen Blueberries or Fresh Blueberries

    Instructions

    Preheat your oven to 350 degrees. This recipe makes 12 muffins, but for them to rise properly I like to use two muffin pans lined with 6 muffin liners each.

    In a large mixing bowl whisk together the gluten free flour, baking powder, salt and baking soda. Set aside.

    In the bowl of your stand mixer add the melted butter and granulated sugar. Mix to combine. Add the yogurt, milk, eggs, lemon juice, lemon zest and vanilla extract. Blend until combined.

    Add the dry ingredients to the wet ingredients and blend just until combined. Remove the bowl from your stand mixer and using a spatula stir the blueberries into the muffin batter.

    Evenly divide the batter between the 12 muffin liners.

    Bake at 350 degrees for 25-30 minutes. The muffins will be lightly browned and a toothpick inserted in the center will come out clean when the muffins are done.

    Let the muffins cool completely before storing them in an airtight container.

    Supplies


    More Recipes You Might Enjoy

    • Gluten Free Blueberry Muffins
    • Gluten Free Banana Bread Muffins
    • Gluten Free Blueberry Oat Muffins
    • Gluten Free Blueberry Coffee Cake

    I get a lot of my ingredients from Thrive Market. Thrive Market has been a game changer for me eating gluten free. They have so many options I can't get at my rural grocery stores! Use this link to get 40% off your first order!

    Print
    clock clock iconcutlery cutlery iconflag flag iconfolder folder iconinstagram instagram iconpinterest pinterest iconfacebook facebook iconprint print iconsquares squares iconheart heart iconheart solid heart solid icon

    Gluten Free Lemon Blueberry Muffins


    5 Stars 4 Stars 3 Stars 2 Stars 1 Star

    No reviews

    • Author: Elaine VanVleck
    • Total Time: 45 minutes
    • Yield: 12 muffins 1x
    • Diet: Gluten Free
    Print Recipe
    Pin Recipe

    Description

    These Gluten Free Lemon Blueberry Muffins are bright, fresh, and bursting with flavor in every bite. This recipe creates soft, moist muffins with a tender crumb and the perfect balance of citrus and sweet berries. 


    Ingredients

    Scale
    • 2 cups Gluten Free Flour
    • 2 tsp Baking Powder
    • 1 tsp Salt
    • ½ tsp Baking Soda
    • ¾ cup Granulated Sugar
    • ½ cup Unsalted Butter, melted
    • 1 cup Greek Yogurt
    • ½ cup Milk
    • 2 large Eggs
    • ¼ cup Lemon Juice
    • 2 Tbsp Lemon Zest
    • 1 tsp Vanilla Extract
    • 1 ½ cups Frozen Blueberries or Fresh Blueberries

    Instructions

    Preheat your oven to 350 degrees. This recipe makes 12 muffins, but for them to rise properly I like to use two muffin pans lined with 6 muffin liners each.

    In a large mixing bowl whisk together the gluten free flour, baking powder, salt and baking soda. Set aside.

    In the bowl of your stand mixer add the melted butter and granulated sugar. Mix to combine. Add the yogurt, milk, eggs, lemon juice, lemon zest and vanilla extract. Blend until combined.

    Add the dry ingredients to the wet ingredients and blend just until combined. Remove the bowl from your stand mixer and using a spatula stir the blueberries into the muffin batter.

    Evenly divide the batter between the 12 muffin liners.

    Bake at 350 degrees for 25-30 minutes. The muffins will be lightly browned and a toothpick inserted in the center will come out clean when the muffins are done.

    Let the muffins cool completely before storing them in an airtight container.

    • Prep Time: 15 minutes
    • Cook Time: 30 minutes
    • Category: Breakfast, Snacks
    • Method: Baking
    • Cuisine: Gluten Free

    Did you make this recipe?

    Tag @smallfarmbiglife on Instagram and hashtag it #smallfarmbiglife

    Top Tip

    If you make this recipe in one muffin pan the muffin tops may run together. I wanted the tops to rise more so I make this recipe using two muffin pans with six muffins in each pan. This allows better air circulation around the muffins and room for them to rise more.

    Didn't find the answer you're looking for?

    Ask AI to answer based on this recipe:

    ChatGPT
    Google AI
    Perplexity
    Grok
    Claude

    Frequently Asked Questions

    How do I keep gluten free lemon blueberry muffins moist?

    The key to moist muffins is not over mixing the batter and baking just until done. This easy gluten free muffin recipe is designed to create soft, tender, moist blueberry muffins every time.

    Can I make these lemon blueberry muffins ahead of time?

    Absolutely. These gluten free lemon blueberry muffins store well in an airtight container and are perfect for meal prep. They make a delicious breakfast muffin or quick snack throughout the week.

    One Pan Creamy Garlic Chicken

    This One Pan Creamy Garlic Chicken is the kind of quick and easy weeknight dinner you'll keep on repeat. Juicy pan seared chicken breast simmers in a rich, flavorful creamy garlic sauce, all made in one skillet for minimal cleanup.

    Ready in about 30 minutes, this creamy garlic chicken skillet delivers tender, juicy bites with bold garlic flavor and that smooth, comforting sauce everyone loves.

    a large saute pan of one pan creamy garlic chicken with finely grated parmesan cheese sprinkled on top

    If you're searching for the best creamy garlic chicken recipe, this one checks every box! It's simple, satisfying, and incredibly delicious. Whether you call it creamy garlic parm chicken, garlic butter chicken, or your new favorite one skillet dinner recipe, it's a reliable go to when you need an easy but delicious dinner.

    Perfect as a hearty chicken dinner recipe for busy nights, this creamy chicken breast in garlic sauce proves that a flavorful, homemade meal doesn't have to be complicated.

    If you are looking for more chicken recipes try my Air Fryer Chicken Bites, my Gluten Free Chicken and Broccoli Pasta Bake, my Gluten Free Chicken Pot Pie Casserole or my Gluten Free Chicken Parmesan Pasta Casserole.

    You can find all of my meal recipes here: Gluten Free Meal Recipes

    a large saute pan of one pan creamy garlic chicken with finely grated parmesan cheese sprinkled on top
    [feast_advanced_jump_to]

    Ingredients

    • Boneless Skinless Chicken Breasts
    • Salt
    • Coarse Ground Black Pepper
    • Smoked Paprika
    • Gluten Free Flour
    • Avocado Oil or Vegetable Oil
    • Butter
    • Minced Garlic
    • Yellow Onion
    • Low Sodium Chicken Broth
    • Heavy Cream
    • Garlic Powder
    • Parmesan Cheese

    Instructions

    Carefully fillet the chicken breasts in half into thin cutlets.

    In a small bowl mix together the salt, pepper, paprika and gluten free flour. Sprinkle about 1 tablespoon of the mixture onto each side of the chicken cutlets and pat in.

    In a large skillet over medium heat add the avocado oil and 1 tablespoon of butter. Let it melt completely. Add the chicken cutlets and cook on both sides until golden brown and cooked through. The internal temperature should be at least 165 degrees Fahrenheit. Transfer the chicken to a plate or platter.

    Add 1 tablespoon of butter to your skillet. Add the minced garlic and finely chopped onion. Cook 8-10 minutes until the onion is translucent.

    Add the chicken broth, heavy cream, garlic powder, salt and pepper to the pan. Stir and scrape the bottom of your pan to incorporate the brown bits into the sauce. Simmer the sauce 12-15 minutes until it reduces in half and thickens.

    Add the cooked chicken cutlets back into the pan and heat through.

    Top with finely grated parmesan cheese and serve.

    Supplies


    More Recipes You Might Enjoy
    • Air Fryer Chicken Bites
    • Gluten Free Chicken and Broccoli Pasta Bake
    • Gluten Free Chicken Pot Pie Casserole
    • Gluten Free Instant Pot Chicken and Dumplings

    I get a lot of my ingredients from Thrive Market. Thrive Market has been a game changer for me eating gluten free. They have so many options I can't get at my rural grocery stores! Use this link to get 40% off your first order!
    Print
    clock clock iconcutlery cutlery iconflag flag iconfolder folder iconinstagram instagram iconpinterest pinterest iconfacebook facebook iconprint print iconsquares squares iconheart heart iconheart solid heart solid icon

    One Pan Creamy Garlic Chicken


    5 Stars 4 Stars 3 Stars 2 Stars 1 Star

    No reviews

    • Author: Elaine VanVleck
    • Total Time: 40 minutes
    • Yield: 4 servings 1x
    • Diet: Gluten Free
    Print Recipe
    Pin Recipe

    Description

    This One Pan Creamy Garlic Chicken is the kind of quick and easy weeknight dinner you'll keep on repeat. Juicy pan seared chicken breast simmers in a rich, flavorful creamy garlic sauce, all made in one skillet for minimal cleanup.


    Ingredients

    Scale
    • 2 Boneless Skinless Chicken Breasts, fillet in half
    • ½ tsp Salt
    • ½ tsp Coarse Ground Black Pepper
    • ½ tsp Smoked Paprika
    • ¼ cup Gluten Free Flour
    • 2 Tbsp Avocado Oil or Vegetable Oil
    • 1 Tbsp Butter

    Sauce:

    • 1 Tbsp Butter
    • 2 Tbsp Minced Garlic
    • 1 small Yellow Onion, finely chopped
    • 1 cup Low Sodium Chicken Broth
    • ½ cup Heavy Cream
    • ½ tsp Garlic Powder
    • ¼ tsp Salt
    • ¼ tsp Coarse Ground Black Pepper
    • ⅓ cup Parmesan Cheese, finely grated

    Instructions

    Carefully fillet the chicken breasts in half into thin cutlets.

    In a small bowl mix together the salt, pepper, paprika and gluten free flour. Sprinkle about 1 tablespoon of the mixture onto each side of the chicken cutlets and pat in.

    In a large skillet over medium heat add the avocado oil and 1 tablespoon of butter. Let it melt completely. Add the chicken cutlets and cook on both sides until golden brown and cooked through. The internal temperature should be at least 165 degrees Fahrenheit. Transfer the chicken to a plate or platter.

    Add 1 tablespoon of butter to your skillet. Add the minced garlic and finely chopped onion. Cook 8-10 minutes until the onion is translucent.

    Add the chicken broth, heavy cream, garlic powder, salt and pepper to the pan. Stir and scrape the bottom of your pan to incorporate the brown bits into the sauce. Simmer the sauce 12-15 minutes until it reduces in half and thickens.

    Add the cooked chicken cutlets back into the pan and heat through.

    Top with finely grated parmesan cheese and serve.

    • Prep Time: 10 minutes
    • Cook Time: 30 minutes
    • Category: Chicken, Meat
    • Method: Stove Top
    • Cuisine: Gluten Free

    Did you make this recipe?

    Tag @smallfarmbiglife on Instagram and hashtag it #smallfarmbiglife

    Top Tip

    I don't suggest over crowding the pan by adding more chicken. If you need more than 4 servings I would either use a larger pan and double the recipe or double the recipe and use two pans.

    Didn't find the answer you're looking for?

    Ask AI to answer based on this recipe:

    ChatGPT
    Google AI
    Perplexity
    Grok
    Claude

    Frequently Asked Questions

    Can I use chicken thighs instead of chicken breast?

    Yes! While this recipe uses pan seared chicken breast, boneless skinless chicken thighs work beautifully in this creamy garlic chicken skillet. Just adjust the cooking time slightly to ensure the chicken is fully cooked and tender.

    How do I keep the chicken juicy in a creamy garlic chicken recipe?

    The key to juicy chicken is properly searing it first and not overcooking it. A good sear locks in flavor and moisture before the chicken simmers in the creamy garlic sauce, creating tender, flavorful bites in this one pan creamy garlic chicken.

    Can I make this creamy garlic chicken ahead of time?

    Absolutely. This 30 minute creamy garlic chicken skillet reheats well and makes great leftovers for lunch or dinner the next day. Store it in an airtight container in the refrigerator and slowly reheat to keep the creamy garlic sauce smooth and delicious.

    • « Previous Page
    • 1
    • …
    • 8
    • 9
    • 10
    • 11
    • 12
    • …
    • 100
    • Next Page »

    Welcome! I'm Elaine

    I'm so glad you are here! I share easy gluten free recipes from my small farm in Washington.

    Be sure to sign up for my newsletter to stay up to date on all of my new recipes.

    More about me...
    • Instagram
    • Pinterest
    • Facebook
    • Twitter
    • Mail

    Load up on new recipes, exclusive goodies, + more!
    Sign up below to stay up-to-date on news, events, and special deals.
    Thank you for subscribing!

    Easy Meals Recipes

    • Gluten Free Instant Pot Chili Mac and Cheese
    • Gluten Free Taco Casserole
    • Gluten Free Cowboy Baked Beans
    • Gluten Free Walking Taco Casserole
    • Gluten Free Creamy Beef and Mushroom Pasta
    • Gluten Free Instant Pot Chicken and Dumplings
    • Instant Pot Mexican Style Beef and Rice
    • Gluten Free Chicken Parmesan Pasta Casserole
    • Gluten Free One Pot Hamburger Helper Copycat
    • Gluten Free Salisbury Steak with Mushroom Gravy
    • Gluten Free Air Fryer Fajitas
    • Gluten Free Sloppy Joe Casserole

    Footer

    back to top

    About

    • Privacy Policy
    • Shop my Amazon Page
    • Follow me on LTK

    Newsletter

    • Sign Up! for emails and updates

    Contact

    • Contact
    • Media Kit
    • About Me

    As an Amazon Associate I earn from qualifying purchases.

    I may get commissions for purchases made through links on this site.

    Copyright © 2026 Brunch Pro on the Brunch Pro Theme