Small Farm Big Life

  • Gluten Free Recipe Index
  • Subscribe
  • Resources
menu icon
go to homepage
  • Home
  • Gluten Free Recipe Index
  • Subscribe
  • My Story
  • Resources
  • Free Guides
    • Email
    • Facebook
    • Instagram
    • Pinterest
  • subscribe
    search icon
    Homepage link
    • Home
    • Gluten Free Recipe Index
    • Subscribe
    • My Story
    • Resources
    • Free Guides
    • Email
    • Facebook
    • Instagram
    • Pinterest
  • ×

    Gluten Free Lemon Olive Oil Cake

    This Gluten Free Lemon Olive Oil Cake is a moist, easy dessert inspired by classic Italian olive oil cake recipes. Made from scratch, this simple lemon olive oil cake has a tender crumb and bright citrus flavor that makes it feel light yet indulgent.

    The olive oil creates a super moist gluten free olive oil cake that stays soft for days, making it a go to for home bakers who want an easy, reliable cake that still feels special.

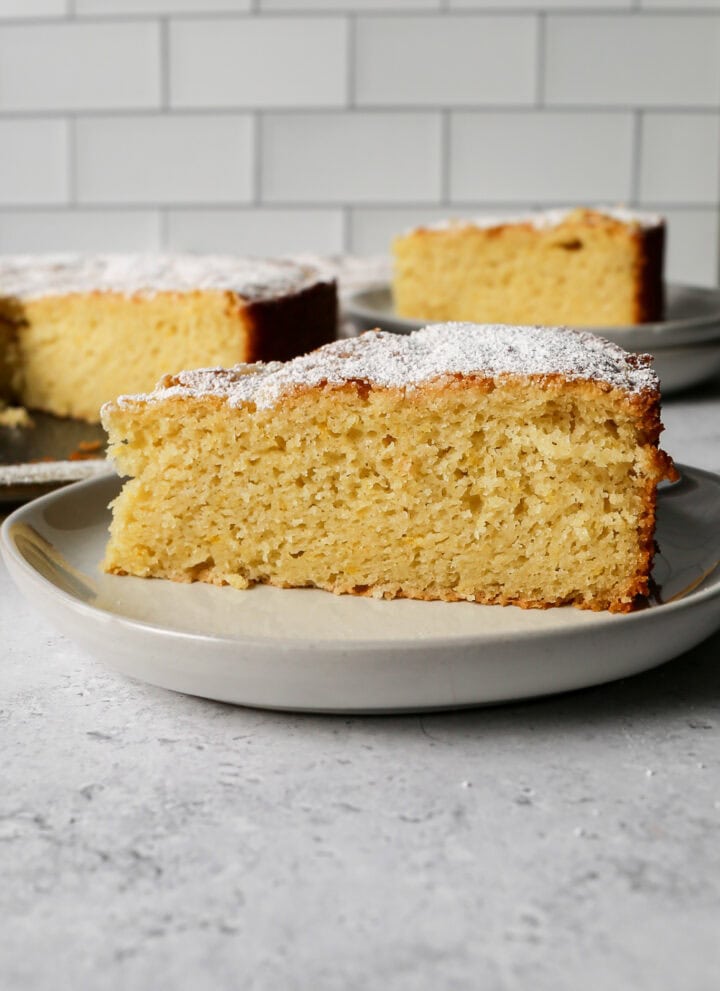
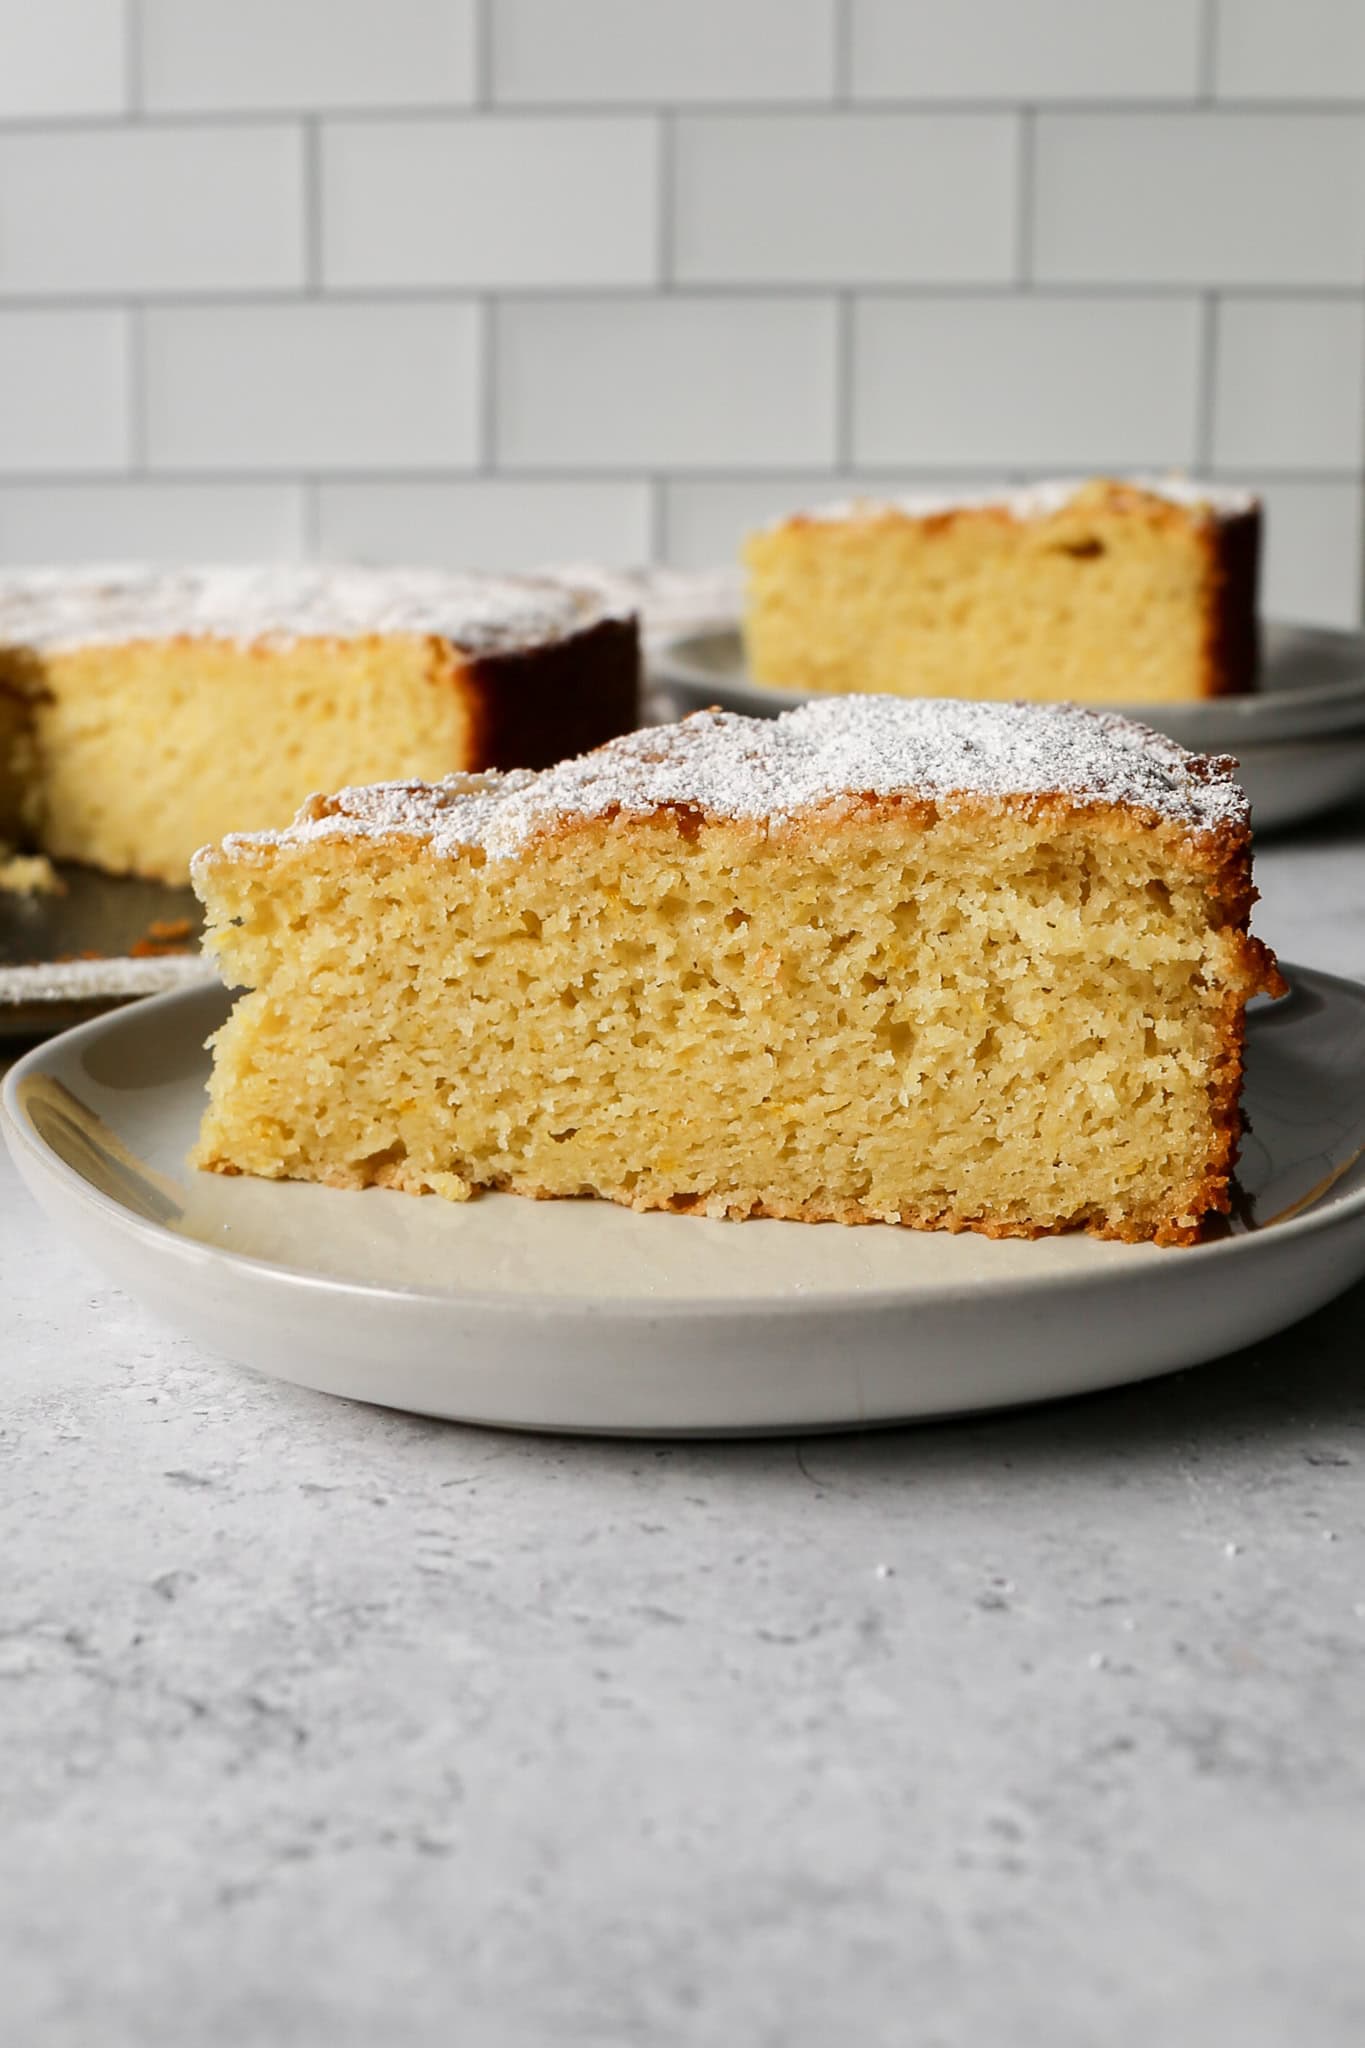
    a slice of gluten free lemon olive oil cake on a beige plate in front of the cake on a platter and another slice of cake.

    Perfect as a single layer round cake, this gluten free lemon cake works beautifully for everyday baking, casual gatherings, or a simple dessert after dinner. With its balance of lemon and olive oil, this olive oil lemon cake is a timeless Italian dessert that's both elegant and approachable.

    Whether you're learning how to make lemon olive oil cake or looking for the best lemon olive oil cake recipe, this gluten free version proves that simple, moist cakes can be absolutely delicious.

    If you are looking for more easy cake recipes try my Gluten Free Blueberry Coffee Cake, my Gluten Free Vanilla Buttermilk Poke Cake, my Gluten Free Carrot Sheet Cake with Cream Cheese Frosting or my Gluten Free Cherry Almond Cake.

    You can find all of my cake recipes here: Gluten Free Cake Recipes

    the gluten free lemon olive oil cake on a platter before having powdered sugar sprinkled on top.
    [feast_advanced_jump_to]

    Ingredients

    • Gluten Free Flour
    • Baking Powder
    • Baking Soda
    • Salt
    • Olive Oil
    • Eggs
    • Granulated Sugar
    • Vanilla Extract
    • Lemon Juice
    • Greek Yogurt
    • Powdered Sugar

    Instructions

    Preheat your oven to 350 degrees. Grease a 9-inch springform pan with butter or coconut oil. Wrap the bottom of the pan in aluminum foil. This cake may leak some oil and the aluminum foil will catch that in your oven. Set aside.

    In the bowl of your stand mixer blend together the olive oil, eggs, sugar, vanilla, lemon juice and yogurt until they're combined.

    In a large mixing bowl whisk together the gluten free flour, baking powder, baking soda and salt.

    Add the dry ingredients to the wet ingredients and blend just until combined.

    Pour the cake batter into your greased pan evenly. Sprinkle 2 tablespoons of granulated sugar evenly over the top.

    Bake at 350 degrees for 50-55 minutes. The cake will be lightly browned on top and a toothpick will come out clean when it's done.

    Let the cake cool for 10 minutes and the gently remove the sides of the springform pan. Allow the cake to cool completely before dusting with powdered sugar and serving.

    Supplies


    More Recipes You Might Enjoy

    • Gluten Free Blueberry Coffee Cake
    • Gluten Free Lemon Bundt Cake with Lemon Glaze
    • Gluten Free Raspberry Cornmeal Cake
    • Gluten Free Pineapple Upside Down Cake

    I get a lot of my ingredients from Thrive Market. Thrive Market has been a game changer for me eating gluten free. They have so many options I can't get at my rural grocery stores! Use this link to get 40% off your first order!

    Print
    clock clock iconcutlery cutlery iconflag flag iconfolder folder iconinstagram instagram iconpinterest pinterest iconfacebook facebook iconprint print iconsquares squares iconheart heart iconheart solid heart solid icon

    Gluten Free Lemon Olive Oil Cake


    5 Stars 4 Stars 3 Stars 2 Stars 1 Star

    No reviews

    • Author: Elaine VanVleck
    • Total Time: 1 hour 5 minutes
    • Yield: 8 servings 1x
    • Diet: Gluten Free
    Print Recipe
    Pin Recipe

    Description

    This Gluten Free Lemon Olive Oil Cake is a moist, easy dessert inspired by classic Italian olive oil cake recipes. Made from scratch, this simple lemon olive oil cake has a tender crumb and bright citrus flavor that makes it feel light yet indulgent. 


    Ingredients

    Scale
    • 2 cups Gluten Free Flour
    • ½ tsp Baking Powder
    • ½ tsp Baking Soda
    • 1 tsp Salt
    • 1 cup Olive Oil
    • 3 large Eggs
    • 1 cup Granulated Sugar
    • 2 tsp Vanilla Extract
    • ½ cup Lemon Juice
    • 1 cup Greek Yogurt

    Topping:

    • 2 Tbsp Granulated Sugar

    Powdered Sugar, for dusting top after baked


    Instructions

    Preheat your oven to 350 degrees. Grease a 9-inch springform pan with butter or coconut oil. Wrap the bottom of the pan in aluminum foil. This cake may leak some oil and the aluminum foil will catch that in your oven. Set aside.

    In the bowl of your stand mixer blend together the olive oil, eggs, sugar, vanilla, lemon juice and yogurt until they're combined.

    In a large mixing bowl whisk together the gluten free flour, baking powder, baking soda and salt.

    Add the dry ingredients to the wet ingredients and blend just until combined.

    Pour the cake batter into your greased pan evenly. Sprinkle 2 tablespoons of granulated sugar evenly over the top.

    Bake at 350 degrees for 50-55 minutes. The cake will be lightly browned on top and a toothpick will come out clean when it's done.

    Let the cake cool for 10 minutes and the gently remove the sides of the springform pan. Allow the cake to cool completely before dusting with powdered sugar and serving.

    • Prep Time: 15 minutes
    • Cook Time: 50 minutes
    • Category: Cake
    • Method: Baking
    • Cuisine: Gluten Free

    Did you make this recipe?

    Tag @smallfarmbiglife on Instagram and hashtag it #smallfarmbiglife

    Top Tip

    If you don't want to dust this cake with powdered sugar it's just as delicious without it. I think the browned top and crunchy sugar are pretty on their own too.

    Didn't find the answer you're looking for?

    Ask AI to answer based on this recipe:

    ChatGPT
    Google AI
    Perplexity
    Grok
    Claude

    Frequently Asked Questions

    What type of olive oil is best for lemon olive oil cake?

    A mild or light extra virgin olive oil works best for this Italian lemon olive oil cake recipe. Using a smoother olive oil allows the lemon flavor to shine while still creating a moist, tender crumb that makes this gluten free olive oil cake so soft and delicious.

    How should I store gluten free lemon olive oil cake?

    Store this gluten free lemon cake covered at room temperature for up to two days, or refrigerate it to keep it fresh longer. Because it's an olive oil cake, it stays moist and actually tastes even better the next day, making it a great make ahead lemon dessert.

    Pineapple Jam

    This Pineapple Jam is a quick and easy homemade jam that's perfect if you're looking for a simple pineapple jam recipe without pectin. Made from scratch using canned pineapple, this easy homemade pineapple jam comes together fast with a bright tropical flavor.

    If you've ever wondered how to make pineapple jam, this no pectin method is an approachable way to create a delicious homemade jam without complicated steps.

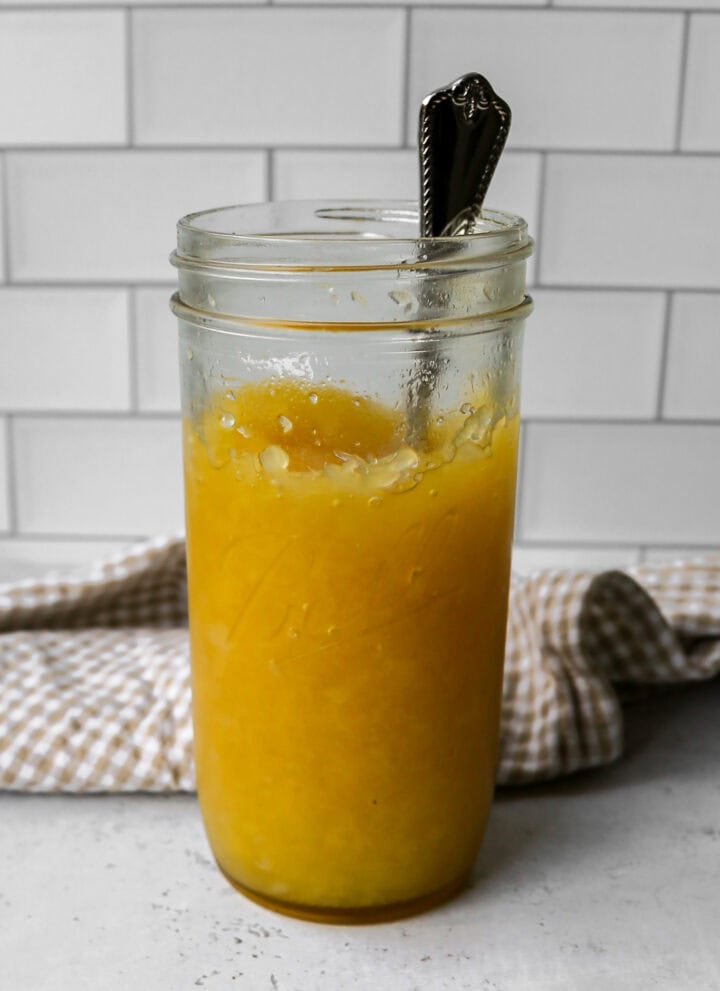
    a Ball jar of pineapple jam with a spoon in it

    Perfect for toast, biscuits, yogurt, or desserts, this pineapple jam recipe is a versatile addition to your kitchen. The tropical pineapple flavor makes it feel special while still being an easy jam recipe you can make anytime.

    Whether you're new to homemade jams and jellies or looking for a reliable pineapple preserves recipe, this homemade pineapple jam is a great place to start.

    If you are looking for more pineapple recipes try my Pineapple Coleslaw, my Easy Fresh Pineapple Salsa, my Gluten Free Pineapple Bars or my Gluten Free Pineapple Upside Down Cake.

    an overhead view of the pineapple jam in a jar with a spoon scoop of it on top
    [feast_advanced_jump_to]

    Ingredients

    • Canned Crushed Pineapple
    • Granulated Sugar

    Instructions

    In a small saucepan add the crushed pineapple with the juice from the can and the sugar. Stir together.

    Bring this mixture to a boil and simmer for 20-25 minutes until jam is thickened. Stirring occasionally to keep jam from sticking to the bottom of your saucepan. The jam will still be a little bit runny at this point but will thicken more once it cools.

    Pour the jam into a jar and cool completely. Store in a sealed jar in the refrigerator for up to one month.

    Supplies


    More Recipes You Might Enjoy

    • Gluten Free Cranberry Jam
    • Gluten Free Frog Eye Salad
    • Gluten Free Pineapple Upside Down Cake
    • Gluten Free Pineapple Bars

    I get a lot of my ingredients from Thrive Market. Thrive Market has been a game changer for me eating gluten free. They have so many options I can't get at my rural grocery stores! Use this link to get 40% off your first order!

    Print
    clock clock iconcutlery cutlery iconflag flag iconfolder folder iconinstagram instagram iconpinterest pinterest iconfacebook facebook iconprint print iconsquares squares iconheart heart iconheart solid heart solid icon

    Pineapple Jam


    5 Stars 4 Stars 3 Stars 2 Stars 1 Star

    No reviews

    • Author: Elaine VanVleck
    • Total Time: 25 minutes
    • Yield: 2 cups 1x
    • Diet: Gluten Free
    Print Recipe
    Pin Recipe

    Description

    This Pineapple Jam is a quick and easy homemade jam that's perfect if you're looking for a simple pineapple jam recipe without pectin. Made from scratch using canned pineapple, this easy homemade pineapple jam comes together fast with a bright tropical flavor. 


    Ingredients

    Scale
    • 1 - 20 ounce can Crushed Pineapple, with juice from can
    • ¾ cup Granulated Sugar

    Instructions

    In a small saucepan add the crushed pineapple with the juice from the can and the sugar. Stir together.

    Bring this mixture to a boil and simmer for 20-25 minutes until jam is thickened. Stirring occasionally to keep jam from sticking to the bottom of your saucepan. The jam will still be a little bit runny at this point but will thicken more once it cools.

    Pour the jam into a jar and cool completely. Store in a sealed jar in the refrigerator for up to one month.

    • Prep Time: 5 minutes
    • Cook Time: 20 minutes
    • Category: Jam
    • Method: Stove Top
    • Cuisine: Gluten Free

    Did you make this recipe?

    Tag @smallfarmbiglife on Instagram and hashtag it #smallfarmbiglife

    Top Tip

    In a good nonstick saucepan this jam can cook with very little stirring required. I put the jam on the stove and then cleaned my kitchen and did other chores while I wait for it to thicken.

    Didn't find the answer you're looking for?

    Ask AI to answer based on this recipe:

    ChatGPT
    Google AI
    Perplexity
    Grok
    Claude

    Frequently Asked Questions

    Can I make pineapple jam without pectin?

    Yes, this pineapple jam recipe is made without pectin, using a simple method that allows the jam to thicken naturally as it cooks. This makes it an easy option for homemade jam, especially if you don't usually keep pectin on hand.

    Can I use canned pineapple to make pineapple jam?

    Absolutely. Using canned pineapple is a convenient way to make homemade pineapple jam quickly and easily. It saves prep time while still giving you a smooth, flavorful jam with a bright pineapple taste.

    How should I store homemade pineapple jam?

    Store homemade pineapple jam in an airtight container in the refrigerator for up to one month. Because this is a no pectin, quick jam recipe, it's best enjoyed fresh and can't be stored long term like shelf stable preserves.

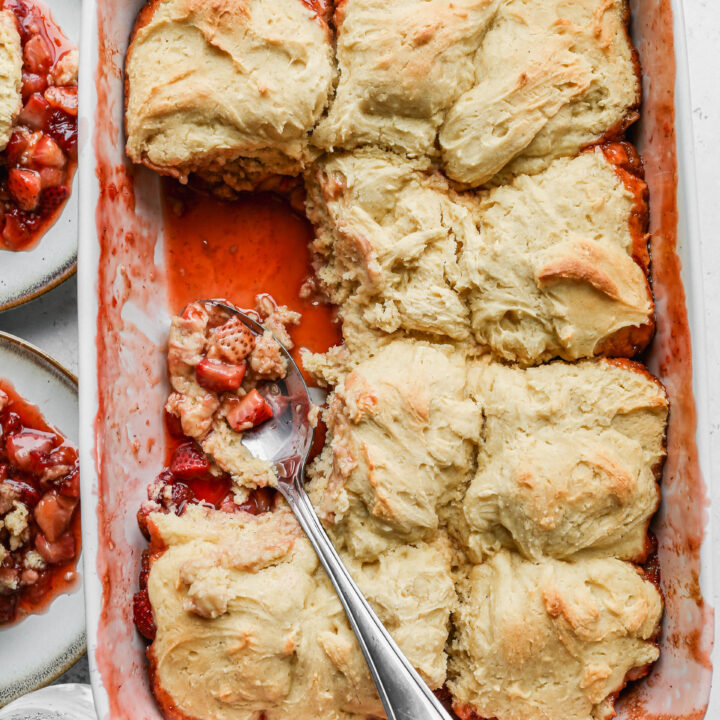
    Gluten Free Slow Cooker Berry Cobbler

    This Slow Cooker Berry Cobbler is a warm, cozy dessert that couldn't be easier to make. Whether you call it slow cooker mixed berry cobbler, triple berry cobbler, or a classic crockpot berry cobbler, this recipe delivers sweet, bubbling fruit with a soft, tender topping every time.

    It's a super easy berry cobbler recipe that's perfect when you want a comforting slow cooker dessert without turning on the oven.

    a plate with gluten free slow cooker berry cobbler and a fork on it

    Perfect for busy days and casual gatherings, this gluten free berry cobbler is a reliable crowd pleaser. Made as a gluten free crockpot dessert recipe, it works beautifully as a slow cooker fruit dessert you can prep ahead and serve warm.

    If you're wondering how to make berry cobbler in the crockpot, this favorite dessert recipe proves that simple, homemade desserts can be just as satisfying as bakery style treats.

    If you are looking for more berry dessert recipes try my Gluten Free Blueberry Coffee Cake, my Gluten Free Strawberry Cobbler, my Gluten Free Cranberry Apple Crisp or my Gluten Free Strawberry Jam Bars.

    You can find all my dessert recipes here: Gluten Free Dessert Recipes

    a plate of gluten free slow cooker berry cobbler sitting in front of a white crockpot
    [feast_advanced_jump_to]

    Ingredients

    • Frozen Mixed Berries
    • Blueberry Pie Filling
    • Granulated Sugar
    • Gluten Free Flour
    • Baking Powder
    • Salt
    • Buttermilk
    • Eggs
    • Vanilla Extract

    Instructions

    Add the frozen mixed berries, blueberry pie filling and sugar to the bowl of your slow cooker. Stir to combine. Cook on low heat for 2 hours until the mixture is bubbling.

    Turn the slow cooker to high heat.

    In a large mixing bowl stir together the gluten free flour, baking powder, salt, sugar, buttermilk, eggs and vanilla extract to make the topping.

    Spoon the topping mixture over the berry mixture.

    Cook in the slow cooker on high for 1 hour or until a toothpick inserted in the center of the topping comes out clean.

    Serve warm on its own or with vanilla ice cream.

    Supplies


    More Recipes You Might Enjoy

    • Gluten Free Strawberry Cobbler
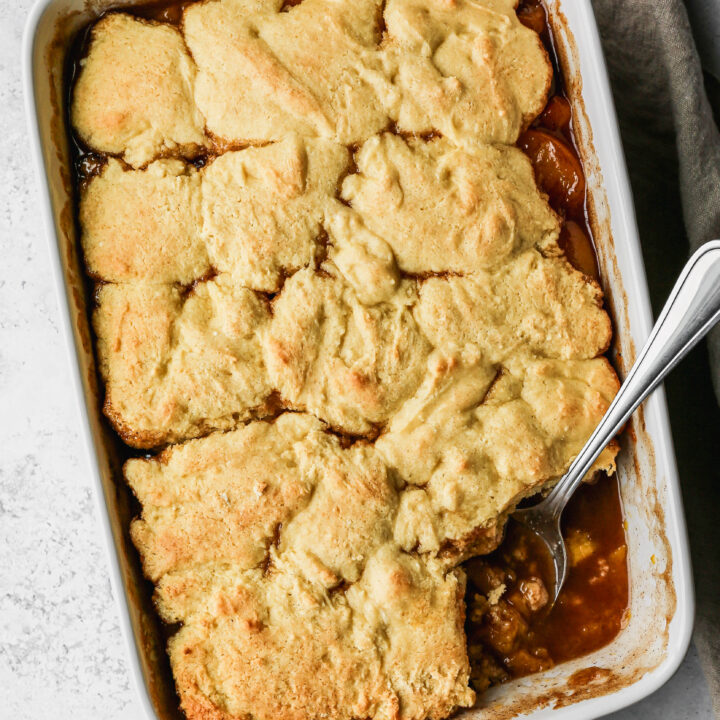
    • Gluten Free Canned Peach Cobbler
    • Gluten Free Blackberry Cobbler
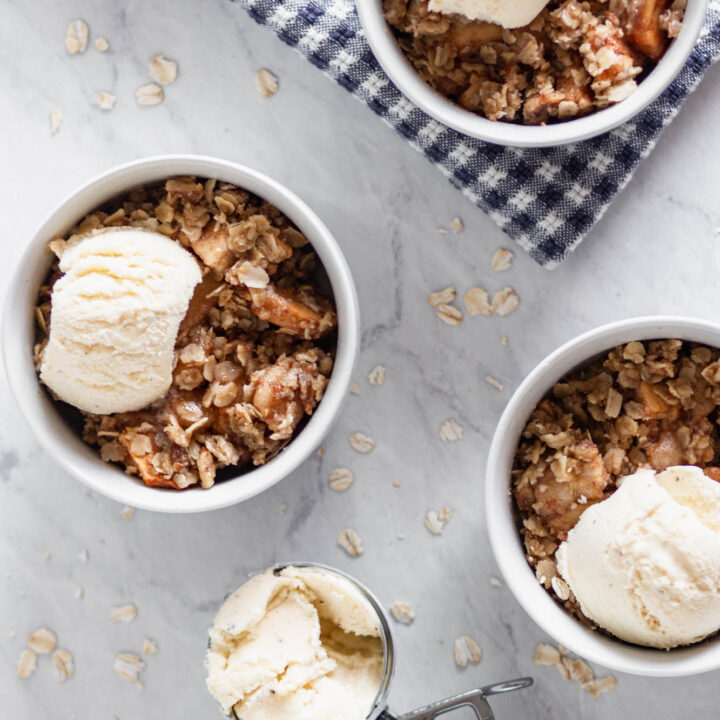
    • Gluten Free Apple Crisp

    I get a lot of my ingredients from Thrive Market. Thrive Market has been a game changer for me eating gluten free. They have so many options I can't get at my rural grocery stores! Use this link to get 40% off your first order!

    Print
    clock clock iconcutlery cutlery iconflag flag iconfolder folder iconinstagram instagram iconpinterest pinterest iconfacebook facebook iconprint print iconsquares squares iconheart heart iconheart solid heart solid icon

    Gluten Free Slow Cooker Berry Cobbler


    5 Stars 4 Stars 3 Stars 2 Stars 1 Star

    No reviews

    • Author: Elaine VanVleck
    • Total Time: 3 hours 15 minutes
    • Yield: 6 servings 1x
    • Diet: Gluten Free
    Print Recipe
    Pin Recipe

    Description

    This Slow Cooker Berry Cobbler is a warm, cozy dessert that couldn't be easier to make. Whether you call it slow cooker mixed berry cobbler, triple berry cobbler, or a classic crockpot berry cobbler, this recipe delivers sweet, bubbling fruit with a soft, tender topping every time. 


    Ingredients

    Scale
    • 12 ounce bag Frozen Mixed Berries
    • 21 ounce can Blueberry Pie Filling
    • 2 Tbsp Granulated Sugar

    Buttermilk Topping:

    • 2 ½ cups Gluten Free Flour
    • 3 tsp Baking Powder
    • 1 tsp Salt
    • 1 cup Granulated Sugar
    • 1 cup Buttermilk
    • 2 large Eggs
    • 1 tsp Vanilla Extract

    Instructions

    Add the frozen mixed berries, blueberry pie filling and sugar to the bowl of your slow cooker. Stir to combine. Cook on low heat for 2 hours until the mixture is bubbling.

    Turn the slow cooker to high heat.

    In a large mixing bowl stir together the gluten free flour, baking powder, salt, sugar, buttermilk, eggs and vanilla extract to make the topping.

    Spoon the topping mixture over the berry mixture.

    Cook in the slow cooker on high for 1 hour or until a toothpick inserted in the center of the topping comes out clean.

    Serve warm on its own or with vanilla ice cream.

    • Prep Time: 15 minutes
    • Cook Time: 3 hours
    • Category: Dessert
    • Method: Slow Cooker, Crockpot
    • Cuisine: Gluten Free

    Did you make this recipe?

    Tag @smallfarmbiglife on Instagram and hashtag it #smallfarmbiglife

    Top Tip

    If you can't get canned blueberry pie filling you could also use canned cherry pie filling. It is important that it's the pie filling and not just the fruit canned. The pie filling is thick and is what gives thickness to this berry cobbler's filling.

    Didn't find the answer you're looking for?

    Ask AI to answer based on this recipe:

    ChatGPT
    Google AI
    Perplexity
    Grok
    Claude

    Frequently Asked Questions

    Can you make berry cobbler in the slow cooker?

    Yes! Slow cooker berry cobbler is an easy, hands off way to make a warm fruit dessert with minimal prep and no oven required.

    Can I use frozen berries for crockpot berry cobbler?

    Absolutely. Frozen berries works great and makes this dessert even more convenient, with no need to thaw the fruit first.

    Gluten Free Slow Cooker Beef and Broccoli

    This Slow Cooker Beef and Broccoli is a savory, comforting dinner that's truly better than takeout. Made as an easy crockpot beef and broccoli recipe, it delivers tender beef and flavorful broccoli in a rich, saucy finish that tastes like your favorite restaurant version.

    This slow cooker broccoli beef is a family favorite and a go to easy slow cooker dinner when you want something satisfying, cozy, and full of flavor.

    two white bowls of gluten free slow cooker beef and broccoli next to silver forks and a linen kitchen towel

    Perfect for busy days, this slow cooker beef and broccoli is both healthy and incredibly simple to make. It's a gluten free beef and broccoli in the slow cooker option that works beautifully for meal prep, weeknight dinners, or whenever you need a reliable slow cooker dinner recipe.

    If you're wondering how do you make beef and broccoli that's flavorful, comforting, and hands off, this best crockpot beef and broccoli checks every box.

    If you are looking for more beef recipes try my Slow Cooker Steak and Mushrooms, my Oven Baked Steak and Potato Kabobs, my Air Fryer Garlic Steak Bites or my Gluten Free Salisbury Steak with Mushroom Gravy.

    You can find all my meal recipes here: Gluten Free Meal Recipes

    [feast_advanced_jump_to]

    Ingredients

    • Beef Chuck Roast
    • Beef Broth
    • Coconut Aminos
    • Brown Sugar
    • Minced Garlic
    • Sesame Oil
    • Salt
    • Ground Ginger
    • Coarse Ground Black Pepper
    • Cornstarch
    • Frozen Broccoli
    • Jasmine Rice

    Instructions

    In the bowl of your Crockpot add the beef broth, coconut aminos, brown sugar, minced garlic, sesame oil, salt, ginger and pepper. Stir to combine.

    Lay the beef roast strips in the crockpot evenly.

    Cook on high heat 1-2 hours or low heat 4-5 hours.

    30 minutes before the beef strips are done combine the cornstarch and 3 tablespoons of water in a small bowl. Pour the cornstarch mixture into the beef mixture and stir to combine. Add the frozen broccoli and stir.

    Continue to cook in the slow cooker until the beef is done and the broccoli is tender.

    Make your rice to serve the beef and broccoli over. I like to make mine in the Instant Pot. I add 2 cups jasmine rice and 2 ½ cups water. Cook on manual for 3 minutes and let the pressure release naturally.

    Serve the beef and broccoli over the cooked rice.

    Supplies


    More Recipes You Might Enjoy
    • Gluten Free Easy Ground Beef Shepherd's Pie
    • Gluten Free Cheesy Mushroom Hamburger Rice Casserole
    • 10 Easy Gluten Free Beef Recipes
    • Slow Cooker Steak and Mushrooms

    I get a lot of my ingredients from Thrive Market. Thrive Market has been a game changer for me eating gluten free. They have so many options I can't get at my rural grocery stores! Use this link to get 40% off your first order!

    Print
    clock clock iconcutlery cutlery iconflag flag iconfolder folder iconinstagram instagram iconpinterest pinterest iconfacebook facebook iconprint print iconsquares squares iconheart heart iconheart solid heart solid icon

    Gluten Free Slow Cooker Beef and Broccoli


    5 Stars 4 Stars 3 Stars 2 Stars 1 Star

    No reviews

    • Author: Elaine VanVleck
    • Total Time: 1 hour 45 minutes
    • Yield: 6 servings 1x
    • Diet: Gluten Free
    Print Recipe
    Pin Recipe

    Description

    This Slow Cooker Beef and Broccoli is a savory, comforting dinner that's truly better than takeout. Made as an easy crockpot beef and broccoli recipe, it delivers tender beef and flavorful broccoli in a rich, saucy finish that tastes like your favorite restaurant version. 


    Ingredients

    Scale
    • 1 lbs. Beef Chuck Roast, cut into think strips
    • ½ cup Beef Broth
    • ½ cup Coconut Aminos
    • ¼ cup Brown Sugar
    • 2 Tbsp Minced Garlic
    • 2 Tbsp Sesame Oil
    • 1 tsp Salt
    • 1 tsp Ground Ginger
    • ¼ tsp Coarse Ground Black Pepper
    • 2 Tbsp. Cornstarch
    • 3 Tbsp. Water
    • 12 ounce bag Frozen Broccoli
    • Jasmine Rice, cooked for serving

    Instructions

    In the bowl of your Crockpot add the beef broth, coconut aminos, brown sugar, minced garlic, sesame oil, salt, ginger and pepper. Stir to combine.

    Lay the beef roast strips in the crockpot evenly.

    Cook on high heat 1-2 hours or low heat 4-5 hours.

    30 minutes before the beef strips are done combine the cornstarch and 3 tablespoons of water in a small bowl. Pour the cornstarch mixture into the beef mixture and stir to combine. Add the frozen broccoli and stir.

    Continue to cook in the slow cooker until the beef is done and the broccoli is tender.

    Make your rice to serve the beef and broccoli over. I like to make mine in the Instant Pot. I add 2 cups jasmine rice and 2 ½ cups water. Cook on manual for 3 minutes and let the pressure release naturally.

    Serve the beef and broccoli over the cooked rice.

    • Prep Time: 15 minutes
    • Cook Time: 1 hour 30 minutes
    • Category: Meals
    • Method: Slow Cooker, Crockpot
    • Cuisine: Gluten Free

    Did you make this recipe?

    Tag @smallfarmbiglife on Instagram and hashtag it #smallfarmbiglife

    Top Tip

    My favorite way to serve this is over rice. Jasmine rice is my favorite for its texture. I cook mine in my Instant Pot. I add 2 cups Jasmine Rice and 2 ½ cups water for 3 minutes on Manual. Then let the steam release naturally.

    I'm aware that others say to do a one to one ratio with the rice and water. For me this allows the rice to stick together too much. Adding the extra ½ cup of water gives me rice that is easily fluffed with a fork and served.

    Didn't find the answer you're looking for?

    Ask AI to answer based on this recipe:

    ChatGPT
    Google AI
    Perplexity
    Grok
    Claude

    Frequently Asked Questions

    Can you make beef and broccoli in the slow cooker?

    Yes! Slow cooker beef and broccoli is an easy, hands off way to create tender beef with rich, savory flavor while letting the crockpot do all the work.

    Is slow cooker beef and broccoli healthy?

    This recipe can be a healthy crockpot dinner when enjoyed with balanced portions and served alongside rice, making it a satisfying and nourishing meal.

    Is this slow cooker beef and broccoli gluten free?

    Yes, this gluten free beef and broccoli in the slow cooker is made without gluten, making it a great option for anyone following a gluten free diet.

    Gluten Free Cheesy Sourdough Bread

    This Gluten Free Cheesy Sourdough Bread is a savory, bakery style loaf that delivers everything you love about artisan sourdough bread with the rich flavor of melted cheese in every bite. Made as a gluten free sourdough bread recipe, this loaf uses sourdough discard to create a tender crumb, crisp crust, and deep, tangy flavor.

    Whether you think of it as cheddar sourdough bread, a three cheese sourdough bread, or a classic sourdough cheese bread, it's a delicious twist on traditional gluten free bread that feels truly homemade and satisfying.

    two slices of toasted gluten free cheesy sourdough bread on a plate

    Perfect for slicing, toasting, or serving alongside soups and dinners, this gluten free cheese bread is both approachable and impressive.

    Baked in a loaf pan, it's an easy gluten free bread option that works for everyday meals while still feeling special enough for entertaining.

    If you're looking for what to add to sourdough bread to elevate it, this gluten free discard recipe is a must try and might just become your best gluten free sourdough bread recipe yet.

    If you are looking for more sourdough recipes try my Gluten Free Sourdough Sandwich Bread, my Gluten Free Sourdough Croutons, my Gluten Free Sourdough Pizza Crust or my Gluten Free Sourdough Bread.

    You can find all of my bread recipes here: Gluten Free Bread Recipes

    a loaf of gluten free cheesy sourdough bread with a slice cut from it sitting on a platter
    [feast_advanced_jump_to]

    Ingredients

    • Sourdough Starter
    • Butter
    • Honey
    • Milk
    • Gluten Free Flour
    • Potato Starch or Tapioca Flour
    • Baking Powder
    • Salt
    • Parmesan Cheese
    • Gouda Cheese
    • Cheddar Cheese

    Instructions

    Grease your bread pan with coconut oil or butter. Set aside.

    In the microwave or on the stovetop heat your milk just until it's warm to the touch. You don't want it too hot! Also melt the butter on the stovetop or in the microwave.

    In the bowl of your stand mixer add the sourdough starter, melted butter, honey and warm milk. Blend together.

    Add the potato starch or tapioca starch, gluten free flour, baking powder, salt, shredded parmesan cheese, shredded gouda cheese and shredded cheddar cheese. Blend just until ingredients begin to mix together. Remove from the stand mixer and gently fold any ingredients left on the bottom of the bowl into the mixture with a spatula.

    The dough will be very sticky. You don't want to knead or overwork the dough. This sticky texture will let the bread rise nicely.

    Spoon the dough into your greased bread pan. Cover the bread pan with a plate or platter and let it rest in a warm area for 6-8 hours. I like to mix my dough up at night before I go to bed and let it proof overnight and then bake in the morning.

    Preheat your oven to 350 degrees.

    Bake the bread for 1 hour 10 minutes to 1 hour 15 minutes. The top will be very lightly browned and the sides will be a little darker brown. This is a light bread and will not get really brown on top.

    Let the bread stand in the pan for at least 10 minutes to cool before you turn it out onto a plate or platter to finish cooling.

    Once the bread has completely cooled slice it into pieces and store it in a sealed container.

    Depending on how warm your house is it will last on the counter for 3-4 days. If you aren't going to use it in that amount of time place it in the fridge where it should last 5-7 days.

    Supplies


    More Recipes You Might Enjoy

    • Gluten Free Sourdough Sandwich Bread
    • Gluten Free Chocolate Sourdough Bread
    • Gluten Free Cinnamon Raisin Sourdough Bread
    • Gluten Free Sourdough Starter

    I get a lot of my ingredients from Thrive Market. Thrive Market has been a game changer for me eating gluten free. They have so many options I can't get at my rural grocery stores! Use this link to get 40% off your first order!
    Print
    clock clock iconcutlery cutlery iconflag flag iconfolder folder iconinstagram instagram iconpinterest pinterest iconfacebook facebook iconprint print iconsquares squares iconheart heart iconheart solid heart solid icon

    Gluten Free Cheesy Sourdough Bread


    5 Stars 4 Stars 3 Stars 2 Stars 1 Star

    5 from 1 review

    • Author: Elaine VanVleck
    • Total Time: 9 hours 10 minutes
    • Yield: 15 servings 1x
    • Diet: Gluten Free
    Print Recipe
    Pin Recipe

    Description

    This Gluten Free Cheesy Sourdough Bread is a savory, bakery style loaf that delivers everything you love about artisan sourdough bread with the rich flavor of melted cheese in every bite. Made as a gluten free sourdough bread recipe, this loaf uses sourdough discard to create a tender crumb, crisp crust, and deep, tangy flavor. 


    Ingredients

    Scale
    • 1 ½ cups Sourdough Starter
    • 4 Tbsp Butter, melted
    • 2 Tbsp Honey
    • 1 ¾ Milk, warm
    • 2 ½ cups Gluten Free Flour
    • ½ cup Potato Starch or Tapioca Flour
    • 1 Tbsp Baking Powder
    • 2 tsp Salt
    • ½ cup Parmesan Cheese, shredded
    • ½ cup Gouda Cheese, shredded
    • ½ cup Cheddar Cheese, shredded

    Instructions

    Grease your bread pan with coconut oil or butter. Set aside.

    In the microwave or on the stovetop heat your milk just until it's warm to the touch. You don't want it too hot! Also melt the butter on the stovetop or in the microwave.

    In the bowl of your stand mixer add the sourdough starter, melted butter, honey and warm milk. Blend together.

    Add the potato starch or tapioca starch, gluten free flour, baking powder, salt, shredded parmesan cheese, shredded gouda cheese and shredded cheddar cheese. Blend just until ingredients begin to mix together. Remove from the stand mixer and gently fold any ingredients left on the bottom of the bowl into the mixture with a spatula.

    The dough will be very sticky. You don't want to knead or overwork the dough. This sticky texture will let the bread rise nicely.

    Spoon the dough into your greased bread pan. Cover the bread pan with a plate or platter and let it rest in a warm area for 6-8 hours. I like to mix my dough up at night before I go to bed and let it proof overnight and then bake in the morning.

    Preheat your oven to 350 degrees.

    Bake the bread for 1 hour 10 minutes to 1 hour 15 minutes. The top will be very lightly browned and the sides will be a little darker brown. This is a light bread and will not get really brown on top.

    Let the bread stand in the pan for at least 10 minutes to cool before you turn it out onto a plate or platter to finish cooling.

    Once the bread has completely cooled slice it into pieces and store it in a sealed container.

    Depending on how warm your house is it will last on the counter for 3-4 days. If you aren't going to use it in that amount of time place it in the fridge where it should last 5-7 days.

    • Prep Time: 8 hours
    • Cook Time: 1 hour, 10 minutes
    • Category: Breads
    • Method: Baking
    • Cuisine: Gluten Free

    Did you make this recipe?

    Tag @smallfarmbiglife on Instagram and hashtag it #smallfarmbiglife

    Top Tip

    I liked to finely grate the parmesan cheese and then coarsely grate the gouda and cheddar. You could also use cheese that is already shredded. You could also use whatever block cheese you have in your fridge. Just use the same total measurement. For example, if you only have cheddar cheese then use 2 cups of it coarsely grated.

    Didn't find the answer you're looking for?

    Ask AI to answer based on this recipe:

    ChatGPT
    Google AI
    Perplexity
    Grok
    Claude

    Frequently Asked Questions

    Can you make cheesy sourdough bread with gluten free sourdough starter?

    Yes, this recipe is made using a gluten free sourdough starter, making it a great option for anyone following a gluten free diet while still enjoying classic sourdough flavor.

    How should gluten free cheesy sourdough bread be stored?

    Store the bread fully cooled in an airtight container at room temperature for short term storage of 3-4 days. You can also slice and freeze it to maintain freshness longer.

    • « Previous Page
    • 1
    • …
    • 10
    • 11
    • 12
    • 13
    • 14
    • …
    • 100
    • Next Page »

    Welcome! I'm Elaine

    I'm so glad you are here! I share easy gluten free recipes from my small farm in Washington.

    Be sure to sign up for my newsletter to stay up to date on all of my new recipes.

    More about me...
    • Instagram
    • Pinterest
    • Facebook
    • Twitter
    • Mail

    Load up on new recipes, exclusive goodies, + more!
    Sign up below to stay up-to-date on news, events, and special deals.
    Thank you for subscribing!

    Easy Meals Recipes

    • Gluten Free Instant Pot Chili Mac and Cheese
    • Gluten Free Taco Casserole
    • Gluten Free Cowboy Baked Beans
    • Gluten Free Walking Taco Casserole
    • Gluten Free Creamy Beef and Mushroom Pasta
    • Gluten Free Instant Pot Chicken and Dumplings
    • Instant Pot Mexican Style Beef and Rice
    • Gluten Free Chicken Parmesan Pasta Casserole
    • Gluten Free One Pot Hamburger Helper Copycat
    • Gluten Free Salisbury Steak with Mushroom Gravy
    • Gluten Free Air Fryer Fajitas
    • Gluten Free Sloppy Joe Casserole

    Footer

    back to top

    About

    • Privacy Policy
    • Shop my Amazon Page
    • Follow me on LTK

    Newsletter

    • Sign Up! for emails and updates

    Contact

    • Contact
    • Media Kit
    • About Me

    As an Amazon Associate I earn from qualifying purchases.

    I may get commissions for purchases made through links on this site.

    Copyright © 2026 Brunch Pro on the Brunch Pro Theme