Small Farm Big Life

  • Gluten Free Recipe Index
  • Subscribe
  • Resources
menu icon
go to homepage
  • Home
  • Gluten Free Recipe Index
  • Subscribe
  • My Story
  • Resources
  • Free Guides
    • Email
    • Facebook
    • Instagram
    • Pinterest
  • subscribe
    search icon
    Homepage link
    • Home
    • Gluten Free Recipe Index
    • Subscribe
    • My Story
    • Resources
    • Free Guides
    • Email
    • Facebook
    • Instagram
    • Pinterest
  • ×

    Seven Layer Salad

    This classic recipe for seven layer salad has a delicious dressing and is easy to make. This is the best healthy salad with sour cream and mayo in the dressing. This traditional recipe is gluten free and just like the old fashioned seven layer salads I remember growing up.

    a glass trifle dish of seven layer salad next to some white salad plates and silver forks

    This salad is a classic that we had at all the holidays growing up. It's really easy to make and is always I hit. I love to make this salad the day before so it's one less thing to worry about on holidays.

    Ideal as a make ahead salad, this cold salad can be prepped the night before, making it a stress-free option for parties and large gatherings.

    Whether you're hosting or contributing to a salad for a crowd, the seven layer salad recipe remains a timeless favorite. It's especially popular as a cookout side dish, complete with savory toppings like crispy bacon, offering a perfect balance of freshness and indulgence.

    If you are looking for more salad recipes try my Chopped Wedge Layer Salad, my Gluten Free BLT Pasta Salad, my Southwestern Style Coleslaw or my Easy Apple Slaw with Poppyseed Dressing.

    You can find all of my salad recipes here: Gluten Free Salad Recipes

    [feast_advanced_jump_to]

    Why You'll Love This Recipe

    • Made a day ahead, so it's one less thing to worry about
    • No cooking required beyond boiling eggs and frying bacon
    • A classic combination everyone recognizes
    • Feeds a crowd and is perfect for potlucks and holidays

    Tips for the Best Presentation

    Use a clear glass trifle bowl if you have one, it's what makes this salad so eye catching. As you layer each ingredient, push some of it toward the edges of the bowl so every layer is visible from the outside, then fill in the center. Spreading the dressing all the way to the edges seals the salad and keeps it fresh.

    Ways to Customize This Salad

    Not a fan of tomatoes? Leave them out. A splash of apple cider vinegar in the dressing adds a little extra zest if you want more tang. Celery or red onion are also easy additions if you'd like more crunch.

    Storage

    Store the leftovers in an air tight container in the refrigerator for up to 5 days.

    Top Tip

    The salad will last longer if you don't mix the dressing into the other salad ingredients before you store it.

    Frequently Asked Questions

    Can seven layer salad be made ahead?

    Yes! I actually like this salad the most when it's been made a day ahead. I like the vegetables and eggs really cold and for the dressing to have time for the flavors to meld.

    Make sure your lettuce is really dry so it doesn't get soggy. The recipe calls for spreading the dressing over the top and sealing the salad underneath. This will keep the salad fresh and crisp for a day in the fridge.

    Is seven layer salad low carb?

    Yes it can be. This recipe calls for sugar in the dressing, but it's not absolutely necessary. If you are low carb replace the sugar with 1 teaspoon of apple cider vinegar. The dressing will still be delicious and you will have a perfect meal.

    How long will seven layer salad last?

    We don't usually have a lot of leftovers with this yummy salad, but if you do you can store leftovers in the fridge for one day. The key is to not mix the dressing in.

    I serve this salad by scooping it out and placing it on plates with the dressing on top. Then each person can stir their own dressing in. When you want to store this salad place the ingredients on the bottom and the dressing on top of those. Do not stir them together! Stirring them together will make the salad soggy for the next day.

    What kind of bowl should I use for seven layer salad?

    A clear glass trifle bowl works best, since it shows off all the colorful layers. A large glass bowl with straight sides works well too if you don't have a trifle bowl on hand.

    Didn't find the answer you're looking for?

    Ask AI to answer based on this recipe:

    ChatGPT
    Google AI
    Perplexity
    Grok
    Claude

    Seven Layer Salad Supplies

    More Recipes You Might Enjoy

    • Chopped Wedge Layer Salad
    • Gluten Free BLT Pasta Salad
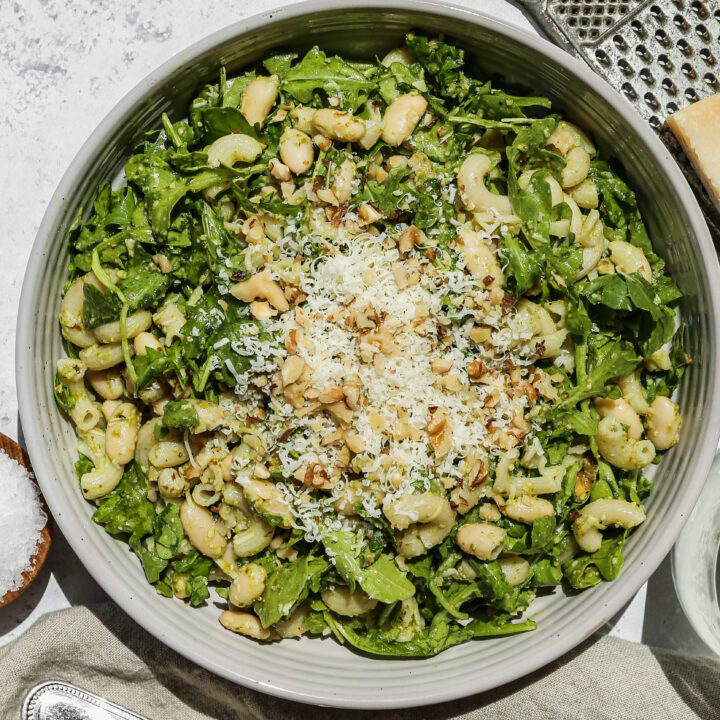
    • Gluten Free Pesto Pasta Salad
    • Pineapple Coleslaw

    I get a lot of my ingredients from Thrive Market. Thrive Market has been a game changer for me eating gluten free. They have so many options I can't get at my rural grocery stores! Use this link to get 40% off your first order!

    Print
    clock clock iconcutlery cutlery iconflag flag iconfolder folder iconinstagram instagram iconpinterest pinterest iconfacebook facebook iconprint print iconsquares squares iconheart heart iconheart solid heart solid icon

    Seven Layer Salad


    5 Stars 4 Stars 3 Stars 2 Stars 1 Star

    5 from 2 reviews

    • Author: Elaine VanVleck
    • Total Time: 30 minutes
    • Yield: 8 servings 1x
    • Diet: Gluten Free
    Print Recipe
    Pin Recipe

    Description

    This classic seven layer salad is a timeless gluten free side dish that is perfect for potlucks, holidays, cookouts, and any gathering where you need to feed a crowd. Crisp iceberg lettuce, sweet peas, hard boiled eggs, green onions, tomatoes, crispy bacon, and cheddar cheese are layered in a trifle bowl and topped with a creamy homemade dressing that seals in all the freshness. Best of all it can be made a day ahead, making it the ultimate stress free make ahead salad!


    Ingredients

    Scale
    • 1 medium head Iceberg Lettuce
    • 1 cup Frozen Peas, thawed
    • 6 hard boiled Eggs, chopped
    • 1 cup Green Onions, chopped
    • 2 medium Tomatoes, coarsely chopped
    • 7 slices Bacon, cooked and crumbled
    • 1 cup Cheddar Cheese, shredded
    • 1 cup Mayonnaise
    • 1 cup Sour Cream
    • 2 Tbsp. Granulated Sugar
    • ½ tsp. Sea Salt, divided
    • ½ tsp. Coarse Ground Black Pepper, divided

    Instructions

    Rinse iceberg lettuce and then spin in a salad spinner to get all of the excess water off. Chop the lettuce and cover the bottom of your trifle bowl. Sprinkle with salt and pepper.

    Spread thawed peas over the lettuce layer.

    Spread the chopped hard boiled eggs over the pea layer. Sprinkle with salt and pepper.

    Chop the green onions and spread over the hard boiled egg layer.

    Coarsely chop the tomatoes and spread over the green onion layer. Sprinkle with salt and pepper.

    Crumble the bacon over the tomato layer.

    Sprinkle the shredded cheese over the bacon layer.

    In a mixing bowl whisk the mayonnaise, sour cream and sugar until thoroughly combined. Spread this dressing over the last cheese layer. Spread the dressing all the way to the edges to seal the salad. If you would like to you can sprinkle the top with cheese, bacon and green onions. However, I like mine with just the dressing.

    Cover the salad with plastic wrap and refrigerate for up to one day before serving.

    If you made this recipe please leave a star rating and comment below. It helps other readers find this recipe and means so much to me.

    Notes

    If you want a low carb version, replace the sugar in the dressing with 1 teaspoon apple cider vinegar.

    • Prep Time: 30 minutes
    • Cook Time: 0 minutes
    • Category: Salad
    • Method: Chopped
    • Cuisine: American

    Did you make this recipe?

    Tag @smallfarmbiglife on Instagram and hashtag it #smallfarmbiglife

    If you made this seven layer salad I would love to hear what you thought! Please leave a star rating and a comment below. It means so much and helps other readers find this recipe too.

    Seven Layer Salad Ingredients

    • Iceberg Lettuce
    • Frozen Peas
    • Eggs
    • Green Onions
    • Tomatoes
    • Bacon
    • Cheddar Cheese
    • Mayonnaise
    • Sour Cream
    • Granulated Sugar
    • Sea Salt
    • Coarse Ground Black Pepper

    Instructions

    Rinse iceberg lettuce and then spin in a salad spinner to get all of the excess water off. Chop the lettuce and cover the bottom of your trifle bowl. Sprinkle with salt and pepper.

    Spread thawed peas over the lettuce layer.

    Spread the chopped hard boiled eggs over the pea layer. Sprinkle with salt and pepper.

    Chop the green onions and spread over the hard boiled egg layer.

    Coarsely chop the tomatoes and spread over the green onion layer. Sprinkle with salt and pepper.

    Crumble the bacon over the tomato layer.

    Sprinkle the shredded cheese over the bacon layer.

    In a mixing bowl whisk the mayonnaise, sour cream and sugar until thoroughly combined. Spread this dressing over the last cheese layer. Spread the dressing all the way to the edges to seal the salad. If you would like to you can sprinkle the top with cheese, bacon and green onions. However, I like mine with just the dressing.

    Cover the salad with plastic wrap and refrigerate for up to one day before serving.

    Gluten Free Advent Calendars

    Being gluten free doesn't mean you have to miss out on any of the holiday fun. I've put together these gluten free advent calendar options. There are calendars that are ready to be used and some that you can put your own gluten free treats in.

    a wicker basket with small paper bags being used for gluten free advent calendars

    Gluten Free Advent Calendars

    *I am listing these as gluten free food and candy because the website or the brand states it is gluten free. Please make sure before ordering or consuming the item still states gluten free.

      Christmas Articles You Might Enjoy:

      • 2026 Holiday Gift Guides
      • Easy Gluten Free Christmas Recipes
      • Easy Gluten Free Christmas Cookies for Your Cookie Tray
      • 2025 Black Friday Sales (Updated Often!)

      Gluten Free Pecan Pie Bars

      These gluten free pecan pie bars are a Thanksgiving favorite, and I love that there's no pie crust to roll out. I cut this recipe into 16 generous bars, perfect if they're the main dessert, or slice them smaller for a dessert table.

      gluten free pecan pie bars cut into rectangles on a piece of white parchment paper next to a wooden bowl of whole pecans

      These gluten free pecan pie bars come together quickly and taste just like a slice of pecan pie without all the extra effort.

      Made with pure maple syrup instead of corn syrup, they're rich, gooey, and delicious served after a meal with a cup of coffee or tea.

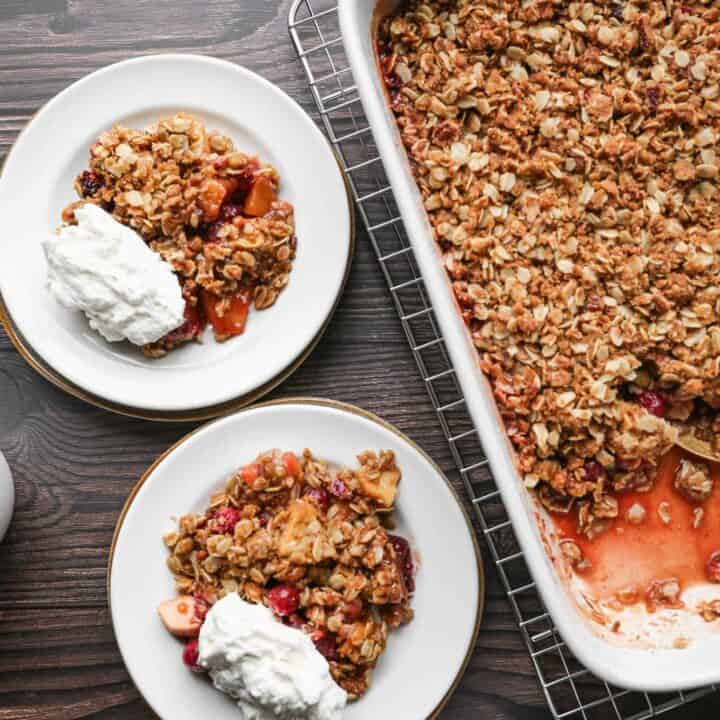
      If you are looking for more Thanksgiving dessert recipe ideas try my Gluten Free Praline Pumpkin Pie, my Gluten Free Pumpkin Gingersnap Parfait, my Gluten Free Cranberry Apple Crisp or my Gluten Free Strawberry Pretzel Dessert.

      You can find all of my Thanksgiving recipes here: Delicious Gluten Free Thanksgiving Recipes

      a gluten free pecan pie bar on a white plate with a fork next to a wooden bowl of whole pecans, a small wooden bowl of coarse salt and a cup of tea
      [feast_advanced_jump_to]

      Why You'll Love These Bars

      • No corn syrup, made with pure maple syrup instead
      • No pie crust to roll out
      • Easy to slice and serve a crowd
      • Great for making ahead of Thanksgiving

      Ingredient Notes

      • Pure maple syrup gives these bars a rich, slightly caramel flavor without needing corn syrup.
      • When mixing the filling, beat just until the ingredients come together, overmixing can make the filling dense instead of gooey.

      Make Ahead Tips

      These bars can be made 3 to 4 days in advance. Store them covered in the refrigerator, then set them out the morning you plan to serve them so they come to room temperature by dessert time.

      Serving Suggestions

      These bars are delicious on their own with a cup of coffee or tea. They are also great served with a scoop of vanilla ice cream or a dollop of whipped cream for something extra special.

      Storage and Freezing

      Store the bars covered in the refrigerator for up to 3 days. You can also place each bar in an individual container for easy grab and go servings. To freeze, store in a freezer safe container for up to a month.

      Top Tip

      When mixing the filling, beat just until the ingredients come together. Over mixing can make the filling dense instead of gooey, so stop as soon as everything is combined.

      Frequently Asked Questions

      How should I store these pecan pie bars?

      You can place a lid or plastic wrap over the container you baked the bars in and store them like that in the refrigerator. I also like placing each bar in a small glass container so they are ready for single servings.

      Then they can be taken out of the fridge for a quick treat or to be put into a lunch box. If they've been in the refrigerator for over three days I put the individual containers in the freezer for later.

      Can these bars be frozen?

      Yes! They do well in a freezer safe container in the freezer for up to a month. You could make these a few days or a week prior to Thanksgiving or an event you want to take them too and then freeze them so you're not rushed to make dessert while cooking the rest of the meal.

      How far in advance can I make these bars?

      These bars can be made 3 to 4 days ahead of time. Store them in the refrigerator, then take them out the morning of your event so they're at room temperature by dessert time.

      Didn't find the answer you're looking for?

      Ask AI to answer based on this recipe:

      ChatGPT
      Google AI
      Perplexity
      Grok
      Claude

      Supplies

      More Recipes You Might Enjoy

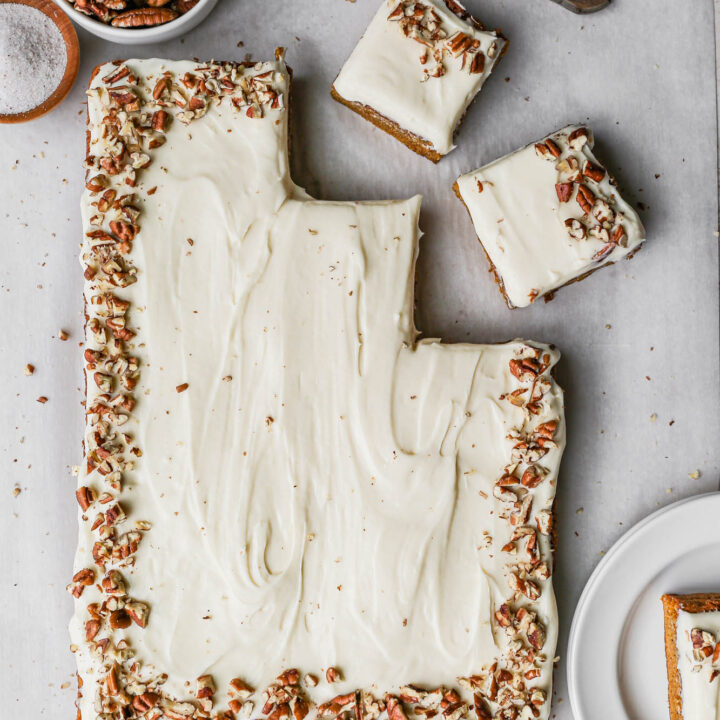
      • Gluten Free Sweet Potato Cake with Cream Cheese Frosting
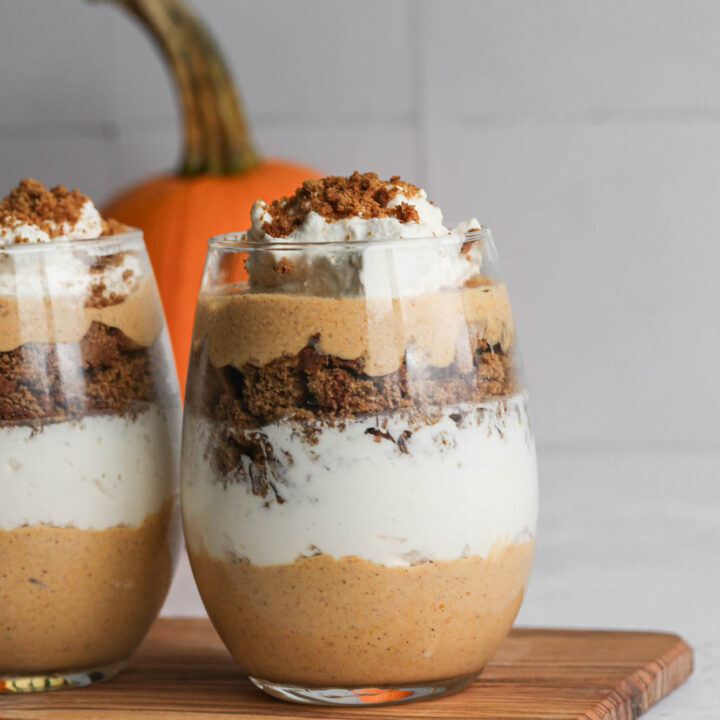
      • Gluten Free Pumpkin Gingersnap Parfait
      • Gluten Free Cranberry Apple Crisp
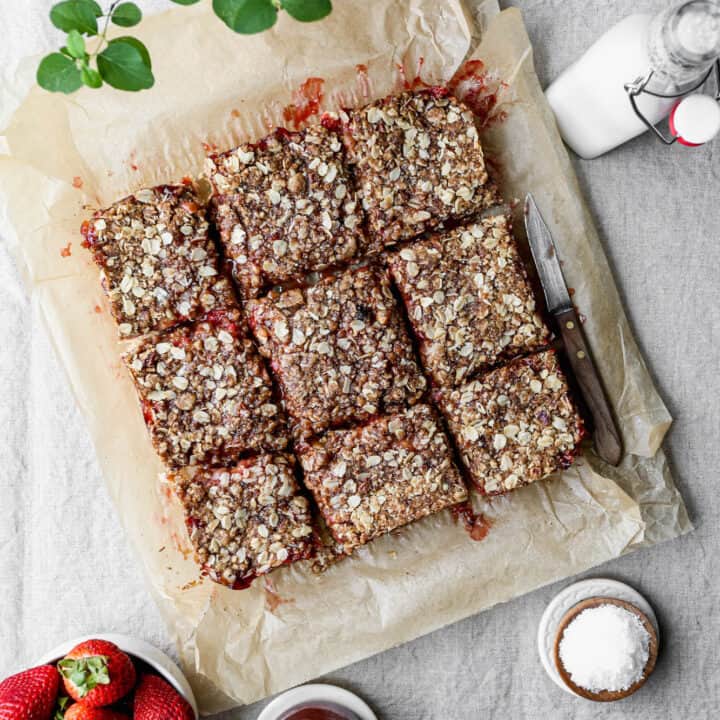
      • Gluten Free Strawberry Jam Bars

      I get a lot of my ingredients from Thrive Market. Thrive Market has been a game changer for me eating gluten free. They have so many options I can't get at my rural grocery stores! Use this link to get 40% off your first order!

      Print
      clock clock iconcutlery cutlery iconflag flag iconfolder folder iconinstagram instagram iconpinterest pinterest iconfacebook facebook iconprint print iconsquares squares iconheart heart iconheart solid heart solid icon

      Gluten Free Pecan Pie Bars


      5 Stars 4 Stars 3 Stars 2 Stars 1 Star

      No reviews

      • Author: Elaine VanVleck
      • Total Time: 1 hour 10 minutes
      • Yield: 16 large bars 1x
      • Diet: Gluten Free
      Print Recipe
      Pin Recipe

      Description

      These gluten free pecan pie bars have a buttery shortbread crust and a rich, gooey filling made with pure maple syrup instead of corn syrup. They're easy to slice and share, perfect for Thanksgiving or any fall gathering.


      Ingredients

      Scale

      Crust:

      • 2 cups Gluten Free Flour
      • 1 cup Unsalted Butter, at room temperature
      • ⅓ cup Brown Sugar
      • ⅓ cup Pecans, finely chopped

      Filling:

      • ⅓ cup Granulated Sugar
      • ⅓ cup Brown Sugar
      • ⅓ cup Gluten Free Flour
      • 1 tsp. Sea Salt
      • 1 cup Pure Maple Syrup
      • 4 large Eggs
      • 2 tsp. Vanilla Extract
      • 1 cup Pecans, coarsely chopped

      Instructions

      Preheat your oven to 350 degrees. Grease a 9x13 pan with coconut oil or butter. If you would like to pull the bars out of the pan to cut them also line the pan with parchment paper. Set aside.

      In a food processor, using a push chopper or a knife and cutting board finely chop ⅓ cup pecans. Then, coarsely chop 1 cup of pecans. Set aside.

      In the bowl of your stand mixer add the butter and brown sugar. Beat until well blended together. Add the gluten free flour and finely chopped pecans and beat until a dough forms.

      Press the dough evenly into the 9x13 pan. Bake at 350 degrees for 25 minutes or until the edges are golden brown.

      While the crust is baking make the filling. In your stand mixer add the granulated sugar, brown sugar, gluten free flour, salt, maple syrup, eggs and vanilla. Beat until the ingredients are mixed into a runny batter. Add the coarsely chopped pecans and beat just until they are blended.

      When the crust comes out of the oven pour the filling mixture over top.

      Return the 9x13 pan to the oven and bake at 350 degrees for 30-35 minutes. The edges will pull away from the sides and be browned when the bars are done.

      Cool completely before cutting into bars.

      If you made this recipe please leave a star rating and comment below. It helps other readers find this recipe and means so much to me.

      • Prep Time: 15 minutes
      • Cook Time: 55 minutes
      • Category: Dessert
      • Method: Baking
      • Cuisine: American

      Did you make this recipe?

      Tag @smallfarmbiglife on Instagram and hashtag it #smallfarmbiglife

      I'd love to hear how these gluten free pecan pie bars turn out for you! Leave a comment and star rating below, and let me know if they make it onto your Thanksgiving dessert table. Don't forget to pin this recipe so you can find it again when the holidays roll around.

      Pecan Pie Bars Ingredients

      • Gluten Free Flour
      • Unsalted Butter
      • Brown Sugar
      • Pecans
      • Granulated Sugar
      • Sea Salt
      • Pure Maple Syrup
      • Eggs
      • Vanilla Extract

      Instructions

      Preheat your oven to 350 degrees. Grease a 9x13 pan with coconut oil or butter. If you would like to pull the bars out of the pan to cut them also line the pan with parchment paper. Set aside.

      In a food processor, using a push chopper or a knife and cutting board finely chop ⅓ cup pecans. Then, coarsely chop 1 cup of pecans. Set aside.

      In the bowl of your stand mixer add the butter and brown sugar. Beat until well blended together. Add the gluten free flour and finely chopped pecans and beat until a dough forms.

      Press the dough evenly into the 9x13 pan. Bake at 350 degrees for 25 minutes or until the edges are golden brown.

      While the crust is baking make the filling. In your stand mixer add the granulated sugar, brown sugar, gluten free flour, salt, maple syrup, eggs and vanilla. Beat until the ingredients are mixed into a runny batter. Add the coarsely chopped pecans and beat just until they are blended.

      When the crust comes out of the oven pour the filling mixture over top.

      Return the 9x13 pan to the oven and bake at 350 degrees for 30-35 minutes. The edges will pull away from the sides and be browned when the bars are done.

      Cool completely before cutting into bars.

      Gluten Free Double Chocolate Chip Cookies

      These gluten free double chocolate chip cookies are for anyone who loves chocolate as much as I do. They're rich, chewy, and made in one bowl with cocoa powder and chocolate chips. No melting chocolate on the stove, just mix everything together and bake.

      a blue floral plate of gluten free double chocolate cookies next to a small bowl of cocoa powder, a glass of milk and a small wooden bowl of chocolate chips

      I love how quick these come together, especially when I'm craving something chocolatey. They're great for a holiday cookie tray, but honestly I make them any time of year.

      Pull them from the oven while the centers are still soft and you'll have the perfect chewy cookie.

      If you are looking for more chocolate recipes try my Gluten Free Chocolate Pound Cake, my Gluten Free Double Chocolate Bundt Cake, my Gluten Free Chocolate Chip Banana Muffins or my Gluten Free Triple Chocolate Brownies.

      You can find all of my cookie recipes here: Gluten Free Cookie Recipes

      a blue floral plate of gluten free double chocolate cookies next to a small bowl of cocoa powder, a glass of milk and a small wooden bowl of chocolate chips
      [feast_advanced_jump_to]

      Why You'll Love This Recipe

      • Made in one bowl, no need to melt chocolate
      • Rich, fudgy texture with crisp edges
      • Ready in about 25 minutes
      • Perfect for a cookie board or holiday gathering

      Tips for the Best Cookies

      • Scoop your gluten free flour into the measuring cup and shake it level rather than packing it down, too much flour is the most common reason cookies turn out dry or cakey.
      • Mix just until the dry ingredients are incorporated once you add the flour and cocoa powder, overmixing can make the cookies tough instead of chewy.

      Storage

      Store the cookies in an airtight container at room temperature for up to 5 days.

      Top Tip

      For cookies that bake evenly, use a cookie scoop so each one is the same size. Pull them from the oven while the centers still look slightly underdone, they'll continue to set as they cool, which is what keeps them soft and chewy instead of dry.

      Frequently Asked Questions

      Can these cookies be frozen?

      Yes! These cookies can be frozen as prescooped dough to be baked later or they can be frozen after you have already baked them. Be sure to use freezer bags or containers so the cookies don't get freezer burned. They will keep in the freezer for up to a month.

      What is the best gluten free flour for cookies?

      My top two picks are King Arthur Gluten Free Measure for Measure Flour and Bob's Red Mill Gluten Free 1 to 1 Baking Flour. I've used both for years and have been happy with the results. They're both fine ground, so you don't get a gritty texture in your baked goods.

      Why did my cookies turn out cakey instead of chewy?

      This is usually caused by too much flour or overbaking. Scoop your flour into the measuring cup and shake it level rather than packing it down, and pull the cookies from the oven while the centers still look slightly underdone, they'll continue to set as they cool.

      Didn't find the answer you're looking for?

      Ask AI to answer based on this recipe:

      ChatGPT
      Google AI
      Perplexity
      Grok
      Claude

      Double Chocolate Chip Cookies Supplies

      More Recipes You Might Enjoy
      • Gluten Free Chocolate Pound Cake
      • 10 Gluten Free Chocolate Desserts
      • Gluten Free Double Chocolate Bundt Cake
      • Gluten Free Triple Chocolate Brownies

      I get a lot of my ingredients from Thrive Market. Thrive Market has been a game changer for me eating gluten free. They have so many options I can't get at my rural grocery stores! Use this link to get 40% off your first order!

      Print
      clock clock iconcutlery cutlery iconflag flag iconfolder folder iconinstagram instagram iconpinterest pinterest iconfacebook facebook iconprint print iconsquares squares iconheart heart iconheart solid heart solid icon

      Gluten Free Double Chocolate Chip Cookies


      5 Stars 4 Stars 3 Stars 2 Stars 1 Star

      No reviews

      • Author: Elaine VanVleck
      • Total Time: 25 minutes
      • Yield: 24 cookies 1x
      • Diet: Gluten Free
      Print Recipe
      Pin Recipe

      Description

      These gluten free double chocolate chip cookies are rich, fudgy, and made in one bowl with cocoa powder and semi-sweet chocolate chips. No need to melt any chocolate, just mix and bake. They're perfect for a cookie board or any chocolate craving.


      Ingredients

      Scale
      • 1 cup Gluten Free Flour
      • 6 Tbsp. Cocoa Powder
      • ½ tsp. Baking Powder
      • ½ tsp. Baking Soda
      • ½ tsp. Sea Salt
      • ½ cup Brown Sugar
      • ½ cup Granulated Sugar
      • ½ cup Unsalted Butter, at room temperature
      • 1 tsp. Vanilla Extract
      • 2 large Eggs
      • 1 cup Semi-Sweet Chocolate Chips

      Instructions

      Preheat your oven to 375 degrees

      Place the brown sugar, granulated sugar and unsalted butter into the bowl of your stand mixer. Mix on medium high speed until these ingredients are well blended. Add the vanilla and eggs and beat until blended.

      Add the flour, cocoa powder, baking powder, baking soda and salt. Mix until the dry ingredients are just incorporated with the wet ingredients. Add the chocolate chips and mix until they are blended into the dough.

      Using a cookie scoop place the dough on your lined baking sheets.

      Bake at 375 degrees for 15 minutes. The cookies edges will be slightly crisp, but the center will be soft.

      If you made this recipe please leave a star rating and comment below. It helps other readers find this recipe and means so much to me.

      • Prep Time: 10 minutes
      • Cook Time: 15 minutes
      • Category: Cookies
      • Method: Baking
      • Cuisine: American

      Did you make this recipe?

      Tag @smallfarmbiglife on Instagram and hashtag it #smallfarmbiglife

      I'd love to hear how these gluten free double chocolate chip cookies turn out for you! Leave a comment and star rating below, and let me know if you add any mix-ins. Don't forget to pin this recipe so you can make it again whenever a chocolate craving hits.

      Double Chocolate Chip Cookies Ingredients

      • Gluten Free Flour
      • Cocoa Powder
      • Baking Powder
      • Baking Soda
      • Sea Salt
      • Brown Sugar
      • Granulated Sugar
      • Unsalted Butter
      • Vanilla Extract
      • Eggs
      • Semi-Sweet Chocolate Chips

      Instructions

      These cookies are super simple to make! The brown sugar, granulated sugar, unsalted butter, vanilla and eggs go into your mixer. Mix on medium high speed until these ingredients are well blended.

      Add the flour, cocoa powder, baking powder, baking soda and salt. Mix until the dry ingredients are just incorporated with the wet ingredients. Add the chocolate chips and mix until they are blended into the dough.

      I love to use a cookie scoop to make things really easy when placing the dough on your baking sheet. A cookie scoop helps you to have uniform cookies so they bake at the same temperature and time period.

      Bake at 375 degrees for 15 minutes. The cookies edges will be slightly crisp, but the center will be soft.

      Gluten Free Sweet Potato Biscuits

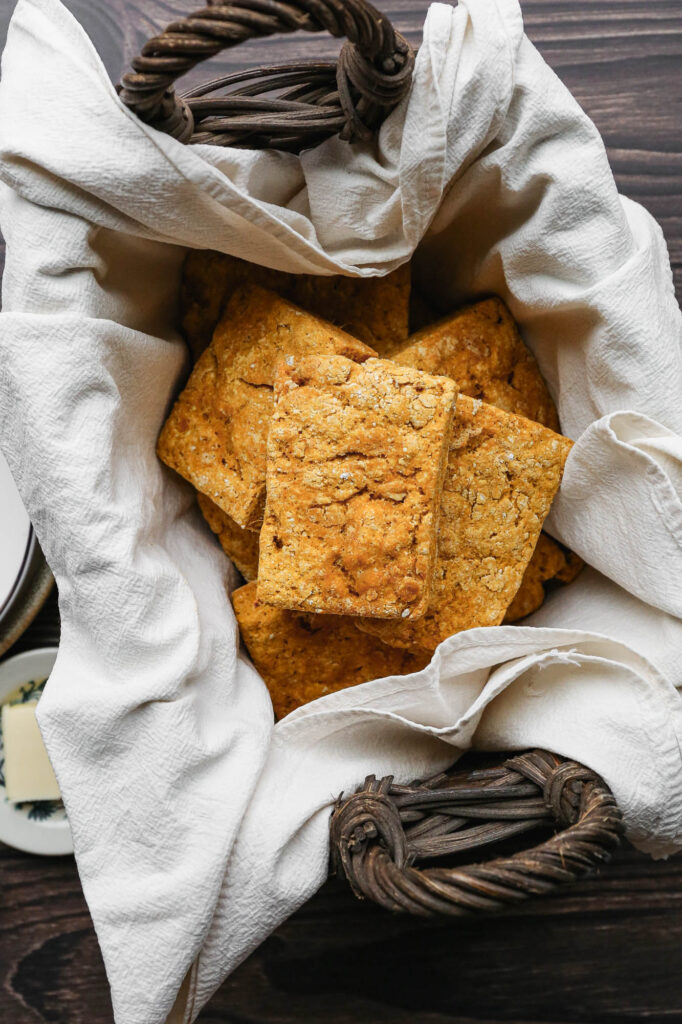
      These gluten free sweet potato biscuits are my favorite way to use up leftover sweet potatoes. They're soft and savory, with no added sugar, so they're perfect for serving with dinner. I love them warm with a pat of butter melting on top.

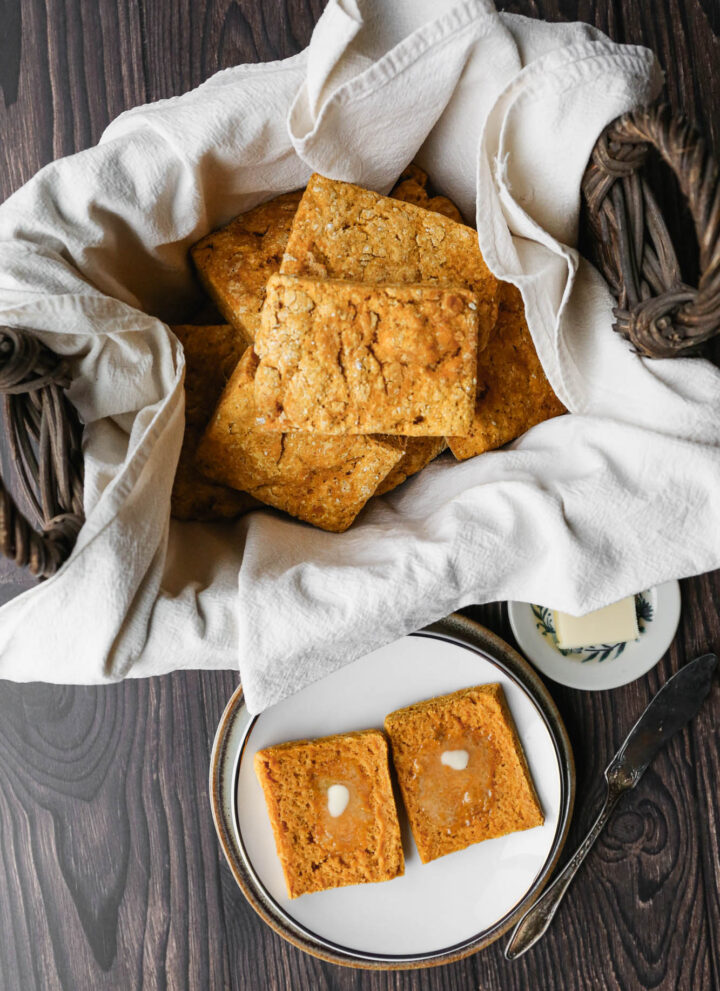
      a basket lined with a cream towel of gluten free sweet potato biscuits next to a plate with a biscuit cut in half with butter melting on top

      The dough comes together in a stand mixer, so there's no cutting in butter by hand. Then just roll it out and cut squares with a pizza cutter. No biscuit cutter and no scraps to roll again!

      They're so good with a bowl of soup, and they're a great addition to your Thanksgiving table.

      If you are looking for more sweet potato recipes try my Gluten Free Sweet Potato Cake with Cream Cheese Frosting, my Sheet Pan Mini Meatloaves and Sweet Potatoes or my Air Fryer Sweet Potato Wedges.

      You can find all of my side dish recipes here: Gluten Free Side Dish Recipes

      Not sure which gluten free flour to reach for? Check out my guide: Bob's Red Mill 1 to 1 vs King Arthur Measure for Measure: Which Gluten Free Flour to Use and When

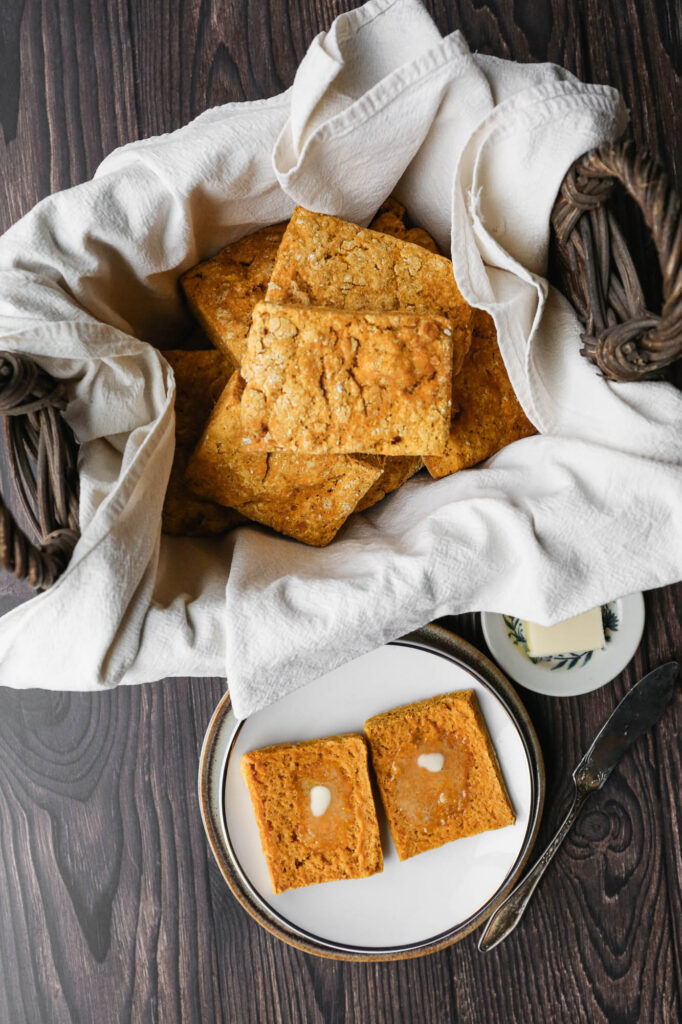
      a basket lined with a cream towel of gluten free sweet potato biscuits
      [feast_advanced_jump_to]

      Why You'll Love These Biscuits

      • Savory, not sweet. Most sweet potato biscuits have added sugar. These are made to serve with dinner.
      • No biscuit cutter needed. Roll out the dough and cut squares with a pizza cutter. There are no scraps to reroll.
      • Mixed in a stand mixer. There's no cutting in butter by hand.
      • Great for leftover sweet potatoes. Yesterday's side dish becomes tonight's biscuits.
      • Freezer friendly. Freeze the cut dough and bake the biscuits fresh whenever you need them.

      Savory Sweet Potato Biscuits for Dinner

      Most sweet potato biscuits are sweetened with brown sugar or maple syrup. These have no added sugar, so the sweet potato flavor stays mild and savory. That makes them a great side for soup, chili, or roast chicken. If you'd like them a little sweeter for breakfast, brush the warm biscuits with honey butter or serve them with jam.

      How to Cook Sweet Potatoes for Biscuits

      You need 1½ cups of smooth mashed sweet potato. Here are the easiest ways to get it:

      • Instant Pot: This is my favorite method. Add 1 cup of water and the rack, then add the whole sweet potatoes. Pressure cook on manual for 12 to 18 minutes, depending on their size. Let the steam release naturally, then cool, peel, and mash in your stand mixer.
      • Leftovers: Plain leftover mashed or baked sweet potatoes work perfectly. Skip any that were made with brown sugar or marshmallows.
      • Oven: Roast whole sweet potatoes until very soft, then cool, peel, and mash.

      Let the sweet potatoes cool completely before mixing. Warm sweet potato will melt the butter and make the biscuits dense.

      Tips for Tender Gluten Free Biscuits

      • Use cold butter. Dice it and keep it in the fridge until you need it.
      • Stop mixing while you can still see lumps. Small pieces of butter make tender biscuits.
      • Roll to an even ½ inch. Even biscuits bake evenly.
      • Flour your mat well. Gluten free dough can stick, so dust your mat and rolling pin with extra flour.
      • Let them cool a few minutes. Gluten free biscuits can taste gummy straight from the oven, and they firm up as they cool slightly.

      What to Serve With Sweet Potato Biscuits

      These biscuits are perfect alongside a bowl of soup. Try them with my Instant Pot Beef and Vegetable Soup, Instant Pot Baked Potato Soup, or Instant Pot Sausage and Kale Soup. They're also a great addition to your Thanksgiving table. For breakfast, split them open and spread them with butter and my Gluten Free Cranberry Jam or Pineapple Jam.

      Storage

      Store the biscuits in an airtight container at room temperature for up to 2 days, or in the refrigerator for up to 5 days. Warm them before serving for the best texture.

      Top Tip

      Make these biscuits with leftover sweet potatoes. Save some plain mashed sweet potato from dinner, and you'll have biscuits ready for the next night's meal.

      Frequently Asked Questions

      Can you freeze gluten free sweet potato biscuits?

      Yes! Roll and cut the dough, then freeze the biscuits on a baking sheet until firm. Move them to a freezer safe container for up to a month. When you're ready to bake, thaw them on a parchment lined baking sheet and bake at 425 degrees for 12 to 15 minutes.

      Can I use canned sweet potatoes?

      I've only tested this recipe with fresh cooked sweet potatoes. Avoid canned sweet potatoes packed in syrup, because they'll make the dough too wet and sweet.

      Are these sweet potato biscuits sweet?

      No. There's no added sugar, so they have a mild, savory flavor. For a sweeter biscuit, brush them with honey butter or serve them with jam.

      Do I need a biscuit cutter?

      No. I cut the dough into squares with a pizza cutter, which means no scraps to roll again. You can use a round cutter if you prefer.

      How do I reheat leftover biscuits?

      Warm them in a 350 degree oven for about 5 minutes, or microwave them for 10 to 15 seconds.

      Didn't find the answer you're looking for?

      Ask AI to answer based on this recipe:

      ChatGPT
      Google AI
      Perplexity
      Grok
      Claude

      Supplies

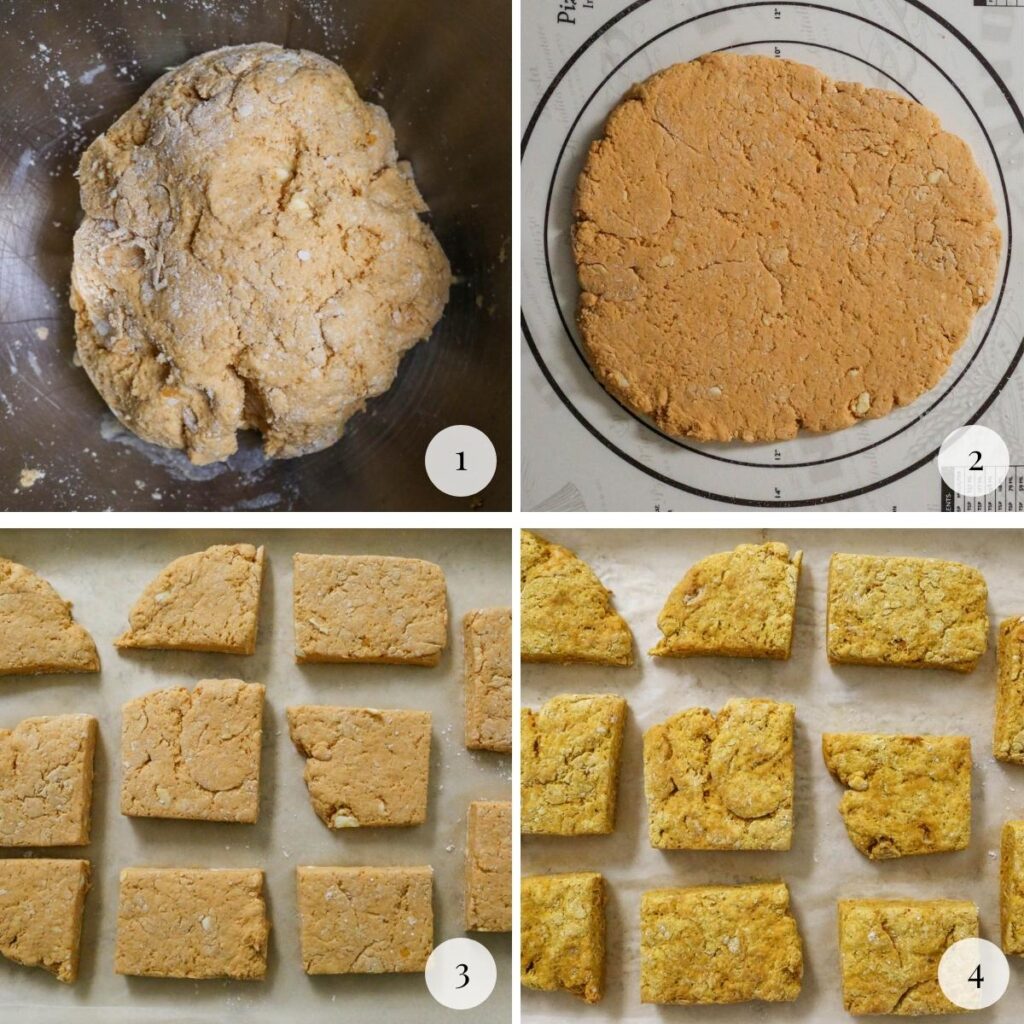
      instruction photos for gluten free sweet potato biscuits with the dough in a bowl, the dough rolled out, the dough cut into biscuits and the biscuits baked on a baking pan

      More Recipes You Might Enjoy

      • Gluten Free Buttermilk Drop Biscuits
      • Gluten Free Millet Drop Biscuits
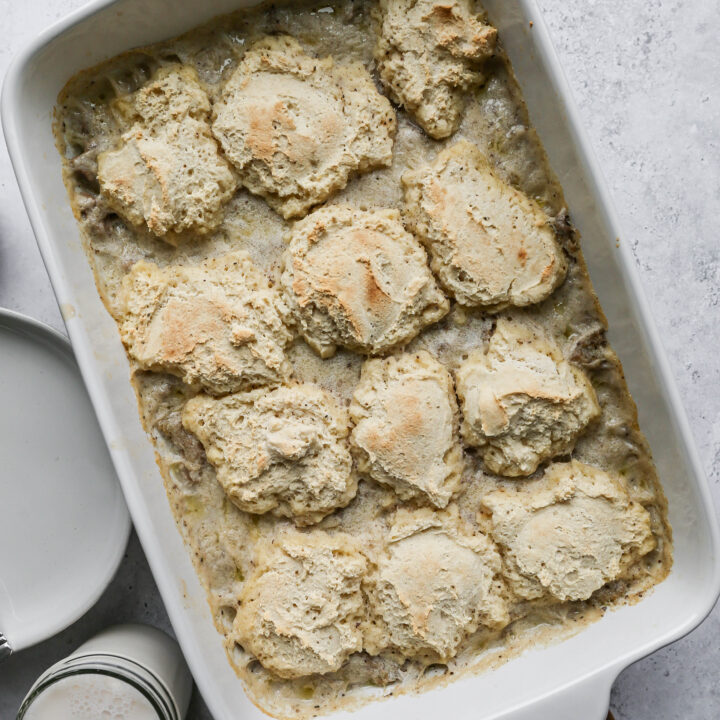
      • Gluten Free Biscuits and Gravy Casserole
      • Gluten Free Instant Pot Chicken and Dumplings

      I get a lot of my ingredients from Thrive Market. Thrive Market has been a game changer for me eating gluten free. They have so many options I can't get at my rural grocery stores! Use this link to get 40% off your first order!

      Print
      clock clock iconcutlery cutlery iconflag flag iconfolder folder iconinstagram instagram iconpinterest pinterest iconfacebook facebook iconprint print iconsquares squares iconheart heart iconheart solid heart solid icon

      Gluten Free Sweet Potato Biscuits


      5 Stars 4 Stars 3 Stars 2 Stars 1 Star

      No reviews

      • Author: Elaine VanVleck
      • Total Time: 35 minutes
      • Yield: 11 biscuits 1x
      • Diet: Gluten Free
      Print Recipe
      Pin Recipe

      Description

      Soft, savory gluten free sweet potato biscuits mixed in a stand mixer and cut into squares, so there's no biscuit cutter needed. Serve them warm with butter alongside soup, chili, or your holiday dinner.


      Ingredients

      Units Scale
      • 2 cups Gluten Free Flour
      • 1 Tbsp. Baking Powder
      • 1 tsp. Baking Soda
      • 1 tsp. Sea Salt
      • 4 Tbsp. Unsalted Butter, diced
      • 1 ½ cups mashed Sweet Potato, cooked and cooled
      • 3 Tbsp. Milk

      Instructions

      Preheat your oven to 425 degrees. Line a baking sheet with parchment paper and set aside.

      In the bowl of your stand mixer blend the gluten free flour, baking powder, baking soda and salt to combine dry ingredients. Add the diced butter and beat together until combined with lumps still showing. 

      Add the mashed sweet potato and milk to this mixture and beat until blended together. The dough will still have some lumps showing and will be soft and not sticky.

      Using a dough mat or your countertop coated with some extra flour roll the biscuits out to ½-inch thickness.

      Using a pizza cutter or knife, cut the dough into rectangles (or whatever shape you would like). 

      Bake at 425 degrees for 12-15 minutes or until the biscuits are golden brown on the bottom. 

      Let the biscuits cool slightly before serving.

      If you made this recipe please leave a star rating and comment below. It helps other readers find this recipe and means so much to me.

      • Prep Time: 20 minutes
      • Cook Time: 15 minutes
      • Category: Breads
      • Method: Baking
      • Cuisine: American

      Did you make this recipe?

      Tag @smallfarmbiglife on Instagram and hashtag it #smallfarmbiglife

      If you make these gluten free sweet potato biscuits, please leave a star rating and a comment below. It helps other readers find the recipe. You can also tag me on Instagram at @smallfarmbiglife so I can see them!

      Sweet Potato Biscuits Ingredients

      • Gluten Free Flour
      • Baking Powder
      • Baking Soda
      • Sea Salt
      • Unsalted Butter
      • Sweet Potato
      • Milk

      Instructions

      Preheat your oven to 425 degrees. Line a baking sheet with parchment paper and set aside.

      In the bowl of your stand mixer blend the gluten free flour, baking powder, baking soda and salt to combine dry ingredients. Add the diced butter and beat together until combined with lumps still showing. 

      Add the mashed sweet potato and milk to this mixture and beat until blended together. The dough will still have some lumps showing and will be soft and not sticky.

      Using a dough mat or your countertop coated with some extra flour roll the biscuits out to ½-inch thickness.

      Using a pizza cutter or knife, cut the dough into rectangles (or whatever shape you would like). 

      Bake at 425 degrees for 12-15 minutes or until the biscuits are golden brown on the bottom. 

      Let the biscuits cool slightly before serving.

      • « Previous Page
      • 1
      • …
      • 21
      • 22
      • 23
      • 24
      • 25
      • …
      • 31
      • Next Page »

      Welcome! I'm Elaine

      I'm so glad you are here! I share easy gluten free recipes from my small farm in Washington.

      Be sure to sign up for my newsletter to stay up to date on all of my new recipes.

      More about me...
      • Instagram
      • Pinterest
      • Facebook
      • Twitter
      • email

      Free gluten free recipe ebook
      My most loved recipes in one download, plus new recipes every Friday.
      Check your inbox! Your ebook is on its way.

      Easy Meals Recipes

      • Gluten Free Instant Pot Chili Mac and Cheese
      • Gluten Free Taco Casserole
      • Gluten Free Cowboy Baked Beans
      • Gluten Free Walking Taco Casserole
      • Gluten Free Creamy Beef and Mushroom Pasta
      • Gluten Free Instant Pot Chicken and Dumplings
      • Instant Pot Mexican Style Beef and Rice
      • Gluten Free Chicken Parmesan Pasta Casserole
      • Gluten Free One Pot Hamburger Helper Copycat
      • Gluten Free Salisbury Steak with Mushroom Gravy
      • Gluten Free Air Fryer Fajitas
      • Gluten Free Sloppy Joe Casserole

      Footer

      back to top

      About

      • Privacy Policy
      • Shop my Amazon Page
      • Follow me on LTK

      Newsletter

      • Sign Up! for emails and updates

      Contact

      • Contact
      • Media Kit
      • About Me

      As an Amazon Associate I earn from qualifying purchases.

      I may get commissions for purchases made through links on this site.

      Copyright © 2026 Brunch Pro on the Brunch Pro Theme