Small Farm Big Life

  • Gluten Free Recipe Index
  • Subscribe
  • Resources
menu icon
go to homepage
  • Home
  • Gluten Free Recipe Index
  • Subscribe
  • My Story
  • Resources
  • Free Guides
    • Email
    • Facebook
    • Instagram
    • Pinterest
  • subscribe
    search icon
    Homepage link
    • Home
    • Gluten Free Recipe Index
    • Subscribe
    • My Story
    • Resources
    • Free Guides
    • Email
    • Facebook
    • Instagram
    • Pinterest
  • ×

    Gluten Free Homemade Ranch Dip

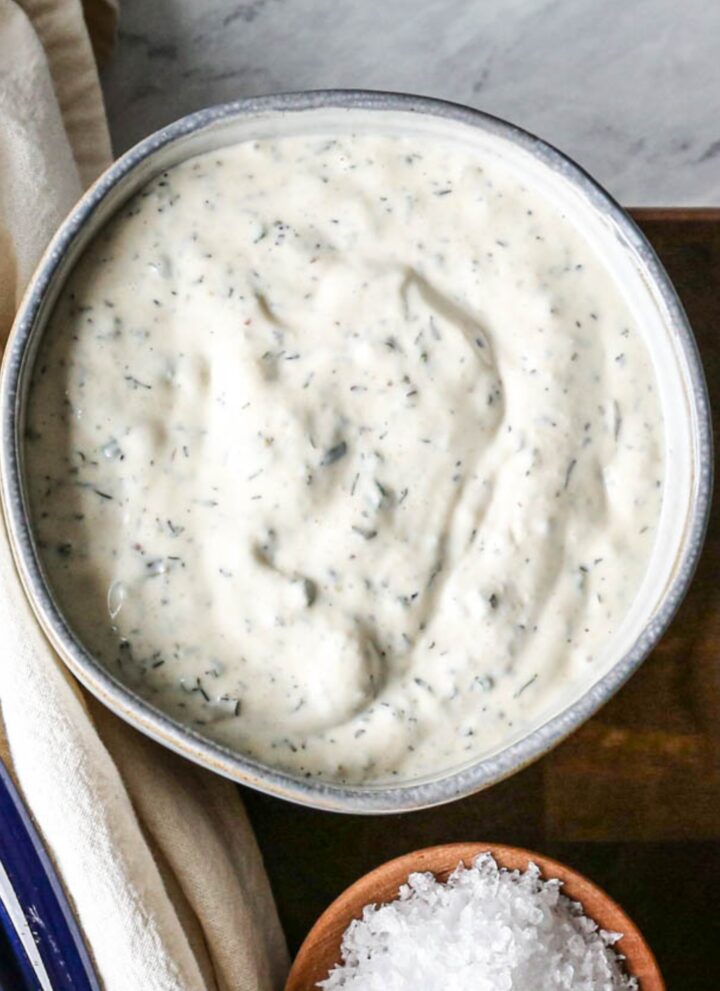
    This easy recipe for gluten free homemade ranch dip is thick and perfect for dipping fries, veggie and chips! The dip is made with sour cream, mayonnaise, and buttermilk. This keto friendly sauce is thick and creamy! Let me show you how to make the best ranch dip you've had.

    I love a yummy dip for fresh vegetables from the garden, to go with fries or to have with chips. This sauce is super simple to make and is absolutely delicious!

    I like to make this dip in a jar and using either my emersion blender or the shake attachment for my hand held kitchenmaid mixer. It works perfect to save mayonnaise jars to make this sauce in. I also like to use wide mouth jars so the sauce is easy to get out.

    This gluten free homemade ranch dip will last in your refrigerator for a few days, so it's easy to make it ahead. I like to make this dip at least a day before we are going to use it. Letting it sit in the refrigerator for a couple of days before you want to use it really lets the flavors come out.

    [feast_advanced_jump_to]

    Ingredients

    Buttermilk Blend Powder
    Dried Parsley
    Onion Powder
    Garlic Powder
    Sea Salt
    Coarse Ground Black Pepper
    Dried Chives
    Dried Dill Weed
    Sour Cream
    Mayonnaise
    Milk

    Instructions

    Add the buttermilk blend powder, dried parsley flakes, onion powder, garlic powder, sea salt, black pepper, dried chives, dried dill weed, sour cream, mayonnaise and milk to a jar or bowl.

    Using an emersion blender, your Kitchen Aid hand held mixer, a food processor or your stand mixer blend all of the ingredients together.

    The mixture will be thick like a dip. If you prefer a thinner ranch you can add milk until you get your desired consistency.

    Supplies

    More Recipes You Might Like
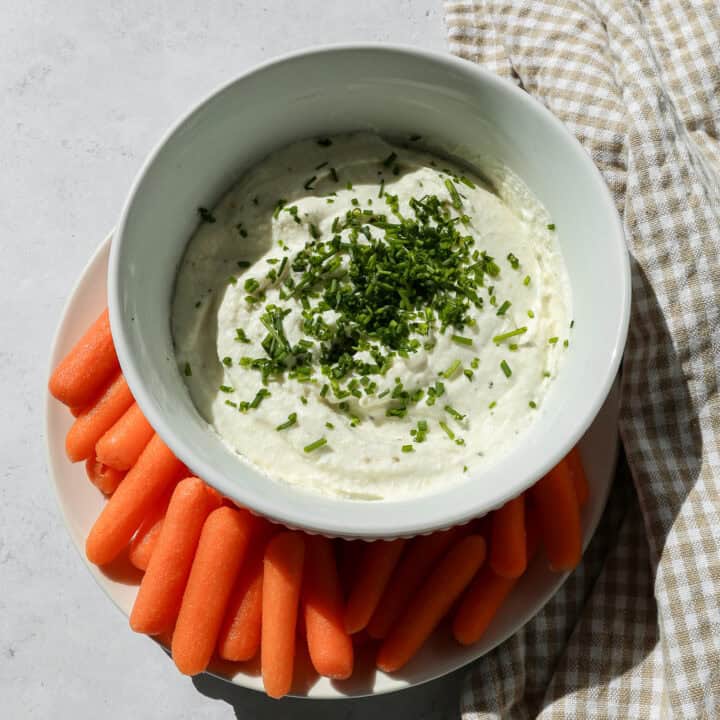
    • High Protein Cottage Cheese Dip
    • Gluten Free Caramelized Onion Dip
    • Gluten Free Easy Homemade Garlic Hummus
    • Creamy Sausage Bean Dip

    I get a lot of my ingredients from Thrive Market. Thrive Market has been a game changer for me eating gluten free. They have so many options I can't get at my rural grocery stores! Use this link to get 40% off your first order!

    Print
    clock clock iconcutlery cutlery iconflag flag iconfolder folder iconinstagram instagram iconpinterest pinterest iconfacebook facebook iconprint print iconsquares squares iconheart heart iconheart solid heart solid icon

    Gluten Free Homemade Ranch Dip


    5 Stars 4 Stars 3 Stars 2 Stars 1 Star

    No reviews

    • Author: Elaine VanVleck
    • Total Time: 10 minutes
    • Yield: 2 ½ cups 1x
    • Diet: Gluten Free
    Print Recipe
    Pin Recipe

    Description

    This easy recipe for gluten free homemade ranch dip is thick and perfect for dipping fries, veggie and chips! The dip is made with sour cream, mayonnaise, and buttermilk. This keto friendly sauce is thick and creamy! Let me show you how to make the best ranch dip you've had. 


    Ingredients

    Scale
    • ⅓ cup Buttermilk Blend Powder
    • 2 Tbsp. Dried Parsley Flakes
    • 2 tsp. Onion Powder
    • 2 tsp. Garlic Powder
    • 1 tsp. Sea Salt
    • ½ tsp. Coarse Ground Black Pepper
    • 1 tsp. Dried Chives
    • ½ tsp. Dried Dill Weed
    • 1 cup Sour Cream
    • 1 cup Mayonnaise
    • ¼ cup Milk

    Instructions

    Add the buttermilk blend powder, dried parsley flakes, onion powder, garlic powder, sea salt, black pepper, dried chives, dried dill weed, sour cream, mayonnaise and milk to a jar or bowl.

    Using an emersion blender, your Kitchen Aid hand held mixer, a food processor or your stand mixer blend all of the ingredients together.

    The mixture will be thick like a dip. If you prefer a thinner ranch you can add milk until you get your desired consistency.

    Notes

    If you want a thinner mixture to use for dressing add more milk until you get your desired consistency.

    • Prep Time: 10 minutes
    • Category: Dips
    • Method: Blended
    • Cuisine: Gluten Free

    Did you make this recipe?

    Tag @smallfarmbiglife on Instagram and hashtag it #smallfarmbiglife

    Didn't find the answer you're looking for?

    Ask AI to answer based on this recipe:

    ChatGPT
    Google AI
    Perplexity
    Grok
    Claude

    Frequently Asked Questions

    How do you make gluten free homemade ranch dip from scratch?

    It is so easy to make this dip! You add the sour cream, mayonnaise, milk, dried dill weed, dried chives, ground black pepper, sea salt, garlic powder, onion powder, dried parsley and buttermilk powder to a jar or bowl. Blend this mixture together using your mixer, emersion blender, or milkshake attachment for your hand held Kitchen Aid mixer.

    I like to make this dip in the same container I'm going to store it in so there is very little clean up. Store the gluten free homemade ranch dip in your refrigerator for up to a week.

    How long does homemade ranch dip last?

    Honestly we go through this pretty quickly, but it should last in your refrigerator for up to a week. I like this dip best after it's been in a refrigerator for a day and has really gotten flavorful.
    Gluten Free Coleslaw

    This easy recipe for gluten free coleslaw has a creamy, homemade dressing. This healthy salad is keto and low carb friendly. I walk you through how to make the best gluten free coleslaw.

    I make this salad multiple times during the summer. It's so simple to make and is even better the second night after the cabbage has marinated in the sauce.

    I like to use the prepackaged coleslaw mix. I usually buy the package with carrots in it, but if you are Keto or low carb you can get the bags without carrots. You could also finely chop up heads of cabbage on your own.

    As we start to get cabbage from the garden I will chop up my own cabbage and run carrots through the food processor or mandolin slicer for this salad.

    If you are looking for more cabbage recipes try my Thai Style Cabbage Salad, my Southwestern Style Coleslaw, my Easy Apple Slaw with Poppyseed Dressing, or my Pineapple Coleslaw.

    [feast_advanced_jump_to]

    Ingredients

    Coleslaw Mix
    Mayonnaise
    Apple Cider Vinegar
    Dijon Mustard
    Celery Seeds
    Sea Salt
    Coarse Ground Black Pepper

    Instructions

    In a large bowl pour the bags of coleslaw mix.

    In a small bowl or jar add the mayonnaise, apple cider vinegar, mustard, celery seeds, salt and pepper. Using the drink attachment for your hand mixer, an emersion blender or whisking by hand mix the ingredients together thoroughly.

    Pour the dressing over the coleslaw mix and stir until it is all coated.

    Store in your refrigerator for at least 2 hours before serving.

    Supplies

    Frequently Asked Questions

    Does coleslaw have gluten in it?

    This largely depends upon what type of vinegar you use. Malt vinegars are made from barley and would contain gluten. In this recipe I use apple cider vinegar which is usually safe.

    As always make sure you read the label to make sure nothing that contains gluten has been added to the apple cider vinegar. I like the tanginess the apple cider vinegar adds to the salad.

    Is coleslaw ok on Keto or low carb diets?

    Yes. Coleslaw makes a fantastic side dish while on a Keto or a low carb diet.

    How long does gluten free coleslaw keep?

    Coleslaw is generally fine for 2-4 days in the refrigerator. I actually like coleslaw the best on the second day after the cabbage has marinated in the sauce.

    Be sure not to leave your coleslaw out in the sun or warm temperatures so the dressing doesn't spoil. The gluten free coleslaw needs to go back in the refrigerator after you've served it.

    More Recipes You Might Enjoy

    Cucumber Salad with Vinegar Dressing
    Seven Layer Salad
    Easy Pea Salad
    Black Beans and Corn Salad
    The Best Old Fashioned Chicken Salad

    I get my ingredients from Thrive Market. Thrive Market has been a game changer for me eating gluten free. They have so many options I can't get at my rural grocery stores! Use this link to get 25% off your first order!

    Print
    clock clock iconcutlery cutlery iconflag flag iconfolder folder iconinstagram instagram iconpinterest pinterest iconfacebook facebook iconprint print iconsquares squares iconheart heart iconheart solid heart solid icon

    Gluten Free Coleslaw


    5 Stars 4 Stars 3 Stars 2 Stars 1 Star

    No reviews

    • Author: Elaine VanVleck
    • Total Time: 10 minutes
    • Yield: 8 servings 1x
    • Diet: Gluten Free
    Print Recipe
    Pin Recipe

    Description

    This easy recipe for gluten free coleslaw has a creamy, homemade dressing. This healthy salad is keto and low carb friendly. I walk you through how to make the best gluten free coleslaw.


    Ingredients

    Scale

    2 - 14 ounce bags Coleslaw Mix
    ¾ cup Mayonnaise
    ⅓ cup Apple Cider Vinegar
    2 tsp. Dijon Mustard
    1 tsp. Celery Seeds
    1 tsp. Sea Salt
    1 tsp. Coarse Ground Black Pepper


    Instructions

    In a large bowl pour the bags of coleslaw mix.

    In a small bowl or jar add the mayonnaise, apple cider vinegar, mustard, celery seeds, salt and pepper. Using the drink attachment for your hand mixer, an emersion blender or whisking by hand mix the ingredients together thoroughly.

    Pour the dressing over the coleslaw mix and stir until it is all coated.

    Store in your refrigerator for at least 2 hours before serving.

    Notes

    I like this salad best on day two after the cabbage and dressing have mixed thoroughly.

    • Prep Time: 10 minutes
    • Category: Salad
    • Method: Mixing
    • Cuisine: Gluten Free

    Did you make this recipe?

    Tag @smallfarmbiglife on Instagram and hashtag it #smallfarmbiglife

    Gluten Free Sourdough Bread

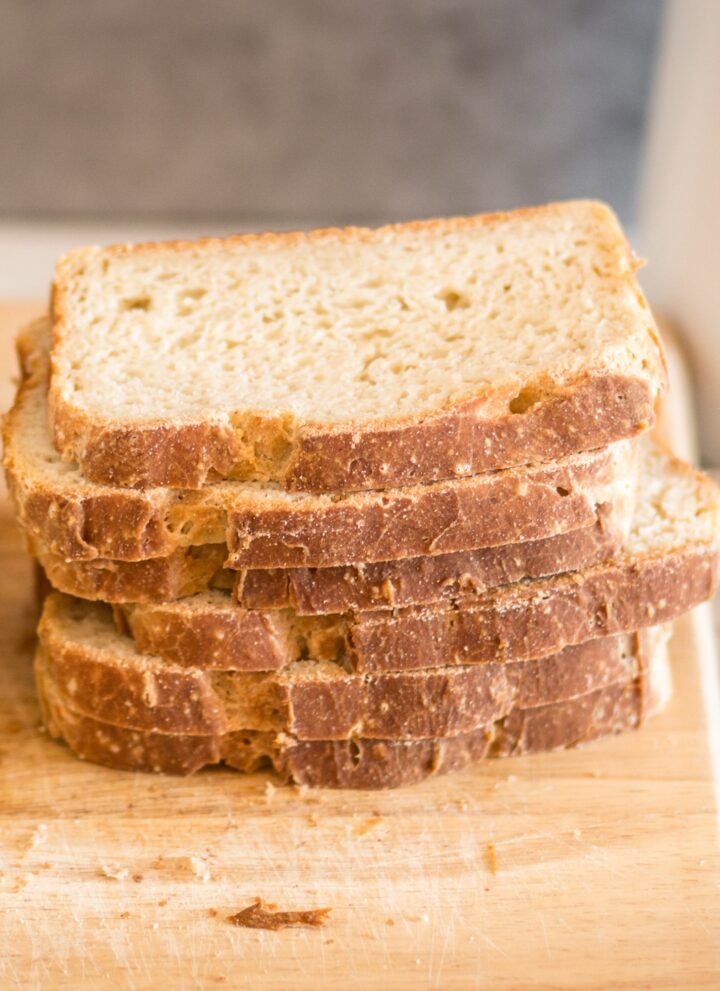
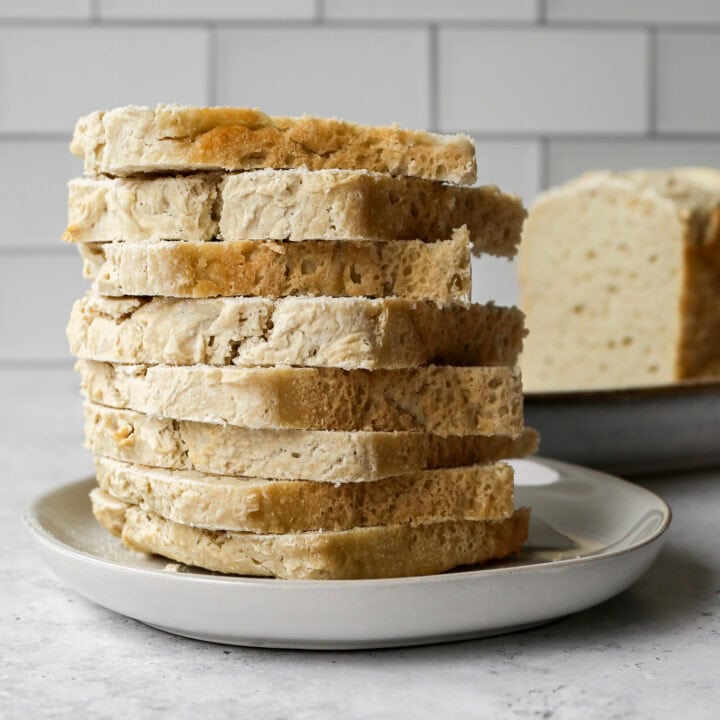
    This gluten free sourdough bread is a soft, sliceable loaf that holds together for sandwiches, toast, and French toast. It is a no knead recipe that you mix in a stand mixer, proof overnight in a regular loaf pan, and bake in the morning. All you need is discard from an active starter, and you can make your own with my gluten free sourdough starter recipe.

    Finding a gluten free bread that didn't fall apart was one of my biggest struggles when I first went gluten free. Store bought loaves were gritty, expensive, and crumbled the second I made a sandwich.

    After a lot of testing, this is the loaf I landed on, and I still make it every week. I mix the dough after dinner, set the pan on the hearth next to our wood stove, and wake up to dough ready for the oven.

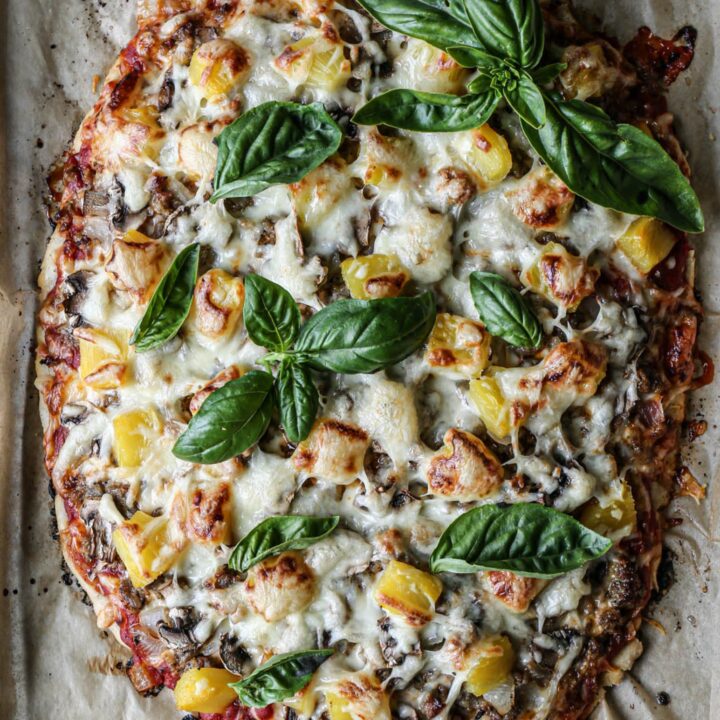
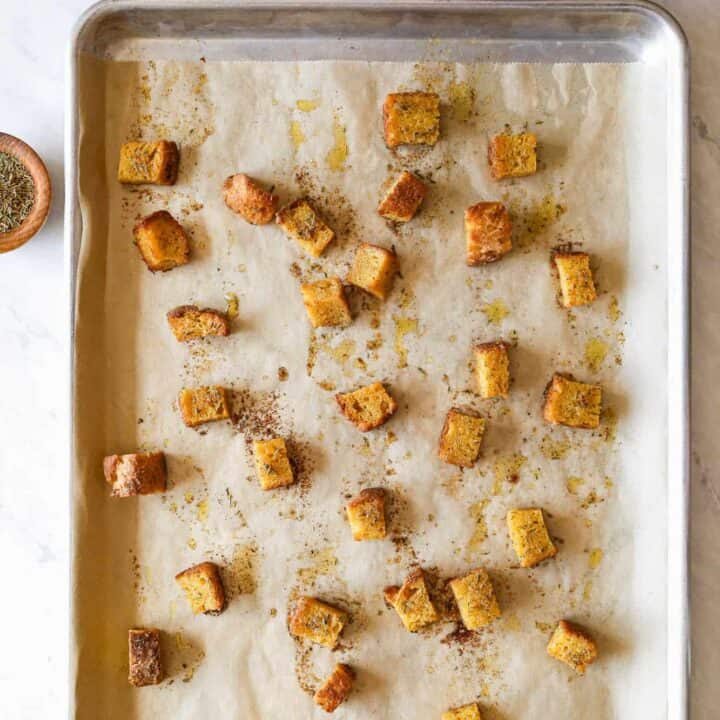
    With the sourdough starter I also like to make gluten free sourdough croutons and gluten free sourdough pizza crust. I also love to make my Gluten Free Cranberry Pecan Sourdough Bread, my Gluten Free Apple Cinnamon French Toast Casserole and my Easy Gluten Free Bread Recipes.

    [feast_advanced_jump_to]

    Why You'll Love This Recipe

    • No Dutch oven, no scale, no shaping. Mix it in a stand mixer, pour it into a regular loaf pan, and bake.
    • It's a real sandwich loaf. Square slices that hold together for sandwiches, toast, and French toast without crumbling.
    • Overnight proof, morning bake. Mix after dinner and the dough is ready for the oven when you wake up.
    • Soft, not gummy or gritty. Eggs, butter, and milk give it a tender crumb that's nothing like store bought gluten free bread.
    • Reader tested for six years. Dozens of readers call it the best gluten free bread they've made since going gluten free.

    How This Gluten Free Sourdough Bread Is Different

    Most gluten free sourdough recipes make a crusty round loaf in a Dutch oven and ask you to weigh everything on a kitchen scale. This one is different. It is an enriched sandwich loaf made with eggs, butter, milk, and honey, so it bakes up soft and sliceable.

    You mix it in a stand mixer, pour it into a regular loaf pan, and let it proof overnight. There is no kneading, no shaping, and no scoring. If you want a square slice of bread for sandwiches and toast, this is the recipe to make.

    Which of my sourdough recipes should you make?

    • This Gluten Free Sourdough Bread: made with my own flour blend for the best rise and softest texture.
    • Gluten Free Sourdough Sandwich Bread: made with 1 to 1 gluten free flour, if you'd rather not buy individual flours.
    • Flavored loaves: try my Cheesy, Cinnamon Raisin, or Cranberry Pecan sourdough breads.

    How to Use Sourdough Discard in This Gluten Free Sourdough Bread

    This recipe uses sourdough discard, not freshly fed starter. Discard is the portion you remove from an active starter before you feed it. There is no need to wait for your starter to peak or time your feedings around baking day.

    Your discard should come from an active, healthy starter that is being fed regularly. Store the discard in an airtight jar in the refrigerator until you are ready to bake. If you don't have a starter yet, start with my gluten free sourdough starter recipe, and learn how to keep it going with my guide on how to feed and maintain a gluten free sourdough starter.

    Cold discard is fine. I like to set my discard on the counter to come to room temperature before I mix the dough. If you forget, you can use it straight from the refrigerator. The long overnight proof gives the dough plenty of time to warm up and rise just fine.

    How to Know Your Gluten Free Sourdough Bread Is Done

    Gluten free bread holds onto moisture, so it can look done before the center is set. The most reliable test is an instant read thermometer. The center of the loaf should read about 205 to 210°F.

    Honestly, I rarely check the temperature on my loaf. I know after baking several loaves in my oven that this time and temperature is perfect for the loaf to be done. You may need to check the temperature your first couple of loaves to be sure your oven temperature is correct and that this bake time will work for you.

    Let the loaf cool completely before you slice it. Cutting it warm is the most common reason gluten free bread turns gummy.

    Troubleshooting

    • Dough overflowed the pan: Your starter is very active or your proofing spot is too warm. Shorten the proof and bake as soon as the dough rises above the rim.
    • Loaf sank in the middle: It likely overproofed. Shorten the proof next time.
    • Gummy center: It was underbaked or sliced too soon. Check the internal temperature and cool completely.
    • Dense, short loaf: Your starter wasn't active enough, or your pan was too wide. A narrower pan gives you a taller loaf.

    Sourdough Bread Storage

    Store the cooled loaf in an airtight container at room temperature for up to 5 days. To freeze, slice it first and place parchment between slices, then store in a freezer safe container for up to 1 month. Toast slices straight from the freezer.

    Top Tip

    Cover the loaf pan with a second upside down loaf pan or a bowl while it proofs. It keeps the top of the dough from drying out overnight, so it rises evenly and bakes with a smooth, golden crust.

    Frequently Asked Questions

    Can you eat sourdough bread on a gluten free diet?

    Regular sourdough bread is made with wheat flour, so it is not gluten free and is not safe for anyone with celiac disease. The fermentation process does not remove the gluten. To enjoy sourdough on a gluten free diet, you need a starter and bread made only with gluten free flours. That is why I make my own gluten free sourdough starter, so I know exactly what goes into it.

    How does gluten free sourdough work?

    What makes this recipe truly gluten free is that the sourdough starter is made strictly with gluten free flour. There isn't any gluten in the process of making the starter or in the bread recipe.

    This sourdough bread is made from a fermented sourdough starter and doesn't need gluten to work. The bread rises because of the fermentation. The process of making the bread is different from a gluten sourdough starter, but you still get delicious bread with this recipe.

    What size bread pan should I use for this gluten free sourdough bread?

    I typically use either a 9x4 metal bread pan. A narrower pan will give you a taller, more traditional looking slice of bread. A wider pan will give you a flatter loaf but it will still taste just as delicious. I recommend a metal bread pan over glass for this recipe as it conducts heat more evenly.

    Can I make this gluten free sourdough bread dairy free?

    Yes! I regularly make this bread with almond milk in place of regular milk and it works beautifully. For the butter I recommend melted coconut oil as a substitute. It will give the bread a very slightly different flavor but the texture and rise will be similar. Dairy free butter options should also work well.

    Can I substitute psyllium husk for the xanthan gum?

    I don't recommend it. The xanthan gum acts like gluten here, holding the dough together and giving it structure. Psyllium husk absorbs liquid very differently, so it doesn't work as a simple swap in this recipe.

    Can I use 1 to 1 gluten free flour in this recipe?

    This recipe is built around my own flour blend, and I didn't like the rise when I tested it with 1 to 1 flour alone. If you'd rather use 1 to 1 flour, try my Gluten Free Sourdough Sandwich Bread. It adds a starch for a better rise.

    Can I bake this in a Dutch oven?

    I don't recommend it. This dough is soft and pourable, so in a wide Dutch oven it spreads and bakes into a very flat loaf. The loaf pan keeps it compact so it rises tall.

    Why does this recipe use so much baking powder?

    Gluten free sourdough doesn't rise as much as wheat sourdough, and the baking powder gives it extra lift. I've tested it with less, and the bread wasn't as light and fluffy.

    Didn't find the answer you're looking for?

    Ask AI to answer based on this recipe:

    ChatGPT
    Google AI
    Perplexity
    Grok
    Claude

    Sourdough Bread Supplies

    Recipe Review

    "The bread is my 5th or 6th attempt with GF sourdough and the best! I love it! I've bought loaves as well, but they are nowhere near as good as your bread."

    More Recipes You Might Enjoy

    • Gluten Free Sourdough Sandwich Bread
    • Gluten Free Cheesy Sourdough Bread
    • Gluten Free Chocolate Sourdough Bread
    • Gluten Free Cinnamon Raisin Sourdough Bread

    I get a lot of my ingredients from Thrive Market. Thrive Market has been a game changer for me eating gluten free. They have so many options I can't get at my rural grocery stores! Use this link to get 40% off your first order!

    Print
    clock clock iconcutlery cutlery iconflag flag iconfolder folder iconinstagram instagram iconpinterest pinterest iconfacebook facebook iconprint print iconsquares squares iconheart heart iconheart solid heart solid icon

    Gluten Free Sourdough Bread


    5 Stars 4 Stars 3 Stars 2 Stars 1 Star

    5 from 6 reviews

    • Author: Elaine VanVleck
    • Total Time: 9 hours 25 minutes
    • Yield: 16 slices or 1 loaf 1x
    • Diet: Gluten Free
    Print Recipe
    Pin Recipe

    Description

    This no knead gluten free sourdough bread proofs overnight in a loaf pan and bakes into a soft, tangy loaf with a golden crust. It slices clean for sandwiches, toast, and French toast without crumbling. It is the gluten free sandwich bread my readers come back to again and again.


    Ingredients

    Scale
    • 1 ½ cups Gluten Free Sourdough Starter Discard
    • 3 large Eggs
    • 4 Tbsp Unsalted Butter, melted
    • 1 ¼ cups Milk
    • 2 Tbsp. Honey
    • ¾ cup Sweet Sorghum Flour
    • ¾ cup Tapioca Flour
    • ½ cup Brown Rice Flour
    • ½ cup Potato Starch
    • 1 Tbsp. Xanthan Gum
    • 1 Tbsp. Baking Powder
    • 2 tsp. Sea Salt

    Instructions

    In the bowl of your stand mixer place the gluten free sourdough starter discard, eggs, butter, milk and honey. Beat until it is blended together in a wet mixture.

    Add the sweet sorghum flour, tapioca flour, brown rice flour, potato starch, xanthan gum, baking powder and sea salt. Mix until well blended 3-4 minutes. The dough will be wet and sticky, but blended together well.

    Grease a bread pan with coconut oil. 

    Pour the dough into the bread pan and spread evenly. Place a bowl or another bread pan over this pan and place in a warm place for 6-8 hours. I like to mix my dough up the night before and let it proof overnight.

    Preheat your oven to 350 degrees.

    Bake the bread for 1 hour 10 minutes. The top will be brown and have a nice crust when the bread is done.

    Let the bread stand in the pan for 10 minutes and then turn out onto a cooling rack. Let the bread cool completely before slicing.

    When the bread is completely cooled store in a sealed container for up to five days.

    If you made this recipe please leave a star rating and comment below. It helps other readers find this recipe and means so much to me.

    Notes

    The width and size of your bread pan will affect how tall your loaf is. A smaller or more narrow bread pan will give you a taller slice of bread. I use a regular bread pan and am fine with the rectangular shape of my loaves of bread.

    • Prep Time: 8 hours, 15 minutes
    • Cook Time: 1 hour 10 minutes
    • Category: Bread
    • Method: Baking
    • Cuisine: American

    Did you make this recipe?

    Tag @smallfarmbiglife on Instagram and hashtag it #smallfarmbiglife

    If you made this gluten free sourdough bread I would love to hear what you thought! Please leave a star rating and a comment below. Reading your results and questions truly means so much.

    a sandwich using this gluten free sourdough bread recipe

    Gluten Free Sourdough Starter

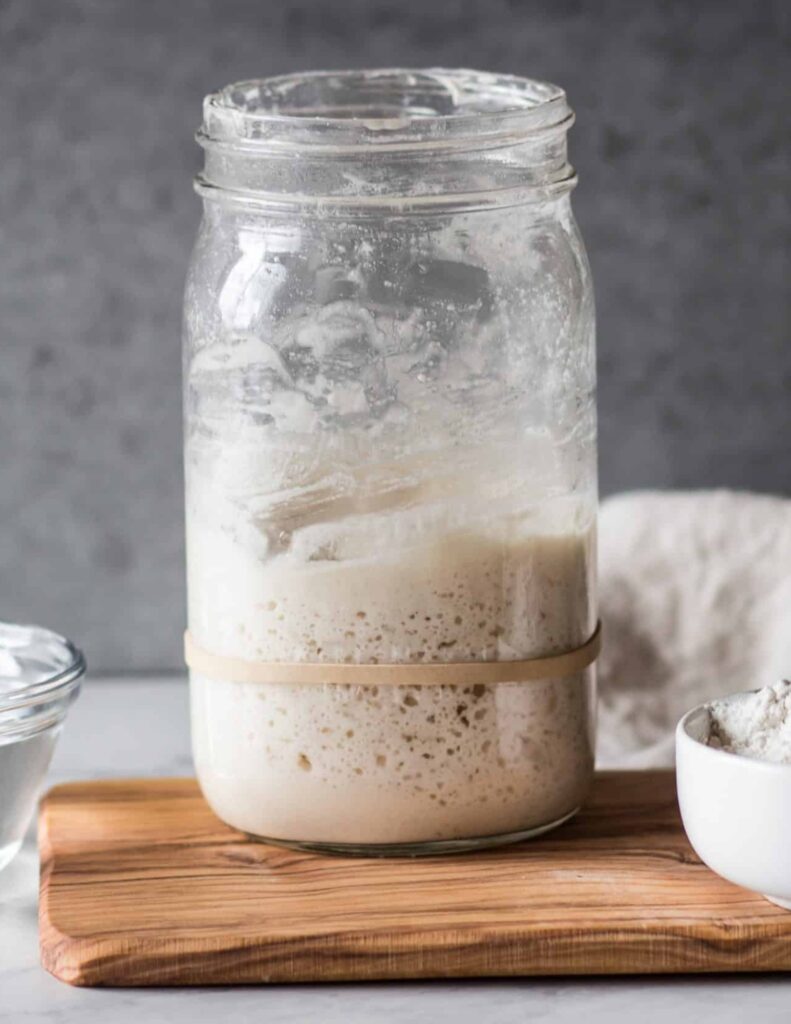
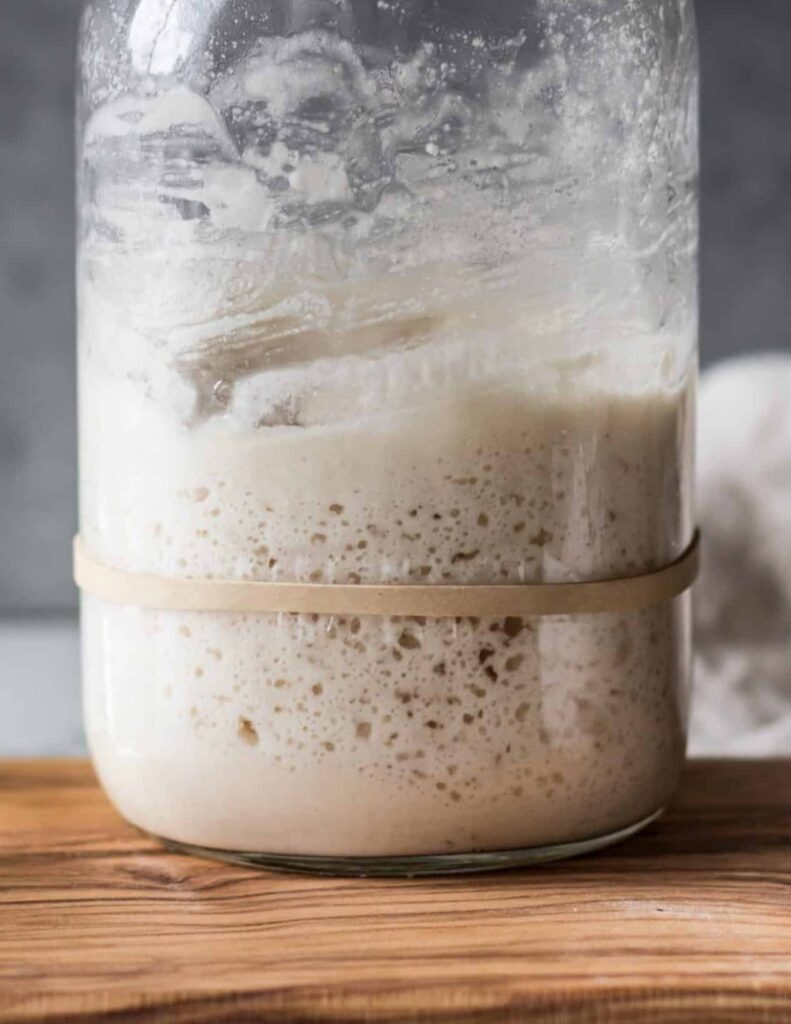
    This gluten free sourdough starter is made with just two ingredients: gluten free flour and water. It takes about a week of daily feeding for the natural yeast and bacteria in the flour to develop, which is what gives sourdough its tangy flavor and helps baked goods rise. Once your starter is active and bubbly, you can use it in a variety of recipes.

    I'll share some of my favorites, along with troubleshooting and storage tips, throughout this post.

    I love that making your own starter means you know exactly what went into it and that it stays completely gluten free from start to finish, with no cross contamination risk from a starter that may have been made in a shared kitchen.

    It costs a lot less than buying a starter, and once it is active, it will keep going for years with regular feeding.

    Once your starter is done try my Gluten Free Sourdough Bread, my Gluten Free Sourdough Sandwich Bread, my Gluten Free Sourdough Pizza Crust and my Gluten Free Sourdough Croutons.

    You can find all of my bread recipes here: Gluten Free Bread Recipes

    If you are looking for more guidance or have more questions my How to Feed and Maintain a Gluten Free Sourdough Starter guide is helpful.

    [feast_advanced_jump_to]

    Why You'll Love This Recipe

    • Made with only two ingredients: gluten free flour and water
    • Costs far less than buying a starter
    • Keeps you in full control of ingredients, so you know it's truly gluten free
    • Lasts for years with simple weekly feeding once established
    • Works in a variety of recipes, including sourdough bread, pizza crust, and croutons

    Troubleshooting Your Starter

    Gluten free starters can behave a little differently than traditional wheat starters, so a few hiccups along the way are normal.

    • No bubbles yet: Gluten free starters often take longer to become active than wheat based ones. Give it a few extra days before you worry.
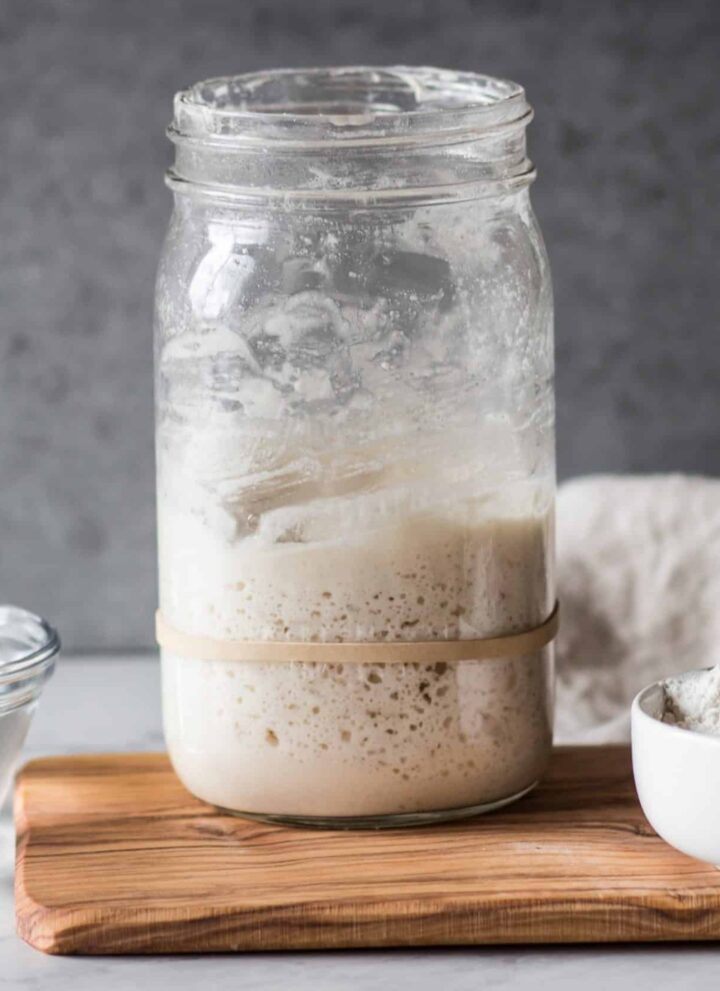
    • A layer of liquid on top: This is called hooch and is a normal sign your starter is hungry. Stir it back in or pour it off before your next feeding.
    • Mold: If you see fuzzy spots of green, black, or pink, discard the starter and start over with a clean jar. A thin layer of liquid or a slightly gray color on top is normal and is not the same as mold.

    What Kind of Container Should I Use?

    Use a glass or other nonreactive jar for your starter, like a wide mouth mason jar. Avoid metal containers, since the acidity of the starter can react with metal over time. Give your starter plenty of room in the jar, since it will grow as it ferments.

    Ways to Use Your Gluten Free Sourdough Starter

    Once your starter is active and bubbly, there is a lot you can do with it.

    • Gluten Free Sourdough Bread for a classic loaf
    • Gluten Free Sourdough Pizza Crust for homemade pizza night
    • Gluten Free Sourdough Croutons, a great way to use up discard
    • Gluten Free Sandwich Bread that is also perfect for toast
    • Gluten Free Cheesy Bread is perfect with soups

    Top Tip

    • Gluten free sourdough starters tend to take longer to ferment and start bubbling than a regular starter. Be patient, it will happen.
    • Do not use tap water that has chlorine in it for this recipe. It is best to use filtered water or tap water from a well. Chlorine will hinder the fermenting process of your starter.

    Frequently Asked Questions

    Can you eat sourdough bread on a gluten free diet?

    I know that some people who have an intolerance to gluten can eat sourdough that is made from regular wheat flour. That isn't the case for me and may not be the case for you. If you can't tolerate any gluten I wouldn't suggest eating regular sourdough bread.

    This recipe shows you how to make your own gluten free sourdough starter. I love that you are in control of everything that goes into the starter and the environment it is processed in. You will know for sure that it's gluten free and safe for you.

    What flour should I use for this starter?

    Gluten Free King Arthur Measure for Measure or Gluten Free Bob's Red Mill 1 to 1 both work well. Any regular gluten free flour blend should work, and there is no need for a specialty gluten free bread flour.

    What do I do with the starter left on the counter after moving the discard to the fridge?

    Feed it again so you can keep making starter for future batches of bread. If you don't want to make more right away, place it in the fridge to slow down fermentation until you're ready to use it again.

    How many loaves of bread can I make from one starter?

    The starter that goes in the fridge makes one loaf. The starter left on the counter can be fed continuously, allowing you to make a new loaf every two days.

    Didn't find the answer you're looking for?

    Ask AI to answer based on this recipe:

    ChatGPT
    Google AI
    Perplexity
    Grok
    Claude

    Supplies

    More Recipes You Might Enjoy

    • Gluten Free Sourdough Bread
    • Gluten Free Sourdough Pizza Crust
    • Gluten Free Sourdough Croutons
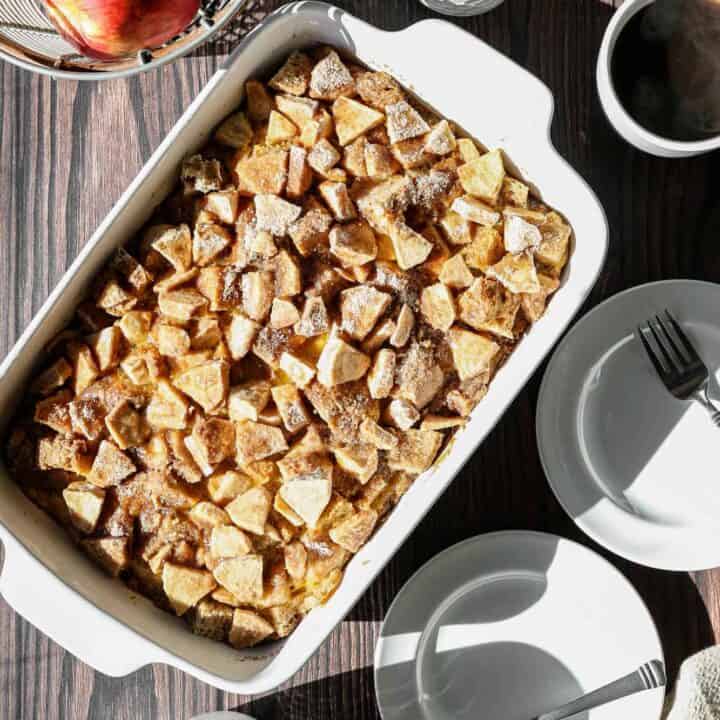
    • Gluten Free Apple Cinnamon French Toast Casserole

    I get a lot of my ingredients from Thrive Market. Thrive Market has been a game changer for me eating gluten free. They have so many options I can't get at my rural grocery stores! Use this link to get 40% off your first order!

    Print
    clock clock iconcutlery cutlery iconflag flag iconfolder folder iconinstagram instagram iconpinterest pinterest iconfacebook facebook iconprint print iconsquares squares iconheart heart iconheart solid heart solid icon

    Gluten Free Sourdough Starter


    5 Stars 4 Stars 3 Stars 2 Stars 1 Star

    No reviews

    • Author: Elaine VanVleck
    • Total Time: 5 minutes
    • Yield: ¾ cup daily 1x
    • Diet: Gluten Free
    Print Recipe
    Pin Recipe

    Description

    This gluten free sourdough starter is made with just two ingredients: gluten free flour and water. It takes about a week of daily feeding to become active and bubbly, and once it's ready, you can use it in gluten free sourdough bread, pizza crust, and more.


    Ingredients

    Units Scale
    • ⅓ cup Gluten Free Flour
    • ⅓ cup Hot Water (not too hot to burn, but also warmer than room temperature)

    Instructions

    Day 1: Combine the flour and hot water in a one quart jar. Stir well, then loosely cover with a lid or a coffee filter secured with a rubber band. Place the jar in a warm spot, ideally 70 to 74 degrees.

    Days 2 through 6: At the same time each day, discard half of the starter, then feed the remaining starter with another ⅓ cup gluten free flour and ⅓ cup hot water.

    Day 7: Instead of discarding, save the discard in a separate container and place it in the fridge. Feed the starter in the jar as usual (⅓ cup gluten free flour and ⅓ cup hot water).

    Day 8: Add the day 7 discard to the container already in the fridge. Feed the jar of starter on the counter another ⅓ cup flour and ⅓ cup hot water.

    Ongoing: Once established, keep your starter on the counter and feed it every day to bake regularly, or store it in the fridge and feed it once a week to keep it alive.

    If you made this recipe please leave a star rating and comment below. It helps other readers find this recipe and means so much to me.

    • Prep Time: 5 minutes
    • Category: Breads
    • Method: Fermenting
    • Cuisine: American

    Did you make this recipe?

    Tag @smallfarmbiglife on Instagram and hashtag it #smallfarmbiglife

    If you make this gluten free sourdough starter, I would love to hear how it turns out. Leave a comment below and let me know how your starter is doing, and be sure to tag @smallfarmbiglife on Instagram once you bake your first loaf. For more gluten free sourdough recipes like this one, subscribe to the newsletter so you never miss a new post.

    Sourdough Starter Ingredients

    Gluten Free Flour
    Hot Water (not too hot to burn, but also warmer than room temperature)

    Instructions

    Day 1: Combine the flour and hot water in a one quart jar. Stir well, then loosely cover with a lid or a coffee filter secured with a rubber band. Place the jar in a warm spot, ideally 70 to 74 degrees.

    Days 2 through 6: At the same time each day, discard half of the starter, then feed the remaining starter with another ⅓ cup gluten free flour and ⅓ cup hot water.

    Day 7: Instead of discarding, save the discard in a separate container and place it in the fridge. Feed the starter in the jar as usual (⅓ cup gluten free flour and ⅓ cup hot water).

    Day 8: Add the day 7 discard to the container already in the fridge. Feed the jar of starter on the counter another ⅓ cup flour and ⅓ cup hot water.

    Ongoing: Once established, keep your starter on the counter and feed it every day to bake regularly, or store it in the fridge and feed it once a week to keep it alive.

    Gluten Free Cornbread

    This easy gluten free cornbread is one of those recipes that belongs in every gluten free kitchen and once you make it from scratch you will never go back to a box mix. Made with gluten free cornmeal and gluten free flour, this homemade cornbread bakes up perfectly golden on the edges with a soft and tender center that is slightly sweet and absolutely delicious.

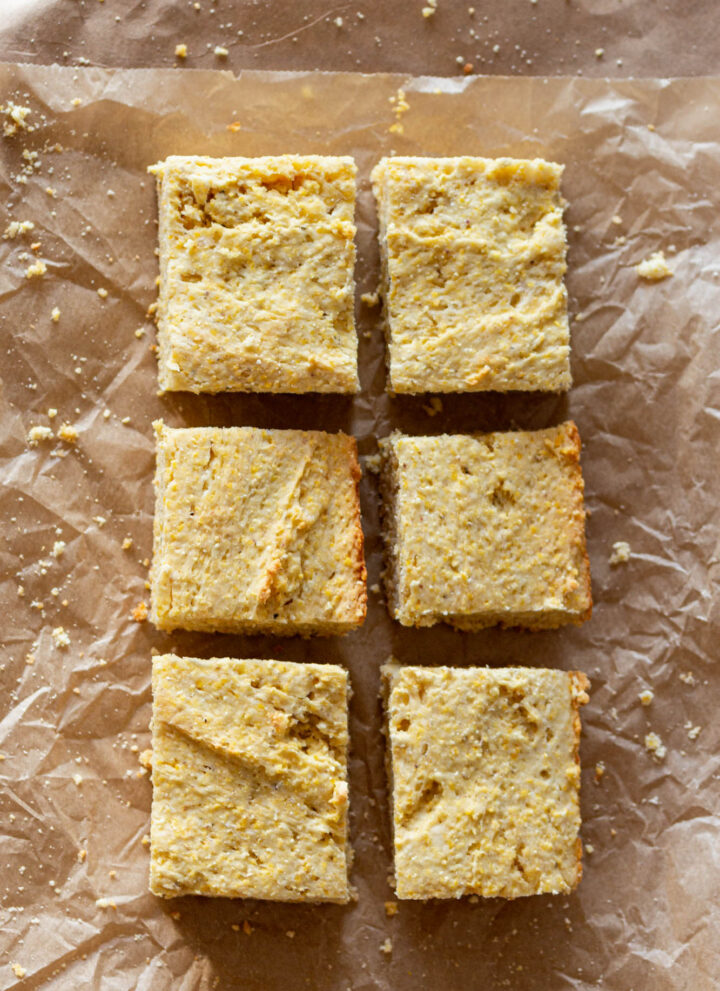
    It comes together in just 40 minutes with simple everyday ingredients and a 9x13 baking dish which means you get 15 generous squares of the best gluten free cornbread you have ever tasted.

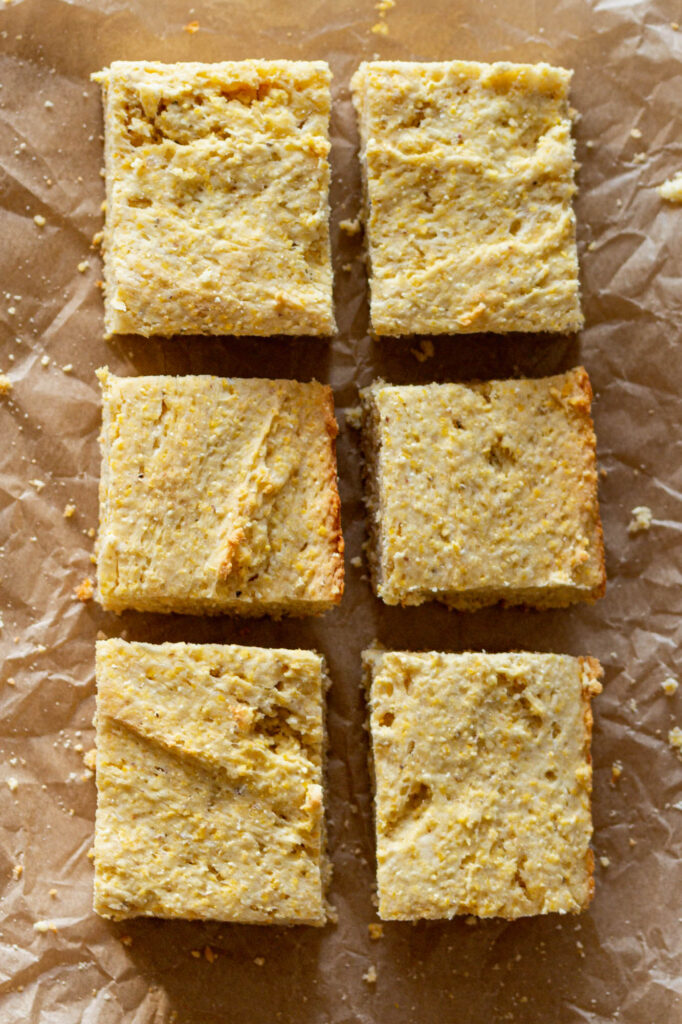
    six cornbread squares on natural parchment paper with crumbs around them

    This gluten free cornbread recipe is incredibly versatile and works for so many different occasions. It is the perfect side dish for a cozy bowl of gluten free chili on a weeknight, a crowd pleasing addition to a holiday dinner table at Thanksgiving or Christmas. It's an absolute must make alongside my Gluten Free Cowboy Baked Beans at a summer BBQ.

    I love serving it straight out of the oven with a generous pat of butter melting right into the top and a drizzle of honey for a little extra sweetness.

    You can also use leftover squares to make my Gluten Free Cornbread Stuffing which is one of my favorite things to do with any cornbread that does not get eaten the first day.

    If you are looking for more biscuits and bread recipes try my Gluten Free Buttermilk Drop Biscuits, my Gluten Free Sweet Potato Biscuits, my Gluten Free Millet Drop Biscuits or my Gluten Free Sourdough Bread.

    You can find all of my side dish recipes here: Gluten Free Side Dishes Recipes

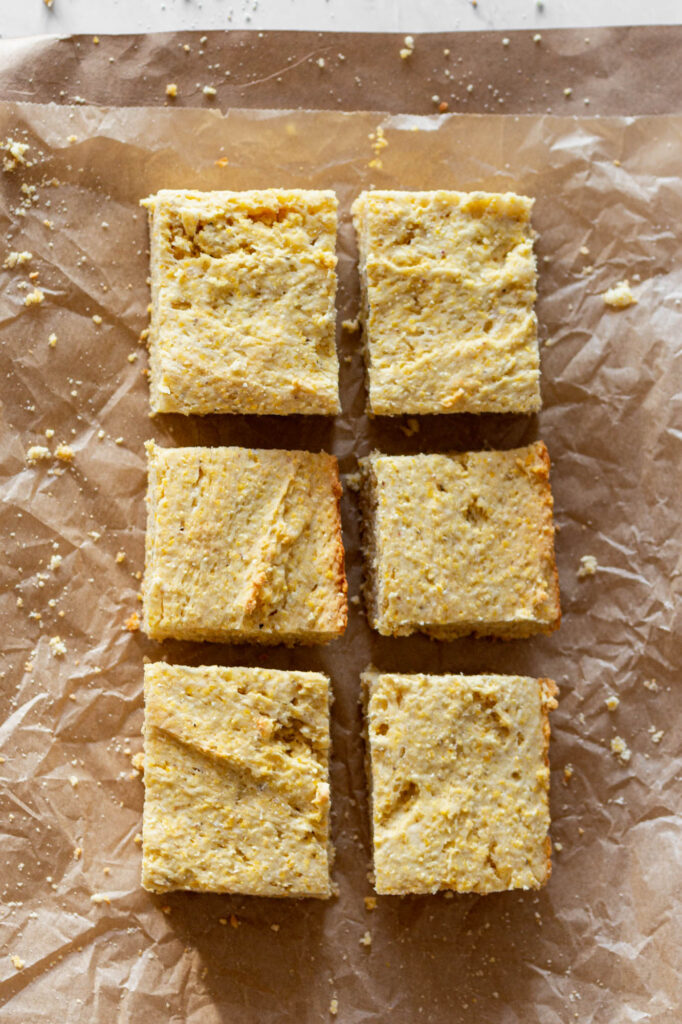
    six cornbread squares on natural parchment paper with crumbs around them
    [feast_advanced_jump_to]

    Ingredients

    • Unsalted Butter
    • Milk
    • Eggs
    • Gluten Free Cornmeal
    • Gluten Free Flour
    • Granulated Sugar
    • Baking Powder
    • Sea Salt

    Instructions

    Preheat your oven to 400 degrees. Grease a 9x13 baking dish with butter or coconut oil. Set aside.

    In the bowl of your stand mixer add the softened butter, milk, eggs, gluten free cornmeal, gluten free flour, sugar, baking powder and salt. Blend the ingredients together. Do not over blend. The mixture will be a bit lumpy.

    Pour the mixture into your greased 9x13 baking dish.

    Bake at 400 degrees for 20 to 25 minutes or until the edges of the cornbread are golden brown.

    Wait for the cornbread to cool before slicing into squares.

    Supplies

    More Recipes You Might Enjoy

    • Gluten Free Buttermilk Drop Biscuits
    • Gluten Free Cornbread Stuffing
    • Gluten Free Italian Almond Flour Bread
    • Gluten Free Sweet Potato Biscuits

    I get a lot of my ingredients from Thrive Market. Thrive Market has been a game changer for me eating gluten free. They have so many options I can't get at my rural grocery stores! Use this link to get 40% off your first order!

    Print
    clock clock iconcutlery cutlery iconflag flag iconfolder folder iconinstagram instagram iconpinterest pinterest iconfacebook facebook iconprint print iconsquares squares iconheart heart iconheart solid heart solid icon

    Gluten Free Cornbread


    5 Stars 4 Stars 3 Stars 2 Stars 1 Star

    No reviews

    • Author: Elaine VanVleck
    • Total Time: 40 minutes
    • Yield: 15 large pieces 1x
    • Diet: Gluten Free
    Print Recipe
    Pin Recipe

    Description

    This easy gluten free cornbread is made completely from scratch with gluten free cornmeal and gluten free flour for a moist and tender homemade cornbread that bakes up perfectly golden in just 40 minutes. Slightly sweet with crispy golden edges and a soft and fluffy center, this is the best gluten free cornbread recipe for serving alongside chili, soups, BBQ, and holiday dinners!


    Ingredients

    Scale
    • ½ cup Unsalted Butter, softened
    • 2 cups Milk
    • 2 large Eggs
    • 2 ½ cups Gluten Free Cornmeal
    • 2 cups Gluten Free Flour
    • ¼ cup Granulated Sugar
    • 2 Tbsp. Baking Powder
    • 1 tsp. Sea Salt

    Instructions

    Preheat your oven to 400 degrees. Grease a 9x13 baking dish with butter or coconut oil. Set aside.

    In the bowl of your stand mixer add the softened butter, milk, eggs, gluten free cornmeal, gluten free flour, sugar, baking powder and salt. Blend the ingredients together. Do not over blend. The mixture will be a bit lumpy.

    Pour the mixture into your greased 9x13 baking dish.

    Bake at 400 degrees for 20 to 25 minutes or until the edges of the cornbread are golden brown.

    Wait for the cornbread to cool before slicing into squares.

    If you made this recipe please leave a star rating and comment below. It helps other readers find this recipe and means so much to me.

    Notes

    I have used both whole milk and almond milk in this recipe with success.

    • Prep Time: 15 minutes
    • Cook Time: 25 minutes
    • Category: Breads
    • Method: Baking
    • Cuisine: American

    Did you make this recipe?

    Tag @smallfarmbiglife on Instagram and hashtag it #smallfarmbiglife

    If you make this Gluten Free Cornbread I would love to hear what you think! Leave a star rating and a comment below and let me know what you served it with.

    Don't forget to save this recipe to your Pinterest boards so you can find it again every time a cornbread craving hits!

    Storage

    Store leftover gluten free cornbread in an airtight container or wrapped tightly in plastic wrap at room temperature for up to 2 days. For longer storage place the cornbread in a sealed airtight container in the refrigerator for up to 5 days.

    To reheat individual squares warm in the microwave for 20 to 30 seconds or wrap in foil and warm in a 350 degree oven for about 10 minutes until heated through.

    This cornbread also freezes beautifully. Once completely cooled wrap individual squares tightly in plastic wrap and place them in a freezer safe bag or airtight container and freeze for up to 3 months. Thaw at room temperature for about an hour or warm individual squares in the microwave straight from the freezer for 45 to 60 seconds. This is a great recipe to make a double batch of and freeze so you always have homemade gluten free cornbread on hand.

    Top Tip

    Do not over mix the cornbread batter once all of the ingredients are combined. Over mixing gluten free batters can cause the starches in the gluten free flour to break down and result in a gummy and dense texture instead of the light and tender crumb you are going for.

    Mix just until everything is incorporated and the batter is evenly combined then stop. A few small lumps in the batter are completely fine and actually a sign that you have not over mixed. The batter will be thicker than a traditional cake batter and that is exactly what you want for a moist and tender gluten free cornbread with a beautiful golden crust.

    Didn't find the answer you're looking for?

    Ask AI to answer based on this recipe:

    ChatGPT
    Google AI
    Perplexity
    Grok
    Claude

    Frequently Asked Questions

    Does cornbread have gluten in it?

    Traditional cornbread can contain gluten depending on how it is made. While cornmeal itself is naturally gluten free many cornbread recipes also call for all purpose wheat flour which contains gluten. Store bought cornbread mixes almost always contain wheat flour as well. This recipe uses gluten free flour in place of all purpose flour to make a completely gluten free cornbread that is safe for anyone avoiding gluten. It is also important to make sure your cornmeal is certified gluten free as regular cornmeal is often processed in facilities that also process wheat and can be cross contaminated.

    What is the best gluten free cornmeal for this recipe?

    Bob's Red Mill Gluten Free Cornmeal is my top recommendation for this recipe. It is a coarser ground cornmeal which gives the cornbread a wonderful texture and a classic cornbread bite. It is certified gluten free and widely available at most grocery stores and online. Make sure to always check the label and look for a certified gluten free seal on whatever cornmeal you purchase to ensure it has not been cross contaminated during processing.

    Can I add mix ins to this cornbread recipe?

    Absolutely! This gluten free cornbread recipe is a wonderful base for all kinds of delicious mix ins. Shredded cheddar cheese and diced jalapenos make a savory and spicy version that is amazing alongside chili and BBQ. Creamed corn stirred into the batter adds extra moisture and a sweeter corn flavor. Fresh or frozen blueberries make a wonderful sweet breakfast version. Simply fold your mix ins into the batter right before pouring it into the baking dish.

    What do you serve with gluten free cornbread?

    This gluten free cornbread pairs beautifully with so many different dishes. It is the classic companion to a bowl of gluten free chili and absolutely perfect alongside my Gluten Free Cowboy Baked Beans for a summer BBQ. It is also wonderful served with gluten free soups and stews on a cozy weeknight and makes a beautiful addition to a holiday dinner table at Thanksgiving and Christmas. Any leftover squares can be used to make my Gluten Free Cornbread Stuffing which is one of the most delicious things you can do with day old cornbread.

    • « Previous Page
    • 1
    • …
    • 14
    • 15
    • 16

    Welcome! I'm Elaine

    I'm so glad you are here! I share easy gluten free recipes from my small farm in Washington.

    Be sure to sign up for my newsletter to stay up to date on all of my new recipes.

    More about me...
    • Instagram
    • Pinterest
    • Facebook
    • Twitter
    • email

    Free gluten free recipe ebook
    My most loved recipes in one download, plus new recipes every Friday.
    Check your inbox! Your ebook is on its way.

    Easy Meals Recipes

    • Gluten Free Instant Pot Chili Mac and Cheese
    • Gluten Free Taco Casserole
    • Gluten Free Cowboy Baked Beans
    • Gluten Free Walking Taco Casserole
    • Gluten Free Creamy Beef and Mushroom Pasta
    • Gluten Free Instant Pot Chicken and Dumplings
    • Instant Pot Mexican Style Beef and Rice
    • Gluten Free Chicken Parmesan Pasta Casserole
    • Gluten Free One Pot Hamburger Helper Copycat
    • Gluten Free Salisbury Steak with Mushroom Gravy
    • Gluten Free Air Fryer Fajitas
    • Gluten Free Sloppy Joe Casserole

    Footer

    back to top

    About

    • Privacy Policy
    • Shop my Amazon Page
    • Follow me on LTK

    Newsletter

    • Sign Up! for emails and updates

    Contact

    • Contact
    • Media Kit
    • About Me

    As an Amazon Associate I earn from qualifying purchases.

    I may get commissions for purchases made through links on this site.

    Copyright © 2026 Brunch Pro on the Brunch Pro Theme