• Skip to primary navigation
  • Skip to main content
  • Skip to primary sidebar
  • Skip to footer
Small Farm Big Life logo
  • Recipe Index
  • Subscribe
  • Resources
  • Home Decor
  • Nav Social Menu

    • Email
    • Facebook
    • Instagram
    • Pinterest
menu icon
go to homepage
subscribe
search icon
Homepage link
  • Home
  • Recipe Index
  • Subscribe
  • My Story
  • Resources
  • Free Guides
  • Home Decor
    • Email
    • Facebook
    • Instagram
    • Pinterest
  • ×

    Air Fryer Sweet Potato Wedges

    plate full of gluten free air fryer sweet potato wedges

    This recipe for easy Air Fryer Sweet Potato Wedges makes a perfect crispy and healthy side dish. These homemade seasoned wedges are whole 30 compliant. They can be air fried quickly and are the best way to make sweet potato wedges.

    We love these air fryer sweet potato wedges for a snack also. They are great to serve for a crowd at a gathering or to make for a snack. I like to cut up and soak six sweet potatoes so I can make more than one batch at a time.

    It is key when making a larger batch not to try to crowd them into your air fryer. It is best to stick to no more than two medium sweet potatoes cut up in your air fryer at a time.

    If you crowd the potatoes or stack them on top of each other they won't get a crispy exterior and may not cook completely. When I'm doing multiple batches I air fry and switch them out while I make the rest of dinner.

    a plate full of gluten free air fryer sweet potato wedges with gluten free homemade ranch dip

    Are air fried sweet potatoes healthy?

    Since these aren't deep fried they are a healthier version than wedges or fries that are. We do use oil in this recipe to bind the spices to the potatoes, but it's much less oil on the fries than you would get if they were deep fried.

    I also like that by using the air fryer I can control the type of oil I use. I used olive oil in this recipe, but I could have also use avocado oil or coconut oil. I'm able to choose healthier options when I air fry the sweet potatoes at home.

    Air Fryers and Accessories

    How do I air fry sweet potato wedges?

    These gluten free air fryer sweet potato wedges are really simple to make. I like to soak the chopped up sweet potatoes in water for an hour before air frying.

    By soaking the sweet potatoes you remove some of the excess starch. Removing the excess starch helps the sweet potatoes not to stick together and to get a crispy exterior.

    Drain and pat dry the sweet potatoes. In a bowl add the sweet potatoes, olive oil, sea salt, pepper, garlic powder, onion powder and paprika. Stir to coat the sweet potatoes in the mixture.

    Lay the wedges out in the air fryer basket so they aren't touching. Air fryer at 400 degrees for 11 minutes.

    If you like this recipe you might also enjoy:

    Gluten Free Coleslaw
    Gluten Free Cheeseburger Casserole
    Crispy Garlic and Rosemary Smashed Potatoes
    Gluten Free Air Fryer Turkey Breast
    Air Fryer Fajitas

    I get my ingredients from Thrive Market. Thrive Market has been a game changer for me eating gluten free. They have so many options I can't get at my rural grocery stores! Use this link to get 25% off your first order!

    Print
    clock clock iconcutlery cutlery iconflag flag iconfolder folder iconinstagram instagram iconpinterest pinterest iconfacebook facebook iconprint print iconsquares squares iconheart heart iconheart solid heart solid icon

    Air Fryer Sweet Potato Wedges


    5 Stars 4 Stars 3 Stars 2 Stars 1 Star

    No reviews

    • Author: Elaine VanVleck
    • Total Time: 1 hour 21 minutes
    • Yield: 3 servings 1x
    • Diet: Gluten Free
    Print Recipe
    Pin Recipe

    Description

    This recipe for easy Air Fryer Sweet Potato Wedges makes a perfect crispy and healthy side dish. These homemade seasoned wedges are whole 30 compliant. They can be air fried quickly and are the best way to make sweet potato wedges.


    Ingredients

    Scale

    2 medium Sweet Potatoes
    1 Tbsp. Olive Oil
    ½ tsp. Sea Salt
    ½ tsp. Ground Black Pepper
    ½ tsp. Garlic Powder
    ½ tsp. Onion Powder
    ½ tsp. Smoked Paprika


    Instructions

    Cut the sweet potatoes into wedges.

    Soak the wedges in cold water for one hour.

    Drain the water from the sweet potato wedges and pat them dry.

    Add the wedges to a large bowl along with the olive oil, salt, pepper, garlic powder, onion powder and paprika. Stir to coat the potato wedges completely.

    Lay the potato wedges in the basket of your air fryer so they aren't touching. Pour any excess oil mixture in the bowl over the sweet potato wedges.

    Air fry at 400 degrees for 11-12 minutes. 

    Move the wedges from the air fryer to a plate to cool. Serve hot with my Gluten Free Homemade Ranch Dip.

    • Prep Time: 1 hour 10 minutes
    • Cook Time: 11 minutes
    • Category: Side Dish
    • Method: Air Fryer
    • Cuisine: Gluten Free

    Did you make this recipe?

    Tag @smallfarmbiglife on Instagram and hashtag it #smallfarmbiglife

    Gluten Free Homemade Ranch Dip

    This easy recipe for gluten free homemade ranch dip is thick and perfect for dipping fries, veggie and chips! The dip is made with sour cream, mayonnaise, and buttermilk. This keto friendly sauce is thick and creamy! Let me show you how to make the best ranch dip you've had.

    I love a yummy dip for fresh vegetables from the garden, to go with fries or to have with chips. This sauce is super simple to make and is absolutely delicious!

    I like to make this dip in a jar and using either my emersion blender or the shake attachment for my hand held kitchenmaid mixer. It works perfect to save mayonnaise jars to make this sauce in. I also like to use wide mouth jars so the sauce is easy to get out.

    This gluten free homemade ranch dip will last in your refrigerator for a few days, so it's easy to make it ahead. I like to make this dip at least a day before we are going to use it. Letting it sit in the refrigerator for a couple of days before you want to use it really lets the flavors come out.

    [feast_advanced_jump_to]

    Ingredients

    Buttermilk Blend Powder
    Dried Parsley
    Onion Powder
    Garlic Powder
    Sea Salt
    Coarse Ground Black Pepper
    Dried Chives
    Dried Dill Weed
    Sour Cream
    Mayonnaise
    Milk

    Instructions

    Add the buttermilk blend powder, dried parsley flakes, onion powder, garlic powder, sea salt, black pepper, dried chives, dried dill weed, sour cream, mayonnaise and milk to a jar or bowl.

    Using an emersion blender, your Kitchen Aid hand held mixer, a food processor or your stand mixer blend all of the ingredients together.

    The mixture will be thick like a dip. If you prefer a thinner ranch you can add milk until you get your desired consistency.

    Supplies

    Frequently Asked Questions

    How do you make gluten free homemade ranch dip from scratch?

    It is so easy to make this dip! You add the sour cream, mayonnaise, milk, dried dill weed, dried chives, ground black pepper, sea salt, garlic powder, onion powder, dried parsley and buttermilk powder to a jar or bowl. Blend this mixture together using your mixer, emersion blender, or milkshake attachment for your hand held Kitchen Aid mixer.

    I like to make this dip in the same container I'm going to store it in so there is very little clean up. Store the gluten free homemade ranch dip in your refrigerator for up to a week.

    How long does homemade ranch dip last?

    Honestly we go through this pretty quickly, but it should last in your refrigerator for up to a week. I like this dip best after it's been in a refrigerator for a day and has really gotten flavorful.

    More Recipes You Might Like

    Creamy Sausage Bean Dip
    Gluten Free Caramelized Onion Dip
    Gluten Free Scotch Eggs with Honey Mustard Dipping Sauce
    Gluten Free Easy Homemade Garlic Hummus
    Gluten Free Burger Sauce
    Gluten Free Cheesy Pinto Beans

    I get my ingredients from Thrive Market. Thrive Market has been a game changer for me eating gluten free. They have so many options I can't get at my rural grocery stores! Use this link to get 25% off your first order!

    Print
    clock clock iconcutlery cutlery iconflag flag iconfolder folder iconinstagram instagram iconpinterest pinterest iconfacebook facebook iconprint print iconsquares squares iconheart heart iconheart solid heart solid icon

    Gluten Free Homemade Ranch Dip


    5 Stars 4 Stars 3 Stars 2 Stars 1 Star

    No reviews

    • Author: Elaine VanVleck
    • Total Time: 10 minutes
    • Yield: 2 ½ cups 1x
    • Diet: Gluten Free
    Print Recipe
    Pin Recipe

    Description

    This easy recipe for gluten free homemade ranch dip is thick and perfect for dipping fries, veggie and chips! The dip is made with sour cream, mayonnaise, and buttermilk. This keto friendly sauce is thick and creamy! Let me show you how to make the best ranch dip you've had. 


    Ingredients

    Scale

    ⅓ cup Buttermilk Blend Powder
    2 Tbsp. Dried Parsley Flakes
    2 tsp. Onion Powder
    2 tsp. Garlic Powder
    1 tsp. Sea Salt
    ½ tsp. Coarse Ground Black Pepper
    1 tsp. Dried Chives
    ½ tsp. Dried Dill Weed
    1 cup Sour Cream
    1 cup Mayonnaise
    ¼ cup Milk


    Instructions

    Add the buttermilk blend powder, dried parsley flakes, onion powder, garlic powder, sea salt, black pepper, dried chives, dried dill weed, sour cream, mayonnaise and milk to a jar or bowl.

    Using an emersion blender, your Kitchen Aid hand held mixer, a food processor or your stand mixer blend all of the ingredients together.

    The mixture will be thick like a dip. If you prefer a thinner ranch you can add milk until you get your desired consistency.

    Notes

    If you want a thinner mixture to use for dressing add more milk until you get your desired consistency.

    • Prep Time: 10 minutes
    • Category: Dips
    • Method: Blended
    • Cuisine: Gluten Free

    Did you make this recipe?

    Tag @smallfarmbiglife on Instagram and hashtag it #smallfarmbiglife

    Gluten Free Coleslaw

    This easy recipe for gluten free coleslaw has a creamy, homemade dressing. This healthy salad is keto and low carb friendly. I walk you through how to make the best gluten free coleslaw.

    I make this salad multiple times during the summer. It's so simple to make and is even better the second night after the cabbage has marinated in the sauce.

    I like to use the prepackaged coleslaw mix. I usually buy the package with carrots in it, but if you are Keto or low carb you can get the bags without carrots. You could also finely chop up heads of cabbage on your own.

    As we start to get cabbage from the garden I will chop up my own cabbage and run carrots through the food processor or mandolin slicer for this salad.

    If you are looking for more cabbage recipes try my Thai Style Cabbage Salad, my Southwestern Style Coleslaw, my Easy Apple Slaw with Poppyseed Dressing, or my Pineapple Coleslaw.

    [feast_advanced_jump_to]

    Ingredients

    Coleslaw Mix
    Mayonnaise
    Apple Cider Vinegar
    Dijon Mustard
    Celery Seeds
    Sea Salt
    Coarse Ground Black Pepper

    Instructions

    In a large bowl pour the bags of coleslaw mix.

    In a small bowl or jar add the mayonnaise, apple cider vinegar, mustard, celery seeds, salt and pepper. Using the drink attachment for your hand mixer, an emersion blender or whisking by hand mix the ingredients together thoroughly.

    Pour the dressing over the coleslaw mix and stir until it is all coated.

    Store in your refrigerator for at least 2 hours before serving.

    Supplies

    Frequently Asked Questions

    Does coleslaw have gluten in it?

    This largely depends upon what type of vinegar you use. Malt vinegars are made from barley and would contain gluten. In this recipe I use apple cider vinegar which is usually safe.

    As always make sure you read the label to make sure nothing that contains gluten has been added to the apple cider vinegar. I like the tanginess the apple cider vinegar adds to the salad.

    Is coleslaw ok on Keto or low carb diets?

    Yes. Coleslaw makes a fantastic side dish while on a Keto or a low carb diet.

    How long does gluten free coleslaw keep?

    Coleslaw is generally fine for 2-4 days in the refrigerator. I actually like coleslaw the best on the second day after the cabbage has marinated in the sauce.

    Be sure not to leave your coleslaw out in the sun or warm temperatures so the dressing doesn't spoil. The gluten free coleslaw needs to go back in the refrigerator after you've served it.

    More Recipes You Might Enjoy

    Cucumber Salad with Vinegar Dressing
    Seven Layer Salad
    Easy Pea Salad
    Black Beans and Corn Salad
    The Best Old Fashioned Chicken Salad

    I get my ingredients from Thrive Market. Thrive Market has been a game changer for me eating gluten free. They have so many options I can't get at my rural grocery stores! Use this link to get 25% off your first order!

    Print
    clock clock iconcutlery cutlery iconflag flag iconfolder folder iconinstagram instagram iconpinterest pinterest iconfacebook facebook iconprint print iconsquares squares iconheart heart iconheart solid heart solid icon

    Gluten Free Coleslaw


    5 Stars 4 Stars 3 Stars 2 Stars 1 Star

    No reviews

    • Author: Elaine VanVleck
    • Total Time: 10 minutes
    • Yield: 8 servings 1x
    • Diet: Gluten Free
    Print Recipe
    Pin Recipe

    Description

    This easy recipe for gluten free coleslaw has a creamy, homemade dressing. This healthy salad is keto and low carb friendly. I walk you through how to make the best gluten free coleslaw.


    Ingredients

    Scale

    2 - 14 ounce bags Coleslaw Mix
    ¾ cup Mayonnaise
    ⅓ cup Apple Cider Vinegar
    2 tsp. Dijon Mustard
    1 tsp. Celery Seeds
    1 tsp. Sea Salt
    1 tsp. Coarse Ground Black Pepper


    Instructions

    In a large bowl pour the bags of coleslaw mix.

    In a small bowl or jar add the mayonnaise, apple cider vinegar, mustard, celery seeds, salt and pepper. Using the drink attachment for your hand mixer, an emersion blender or whisking by hand mix the ingredients together thoroughly.

    Pour the dressing over the coleslaw mix and stir until it is all coated.

    Store in your refrigerator for at least 2 hours before serving.

    Notes

    I like this salad best on day two after the cabbage and dressing have mixed thoroughly.

    • Prep Time: 10 minutes
    • Category: Salad
    • Method: Mixing
    • Cuisine: Gluten Free

    Did you make this recipe?

    Tag @smallfarmbiglife on Instagram and hashtag it #smallfarmbiglife

    Gluten Free Sourdough Bread

    This easy recipe for gluten free sour dough bread includes the instructions for how to make your own gluten free sourdough starter. This no knead, homemade gluten free bread is great for sandwiches or making french toast.

    Finding a gluten free bread that actually holds together for a sandwich was one of the things I struggled with most when I first went gluten free. I tried every store bought brand I could find and was so disappointed! They were gritty, fell apart, and were expensive on top of it all.

    After testing recipe after recipe I finally landed on this gluten free sourdough bread and it completely changed things for me. It holds together for sandwiches, makes incredible French toast, and is perfect toasted.

    It is the loaf I make every single week and the one my readers come back to again and again.

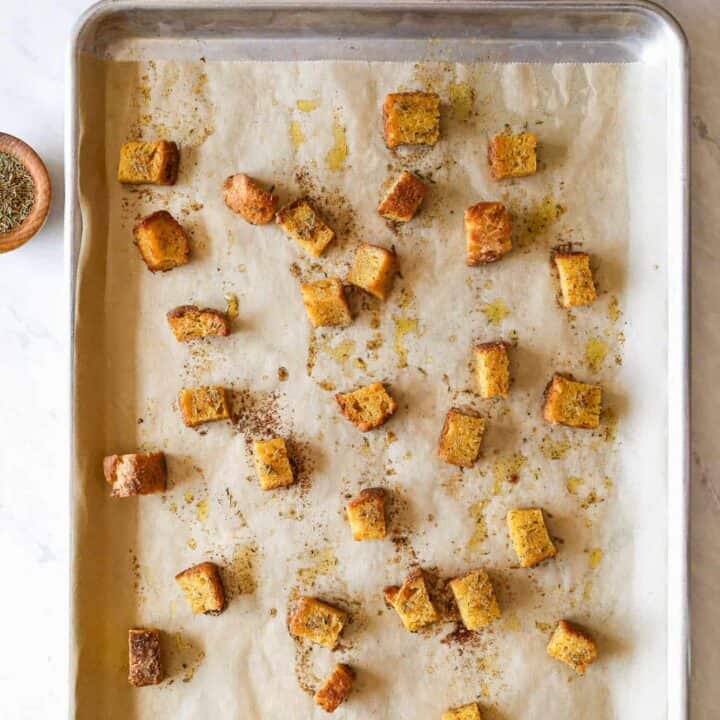
    With the sourdough starter I also like to make gluten free sourdough croutons and gluten free sourdough pizza crust.

    [feast_advanced_jump_to]

    Ingredients

    Eggs
    Unsalted Butter
    Milk
    Honey
    Sweet Sorghum Flour
    Tapioca Flour
    Brown Rice Flour
    Potato Starch
    Xanthan Gum
    Baking Powder
    Sea Salt

    Instructions

    In the bowl of your stand mixer place the gluten free sourdough starter, eggs, butter, milk and honey. Beat until it is blended together in a wet mixture.

    Add the sweet sorghum flour, tapioca flour, brown rice flour, potato starch, xanthan gum, baking powder and sea salt. Mix until well blended 3-4 minutes. The dough will be wet and sticky, but blended together well.

    Grease a bread pan with coconut oil. 

    Pour the dough into the bread pan and spread evenly. Place a bowl or another bread pan over this pan and place in a warm place for 6-8 hours. I like to mix my dough up the night before and let it proof overnight.

    Preheat your oven to 350 degrees.

    Bake the bread for 1 hour 10 minutes. The top will be brown and have a nice crust when the bread is done.

    Let the bread stand in the pan for 10 minutes and then turn out onto a cooling rack. Let the bread cool completely before slicing.

    When the bread is completely cooled store in a sealed container for up to five days.

    Supplies

    Recipe Review

    "The bread is my 5th or 6th attempt with GF sourdough and the best! I love it! I've bought loaves as well, but they are nowhere near as good as your bread."

    Storage

    Store the cooled loaf in an air tight container for up to 7 days. You can also freeze the bread in an air tight freezer safe container for up to a month.

    Top Tip

    Using a more narrow bread pan will yield a taller loaf of bread. If you aren't concerned about having a rectangular slice of bread using a regular 9" x 5" bread pan works fine.

    More Recipes You Might Enjoy

    • Gluten Free Sourdough Sandwich Bread
    • Gluten Free Cheesy Sourdough Bread
    • Gluten Free Chocolate Sourdough Bread
    • Gluten Free Cinnamon Raisin Sourdough Bread

    I get a lot of my ingredients from Thrive Market. Thrive Market has been a game changer for me eating gluten free. They have so many options I can't get at my rural grocery stores! Use this link to get 40% off your first order!

    Print

    clock clock iconcutlery cutlery iconflag flag iconfolder folder iconinstagram instagram iconpinterest pinterest iconfacebook facebook iconprint print iconsquares squares iconheart heart iconheart solid heart solid icon

    Gluten Free Sourdough Bread


    5 Stars 4 Stars 3 Stars 2 Stars 1 Star

    5 from 6 reviews

    • Author: Elaine VanVleck
    • Total Time: 9 hours 10 minutes
    • Yield: 16 slices or 1 loaf 1x
    • Diet: Gluten Free
    Print Recipe
    Pin Recipe

    Description

    This gluten free sourdough bread is made with a homemade gluten free sourdough starter and a custom blend of gluten free flours for a tangy, hearty loaf that holds together beautifully for sandwiches, toast, and French toast. It is a no knead recipe that proofs overnight and bakes up with a thick crust and a satisfying texture that is nothing like the gritty store-bought gluten free breads. If you have been missing real sourdough bread this recipe is going to change everything for you!


    Ingredients

    Scale
    • 1 ½ cups Gluten Free Sourdough Starter
    • 3 large Eggs
    • 4 Tbsp Unsalted Butter, melted
    • 1 ¼ cups Milk
    • 2 Tbsp. Honey
    • ¾ cup Sweet Sorghum Flour
    • ¾ cup Tapioca Flour
    • ½ cup Brown Rice Flour
    • ½ cup Potato Starch
    • 1 Tbsp. Xanthan Gum
    • 1 Tbsp. Baking Powder
    • 2 tsp. Sea Salt

    Instructions

    In the bowl of your stand mixer place the gluten free sourdough starter, eggs, butter, milk and honey. Beat until it is blended together in a wet mixture.

    Add the sweet sorghum flour, tapioca flour, brown rice flour, potato starch, xanthan gum, baking powder and sea salt. Mix until well blended 3-4 minutes. The dough will be wet and sticky, but blended together well.

    Grease a bread pan with coconut oil. 

    Pour the dough into the bread pan and spread evenly. Place a bowl or another bread pan over this pan and place in a warm place for 6-8 hours. I like to mix my dough up the night before and let it proof overnight.

    Preheat your oven to 350 degrees.

    Bake the bread for 1 hour 10 minutes. The top will be brown and have a nice crust when the bread is done.

    Let the bread stand in the pan for 10 minutes and then turn out onto a cooling rack. Let the bread cool completely before slicing.

    When the bread is completely cooled store in a sealed container for up to five days.

    Notes

    The width and size of your bread pan will effect how tall your loaf is. A smaller or more narrow bread pan will give you a taller slice of bread. I use a regular bread pan and am fine with the rectangular shape of my loafs of bread.

    • Prep Time: 8 hours
    • Cook Time: 1 hour 10 minutes
    • Category: Bread
    • Method: Baking
    • Cuisine: American

    Did you make this recipe?

    Tag @smallfarmbiglife on Instagram and hashtag it #smallfarmbiglife

    Frequently Asked Questions

    Can you eat sourdough bread on a gluten free diet?

    Some people who have an intolerance to gluten can eat sourdough that is made from regular flour. That isn't the case for me and may to be the case for you. If you can't tolerate any gluten I wouldn't suggest eating regular sourdough bread.

    This recipe shows you how to make your own gluten free sourdough starter. I love that you are in control of everything that goes into the starter and the environment it is processed in. You will know for sure that it's gluten free and safe for you.

    How does gluten free sourdough work?

    What makes this recipe truly gluten free is that the sourdough starter is made strictly with gluten free flour. There isn't any gluten in the process of making the starter or in the bread recipe.

    This sourdough bread is made from a fermented sourdough starter and doesn't need gluten to work. The bread rises because of the fermentation. The process of making the bread is different from a gluten sourdough starter, but you still get delicious bread with this recipe.

    What size bread pan should I use for this gluten free sourdough bread?

    I typically use either a 9x4 metal bread pan. A narrower pan will give you a taller, more traditional looking slice of bread. A wider pan will give you a flatter loaf but it will still taste just as delicious. I recommend a metal bread pan over glass for this recipe as it conducts heat more evenly.

    Can I make this gluten free sourdough bread dairy free?

    Yes! I regularly make this bread with almond milk in place of regular milk and it works beautifully. For the butter I recommend melted coconut oil as a substitute. It will give the bread a very slightly different flavor but the texture and rise will be similar. Vegan butter options should also work well.

    Can I substitute psyllium husk for the xanthan gum?

    The xanthan gum acts like gluten in this recipe, helping the dough stick together and giving the bread structure. Some sources suggest you can replace xanthan gum with twice the amount of psyllium husk, however I have not personally tested this substitution in this recipe so I cannot guarantee the results. If you try it I would love to hear how it turns out in the comments!

    a sandwich using this gluten free sourdough bread recipe

    If you made this gluten free sourdough bread I would love to hear what you thought! Please leave a star rating and a comment below. Reading your results and questions truly means so much.

    Gluten Free Sourdough Starter

    In this recipe I teach you how to make your own gluten free sourdough starter at home. You will simply combine gluten free flour and water to start the fermenting process. You can use this starter to make lots of easy and delicious gluten free sourdough recipes!

    You can purchase sourdough starters, but it's really easy to start your own and will cost a lot less. Starting your own also means you know exactly what's in it and that it's truly gluten free.

    Once your starter is done try my Gluten Free Sourdough Bread, my Gluten Free Sourdough Pizza Crust and my Gluten Free Sourdough Croutons.

    [feast_advanced_jump_to]

    Ingredients

    Gluten Free Flour
    Hot Water (not too hot to burn, but also warmer than room temperature)

    Instructions

    In a one quart jar place the flour and hot water. The water should be hot but you should still be able to run your hand under it without burning yourself. 

    Stir the flour and water mixture until thoroughly combined.

    Place a lid on top without screwing it down or place a coffee filter and rubber band on top.

    Put the jar in a warm place. I put mine on the mantle above our wood stove. The room should be 70-74 degrees for the starter to grow.

    Everyday around the same time discard half the starter and put another ⅓ cup gluten free flour and ⅓ cup hot water for 6 days. On the 7th day save the discard in a container and place in the fridge. Repeat the process of adding ⅓ cup flour and ⅓ cup hot water. 

    On the 8th day add the discard to yesterday's container. Place this on the counter to bring it back up to room temperature. Feed the starter in the jar another ⅓ cup flour and ⅓ cup hot water. 

    At this point you can leave your starter out and repeat the process of making bread every other day or you can place your starter in the refrigerator. If you place your starter in the refrigerator you will need to feed it ⅓ cup flour and ⅓ cup water once a week to keep it alive.

    Supplies

    Top Tip

    • Gluten free sourdough starters tend to take longer to ferment and start bubbling than a regular starter. Be patient, it will happen.
    • Do not use tap water that has chlorine in it for this recipe. It is best to use filtered water or tap water from a well. Chlorine will hinder the fermenting process of your starter.

    Frequently Asked Questions

    Can you eat sourdough bread on a gluten free diet?

    I know that some people who have an intolerance to gluten can eat sourdough that is made from regular wheat flour. That isn't the case for me and may not be the case for you. If you can't tolerate any gluten I wouldn't suggest eating regular sourdough bread.

    This recipe shows you how to make your own gluten free sourdough starter. I love that you are in control of everything that goes into the starter and the environment it is processed in. You will know for sure that it's gluten free and safe for you.

    More Recipes You Might Enjoy

    • Gluten Free Sourdough Bread
    • Gluten Free Sourdough Pizza Crust
    • Gluten Free Sourdough Croutons
    • Gluten Free Apple Cinnamon French Toast Casserole

    I get my ingredients from Thrive Market. Thrive Market has been a game changer for me eating gluten free. They have so many options I can't get at my rural grocery stores! Use this link to get 25% off your first order!

    Print
    clock clock iconcutlery cutlery iconflag flag iconfolder folder iconinstagram instagram iconpinterest pinterest iconfacebook facebook iconprint print iconsquares squares iconheart heart iconheart solid heart solid icon

    Gluten Free Sourdough Starter


    5 Stars 4 Stars 3 Stars 2 Stars 1 Star

    No reviews

    • Author: Elaine VanVleck
    • Total Time: 5 minutes
    • Yield: ¾ cup daily 1x
    • Diet: Gluten Free
    Print Recipe
    Pin Recipe

    Description

    In this post I show you how to make an easy gluten free sourdough starter. It's so simple to start the process with gluten free flour and water! This sourdough starter makes the best bread!


    Ingredients

    Scale

    ⅓ cup Gluten Free Flour
    ⅓ cup Hot Water (not too hot to burn, but also warmer than room temperature)


    Instructions

    In a one quart jar place the flour and hot water. The water should be hot but you should still be able to run your hand under it without burning yourself. 

    Stir the flour and water mixture until thoroughly combined.

    Place a lid on top without screwing it down or place a coffee filter and rubber band on top.

    Put the jar in a warm place. I put mine on the mantle above our wood stove. The room should be 70-74 degrees for the starter to grow.

    Everyday around the same time discard half the starter and put another ⅓ cup gluten free flour and ⅓ cup hot water for 6 days. On the 7th day save the discard in a container and place in the fridge. Repeat the process of adding ⅓ cup flour and ⅓ cup hot water. 

    On the 8th day add the discard to yesterday's container. Place this on the counter to bring it back up to room temperature. Feed the starter in the jar another ⅓ cup flour and ⅓ cup hot water. 

    At this point you can leave your starter out and repeat the process of making bread every other day or you can place your starter in the refrigerator. If you place your starter in the refrigerator you will need to feed it ⅓ cup flour and ⅓ cup water once a week to keep it alive.

    • Prep Time: 5 minutes
    • Category: Breads
    • Method: Fermenting
    • Cuisine: Gluten Free

    Did you make this recipe?

    Tag @smallfarmbiglife on Instagram and hashtag it #smallfarmbiglife

    • « Go to Previous Page
    • Page 1
    • Interim pages omitted …
    • Page 12
    • Page 13
    • Page 14
    • Page 15
    • Go to Next Page »

    Primary Sidebar

    Welcome! I'm Elaine

    I'm so glad you are here! I share easy gluten free recipes from my small farm in Washington.

    Be sure to sign up for my newsletter to stay up to date on all of my new recipes.

    More about me...
    • Instagram
    • Pinterest
    • Facebook
    • Twitter
    • Mail

    Load up on new recipes, exclusive goodies, + more!
    Sign up below to stay up-to-date on news, events, and special deals.
    Thank you for subscribing!

    Easy Meals Recipes

    • Gluten Free Instant Pot Chili Mac and Cheese
    • Gluten Free Taco Casserole
    • Gluten Free Cowboy Baked Beans
    • Gluten Free Walking Taco Casserole
    • Gluten Free Creamy Beef and Mushroom Pasta
    • Gluten Free Instant Pot Chicken & Dumplings
    • Instant Pot Mexican Style Beef and Rice
    • Gluten Free Chicken Parmesan Pasta Casserole
    • Gluten Free One Pot Hamburger Helper Copycat
    • Gluten Free Salisbury Steak with Mushroom Gravy
    • Gluten Free Air Fryer Fajitas
    • Gluten Free Sloppy Joe Casserole

    Footer

    Disclaimer:

    “We are a participant in the Amazon Services LLC Associates Program, an affiliate advertising program designed to provide a means for us to earn fees by linking to Amazon.com and affiliated sites.”

    Footer

    back to top

    About

    • Privacy Policy
    • Shop my Amazon Page
    • Follow me on LTK

    Newsletter

    • Sign Up! for emails and updates

    Contact

    • Contact
    • Media Kit
    • About Me

    As an Amazon Associate I earn from qualifying purchases.

    I may get commissions for purchases made through links on this site.

    Copyright © 2026 Brunch Pro on the Brunch Pro Theme