Small Farm Big Life

  • Gluten Free Recipe Index
  • Subscribe
  • Resources
menu icon
go to homepage
  • Home
  • Gluten Free Recipe Index
  • Subscribe
  • My Story
  • Resources
  • Free Guides
    • Email
    • Facebook
    • Instagram
    • Pinterest
  • subscribe
    search icon
    Homepage link
    • Home
    • Gluten Free Recipe Index
    • Subscribe
    • My Story
    • Resources
    • Free Guides
    • Email
    • Facebook
    • Instagram
    • Pinterest
  • ×

    Gluten Free Pumpkin Spice Bundt Cake

    This easy recipe for gluten free pumpkin spice bundt cake is made from scratch with a yummy glaze. It's so easy to make the best, moist homemade bundt cake you won't go back to box mixes! I love this cake with my maple glaze, but you could also just sprinkle on powdered sugar or make a simple confectioner sugar, milk and vanilla glaze to pour over top. This cake is great with coffee for brunch or dessert after dinner.

    a gluten free pumpkin spice bundt cake on a cake stand surrounded by mini pumpkins

    If you are looking for more pumpkin recipes try my Gluten Free Pumpkin Cake with Cream Cheese Frosting, my Gluten Free Baked Pumpkin Donuts with Chocolate Glaze, my Gluten Free Pumpkin Oatmeal Cake or my Gluten Free Pumpkin Spice Pancakes.

    You can find all of my cake recipes here: Gluten Free Cake Recipes

    You can find all of my pumpkin recipes here: Gluten Free Pumpkin Recipes

    a slice of gluten free pumpkin spice bundt cake on a plate
    [feast_advanced_jump_to]

    Ingredients

    Brown Rice Flour
    Potato Starch
    Tapioca Flour
    Baking Powder
    Xanthan Gum
    Baking Soda
    Sea Salt
    Ground Cinnamon
    Ground Ginger
    Ground Cloves
    Allspice
    Ground Nutmeg
    Unsalted Butter
    Granulated Sugar
    Brown Sugar
    Molasses
    Eggs
    Pumpkin Puree
    Sour Cream
    Vanilla Extract

    Instructions

    Preheat your oven to 325 degrees.

    Grease a bundt pan with butter or coconut oil. Set aside.

    In a mixing bowl whisk together the brown rice flour, potato starch, tapioca flour, baking powder, xanthan gum, baking soda, salt, cinnamon, ginger, cloves, allspice and nutmeg. Set aside.

    In the bowl of your stand mixer blend together the butter, granulated sugar and brown sugar. Add the molasses and eggs. Blend until they are incorporated into the batter. 

    Add the pumpkin puree, sour cream and vanilla. Blend until just mixed together. Add the dry ingredients and blend until they are just mixed in.

    Pour the cake batter into the bundt pan evenly.

    Bake at 325 degrees for 1 hour 5 minutes. The cake will be browned and spring back to your touch.

    Let the cake cool for 10 minutes in the pan and then tip onto a serving dish or cooling rack to finish cooling.

    I like this cake with my Maple Glaze. You could also use powdered sugar or a simple Vanilla Glaze.

    Supplies

    Frequently Asked Questions

    Can I use a regular cake pan rather than a bundt cake pan?

    Yes! I'm a huge fan of the look of a bundt cake, but you can definitely make bundt cake recipes in regular cake pans or a 9x13 baking pan.
    I usually stick to a bundt pan because pouring the frosting over is so much easier than frosting a layer cake. But, if you don't have a bundt pan don't let that stop you from making this cake!

    Whatever pan you choose to use be sure to grease it with butter or coconut oil so your cake comes out of the pan easily. You can use the suggested maple glaze or another frosting of your choice.

    More Recipes You Might Enjoy

    • Gluten Free Orange Bundt Cake
    • Gluten Free Eggnog Bundt Cake
    • Gluten Free Pear Bundt Cake
    • Gluten Free Gingerbread Bundt Cake

    I get my ingredients from Thrive Market. Thrive Market has been a game changer for me eating gluten free. They have so many options I can't get at my rural grocery stores! Use this link to get 25% off your first order!

    Print
    clock clock iconcutlery cutlery iconflag flag iconfolder folder iconinstagram instagram iconpinterest pinterest iconfacebook facebook iconprint print iconsquares squares iconheart heart iconheart solid heart solid icon

    Gluten Free Pumpkin Spice Bundt Cake


    5 Stars 4 Stars 3 Stars 2 Stars 1 Star

    No reviews

    • Author: Elaine VanVleck
    • Total Time: 1 hour 25 minutes
    • Yield: 10 slices 1x
    • Diet: Gluten Free
    Print Recipe
    Pin Recipe

    Description

    This easy recipe for gluten free pumpkin spice bundt cake is made from scratch with a yummy glaze. It's so easy to make the best, moist homemade bundt cake you won't go back to box mixes! 


    Ingredients

    Scale
    • 2 ½ cups Brown Rice Flour
    • ⅔ cup Potato Starch
    • ⅓ cup Tapioca Flour
    • 3 tsp. Baking Powder
    • 2 tsp. Xanthan Gum
    • 1 tsp. Baking Soda
    • 1 tsp. Sea Salt
    • 2 tsp. Ground Cinnamon
    • ½ tsp. Ground Ginger
    • ¼ tsp. Ground Cloves
    • ¼ tsp. Allspice
    • ¼ tsp. Ground Nutmeg
    • 1 cup Unsalted Butter, softened
    • 1 cup Granulated Sugar
    • ½ tups Brown Sugar
    • 1 Tbsp. Molasses
    • 3 large Eggs
    • 1 cup Pumpkin Puree
    • ½ cup Sour Cream
    • 1 tsp. Vanilla Extract

    Instructions

    Preheat your oven to 325 degrees.

    Grease a bundt pan with butter or coconut oil. Set aside.

    In a mixing bowl whisk together the brown rice flour, potato starch, tapioca flour, baking powder, xanthan gum, baking soda, salt, cinnamon, ginger, cloves, allspice and nutmeg. Set aside.

    In the bowl of your stand mixer blend together the butter, granulated sugar and brown sugar. Add the molasses and eggs. Blend until they are incorporated into the batter. 

    Add the pumpkin puree, sour cream and vanilla. Blend until just mixed together. Add the dry ingredients and blend until they are just mixed in.

    Pour the cake batter into the bundt pan evenly.

    Bake at 325 degrees for 1 hour 5 minutes. The cake will be browned and spring back to your touch.

    Let the cake cool for 10 minutes in the pan and then tip onto a serving dish or cooling rack to finish cooling.

    I like this cake with my Maple Glaze. You could also use powdered sugar or a simple Vanilla Glaze.

    • Prep Time: 20 minutes
    • Cook Time: 65 minutes
    • Category: Cakes
    • Method: Baking
    • Cuisine: Gluten Free

    Did you make this recipe?

    Tag @smallfarmbiglife on Instagram and hashtag it #smallfarmbiglife

    Top Tip

    The molasses in this cake gives it an extra pumpkin spice flavor. If you aren't a fan of molasses you can omit it without altering the texture of the cake. You may want to add a bit more spices to make up for the molasses.

    Gluten Free Blackberry Cobbler

    This easy gluten free blackberry cobbler is the summer dessert you are going to want to make every single year when blackberries are at their peak. Sweet and juicy blackberries are tossed with sugar, honey, and arrowroot powder and topped with a tender buttery gluten free biscuit topping that bakes up perfectly golden and gorgeous in just 45 minutes. It works beautifully with fresh wild blackberries, marionberries, and store bought blackberries alike, and because it also works with frozen blackberries you can make this gluten free cobbler any time of year.

    This is the kind of simple and satisfying from scratch gluten free dessert that looks impressive on any table but could not be easier to pull together.

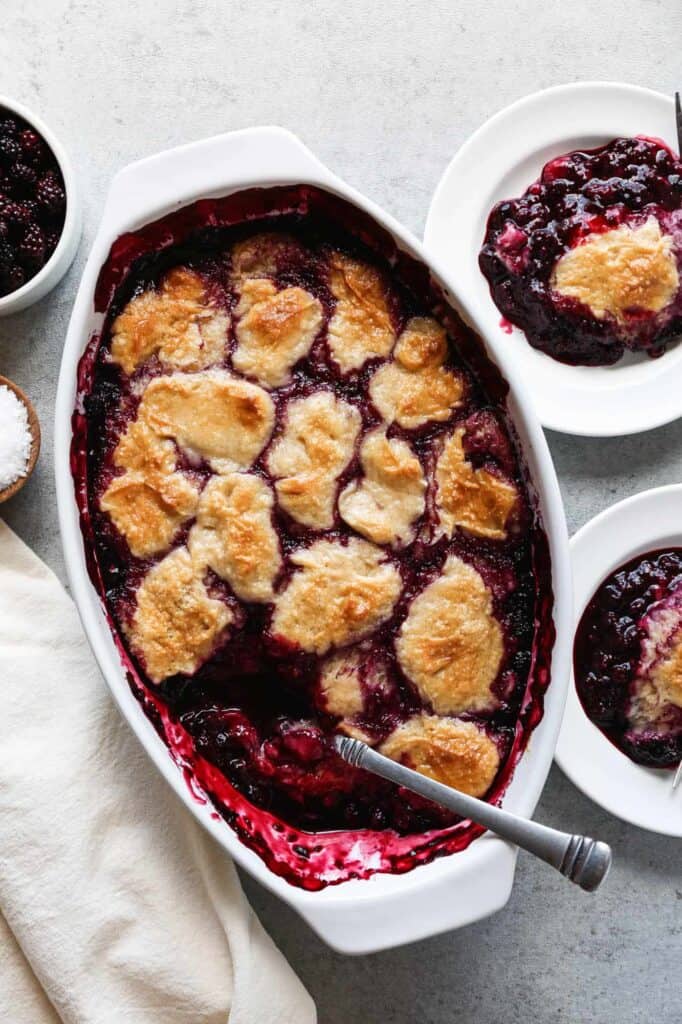
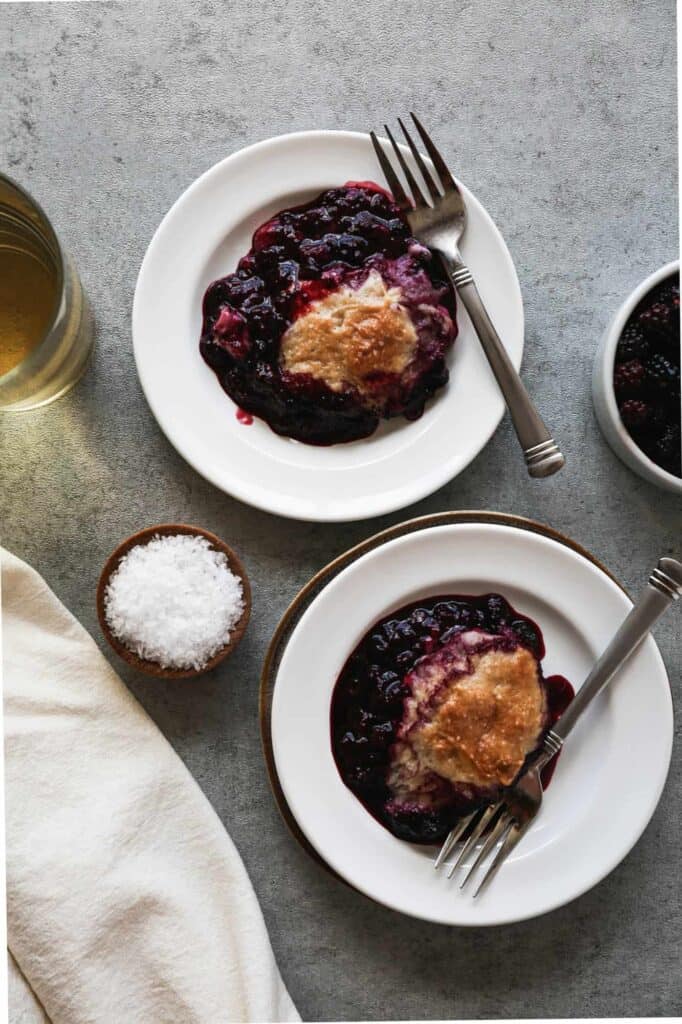
    a baking dish of gluten free blackberry cobbler with two plates dished up

    Living in the Pacific Northwest means we are surrounded by wild blackberries every summer and this gluten free blackberry cobbler is one of my favorite ways to use them up. There is something incredibly satisfying about going out and picking wild blackberries and then turning them into the most delicious homemade cobbler the same day.

    The sweet bubbly blackberry filling paired with the golden gluten free biscuit topping is an absolutely perfect combination and it is even better served warm with a generous scoop of vanilla ice cream melting right over the top.

    Whether you are using fresh picked wild blackberries, homegrown marionberries, or a bag of frozen blackberries from the freezer this is the gluten free summer dessert recipe you will make again and again every blackberry season.

    If you are looking for more blackberry recipes you might also enjoy my Homemade Blackberry Lemonade or my Gluten Free Blackberry Oat Muffins.

    All of my gluten free desserts can be found here: Gluten Free Desserts

    two plates of gluten free blackberry cobbler
    [feast_advanced_jump_to]

    Ingredients

    Blackberries
    Granulated Sugar
    Arrowroot Powder or Cornstarch
    Honey
    Gluten Free Flour
    Buttermilk
    Eggs
    Baking Powder
    Sea Salt
    Vanilla Extract

    Instructions

    Preheat your oven to 350 degrees.

    In a large bowl mix the blackberries, sugar, arrowroot powder or cornstarch and honey. Set aside.

    In the bowl of your stand mixer beat together the gluten free flour, sugar, buttermilk, eggs, baking powder, salt and vanilla extract. Blend just until all ingredients are combined. Don't over mix the dough.

    Pour the blackberry mixture into a greased 2 quart baking dish. Dollop spoon fulls of dough onto the blackberry mixture.

    Bake at 350 degrees for 45 minutes or until the topping is golden brown.

    Let cool completely and then store covered in your refrigerator for up to a five days.

    Supplies

    More Recipes You Might Enjoy

    • Gluten Free Blackberry Oat Muffins
    • Gluten Free Slow Cooker Berry Cobbler
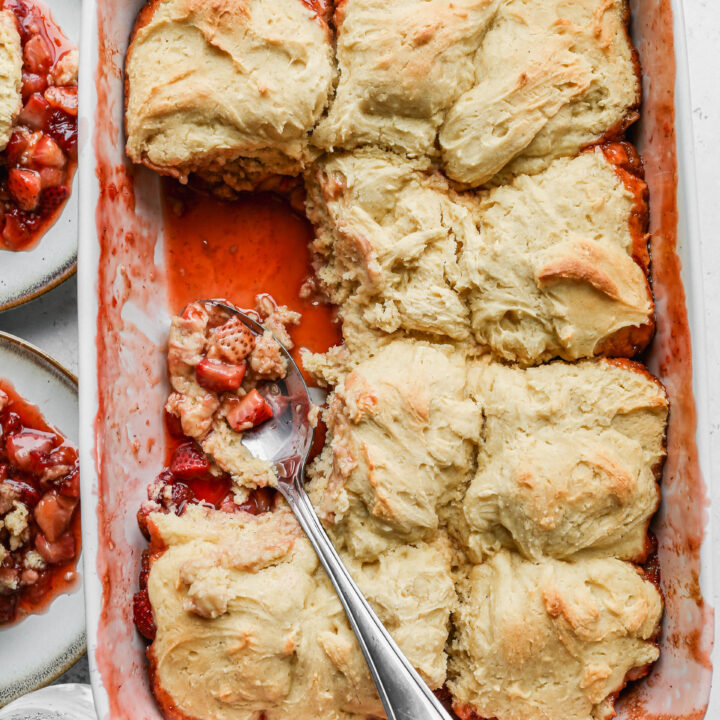
    • Gluten Free Strawberry Cobbler
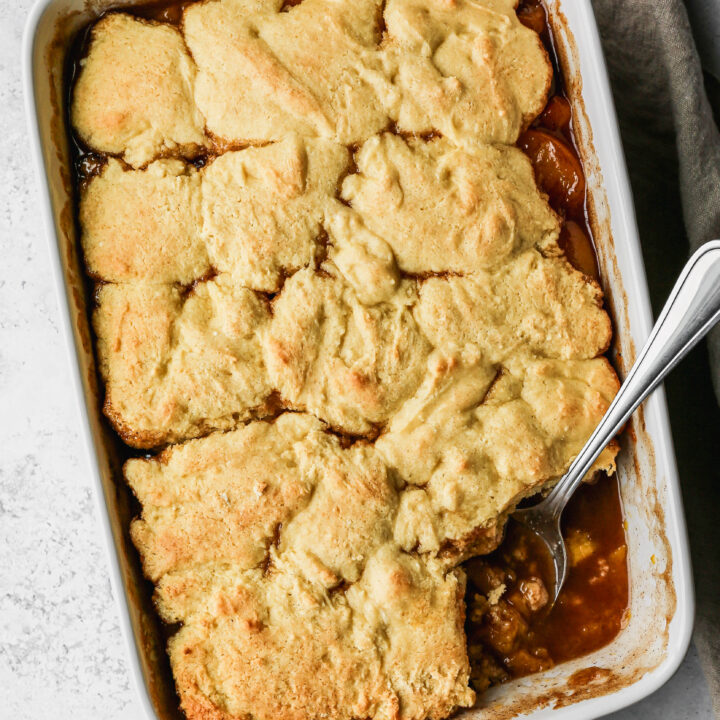
    • Gluten Free Canned Peach Cobbler

    I get a lot of my ingredients from Thrive Market. Thrive Market has been a game changer for me eating gluten free. They have so many options I can't get at my rural grocery stores! Use this link to get 40% off your first order!

    Print
    clock clock iconcutlery cutlery iconflag flag iconfolder folder iconinstagram instagram iconpinterest pinterest iconfacebook facebook iconprint print iconsquares squares iconheart heart iconheart solid heart solid icon

    Gluten Free Blackberry Cobbler


    5 Stars 4 Stars 3 Stars 2 Stars 1 Star

    No reviews

    • Author: Elaine VanVleck
    • Total Time: 1 hour 5 minutes
    • Yield: 8 servings 1x
    • Diet: Gluten Free
    Print Recipe
    Pin Recipe

    Description

    This easy gluten free blackberry cobbler is made with fresh or frozen blackberries and a simple from scratch biscuit topping that bakes up perfectly golden in just 45 minutes! Sweet juicy blackberries bubble under a tender and buttery gluten free cobbler topping for the most satisfying summer dessert. Perfect for wild blackberries, marionberries, and store bought blackberries alike!


    Ingredients

    Scale

    Filling:

    • 5 cups Blackberries
    • ¼ cup Granulated Sugar
    • 2 Tbsp Arrowroot Powder or Cornstarch
    • 2 Tbsp Honey

    Topping:

    • 2 ½ cups Gluten Free Flour
    • 3 tsp Baking Powder
    • 1 tsp Sea Salt
    • 1 cup Granulated Sugar
    • 1 cup Buttermilk
    • 2 large Eggs
    • 1 tsp Vanilla Extract

    Instructions

    Preheat your oven to 350 degrees.

    In a large bowl mix the blackberries, sugar, arrowroot powder or cornstarch and honey. Set aside.

    In the bowl of your stand mixer beat together the gluten free flour, sugar, buttermilk, eggs, baking powder, salt and vanilla extract. Blend just until all ingredients are combined. Don't over mix the dough.

    Pour the blackberry mixture into a greased 2 quart baking dish. Dollop spoon fulls of dough onto the blackberry mixture.

    Bake at 350 degrees for 45 minutes or until the topping is golden brown.

    Let cool completely and then store covered in your refrigerator for up to a five days.

    If you made this recipe please leave a star rating and comment below. It helps other readers find this recipe and means so much to me.

    • Prep Time: 20 minutes
    • Cook Time: 45 minutes
    • Category: Dessert
    • Method: Baking
    • Cuisine: American

    Did you make this recipe?

    Tag @smallfarmbiglife on Instagram and hashtag it #smallfarmbiglife

    If you make this Gluten Free Blackberry Cobbler I would love to hear what you think! Leave a star rating and a comment below and let me know what kind of blackberries you used.

    Don't forget to save this recipe to your Pinterest boards so you can find it again all blackberry season long!

    Storage

    Store leftover gluten free blackberry cobbler covered tightly or in an airtight container in the refrigerator for up to 5 days. The cobbler is actually wonderful made the day before serving as the blackberry filling has time to set up and thicken beautifully overnight in the refrigerator making it much easier to dish up into individual servings. To reheat the whole cobbler place it uncovered in a 250 degree oven for about 15 to 20 minutes until warmed through. To reheat individual portions warm in the microwave for 30 to 45 seconds. Serve warm with a generous scoop of vanilla ice cream for the most delicious summer dessert experience. This cobbler is not ideal for freezing as the biscuit topping can become soggy and the blackberry filling can get watery once thawed.

    Top Tip

    Do not over mix the cobbler topping batter once all of the ingredients are combined. Over mixing develops the starches in the gluten free flour and results in a tough and dense topping rather than the light and tender biscuit like cobbler topping you are going for.

    Mix just until everything is incorporated and the batter is evenly combined then stop immediately. The batter will be thick and that is exactly what you want. When you dollop the topping over the blackberry filling use a large spoon and drop generous spoonfuls evenly across the surface without spreading or pressing them down. The topping will spread and puff up beautifully in the oven on its own and give you that gorgeous rustic cobbler look every single time.

    Didn't find the answer you're looking for?

    Ask AI to answer based on this recipe:

    ChatGPT
    Google AI
    Perplexity
    Grok
    Claude

    Frequently Asked Questions

    Can I use frozen blackberries instead of fresh?

    Yes! Frozen blackberries work beautifully in this gluten free blackberry cobbler and are a great option for making this dessert year round when fresh blackberries are not in season. There is no need to thaw the blackberries before using them. Simply add them frozen directly to the bowl with the sugar, honey, and arrowroot powder and toss to combine. Keep in mind that frozen blackberries will release more liquid than fresh as they bake so the filling may be slightly more juicy but just as delicious. The arrowroot powder or cornstarch in the filling helps thicken those juices into a beautiful glossy sauce.

    Can I use a different berry in this cobbler recipe?

    Absolutely! This gluten free cobbler recipe works beautifully with a wide variety of berries and stone fruits. Blueberries, marionberries, boysenberries, and mixed berries are all wonderful substitutes or additions to the blackberry filling. You can also combine blackberries with peaches for a classic summer combination that is absolutely incredible. Just use the same total amount of fruit called for in the recipe and follow the instructions exactly as written.

    What is the difference between a cobbler and a crisp?

    A cobbler and a crisp are both fruit desserts with a topping but they are quite different. A cobbler has a thick biscuit or cake like topping that is dolloped over the fruit filling and bakes up soft and tender with golden edges. A crisp has an oat and butter crumble topping that bakes up crunchy and golden. This gluten free blackberry cobbler uses a buttermilk biscuit style topping that is soft and tender on the inside with slightly golden edges for the classic cobbler texture everyone loves.

    Can I make this cobbler without buttermilk?

    Yes! If you do not have buttermilk on hand you can make a simple buttermilk substitute by adding one tablespoon of white vinegar or lemon juice to one cup of regular milk and letting it sit for five minutes until it curdles slightly. This homemade buttermilk substitute works perfectly in this cobbler topping and gives you the same tender and slightly tangy biscuit texture as real buttermilk.

    How do I know when my gluten free blackberry cobbler is done baking?

    The cobbler is done when the biscuit topping is golden brown on top and the blackberry filling is bubbling up around the edges of the baking dish. The topping should feel set and firm to a light touch rather than wet or jiggly in the center. If the topping is browning too quickly before the filling is bubbling you can loosely tent the baking dish with foil and continue baking until the filling is hot and bubbly all the way through. Always let the cobbler cool for at least 15 to 20 minutes before serving so the filling has time to thicken slightly.

    Can I make this gluten free blackberry cobbler ahead of time?

    Yes! This cobbler is actually wonderful made the day before you plan to serve it. Bake it completely, let it cool to room temperature, then cover and refrigerate overnight. The blackberry filling sets up beautifully overnight and the flavors deepen and meld together for an even more delicious cobbler the next day. Reheat the whole cobbler uncovered in a 250 degree oven for 15 to 20 minutes before serving or warm individual portions in the microwave for 30 to 45 seconds. Serve warm with vanilla ice cream for the most perfect summer dessert.

    Refrigerator Bread and Butter Pickles

    If you have never made homemade pickles before, this refrigerator bread and butter pickle recipe is the perfect place to start. Fresh cucumbers and sweet onion get packed into a half gallon jar with a simple sweet and tangy brine made from apple cider vinegar, white vinegar, sugar, mustard seeds, celery seeds, and turmeric. There is no canning equipment required, no special skills needed, and the whole thing comes together in about 20 minutes.

    Just let the jar cool, pop it in the fridge, and in one week you have the most flavorful crunchy homemade pickles you have ever tasted.

    These homemade bread and butter pickles are so much better than anything you can buy at the store and they are a wonderful way to use up an abundance of garden cucumbers at the end of summer.

    The brine is perfectly balanced between sweet and tangy with just the right amount of spice from the mustard seeds and a beautiful golden color from the turmeric.

    I make a few jars every summer and we enjoy them on burgers, sandwiches, snack boards, and straight from the jar all the way into fall. Once you try homemade refrigerator pickles you will never go back to store bought.

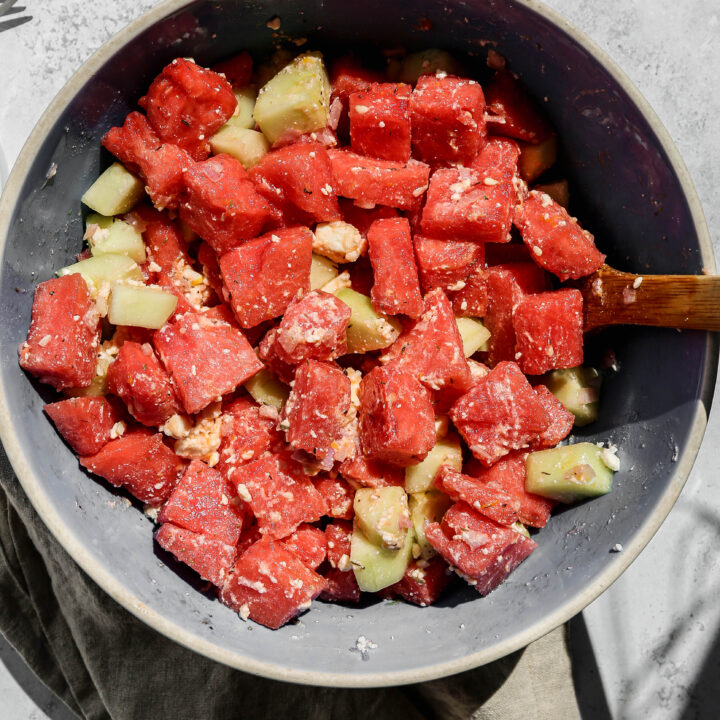
    If you are looking for more cucumber recipes try my Cucumber Salad with Vinegar Dressing, my Creamy Cucumber Salad or my Watermelon Cucumber and Feta Salad.

    You can find all of my snack recipes here: Gluten Free Snack Recipes

    [feast_advanced_jump_to]

    Ingredients

    Cucumbers
    Sweet Onion
    Granulated Sugar
    Brown Sugar
    White Vinegar
    Apple Cider Vinegar
    Sea Salt
    Mustard Seeds
    Celery Seeds
    Ground Turmeric

    Instructions

    This recipe makes one 2 quart or half gallon jar. I slice up the cucumbers and the onions and then layer them into the jar. Be sure to press them in as you go so you can get everything into the jar.

    Next I make the brine in a saucepan on my stovetop. When it's complete I pour it over the jar of pickles and onions. Let the jar set on your counter until it is cooled before placing a lid on and putting it in your refrigerator.

    I like to shake the jar every other day to keep the spices mixed up with the liquid. I let the jar set in the refrigerator for one week before tasting the pickles. At this point they should have a vinegar and spice pickle flavor with a bit of sweet.

    Supplies

    Storage

    Store the pickles in your refrigerator for up to 1-2 months in an air tight jar or container. The pickles will get more flavor the longer they sit in the brine.

    More Recipes You Might Enjoy

    • Cucumber Salad with Vinegar Dressing
    • Easy Refrigerator Pickled Cauliflower
    • Watermelon Cucumber and Feta Salad
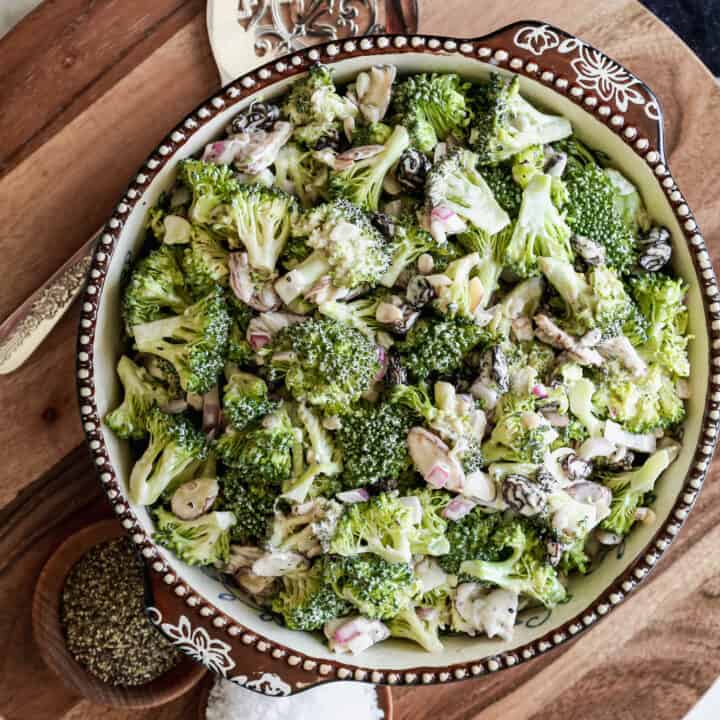
    • Sugar Free Broccoli Salad

    I get a lot of my ingredients from Thrive Market. Thrive Market has been a game changer for me eating gluten free. They have so many options I can't get at my rural grocery stores! Use this link to get 40% off your first order!

    Print
    clock clock iconcutlery cutlery iconflag flag iconfolder folder iconinstagram instagram iconpinterest pinterest iconfacebook facebook iconprint print iconsquares squares iconheart heart iconheart solid heart solid icon

    Refrigerator Bread and Butter Pickles


    5 Stars 4 Stars 3 Stars 2 Stars 1 Star

    1 from 1 review

    • Author: Elaine VanVleck
    • Total Time: 23 minutes
    • Yield: 1 half gallon jar 1x
    • Diet: Gluten Free
    Print Recipe
    Pin Recipe

    Description

    This easy refrigerator bread and butter pickle recipe makes the most crunchy and flavorful homemade pickles with no canning required! Fresh cucumbers and sweet onion are packed into a half gallon jar with a simple sweet and tangy brine made from apple cider vinegar, white vinegar, sugar, mustard seeds, celery seeds, and turmeric. Ready to eat in one week and perfect for burgers, sandwiches, snack boards, and snacking straight from the jar.


    Ingredients

    Scale
    • 6 cups Cucumbers, thinly sliced rounds
    • 2 cups Sweet Onion, thinly sliced
    • ¾ cup Granulated Sugar
    • ¼ cup Brown Sugar
    • 1 cup White Vinegar
    • 1 cup Apple Cider Vinegar
    • 1 tsp. Sea Salt
    • 1 tsp. Mustard Seeds
    • ½ tsp. Celery Seeds
    • ½ tsp. Ground Turmeric

    Instructions

    Make sure your 2 quart jars or half gallon jar is clean and sterilized. I like to run my jar through the dishwasher and the heat dry before using it.

    Slice the cucumber and the sweet onion. Layer the cucumber and sweet onion into your jar or jars.

    On the stovetop in a saucepan heat the granulated sugar, brown sugar, white vinegar, apple cider vinegar, salt, mustard seeds, celery seeds and ground turmeric until the sugar is dissolved. 

    Pour the vinegar mixture over the cucumbers and onions in the jar. This should fill the jars to the top and completely cover the cucumbers and onions. If it doesn't add a bit more apple cider vinegar or water to the jar.

    Let the jar cool completely on your countertop. After the jar has cooled place a lid on the jar and put it in the refrigerator. 

    I shake the jar every other day to keep the spices mixed in. The pickles should be ready to eat in a week.

    Notes

    Refrigerator bread and butter pickles should keep in your refrigerator for 1-2 months. 

    • Prep Time: 15 minutes
    • Cook Time: 8 minutes
    • Category: Condiments
    • Method: Pickling
    • Cuisine: American

    Did you make this recipe?

    Tag @smallfarmbiglife on Instagram and hashtag it #smallfarmbiglife

    If you make these Refrigerator Bread and Butter Pickles I would love to hear how they turned out! Leave a star rating and a comment below and let me know what you served them with.

    Don't forget to save this recipe to your Pinterest boards so you can find it again all cucumber season long!

    Top Tips

    I start using the pickles after a week in the brine, but the flavor gets even better after two weeks.

    These refrigerator bread and butter pickles are perfect for a snack board and on hamburgers. They are a great way to use extra cucumbers from the garden.

    Didn't find the answer you're looking for?

    Ask AI to answer based on this recipe:

    ChatGPT
    Google AI
    Perplexity
    Grok
    Claude

    Frequently Asked Questions

    Can I use pickling cucumbers instead of regular cucumbers?

    Yes and pickling cucumbers are actually a great choice for this recipe! They tend to have thinner skins, fewer seeds, and a firmer flesh than regular slicing cucumbers, which means they stay crunchier longer in the brine. If you are using pickling cucumbers you can slice them the same way as regular cucumbers. Either variety works beautifully in this recipe so use whatever you have on hand or whatever is growing in your garden.

    Do I need to sterilize the jar before making refrigerator pickles?

    Yes, starting with a clean sterilized jar is important for food safety and for keeping your pickles fresh as long as possible. The easiest way to sterilize your jar is to run it through the dishwasher on the hot dry cycle right before you use it. You can also wash it thoroughly with hot soapy water and let it air dry completely. Since these are refrigerator pickles and not shelf stable canned pickles the sterilization process does not need to be as rigorous as traditional canning, but a clean jar makes a big difference.

    Can I make these bread and butter pickles with other vegetables?

    Absolutely! The sweet and tangy brine in this recipe works beautifully with other vegetables too. Cauliflower florets, sliced bell peppers, sliced jalapeños, and green beans are all great options. You can even do a mix of cucumbers and another vegetable in the same jar. If you love pickled cauliflower specifically I also have a dedicated refrigerator pickled cauliflower recipe on the blog that you might enjoy.

    Why did my pickles turn soft instead of staying crunchy?

    A few things can cause soft refrigerator pickles. The most common reason is that the cucumbers sat in the brine too long before being refrigerated. It is important to let the jar cool completely on the counter before putting the lid on and moving it to the fridge, but do not leave it out longer than necessary. Using very fresh cucumbers also makes a big difference in crunch. Older cucumbers that have been sitting in the refrigerator for a while tend to produce softer pickles. Slicing the cucumbers thicker can also help them hold their texture better in the brine.

    Can I reduce the sugar to make these less sweet?

    Yes you can reduce the sugar to suit your taste preferences. Keep in mind that the sugar is what balances the tartness of the vinegar and gives bread and butter pickles their signature sweet and tangy flavor. If you reduce the sugar too much they will taste more like a dill style pickle than a traditional bread and butter pickle. Start by reducing the sugar by a couple of tablespoons and taste the brine before pouring it over the cucumbers to find the right balance for you.

    Can I double this recipe to make more jars?

    Absolutely! This recipe scales up very easily. Simply double or triple all of the ingredients to make two or three half gallon jars at once. Making a few jars at the end of summer when cucumbers are at their peak is a great way to stock your fridge with homemade pickles to enjoy well into the fall months. The flavor only gets better the longer they sit in the brine.

    Homemade Strawberry Banana Popsicles

    This easy recipe for homemade strawberry banana popsicles is a creamy frozen treat! I love ice pops as a perfect summer frozen dessert. This healthy recipe has real fruit and is simple to make.

    Perfect as a popsicle recipe for kids or a light easy summer dessert, these frozen fruit popsicles are a great alternative to store-bought versions.

    With the sweet taste of strawberries and bananas in every bite, they're a go-to healthy strawberry banana popsicle option that fits any warm-weather occasion.

    If you're wondering how to make strawberry banana popsicles that are delicious and guilt-free, this easy fruit popsicle recipe is the answer.

    My favorite popsicle mold is the Norpro Frozen Ice Pop Maker. I like it's sturdy construction and that I can use wooden popsicle sticks with it. After the popsicles are frozen the lid comes off easily. I dip the mold into hot water and the ice pops come out easily.

    You might also like my Gluten Free Strawberry Icebox Bars recipe.

    [feast_advanced_jump_to]

    Ingredients

    Strawberries
    Bananas
    Milk
    Honey
    Heavy Whipping Cream
    Granulated Sugar

    Instructions

    In a saucepan on medium heat cook the strawberries, bananas, milk and honey stirring occasionally until fruit is broken down and the mixture has slightly thickened.

    Let the fruit mixture cool.

    Using a stand mixer on high speed whisk the heavy whipping cream and sugar until stiff peaks form. 

    Reserve one cup of the fruit mixture. Pour the rest of the fruit mixture into a blender and puree.

    Fold the fruit mixture, fruit puree and whipped cream together. 

    Pour or scoop the mixture into the popsicle molds. Place the lid on your mold and the popsicle sticks into the lid. If you don't have a lid you can use plastic wrap or tin foil to hold the popsicle sticks in place.

    Freeze for at least two hours before serving. 

    If you can't get the popsicles out of the mold you can submerge the bottom of the mold in hot water for a few seconds. Be careful not to get water into your popsicles.

    Supplies

    Top Tip

    When I say fold I mean to pour the whipped cream on top of the strawberry mixture, then take a spatula and gently pull strawberry mixture over the whipped cream until they mix together. You want to keep the airiness of the whipped cream so you don't just want to stir them together.

    Frequently Asked Questions

    How long will homemade popsicles last in the freezer?

    I don't like to leave my homemade strawberry banana popsicles in the freezer for longer than one week. This prevents them from getting freezer burnt. Honestly, they get consumed so fast they don't normally last the entire week during the summer.

    More Recipes You Might Enjoy

    • Gluten Free Strawberry Icebox Bars
    • Strawberry Daiquiri Mocktails
    • Gluten Free No Bake Lemon Icebox Pie
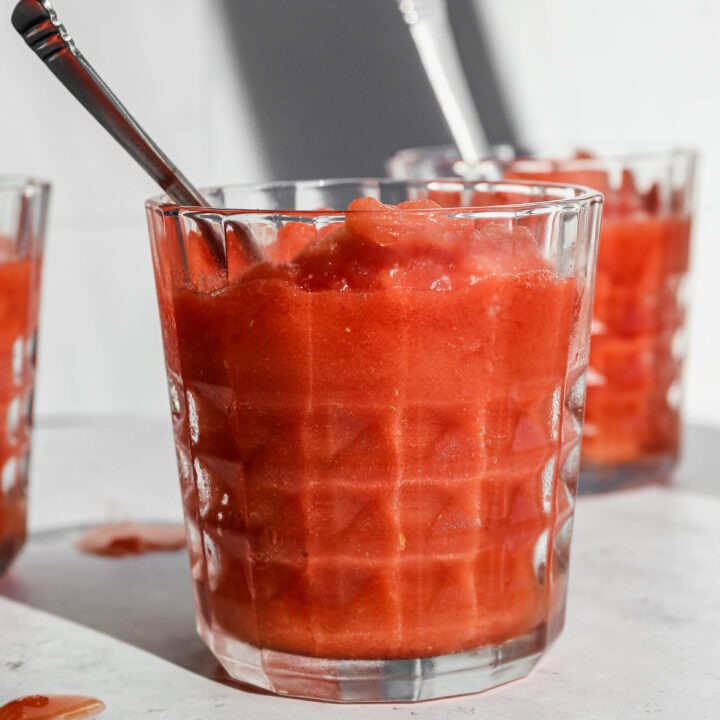
    • Easy Frozen Watermelon Margarita Mocktail

    I get a lot of my ingredients from Thrive Market. Thrive Market has been a game changer for me eating gluten free. They have so many options I can't get at my rural grocery stores! Use this link to get 40% off your first order!

    Print
    clock clock iconcutlery cutlery iconflag flag iconfolder folder iconinstagram instagram iconpinterest pinterest iconfacebook facebook iconprint print iconsquares squares iconheart heart iconheart solid heart solid icon

    Homemade Strawberry Banana Popsicles


    5 Stars 4 Stars 3 Stars 2 Stars 1 Star

    No reviews

    • Author: Elaine VanVleck
    • Total Time: 30 minutes
    • Yield: 10 popsicles 1x
    • Diet: Gluten Free
    Print Recipe
    Pin Recipe

    Description

    This easy recipe for homemade strawberry banana popsicles is a creamy frozen treat! I love ice pops as a perfect summer frozen dessert. This healthy recipe has real fruit and is simple to make.


    Ingredients

    Scale
    • 3 cups Strawberries, hulled and sliced
    • 2 medium ripe Bananas, cut into chunks
    • 2 Tbsp. Milk
    • 2 Tbsp. Honey
    • 1 cup Heavy Whipping Cream
    • 2 Tbsp. Granulated Sugar

    Instructions

    In a saucepan on medium heat cook the strawberries, bananas, milk and honey stirring occasionally until fruit is broken down and the mixture has slightly thickened.

    Let the fruit mixture cool.

    Using a stand mixer on high speed whisk the heavy whipping cream and sugar until stiff peaks form. 

    Reserve one cup of the fruit mixture. Pour the rest of the fruit mixture into a blender and puree.

    Fold the fruit mixture, fruit puree and whipped cream together. 

    Pour or scoop the mixture into the popsicle molds. Place the lid on your mold and the popsicle sticks into the lid. If you don't have a lid you can use plastic wrap or tin foil to hold the popsicle sticks in place.

    Freeze for at least two hours before serving. 

    If you can't get the popsicles out of the mold you can submerge the bottom of the mold in hot water for a few seconds. Be careful not to get water into your popsicles.

    • Prep Time: 20 minutes
    • Cook Time: 10 minutes
    • Category: Ice Cream
    • Method: Frozen
    • Cuisine: Gluten Free

    Did you make this recipe?

    Tag @smallfarmbiglife on Instagram and hashtag it #smallfarmbiglife

    Top Tip

    This is a great way to use strawberries and ripe bananas. I know when it's hot I don't want to turn my oven on for banana bread, so instead I make these delicious popsicles.

    Gluten Free Strawberry Icebox Bars

    Summer afternoons on the farm call for desserts that come straight from the freezer. These Gluten Free Strawberry Icebox Bars are exactly that. A buttery gluten free pretzel crust is topped with a creamy strawberry and cream cheese filling, then frozen until firm. The texture is somewhere between cheesecake and ice cream.

    Sweet, salty, and bursting with fresh strawberry flavor, this dessert disappears fast at any summer gathering.

    This is one of my favorite make ahead desserts because it lives in the freezer until you need it. Slice the bars straight from the freezer and top each one with a swirl of fresh whipped cream.

    If you prefer a chilled, layered version of this flavor combination, try my Gluten Free Strawberry Pretzel Dessert. It is a classic potluck favorite.

    If you are looking for more strawberry recipes try my Gluten Free Strawberry Cobbler, my Gluten Free Strawberry Jam Bars, my Homemade Strawberry Banana Popsicles or my Strawberry Daiquiri Mocktails.

    You can find all of my dessert recipes here: Gluten Free Dessert Recipes

    [feast_advanced_jump_to]

    Freezing and Serving

    Freeze these bars for at least 8 hours before slicing. The full freeze time allows the creamy filling to set firm enough to hold its shape when sliced. Let the bars sit at room temperature for a few minutes before cutting for the cleanest slices. Make the fresh whipped cream right before serving and add a dollop to each bar.

    Storage

    Store these bars covered in the freezer for up to one month. Slice them ahead of time and store individual portions in an airtight container for easy grab and go desserts. Let frozen bars sit at room temperature for a few minutes before serving.

    Top Tip

    For the smoothest filling, make sure your cream cheese is fully softened before mixing. Cold cream cheese will leave small lumps in the filling that do not blend out, even with a stand mixer. Set it out at room temperature for about 30 minutes before you start, and it will whisk together perfectly smooth with the sweetened condensed milk and gelatin.

    Frequently Asked Questions

    What does "icebox bars" mean?

    Iceboxes were used before electric refrigerators and freezers were invented. They held a block of ice to keep food cold. Icebox desserts traditionally combine fruit, cream, and a wafer or cracker base, and are stored cold or frozen. These bars use fresh strawberries, a creamy filling, and a gluten free pretzel crust. They are stored in the freezer for an ice cream like texture.

    How do I make homemade whipped cream for topping?

    Add 1 cup of heavy whipping cream and 2 tablespoons of granulated sugar to your stand mixer. Whip on medium high for 5 to 8 minutes until stiff peaks form. The whipped cream is ready when it holds its shape and does not flatten when you lift the whisk. Serve a dollop on top of each bar.

    Can I use frozen strawberries instead of fresh?

    Yes, frozen strawberries work well in this recipe. Thaw them first and drain any excess liquid before pureeing. This keeps the filling from becoming too watery once it freezes.

    What if I don't have a food processor for the crust?

    A food processor makes quick work of crushing the pretzels, but it is not required. Place the pretzels in a sealed bag and crush them with a rolling pin until finely crushed. Then mix in the maple syrup and butter by hand.

    Didn't find the answer you're looking for?

    Ask AI to answer based on this recipe:

    ChatGPT
    Google AI
    Perplexity
    Grok
    Claude

    Supplies

    More Recipes You Might Enjoy

    • Strawberry Daiquiri Mocktails
    • Homemade Strawberry Banana Popsicles
    • Gluten Free Strawberry Rhubarb Bars
    • Gluten Free Strawberry Cobbler

    I get a lot of my ingredients from Thrive Market. Thrive Market has been a game changer for me eating gluten free. They have so many options I can't get at my rural grocery stores! Use this link to get 40% off your first order!

    Print
    clock clock iconcutlery cutlery iconflag flag iconfolder folder iconinstagram instagram iconpinterest pinterest iconfacebook facebook iconprint print iconsquares squares iconheart heart iconheart solid heart solid icon

    Gluten Free Strawberry Icebox Bars


    5 Stars 4 Stars 3 Stars 2 Stars 1 Star

    No reviews

    • Author: Elaine VanVleck
    • Total Time: 45 minutes
    • Yield: 12 bars 1x
    • Diet: Gluten Free
    Print Recipe
    Pin Recipe

    Description

    A sweet pretzel crust topped with a creamy strawberry and cream cheese filling, frozen until firm like an ice cream bar. Sliced into squares and served with fresh whipped cream, these gluten free strawberry icebox bars are one of the easiest make ahead desserts for summer.


    Ingredients

    Scale
    • 4 cups Gluten Free Pretzels, crushed
    • 2 Tbsp. Maple Syrup
    • ½ cup Unsalted Butter, cold and cubed
    • 1-2 tablespoon Cold Water
    • 2 cups Strawberries, cored and sliced
    • 1 - 14 ounce can Sweetened Condensed Milk
    • 4 ounces Cream Cheese, softened
    • 1 - 3 ounce package Strawberry Gelatin
    • 1 cup Heavy Whipping Cream
    • ¼ tsp. Sea Salt

    Whipped Cream:

    • 1 cup Heavy Whipping Cream
    • 2 Tbsp. Granulated Sugar

    Instructions

    Preheat your oven to 375 degrees. 

    Grease a 9x13 baking dish with coconut oil or butter. Set aside

    In a food processor pulse the pretzels into crumbles. Add the maple syrup and butter. Pulse into small clumps. Add water 1 tablespoon as a time and pulse until a dough begins to form.

    Press the pretzel mixture into the bottom of the greased 9x13 baking dish. Bake at 375 degrees for 12-15 minutes. The crust will be slightly browned. Set aside to cool.

    Process the strawberries in a blender until they are finely chopped.

    In a stand mixer whisk the sweetened condensed milk, cream cheese and strawberry gelatin using the whisk attachment until they are smooth. Add the pureed strawberries and whisk together until blended.

    In a separate bowl whisk the heavy cream and sea salt on medium high until soft peaks form. Fold the strawberry mixture into the whipped cream mixture until it's folded together. 

    Pour the strawberry and cream mixture over the cooled pretzel crust. Freeze for at least 8 hours before serving. 

    Prior to serving whisk the heavy whipping cream and sugar together on medium high speed until stiff peaks form. Serve over the bars.

    If you made this recipe please leave a star rating and comment below. It helps other readers find this recipe and means so much to me.

    Notes

    When I say fold I mean to pour the whipped cream on top of the strawberry mixture, then take a spatula and gently pull strawberry mixture over the whipped cream until they mix together. You want to keep the airiness of the whipped cream so you don't just want to stir them together.

    • Prep Time: 30 minutes
    • Cook Time: 15 minutes
    • Category: Dessert
    • Method: Frozen
    • Cuisine: American

    Did you make this recipe?

    Tag @smallfarmbiglife on Instagram and hashtag it #smallfarmbiglife

    If you make these Gluten Free Strawberry Icebox Bars, I would love to hear what you think! Leave a comment below and let me know how they turned out, or tag me on Instagram so I can see your bars.

    This is one of those desserts you will want to keep stocked in the freezer all summer long, so save it to your favorite Pinterest board so you always have it ready when you need a frozen treat!

    Ingredients

    Gluten Free Pretzels
    Maple Syrup
    Unsalted Butter
    Cold Water
    Strawberries
    Sweetened Condensed Milk
    Cream Cheese
    Strawberry Gelatin
    Heavy Whipping Cream
    Sea Salt
    Granulated Sugar

    Instructions

    Preheat your oven to 375 degrees. 

    Grease a 9x13 baking dish with coconut oil or butter. Set aside

    In a food processor pulse the pretzels into crumbles. Add the maple syrup and butter. Pulse into small clumps. Add water 1 tablespoon as a time and pulse until a dough begins to form.

    Press the pretzel mixture into the bottom of the greased 9x13 baking dish. Bake at 375 degrees for 12-15 minutes. The crust will be slightly browned. Set aside to cool.

    Process the strawberries in a blender until they are finely chopped.

    In a stand mixer whisk the sweetened condensed milk, cream cheese and strawberry gelatin using the whisk attachment until they are smooth. Add the pureed strawberries and whisk together until blended.

    In a separate bowl whisk the heavy cream and sea salt on medium high until soft peaks form. Fold the strawberry mixture into the whipped cream mixture until it's folded together. 

    Pour the strawberry and cream mixture over the cooled pretzel crust. Freeze for at least 8 hours before serving. 

    Prior to serving whisk the heavy whipping cream and sugar together on medium high speed until stiff peaks form. Serve over the bars.

    • « Previous Page
    • 1
    • …
    • 27
    • 28
    • 29
    • 30
    • Next Page »

    Welcome! I'm Elaine

    I'm so glad you are here! I share easy gluten free recipes from my small farm in Washington.

    Be sure to sign up for my newsletter to stay up to date on all of my new recipes.

    More about me...
    • Instagram
    • Pinterest
    • Facebook
    • Twitter
    • Mail

    Load up on new recipes, exclusive goodies, + more!
    Sign up below to stay up-to-date on news, events, and special deals.
    Thank you for subscribing!

    Easy Meals Recipes

    • Gluten Free Instant Pot Chili Mac and Cheese
    • Gluten Free Taco Casserole
    • Gluten Free Cowboy Baked Beans
    • Gluten Free Walking Taco Casserole
    • Gluten Free Creamy Beef and Mushroom Pasta
    • Gluten Free Instant Pot Chicken and Dumplings
    • Instant Pot Mexican Style Beef and Rice
    • Gluten Free Chicken Parmesan Pasta Casserole
    • Gluten Free One Pot Hamburger Helper Copycat
    • Gluten Free Salisbury Steak with Mushroom Gravy
    • Gluten Free Air Fryer Fajitas
    • Gluten Free Sloppy Joe Casserole

    Footer

    back to top

    About

    • Privacy Policy
    • Shop my Amazon Page
    • Follow me on LTK

    Newsletter

    • Sign Up! for emails and updates

    Contact

    • Contact
    • Media Kit
    • About Me

    As an Amazon Associate I earn from qualifying purchases.

    I may get commissions for purchases made through links on this site.

    Copyright © 2026 Brunch Pro on the Brunch Pro Theme