Small Farm Big Life

  • Gluten Free Recipe Index
  • Subscribe
  • Resources
menu icon
go to homepage
  • Home
  • Gluten Free Recipe Index
  • Subscribe
  • My Story
  • Resources
  • Free Guides
    • Email
    • Facebook
    • Instagram
    • Pinterest
  • subscribe
    search icon
    Homepage link
    • Home
    • Gluten Free Recipe Index
    • Subscribe
    • My Story
    • Resources
    • Free Guides
    • Email
    • Facebook
    • Instagram
    • Pinterest
  • ×

    Gluten Free Ginger Cookies

    These gluten free ginger cookies are soft, chewy, and packed with warm molasses and ginger flavor. Real crystallized ginger gives them an extra bite of flavor in every cookie. Rolled in coarse sugar, they bake up with that classic cracked top everyone loves in a good ginger cookie.

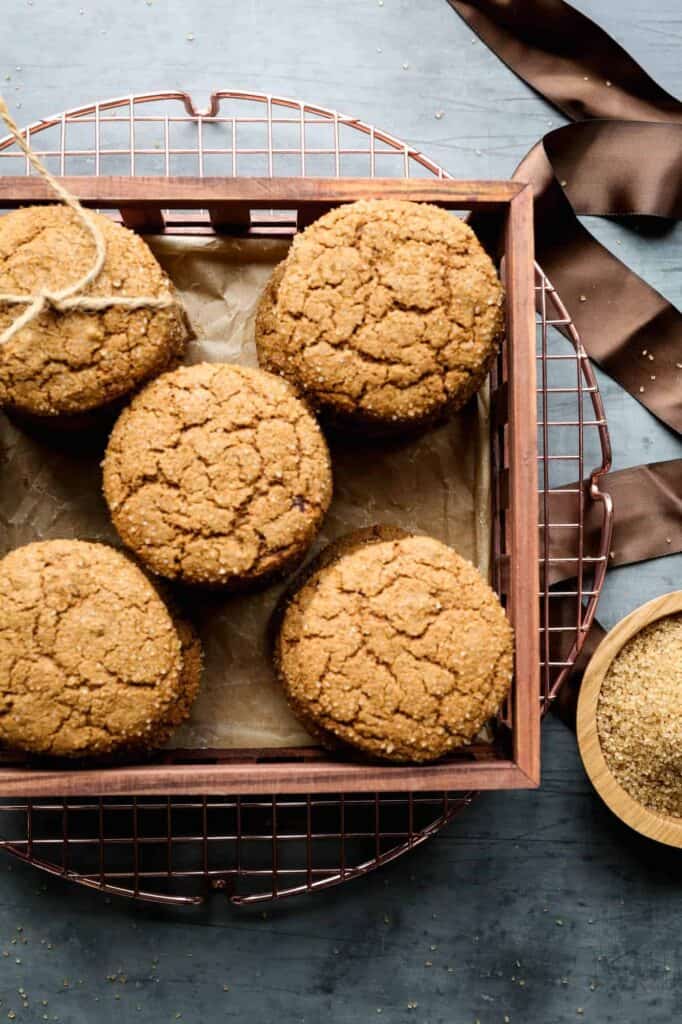
    a box full of gluten free ginger cookies

    These cookies have become a holiday tradition in our house, especially with my brother, who requests them every single year. The combination of molasses, warm spices, and real crystallized ginger gives them so much more depth than a typical ginger cookie.

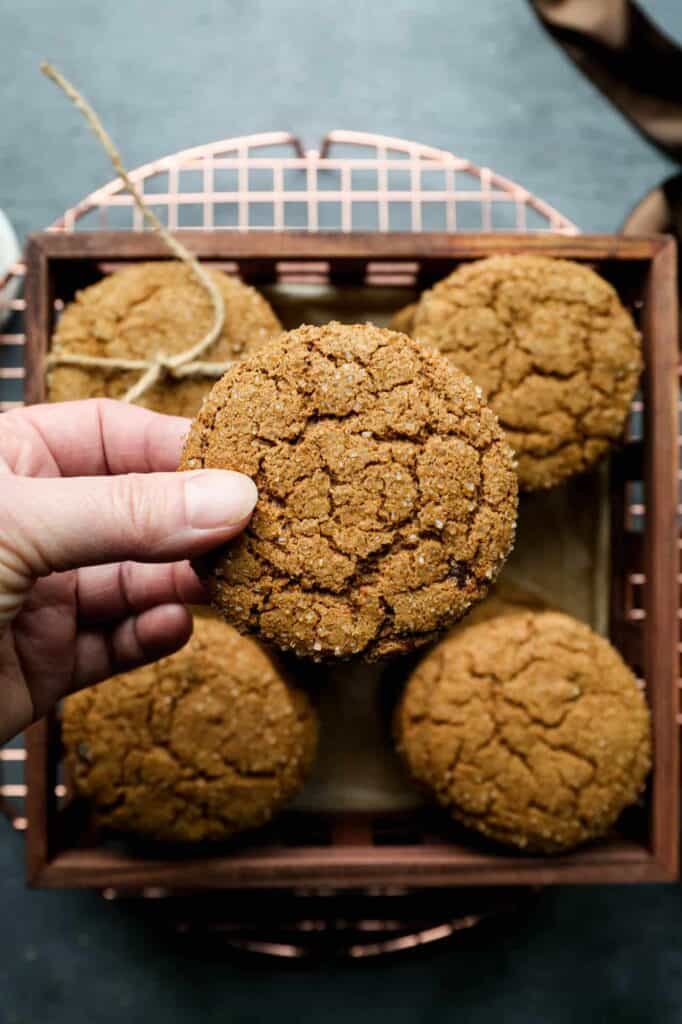
    Roll them in coarse sugar before baking and you'll get that beautiful cracked top every time.

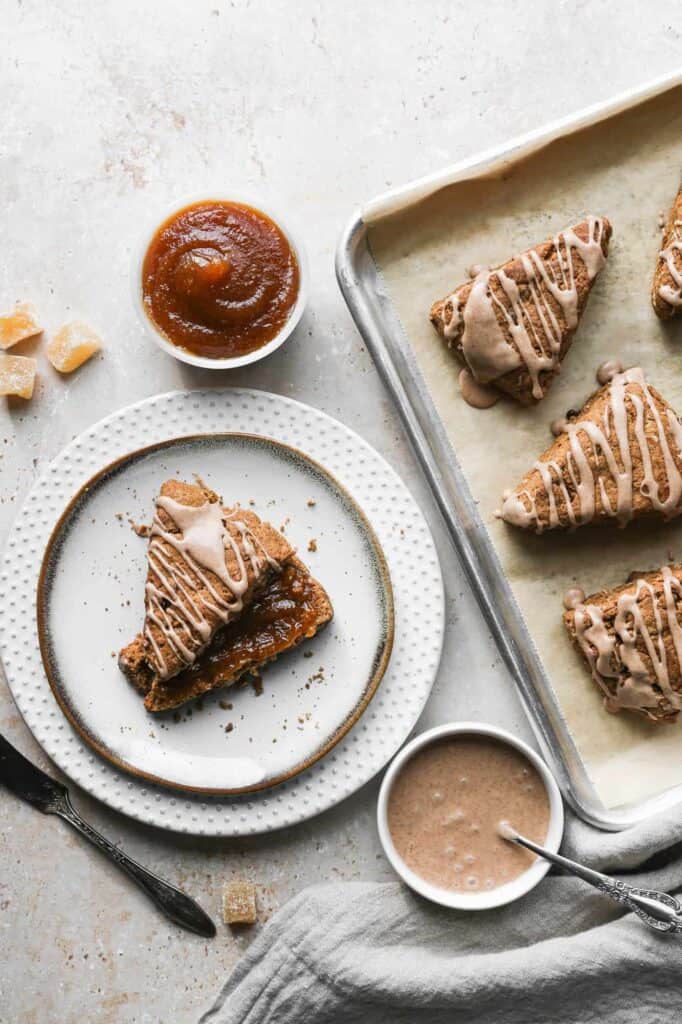
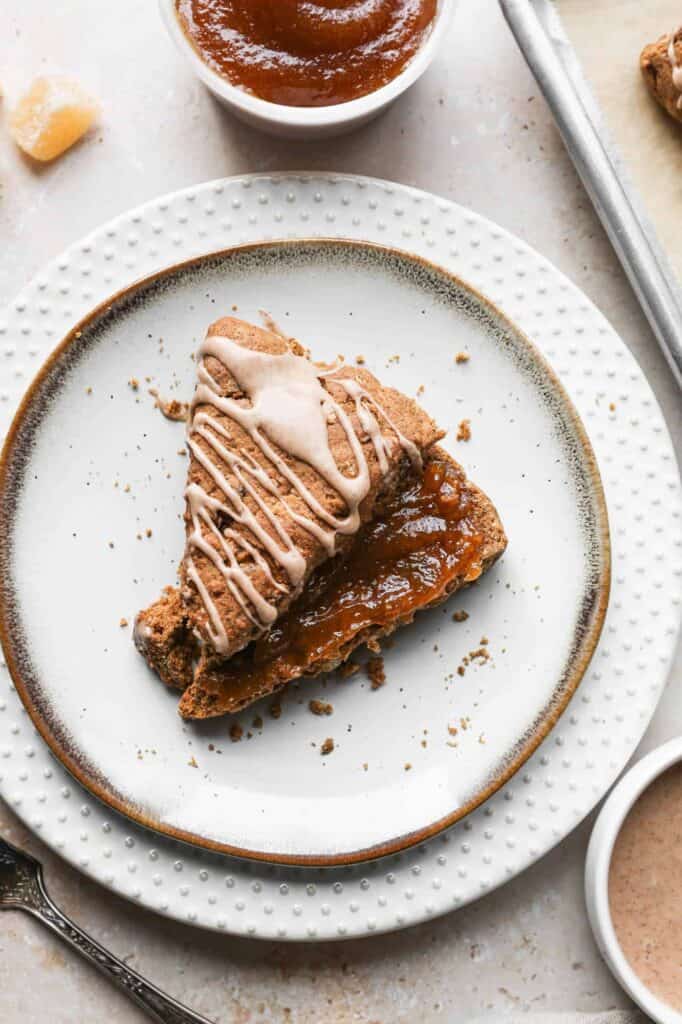
    If you are looking for more fall spice recipes try my Gluten Free Gingerbread Bundt Cake, my Gluten Free Gingersnap Cookies, my Gluten Free Gingerbread Scones or my Gluten Free Gingerbread Pancakes.

    You can find all my cookie recipes here: Gluten Free Cookies Recipes

    a box full of gluten free ginger cookies with me holding one in my hand
    [feast_advanced_jump_to]

    Why You'll Love This Recipe

    • Soft, chewy texture with a crackled sugar coated top
    • Real crystallized ginger for extra bite and flavor
    • Perfect for holiday cookie trays
    • Simple pantry ingredients

    Tips for the Best Cracked Tops

    If your dough feels warm or soft, chill it in the refrigerator for an hour or two before scooping and baking. This helps the cookies hold their shape and develop that classic cracked top as they bake.

    Storage

    Store the cookies in an airtight container at room temperature for up to 5 days.

    Top Tip

    Don't skip rolling the dough balls generously in the coarse sugar before baking. It's what gives these cookies their signature crunchy, sparkly coating and helps create that crackled look on top as they spread in the oven.

    Frequently Asked Questions

    Do gluten free ginger cookies take longer to bake?

    Yes, gluten free ginger cookies do tend to take longer to bake than cookies made with a gluten flour. The outside of the cookie will be browned, but they may not be cooked through in the center.

    If you are having this issue you can lower the oven temperature and bake the cookies a bit longer. I also only bake one baking sheet at a time of gluten free cookies. They need to be evenly heated to cook correctly.

    Why are my gluten free cookies gritty?

    The gluten free flour you use is really important for the texture of your cookies. If you use a coarse ground gluten free flour your cookies will have a gritty texture. I recommend gluten free Bob's Red Mill 1 to 1 Baking Flour or King Arthur Measure for Measure Gluten Free Flour, both are finely ground and have consistently turned out well for my baked goods.

    Why didn't my cookies crack on top?

    This usually means the dough was too warm when it went into the oven. Try chilling the dough for an hour or two before scooping and baking, this helps the cookies hold their shape and develop that classic cracked top.

    Didn't find the answer you're looking for?

    Ask AI to answer based on this recipe:

    ChatGPT
    Google AI
    Perplexity
    Grok
    Claude

    Supplies

    More Recipes You Might Enjoy

    • Gluten Free Orange Cranberry Butter Cookies
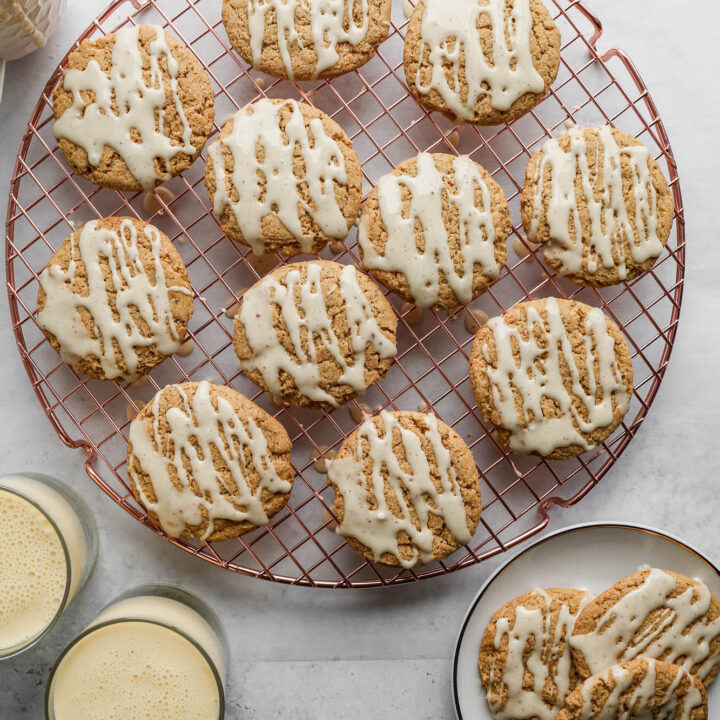
    • Gluten Free Eggnog Cookies
    • Gluten Free Snowball Cookies
    • Gluten Free Gingersnap Cookies

    I get a lot of my ingredients from Thrive Market. Thrive Market has been a game changer for me eating gluten free. They have so many options I can't get at my rural grocery stores! Use this link to get 40% off your first order!
    Print
    clock clock iconcutlery cutlery iconflag flag iconfolder folder iconinstagram instagram iconpinterest pinterest iconfacebook facebook iconprint print iconsquares squares iconheart heart iconheart solid heart solid icon

    Gluten Free Ginger Cookies


    5 Stars 4 Stars 3 Stars 2 Stars 1 Star

    2 from 2 reviews

    • Author: Elaine VanVleck
    • Total Time: 30 minutes
    • Yield: 31 cookies 1x
    • Diet: Gluten Free
    Print Recipe
    Pin Recipe

    Description

    These gluten free ginger cookies are soft, chewy, and full of warm molasses and ginger flavor. Real crystallized ginger gives them an extra punch, and the sugar coating creates a beautiful cracked top. They're a must for any holiday cookie tray.


    Ingredients

    Scale
    • ½ cup Unsalted Butter, at room temperature
    • 1 cup Brown Sugar
    • 2 large Eggs
    • 2 Tbsp. Molasses
    • 2 ½ cups Gluten Free Flour
    • 1 tsp. Ground Cinnamon
    • ½ tsp. Ground Ginger
    • ½ tsp. Ground Cloves
    • ½ tsp. Sea Salt
    • 1 ½ tsp. Baking Soda
    • ½ cup Crystalized Ginger, coarsely chopped
    • ½ cup Demenara Sugar

    Instructions

    Preheat your oven to 350 degrees. Line three baking sheets with parchment paper and set aside.

    In the bowl of your stand mixer beat together the butter and brown sugar until they are light and fluffy. Then add the eggs and molasses. Beat until blended together.

    In a separate bowl whisk together the gluten free flour, ground cinnamon, ground ginger, ground cloves, salt and baking soda. Add the dry ingredients to the wet ingredients. Beat just until they are combined.

    Add the chopped crystalized ginger and beat to combine into the dough.

    If your dough feels warm or soft, chill it in the refrigerator for an hour or two before scooping and baking. This helps the cookies hold their shape and develop that classic cracked top as they bake.

    The dough will be thick. Using a cookie scoop or tablespoon scoop the dough and then roll in the demerara sugar. Place on the baking sheet and smash slightly with the palm of your hand.

    Bake at 350 degrees for 12-15 minutes. The cookies will be cracked on top, slightly firm to the touch and golden brown when done.

    If you made this recipe please leave a star rating and comment below. It helps other readers find this recipe and means so much to me.

    • Prep Time: 15 minutes
    • Cook Time: 15 minutes
    • Category: Cookies
    • Method: Baking
    • Cuisine: American

    Did you make this recipe?

    Tag @smallfarmbiglife on Instagram and hashtag it #smallfarmbiglife

    I'd love to hear how these gluten free ginger cookies turn out for you! Leave a comment and star rating below, and let me know if they become a holiday tradition at your house too. Don't forget to pin this recipe so you can make it again all season long.

    Ginger Cookies Ingredients

    Unsalted Butter
    Brown Sugar
    Eggs
    Molasses
    Gluten Free Flour
    Ground Cinnamon
    Ground Ginger
    Ground Cloves
    Sea Salt
    Baking Soda
    Crystalized Ginger
    Demenara Sugar

    Instructions

    Preheat your oven to 350 degrees. Line three baking sheets with parchment paper and set aside.

    In the bowl of your stand mixer beat together the butter and brown sugar until they are light and fluffy. Then add the eggs and molasses. Beat until blended together.

    In a separate bowl whisk together the gluten free flour, ground cinnamon, ground ginger, ground cloves, salt and baking soda. Add the dry ingredients to the wet ingredients. Beat just until they are combined.

    Add the chopped crystalized ginger and beat to combine into the dough.

    If your dough feels warm or soft, chill it in the refrigerator for an hour or two before scooping and baking. This helps the cookies hold their shape and develop that classic cracked top as they bake.

    The dough will be thick. Using a cookie scoop or tablespoon scoop the dough and then roll in the demerara sugar. Place on the baking sheet and smash slightly with the palm of your hand.

    Bake at 350 degrees for 12-15 minutes. The cookies will be cracked on top, slightly firm to the touch and golden brown when done.

    Gluten Free Orange Cranberry Butter Cookies

    These gluten free orange cranberry butter cookies are buttery, tender, and full of festive flavor. Dried cranberries and fresh orange zest make them feel like a holiday classic, and since they're eggless, they come together with just a handful of pantry staples.

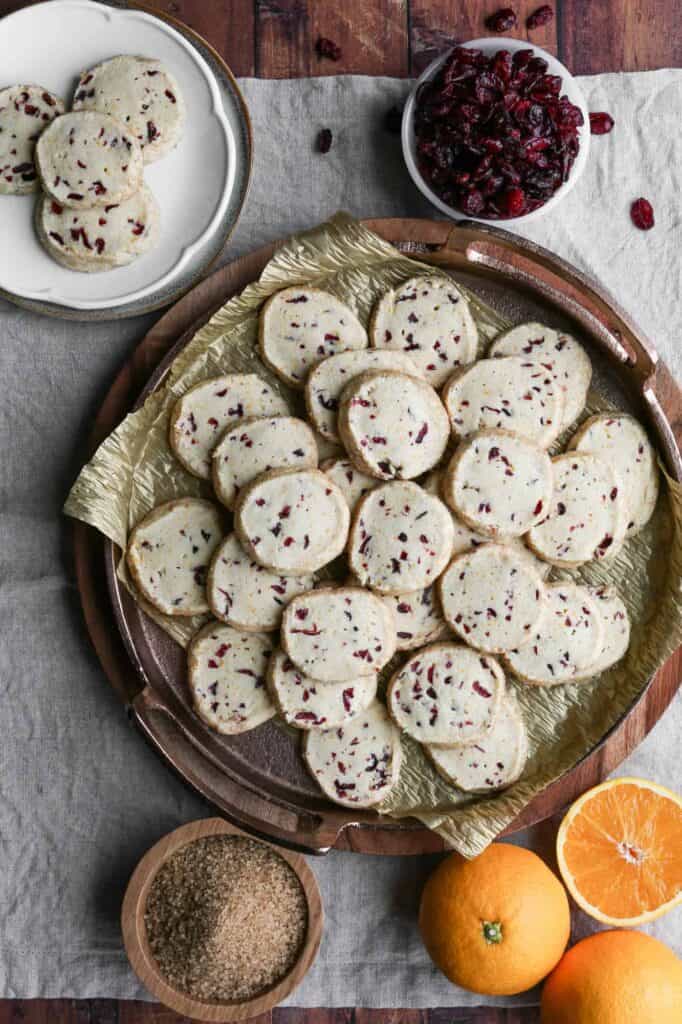
    a tray of gluten free orange cranberry butter cookies with a small plate of cookies, a bowl of dried cranberries and three oranges

    These gluten free orange cranberry butter cookies are a simple yet classic treat perfect for the holiday season. With their rich, buttery shortbread base and bursts of sweet dried cranberries, these cranberry orange shortbread cookies bring festive flavor to every bite.

    Whether you call them cranberry orange cookies or shortbread cranberry orange cookies, they're a must have recipe for any cookie tray or holiday cookie exchange.

    Butter cookies or shortbread are one of my favorite holiday treats. I love the crisp on the outside, yet soft on the inside texture. These cookies melt in your mouth!

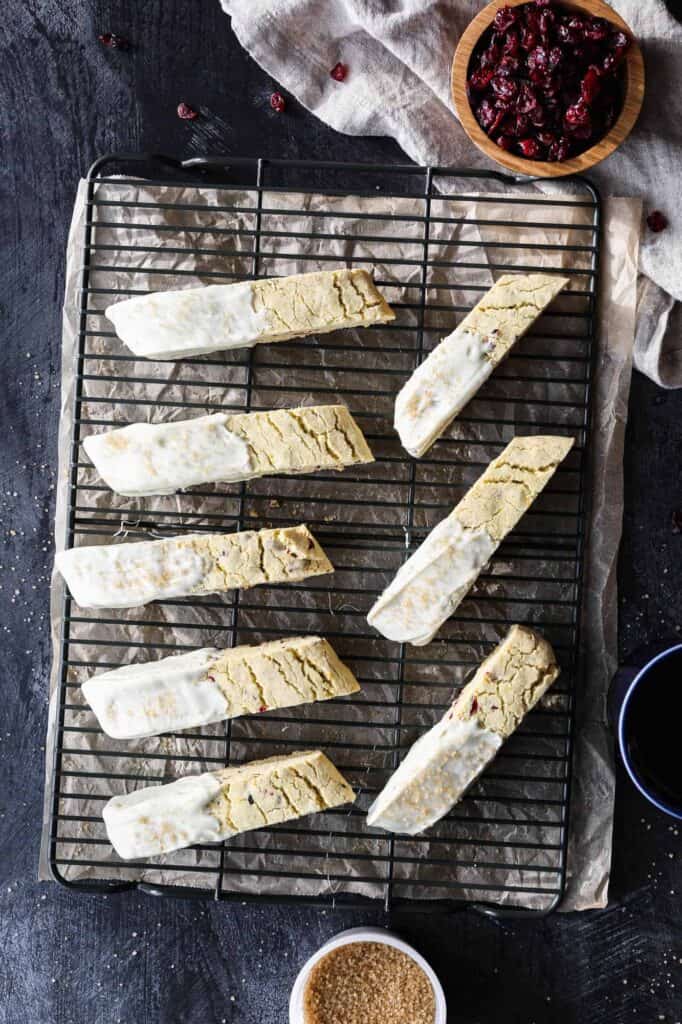
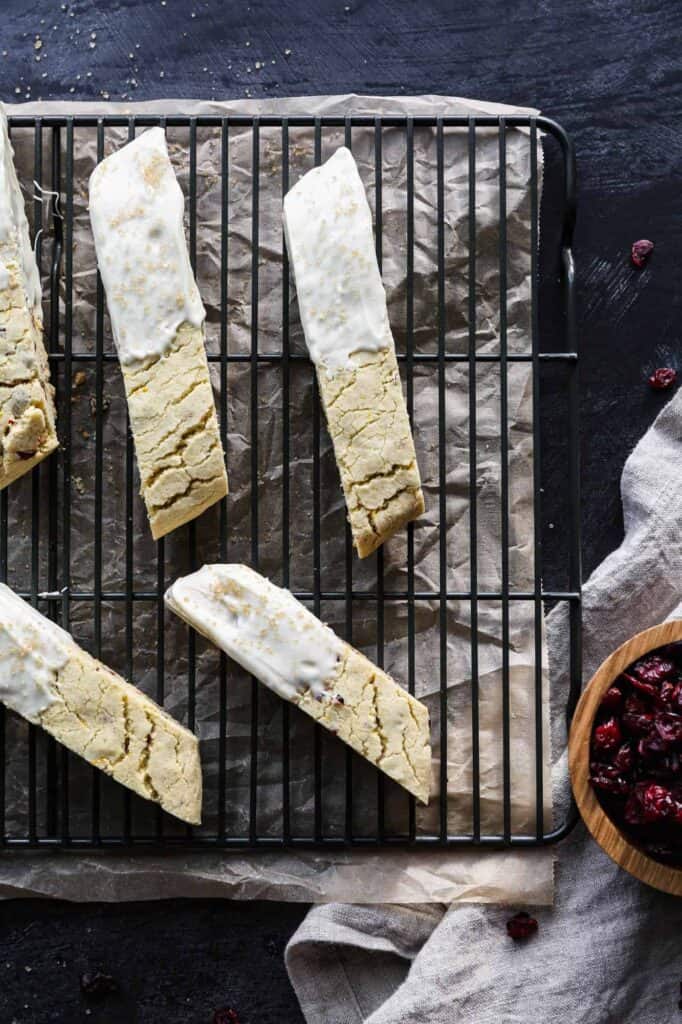
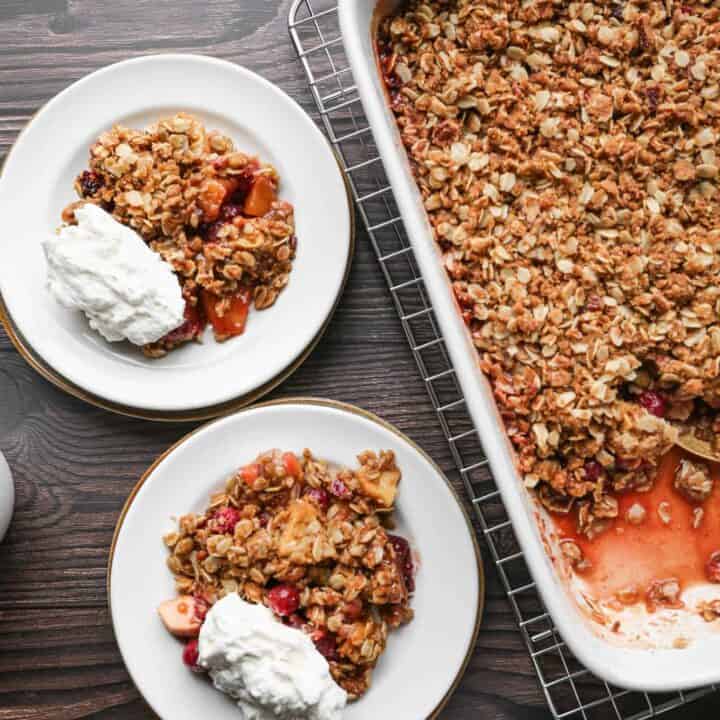
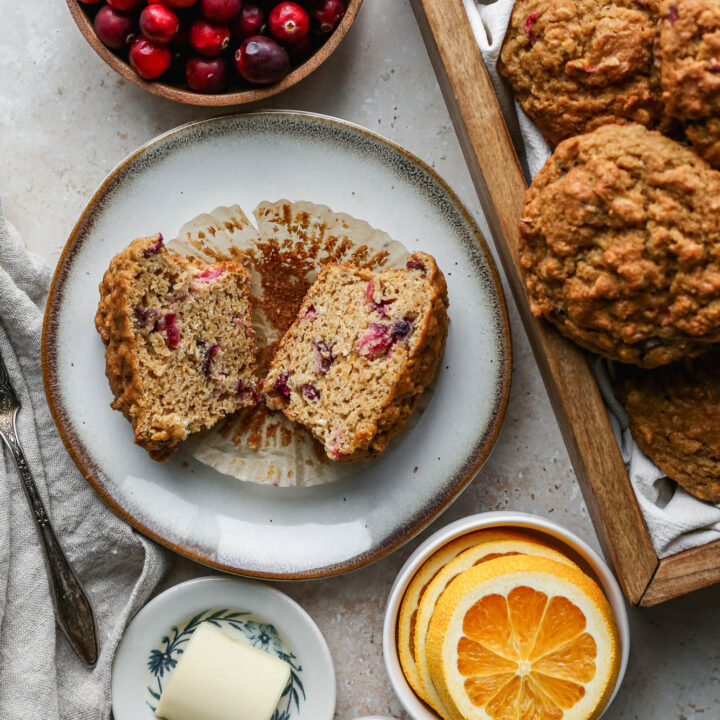
    If you're looking for more cranberry recipes try my Gluten Free Cranberry Orange Muffins, my Gluten Free Cranberry Apple Crisp, my Gluten Free Orange Cranberry Biscotti or my Gluten Free White Chocolate Cranberry Cookies.

    You can find all my cranberry recipes here: Gluten Free Cranberry Recipes

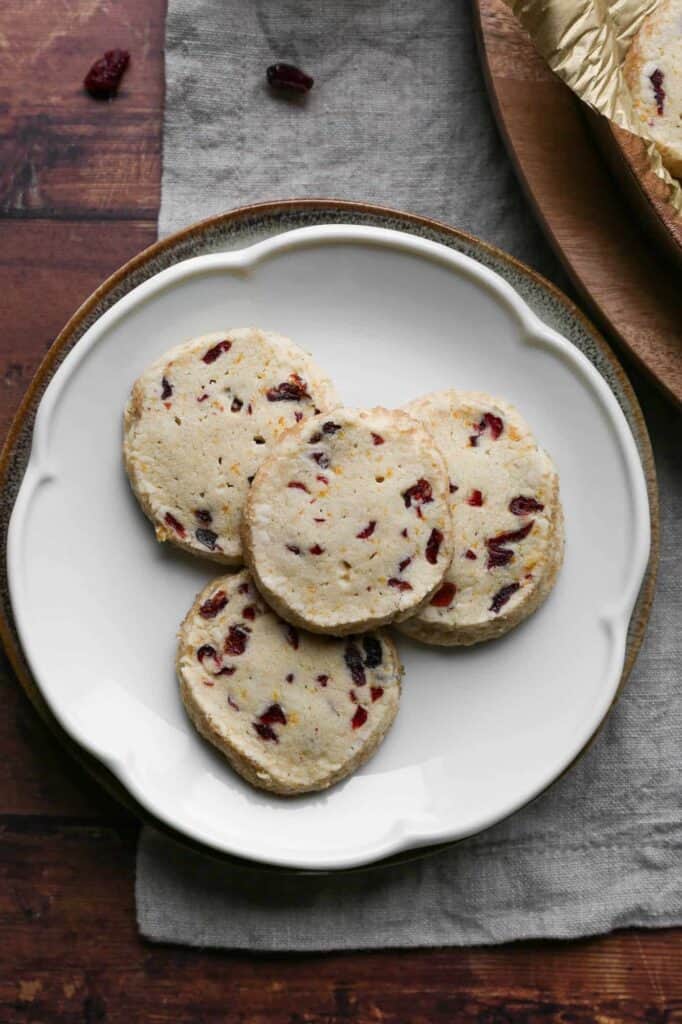
    a plate of gluten free orange cranberry cookies
    [feast_advanced_jump_to]

    Why You'll Love This Recipe

    • Buttery, eggless shortbread base
    • Easy slice and bake method
    • Bursting with cranberries and fresh orange zest
    • Perfect for a holiday cookie tray or exchange

    Ingredient Notes

    • This recipe works well with Gluten Free Bob's Red Mill 1 to 1 or King Arthur Measure for Measure gluten free flour.
    • For a dairy free version, you can substitute solid coconut oil for the butter, just be sure it's soft rather than fully melted, similar to room temperature butter.

    Make Ahead and Freezing

    The dough log can be made ahead and frozen for up to 3 months. Wrap it tightly in plastic wrap, then thaw it in the refrigerator before slicing and baking as directed.

    Storage

    Store the cookies in an airtight container at room temperature for up to 5 days. The unbaked dough log can also be frozen for up to 3 months, thaw in the refrigerator before slicing and baking.

    Top Tip

    Watch these closely in the last few minutes of baking. Shortbread cookies can go from perfectly golden to over baked quickly, and pulling them just as the edges turn slightly brown keeps that classic melt in your mouth texture instead of a dry, crumbly one.

    Frequently Asked Questions

    Can I make these cookies dairy free?

    Yes. You can substitute solid coconut oil for the butter. Make sure it's soft rather than fully melted, similar to room temperature butter. Coconut oil has a stronger flavor than butter, so you may want to add an extra teaspoon or two of orange zest to balance it out.

    Will shortbread cookies be soft out of the oven?

    Yes. These gluten free orange cranberry butter cookies or shortbread cookies will be slightly soft while hot right out of the oven. Let them set for at least 10 minutes before you remove them from the baking sheet.

    As the cookies cool they will get a slightly crisp texture on the outside. The inside of the cookie will still be melt in your mouth soft.

    Didn't find the answer you're looking for?

    Ask AI to answer based on this recipe:

    ChatGPT
    Google AI
    Perplexity
    Grok
    Claude

    Supplies

    More Recipes To Enjoy

    • Gluten Free Cranberry Orange Muffins
    • Gluten Free Cranberry Apple Crisp
    • Cranberry Fluff Salad
    • Easy Gluten Free Christmas Cookie Recipes

    I get a lot of my ingredients from Thrive Market. Thrive Market has been a game changer for me eating gluten free. They have so many options I can't get at my rural grocery stores! Use this link to get 40% off your first order!

    Print
    clock clock iconcutlery cutlery iconflag flag iconfolder folder iconinstagram instagram iconpinterest pinterest iconfacebook facebook iconprint print iconsquares squares iconheart heart iconheart solid heart solid icon

    Gluten Free Orange Cranberry Butter Cookies


    5 Stars 4 Stars 3 Stars 2 Stars 1 Star

    No reviews

    • Author: Elaine VanVleck
    • Total Time: 2 hours 15 minutes
    • Yield: 62 cookies 1x
    • Diet: Gluten Free
    Print Recipe
    Pin Recipe

    Description

    These gluten free orange cranberry butter cookies are buttery, tender, and studded with dried cranberries and fresh orange zest. This eggless shortbread recipe is easy to slice and bake, making it perfect for a holiday cookie tray or cookie exchange.


    Ingredients

    Scale
    • 1 ½ cups Unsalted Butter, at room temperature
    • 1 ¼ cups Powdered Sugar
    • 2 tsp. Vanilla Extract
    • 3 cups Gluten Free Flour
    • ½ tsp. Baking Powder
    • ½ tsp. Sea Salt
    • 1 cup Dried Cranberries, finely chopped
    • 2 Tbsp. Orange Zest
    • ½ cup Demerara Sugar

    Instructions

    Preheat your oven to 350 degrees. Line three baking sheets with parchment paper. Set aside.

    Beat the room temperature butter in the stand mixer for 2-3 minutes until it's creamy. Add the powdered sugar and vanilla. Beat until smooth.

    In a bowl whisk together the gluten free flour, baking powder and sea salt. Add this to the butter mixture. Blend together until just combined. Add the dried cranberries and orange zest and mix to combine them into the dough.

    Divide the dough into half. Roll each half into a log in parchment paper that's about 2 inches wide by 2 inches tall. Chill for at least 2 hours.

    Place the demerara sugar on a plate or shallow dish. Roll each cookie log in the demerara sugar and gently press the sugar into the sides. Cut the log into ¼ inch thick rounds using a very sharp knife.

    Place cookie rounds on a lined baking sheet. Bake at 350 degrees for 12-15 minutes. The edges will be slightly browned around the edges when they are done.

    If you made this recipe please leave a star rating and comment below. It helps other readers find this recipe and means so much to me.

    • Prep Time: 120 minutes
    • Cook Time: 15 minutes
    • Category: Cookies
    • Method: Baking
    • Cuisine: American

    Did you make this recipe?

    Tag @smallfarmbiglife on Instagram and hashtag it #smallfarmbiglife

    I'd love to hear how these gluten free orange cranberry butter cookies turn out for you! Leave a comment and star rating below, and let me know if you add them to your holiday cookie tray. Don't forget to pin this recipe so you can make it again all season long.

    Orange Cranberry Butter Cookies Ingredients

    Unsalted Butter
    Powdered Sugar
    Vanilla Extract
    Gluten Free Flour
    Baking Powder
    Sea Salt
    Dried Cranberries
    Orange Zest
    Demerara Sugar

    Instructions

    Preheat your oven to 350 degrees. Line three baking sheets with parchment paper. Set aside.

    Beat the room temperature butter in the stand mixer for 2-3 minutes until it's creamy. Add the powdered sugar and vanilla. Beat until smooth.

    In a bowl whisk together the gluten free flour, baking powder and sea salt. Add this to the butter mixture. Blend together until just combined. Add the dried cranberries and orange zest and mix to combine them into the dough.

    Divide the dough into half. Roll each half into a log in parchment paper that's about 2 inches wide by 2 inches tall. Chill for at least 2 hours.

    Place the demerara sugar on a plate or shallow dish. Roll each cookie log in the demerara sugar and gently press the sugar into the sides. Cut the log into ¼ inch thick rounds using a very sharp knife.

    Place cookie rounds on a lined baking sheet. Bake at 350 degrees for 12-15 minutes. The edges will be slightly browned around the edges when they are done.

    Cranberry Fluff Salad

    This cranberry fluff salad has been on our Thanksgiving table for as long as I can remember, and it somehow disappears faster than the pie. Sweet pineapple, tart fresh cranberries, crunchy pecans, and a cloud of homemade whipped cream come together in one bowl for a salad that tastes just as good as dessert.

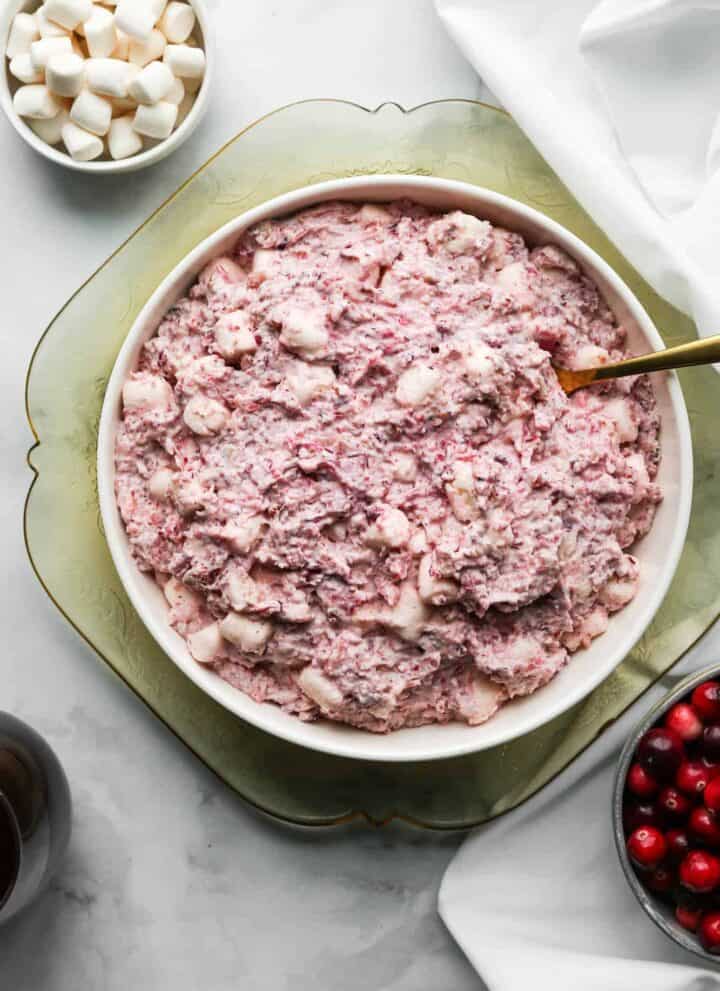
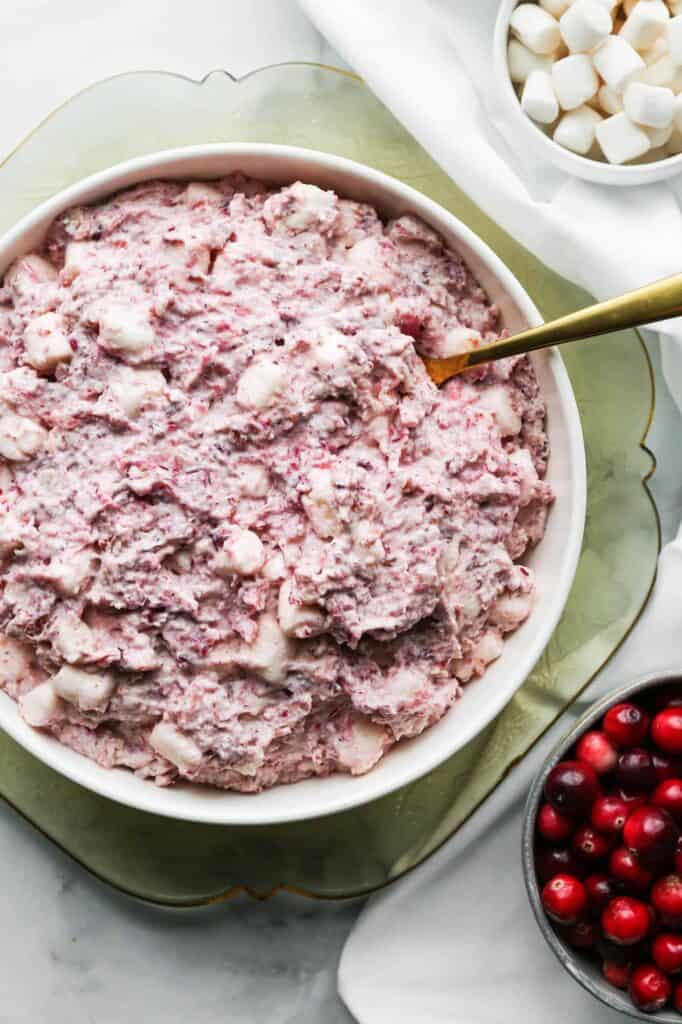
    a serving bowl of cranberry fluff salad with little dishes of marshmallows and fresh cranberries beside it

    This is one of those old fashioned holiday recipes everyone seems to have a version of, but ours leans on fresh cranberries instead of canned, and real whipped cream instead of a tub of Cool Whip, for a brighter, lighter flavor.

    It's gluten free, comes together in minutes, and only gets better the longer it chills, so it's one less thing to worry about on Thanksgiving or Christmas Day.

    If you are looking for more cranberry recipes try my Frozen Cranberry Margarita Mocktail, my Gluten Free Cranberry Orange Muffins, my Gluten Free Slow Cooker Cranberry Meatballs or my Gluten Free Orange Cranberry Butter Cookies.

    You can find all of my Christmas recipes here: Easy Gluten Free Christmas Recipes

    You can find all of my Thanksgiving recipes here: Delicious Gluten Free Thanksgiving Recipes

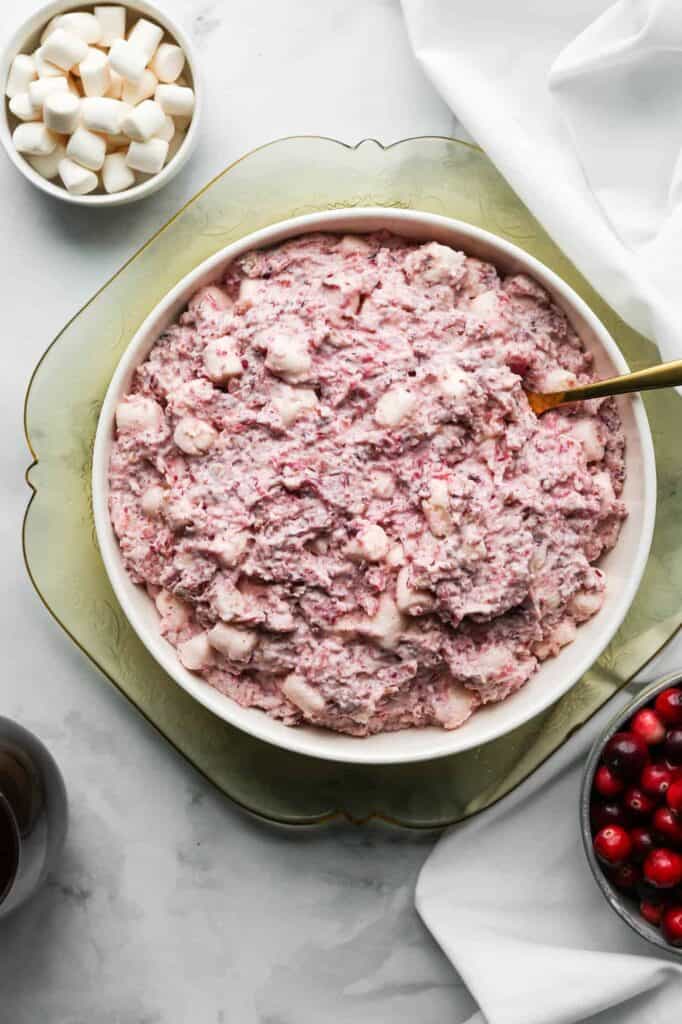
    a serving bowl of cranberry fluff salad with small bowls of marshmallows and fresh cranberries beside it
    [feast_advanced_jump_to]

    Why You'll Love This Recipe

    • Made with fresh cranberries and real whipped cream instead of canned sauce or a tub of Cool Whip
    • Comes together in one bowl in under 15 minutes of hands on time
    • A gluten free dessert salad that works for both Thanksgiving and Christmas
    • Gets better the longer it chills, so it's easy to make ahead for a busy holiday

    Ingredient Notes and Substitutions

    A few small details make a big difference in how this salad turns out. Make sure to drain the crushed pineapple well before adding it, since extra liquid will thin out the whipped cream and make the salad watery instead of fluffy.

    Fresh cranberries give the brightest flavor and best texture, but if fresh aren't available, frozen cranberries work too as long as they are thawed and well drained first. If you are short on time, a tub of whipped topping can stand in for the homemade whipped cream, though the flavor and texture will not be quite as light.

    • Nuts: pecans or walnuts both work well, or leave them out for a nut free version.
    • Marshmallows: classic mini marshmallows are traditional, but colored mini marshmallows make it feel extra festive for Christmas.
    • Pineapple: be sure to use crushed pineapple, not pineapple chunks or tidbits, for the right texture.

    How to Store and Make Ahead

    This salad is easiest to enjoy within a day or two of making it, since the marshmallows and whipped cream will start to lose their fluffy texture the longer they sit. Store leftovers covered in the refrigerator for up to 2 days.

    To get ahead of your holiday prep, you can chop the cranberries and mix them with the sugar up to 2 days in advance and store that mixture separately in the refrigerator, then stir everything else together the day before you plan to serve it. This salad does not freeze well, since the whipped cream and marshmallows change texture once thawed.

    Ways to Customize This Cranberry Fluff Salad

    This recipe is easy to make your own with a few simple swaps or additions.

    • Fold in a cup of mandarin orange segments for extra sweetness and color.
    • Add a handful of shredded coconut for a texture similar to ambrosia salad.
    • Stir in a little orange zest for a brighter, more citrusy flavor.
    • Swap the pecans for toasted walnuts, or leave the nuts out entirely.

    Top Tip

    The fresh cranberries and granulated sugar are chopped up in a food processor. How fine you want the cranberries is up to you. I like them a little bit chunky, so I adjust my food processor setting to chop instead of puree.

    Frequently Asked Questions

    What is cranberry fluff salad?

    Cranberry fluff salad is a sweet, creamy salad made with fresh cranberries, pineapple, marshmallows, and whipped cream. It's similar to other fluff or ambrosia style salads, but it stands out for its bright, tart cranberry flavor, which makes it a favorite at Thanksgiving and Christmas.

    Can I freeze cranberry fluff salad?

    I haven't frozen this salad before. I like it cold, but I don't think frozen would be as good.

    If you are wanting to freeze it for later you could do that if you are using store bought whipped cream. Store bought whipped cream freezes easily and defrosts to the same consistency. If you are making homemade whipped cream it may separate as it defrosts, so I wouldn't suggest freezing it.

    Can I make this ahead of time?

    Yes, and it actually tastes better when you do. You can chop the cranberries and mix them with the sugar up to 2 days ahead, then stir in the remaining ingredients the day before serving. See the Storage and Make Ahead section above for details.

    Do I need to drain the pineapple?

    Yes. Draining the crushed pineapple well before adding it is an important step. Skipping it will add extra liquid to the salad and make it watery instead of thick and fluffy.

    Didn't find the answer you're looking for?

    Ask AI to answer based on this recipe:

    ChatGPT
    Google AI
    Perplexity
    Grok
    Claude

    Cranberry Fluff Salad Supplies

    More Recipes You Might Enjoy

    • Gluten Free Cranberry Apple Crisp
    • Gluten Free Cranberry Orange Muffins
    • Gluten Free Slow Cooker Cranberry Meatballs
    • Gluten Free Cranberry Jam

    I get a lot of my ingredients from Thrive Market. Thrive Market has been a game changer for me eating gluten free. They have so many options I can't get at my rural grocery stores! Use this link to get 40% off your first order!

    Print
    clock clock iconcutlery cutlery iconflag flag iconfolder folder iconinstagram instagram iconpinterest pinterest iconfacebook facebook iconprint print iconsquares squares iconheart heart iconheart solid heart solid icon

    Cranberry Fluff Salad


    5 Stars 4 Stars 3 Stars 2 Stars 1 Star

    No reviews

    • Author: Elaine VanVleck
    • Total Time: 2 hours 15 minutes
    • Yield: 4 cups 1x
    • Diet: Gluten Free
    Print Recipe
    Pin Recipe

    Description

    This sweet and tart cranberry fluff salad is a Thanksgiving and Christmas classic that always disappears fast. It comes together in minutes and gets even better the longer it chills, making it one of the easiest make ahead desserts for your holiday table.


    Ingredients

    Scale
    • 1 ½ cups Fresh Cranberries
    • ¾ cup Granulated Sugar
    • 1 cup Crushed Pineapple, drained
    • 1 cup Pecans, chopped
    • 2 cups Small Marshmallows
    • 3 cups Whipped Cream

    Instructions

    Place the fresh cranberries and granulated sugar in your food processor and chop them into pieces. Adjust your food processor for the consistency you would like. I like hearty chunks of cranberries.

    In a medium sized bowl pour the cranberry mixture, crushed pineapple, pecans, marshmallows and whipped cream. Stir all the ingredients together until they are mixed well.

    Place the covered bowl in the refrigerator for at least two hours before serving.

    If you made this recipe please leave a star rating and comment below. It helps other readers find this recipe and means so much to me.

    • Prep Time: 2 hours, 15 minutes
    • Cook Time: 0 minutes
    • Category: Salad
    • Method: Food Processor
    • Cuisine: American

    Did you make this recipe?

    Tag @smallfarmbiglife on Instagram and hashtag it #smallfarmbiglife

    If you make this cranberry fluff salad, I would love to hear how it turned out. Leave a comment and a star rating below, and tag @smallfarmbiglife on Instagram so I can see your holiday table. Looking for more holiday dishes? Check out my full collections of Gluten Free Christmas Recipes and Gluten Free Thanksgiving Recipes.

    Cranberry Fluff Salad Ingredients

    • Fresh Cranberries
    • Granulated Sugar
    • Crushed Pineapple
    • Pecans
    • Small Marshmallows
    • Whipped Cream

    Instructions

    Place the fresh cranberries and granulated sugar in your food processor and chop them into pieces. Adjust your food processor for the consistency you would like. I like hearty chunks of cranberries.

    In a medium sized bowl pour the cranberry mixture, crushed pineapple, pecans, marshmallows and whipped cream. Stir all the ingredients together until they are mixed well.

    Place the covered bowl in the refrigerator for at least two hours before serving.

    Gluten Free Corn Pudding Skillet

    This easy recipe for gluten free corn pudding skillet makes a great Thanksgiving side dish. This baked casserole is healthy and homemade. This new version of an old fashioned recipe makes the best savory corn pudding.

    a cast iron skillet of gluten free corn pudding skillet

    My version of a classic recipe is a savory pudding. With just one tablespoon of sugar added this dish is great for meals and can be served hot right of the oven. I really enjoy the leftovers the next day for breakfast!

    If you are looking for more corn side dish recipes try my Gluten Free Zucchini Squash and Corn Casserole, my Easy Fried Frozen Corn, Cheesy Slow Cooker Creamed Corn or my Healthy Mexican Street Corn Salad.

    You can find all of my side dishes here: Gluten Free Side Dish Recipes

    two plates of gluten free corn pudding skillet
    [feast_advanced_jump_to]

    Ingredients

    Frozen Whole Kernel Corn
    Sweet Onion
    Dried Thyme
    Olive Oil
    Gluten Free Flour
    Granulated Sugar
    Baking Powder
    Sea Salt
    Eggs
    Heavy Whipping Cream
    Unsalted Butter

    Instructions

    Preheat your oven to 350 degrees.

    Add the olive oil and heat your cast iron skillet over medium heat. 

    Add the corn, onions and thyme to the skillet and cook until the onion is translucent. 

    While the corn mixture is cooking in a small bowl whisk together the gluten free flour, sugar, baking powder and sea salt.

    In a medium bowl whisk together the eggs, heavy cream and melted butter.

    When the corn mixture is done cooking combine the flour and egg mixtures and then pour over the corn mixture in the cast iron skillet.

    Stir the cast iron skillet ingredients together.

    Bake at 350 degrees for 45 minutes. The top and edges will be lightly browned and firm.

    Let cool slightly and serve hot.

    Supplies

    Frequently Asked Questions

    How long will corn pudding last in the refrigerator?

    Gluten free corn pudding skillet will last in the refrigerator for 3-4 days. After it has cooled completely place in a sealed container and refrigerate. You can also place in a freezer safe container and freeze for up to a month.

    Do you eat corn pudding hot or cold?

    I prefer this savory corn pudding casserole hot. I like to serve this as a hearty side dish with meals. It's perfect as a hot side dish for Thanksgiving or other gatherings.

    Some do enjoy corn pudding cold directly from the refrigerator. I however, think it is much tastier hot right out of the oven and then reheated when serving leftovers.

    More Recipes You Might Enjoy

    • Gluten Free Zucchini Squash and Corn Casserole
    • Cheesy Slow Cooker Creamed Corn
    • Gluten Free Cornbread Stuffing
    • Gluten Free Plum Cornmeal Cake

    I get my ingredients from Thrive Market. Thrive Market has been a game changer for me eating gluten free. They have so many options I can't get at my rural grocery stores! Use this link to get 25% off your first order!

    Print
    clock clock iconcutlery cutlery iconflag flag iconfolder folder iconinstagram instagram iconpinterest pinterest iconfacebook facebook iconprint print iconsquares squares iconheart heart iconheart solid heart solid icon

    Gluten Free Corn Pudding Skillet


    5 Stars 4 Stars 3 Stars 2 Stars 1 Star

    5 from 1 review

    • Author: Elaine VanVleck
    • Total Time: 1 hour
    • Yield: 12 servings 1x
    • Diet: Gluten Free
    Print Recipe
    Pin Recipe

    Description

    This easy recipe for gluten free corn pudding skillet makes a great Thanksgiving side dish. This baked casserole is healthy and homemade. This new version of an old fashioned recipe makes the best savory corn pudding.


    Ingredients

    Scale
    • 32 ounces Frozen Whole Kernel Corn
    • 1 small Sweet Onion, chopped
    • 2 tsp. Dried Thyme
    • 2 Tbsp. Olive Oil
    • 4 Tbsp. Gluten Free Flour
    • 1 Tbsp. Granulated Sugar
    • 2 tsp. Baking Powder
    • 2 tsp. Sea Salt
    • 6 large Eggs
    • 2 cups Heavy Whipping Cream
    • ½ cup Unsalted Butter, melted

    Instructions

    Preheat your oven to 350 degrees.

    Add the olive oil and heat your cast iron skillet over medium heat. 

    Add the corn, onions and thyme to the skillet and cook until the onion is translucent. 

    While the corn mixture is cooking in a small bowl whisk together the gluten free flour, sugar, baking powder and sea salt.

    In a medium bowl whisk together the eggs, heavy cream and melted butter.

    When the corn mixture is done cooking combine the flour and egg mixtures and then pour over the corn mixture in the cast iron skillet.

    Stir the cast iron skillet ingredients together.

    Bake at 350 degrees for 45 minutes. The top and edges will be lightly browned and firm.

    Let cool slightly and serve hot.

    Notes

    If you don't have a cast iron skillet you can cook the corn mixture on the stove top and then combine all the ingredients in a greased 9x13 pan.

    • Prep Time: 15 minutes
    • Cook Time: 45 minutes
    • Category: Side Dish
    • Method: Baking
    • Cuisine: Gluten Free

    Did you make this recipe?

    Tag @smallfarmbiglife on Instagram and hashtag it #smallfarmbiglife

    Top Tip

    I love a simple side dish! For this recipe I use frozen corn and dried thyme to make things really simple. It's easy to buy the ingredients ahead of time and have them for when you want to make this side dish.

    Air Fryer Roasted Maple Delicata Squash

    This Air Fryer Maple Delicata Squash is the fall side dish I look forward to making every single year. Delicata squash is my absolute favorite winter squash and I grow it in my garden every season specifically because it is the easiest squash to work with. No peeling, no wrestling with a rock hard butternut skin, and no special equipment required.

    You just slice it, toss it in a bowl with maple syrup, cinnamon, olive oil, and sea salt, and let the air fryer do its thing in about 12 minutes.

    a platter of air fryer roasted maple Delicata squash

    What makes this version special is the maple cinnamon coating. Most air fryer delicata squash recipes keep it simple and savory with garlic and salt which is delicious but this sweet and caramelized version is something else entirely.

    The maple syrup caramelizes in the air fryer and creates these gorgeous golden edges that taste almost like candy.

    It is sweet enough to feel indulgent but still works beautifully as a side dish alongside roasted chicken, pork tenderloin, or a holiday meal. Once you try it this way you will not want to make it any other way.

    If you are looking for more air fryer vegetable recipes try my Air Fryer Roasted Zucchini Squash, my Air Fryer Roasted Parmesan Broccoli or my Air Fryer Pesto Baby Potatoes.

    You can find all of my air fryer recipes here: Gluten Free Air Fryer Recipes

    a platter of air fryer roasted maple delicate squash
    [feast_advanced_jump_to]

    What Is Delicata Squash and Why You Need to Try It

    If you have never cooked with delicata squash before this recipe is the perfect introduction. Here is everything you need to know.

    • Delicata squash is a small oblong winter squash with creamy yellow skin and distinctive green stripes. It is sometimes called sweet potato squash because its flavor is mild, naturally sweet, and creamy similar to a sweet potato but with a subtle squash earthiness. The texture when cooked is silky and tender with a slight sweetness that caramelizes beautifully at high heat.
    • The biggest reason to love delicata squash is that you do not have to peel it. The skin is thin and edible and softens completely during cooking. This makes it significantly easier and faster to prepare than butternut squash, acorn squash, or any other winter squash you might have worked with before. No vegetable peeler required.
    • Delicata squash is also a good source of fiber, vitamin C, potassium, and beta carotene making it one of the more nutritious fall vegetables you can add to your plate.

    Why the Air Fryer Is the Best Way to Cook Delicata Squash

    You can roast delicata squash in the oven but the air fryer does something the oven cannot achieve as quickly or as effectively. The concentrated circulating heat of the air fryer caramelizes the maple syrup coating and the natural sugars in the squash faster and more intensely than oven roasting, giving you those gorgeous golden caramelized edges in just 12 minutes instead of the 25 to 30 minutes an oven would take.

    The air fryer also frees up your oven for everything else you are making for dinner which is especially valuable when you are cooking a holiday meal and every inch of oven space is spoken for.

    Tips for the Best Air Fryer Maple Delicata Squash

    A few simple tips will help you get perfectly caramelized and tender squash every time.

    • Do not overcrowd the basket. This is the most important tip for any air fryer recipe. If the squash slices are piled on top of each other the air cannot circulate around them and they will steam rather than caramelize. Cook in a single layer and work in batches if you have more squash than fits comfortably.
    • Shake the basket halfway through. At the six minute mark shake the basket or use tongs to flip the squash pieces so both sides get equal exposure to the heat and caramelize evenly.
    • Cut the slices consistently. Try to cut all your squash slices to the same quarter inch thickness so they all cook at the same rate. Thicker slices may need an extra two to three minutes.
    • Watch closely at the end. The maple syrup can go from perfectly caramelized to burnt quickly in the last few minutes. Check at 12 minutes and add time in two minute increments if needed.

    Serving Suggestions

    This maple delicata squash is versatile enough to work with many different meals. Here are my favorite ways to serve it.

    • As a holiday side dish. The sweet caramelized maple flavor makes this elegant enough for Thanksgiving or Christmas dinner. It looks beautiful on a holiday table and takes only 22 minutes to make.
    • Alongside roasted chicken or pork. The sweet maple coating pairs especially well with savory proteins like roasted chicken thighs, pork tenderloin, or grilled chicken breast.
    • On a fall salad. Add the warm squash slices to a bed of mixed greens or arugula with walnuts, dried cranberries, and a simple maple vinaigrette for a stunning seasonal salad.

    Oven Instructions

    No air fryer? No problem. This recipe works beautifully in the oven as well.

    Preheat your oven to 425 degrees. Prepare the squash exactly as directed in the recipe. Spread the seasoned squash slices in a single layer on a parchment lined baking sheet with space between each piece. Roast for 20 to 25 minutes flipping halfway through until the squash is tender and caramelized. The oven version will take about twice as long as the air fryer but the results are equally delicious.

    Storage and Reheating

    Store leftover air fryer maple delicata squash in an airtight container in the refrigerator for up to four days. The squash will soften slightly as it sits in the refrigerator which is normal. To reheat, place the leftover squash back in the air fryer at 375 degrees for three to five minutes until warmed through and the edges recrisp. You can also reheat in the microwave but the texture will be softer without the recrisping the air fryer provides.

    Top Tip

    Do not skip shaking the basket halfway through cooking. At the six minute mark open your air fryer and give the basket a shake or use tongs to flip the squash pieces individually. This ensures both sides of each slice get direct contact with the hot air and caramelize evenly. Without this step the bottom sides of the squash will be beautifully golden and the top sides will be pale and underdone.

    Frequently Asked Questions

    Can I eat the skin of the Delicata squash?

    Yes! The skin of a Delicata squash softens completely during cooking and is fully edible. You do not need to peel it at all which makes this one of the easiest winter squashes to prepare. Simply cut it in half, remove the seeds, cut off the ends, and slice into half rounds.

    How can I tell if a Delicata squash is ripe?

    You should not be able to pierce the skin of a ripe Delicata squash with your fingernail. The stem should be tan rather than bright green since a green stem means the squash likely is not ready yet. You can also tell by the color. A pale cream colored squash needs more time to mature. A ripe Delicata squash should be more yellow and may have some orange spots.

    What does Delicata squash taste like?

    Delicata squash has a mild, naturally sweet, and creamy flavor similar to a sweet potato but with a subtle squash earthiness. It is less intensely flavored than butternut squash which makes it very approachable for people who are not big squash fans. The maple syrup and cinnamon coating in this recipe amplifies that natural sweetness and creates gorgeous caramelized edges that taste almost like candy.

    Can I make this recipe in the oven instead of the air fryer?

    Yes. Preheat your oven to 425 degrees and prepare the squash exactly as directed in the recipe. Spread the seasoned squash slices in a single layer on a parchment lined baking sheet with space between each piece. Roast for 20 to 25 minutes flipping halfway through until the squash is tender and the maple syrup has caramelized. The oven version takes about twice as long as the air fryer but the results are equally delicious.

    Supplies

    You Might Also Enjoy These Recipes

    • Air Fryer Roasted Zucchini Squash
    • Cheesy Gluten Free Summer Squash Casserole
    • Air Fryer Pesto Baby Potatoes
    • Gluten Free Zucchini Squash and Corn Casserole

    I get a lot of my ingredients from Thrive Market. Thrive Market has been a game changer for me eating gluten free. They have so many options I can't get at my rural grocery stores! Use this link to get 40% off your first order!

    Print
    clock clock iconcutlery cutlery iconflag flag iconfolder folder iconinstagram instagram iconpinterest pinterest iconfacebook facebook iconprint print iconsquares squares iconheart heart iconheart solid heart solid icon

    Air Fryer Roasted Maple Delicata Squash


    5 Stars 4 Stars 3 Stars 2 Stars 1 Star

    5 from 1 review

    • Author: Elaine VanVleck
    • Total Time: 22 minutes
    • Yield: 5 servings 1x
    • Diet: Gluten Free
    Print Recipe
    Pin Recipe

    Description

    Delicata squash slices tossed in olive oil, pure maple syrup, cinnamon, salt, and pepper then air fried at 400 degrees until tender and caramelized. This gluten free air fryer maple delicata squash is the sweetest and most elegant fall side dish on the table and ready in just 22 minutes with no peeling required.


    Ingredients

    Scale
    • 2 medium Delicata Squash, seeded and sliced ¼" thick
    • 2 Tbsp. Olive Oil
    • 3 Tbsp. Maple Syrup
    • 1 tsp. Sea Salt
    • ½ tsp. Ground Black Pepper
    • ¼ tsp. Ground Cinnamon

    Instructions

    Using a sharp knife, slice the Delicata squash in half. Remove the seeds from the center. Cut the ends off and discard. Slice the squash into ¼ inch thick half rounds.

    Place squash, olive oil, maple syrup, salt, pepper and cinnamon in a large bowl. Stir to coat the squash thoroughly.

    Pour the squash mixture into the basket of your air fryer. Drizzle the sauce from the bowl over the squash.

    Air fry at 400 degrees for 12 minutes.

    After 12 minutes check the squash. It should be cooked through and starting to brown. If there isn't any browning yet cook at 400 degrees for another 2-5 minutes.

    Serve warm as a side dish.

    If you made this recipe please leave a star rating and comment below. It helps other readers find this recipe and means so much to me.

    • Prep Time: 10 minutes
    • Cook Time: 12 minutes
    • Category: Side Dish
    • Method: Air Fryer
    • Cuisine: American

    Did you make this recipe?

    Tag @smallfarmbiglife on Instagram and hashtag it #smallfarmbiglife

    If you make this Air Fryer Maple Delicata Squash I would love to hear what you think! Leave a comment below and let me know how it turned out or tag me on Instagram so I can see your batch.

    This is one of those fall side dishes that earns a permanent spot on your holiday table so save it to your favorite Pinterest board so you always have it ready when squash season arrives!

    Didn't find the answer you're looking for?

    Ask AI to answer based on this recipe:

    ChatGPT
    Google AI
    Perplexity
    Grok
    Claude

    Maple Delicata Squash Ingredients

    • Delicata Squash
    • Olive Oil
    • Pure Maple Syrup
    • Sea Salt
    • Coarse Ground Black Pepper
    • Ground Cinnamon

    Instructions

    Using a sharp knife, slice the Delicata squash in half. Remove the seeds from the center. Cut the ends off and discard. Slice the squash into ¼ inch thick half rounds.

    Place squash, olive oil, maple syrup, salt, pepper and cinnamon in a large bowl. Stir to coat the squash thoroughly.

    Pour the squash mixture into the basket of your air fryer. Drizzle the sauce from the bowl over the squash.

    Air fry at 400 degrees for 12 minutes.

    After 12 minutes check the squash. It should be cooked through and starting to brown. If there isn't any browning yet cook at 400 degrees for another 2-5 minutes.

    Serve warm as a side dish.

    • « Previous Page
    • 1
    • …
    • 26
    • 27
    • 28
    • 29
    • 30
    • Next Page »

    Welcome! I'm Elaine

    I'm so glad you are here! I share easy gluten free recipes from my small farm in Washington.

    Be sure to sign up for my newsletter to stay up to date on all of my new recipes.

    More about me...
    • Instagram
    • Pinterest
    • Facebook
    • Twitter
    • Mail

    Load up on new recipes, exclusive goodies, + more!
    Sign up below to stay up-to-date on news, events, and special deals.
    Thank you for subscribing!

    Easy Meals Recipes

    • Gluten Free Instant Pot Chili Mac and Cheese
    • Gluten Free Taco Casserole
    • Gluten Free Cowboy Baked Beans
    • Gluten Free Walking Taco Casserole
    • Gluten Free Creamy Beef and Mushroom Pasta
    • Gluten Free Instant Pot Chicken and Dumplings
    • Instant Pot Mexican Style Beef and Rice
    • Gluten Free Chicken Parmesan Pasta Casserole
    • Gluten Free One Pot Hamburger Helper Copycat
    • Gluten Free Salisbury Steak with Mushroom Gravy
    • Gluten Free Air Fryer Fajitas
    • Gluten Free Sloppy Joe Casserole

    Footer

    back to top

    About

    • Privacy Policy
    • Shop my Amazon Page
    • Follow me on LTK

    Newsletter

    • Sign Up! for emails and updates

    Contact

    • Contact
    • Media Kit
    • About Me

    As an Amazon Associate I earn from qualifying purchases.

    I may get commissions for purchases made through links on this site.

    Copyright © 2026 Brunch Pro on the Brunch Pro Theme