Small Farm Big Life

  • Gluten Free Recipe Index
  • Subscribe
  • Resources
menu icon
go to homepage
  • Home
  • Gluten Free Recipe Index
  • Subscribe
  • My Story
  • Resources
  • Free Guides
    • Email
    • Facebook
    • Instagram
    • Pinterest
  • subscribe
    search icon
    Homepage link
    • Home
    • Gluten Free Recipe Index
    • Subscribe
    • My Story
    • Resources
    • Free Guides
    • Email
    • Facebook
    • Instagram
    • Pinterest
  • ×

    Gluten Free Air Fryer Apple Fritters

    There is something about apple fritters that feels like fall in every bite. I love the warm cinnamon spiced dough studded with fresh apple and finished with a sweet vanilla glaze. This recipe for gluten free air fryer apple fritters gives you all of that classic flavor without the deep frying. The batter comes together from scratch with a gluten free flour blend like Bob's Red Mill 1 to 1 or King Arthur Measure for Measure and then air fries up golden and crisp in under 15 minutes.

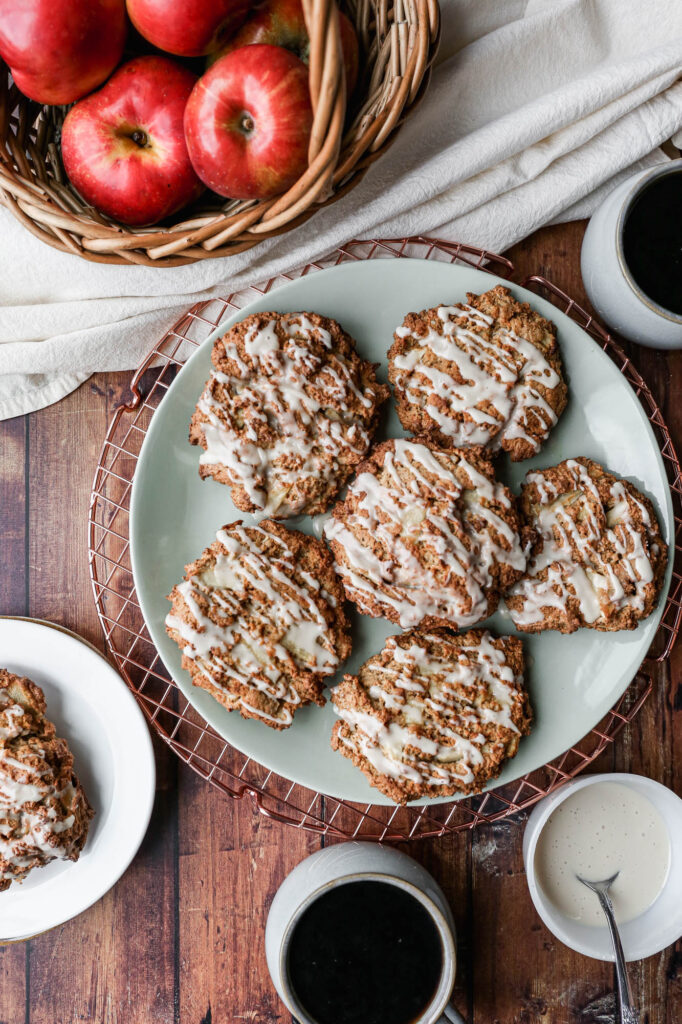
    a light blue plate of gluten free air fryer apple fritters with glaze drizzled over top sitting next to a basket of red apples and two cups of coffee

    I make these on cool fall mornings with a big cup of coffee. They come together fast enough for a weekday breakfast but are impressive enough to serve to guests.

    A gentle hand with the batter is the key here. Gluten free dough can turn dense and tough if it's overmixed, so stir just until everything is combined.

    Once you drizzle these in the vanilla glaze, you will understand why apple fritters are worth making at home all season long.

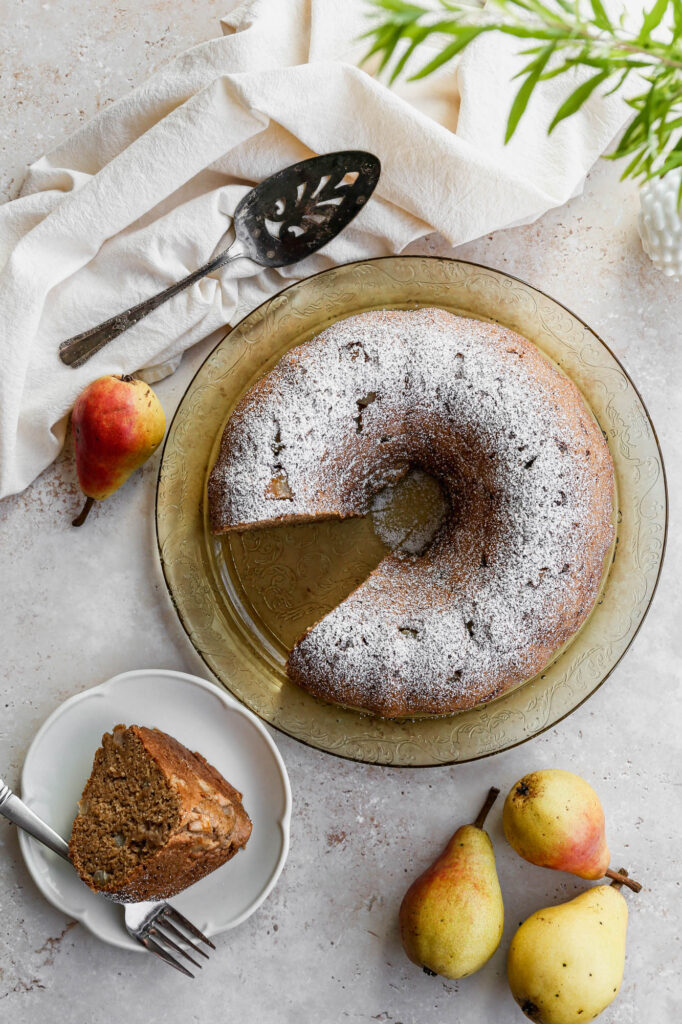
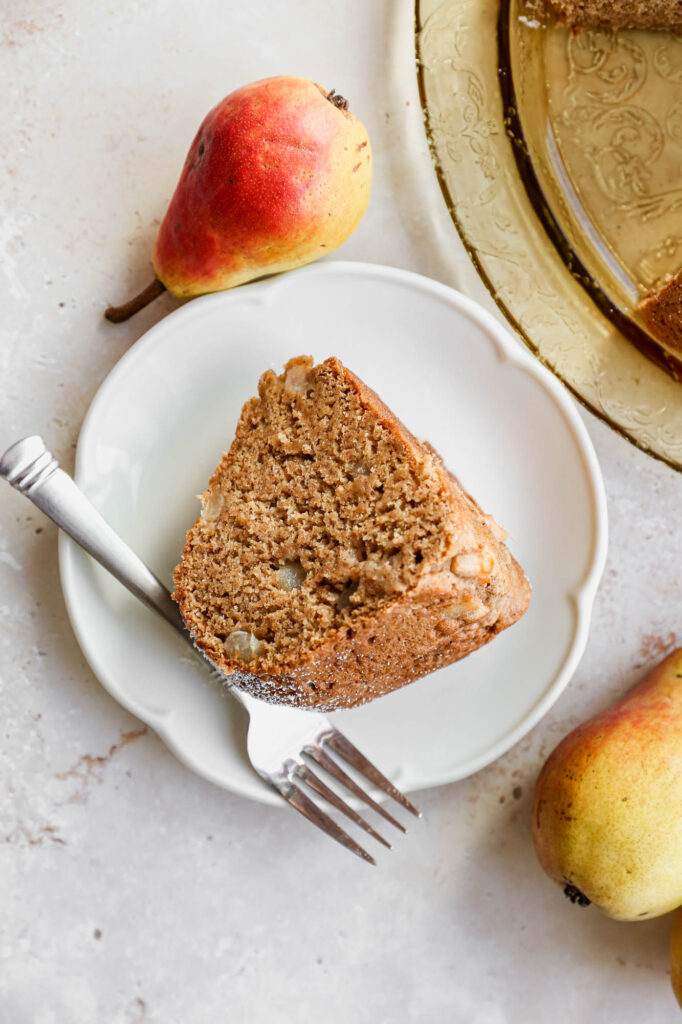
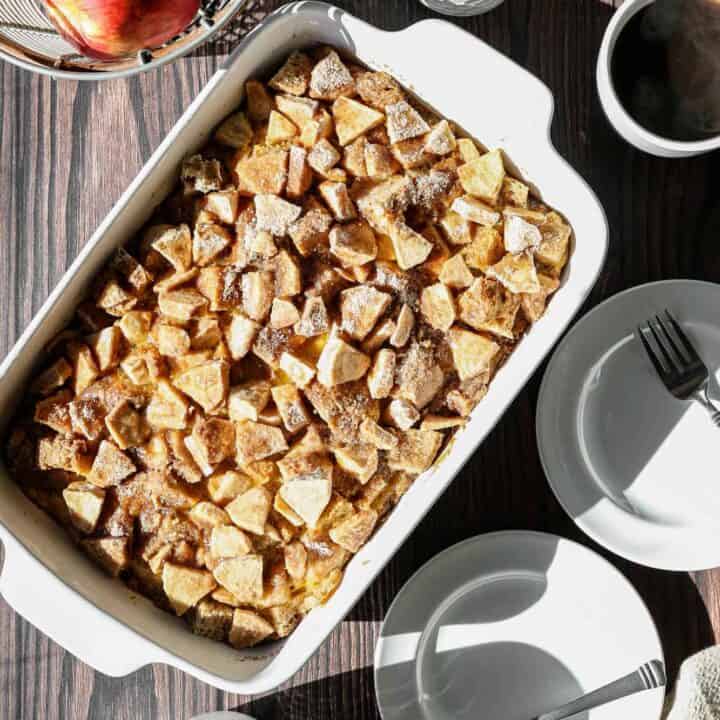
    If you are looking for more apple recipes try my Gluten Free Apple Pie Cookies, my Gluten Free Apple Crisp, my Gluten Free Apple Almond Cake or my Gluten Free Apple Cinnamon French Toast Casserole.

    You can find all of my breakfast recipes here: Gluten Free Breakfast Recipes

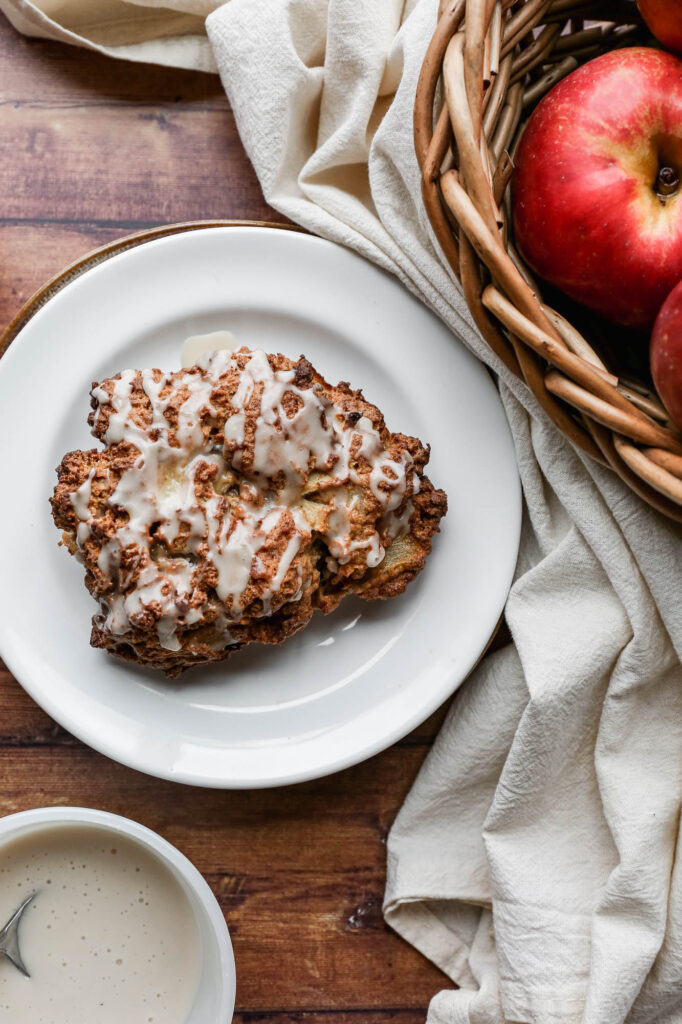
    a white plate of gluten free air fryer apple fritters with glaze drizzled over top sitting next to a basket of red apples and two cups of coffee
    [feast_advanced_jump_to]

    What Apples Work Best for Apple Fritters

    A sweet, firm apple holds up best in this batter. Honeycrisp, Gala, or Fuji all work well since they keep their shape and don't turn mushy once they're mixed into the dough and air fried. Tart apples like Granny Smith will work in a pinch, but you may want to add an extra tablespoon of brown sugar to balance the tartness.

    Tips for Gluten Free Fritter Batter

    Gluten free batter behaves a little differently than traditional wheat flour batter, so a gentle hand goes a long way here.

    • Mix the dry ingredients into the wet ingredients just until combined, overmixing can make gluten free dough turn dense and gummy instead of light and fluffy.
    • A blend like Bob's Red Mill 1 to 1 or King Arthur Measure for Measure works best since both already include a binder, so you won't need to add anything extra in this recipe.

    How to Store and Reheat Apple Fritters

    Store leftover fritters in an airtight container at room temperature for up to 5 days, or freeze them individually in a freezer safe container for longer storage.

    To bring leftovers back to life, pop them in the air fryer at 350 degrees for 2 to 3 minutes, this recrisps the outside without drying out the center the way a microwave would.

    Top Tip

    Keep your fritters uniform in size and about an inch thick. The dough won't spread much in the air fryer, so whatever size you shape it into is close to the size it will stay. Even sizing means every fritter cooks through at the same rate.

    Supplies

    Frequently Asked Questions

    How long do you air fry gluten free apple fritters?

    Air fry these fritters at 380 degrees for 7 minutes, then flip and air fry for 5 minutes more. Flipping is important, without it, one side will end up overdone while the other stays underdone.

    Do I need to make the glaze separately?

    Yes. While the fritters cool slightly, whisk together the powdered sugar, vanilla extract, and milk until smooth, then drizzle or dip the warm fritters into the glaze right before serving.

    Is air frying healthier than deep frying apple fritters?

    Yes. Air frying uses just a light spray of oil instead of submerging the fritters in oil, which cuts down on both fat and calories while still giving you a crisp, golden exterior.

    Why do you line the air fryer basket with parchment paper?

    Parchment paper keeps the soft dough from falling through the ventilation holes in the basket while it cooks. The fritters will still get plenty of airflow and cook through properly with the parchment in place.

    What gluten free flour blend works best for this recipe?

    Bob's Red Mill 1 to 1 or King Arthur Measure for Measure both work well here since they already include a binder. Both give the fritters the right texture without any extra adjustments.

    Can I freeze these apple fritters?

    Yes. Freeze them individually in a freezer safe container, then reheat straight from frozen in the air fryer at 350 degrees for a few minutes to recrisp them.

    Didn't find the answer you're looking for?

    Ask AI to answer based on this recipe:

    ChatGPT
    Google AI
    Perplexity
    Grok
    Claude

    More Recipes You Might Enjoy

    • Gluten Free Apple Cinnamon French Toast Casserole
    • Gluten Free Baked Pumpkin Donuts with Chocolate Glaze
    • Gluten Free Baked Donuts with Brown Sugar Glaze
    • Gluten Free Gingerbread Scones

    I get a lot of my ingredients from Thrive Market. Thrive Market has been a game changer for me eating gluten free. They have so many options I can't get at my rural grocery stores! Use this link to get 40% off your first order!

    Print
    clock clock iconcutlery cutlery iconflag flag iconfolder folder iconinstagram instagram iconpinterest pinterest iconfacebook facebook iconprint print iconsquares squares iconheart heart iconheart solid heart solid icon

    Gluten Free Air Fryer Apple Fritters


    5 Stars 4 Stars 3 Stars 2 Stars 1 Star

    No reviews

    • Author: Elaine VanVleck
    • Total Time: 22 minutes
    • Yield: 8 donuts 1x
    • Diet: Gluten Free
    Print Recipe
    Pin Recipe

    Description

    These soft, cinnamon spiced apple fritters are made gluten free and air fried instead of deep fried. They are finished with a simple vanilla glaze.


    Ingredients

    Scale
    • 2 cups Gluten Free Flour
    • ½ cup Brown Sugar
    • 2 tsp. Baking Powder
    • 2 tsp. Ground Cinnamon
    • ½ tsp. Sea Salt
    • ½ cup Milk
    • 2 Tbsp. Coconut Oil, melted
    • 2 large Eggs
    • 1 Tbsp. Lemon Juice
    • 2 tsp. Vanilla Extract
    • 1 medium Apple, sweet variety peeled, cored and chopped

    Glaze:

    • ½ cup Powdered Sugar
    • ½ tsp. Vanilla Extract
    • 2 tsp. Milk

    Instructions

    In a mixing bowl whisk together the gluten free flour, baking powder, cinnamon and sea salt. Set aside.

    In the bowl of your stand mixer add the brown sugar, milk, melted coconut oil, eggs, lemon juice and vanilla. Beat the ingredients until they are well combined.

    Add the dry ingredients to the wet ingredients and beat together until just combined.

    Using a wooden spoon or spatula mix the apple chunks into the dough. Do not over mix the dough, this can cause dense fritters instead of fluffy ones.

    Line the basket of your air fryer with parchment paper. 

    Dollop the dough in about palm size fritters into the basket. I did four fritters a little bigger than my palm about one inch thick. Spray the top of the fritters with some olive oil or coconut oil.

    Turn on your air fryer and preheat to 380 degrees. Air fry the fritters for 7 minutes.

    Flip the fritters over, spray this side with oil and then air fry at 380 degrees for 5 minutes more.

    Immediately remove the apple fritters from the air fryer basket and move them to a cooling rack.

    Repeat these cooking steps for the next four apple fritters.

    Let the fritters cool completely and then mix up the glaze. In a small bowl whisk together the powdered sugar, vanilla extract and milk. Using a spoon drizzle the glaze over each fritter. Let the glaze set before storing the fritters.

    If you made this recipe please leave a star rating and comment below. It helps other readers find this recipe and means so much to me.

    Notes

    I make 8 gluten free apple fritters total. I make mine in two batches of 4. Your total cook time for all of the fritters will be 24 minutes.

    • Prep Time: 10 minutes
    • Cook Time: 12 minutes
    • Category: Breakfast
    • Method: Air Fryer
    • Cuisine: American

    Did you make this recipe?

    Tag @smallfarmbiglife on Instagram and hashtag it #smallfarmbiglife

    Give these gluten free air fryer apple fritters a try this fall, and let me know how they turn out in the comments below.

    Ingredients

    • Gluten Free Flour
    • Brown Sugar
    • Baking Powder
    • Ground Cinnamon
    • Sea Salt
    • Milk
    • Eggs
    • Coconut Oil
    • Lemon Juice
    • Vanilla Extract
    • Apples

    Instructions

    In a mixing bowl whisk together the gluten free flour, baking powder, cinnamon and sea salt. Set aside.

    In the bowl of your stand mixer add the brown sugar, milk, melted coconut oil, eggs, lemon juice and vanilla. Beat the ingredients until they are well combined.

    Add the dry ingredients to the wet ingredients and beat together until just combined.

    Using a wooden spoon or spatula mix the apple chunks into the dough. Do not over mix the dough, this can cause dense fritters instead of fluffy ones.

    Line the basket of your air fryer with parchment paper. 

    Dollop the dough in about palm size fritters into the basket. I did four fritters a little bigger than my palm about one inch thick. Spray the top of the fritters with some olive oil or coconut oil.

    Turn on your air fryer and preheat to 380 degrees. Air fry the fritters for 7 minutes.

    Flip the fritters over, spray this side with oil and then air fry at 380 degrees for 5 minutes more.

    Immediately remove the apple fritters from the air fryer basket and move them to a cooling rack.

    Repeat these cooking steps for the next four apple fritters.

    Let the fritters cool completely and then mix up the glaze. In a small bowl whisk together the powdered sugar, vanilla extract and milk. Using a spoon drizzle the glaze over each fritter. Let the glaze set before storing the fritters.

    Baked Kale and Zucchini Pilaf

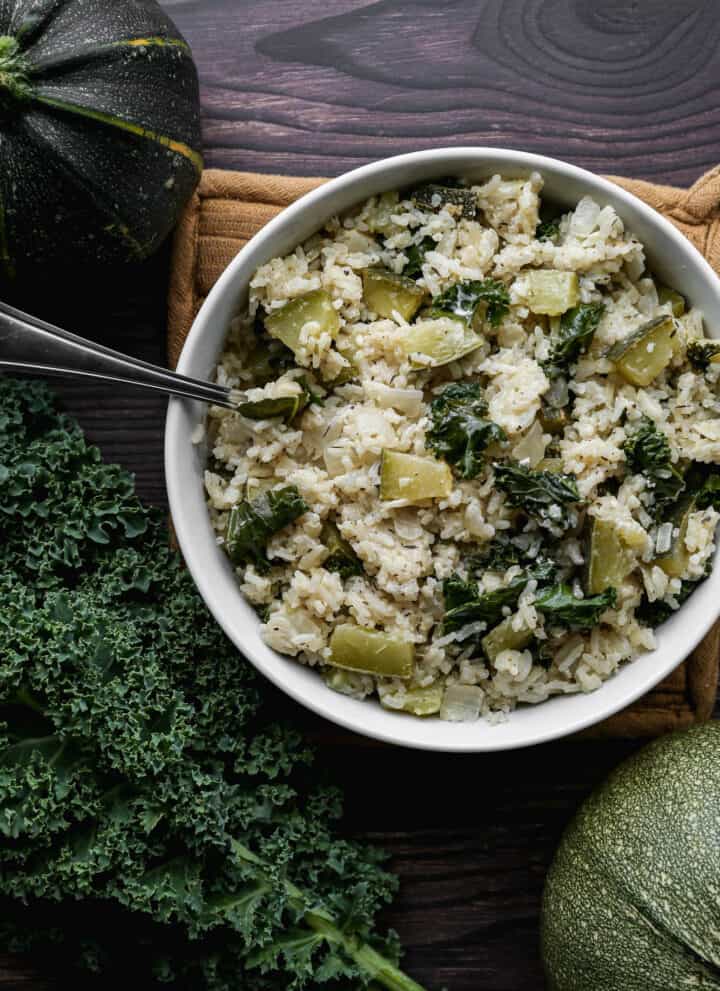
    This easy recipe for gluten free baked kale and zucchini pilaf is made with jasmine rice and lots of green veggies. It's a perfect side dish with steak, chicken or on it's own for a light meal. This rice casserole has cream cheese and spices for a delicious, creamy flavor.

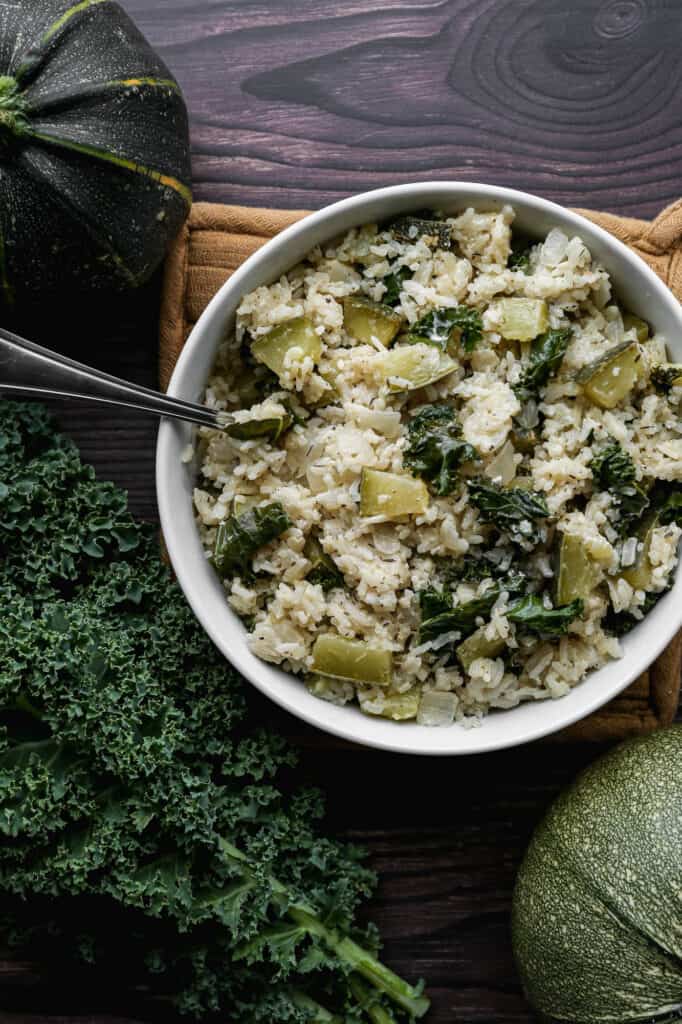
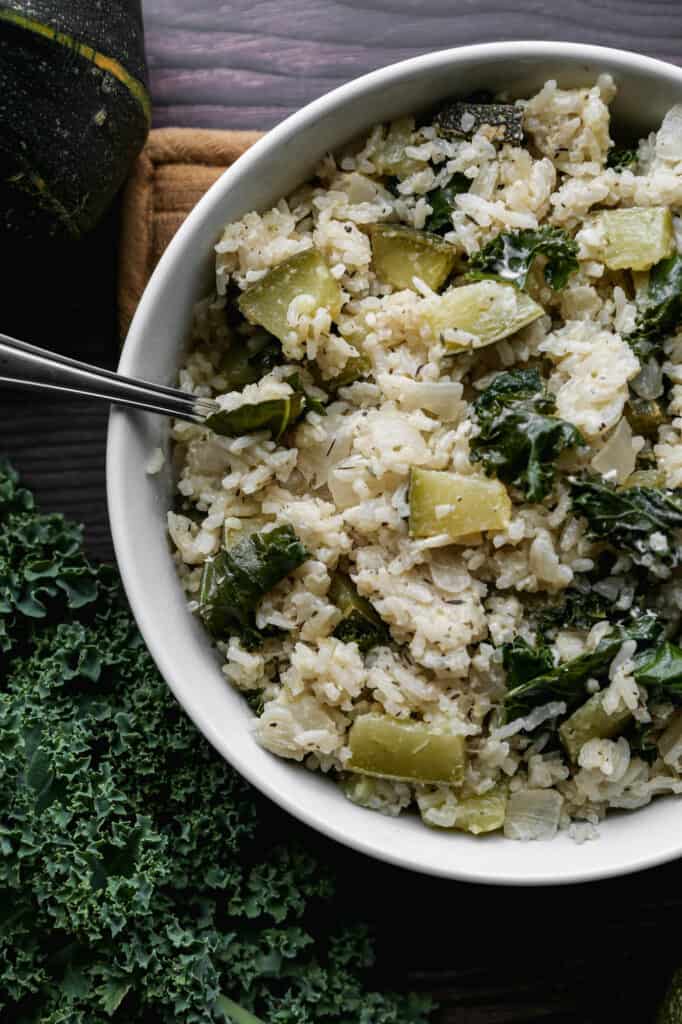
    a white bowl of gluten free baked kale and zucchini pilaf on a tan oven mitt next to two round zucchini and some kale leaves

    I'm always looking for ways to use all of the kale and zucchini I grow in our garden. It's my favorite to have savory recipes that aren't the typical baked goods. Don't get me wrong, I love a good gluten free zucchini bread or cookie, but adding more greens to a meal is always a win.

    If you are looking for more zucchini recipes try my Gluten Free Zucchini Squash and Corn Casserole, my Air Fryer Roasted Zucchini Squash, my Gluten Free Zucchini Chocolate Chip Cookies, or my Easy Gluten Free Zucchini Brownies.

    You can find all of my side dishes here: Gluten Free Side Dish Recipes

    a white bowl of gluten free baked kale and zucchini pilaf on a tan oven mitt next to two round zucchini and some kale leaves
    [feast_advanced_jump_to]

    Ingredients

    • Olive Oil
    • Yellow Onion
    • Minced Garlic
    • Jasmine Rice
    • Vegetable Stock
    • Cream Cheese
    • Dried Thyme
    • Dried Tarragon
    • Sea Salt
    • Ground Black Pepper
    • Zucchini
    • Kale

    Instructions

    Preheat your oven to 350 degrees.

    In an ovenproof, covered dutch oven or pot on medium heat saute the onions and garlic in olive oil until softened, 4-5 minutes. Add zucchini, thyme, tarragon, salt and pepper. Cook 4-5 minutes to soften the zucchini.

    Turn off the heat. Add the jasmine rice and vegetable stock to the pot. Stir to combine ingredients.

    Bake at 350 degrees for 30 minutes with the lid on the pot.

    Carefully remove the pot from the oven. Remove the lid and fluff the rice with a fork. Then add the cream cheese and kale. Stir the kale into the mixture and bury the cream cheese in the middle. 

    Place the dutch oven back in the oven and bake at 350 degrees for 2-3 minutes or until the cream cheese is softened and the kale is wilted.

    Remove from oven and stir the cream cheese into the mixture to create a creamy sauce. Serve immediately while still warm.

    Supplies

    Frequently Asked Questions

    What is pilaf?

    Pilaf is a rice dish that is usually cooked in stock or broth. It includes spices, vegetables and sometimes meat. The idea of pilaf is cooking the rice along with all the other ingredients. I love that pilaf makes for an easy side dish that can be cooking in the oven while I finish the rest of the meal.

    How do you keep kale and squash pilaf from getting watery?

    It's really important not to skip the step of cooking the zucchini on the stovetop before adding the rest of the ingredients and baking. Cooking down the vegetables will evaporate off some of the moisture. 

    Then you will add the rest of your ingredients and bake covered for 30 minutes. It's very important that you use a dutch oven or other dish with a tight fitting cover. This will allow the rice to absorb the vegetable stock and the excess moisture from the zucchini.

    More Recipes You Might Enjoy

    • Cheesy Gluten Free Summer Squash Casserole
    • Air Fryer Roasted Zucchini Squash
    • Gluten Free Zucchini Squash and Corn Casserole
    • Gluten Free Sausage, Kale and Potato Skillet

    I get a lot of my ingredients from Thrive Market. Thrive Market has been a game changer for me eating gluten free. They have so many options I can't get at my rural grocery stores! Use this link to get 25% off your first order!

    Print
    clock clock iconcutlery cutlery iconflag flag iconfolder folder iconinstagram instagram iconpinterest pinterest iconfacebook facebook iconprint print iconsquares squares iconheart heart iconheart solid heart solid icon

    Baked Kale and Zucchini Pilaf


    5 Stars 4 Stars 3 Stars 2 Stars 1 Star

    No reviews

    • Author: Elaine VanVleck
    • Total Time: 52 minutes
    • Yield: 8 servings 1x
    • Diet: Gluten Free
    Print Recipe
    Pin Recipe

    Description

    This easy recipe for gluten free baked kale and zucchini pilaf is made with jasmine rice and lots of green veggies. It's a perfect side dish with steak, chicken or on it's own for a light meal. This rice casserole has cream cheese and spices for a delicious, creamy flavor.


    Ingredients

    Scale

    1 Tbsp. Olive Oil
    1 small Yellow Onion, finely diced
    1 Tbsp. Minced Garlic
    1 cup Jasmine Rice
    2 cups Vegetable Broth
    2 ounces Cream Cheese
    1 tsp. Dried Thyme
    ½ tsp. Dried Tarragon
    ½ tsp. Sea Salt
    ½ tsp. Ground Black Pepper
    1 small Zucchini, seeds removed and diced into ½ inch chunks
    1 cup Kale, stem removed and chopped


    Instructions

    Preheat your oven to 350 degrees.

    In an ovenproof, covered dutch oven or pot on medium heat saute the onions and garlic in olive oil until softened, 4-5 minutes. Add zucchini, thyme, tarragon, salt and pepper. Cook 4-5 minutes to soften the zucchini.

    Turn off the heat. Add the jasmine rice and vegetable stock to the pot. Stir to combine ingredients.

    Bake at 350 degrees for 30 minutes with the lid on the pot.

    Carefully remove the pot from the oven. Remove the lid and fluff the rice with a fork. Then add the cream cheese and kale. Stir the kale into the mixture and bury the cream cheese in the middle. 

    Place the dutch oven back in the oven and bake at 350 degrees for 2-3 minutes or until the cream cheese is softened and the kale is wilted.

    Remove from oven and stir the cream cheese into the mixture to create a creamy sauce. Serve immediately while still warm.

    • Prep Time: 20 minutes
    • Cook Time: 32 minutes
    • Category: Side Dish
    • Method: Baking
    • Cuisine: Gluten Free

    Did you make this recipe?

    Tag @smallfarmbiglife on Instagram and hashtag it #smallfarmbiglife

    Cheesy Gluten Free Summer Squash Casserole

    This Gluten Free Summer Squash Casserole is one of those recipes that I look forward to making every single summer when the garden is overflowing with zucchini and yellow squash and I need a delicious way to use it all up. It is rich, creamy, and packed with sharp cheddar cheese in the most comforting and satisfying baked side dish that disappears fast at any dinner table or potluck.

    The combination of sour cream, mayonnaise, eggs, and cheese creates the most incredibly creamy filling and the gluten free bread crumb topping gets beautifully golden and crunchy under the broiler for the perfect finish.

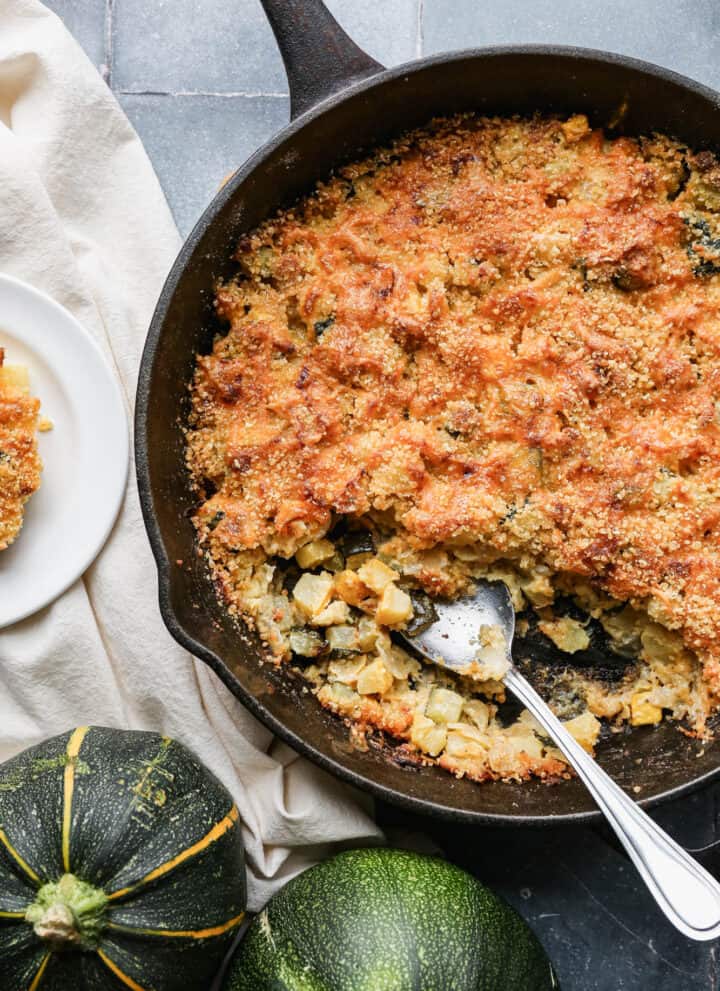
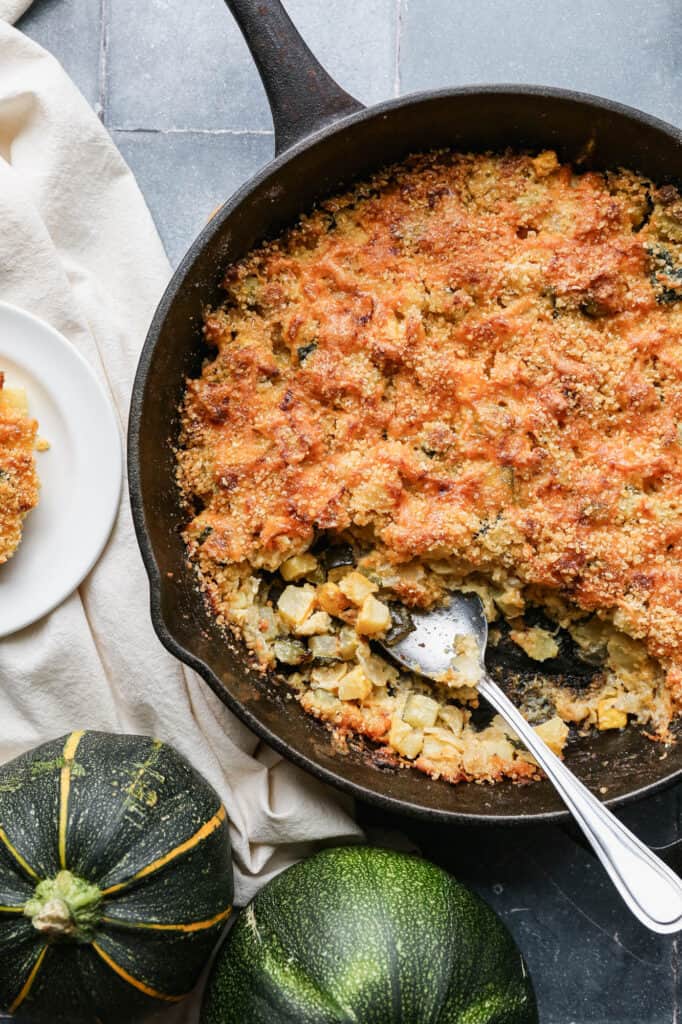
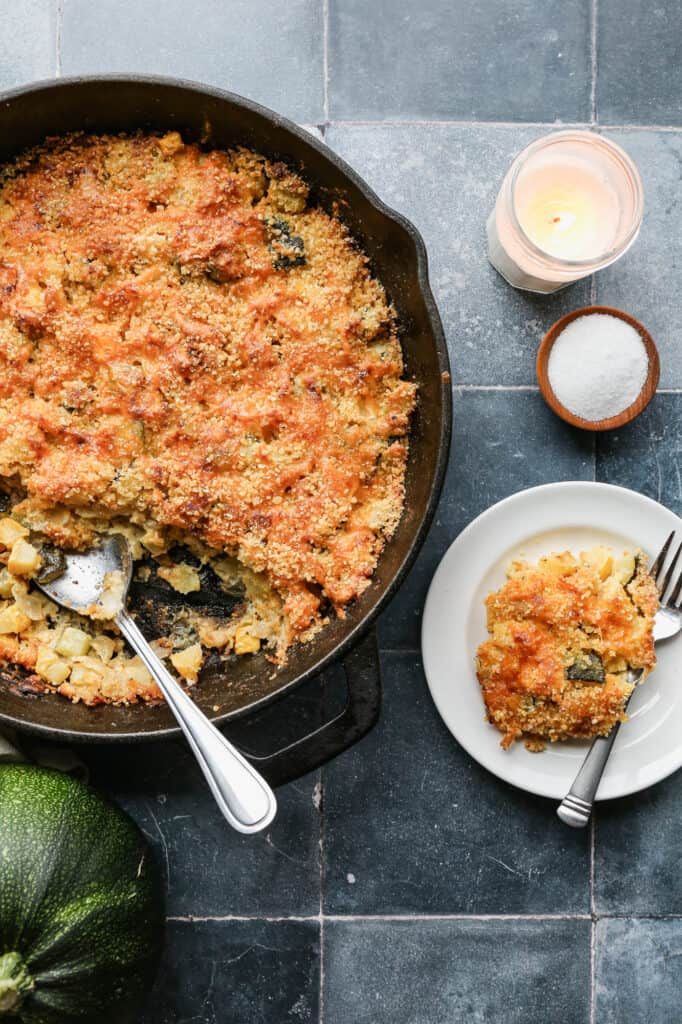
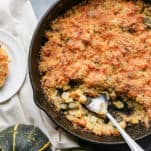
    a cast iron skillet of gluten free summer squash casserole with some served onto a white plate

    The most important thing to know about this recipe is that you need to saute the squash and zucchini on the stovetop before baking. This step cooks out a lot of the moisture from the vegetables which is what keeps your casserole from getting watery. Do not skip it.

    After that the rest of the recipe comes together quickly and the oven does all the work. This is genuinely one of my favorite summer side dishes and I think once you make it you are going to feel the same way.

    If you are looking for more zucchini recipes try my Gluten Free Zucchini Squash and Corn Casserole, my Air Fryer Roasted Zucchini Squash, my Baked Kale and Zucchini Pilaf or my Easy Gluten Free Zucchini Brownies.

    You can find all of my side dish recipes here: Gluten Free Side Dish Recipes

    a cast iron skillet of gluten free summer squash casserole with some served onto a white plate
    [feast_advanced_jump_to]

    Ingredients

    • Yellow Squash
    • Zucchini
    • Unsalted Butter
    • Yellow Onion
    • Minced Garlic
    • Cheddar Cheese
    • Sour Cream
    • Mayonnaise
    • Eggs
    • Sea Salt
    • Ground Black Pepper
    • Gluten Free Bread Crumbs

    Instructions

    Preheat your oven to 350 degrees. 

    In an oven safe pan or cast iron skillet on medium heat add butter and allow to melt. Add the diced onions and cook until they're almost translucent. Add the minced garlic and cook 1-2 minutes more.

    Add the diced yellow squash and zucchini to the onion mixture. Saute on medium heat until the squash starts to soften and the onions are completely translucent.

    Add the eggs to the skillet and mix around until they are creamy and mixed into the vegetables. Add 1 cup of cheddar cheese, sour cream, mayonnaise, salt, pepper and 1 cup of gluten free bread crumbs. Stir thoroughly until everything is mixed together.

    This mixture will be very thick and almost paste like. This will allow for the squash to continue to cook down in the oven and release water.

    Top the mixture with the other ½ cup of cheddar cheese and ½ cup of gluten free bread crumbs.

    Bake at 350 degrees for 45-50 minutes. The edges will be bubbling, the cheese will be melted and the top will be slightly browned when the casserole is done.

    At this point, I like to turn my broiler on high and broil the casserole for 1-2 minutes. This will brown the top and give it a bit of crunch. Watch the casserole very closely as the browning will happen quickly. 

    Supplies

    More Recipes You Might Enjoy

    • Gluten Free Zucchini Squash and Corn Casserole
    • Easy Gluten Free Zucchini Brownies
    • Gluten Free Zucchini Chocolate Chip Cookies
    • Air Fryer Roasted Zucchini Squash

    I get a lot of my ingredients from Thrive Market. Thrive Market has been a game changer for me eating gluten free. They have so many options I can't get at my rural grocery stores! Use this link to get 40% off your first order!

    Print
    clock clock iconcutlery cutlery iconflag flag iconfolder folder iconinstagram instagram iconpinterest pinterest iconfacebook facebook iconprint print iconsquares squares iconheart heart iconheart solid heart solid icon

    Gluten Free Summer Squash Casserole


    5 Stars 4 Stars 3 Stars 2 Stars 1 Star

    No reviews

    • Author: Elaine VanVleck
    • Total Time: 1 hour 15 minutes
    • Yield: 8 servings 1x
    • Diet: Gluten Free
    Print Recipe
    Pin Recipe

    Description

    This Gluten Free Summer Squash Casserole is a rich, creamy, and cheesy baked side dish made with fresh zucchini and yellow squash, sharp cheddar cheese, sour cream, and gluten free bread crumbs for the most delicious and satisfying summer vegetable casserole you will ever make. The squash is sauteed with butter, onion, and garlic before baking which prevents a watery casserole and creates incredible depth of flavor with a beautifully golden and crunchy bread crumb topping. Naturally gluten free and perfect for summer dinners, potlucks, and using up garden zucchini and yellow squash all season long!


    Ingredients

    Scale
    • 1 pound Yellow Squash, seeds removed and cut into ½ inch chunks
    • 1 pound Zucchini, seeds removed and cut into ½ inch chunks
    • 2 Tbsp. Unsalted Butter
    • 1 medium Yellow Onion, diced
    • 1 Tbsp. Minced Garlic
    • 1 ½ cups Cheddar Cheese, grated
    • ½ cup Sour Cream
    • ¼ cup Mayonnaise
    • 2 large Eggs, beaten
    • 1 tsp. Sea Salt
    • 1 tsp. Ground Black Pepper
    • 1 ½ cups Gluten Free Bread Crumbs

    Instructions

    Preheat your oven to 350 degrees. 

    In an oven safe pan or cast iron skillet on medium heat add butter and allow to melt. Add the diced onions and cook until they're almost translucent. Add the minced garlic and cook 1-2 minutes more.

    Add the diced yellow squash and zucchini to the onion mixture. Saute on medium heat until the squash starts to soften and the onions are completely translucent.

    Add the eggs to the skillet and mix around until they are creamy and mixed into the vegetables. Add 1 cup of cheddar cheese, sour cream, mayonnaise, salt, pepper and 1 cup of gluten free bread crumbs. Stir thoroughly until everything is mixed together.

    This mixture will be very thick and almost paste like. This will allow for the squash to continue to cook down in the oven and release water.

    Top the mixture with the other ½ cup of cheddar cheese and ½ cup of gluten free bread crumbs.

    Bake at 350 degrees for 45-50 minutes. The edges will be bubbling, the cheese will be melted and the top will be slightly browned when the casserole is done.

    At this point, I like to turn my broiler on high and broil the casserole for 1-2 minutes. This will brown the top and give it a bit of crunch. Watch the casserole very closely as the browning will happen quickly. 

    • Prep Time: 30 minutes
    • Cook Time: 45 minutes
    • Category: Side Dish
    • Method: Baking
    • Cuisine: American

    Did you make this recipe?

    Tag @smallfarmbiglife on Instagram and hashtag it #smallfarmbiglife

    If you made this Gluten Free Summer Squash Casserole I would love to hear what you thought! Please leave a star rating and a comment below. This is one of my favorite summer side dish recipes and I hope it becomes one of yours too!

    Storage

    After the casserole has cooled completely store in an air tight container in the refrigerator for up to 5 days.

    Top Tip

    Do not skip the step of sauteing the squash and zucchini on the stovetop before adding the remaining ingredients and baking. This is the most important step in the entire recipe. Summer squash holds a tremendous amount of water and cooking it down first allows that moisture to evaporate before the casserole goes into the oven. If you skip this step your casserole will be watery and soupy rather than creamy and set. Cook the squash until it has softened and the onions are completely translucent before moving on.

    Didn't find the answer you're looking for?

    Ask AI to answer based on this recipe:

    ChatGPT
    Google AI
    Perplexity
    Grok
    Claude

    Frequently Asked Questions

    How do you thicken summer squash casserole?

    This recipe has gluten free bread crumbs or rice crumbs in it for a thickener. After cooking the squash on the stovetop there is still a lot of liquid that hasn't evaporated you can add a bit more bread crumbs, but remember, that more moisture will evaporate as you bake this dish.

    How do you keep squash casserole from getting watery?

    It's really important not to skip the step of cooking the squash and zucchini on the stovetop before adding the rest of the ingredients and baking. Cooking down the vegetables will evaporate off some of the moisture.

    Then you will add the cheese, sour cream, mayonnaise, eggs, seasoning and bread crumbs. After adding these the casserole will be almost paste like and very thick. This is perfect because as the squash and zucchini continue to cook down and release water in the oven you will be left with a super creamy hot dish.

    How do I tell if this casserole is done?

    The edges will be bubbling and then cheese will be completely melted on top. The top will just be starting to brown a bit. I like to turn the broiler on high and finish browning the top of the casserole to give this dish a bit of crunch on top at this point.

    Gluten Free Herbes de Provence Almond Flour Bread

    This Gluten Free Herbes de Provence Almond Flour Bread is one of the most unique and flavorful gluten free breads I have ever made. Almond flour, parmesan cheese, and a generous tablespoon of Herbes de Provence are baked together into a golden and fragrant loaf that smells absolutely incredible coming out of the oven. The French herb blend gives this bread a flavor that is unlike any other almond flour bread you have tried.

    It is earthy, aromatic, and completely irresistible toasted with butter.

    a wooden cutting board with a loaf of gluten free herbes de provence keto bread with a few slices next to two plates of sandwiches made from the bread

    What I love most about this recipe is how effortless it is. No yeast, no kneading, and no rising time. The batter comes together in about ten minutes and the oven does the rest.

    I love this bread toasted and slathered with butter, made into a sandwich, or turned into quick garlic toast in the air fryer.

    If you are looking for a gluten free bread with real flavor and real character, this is the one to make.

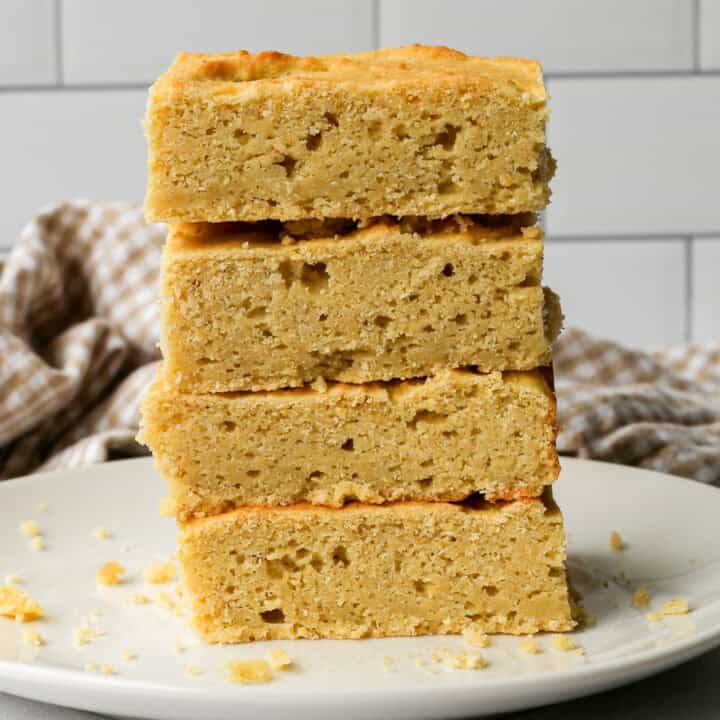
    If you are looking for more bread recipes try my Gluten Free Italian Almond Flour Bread, my Gluten Free Sourdough Bread, my Gluten Free Cornbread or my Gluten Free Buttermilk Drop Biscuits.

    You can find all of my bread recipes here: Gluten Free Bread Recipes

    a sandwich made from this gluten free herbes de provence keto bread on a white place with a dill pickle next to it
    [feast_advanced_jump_to]

    What Is Herbes de Provence?

    Herbes de Provence is a classic French herb blend that originated in the Provence region of southern France. It has a warm, earthy, and slightly floral flavor that is unlike any single herb on its own.

    The blend typically includes dried thyme, rosemary, oregano, marjoram, and savory. Some versions also include lavender which gives the blend a subtle floral note that pairs beautifully with the nuttiness of almond flour and the saltiness of parmesan cheese.

    You can find Herbes de Provence in the spice aisle of most grocery stores. McCormick makes a widely available version. Specialty spice shops and online retailers will often carry more complex blends if you want to explore the flavor further.

    What Makes Almond Flour Work for Gluten Free Bread

    Almond flour is one of the best gluten free flour alternatives for savory quick breads like this one. Here is why it works so well.

    • It is naturally gluten free and grain free. Almond flour is made from blanched almonds ground to a fine powder with no wheat, gluten, or grains involved.
    • It creates a moist and tender crumb. The natural fat content in almond flour keeps baked goods moist and prevents the dry crumbly texture that is common in many gluten free breads.
    • It does not require yeast or kneading. The eggs provide all the structure and lift this bread needs. No special techniques or equipment required beyond a stand mixer.
    • It pairs beautifully with savory flavors. The mild nutty flavor of almond flour is the perfect base for Herbes de Provence, parmesan, and other savory additions.

    Tips for Success

    Beat your eggs until slightly frothy before adding any other ingredients. This is the single most important step in this recipe. Frothy eggs create air in the batter which gives the bread better lift and a lighter texture.

    • Use finely ground blanched almond flour. Coarser almond meal will give your bread a grittier texture. Super fine almond flour gives you the best results.
    • Do not overbake. Start checking the bread at 45 minutes. The top should be golden brown and a toothpick inserted in the center should come out clean. Every oven runs slightly differently so check early rather than late.
    • Let the bread cool completely before slicing. Almond flour bread slices much more cleanly once fully cooled. Slicing it warm will cause it to crumble.
    • Use duck eggs if you can. I use farm fresh duck eggs which give the bread a richer color and flavor. Any large eggs work beautifully but farm fresh eggs will give you the best result.

    Serving Suggestions

    This Herbes de Provence almond flour bread is incredibly versatile. Here are some of my favorite ways to serve it.

    • Toasted with butter. The simplest and most satisfying way to enjoy this bread. Toast a slice until golden and spread generously with salted butter while it is still warm.
    • As a sandwich bread. This bread is sturdy enough for sandwiches. Turkey, swiss cheese, mayonnaise, and mustard on toasted slices with a quick trip through the air fryer makes an incredible toasted sandwich.
    • As gluten free garlic toast. Brush slices with butter, sprinkle with garlic powder, and toast in the air fryer or oven until golden. The Herbes de Provence already baked into the bread makes this garlic toast something special.
    • Dipped in olive oil. Slice and serve alongside a bowl of good olive oil for dipping. The French herb flavor makes this a natural pairing for a simple appetizer or starter.
    • Alongside soup. This bread pairs beautifully with gluten free soups and stews. Use it to soak up the broth from a bowl of tomato soup or chicken vegetable soup.

    Storage

    Store this bread in an airtight container in the refrigerator for up to five days. Because there are no preservatives it will spoil quickly at room temperature especially in warm weather.

    For longer storage this bread freezes beautifully. Wrap individual slices in foil and store them in a freezer safe bag for up to three months. Defrost slices at room temperature or toast them directly from frozen.

    Top Tip

    Do not rush beating the eggs. Add the eggs to your stand mixer first and beat them until they are visibly frothy before adding the butter, oil, or any dry ingredients. This step creates air in the batter that gives the bread a lighter texture and better rise. Skipping it or under beating the eggs is the most common reason almond flour bread comes out dense and flat.

    Frequently Asked Questions

    What is Herbes de Provence and where do I find it?

    Herbes de Provence is a classic French herb blend that typically includes dried thyme, rosemary, oregano, marjoram, and savory. Some blends also include a touch of lavender. You can find it in the spice aisle of most grocery stores. McCormick makes a widely available version that works perfectly in this recipe.

    Can I freeze this gluten free Herbes de Provence almond flour bread?

    Yes and I highly recommend it. This bread freezes beautifully for up to three months. Wrap individual slices in foil and store them in a freezer safe bag. Defrost at room temperature or toast directly from frozen for a quick and easy gluten free bread anytime.

    Why is my almond flour bread dense or flat?

    The most common reason is under beaten eggs. Beat the eggs until they are visibly frothy before adding any other ingredients. This creates air in the batter that gives the bread lift and a lighter texture. Also make sure your baking powder is fresh since old baking powder will not give the bread the rise it needs.

    Can I substitute the Herbes de Provence with another herb blend?

    Yes. Italian seasoning works beautifully as a substitute and gives the bread a more familiar flavor profile. You could also use just rosemary and thyme if you do not have Herbes de Provence on hand. The parmesan cheese carries a lot of the flavor in this bread so any savory herb combination you enjoy will work well.

    Didn't find the answer you're looking for?

    Ask AI to answer based on this recipe:

    ChatGPT
    Google AI
    Perplexity
    Grok
    Claude

    Supplies

    More Recipes You Might Enjoy

    • Gluten Free Italian Almond Flour Bread
    • Gluten Free Sourdough Bread
    • Gluten Free Cornbread
    • Gluten Free Buttermilk Drop Biscuits

    I get a lot of my ingredients from Thrive Market. Thrive Market has been a game changer for me eating gluten free. They have so many options I can't get at my rural grocery stores! Use this link to get 40% off your first order!
    Print
    clock clock iconcutlery cutlery iconflag flag iconfolder folder iconinstagram instagram iconpinterest pinterest iconfacebook facebook iconprint print iconsquares squares iconheart heart iconheart solid heart solid icon

    Gluten Free Herbes de Provence Keto Bread


    5 Stars 4 Stars 3 Stars 2 Stars 1 Star

    No reviews

    • Author: Elaine VanVleck
    • Total Time: 55 minutes
    • Yield: 1 loaf 1x
    • Diet: Gluten Free
    Print Recipe
    Pin Recipe

    Description

    A savory gluten free almond flour bread made with Herbes de Provence, parmesan cheese, and avocado oil. This French herb loaf bakes up golden and flavorful with no yeast and no kneading required. Perfect for gluten free sandwiches, garlic toast, and serving alongside soup.


    Ingredients

    Scale
    • 2 cups Almond Flour
    • 1 tsp. Baking Powder
    • ½ tsp. Xanthan Gum
    • 1 tsp. Sea Salt
    • 1 Tbsp. Herbes de Provence
    • ¼ cup Parmesan Cheese, finely grated
    • 7 large Eggs
    • ½ cup Unsalted Butter, melted
    • 2 Tbsp. Avocado Oil

    Instructions

    Preheat your oven to 350 degrees. Grease a 9x5 loaf pan with coconut oil or butter. Set aside.

    In the bowl of your stand mixer add the eggs and beat them until they are combined. Add the melted butter and avocado oil to the eggs and beat until they are slightly frothy.

    Add the almond flour, baking powder, xanthan gum, sea salt, herbes de Provence and parmesan cheese to the egg mixture and beat just until combined.

    Pour the batter into your greased 9x5 loaf pan.

    Bake at 350 degrees for 45-50 minutes or until the top is golden brown and toothpick comes out clean from the center.

    Let cool slightly and then transfer to a cutting board or cooling rack to finish cooling.

    After the bread has completely cooled you can store it in an air tight container on the counter for up to two days, store in the refrigerator or wrap in tinfoil and then put in a freezer safe container and freeze for up to a month.

    If you made this recipe please leave a star rating and comment below. It helps other readers find this recipe and means so much to me.

    • Prep Time: 10 minutes
    • Cook Time: 45 minutes
    • Category: Bread
    • Method: Baking
    • Cuisine: American

    Did you make this recipe?

    Tag @smallfarmbiglife on Instagram and hashtag it #smallfarmbiglife

    If you make this Gluten Free Herbes de Provence Almond Flour Bread I would love to hear what you think! Leave a comment below and let me know how it turned out or tag me on Instagram so I can see your loaf.

    This is one of those gluten free bread recipes that will surprise you with how much flavor a simple almond flour loaf can have, so save it to your favorite Pinterest board so you always have it ready when you need a delicious and unique gluten free bread!

    Ingredients

    • Almond Flour
    • Baking Powder
    • Xanthan Gum
    • Sea Salt
    • Herbes de Provence
    • Parmesan Cheese
    • Eggs
    • Unsalted Butter
    • Avocado Oil

    Instructions

    Preheat your oven to 350 degrees. Grease a 9x5 loaf pan with coconut oil or butter. Set aside.

    In the bowl of your stand mixer add the eggs and beat them until they are combined. Add the melted butter and avocado oil to the eggs and beat until they are slightly frothy.

    Add the almond flour, baking powder, xanthan gum, sea salt, herbes de Provence and parmesan cheese to the egg mixture and beat just until combined.

    Pour the batter into your greased 9x5 loaf pan.

    Bake at 350 degrees for 45-50 minutes or until the top is golden brown and toothpick comes out clean from the center.

    Let cool slightly and then transfer to a cutting board or cooling rack to finish cooling.

    After the bread has completely cooled you can store it in an air tight container on the counter for up to two days, store in the refrigerator or wrap in tinfoil and then put in a freezer safe container and freeze for up to a month.

    Gluten Free Pizza Crust

    This easy recipe for gluten free pizza crust is a staple recipe for Friday night pizza. The recipe uses yeast and is a basic pizza crust that you can top with anything. I like to go classic with lots of meats and veggies, but you would also make a dessert pizza with cinnamon and sugar.
    a gluten free pizza crust topped with sauce, cheese, mushrooms, black olives, basil and turkey chorizo on top

    My gluten free pizza crust recipe is a simple and versatile solution for creating a delicious pizza base at home, perfect for those with gluten sensitivities or anyone following a gluten free lifestyle.

    This easy to follow recipe ensures that you can enjoy a homemade pizza from scratch, with the flexibility to adapt for additional dietary preferences like egg free, dairy-free, or vegan options.

    Whether you're making pizza for kids or preparing a quick weeknight dinner, this recipe is designed to be hassle-free while delivering great results every time.

    I also have a gluten free sourdough pizza crust recipe that is delicious too.

    a slice of gluten free pizza crust topped with sauce, cheese, mushrooms, black olives, basil and turkey chorizo on top
    [feast_advanced_jump_to]

    Ingredients

    • Gluten Free Flour
    • Sea Salt
    • Xanthan Gum
    • Granulated Sugar
    • Dry Active Yeast
    • Warm Water
    • Olive Oil

    Instructions

    Preheat your oven to 400 degrees.

    In a food processor or your stand mixer add the gluten free flour, salt, xanthan gum, sugar and yeast. Pulse or beat until ingredients are mixed together. 

    Add the warm water and olive oil to the dry ingredients. Turn the food processor or stand mixer on and process the dough until it begins to stick to the sides. This will be past the dough ball stage.

    Place the dough in an oiled and sealed container in a warm spot to rise for 1-2 hours.

    If the dough is sticky and hard to work with refrigerate it for 20 minutes.

    Roll out the dough on a lightly floured surface or between two sheets of parchment paper.

    Bake the crust at 400 degrees for 5-7 minutes or until dough begins to crisp underneath.

    Add your toppings to the crust and bake at 400 degrees for another 10-15 minutes or until the cheese is melted and the edges of the crust are browned.

    Let your pizza cool slightly and then cut to serve.

    Supplies

    Frequently Asked Questions

    Do I have to use yeast in this recipe?

    Yes. The dough will not rise if you don't use yeast for this recipe. You will make the dough in your food processor or mixer and then put it in a sealed container. The gluten free pizza dough will stay in the sealed container for 1-2 hours where it will rise.

    What should I do if the dough is hard to work with?

    If you find the dough sticky or too hard to work with, put it in the refrigerator for 20 minutes. Cooling the dough should help so you can roll out your crust easily. Be sure you are using a surface lightly dusted with flour and add a bit of flour to your rolling pin also.

    If neither of these options work for you I would roll the dough out between two pieces of parchment paper. Be sure to peel both sheets of parchment off the crust before baking it.

    Is yeast gluten free?

    Most yeast is gluten free. I use Fleischmann's Active Dry Yeast for this recipe. This brand says on the bottle that it is gluten free. Always check ingredient lists and containers to make sure they state they are gluten free.

    More Recipes You Might Enjoy

    • Gluten Free Sourdough Pizza Crust
    • Gluten Free Taco Pasta Bake
    • Gluten Free Instant Pot Pizza Soup
    • 10 Easy Gluten Free Beef Recipes

    I get a lot of my ingredients from Thrive Market. Thrive Market has been a game changer for me eating gluten free. They have so many options I can't get at my rural grocery stores! Use this link to get 40% off your first order!

    Print
    clock clock iconcutlery cutlery iconflag flag iconfolder folder iconinstagram instagram iconpinterest pinterest iconfacebook facebook iconprint print iconsquares squares iconheart heart iconheart solid heart solid icon

    Gluten Free Pizza Crust


    5 Stars 4 Stars 3 Stars 2 Stars 1 Star

    No reviews

    • Author: Elaine VanVleck
    • Total Time: 37 minutes
    • Yield: 8 slices 1x
    • Diet: Gluten Free
    Print Recipe
    Pin Recipe

    Description

    This easy recipe for gluten free pizza crust is a staple recipe for Friday night pizza. The recipe uses yeast and is a basic pizza crust that you can top with anything. I like to go classic with lots of meats and veggies, but you would also make a dessert pizza with cinnamon and sugar.


    Ingredients

    Units Scale
    • 3 cups Gluten Free Flour
    • 1 tsp. Sea Salt
    • 2 tsp. Xanthan Gum
    • 2 Tbsp. Granulated Sugar
    • 1 Tbsp. Dry Active Yeast
    • 1 ¾ cup Warm Water
    • ¼ cup Olive Oil

    Instructions

    Preheat your oven to 400 degrees.

    In a food processor or your stand mixer add the gluten free flour, salt, xanthan gum, sugar and yeast. Pulse or beat until ingredients are mixed together. 

    Add the warm water and olive oil to the dry ingredients. Turn the food processor or stand mixer on and process the dough until it begins to stick to the sides. This will be past the dough ball stage.

    Place the dough in an oiled and sealed container in a warm spot to rise for 1-2 hours.

    If the dough is sticky and hard to work with refrigerate it for 20 minutes.

    Roll out the dough on a lightly floured surface or between two sheets of parchment paper.

    Bake the crust at 400 degrees for 5-7 minutes or until dough begins to crisp underneath.

    Add your toppings to the crust and bake at 400 degrees for another 10-15 minutes or until the cheese is melted and the edges of the crust are browned.

    Let your pizza cool slightly and then cut to serve.

    Notes

    I made one thick crust with this recipe. If you want a thinner crust you could divide the dough into two parts.

    • Prep Time: 15 minutes
    • Cook Time: 22 minutes
    • Category: Meals
    • Method: Baking
    • Cuisine: Gluten Free

    Did you make this recipe?

    Tag @smallfarmbiglife on Instagram and hashtag it #smallfarmbiglife

    Top Tip

    I use this recipe to make one thick crust pizza, however you could split this dough in half and make two thin crust pizzas. You can also divide the dough into smaller pieces and make personal pizzas. This is great for making everyone exactly what they want!

    • « Previous Page
    • 1
    • …
    • 58
    • 59
    • 60
    • 61
    • 62
    • …
    • 88
    • Next Page »

    Welcome! I'm Elaine

    I'm so glad you are here! I share easy gluten free recipes from my small farm in Washington.

    Be sure to sign up for my newsletter to stay up to date on all of my new recipes.

    More about me...
    • Instagram
    • Pinterest
    • Facebook
    • Twitter
    • Mail

    Load up on new recipes, exclusive goodies, + more!
    Sign up below to stay up-to-date on news, events, and special deals.
    Thank you for subscribing!

    Easy Meals Recipes

    • Gluten Free Instant Pot Chili Mac and Cheese
    • Gluten Free Taco Casserole
    • Gluten Free Cowboy Baked Beans
    • Gluten Free Walking Taco Casserole
    • Gluten Free Creamy Beef and Mushroom Pasta
    • Gluten Free Instant Pot Chicken and Dumplings
    • Instant Pot Mexican Style Beef and Rice
    • Gluten Free Chicken Parmesan Pasta Casserole
    • Gluten Free One Pot Hamburger Helper Copycat
    • Gluten Free Salisbury Steak with Mushroom Gravy
    • Gluten Free Air Fryer Fajitas
    • Gluten Free Sloppy Joe Casserole

    Footer

    back to top

    About

    • Privacy Policy
    • Shop my Amazon Page
    • Follow me on LTK

    Newsletter

    • Sign Up! for emails and updates

    Contact

    • Contact
    • Media Kit
    • About Me

    As an Amazon Associate I earn from qualifying purchases.

    I may get commissions for purchases made through links on this site.

    Copyright © 2026 Brunch Pro on the Brunch Pro Theme