Small Farm Big Life

  • Gluten Free Recipe Index
  • Subscribe
  • Resources
menu icon
go to homepage
  • Home
  • Gluten Free Recipe Index
  • Subscribe
  • My Story
  • Resources
  • Free Guides
    • Email
    • Facebook
    • Instagram
    • Pinterest
  • subscribe
    search icon
    Homepage link
    • Home
    • Gluten Free Recipe Index
    • Subscribe
    • My Story
    • Resources
    • Free Guides
    • Email
    • Facebook
    • Instagram
    • Pinterest
  • ×

    Gluten Free Cranberry Jam

    This gluten free cranberry jam is sweet, tart, and bright with fresh orange. It cooks down in one saucepan in about 20 minutes, and there's no pectin needed because cranberries thicken on their own. It's perfect for holiday breakfasts, brunch, and homemade gifts.
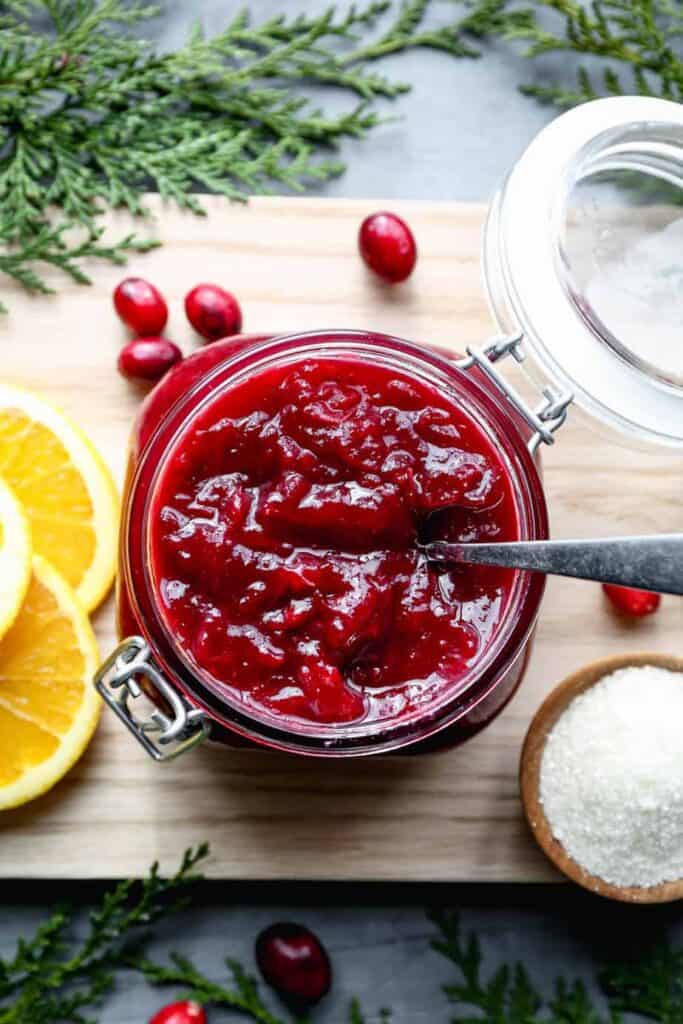
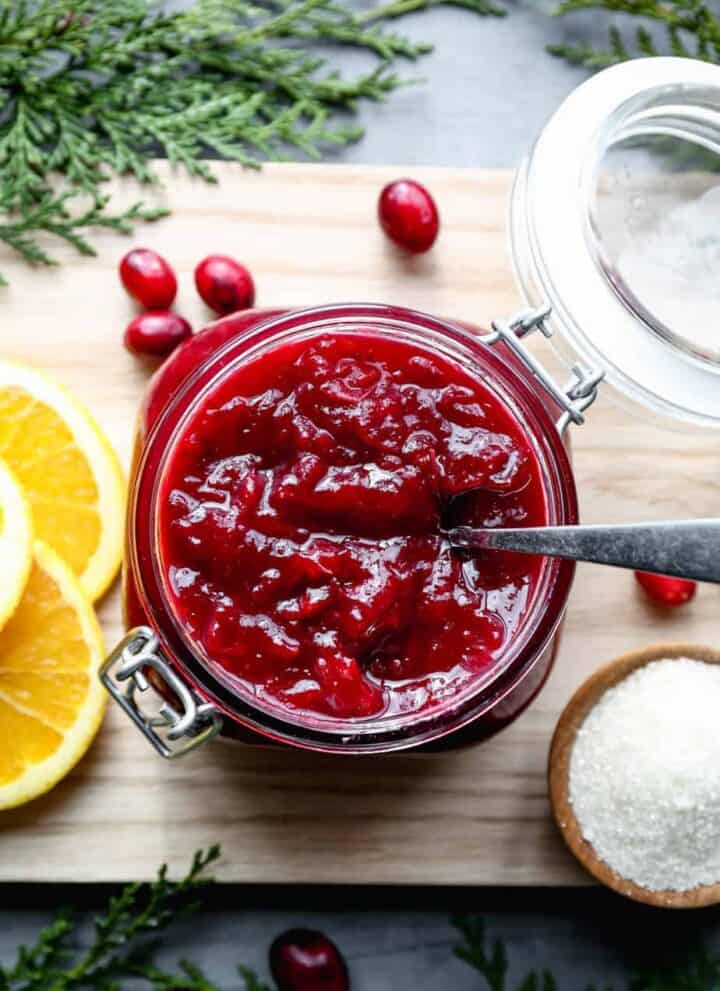
    a jar of cranberry jam with orange slices and fresh cranberries

    I love spreading this jam on toast and waffles, and I've even used it as a filling between cake layers. Making my own jam means I know exactly what goes into it and that it was made in my gluten free kitchen. Once you see how easy it is, you'll want to keep a jar in the fridge all season long.

    If you are looking for more cranberry recipes try my Gluten Free Cranberry Orange Muffins, my Gluten Free Slow Cooker Cranberry Meatballs, my Gluten Free Orange Cranberry Cake or my Gluten Free Pumpkin Cranberry Breakfast Cookies.

    You can find all my cranberry recipes here: 10+ Gluten Free Cranberry Recipes

    You can find all of my breakfast recipes here: Gluten Free Breakfast Recipes
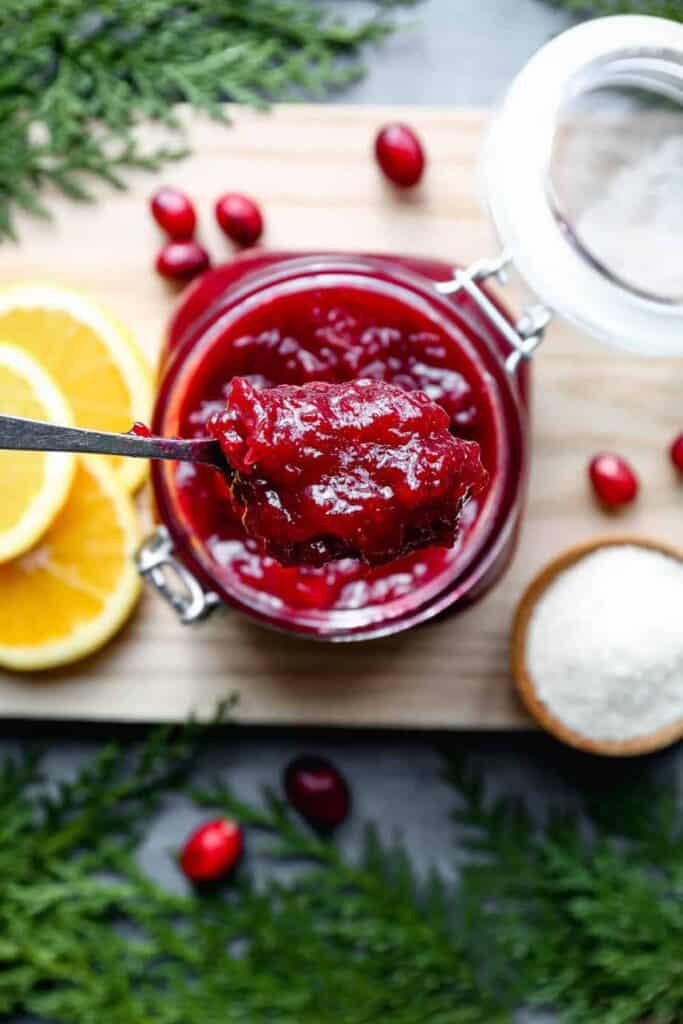
    a jar of gluten free cranberry jam with a spoon out of it
    [feast_advanced_jump_to]

    Why You'll Love This Recipe

    • No pectin needed. Cranberries thicken on their own as they cook down.
    • Ready in about 25 minutes. One saucepan, a few ingredients, and no canning equipment.
    • Sweet, tart, and bright. Orange gives it a fresh citrus flavor that's perfect for the holidays.
    • So many ways to use it. Toast, biscuits, scones, thumbprint cookies, cake filling, or a turkey sandwich.
    • Makes a great homemade gift. Pour it into small jars for neighbors, teachers, and holiday hostesses.

    How to Tell When Your Cranberry Jam Is Done

    Cranberry jam thickens a lot as it cools, so it can be hard to tell when to stop cooking. Pull it too early and it stays runny. Cook it too long and it sets up stiff in the jar.

    The easiest way to check is the cold plate test:

    • Before you start, put a small plate in the freezer.
    • When the cranberries have popped and the jam looks thick, spoon a little onto the cold plate.
    • Set it back in the freezer for 1 to 2 minutes.
    • Push the edge with your finger. If the surface wrinkles, your jam is done. If it runs, keep simmering and test again in a few minutes.

    Ways to Use Gluten Free Cranberry Jam

    This jam goes far beyond toast. A few of my favorite ways to use it:

    • Breakfast: spread it on a slice of gluten free sourdough bread or cranberry pecan sourdough bread, warm buttermilk drop biscuits, or gingerbread scones.
    • Baking: use it to fill gluten free thumbprint cookies or spread it between cake layers.
    • Holiday leftovers: add it to a turkey sandwich made with leftover air fryer turkey breast.
    • Appetizers: spoon it over a wheel of baked brie or add a small bowl to a cheese board.
    • Everyday: swirl it into yogurt or oatmeal.

    Easy Flavor Variations

    • Cinnamon: add a cinnamon stick while it simmers, then remove it before jarring.
    • Ginger: stir in a little grated fresh ginger for warmth.
    • Apple cider: use apple cider in place of the orange juice for a milder flavor.

    Gluten Free Cranberry Jam as a Homemade Gift

    A jar of homemade cranberry jam is one of my favorite easy holiday gifts. One batch fills several small jars, so you can make gifts for neighbors, teachers, and holiday hosts in under half an hour.

    • Use small jars (4 to 8 ounces) so each gift is just the right size.
    • Tie on a tag that says to keep the jam refrigerated.
    • Pair it with something to spread it on, like a loaf of homemade gluten free bread or a batch of scones.

    This is a refrigerator jam, not a canned jam, so give it within a few days of making it and let the recipient know to store it in the fridge.

    Storage

    Store the cooled jam in a sealed jar in the refrigerator for up to 3 weeks. To freeze, spoon it into freezer safe jars, leaving half an inch of space at the top, and freeze for up to 3 months. Thaw overnight in the refrigerator.

    Top Tip

    Stir more often as the jam gets close to done. Once it starts to thicken, the sugar can scorch on the bottom of the pan quickly. A heavy bottomed saucepan helps it cook evenly.

    Frequently Asked Questions

    What's the difference between cranberry sauce and cranberry jam?

    Jam should be thicker than a sauce. Usually jam has bits of the fruit it is made out of while a sauce may be pureed and smooth. For this jam I used whole cranberries and left hearty chunks of them and their seeds in the jam.

    This gluten free cranberry jam has a cup of granulated sugar. This is more than I would use in a cranberry sauce to go with savory foods.

    Do cranberries have pectin?

    Yes, cranberries naturally have pectin. You won't need to add pectin to get a nice thick consistency to your jam. Fresh cranberries contain somewhere between 0.4 and 1.2 percent pectin. The longer you boil the cranberries the more pectin that is released.

    Why is my cranberry jam not thickening?

    Likely you need to boil it more and cook it down. Depending on how much moisture your fresh cranberries release you may need to cook the jam a bit longer. If the jam seems too runny and isn't a jam consistency it needs to be cooked more.

    Continue to lightly boil the jam while stirring to keep your jam from sticking to the pan until you get the thickness you want. Once your jam is done remove your pan from the heat and transfer the jam to a heat proof jar to store in your refrigerator.

    Can I use frozen cranberries?

    Yes. Frozen cranberries work just as well as fresh. You can add them to the pan frozen. They may take a few extra minutes to come to a simmer and start popping.

    Can I freeze cranberry jam?

    Yes. Spoon the cooled jam into freezer safe jars or containers, leaving about half an inch of space at the top for it to expand. Freeze for up to 3 months, then thaw overnight in the refrigerator and stir before serving.

    Can I can this cranberry jam?

    This recipe is a refrigerator jam and hasn't been tested for water bath canning. If you want a shelf stable jam, follow a tested canning recipe and process from a trusted source like the National Center for Home Food Preservation.

    Can I use less sugar?

    You can reduce it a little, but the jam will be more tart and may not set as thick. Sugar also helps the jam keep longer in the fridge, so a lower sugar batch is best eaten sooner.

    Didn't find the answer you're looking for?

    Ask AI to answer based on this recipe:

    ChatGPT
    Google AI
    Perplexity
    Grok
    Claude

    Cranberry Jam Supplies

    More Recipes You Might Enjoy
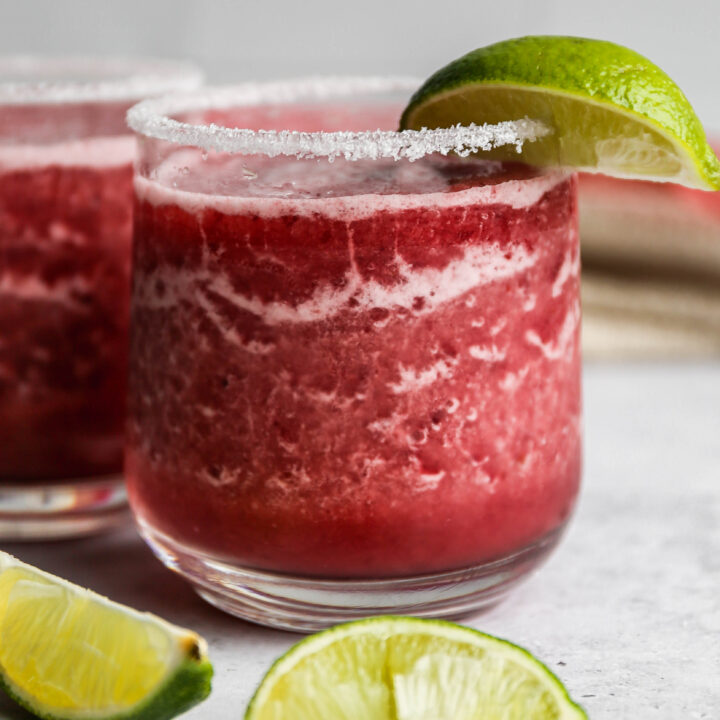
    • Frozen Cranberry Margarita Mocktail
    • Gluten Free Cranberry Orange Muffins
    • Gluten Free Slow Cooker Cranberry Meatballs
    • Cranberry Fluff Salad

    I get a lot of my ingredients from Thrive Market. Thrive Market has been a game changer for me eating gluten free. They have so many options I can't get at my rural grocery stores! Use this link to get 40% off your first order!

    Print
    clock clock iconcutlery cutlery iconflag flag iconfolder folder iconinstagram instagram iconpinterest pinterest iconfacebook facebook iconprint print iconsquares squares iconheart heart iconheart solid heart solid icon

    Gluten Free Cranberry Jam


    5 Stars 4 Stars 3 Stars 2 Stars 1 Star

    5 from 1 review

    • Author: Elaine VanVleck
    • Total Time: 25 minutes
    • Yield: approximately 3 cups 1x
    • Diet: Gluten Free
    Print Recipe
    Pin Recipe

    Description

    This easy gluten free cranberry jam cooks down on the stovetop in about 20 minutes, with no pectin needed. It's sweet, tart, and bright, perfect for holiday toast, biscuits, and brunch. Make a batch to keep in the fridge or share in small jars as a homemade gift.


    Ingredients

    Units Scale
    • 3 ½ cups Fresh Cranberries
    • 1 cup Granulated Sugar
    • ½ cup Orange Juice
    • 2 tsp. Orange Zest
    • 1 cup Water

    Instructions

    In a sauce pan add the cranberries, sugar, orange juice, grated orange peel and water. Cook on medium low heat until it begins to simmer.

    Continue to simmer the jam while stirring constantly to keep the jam from burning on the bottom of the pan. This should take 10-12 minutes to cook the ingredients down into a jam.

    The cranberries will begin to pop. Watch out for hot splatter!

    Once the jam has reached the consistency you desire remove the pan from heat.

    Pour the jam into a heat proof jar and let sit on the counter until it cools completely.

    Once the jam is cooled seal the jar and store in your refrigerator for up to 2 to 3 weeks. 

    If you made this recipe please leave a star rating and comment below. It helps other readers find this recipe and means so much to me.

    • Prep Time: 5 minutes
    • Cook Time: 20 minutes
    • Category: Condiment
    • Method: Stove Top
    • Cuisine: American

    Did you make this recipe?

    Tag @smallfarmbiglife on Instagram and hashtag it #smallfarmbiglife

    If you made this gluten free cranberry jam, I would love to hear how you used it! Please leave a star rating and a comment below. Your ratings help other gluten free cooks find this recipe.

    Gluten Free Gingerbread Scones

    This easy recipe for gluten free gingerbread scones is perfect for Christmas morning. They are moist and drizzled with cinnamon glaze. I added rolled oats to make them a bit more dense and perfect for breakfast.

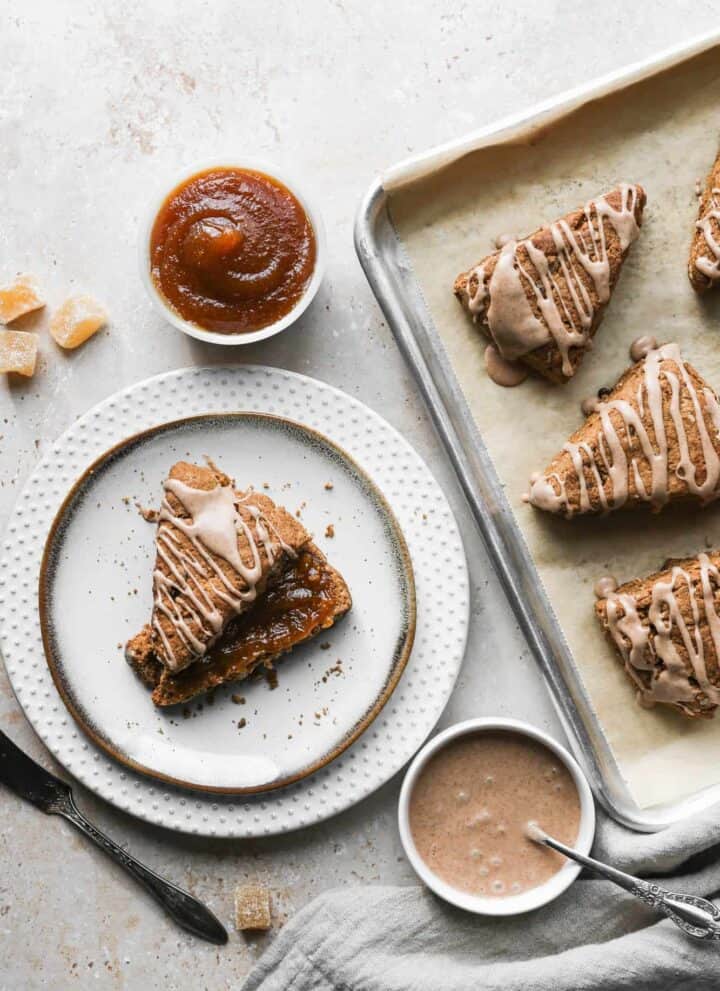
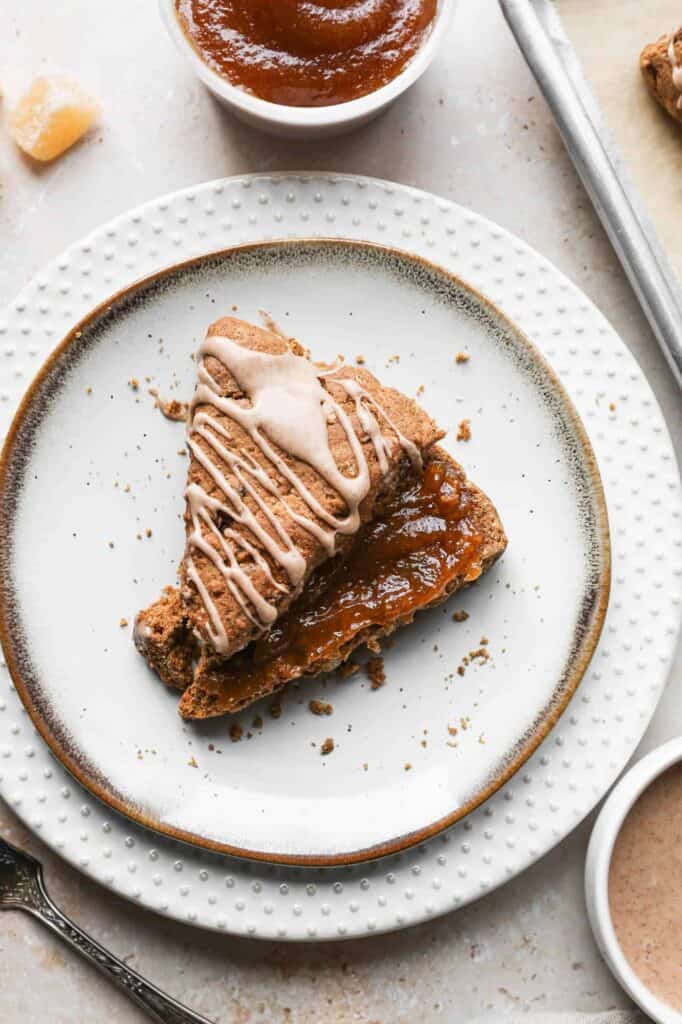
    a plate with a gingerbread scone drizzled with cinnamon glaze next to a cookie sheet of scones.

    Gluten free gingerbread scones are a delightful addition to your holiday baking repertoire. They are perfect for Christmas morning or any cold winter day. This easy scones recipe combines the warm flavors of ginger and spices, creating a sweet treat that embodies the spirit of the season.

    With a soft and tender texture, these homemade scones are not only gluten free but also make for a cozy breakfast or brunch option that everyone will love. Drizzled with a luscious cinnamon glaze, they bring a festive flair to your holiday favorite recipes.

    If you are looking for more ginger recipes try my Gluten Free Gingerbread Pancakes, my Gluten Free Gingerbread Bundt Cake, my Gluten Free Ginger Cookies, or my Gluten Free Gingersnap Cookies.

    You can find all of my breakfast recipes here: Gluten Free Breakfast Recipes

    A plate with a gingerbread scone drizzled with cinnamon glaze
    [feast_advanced_jump_to]

    Ingredients

    Gluten Free Flour
    Gluten Free Rolled Oats
    Brown Sugar
    Baking Powder
    Xanthan Gum
    Ground Ginger
    Ground Cinnamon
    Ground Nutmeg
    Ground Cloves
    Sea Salt
    Unsalted Butter
    Crystalized Ginger
    Heavy Whipping Cream
    Molasses
    Egg
    Powdered Sugar
    Vanilla Extract
    Milk

    Instructions

    Preheat your oven to 425 degrees. Line a baking sheet with parchment paper and set aside.

    In the bowl of your stand mixer beat together the gluten free flour, rolled oats, brown sugar, baking powder, xanthan gum, ground ginger, ground cinnamon, ground nutmeg, ground cloves and sea salt.

    Add the cubed butter to the dry mixture and beat until a lumpy, dry mixture forms. Add the crystalized ginger, heavy whipping cream, molasses and egg. Blend just until the mixture starts to form a ball.

    Take the dough out of the bowl and mix any remaining dry ingredients on the bottom of the bowl in by hand. Form the dough into a 10-12 inch disc. Cut the disc into 8 equal sections like a pie. 

    Place each triangle on the baking sheet so that they aren't touching each other.

    Bake at 425 degrees for 15-16 minutes. The scones will be slightly browned when they are done.

    Place the scones on a cooling rack and let cool completely.

    Make the glaze in a small bowl. Mix together the powdered sugar, ground cinnamon, vanilla extract and milk. Start with 1 tablespoon of milk and add more if needed. I like the glaze to be a bit thick.

    Drizzle the glaze over the cooled scones. Serve plain or with a ginger spread.

    Supplies

    Frequently Asked Questions

    Do I need to use eggs in scones?

    In my opinion, yes you should use an egg or egg substitute in your gluten free gingerbread scones. Eggs provide structure to the scones. Since we aren't using gluten in this recipe it is crucial for the texture of your scones to use an egg.

    Eggs also add moisture to the scone dough, if you can't use eggs you need to substitute with either flax seed meal and water or applesauce. You could use a combination of the two, but it will alter the flavor and texture some.

    Why are my scones hard?

    There are a couple of things that could cause your gluten free gingerbread scones to be hard. First, you do not want to over mix the dough. Once all the ingredients are in the mixing bowl you will want to mix just until ingredients are blended.

    Next, remove the dough from the mixing bowl and if there are crumbs in the bottom that didn't get mixed in knead them in with your hands while you are forming the dough into a large disc shape.

    Second, make sure your baking powder isn't too old. If you are using expired baking powder you aren't going to get fluffy scones. It is also important to use the egg in this recipe or replace it accordingly to keep the moisture level in the scones correct.

    Why are my baked scones so crumbly?

    It is important that you use the heavy whipping cream, molasses and egg in this recipe. They are the only liquids being added. If you don't use enough liquids in the recipe you are likely to get crumbly, dry scones.

    If you've used all the ingredients and your scones are still crumbly you can add a bit more heavy whipping cream or a tablespoon or two of applesauce. Either will add more moisture to the recipe and should remedy your dry scones.

    More Recipes You Might Enjoy

    • Gluten Free Orange Cranberry Biscotti
    • Gluten Free Baked Pumpkin Donuts with Chocolate Glaze
    • Gluten Free Gingerbread Pancakes
    • Gluten Free Gingerbread Bundt Cake

    I get a lot of my ingredients from Thrive Market. Thrive Market has been a game changer for me eating gluten free. They have so many options I can't get at my rural grocery stores! Use this link to get 40% off your first order!

    Print
    clock clock iconcutlery cutlery iconflag flag iconfolder folder iconinstagram instagram iconpinterest pinterest iconfacebook facebook iconprint print iconsquares squares iconheart heart iconheart solid heart solid icon

    Gluten Free Gingerbread Scones


    5 Stars 4 Stars 3 Stars 2 Stars 1 Star

    No reviews

    • Author: Elaine VanVleck
    • Total Time: 35 minutes
    • Yield: 8 1x
    • Diet: Gluten Free
    Print Recipe
    Pin Recipe

    Description

    This easy recipe for gluten free gingerbread scones is perfect for Christmas morning. They are moist and drizzled with cinnamon glaze. I added rolled oats to make them a bit more dense and perfect for breakfast.


    Ingredients

    Scale
    • 2 cups Gluten Free Flour
    • ¾ cup Gluten Free Rolled Oats
    • ¼ cup Brown Sugar
    • 1 Tbsp. Baking Powder
    • 1 tsp. Xanthan Gum
    • 1 ½ tsp. Ground Ginger
    • 1 tsp. Ground Cinnamon
    • ½ tsp. Ground Nutmeg
    • ½ tsp. Ground Cloves
    • ½ tsp. Sea Salt
    • ½ cup Unsalted Butter, cubed
    • ½ cup Crystalized Ginger, diced
    • ¼ cup Heavy Whipping Cream
    • ⅓ cup Molasses
    • 1 large Egg

    Cinnamon Glaze:

    • 1 cup Powdered Sugar
    • 1 tsp. Ground Cinnamon
    • 1 tsp. Vanilla Extract
    • 1-2 Tbsp. Milk

    Instructions

    Preheat your oven to 425 degrees. Line a baking sheet with parchment paper and set aside.

    In the bowl of your stand mixer beat together the gluten free flour, rolled oats, brown sugar, baking powder, xanthan gum, ground ginger, ground cinnamon, ground nutmeg, ground cloves and sea salt.

    Add the cubed butter to the dry mixture and beat until a lumpy, dry mixture forms. Add the crystalized ginger, heavy whipping cream, molasses and egg. Blend just until the mixture starts to form a ball.

    Take the dough out of the bowl and mix any remaining dry ingredients on the bottom of the bowl in by hand. Form the dough into a 10-12 inch disc. Cut the disc into 8 equal sections like a pie. 

    Place each triangle on the baking sheet so that they aren't touching each other.

    Bake at 425 degrees for 15-16 minutes. The scones will be slightly browned when they are done.

    Place the scones on a cooling rack and let cool completely.

    Make the glaze in a small bowl. Mix together the powdered sugar, ground cinnamon, vanilla extract and milk. Start with 1 tablespoon of milk and add more if needed. I like the glaze to be a bit thick.

    Drizzle the glaze over the cooled scones. Serve plain or with a ginger spread.

    • Prep Time: 20 minutes
    • Cook Time: 15 minutes
    • Category: Breakfast
    • Method: Baking
    • Cuisine: Gluten Free

    Did you make this recipe?

    Tag @smallfarmbiglife on Instagram and hashtag it #smallfarmbiglife

    Serving

    I cut my scones in half and served them with The Ginger People's Organic Ginger Spread. I'm a big fan of this company and their products. They have a farming partnership and revenue sharing program with farms in Indonesia. The Ginger People also work with other farming communities around the world making sure to be sustainable for the environment and that the farmers get a fair wage.

    Top Tip

    I really think that the quality of ingredients you use affects the flavor and texture of your baked good. Make sure you are using quality ingredients that aren't expired. I have to admit I'm the worst at cleaning out my spice pantry, but I try to stay on top of the expiration dates and replace what I use most each season.

    Gluten Free Chocolate Mayonnaise Cake

    This Gluten Free Chocolate Mayonnaise Cake is a throwback 1950s, old fashioned dessert that proves timeless recipes never go out of style. Inspired by a vintage mayonnaise cake recipe, this chocolate cake made with mayonnaise bakes up incredibly moist, rich, and tender.

    It's a true decadent chocolate mayo cake. Made from scratch, this easy chocolate mayonnaise cake delivers deep chocolate flavor and the soft texture you expect from a best moist cake recipe.

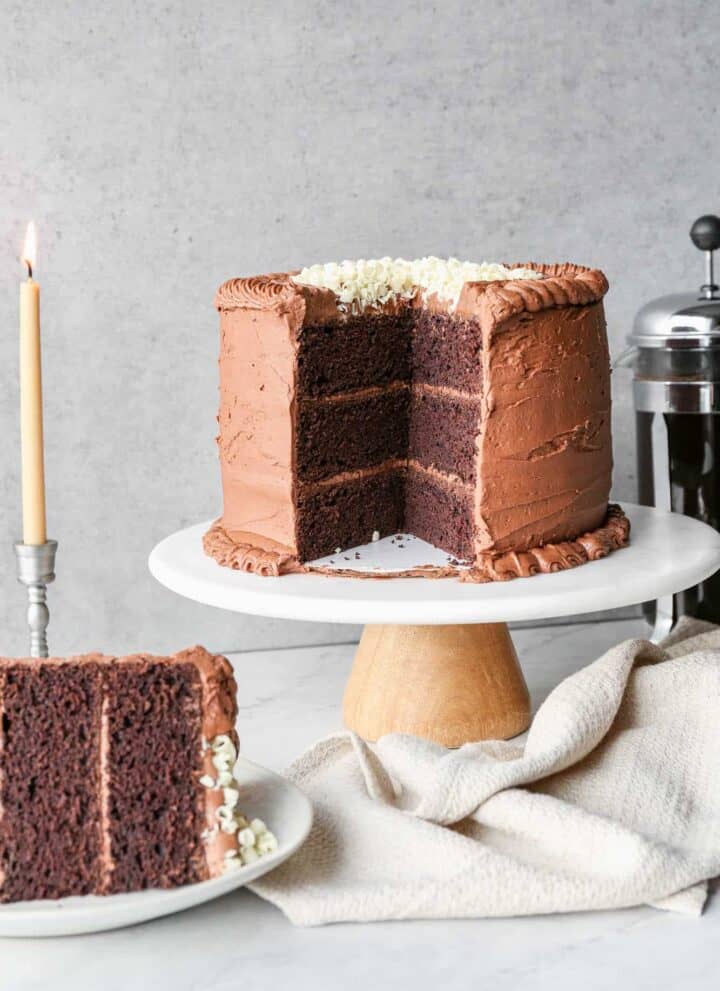
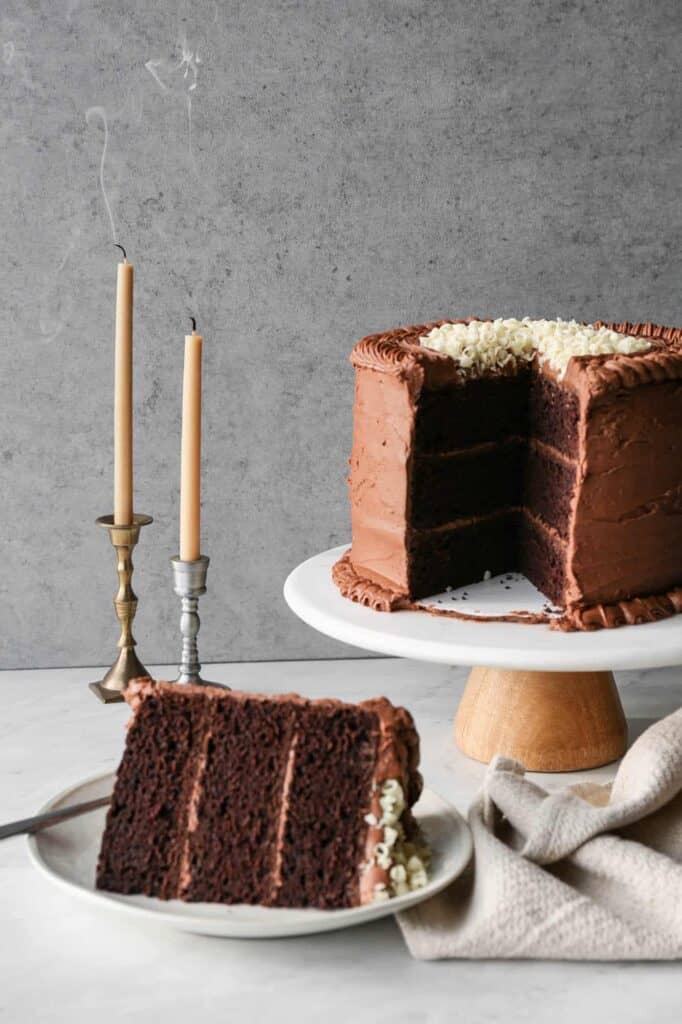
    a gluten free chocolate mayonnaise cake on a cake stand with a slice of cake on a plate and a pot of coffee

    Perfect for celebrations or everyday baking, this moist chocolate cake recipe is a guaranteed crowd pleaser. Whether you're serving it as a homemade birthday cake or a cozy homemade chocolate dessert, this vintage chocolate cake feels special yet simple.

    Finished with chocolate frosting, this gluten free mayonnaise chocolate cake is proof that baking with mayonnaise creates one unforgettable, rich dessert.

    If you would rather have a sheet cake you can make this cake in a 9x13 baking dish instead of three nine inch round pans. Sometimes instead of frosting a layer cake I just want a simple sheet cake to quickly spread frosting onto and be done.

    If you are looking for chocolate recipes you might also like my Gluten Free Chocolate Pound Cake, my Gluten Free Chocolate Zucchini Muffins, my Gluten Free Double Chocolate Chip Cookies or my Gluten Free Double Chocolate Bundt Cake.

    Here's all of my cake recipes: Gluten Free Cake Recipes

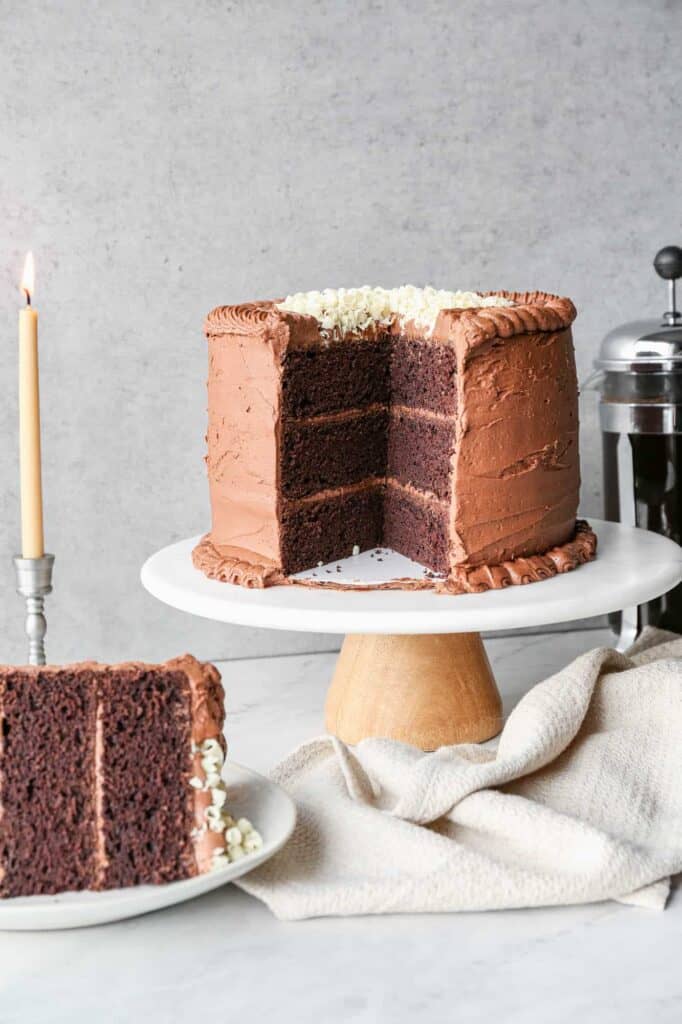
    a gluten free chocolate mayonnaise cake on a cake stand with a slice of cake on a plate
    [feast_advanced_jump_to]

    Ingredients

    Coffee
    Unsweetened Cocoa Powder
    Gluten Free Flour
    Baking Powder
    Baking Soda
    Xanthan Gum
    Sea Salt
    Granulated Sugar
    Eggs
    Mayonnaise
    Vanilla Extract
    Semi-Sweet Chocolate Chips
    Honey
    Heavy Whipping Cream
    Unsalted Butter
    Powdered Sugar

    Instructions

    Preheat your oven to 350 degrees. Grease three 9-inch round cake pans with butter or coconut oil. Set aside.

    In the bowl of your stand mixer add the sugar and eggs. Beat until light and fluffy, 3-4 minutes. Add the mayonnaise and vanilla. Beat until blended.

    Add the coffee and cocoa powder to the egg mixture. Beat until incorporated.

    In a medium bowl whisk together the gluten free flour, baking powder, baking soda, xanthan gum and sea salt.

    Blend the dry ingredients into the wet ingredients until you get a smooth cake batter, 2-3 minutes.

    Pour the cake batter evenly into each cake pan.

    Bake at 350 degrees for 40-45 minutes. The cakes should spring back when lightly touched and be coming away from the edges of the pans.

    Let the cakes stand in the pans for 10 minutes and then place them on a cooling rack to cool completely before frosting. I like to make the cakes the day before so they have plenty of time to cool.

    For the frosting put the chocolate chips, honey and heavy cream into a microwave safe bowl. Microwave in 30 second increments stirring in between until the chocolate chips are melted.

    In the bowl of your stand mixer beat the unsalted butter, sea salt, vanilla and 2 cups of powdered sugar until smooth. Add the chocolate mixture and blend until incorporated. Add 2 cups of powdered sugar and blend until the frosting is smooth and fluffy.

    Supplies

    More Recipes You Might Enjoy
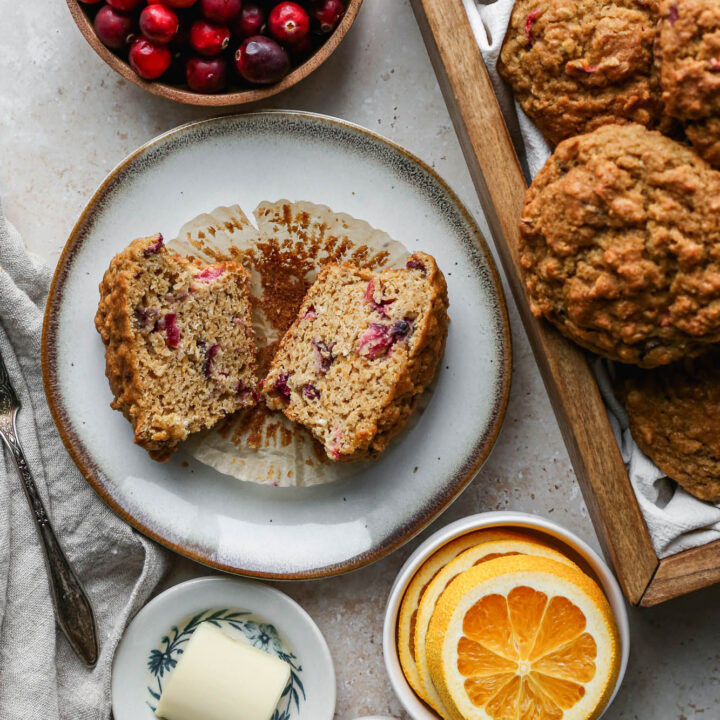
    • Gluten Free Chocolate Pound Cake
    • Gluten Free Chocolate Zucchini Muffins
    • Gluten Free Double Chocolate Bundt Cake
    • 10 Gluten Free Chocolate Desserts

    I get a lot of my ingredients from Thrive Market. Thrive Market has been a game changer for me eating gluten free. They have so many options I can't get at my rural grocery stores! Use this link to get 40% off your first order!
    Print
    clock clock iconcutlery cutlery iconflag flag iconfolder folder iconinstagram instagram iconpinterest pinterest iconfacebook facebook iconprint print iconsquares squares iconheart heart iconheart solid heart solid icon

    Gluten Free Chocolate Mayonnaise Cake


    5 Stars 4 Stars 3 Stars 2 Stars 1 Star

    5 from 2 reviews

    • Author: Elaine VanVleck
    • Total Time: 1 hour 5 minutes
    • Yield: 3 - 9 inch cakes 1x
    • Diet: Gluten Free
    Print Recipe
    Pin Recipe

    Description

    This easy gluten free chocolate mayonnaise cake is my take on a classic 1950s southern recipe. The old fashioned homemade chocolate cake is moist and perfect for dessert. I added chocolate buttercream frosting for the filling and icing.


    Ingredients

    Scale
    • 1 ½ cups Coffee, strongly brewed
    • 1 cup Unsweetened Cocoa Powder
    • 3 cups Gluten Free Flour
    • 2 tsp. Baking Powder
    • 1 ½ tsp. Baking Soda
    • 1 tsp. Xanthan Gum
    • 1 tsp. Sea Salt
    • 2 cups Granulated Sugar
    • 4 large Eggs
    • 1 cup Mayonnaise
    • 1 tsp. Vanilla Extract

    Frosting:

    • 1 ¼ cups Semi-Sweet Chocolate Chips
    • 2 Tbsp. Honey
    • 3 Tbsp. Heavy Cream
    • 1 cup Unsalted Butter, softened
    • ½ tsp. Sea Salt
    • 1 tsp. Vanilla Extract
    • 4 cups Powdered Sugar

    Instructions

    Preheat your oven to 350 degrees. Grease three 9-inch round cake pans with butter or coconut oil. Set aside.

    In the bowl of your stand mixer add the sugar and eggs. Beat until light and fluffy, 3-4 minutes. Add the mayonnaise and vanilla. Beat until blended.

    Add the coffee and cocoa powder to the egg mixture. Beat until incorporated.

    In a medium bowl whisk together the gluten free flour, baking powder, baking soda, xanthan gum and sea salt.

    Blend the dry ingredients into the wet ingredients until you get a smooth cake batter, 2-3 minutes.

    Pour the cake batter evenly into each cake pan.

    Bake at 350 degrees for 40-45 minutes. The cakes should spring back when lightly touched and be coming away from the edges of the pans.

    Let the cakes stand in the pans for 10 minutes and then place them on a cooling rack to cool completely before frosting. I like to make the cakes the day before so they have plenty of time to cool.

    For the frosting put the chocolate chips, honey and heavy cream into a microwave safe bowl. Microwave in 30 second increments stirring in between until the chocolate chips are melted.

    In the bowl of your stand mixer beat the unsalted butter, sea salt, vanilla and 2 cups of powdered sugar until smooth. Add the chocolate mixture and blend until incorporated. Add 2 cups of powdered sugar and blend until the frosting is smooth and fluffy.

    Notes

    This recipe could be dairy free if you use a different frosting.

    • Prep Time: 20 minutes
    • Cook Time: 45 minutes
    • Category: Cake
    • Method: Baking
    • Cuisine: Gluten Free

    Did you make this recipe?

    Tag @smallfarmbiglife on Instagram and hashtag it #smallfarmbiglife

    Storage

    You can store the cake in an air tight container for up to 7 days in the refrigerator. I also like to freeze individual slices in freezer safe containers to enjoy later.

    Top Tip

    I love a layer cake but sometimes a sheet cake is just easier. This cake can be baked in a 9x13 baking pan. Cool the cake completely and then frost.

    Didn't find the answer you're looking for?

    Ask AI to answer based on this recipe:

    ChatGPT
    Google AI
    Perplexity
    Grok
    Claude

    Frequently Asked Questions

    Does mayonnaise make cakes moist?

    Yes! Since mayonnaise is usually made from eggs and oil (or in this case I used avocado oil mayonnaise so it's just oil) it will make your cake very moist and fluffy. It shouldn't matter what brand or type of mayonnaise you use in your cake. You are essentially just adding more oil to the cake batter.

    Is mayonnaise gluten free?

    Mayonnaise is typically gluten free. As always, I would check the label. In some cases the mayonnaise may be made in the same facility as other products that have gluten or other allergens. My favorites are Sir Kensington's Mayonnaise and Primal Kitchen Mayonnaise.

    Can I replace the mayonnaise in this cake with sour cream?

    Yes! You will get the same delicious, fluffy chocolate cake if you use mayonnaise or sour cream. Using avocado oil mayonnaise is a great way to make a cake vegetarian or for any of your dairy free friends and family.

    Gluten Free Orange Cranberry Biscotti

    This easy recipe for gluten free orange cranberry biscotti is dipped in white chocolate and sprinkled with sugar crystals. These nut free breakfast cookies are made with dried cranberries and orange zest.

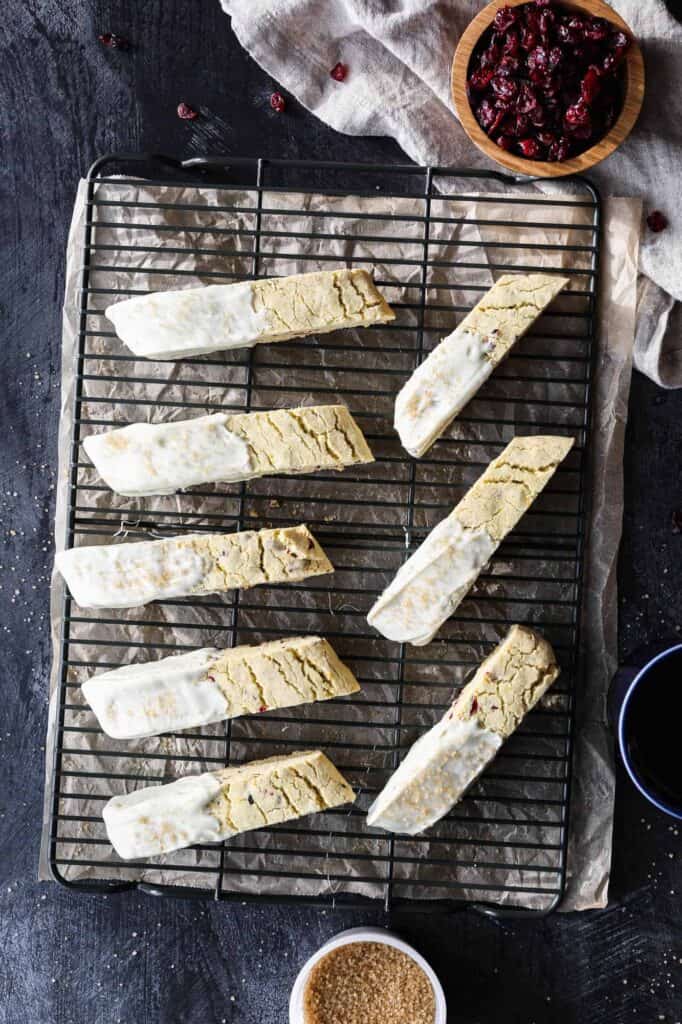
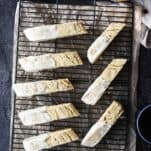
    a cooling rack of gluten free orange cranberry biscotti dipped in white chocolate

    Gluten-free orange cranberry biscotti are a delightful addition to your holiday baking repertoire! They combine the tangy sweetness of cranberries with the bright flavor of orange. This easy biscotti recipe results in delicious cookies that are perfect for Christmas festivities or as part of a homemade Christmas cookie box.

    With my gluten-free biscotti recipe, you can enjoy this traditional Italian treat without sacrificing taste or texture. Ideal for breakfast or as a sweet treat alongside your favorite beverage, these cranberry orange biscotti also lend themselves well to dipping in white chocolate for an extra touch of decadence.

    If you are looking for more cranberry recipes try my Frozen Cranberry Margarita Mocktail, my Gluten Free Cranberry Orange Muffins, my Gluten Free Slow Cooker Cranberry Meatballs or my Gluten Free Pumpkin Cranberry Breakfast Cookies.

    You can find all of my dessert recipes here: Gluten Free Dessert Recipes

    You can find all of my Christmas recipes here: Easy Gluten Free Christmas Recipes

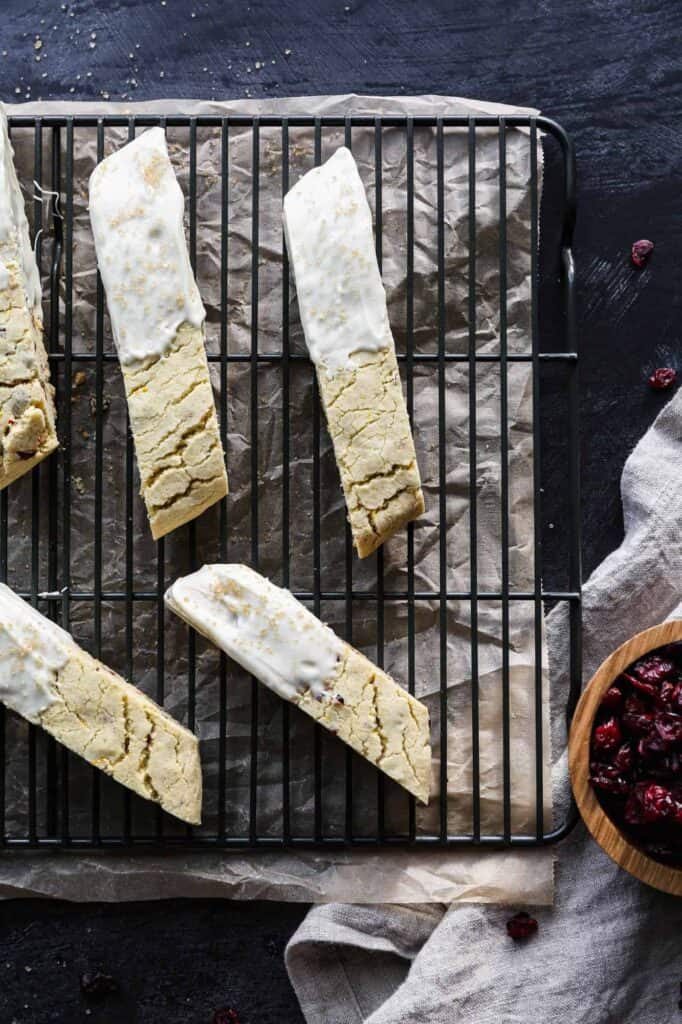
    a cooling rack with gluten free orange cranberry biscotti dipped in white chocolate and sprinkled with sugar crystals
    [feast_advanced_jump_to]

    Ingredients

    Unsalted Butter
    Granulated Sugar
    Eggs
    Orange Zest
    Orange Extract
    Gluten Free Flour
    Baking Powder
    Baking Soda
    Sea Salt
    Dried Cranberries
    White Chocolate Chips
    Demenara Sugar

    Instructions

    Preheat your oven to 325 degrees. Line two baking sheets with parchment paper and set aside.

    In your stand mixer beat the unsalted butter and sugar until fluffy. Add the eggs, orange zest and orange extract and blend together.

    In a medium bowl whisk together the gluten free flour, baking powder, baking soda and sea salt. 

    Add the dry mixture to the wet mixture and blend just until mixed together. Add the finely chopped dried cranberries and mix in. 

    Break the dough into two halves. Using parchment paper on the top and bottom roll the dough to form it into logs on each baking sheet. The parchment paper will keep the dough from sticking to your hands.

    Bake at 325 degrees for 25-30 minutes.

    Cool completely on the baking sheet. I like to cool overnight. If you don't let them cool enough they may crumble when you try to cut them.

    Cut the logs into diagonal slices. Lay the slices out on a baking sheet so they aren't touching each other. 

    Bake at 325 degrees for 7-8 minutes. If you want your biscotti to be more crisp you can bake them longer.

    Let the biscotti cool.

    Using either a double boiler or microwaving for 30 seconds at a time in a microwave safe bowl melt the white chocolate chips.

    Dip the biscotti into the white chocolate. Use a spoon to coat half the biscotti. Scrape the bottom off on the edge of the bowl and place on a cooling rack.

    Before the chocolate has cooled sprinkle with demenara sugar for extra sparkle.

    Supplies

    Frequently Asked Questions

    Can you make gluten free biscotti?

    Yes! This recipe for gluten free orange cranberry biscotti is so easy to make. The key to gluten free biscotti holding together is letting it cool completely before handling it. I like to let the biscotti cool on the baking sheet overnight.

    The next day I cut the biscotti logs on the diagonal into sticks. Then I lay them out on the baking sheet so they aren't touching and bake them again. The second time I bake them I like them to be firm, but not too hard. Of course, if you prefer a denser texture you can bake them longer.

    To finish them I like to dip them in white chocolate. However, they are delicious on their own and this step can be skipped. I love to serve them with coffee or tea for brunch.

    How do you know when biscotti is done?

    For this gluten free orange cranberry biscotti recipe the log of dough will be slightly browned and firm to the touch. The log should not be hard! The second baking will make the biscotti have the harder texture.

    For the second baking you can decide on how hard you want your biscotti. I like mine to be slightly hard, but not a challenge to bite into. I bake them again for 7-8 minutes, but you can alter that time to your liking.

    More Recipes You Might Enjoy

    • Easy Gluten Free Christmas Cookies for Your Cookie Tray
    • Gluten Free Orange Cranberry Butter Cookies
    • Cranberry Fluff Salad
    • Gluten Free Cranberry Apple Crisp

    I get some of my ingredients from Thrive Market. Thrive Market has been a game changer for me eating gluten free. They have so many options I can't get at my rural grocery stores! Use this link to get 25% off your first order!

    Print
    clock clock iconcutlery cutlery iconflag flag iconfolder folder iconinstagram instagram iconpinterest pinterest iconfacebook facebook iconprint print iconsquares squares iconheart heart iconheart solid heart solid icon

    Gluten Free Orange Cranberry Biscotti


    5 Stars 4 Stars 3 Stars 2 Stars 1 Star

    No reviews

    • Author: Elaine VanVleck
    • Total Time: 58 minutes
    • Yield: 16 1x
    • Diet: Gluten Free
    Print Recipe
    Pin Recipe

    Description

    This easy recipe for gluten free orange cranberry biscotti is dipped in white chocolate and sprinkled with sugar crystals. These nut free breakfast cookies are made with dried cranberries and orange zest. 


    Ingredients

    Scale

    ½ cup Unsalted Butter, at room temperature
    1 cup Granulated Sugar
    2 large Eggs
    1 Tbsp. Fresh Orange Zest
    1 tsp. Orange Extract
    3 cups Gluten Free Flour
    1 tsp. Baking Powder
    ½ tsp. Baking Soda
    ½ tsp. Sea Salt
    ½ cup Dried Cranberries, finely chopped
    11 ounces White Chocolate Chips, melted
    ⅓ cup Demenara Sugar


    Instructions

    Preheat your oven to 325 degrees. Line two baking sheets with parchment paper and set aside.

    In your stand mixer beat the unsalted butter and sugar until fluffy. Add the eggs, orange zest and orange extract and blend together.

    In a medium bowl whisk together the gluten free flour, baking powder, baking soda and sea salt. 

    Add the dry mixture to the wet mixture and blend just until mixed together. Add the finely chopped dried cranberries and mix in. 

    Break the dough into two halves. Using parchment paper on the top and bottom roll the dough to form it into logs on each baking sheet. The parchment paper will keep the dough from sticking to your hands.

    Bake at 325 degrees for 25-30 minutes.

    Cool completely on the baking sheet. I like to cool overnight. If you don't let them cool enough they may crumble when you try to cut them.

    Cut the logs into diagonal slices. Lay the slices out on a baking sheet so they aren't touching each other. 

    Bake at 325 degrees for 7-8 minutes. If you want your biscotti to be more crisp you can bake them longer.

    Let the biscotti cool.

    Using either a double boiler or microwaving for 30 seconds at a time in a microwave safe bowl melt the white chocolate chips.

    Dip the biscotti into the white chocolate. Use a spoon to coat half the biscotti. Scrape the bottom off on the edge of the bowl and place on a cooling rack.

    Before the chocolate has cooled sprinkle with demenara sugar for extra sparkle.

    • Prep Time: 20 minutes
    • Cook Time: 38 minutes
    • Category: Cookies
    • Method: Baking
    • Cuisine: Gluten Free

    Did you make this recipe?

    Tag @smallfarmbiglife on Instagram and hashtag it #smallfarmbiglife

    Top Tip

    I know biscotti has the reputation for being hard or bordering on stale sometimes. However, when you make biscotti at home you control how long you bake it the second time.

    The second baking is when biscotti tends to get hard. For this gluten free orange cranberry biscotti I bake it 7-8 minutes after I've cut it into diagonal strips. If you like a hard texture for dipping into coffee or tea you can bake your biscotti longer.

    The Perfect At Home Facial

    It's so simple to do DIY facial at home. These steps for the perfect at home facial will leave your skin glowing! A stay at home treatment is the perfect treat for you and your skin.

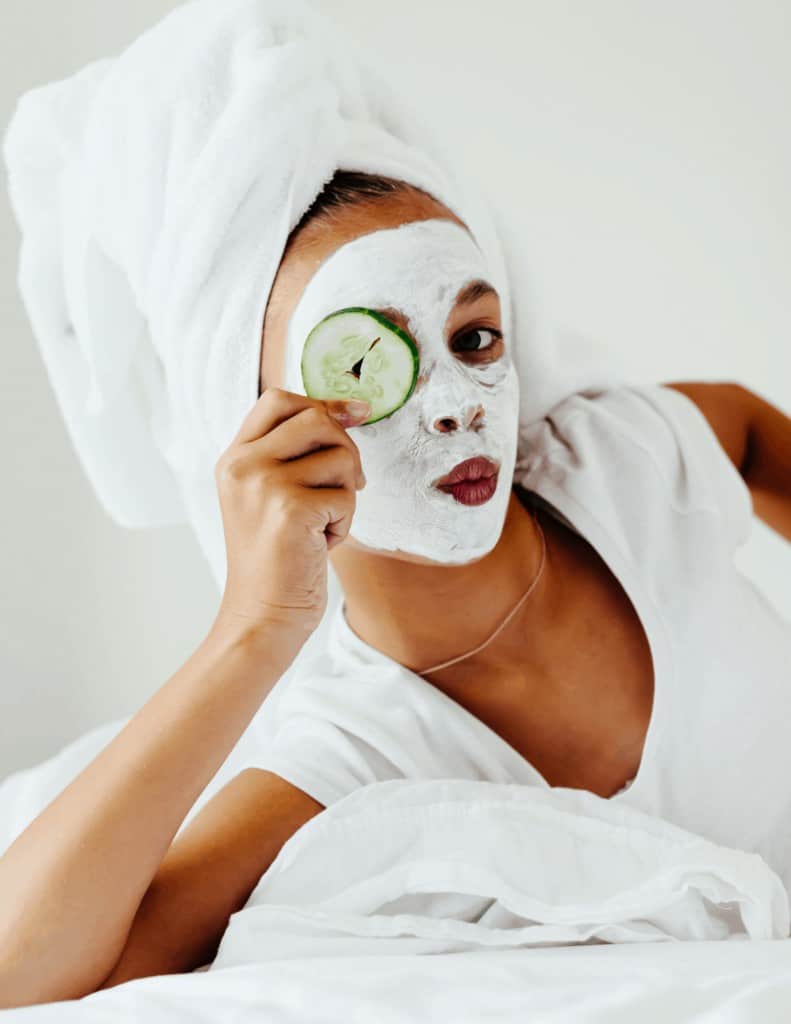
    a woman having the perfect at home facial with a face mask on holding a cucumber slice over one eye.

    Light a candle or turn on your diffuser with some calming lavender oil and treat yourself. It would be perfect to start this process with an epsom salt bath, but if time doesn't allow that jump right into this process of cleansing, masking, massaging and moisturizing your skin.

    Cleanse

    It's always important to start with a clean slate for the perfect at home facial.

    I like a double cleansing process if I'm wearing makeup. I start with e.l.f. SKIN Holy Hydration Makeup Melting Cleansing Balm. It is perfect to remove makeup and leaves your skin soft.

    Then I use the CeraVe Hydrating Oil Face Cleanser. It leaves my skin clean without stripping moisture from my face. I like to use these cotton clothes or this silicone face massager with this cleanser.

    Mask

    To get that perfect glow you need to purify your complexion. The Pacifica Kale Charcoal Ultimate Detox Mask does a great job of purifying and balancing your skin.

    In ten minutes it will absorb excess oil and draw out impurities. It leaves your skin with a smooth and polished complexion.

    This is my favorite weekly skincare treat!

    Massage

    Don't skip a facial massage. It increases blood flow and helps get rid of puffiness.

    Begin by rubbing Well People Bio Booster Oil Drops all over your face and neck.

    Then using your fingers or a jade roller start at your chin and work up to your forehead rolling from your nose out toward your hairline. Repeat 5 times on each side of your face.

    Then roll down the edge of your skin and hairline to your neck and finally to the top of your collarbone on both sides of your face.

    Moisturize

    End the perfect at home facial with a layer of moisturizer to leave your skin feeling luxurious and soft.

    For dry skin I love BYOMA Moisturizing Rich Cream. It leaves your skin rehydrated and refreshed.

    For combination skin I'm a fan of e.l.f. Holy Hydration Face Cream Fragrance Free. It leaves you with the perfect light layer of moisture.


    • « Previous Page
    • 1
    • …
    • 69
    • 70
    • 71
    • 72
    • 73
    • …
    • 88
    • Next Page »

    Welcome! I'm Elaine

    I'm so glad you are here! I share easy gluten free recipes from my small farm in Washington.

    Be sure to sign up for my newsletter to stay up to date on all of my new recipes.

    More about me...
    • Instagram
    • Pinterest
    • Facebook
    • Twitter
    • email

    Free gluten free recipe ebook
    My most loved recipes in one download, plus new recipes every Friday.
    Check your inbox! Your ebook is on its way.

    Easy Meals Recipes

    • Gluten Free Instant Pot Chili Mac and Cheese
    • Gluten Free Taco Casserole
    • Gluten Free Cowboy Baked Beans
    • Gluten Free Walking Taco Casserole
    • Gluten Free Creamy Beef and Mushroom Pasta
    • Gluten Free Instant Pot Chicken and Dumplings
    • Instant Pot Mexican Style Beef and Rice
    • Gluten Free Chicken Parmesan Pasta Casserole
    • Gluten Free One Pot Hamburger Helper Copycat
    • Gluten Free Salisbury Steak with Mushroom Gravy
    • Gluten Free Air Fryer Fajitas
    • Gluten Free Sloppy Joe Casserole

    Footer

    back to top

    About

    • Privacy Policy
    • Shop my Amazon Page
    • Follow me on LTK

    Newsletter

    • Sign Up! for emails and updates

    Contact

    • Contact
    • Media Kit
    • About Me

    As an Amazon Associate I earn from qualifying purchases.

    I may get commissions for purchases made through links on this site.

    Copyright © 2026 Brunch Pro on the Brunch Pro Theme