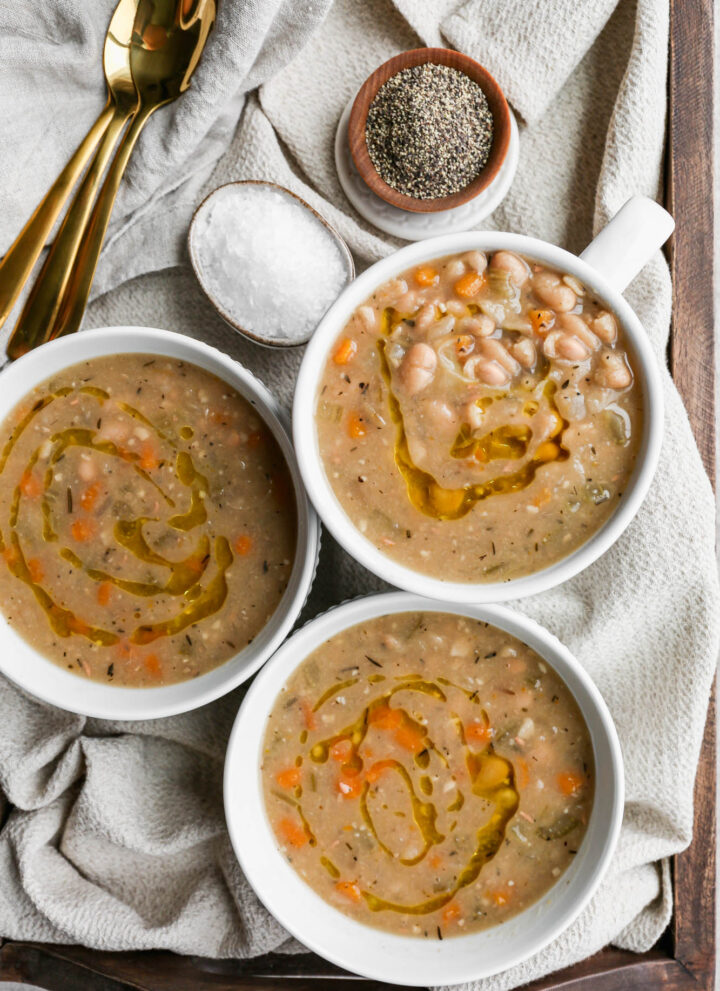
This easy recipe for instant pot vegetarian navy bean soup is the perfect cozy meal! This healthy white bean soup is made with dried beans. It's the perfect comfort food for meals on a cold day.
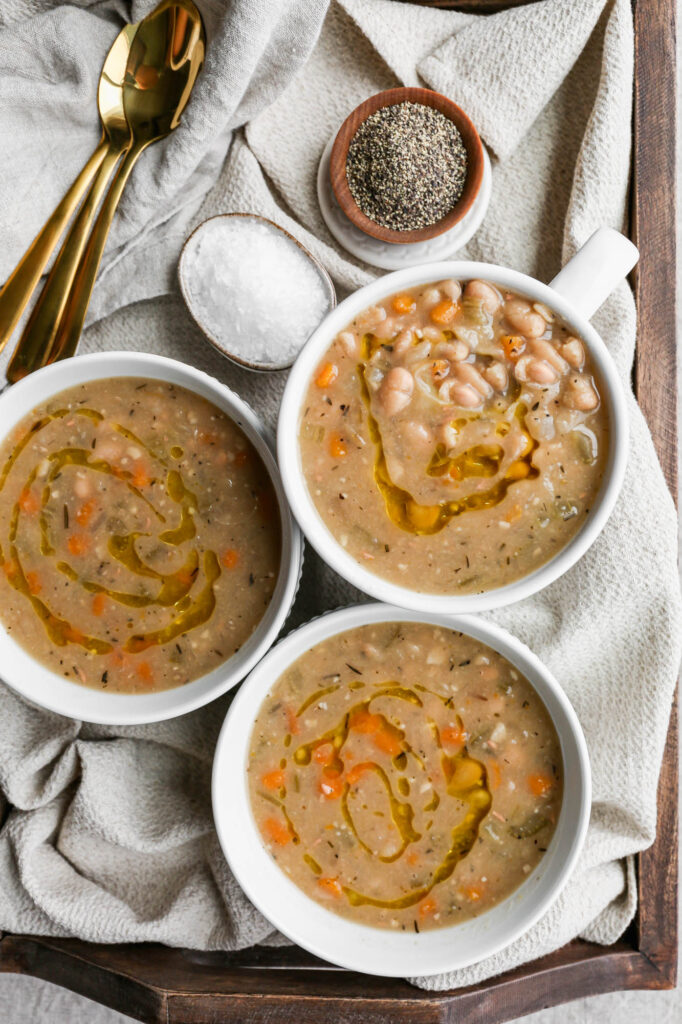
Instant Pot Vegetarian Navy Bean Soup is a hearty and healthy dish packed with nutritious ingredients. This savory soup features dried navy beans and vegetables, making it a perfect option for meal prep or a quick dinner.
With easy vegan recipes and pressure cooker methods, this soup is not only delicious but also fits well into gluten-free and vegetarian diets. Ideal for cozy nights, it offers a comforting blend of flavors that showcases the versatility of navy beans.
If you are looking fore more Instant Pot recipes try these: The Best Gluten Free Instant Pot Recipes
You can find all my soup recipes here: Gluten Free Soups Recipes

Instructions
Soak your navy beans in a bowl of water for 16-24 hours. Strain and rinse the beans thoroughly. Set aside.
In a 6-quart instant pot add olive oil and press the saute button. Saute the onions, carrots and celery for 3-5 minutes to soften.
Add the garlic, salt, pepper, thyme, rosemary, cumin, bay leaves, beans, vegetable stock and water to the instant pot. Stir to combine the ingredients. Press the two bay leaves into the soup mixture.
Using manual pressure cook for 30 minutes. Let the steam release naturally.
Once the steam has released remove the lid. Carefully remove the bay leaves and then serve the soup.
Supplies

Frequently Asked Questions
The first night I make soup in my Instant Pot I let it cool completely. Then I put the lid on or plastic wrap over top and store it in the refrigerator. The next night when I want to reheat the soup I take it out of the fridge and remove the plastic wrap.
I place the stainless pot back in my Instant Pot and put the lid on making sure it's set to sealed. Then I press the manual button and set the time for 3 minutes. The soup will heat up while it's coming to pressure and it only takes a short amount of time to have hot soup ready to serve.
The official instant pot manual calls for at least 8 ounces or 1 cup of liquid for the instant pot to come to pressure. For this recipe you will be using 32 ounces of vegetable broth. That is more than enough liquid for your pressure pot to work properly.

More Recipes You Might Enjoy


I get a lot of my ingredients from Thrive Market. Thrive Market has been a game changer for me eating gluten free. They have so many options I can't get at my rural grocery stores! Use this link to get 25% off your first order!
Instant Pot Vegetarian Navy Bean Soup
- Total Time: 45 minutes
- Yield: 5 servings 1x
- Diet: Gluten Free
Description
This easy recipe for instant pot vegetarian navy bean soup is the perfect cozy meal! This healthy white bean soup is made with dried beans. It's the perfect comfort food for meals on a cold day.
Ingredients
- 1 pound Dried Navy Beans, soaked in water 16-24 hours
- 1 Tbsp. Olive Oil
- 1 large Yellow Onion, chopped
- 3 Carrots, chopped
- 4 Celery Stalks, chopped
- 2 Tbsp. Minced Garlic
- 1 tsp. Sea Salt
- ½ tsp. Coarse Ground Black Pepper
- 1 tsp. Dried Thyme
- ½ tsp. Dried Rosemary
- 1 tsp. Ground Cumin
- 2 Bay Leaves
- 1 - 32 ounce carton Vegetable Broth
- 2 cups Water
Instructions
Soak your navy beans in a bowl of water for 16-24 hours. Strain and rinse the beans thoroughly. Set aside.
In a 6-quart instant pot add olive oil and press the saute button. Saute the onions, carrots and celery for 3-5 minutes to soften.
Add the garlic, salt, pepper, thyme, rosemary, cumin, bay leaves, beans, vegetable stock and water to the instant pot. Stir to combine the ingredients. Press the two bay leaves into the soup mixture.
Using manual pressure cook for 30 minutes. Let the steam release naturally.
Once the steam has released remove the lid. Carefully remove the bay leaves and then serve the soup.
- Prep Time: 15 minutes
- Cook Time: 30 minutes
- Category: Soup
- Method: Instant Pot
- Cuisine: Gluten Free
Top Tip
This soup is a great dairy free soup option. When I created this recipe I wanted a soup that was lighter, but still creamy and delicious. I love to make a pressure pot of this soup for my lunches when I'm meal prepping.