Small Farm Big Life

  • Gluten Free Recipe Index
  • Subscribe
  • Resources
menu icon
go to homepage
  • Home
  • Gluten Free Recipe Index
  • Subscribe
  • My Story
  • Resources
  • Free Guides
    • Email
    • Facebook
    • Instagram
    • Pinterest
  • subscribe
    search icon
    Homepage link
    • Home
    • Gluten Free Recipe Index
    • Subscribe
    • My Story
    • Resources
    • Free Guides
    • Email
    • Facebook
    • Instagram
    • Pinterest
  • ×

    Gluten Free Tater Tot Breakfast Casserole

    This easy recipe for gluten free tater tot breakfast casserole is perfect for any meal! This cheesy hotdish is made with eggs and bacon. I love to serve this loaded quiche for dinner, brunch or breakfast.

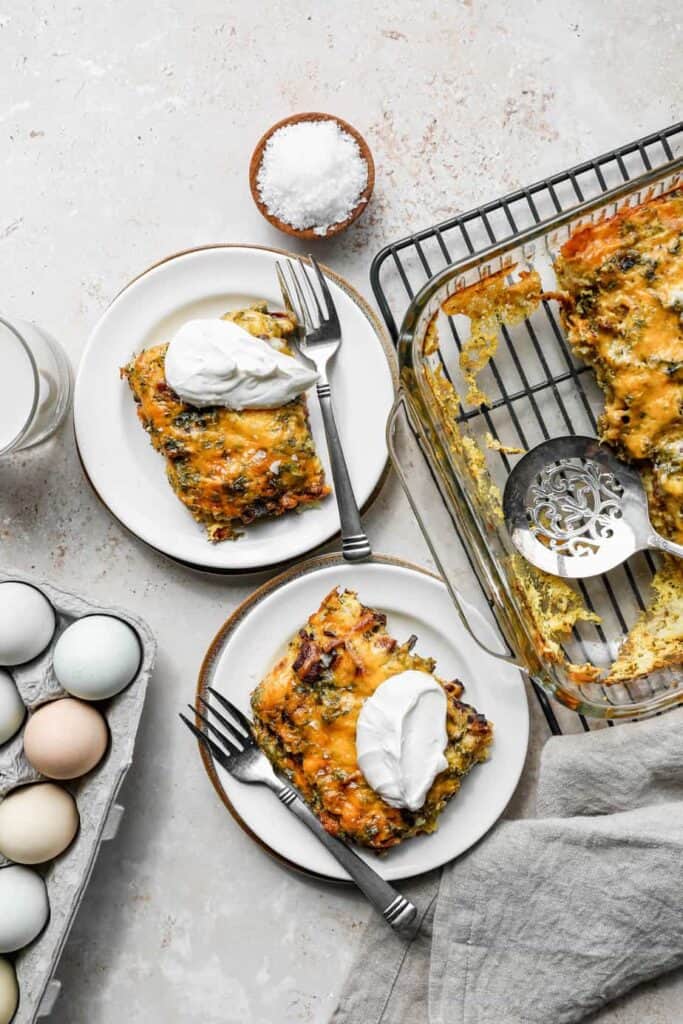
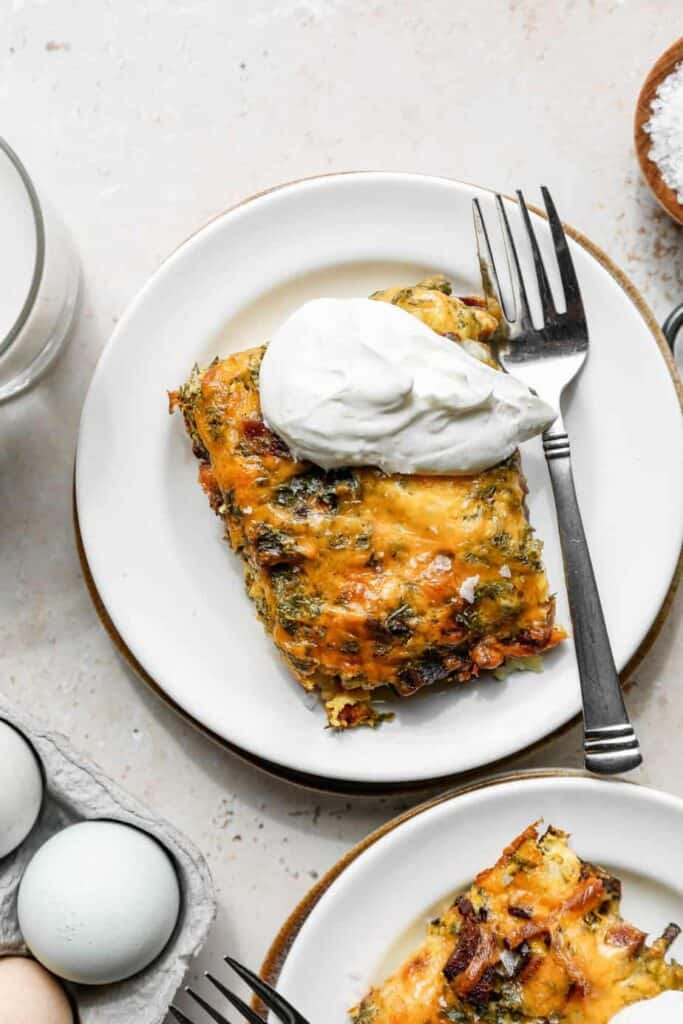
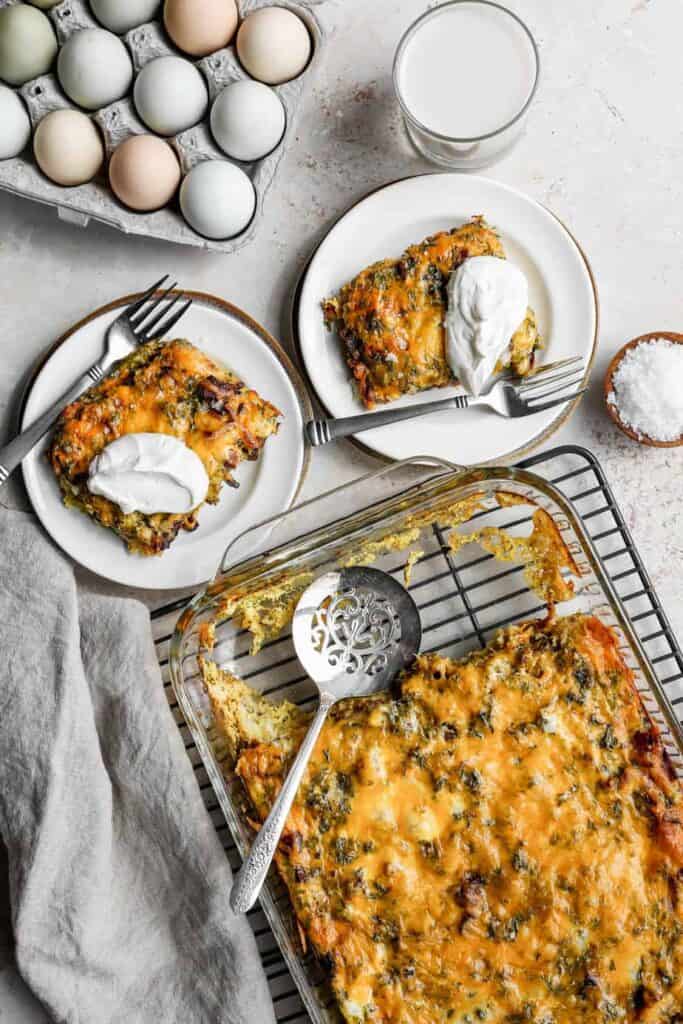
    two white plates with slices of gluten free tater tot breakfast casserole with dollops of sour cream on top next to a 9x13 baking dish of the casserole

    This Gluten Free Tater Tot Breakfast Casserole is the ultimate breakfast comfort food, perfect for any weekend breakfast or brunch. Packed with crispy, cheesy tater tots, eggs, and bacon, this loaded breakfast casserole is a hearty, satisfying meal that will please even the pickiest eaters.

    It's a gluten free casserole recipe that's easy to make and ideal for feeding a crowd at a breakfast buffet or family gathering.

    With a blend of savory bacon and eggs, cheesy tater tots, and the perfect balance of breakfast ingredients, this casserole is sure to become your favorite casserole for breakfast lovers.

    If you are looking for more casserole ideas you might also enjoy my Easy Ground Beef Nacho Casserole, my Gluten Free Cheesy Tater Tot Casserole, my Gluten Free Sloppy Joe Casserole or my Gluten Free Biscuits and Gravy Casserole.

    You can find all of my breakfast recipes here: Gluten Free Breakfast Recipes

    one white plates with slices of gluten free tater tot breakfast casserole with dollops of sour cream on top next to a 9x13 baking dish of the casserole
    [feast_advanced_jump_to]

    Ingredients

    • Bacon
    • Frozen Tater Tots
    • Buttermilk Blend Powder
    • Dried Parsley Flakes
    • Onion Powder
    • Garlic Powder
    • Sea Salt
    • Ground Black Pepper
    • Cheddar Cheese
    • Eggs
    • Milk

    Instructions

    • Preheat your oven to 350 degrees. Grease a 9x13 inch baking dish with coconut oil or butter.
    • In an even layer place the tater tots, cooked bacon crumbles and shredded cheese into the baking dish. Set aside.
    • In a large bowl whisk together the eggs, milk, buttermilk powder, parsley, onion powder, garlic powder, salt and pepper. Pour this mixture over the tater tots, bacon and cheese in the baking dish.
    • Bake at 350 degrees for 40-45 minutes. The eggs will be lightly browned on top and the casserole will be bubbly around the edges when it's done.
    • Let cool slightly and serve with sour cream.

    Supplies

    Frequently Asked Questions

    Is tater tot casserole gluten free?

    Yes! This gluten free tater tot breakfast casserole is made gluten free by using tater tots that are gluten free. Most tater tots should automatically be gluten free, but that doesn't mean they aren't processed with other items that have gluten. Always read your labels and make sure your tater tots are gluten free!

    Can tater tot casserole be frozen?

    Yes. This casserole makes a great freezer meal. Simply follow the instructions to make this cheesy quiche and then once it has cooled completely freeze it. This recipe would be perfect to double and make one meal for dinner and one meal to freeze for later.

    More Recipes You Might Enjoy

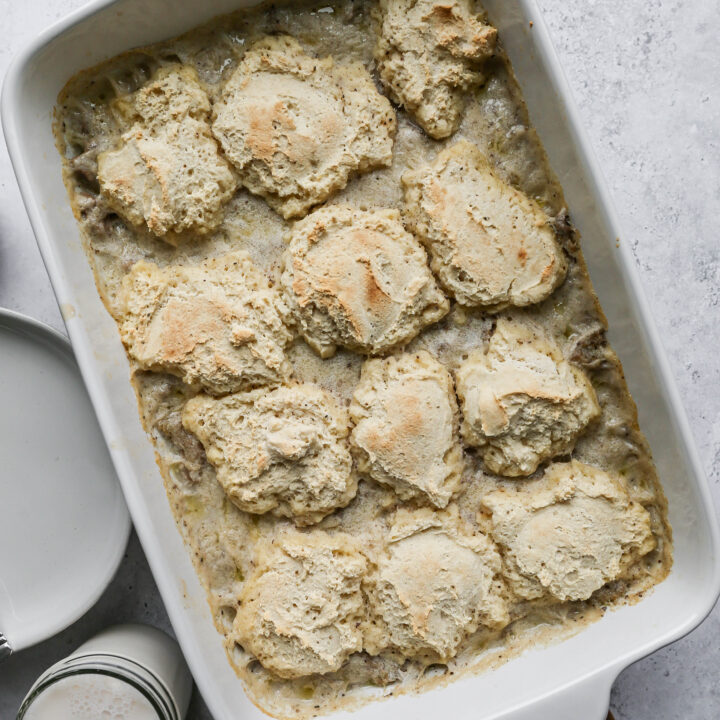
    • Gluten Free Biscuits and Gravy Casserole
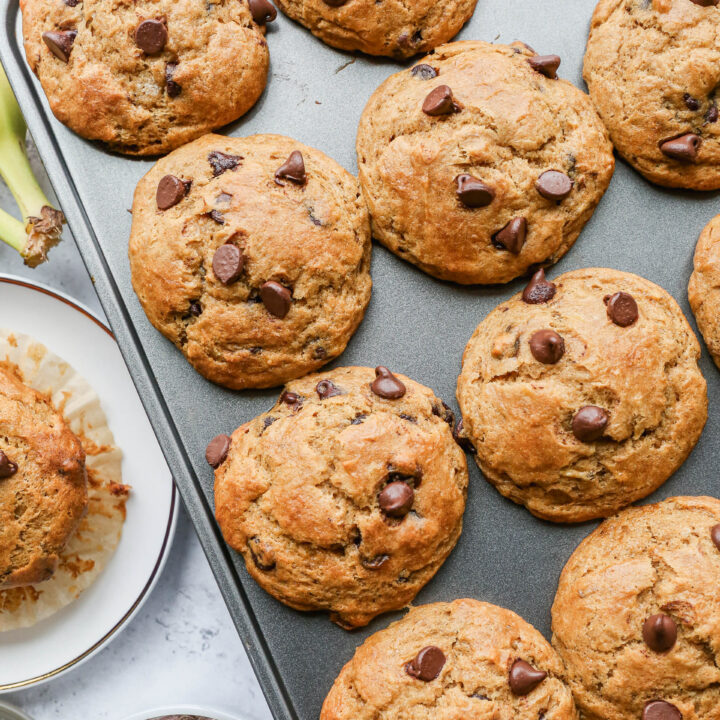
    • Gluten Free Chocolate Chip Banana Muffins
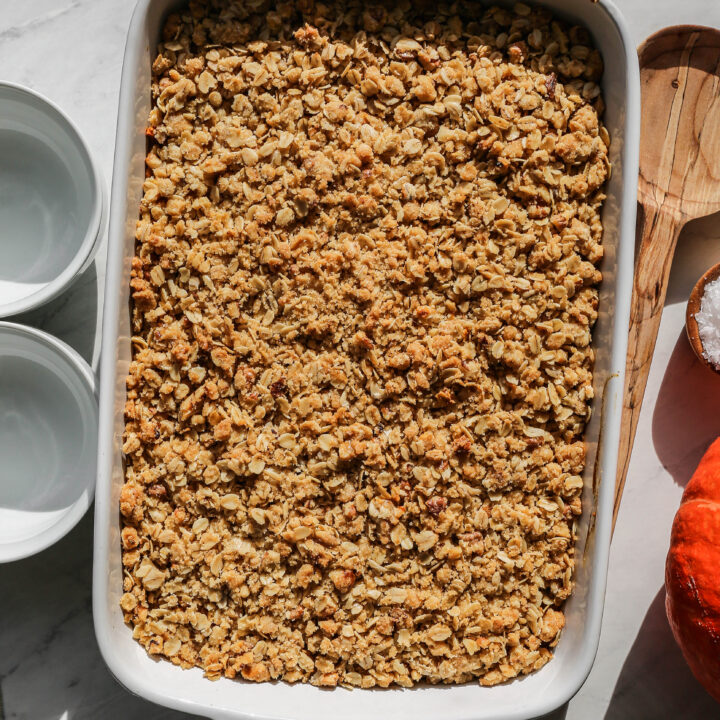
    • Pumpkin Apple Baked Oatmeal with Streusel Topping
    • Gluten Free Air Fryer Apple Fritters

    I get some of my ingredients from Thrive Market. Thrive Market has been a game changer for me eating gluten free. They have so many options I can't get at my rural grocery stores! Use this link to get 25% off your first order!

    Print
    clock clock iconcutlery cutlery iconflag flag iconfolder folder iconinstagram instagram iconpinterest pinterest iconfacebook facebook iconprint print iconsquares squares iconheart heart iconheart solid heart solid icon

    Gluten Free Tater Tot Breakfast Casserole


    5 Stars 4 Stars 3 Stars 2 Stars 1 Star

    No reviews

    • Author: Elaine VanVleck
    • Total Time: 1 hour 20 minutes
    • Yield: 8 servings 1x
    • Diet: Gluten Free
    Print Recipe
    Pin Recipe

    Description

    This easy recipe for gluten free tater tot breakfast casserole is perfect for any meal! This cheesy hotdish is made with eggs and bacon. I love to serve this loaded quiche for dinner, brunch or breakfast.


    Ingredients

    Scale

    1 pound Bacon, cooked and crumbled
    1 - 32 ounce bag Frozen Tater Tots
    ⅓ cup Buttermilk Powder or Buttermilk
    ¼ cup Dried Parsley Flakes
    2 tsp. Onion Powder
    2 tsp. Garlic Powder
    1 tsp. Sea Salt
    ½ tsp. Ground Black Pepper
    2 cups Cheddar Cheese, shredded
    8 large Eggs
    1 ½ cups Milk
    Sour Cream


    Instructions

    Preheat your oven to 350 degrees. Grease a 9x13 inch baking dish with coconut oil or butter.

    In an even layer place the tater tots, cooked bacon crumbles and shredded cheese into the baking dish. Set aside.

    In a large bowl whisk together the eggs, milk, buttermilk powder, parsley, onion powder, garlic powder, salt and pepper. Pour this mixture over the tater tots, bacon and cheese in the baking dish.

    Bake at 350 degrees for 40-45 minutes. The eggs will be lightly browned on top and the casserole will be bubbly around the edges when it's done.

    Let cool slightly and serve with sour cream.

    • Prep Time: 35 minutes
    • Cook Time: 45 minutes
    • Category: Casserole
    • Method: Baking
    • Cuisine: Gluten Free

    Did you make this recipe?

    Tag @smallfarmbiglife on Instagram and hashtag it #smallfarmbiglife

    Top Tip

    I cook my bacon the day before in the oven at 375 degrees for 30 minutes. Then, I flip it and cook 8-10 minutes more until it's done. I move the bacon from the baking sheet to a plate with a paper towel to soak up excess grease. Finally, let the bacon cool completely before chopping into hardy chunks for this recipe.

    With the bacon already cooked it makes this recipe really fast to put together for a weeknight meal or weekend breakfast or brunch. To speed up that process you could put the tater tots in an even layer in your baking dish, top with cheese and bacon. Then store in the refrigerator overnight.

    If you choose to put part of the casserole together the night before you will need to cook this dish for less time when the tater tots are thawed. I would reduce the cook time by 10-12 minutes and then check to see if the eggs are done. The eggs will be browned on top slightly and the dish should be bubbling around the edges a little.

    farm fresh eggs in a carton next to two white plates of gluten free tater tot casserole with dollops of sour cream on top

    Gluten Free Italian Almond Flour Bread

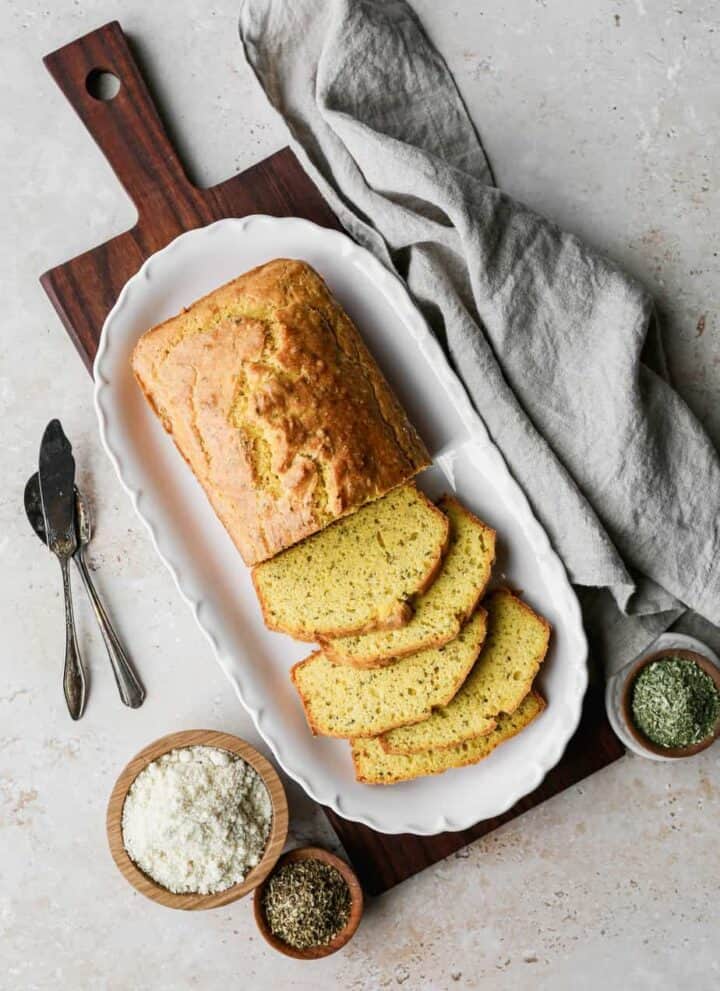
    This Gluten Free Italian Almond Flour Bread is one of those recipes that makes you forget you are eating gluten free bread. Almond flour, parmesan cheese, basil, oregano, and garlic are baked together into a golden and savory loaf that smells incredible coming out of the oven.

    It is hearty enough for sandwiches, beautiful toasted with butter, and makes the most amazing gluten free garlic bread you have ever had.

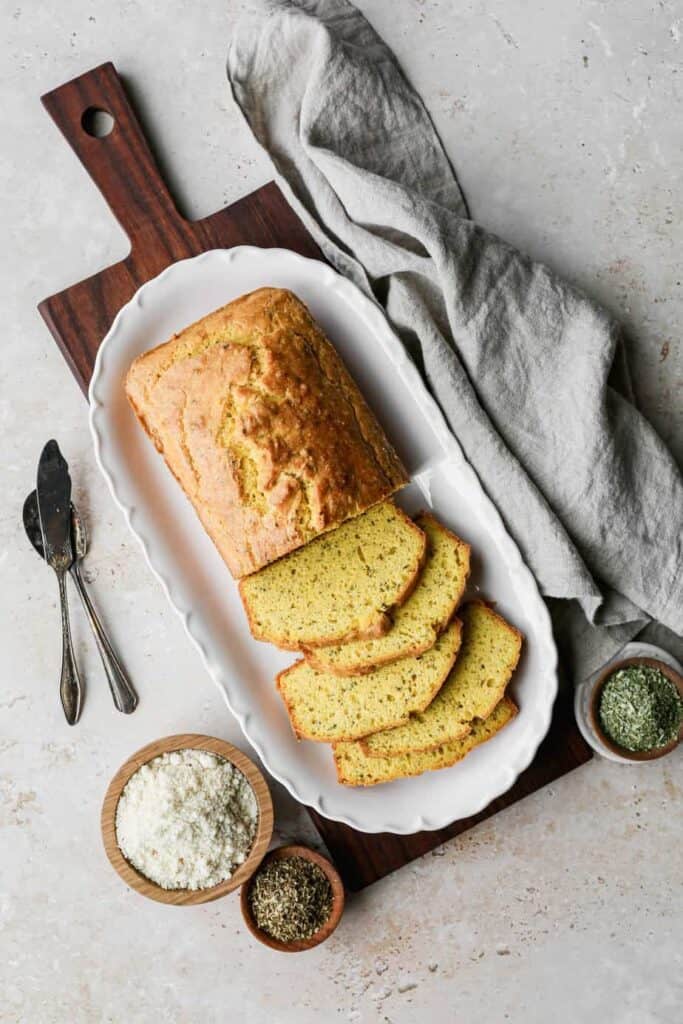
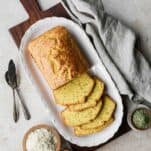
    a loaf of gluten free Italian Keto bread on a white platter with a few slices cut from it

    What I love most about this recipe is how simple it is to put together. No yeast, no kneading, and no waiting for dough to rise.

    You whisk the wet ingredients, fold in the dry ingredients, pour the batter into a loaf pan, and bake.

    The Italian herbs and parmesan give this bread a flavor that sets it completely apart from any other almond flour bread you have tried. If you have been searching for a gluten free bread that actually tastes good, this is the one to make.

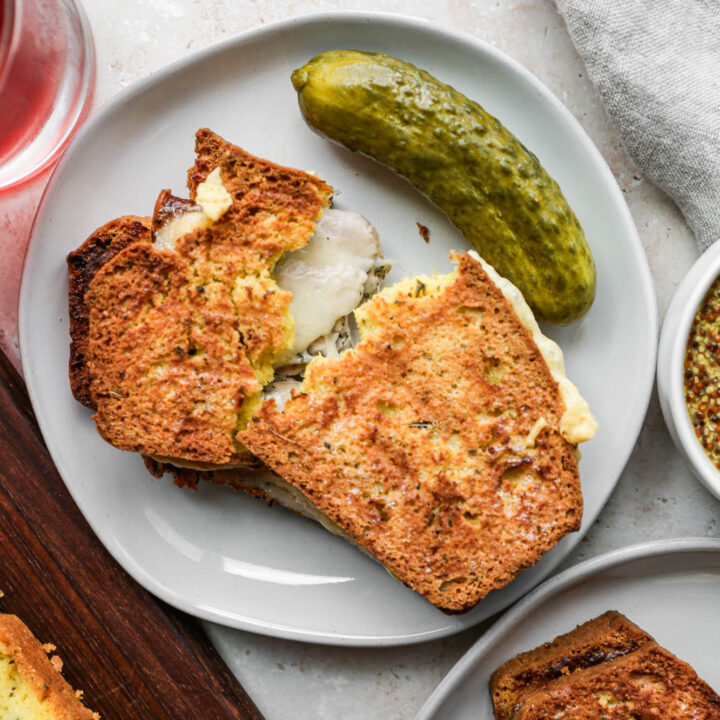
    I love to use this bread to make toasted sandwiches. Here is the recipe for one of my favorite lunches: Low Carb Air Fryer Turkey Sandwich

    If you are looking for more bread recipes try my Gluten Free Cheesy Sourdough Bread, my Gluten Free Sourdough Sandwich Bread, my Gluten Free Herbes de Provence Almond Flour Bread or my Gluten Free Sourdough Bread.

    You can find all of my meals recipes here: Gluten Free Meal Recipes

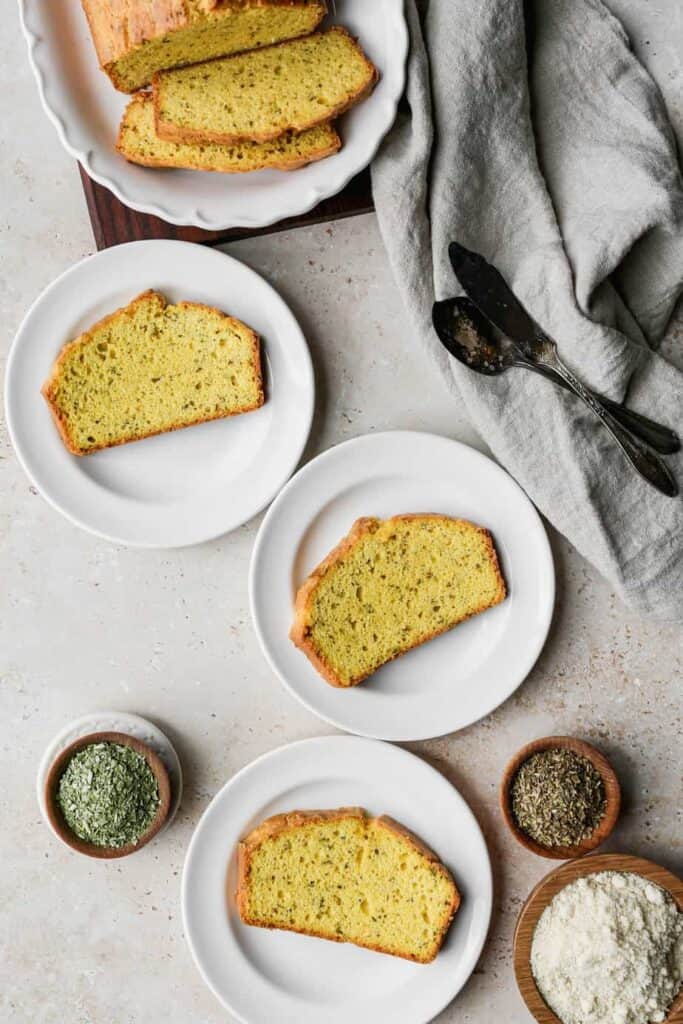
    a loaf of gluten free italian keto bread on a white platter with three slices on white plates
    [feast_advanced_jump_to]

    Why Almond Flour Works for Gluten Free Bread

    Almond flour is one of the best alternatives to traditional wheat flour for gluten free baking. Here is why it works so well for bread.

    • It is naturally gluten free and grain free. Almond flour is made from blanched almonds ground to a fine powder. There is no wheat, no gluten, and no grains involved.
    • It gives bread a moist and tender crumb. Almond flour has a higher fat content than traditional flour which keeps baked goods moist and prevents the dry crumbly texture that plagues so many gluten free breads.
    • It is packed with nutrients. Almond flour is high in protein, healthy fats, vitamin E, and magnesium. It also has fewer carbohydrates per serving than traditional flour.
    • It does not require special techniques. Unlike some gluten free flours, almond flour does not need xanthan gum or psyllium husk to create structure in a quick bread like this one. The eggs provide all the structure and lift you need.

    Tips for Success

    A few simple tips will help you get the best results from this recipe every time.

    • Use finely ground blanched almond flour. Coarser almond meal will give your bread a grittier texture. Look for super fine almond flour for the best results.
    • Beat your eggs until light and frothy. This is the most important step in this recipe. Fully beaten eggs create air in the batter which gives the bread a lighter texture and better rise.
    • Use farm fresh eggs if you can. I use duck eggs from our farm which give the bread a slightly darker and richer color. Any large eggs work beautifully but farm fresh eggs will give you the best flavor.
    • Let the bread cool completely before slicing. Almond flour bread slices much more cleanly once it has cooled fully. Slicing it warm may cause it to crumble.
    • Store it in the refrigerator. Since this bread has no preservatives it keeps best in an airtight container in the refrigerator rather than on the counter.

    Serving Suggestions

    This Italian almond flour bread is incredibly versatile. Here are some of my favorite ways to serve it.

    • Toasted with butter. This is the simplest and most satisfying way to enjoy this bread. Toast a slice until golden and spread with salted butter while it is still warm.
    • As a sandwich bread. This bread is sturdy enough to hold up to sandwich fillings. Turkey, avocado, and a little Dijon mustard on toasted slices makes a great lunch.
    • As gluten free garlic bread. Slice the loaf, brush each slice with garlic butter, and broil until golden. The Italian herbs and parmesan in the bread make it taste like garlic bread was always the plan.
    • Dipped in olive oil. Slice and serve alongside a bowl of olive oil and balsamic vinegar for dipping. The Italian herb flavor makes this a natural pairing.
    • With soup. This bread pairs beautifully with gluten free soups and stews. Use it to soak up the broth in a bowl of tomato soup or chicken vegetable soup.

    Storage

    Store this bread in an airtight container in the refrigerator for up to five days. Because there are no preservatives it will spoil quickly at room temperature, especially in warm weather.

    For longer storage this bread freezes beautifully. Wrap individual slices in foil and store them in a freezer safe bag for up to three months. Defrost slices at room temperature or toast them directly from frozen.

    Top Tip

    Use a stand mixer with the whisk attachment to beat your eggs and do not rush this step. Fully beaten eggs are what give this bread its structure and lift since almond flour has no gluten to create that on its own. Beat the eggs until they are visibly light, frothy, and increased in volume before adding any other ingredients. This single step makes the difference between a dense flat loaf and a bread that rises beautifully and slices cleanly.

    Frequently Asked Questions

    Can I freeze this gluten free Italian almond flour bread?

    Yes! This bread freezes really well. Wrap individual slices in foil and store in a freezer safe bag or container for up to three months. Defrost at room temperature or toast directly from frozen.

    Can I make this bread without a stand mixer?

    Yes. A hand mixer works just as well. The key is beating the eggs until they are light and frothy before adding any other ingredients. Do not skip this step or try to mix by hand since fully beaten eggs are what give this bread its structure and rise.

    Why is my almond flour bread dense or flat?

    The most common reason is under beaten eggs. Make sure you beat the eggs until they are visibly light, frothy, and increased in volume before folding in the dry ingredients. Also check that your baking powder is fresh since old baking powder will not give the bread the lift it needs.

    Can I use this bread for garlic bread?

    Absolutely. It is one of my favorite ways to serve it. Slice the loaf, brush each slice with garlic butter, and broil until golden. The Italian herbs and parmesan already baked into the bread make it taste like garlic bread was always the plan.

    Didn't find the answer you're looking for?

    Ask AI to answer based on this recipe:

    ChatGPT
    Google AI
    Perplexity
    Grok
    Claude

    Supplies

    More Recipes You Might Enjoy

    • Low Carb Air Fryer Turkey Sandwich
    • Gluten Free Herbes de Provence Almond Flour Bread
    • Slow Cooker Steak and Mushrooms
    • Air Fryer Garlic Steak Bites

    I get a lot of my ingredients from Thrive Market. Thrive Market has been a game changer for me eating gluten free. They have so many options I can't get at my rural grocery stores! Use this link to get 40% off your first order!

    Print
    clock clock iconcutlery cutlery iconflag flag iconfolder folder iconinstagram instagram iconpinterest pinterest iconfacebook facebook iconprint print iconsquares squares iconheart heart iconheart solid heart solid icon

    Gluten Free Italian Keto Bread


    5 Stars 4 Stars 3 Stars 2 Stars 1 Star

    No reviews

    • Author: Elaine VanVleck
    • Total Time: 1 hour 10 minutes
    • Yield: 1 loaf 1x
    • Diet: Gluten Free
    Print Recipe
    Pin Recipe

    Description

    A savory gluten free almond flour bread made with parmesan cheese, dried basil, oregano, garlic powder, and olive oil. This Italian herb loaf bakes up golden and flavorful and is perfect for gluten free sandwiches, garlic bread, or toasting with butter.


    Ingredients

    Scale
    • 2 cups Almond Flour
    • 1 tsp. Baking Powder
    • ½ tsp. Xanthan Gum
    • ½ tsp. Sea Salt
    • 2 tsp. Dried Basil
    • 1 tsp. Dried Oregano
    • ½ tsp. Onion Powder
    • ½ tsp. Garlic Powder
    • ¼ cup Parmesan Cheese, finely shredded
    • 7 large Eggs
    • ⅓ cup Unsalted Butter, melted
    • 2 Tbsp. Olive Oil

    Instructions

    Preheat your oven to 350 degrees. Grease a 9x5-inch metal loaf pan with coconut oil or butter. Set aside.

    Using the whisk attachment on your stand mixer beat the eggs until they are light and frothy. Add the melted butter and olive oil and blend into the eggs.

    Add the dry ingredients to the wet ingredients and using a spatula fold them together until they are combined. 

    Pour the bread batter into your greased 9x5 inch metal bread pan.

    Bake at 350 degrees for 45-55 minutes. The bread will be lightly browned on top and a toothpick inserted in the middle will come out clean.

    If you made this recipe please leave a star rating and comment below. It helps other readers find this recipe and means so much to me.

    • Prep Time: 15 minutes
    • Cook Time: 55 minutes
    • Category: Bread
    • Method: Baking
    • Cuisine: American

    Did you make this recipe?

    Tag @smallfarmbiglife on Instagram and hashtag it #smallfarmbiglife

    If you make this Gluten Free Italian Almond Flour Bread I would love to hear what you think! Leave a comment below and let me know how it turned out or tag me on Instagram so I can see your loaf.

    This is one of those gluten free bread recipes that earns a permanent spot in your weekly baking rotation, so save it to your favorite Pinterest board so you always have it ready when you need a delicious gluten free bread for sandwiches, garlic bread, or just toasting with butter!

    Ingredients

    • Almond Flour
    • Baking Powder
    • Xanthan Gum
    • Sea Salt
    • Dried Basil
    • Dried Oregano
    • Onion Powder
    • Garlic Powder
    • Parmesan Cheese
    • Eggs
    • Unsalted Butter
    • Olive Oil

    Instructions

    Preheat your oven to 350 degrees. Grease a 9x5-inch metal loaf pan with coconut oil or butter. Set aside.

    Using the whisk attachment on your stand mixer beat the eggs until they are light and frothy. Add the melted butter and olive oil and blend into the eggs.

    Add the dry ingredients to the wet ingredients and using a spatula fold them together until they are combined. 

    Pour the bread batter into your greased 9x5 inch metal bread pan.

    Bake at 350 degrees for 45-55 minutes. The bread will be lightly browned on top and a toothpick inserted in the middle will come out clean.

    Gluten Free Bagels

    This easy recipe for gluten free bagels are boiled and then baked to get the perfect texture. These homemade bagels are made with yeast and I used everything seasoning on top. They are perfect for breakfast or a snack with cream cheese spread on them.

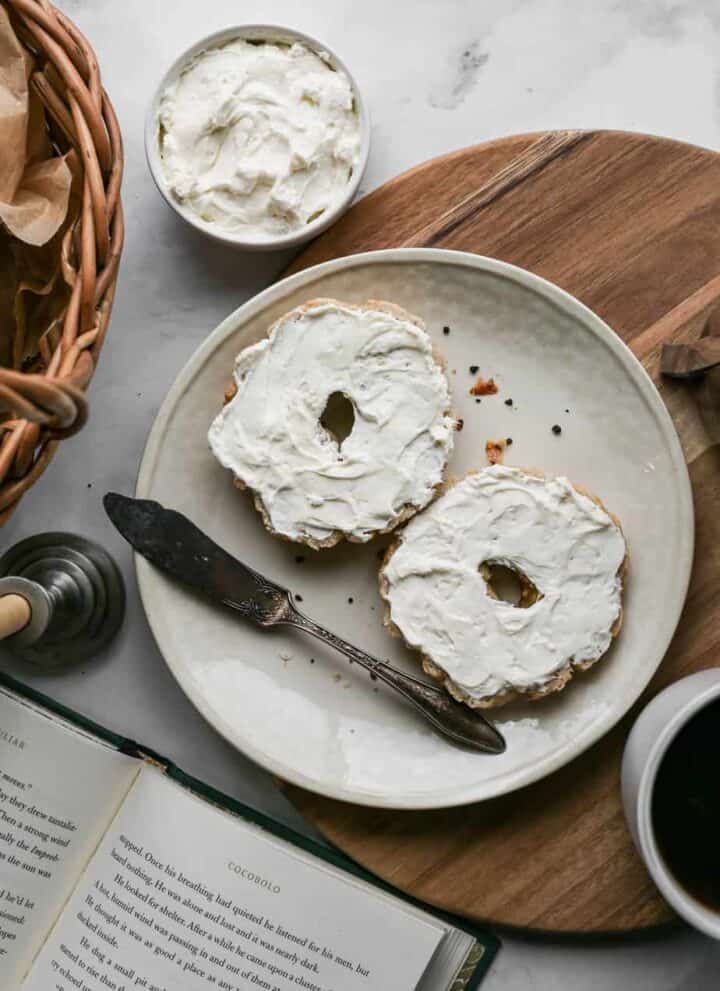
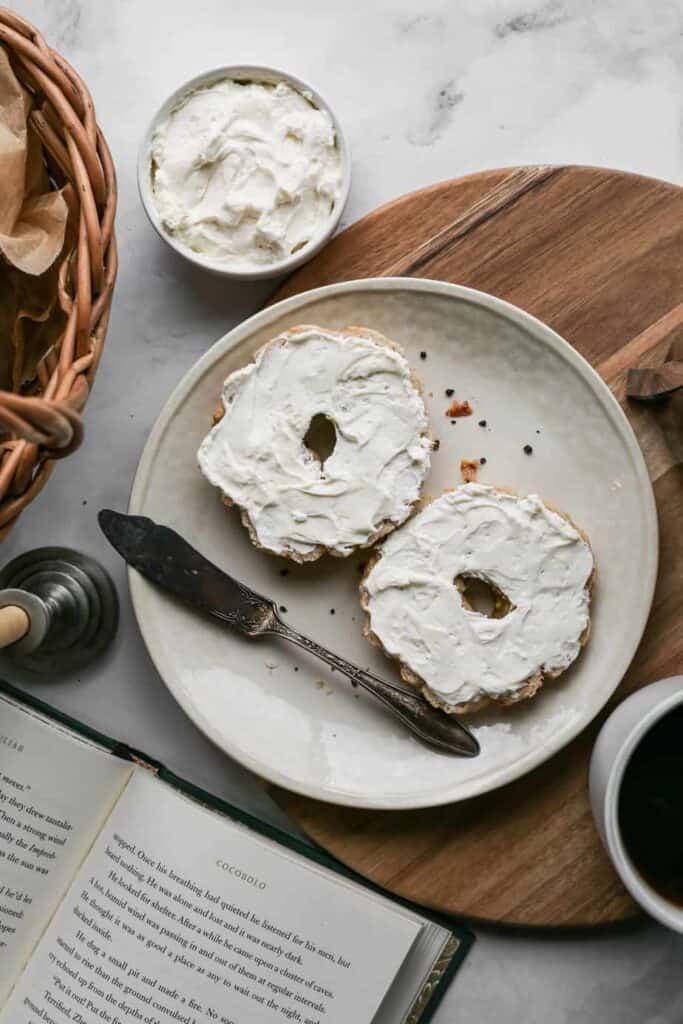
    a plate with a gluten free bagel cut in half with cream cheese spread onto it next tot a basket full of bagels

    Buying gluten free bagels can get expensive! I found some of the brands upset my gut and others were too dry for me. So I started testing making my own. I think what is key for this gluten free version is boiling them in molasses water.

    If you are looking for more bread recipes try my Gluten Free Sourdough Bread, my Gluten Free Gingerbread Scones, my Gluten Free Cornbread or my Gluten Free Buttermilk Drop Biscuits.

    Here are all of my breakfast recipes: Gluten Free Breakfast Recipes

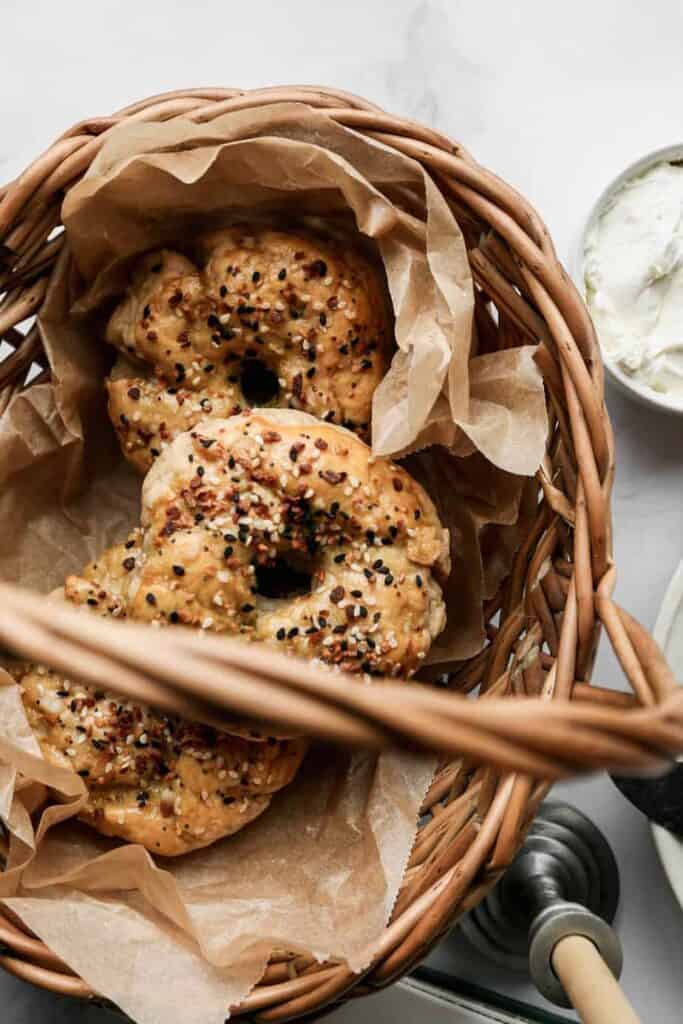
    a basket full of gluten free bagels with everything seasoning on top
    [feast_advanced_jump_to]

    Ingredients

    Warm Water
    Active Dry Yeast
    Honey
    Gluten Free Flour
    Sea Salt
    Unsalted Butter
    Baking Soda
    Molasses
    Egg

    Instructions

    Preheat your oven to 425 degrees. Line a baking sheet with parchment paper and set aside. 

    In a small bowl add the warm water and honey. Sprinkle the yeast on top and let stand for 5-10 minutes until the mixture starts to get foamy on top. 

    In the bowl of your stand mixer beat together the gluten free flour, salt and butter. You can use your dough hook or the beater at this point. Add the yeast mixture and blend until a dough forms.

    Divide the dough into five even balls. Form each ball into a bagel shape and place on the baking sheet.

    Bring a large pot of water to a boil. Add the baking soda and molasses to the boiling water.

    Carefully lower 1-2 bagels at a time into the boiling water. Boil on one side for 3 minutes and then flip and boil on the other side for 1 minute. Carefully remove them from the pot and place them on the baking sheet.

    In a small bowl beat the egg until frothy. Brush each bagel with egg and then sprinkle with salt or everything bagel seasoning. 

    Bake at 425 degrees for 20-25 minutes. The bagels will be golden brown when they are done.

    Let them cool completely before storing them in an airtight container.?

    Supplies

    More Recipes You Might Enjoy

    • Gluten Free Buttermilk Drop Biscuits
    • Gluten Free Gingerbread Scones
    • Gluten Free Millet Drop Biscuits
    • Gluten Free Sweet Potato Biscuits

    I get a lot of my ingredients from Thrive Market. Thrive Market has been a game changer for me eating gluten free. They have so many options I can't get at my rural grocery stores! Use this link to get 40% off your first order!

    Print
    clock clock iconcutlery cutlery iconflag flag iconfolder folder iconinstagram instagram iconpinterest pinterest iconfacebook facebook iconprint print iconsquares squares iconheart heart iconheart solid heart solid icon

    Gluten Free Bagels


    5 Stars 4 Stars 3 Stars 2 Stars 1 Star

    No reviews

    • Author: Elaine VanVleck
    • Total Time: 55 minutes
    • Yield: 5 bagels 1x
    • Diet: Gluten Free
    Print Recipe
    Pin Recipe

    Description

    This easy recipe for gluten free bagels are boiled and then baked to get the perfect texture. These homemade bagels are made with yeast and I used everything seasoning on top. They are perfect for breakfast or a snack with cream cheese spread on them.


    Ingredients

    Units Scale
    • 1 cup Warm Water
    • 1 ¼ tsp. Active Dry Yeast
    • 2 tsp. Honey
    • 3 cups Gluten Free Flour
    • ½ tsp. Sea Salt
    • 4 Tbsp. Unsalted Butter, at room temperature
    • ¼ cup Baking Soda
    • 1 Tbsp. Molasses
    • 1 large Egg

    Instructions

    Preheat your oven to 425 degrees. Line a baking sheet with parchment paper and set aside. 

    In a small bowl add the warm water and honey. Sprinkle the yeast on top and let stand for 5-10 minutes until the mixture starts to get foamy on top. 

    In the bowl of your stand mixer beat together the gluten free flour, salt and butter. You can use your dough hook or the beater at this point. Add the yeast mixture and blend until a dough forms.

    Divide the dough into five even balls. Form each ball into a bagel shape and place on the baking sheet.

    Bring a large pot of water to a boil. Add the baking soda and molasses to the boiling water.

    Carefully lower 1-2 bagels at a time into the boiling water. Boil on one side for 3 minutes and then flip and boil on the other side for 1 minute. Carefully remove them from the pot and place them on the baking sheet.

    In a small bowl beat the egg until frothy. Brush each bagel with egg and then sprinkle with salt or everything bagel seasoning. 

    Bake at 425 degrees for 20-25 minutes. The bagels will be golden brown when they are done.

    Let them cool completely before storing them in an airtight container.

    • Prep Time: 30 minutes
    • Cook Time: 25 minutes
    • Category: Breakfast
    • Method: Baking
    • Cuisine: Gluten Free

    Did you make this recipe?

    Tag @smallfarmbiglife on Instagram and hashtag it #smallfarmbiglife

    Top Tip

    Since gluten free breads and bagels don't rise as much as ones made with wheat it's important to use the boiling process. The bagels really puff up in the water and then continue to rise a little when they are baked. It really helps you to get a fluffier bagel that doesn't have a dry texture.

    Didn't find the answer you're looking for?

    Ask AI to answer based on this recipe:

    ChatGPT
    Google AI
    Perplexity
    Grok
    Claude

    Frequently Asked Questions

    What can I make with gluten free bagels?

    I'm a big fan of eating my gluten free bagels with whipped cream cheese on them. But, I also love a good bagel sandwich with mayonnaise, lettuce, tomatoes, cheddar cheese and turkey. For a breakfast version I fry eggs, melt cheese on them and spread mayonnaise on my bagel for a breakfast sandwich.

    Can I freeze my gluten free bagels?

    Yes! Bagels can be frozen in a freezer safe container or bags. I like to freeze them individually so I can get one out at a time as I want them. Although, this recipe makes 5 bagels and they go pretty quickly at our house. You may want to double this recipe so you have bagels to freeze for later.

    Do I need to use eggs on my bagels?

    In my opinion, yes you should use an egg or egg substitute on your gluten free bagels. The egg will help brown and have a nice outer layer like a bagel you would purchase in the store.

    Eggs also add moisture to the outside of the bagel, if you can't use eggs you need to substitute with either flax seed meal and water or applesauce. You could use a combination of the two, but it will alter the flavor and texture some.

    Gluten Free Cream Cheese Pound Cake

    This Gluten Free Cream Cheese Pound Cake is everything you want in a classic dessert! It's moist, rich, and incredibly easy to make. Baked as a beautiful bundt cake, it delivers that dense yet tender texture you expect from the best cream cheese pound cake, with a smooth crumb that slices perfectly every time.

    If you've been searching for a moist gluten free pound cake recipe that doesn't feel dry or crumbly, this one is the best cream cheese pound cake recipe ever.

    a gluten free cream cheese pound cake on a light blue platter with two slices on white plates with sliced strawberries and homemade whipped cream

    Made completely from scratch, this homemade pound cake is simple enough for everyday baking yet elegant enough for special occasions. The result is a moist & delicious pound cake that works as an easy dessert recipe, a holiday centerpiece, or a comforting slice with coffee.

    Whether you're learning how to make pound cake gluten free or just want a reliable gluten free cake that feels timeless, this cream cheese bundt cake recipe is a must bake classic cake you'll come back to again and again.

    I served mine with fresh strawberries and homemade whipped cream. My simple recipe for homemade whipped cream is in the notes section. I store the leftover strawberries and whipped cream in separate containers in the refrigerator for up to 4 days.

    If you are looking for more desserts try: Gluten Free Dessert Recipes

    If you are looking fore more cakes try: Gluten Free Cake Recipes

    a slice of gluten free cream cheese pound cake on a white plate with sliced strawberries and homemade whipped cream on top
    [feast_advanced_jump_to]

    Ingredients

    • Unsalted Butter
    • Cream Cheese
    • Granulated Sugar
    • Eggs
    • Vanilla Extract
    • Gluten Free Flour
    • Sea Salt
    • Coconut Oil

    Instructions

    Preheat your oven to 300 degrees. Grease a 10-inch bundt pan with coconut oil and set aside.

    In the bowl of your stand mixer beat the butter and cream cheese until mixed together and creamy. Add the sugar and beat until fluffy. 

    Add one egg at a time beating to combine into the sugar mixture. Add vanilla and beat just until combined.

    Add gluten free flour and salt to the wet ingredients. Beat just until a smooth batter forms. 

    Pour the cake batter into your greased bundt pan.

    Bake at 300 degrees for 1 hour 30 minutes. The cake will be lightly browned and a toothpick will come out clean when inserted into the center.

    Let the cake cool in the bundt pan for 10 minutes and then invert onto a cooling rack to finish cooling.

    Serve the cake dusted with powdered sugar or with homemade whipped cream and sugar strawberries.

    Bundt Pans

    More Recipes You Might Enjoy

    • Gluten Free Orange Bundt Cake
    • Gluten Free Hummingbird Bundt Cake
    • Gluten Free Chocolate Pound Cake
    • Gluten Free Sock It To Me Cake

    I get a lot of my ingredients from Thrive Market. Thrive Market has been a game changer for me eating gluten free. They have so many options I can't get at my rural grocery stores! Use this link to get 40% off your first order!

    Print
    clock clock iconcutlery cutlery iconflag flag iconfolder folder iconinstagram instagram iconpinterest pinterest iconfacebook facebook iconprint print iconsquares squares iconheart heart iconheart solid heart solid icon

    Gluten Free Cream Cheese Pound Cake


    5 Stars 4 Stars 3 Stars 2 Stars 1 Star

    No reviews

    • Author: Elaine VanVleck
    • Total Time: 1 hour 45 minutes
    • Yield: 10 servings 1x
    • Diet: Gluten Free
    Print Recipe
    Pin Recipe

    Description

    This easy recipe for gluten free cream cheese pound cake is made in a bundt pan. This delicious dessert is moist and easy to bake. I dusted mine with powdered sugar and served the cake with strawberries.


    Ingredients

    Scale
    • 1 ½ cups Unsalted Butter, softened
    • 1 - 8 ounce package Cream Cheese, at room temperature
    • 2 cups Granulated Sugar
    • 6 large Eggs
    • 2 tsp. Vanilla Extract
    • 3 cups Gluten Free Flour
    • ½ tsp. Sea Salt
      Coconut Oil, for greasing pan
      Fresh Strawberries
      Homemade Whipped Cream, recipe in notes

    Instructions

    Preheat your oven to 300 degrees. Grease a 10-inch bundt pan with coconut oil and set aside.

    In the bowl of your stand mixer beat the butter and cream cheese until mixed together and creamy. Add the sugar and beat until fluffy. 

    Add one egg at a time beating to combine into the sugar mixture. Add vanilla and beat just until combined.

    Add gluten free flour and salt to the wet ingredients. Beat just until a smooth batter forms. 

    Pour the cake batter into your greased bundt pan.

    Bake at 300 degrees for 1 hour 30 minutes. The cake will be lightly browned and a toothpick will come out clean when inserted into the center.

    Let the cake cool in the bundt pan for 10 minutes and then invert onto a cooling rack to finish cooling.

    Serve the cake dusted with powdered sugar or with homemade whipped cream and sugar strawberries.

    Notes

    For sugar strawberries I slice them into a bowl and then add 1-2 tablespoons of granulated sugar on top. Stir until coated with sugar and then let stand for 10 minutes before serving.

    For homemade whipped cream add 1-2 cups of heavy whipping cream, ½ cup powdered sugar and 1 teaspoon of vanilla extract to your mixer. Using the whisk attachment beat on medium-high speed until stiff peaks form.

    • Prep Time: 15 minutes
    • Cook Time: 1 hour 30 minutes
    • Category: Cake
    • Method: Baking
    • Cuisine: Gluten Free

    Did you make this recipe?

    Tag @smallfarmbiglife on Instagram and hashtag it #smallfarmbiglife

    Frequently Asked Questions

    How do I make my gluten free cakes more moist?

    Gluten free baking tends to require more moisture or oil than when you are using regular wheat flour. For this gluten free cream cheese pound cake recipe I added butter and cream cheese to make it moist and delicious.

    If you are using a cake recipe that isn't turning out moist I would suggest adding a bit more oil or butter. You can also add mashed banana or applesauce to help your baked goods have more moisture.

    Do gluten free cakes take longer to bake?

    Yes, gluten free baking in general takes a little bit longer to bake than a cake made with regular wheat flour. However, gluten free baked goods tend to brown faster. So you will want to test the cake with a tooth pick in the center to make sure it's actually done even if it looks browned.
     
    Your cake should be a nice golden brown and a tooth pick inserted in the center of the cake should come out clean. You may need to bake your cake up to 5-8 minutes more. If your cake is already very brown, but not done in the center you will need to lower the oven temperature by 25 degrees and cook longer.

    My Skin Care Routine for Rosacea

    This is my best skin care routine for rosacea. These are my tips for products that have helped with my redness and sensitive skin. I've found that natural cleansers and a few moisturizers give me relief from rosacea symptoms. Warm water and products with clean ingredients have really helped me control rashes and redness.

    a woman with a towel on her head rubbing cleanser onto her face

    Use a Gentle Cleanser

    It's very important to use a cleanser that isn't too harsh in your rosacea skin care routine. Your cleanser shouldn't make your skin feel tight or dry after you've washed your face. I like a cream cleanser, cleansing wipes or a gentle cleansing balm.

    I've also found it important to wash my face with warm water. I never use hot water as that will make my face red and irritated. There is already going to be a bit of redness just from washing my face, so I don't want to add to that by scrubbing too hard or using hot water.

    Some of my favorite cleansers:

    • CeraVe Hydrating Oil Face Cleanser
    • La Roche Posay Lipikar Wash AP+ Gentle Foaming Moisturizing Face Wash
    • La Roche Posay Toleriane Hydrating Gentle Face Wash with Ceramide
    • e.l.f. Skin Pure Skin + Dermatologist Developed Cleanser
    • Acure Brightening Cleansing Gel
    • Acure Seriously Soothing Cleansing Cream

    My Favorite Products

    Find Your Triggers and Avoid Them

    Triggers for rosacea come in many forms and can be different for each person. I highly recommend keeping a journal so you can see what is causing flare ups. For me, heat, wind, harsh products (retinol) and alcohol (drinks and in products) cause my rosacea to flare up.

    When you find your triggers you can replace products that are causing them and make slight changes to your routines for rosacea to keep symptoms away. Although, there are going to be times when you just can't avoid a hot day, working out or other triggers.

    If you are having a flare-up cool water on your face may help. It may also be helpful to use a product with or straight aloe vera (be sure it's pure and doesn't have chemicals) to calm your skin.

    Find a Moisturizer Without Irritating Ingredients

    I've found that anti-aging ingredients tend to irritate my skin. Even though I'm in the age group of using anti-aging I typically skip those products in favor of more gentle moisturizers in my routine for rosacea. I'm a big fan of these moisturizers:

    • e.l.f. Holy Hydration Face Cream Fragrance Free
    • e.l.f. Skin Pure Skin + Dermatologist Developed Moisturizer
    • BYOMA Moisturizing Rich Cream
    • Acure Ultra Hydrating 12 Hour Facial Moisturizer
    • Acure Seriously Soothing SPF 30 Day Cream

    Patch Test New Products

    Whenever I get a new product to try I apply it to a small patch on my cheek to see how my skin will react. If I get redness or the spot starts to itch I use a gentle, trusted cleanser to remove the product.

    I know that some people will try a product a few times to see if their skin will get used to that product. I'm just not a big fan of the waiting period where I have irritated, red skin. I return the product and try something else. There are so many options out there that I don't see the point in being uncomfortable while trying to make a skin care product work for me.

    Keep Your Home's Air Moist

    Dryness in the air can cause rosacea flare-ups and skin irritation. To counter act this I run humidifiers and diffusers in my home. I like to add a couple of drops of essential oils to make my house smell amazing. I've replaced all my candles in my home with diffusers.

    Favorite Diffusers & Humidifiers:

    • White Ceramic Cutout 300ml Large Diffuser
    • URPOWER 500 ML Ultrasonic Oil Diffuser
    • Mid-Century White and Black Footed Base 300ml Large Diffuser

    Sunscreen Is Your Friend

    Sun exposure is one of my main triggers. Good natural, non-chemical sunscreens are my favorite for protecting my skin. I also really like a foundation that has sunscreen in it so I can get both in one application.

    I like to wear a hat to keep the sun directly off my face and keep ice water nearby to stay hydrated and to cool my body. If you find that you've gotten a sunburn you can use an all natural aloe vera product and cool water to treat the redness, itching and irritation. Here are a few of my favorite options:

    • Native Mineral Face Lotion Unscented SPF 30
    • e.l.f. SKIN Suntouchable Invisible Sunscreen
    • Eucerin Sensitive Tinted Mineral Face Sunscreen SPF 35
    • Aromatica 95% Organic Aloe Vera Gel
    • Solara Suncare Daily Defense Mineral Sunscreen SPF 30

    Exfoliate Your Skin Sparingly

    I stay away from chemical exfoliators. I like to use a gentle facial scrub a couple of times per week. If I am having a rosacea flare-up and my skin is irritated I skip exfoliating until the redness and irritation subsides.

    Avoid Fake Fragrances

    Be sure to check all of your products with the EWG app. It is the quickest way to see if a product is a clean option. The EWG app may give a product a higher score for fragrance even if that fragrance is created with essential oils.

    Since some people have reactions to essential oils you will need to go to the brands website to see what they are using for fragrance. Most reputable brands will have the ingredients so they are easy for you to find and decide if the fragrance they are using will work for you.

    I can handle most essential oils on my skin, but you may find some trigger your rosacea. For instance, I can't handle cedar wood essential oil on my skin. A spot test of new products with essential oils is important to be sure that they are going to work for you.

    Other Ingredients I Avoid in My Routine for Rosacea

    • Alcohol
    • Lactic Acid
    • Glycolic Acid
    • Sodium Laurel Sulfate

    I've found these ingredients don't work with my skin. They have all caused rosacea flare-ups for me. You may want to start your own list in your journal or somewhere else that you keep the ingredients that don't work for you.


    If you liked this article you might also enjoy:
    Winter Skin Care Mistakes That Cause Dry, Irritated Skin
    Steps for Switching to Natural Deodorant
    The Best Way to Curl Your Eyelashes
    The Perfect At Home Facial
    Clean Hair Care for Wavy Hair

    • « Previous Page
    • 1
    • …
    • 62
    • 63
    • 64
    • 65
    • 66
    • …
    • 88
    • Next Page »

    Welcome! I'm Elaine

    I'm so glad you are here! I share easy gluten free recipes from my small farm in Washington.

    Be sure to sign up for my newsletter to stay up to date on all of my new recipes.

    More about me...
    • Instagram
    • Pinterest
    • Facebook
    • Twitter
    • Mail

    Load up on new recipes, exclusive goodies, + more!
    Sign up below to stay up-to-date on news, events, and special deals.
    Thank you for subscribing!

    Easy Meals Recipes

    • Gluten Free Instant Pot Chili Mac and Cheese
    • Gluten Free Taco Casserole
    • Gluten Free Cowboy Baked Beans
    • Gluten Free Walking Taco Casserole
    • Gluten Free Creamy Beef and Mushroom Pasta
    • Gluten Free Instant Pot Chicken and Dumplings
    • Instant Pot Mexican Style Beef and Rice
    • Gluten Free Chicken Parmesan Pasta Casserole
    • Gluten Free One Pot Hamburger Helper Copycat
    • Gluten Free Salisbury Steak with Mushroom Gravy
    • Gluten Free Air Fryer Fajitas
    • Gluten Free Sloppy Joe Casserole

    Footer

    back to top

    About

    • Privacy Policy
    • Shop my Amazon Page
    • Follow me on LTK

    Newsletter

    • Sign Up! for emails and updates

    Contact

    • Contact
    • Media Kit
    • About Me

    As an Amazon Associate I earn from qualifying purchases.

    I may get commissions for purchases made through links on this site.

    Copyright © 2026 Brunch Pro on the Brunch Pro Theme