Small Farm Big Life

  • Gluten Free Recipe Index
  • Subscribe
  • Resources
menu icon
go to homepage
  • Home
  • Gluten Free Recipe Index
  • Subscribe
  • My Story
  • Resources
  • Free Guides
    • Email
    • Facebook
    • Instagram
    • Pinterest
  • subscribe
    search icon
    Homepage link
    • Home
    • Gluten Free Recipe Index
    • Subscribe
    • My Story
    • Resources
    • Free Guides
    • Email
    • Facebook
    • Instagram
    • Pinterest
  • ×

    Gluten Free Vanilla Pudding Poke Cake

    This Gluten Free Vanilla Pudding Poke Cake is one of those recipes that looks like it took so much effort but is actually incredibly simple to pull together and the result is always absolutely stunning. A fluffy gluten free white cake is poked all over with holes and filled with creamy vanilla pudding that soaks deep into the cake for the most moist and tender texture in every single slice.

    Then the whole thing gets topped with a light homemade whipped cream and bright colorful sprinkles that make it look like the most festive and beautiful dessert on the table.

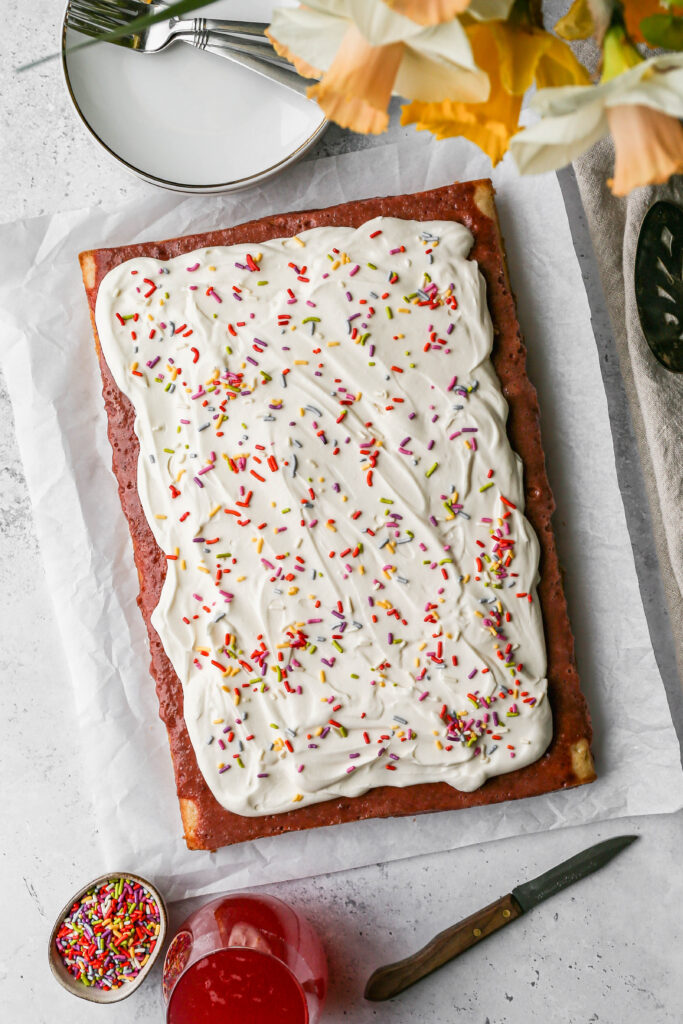
    a 9x13 gluten free easter poke cake with bright colored sprinkles on top next to a vase of daffodils and a small bowl of sprinkles.

    This is the kind of cake that works for absolutely any occasion and I have made it for Easter, birthday parties, spring gatherings, and honestly just because we wanted something special on a random weekend.

    It is gluten free, feeds a crowd beautifully from a 9x13 pan, and can be made ahead which makes it one of my favorite go to desserts when I need something that is impressive without being stressful.

    Everyone who tries this cake asks for the recipe and I think you are going to love it just as much as we do.

    If you are looking for more 9x13 cake recipes try my Gluten Free Carrot Sheet Cake with Cream Cheese Frosting, my Gluten Free Banana Cake, or my Gluten Free Sweet Potato Cake with Cream Cheese Frosting.

    You can find all of my gluten free cake recipes here: Gluten Free Cake Recipes

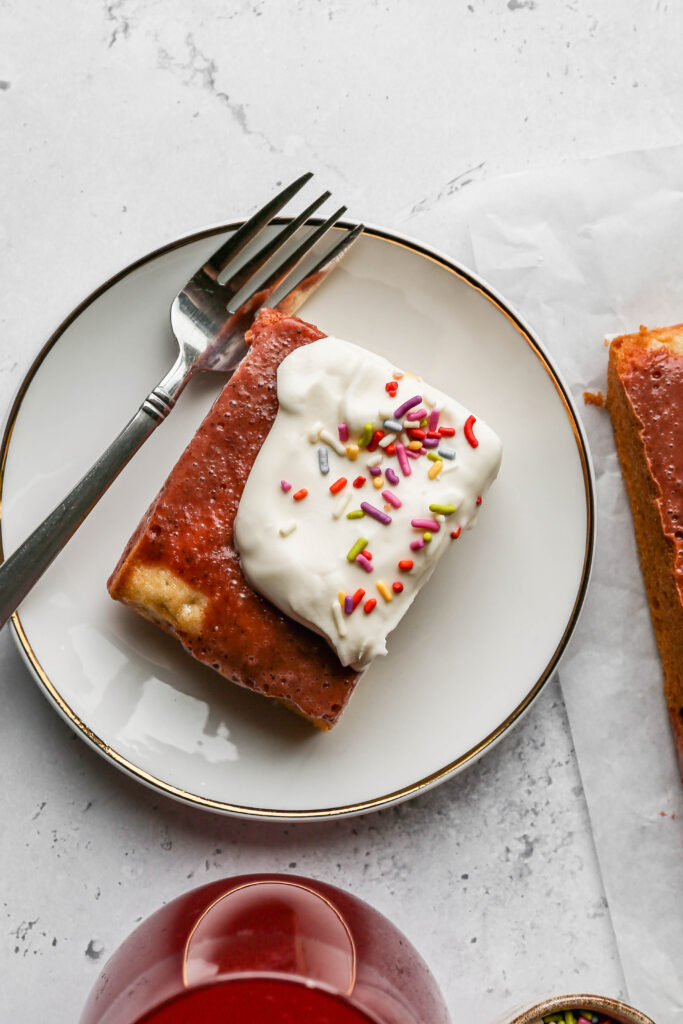
    a slice of gluten free easter poke cake on a white plate next to a small bowl of bright colored sprinkles and a stemless wine glass of a red drink.
    [feast_advanced_jump_to]

    Ingredients

    • Gluten Free Flour
    • Baking Powder
    • Baking Soda
    • Sea Salt
    • Unsalted Butter
    • Granulated Sugar
    • Eggs
    • Vanilla Extract
    • Milk
    • Sour Cream
    • Instant Vanilla Pudding
    • Beet Powder or Ground Freeze Dried Strawberries
    • Heavy Whipping Cream
    • Powdered Sugar
    • Sprinkles

    Instructions

    Preheat your oven to 350 degrees. Grease a 9x13 baking pan with coconut oil or butter and set aside.

    Prepare and bake my Gluten Free White Cake Recipe.

    After the cake comes out of the oven let it cool for 8-10 minutes. Then using the end of a wooden spoon, a chopstick or anything else that will make a hole easily in the cake.

    Poke holes in the cake about one inch apart until the entire cake is covered in holes. Let the cake finish cooling completely.

    Prepare the instant vanilla pudding per the instructions on the box. Add 1-2 teaspoons beet powder or ground freeze dried strawberries for pink coloring (if you want a pink tint to the cake, this step can be skipped if you don't want coloring).

    Before the pudding mixture sets up pour over the cake evenly filling the holes poked into the cake.

    Put the cake into the refrigerator to let the pudding set up completely.

    Before serving the cake prepare the whipped cream topping. In the bowl of your stand mixer using the whisk attachment beat the heavy whipping cream, sifted powdered sugar and vanilla until stiff peaks begin to form.

    Evenly spread the whipped cream topping onto the cake and then add the sprinkles on top.

    Serve the cake immediately. Store the leftover cake in the refrigerator.

    Supplies

    More Recipes You Might Enjoy

    • Gluten Free Coconut Cake
    • Gluten Free Million Dollar Cake
    • Gluten Free Pina Colada Cake
    • Gluten Free Vanilla Cake

    I get a lot of my ingredients from Thrive Market. Thrive Market has been a game changer for me eating gluten free. They have so many options I can't get at my rural grocery stores! Use this link to get 40% off your first order!

    Print
    clock clock iconcutlery cutlery iconflag flag iconfolder folder iconinstagram instagram iconpinterest pinterest iconfacebook facebook iconprint print iconsquares squares iconheart heart iconheart solid heart solid icon

    Gluten Free Vanilla Pudding Poke Cake


    5 Stars 4 Stars 3 Stars 2 Stars 1 Star

    No reviews

    • Author: Elaine VanVleck
    • Total Time: 45 minutes
    • Yield: 15 slices 1x
    • Diet: Gluten Free
    Print Recipe
    Pin Recipe

    Description

    This Gluten Free Vanilla Pudding Poke Cake is the most moist, tender, and impressive sheet cake you will ever make and it is always the first dessert to disappear at any gathering. A fluffy gluten free white cake is filled with creamy vanilla pudding that soaks into every hole and topped with light homemade whipped cream and colorful sprinkles for a beautiful and crowd pleasing dessert that is naturally gluten free. Perfect for birthday parties, Easter, spring celebrations, and any occasion that deserves a stunning and delicious gluten free sheet cake!


    Ingredients

    Scale

    Cake:

    • 2 cups Gluten Free Flour
    • 2 tsp Baking Powder
    • ½ tsp Baking Soda
    • ½ tsp Sea Salt
    • ½ cup Unsalted Butter, at room temperature
    • 1 ½ cups Granulated Sugar
    • 4 Egg Whites, at room temperature
    • 2 tsp Vanilla Extract
    • ½ tsp Almond Extract
    • ? cup Milk
    • ? cup Sour Cream

    Pudding Filling:

    • 3.2 ounce package Instant Vanilla Pudding
    • 1-2 tsp. Beet Powder or Ground Freeze Dried Strawberries

    Whipped Cream Topping:

    • 1 ½ cups Heavy Whipping Cream
    • ½ cup Powdered Sugar, sifted
    • 1 tsp. Vanilla Extract

    Sprinkles


    Instructions

    Preheat your oven to 350 degrees. Grease a 9x13 baking pan with coconut oil or butter and set aside.

    In a mixing bowl sift together the gluten free flour, baking powder, baking soda and salt. Set aside.

    In the bowl of your stand mixer beat together the room temperature butter and granulated sugar until smooth. Add the egg whites, vanilla extract, almond extract, milk and sour cream. Blend the ingredients together. The mixture will be a bit lumpy.

    Add the dry ingredients to the wet ingredients and beat together until mostly smooth. You may still have a few small butter lumps in the batter and that is fine.

    Pour the cake batter into your 9x13 baking pan evenly.

    Bake at 350 degrees for 30-35 minutes. The cake will be browned, pulled away from the edge of the cake pan and a toothpick inserted in the center will come out clean when it is done.

    After the cake comes out of the oven let it cool for 8-10 minutes. Then using the end of a wooden spoon, a chopstick or anything else that will make a hole easily in the cake.

    Poke holes in the cake about one inch apart until the entire cake is covered in holes. Let the cake finish cooling completely.

    Prepare the instant vanilla pudding per the instructions on the box. Add 1-2 teaspoons beet powder or ground freeze dried strawberries for pink coloring (if you want a pink tint to the cake, this step can be skipped if you don't want coloring).

    Before the pudding mixture sets up pour over the cake evenly filling the holes poked into the cake.

    Put the cake into the refrigerator to let the pudding set up completely.

    Before serving the cake prepare the whipped cream topping. In the bowl of your stand mixer using the whisk attachment beat the heavy whipping cream, sifted powdered sugar and vanilla until stiff peaks begin to form.

    Evenly spread the whipped cream topping onto the cake and then add the sprinkles on top.

    Serve the cake immediately. Store the leftover cake in the refrigerator.

    Notes

    You can omit the beet powder or ground freeze dried strawberries if you want the pudding filling to be cream instead of pink. The cake is delicious either way!

    • Prep Time: 20 minutes
    • Cook Time: 25 minutes
    • Category: Cake
    • Method: Baking
    • Cuisine: American

    Did you make this recipe?

    Tag @smallfarmbiglife on Instagram and hashtag it #smallfarmbiglife

    If you made this Gluten Free Vanilla Pudding Poke Cake I would love to hear what you thought! Please leave a star rating and a comment below. This is such a fun and easy gluten free dessert and I hope it becomes a staple at your gatherings too!

    Storage

    Store this gluten free vanilla pudding poke cake covered in the refrigerator for up to 4 days. Because of the pudding filling and whipped cream topping this cake must be refrigerated and should not be left at room temperature for more than 2 hours. I recommend adding the whipped cream topping right before serving for the freshest and most beautiful presentation. This cake is not recommended for freezing as the whipped cream topping does not freeze well.

    Top Tip

    Pour the vanilla pudding over the cake while it is still warm and before it has set up completely. The warm cake will absorb the pudding more deeply into the holes for a more moist and flavorful result in every single slice. Work quickly so the pudding fills all the holes evenly before it starts to set. Then refrigerate the cake until the pudding is completely set before adding the whipped cream topping.

    Didn't find the answer you're looking for?

    Ask AI to answer based on this recipe:

    ChatGPT
    Google AI
    Perplexity
    Grok
    Claude

    Frequently Asked Questions

    How do I make my gluten free cakes more moist?

    Gluten free baking tends to require more moisture or oil than when you are using regular wheat flour. For this gluten free vanilla pudding poke cake the sour cream makes it moist and delicious.

    If you are using a cake recipe that isn't turning out moist I would suggest adding a bit more oil or butter. You can also add mashed banana or applesauce to help your baked goods have more moisture.

    Do gluten free cakes take longer to bake?

    Yes, gluten free baking in general takes a little bit longer to bake than a cake made with regular wheat flour. However, gluten free baked goods tend to brown faster. So you will want to test the cake with a tooth pick in the center to make sure it's actually done even if it looks browned. 

    Your cake should be a nice golden brown and a tooth pick inserted in the center of the cake should come out clean. You may need to bake your cake up to 5-8 minutes more. If your cake is already very brown, but not done in the center you will need to lower the oven temperature by 25 degrees and cook a bit longer.

    Frozen Cranberry Margarita Mocktail

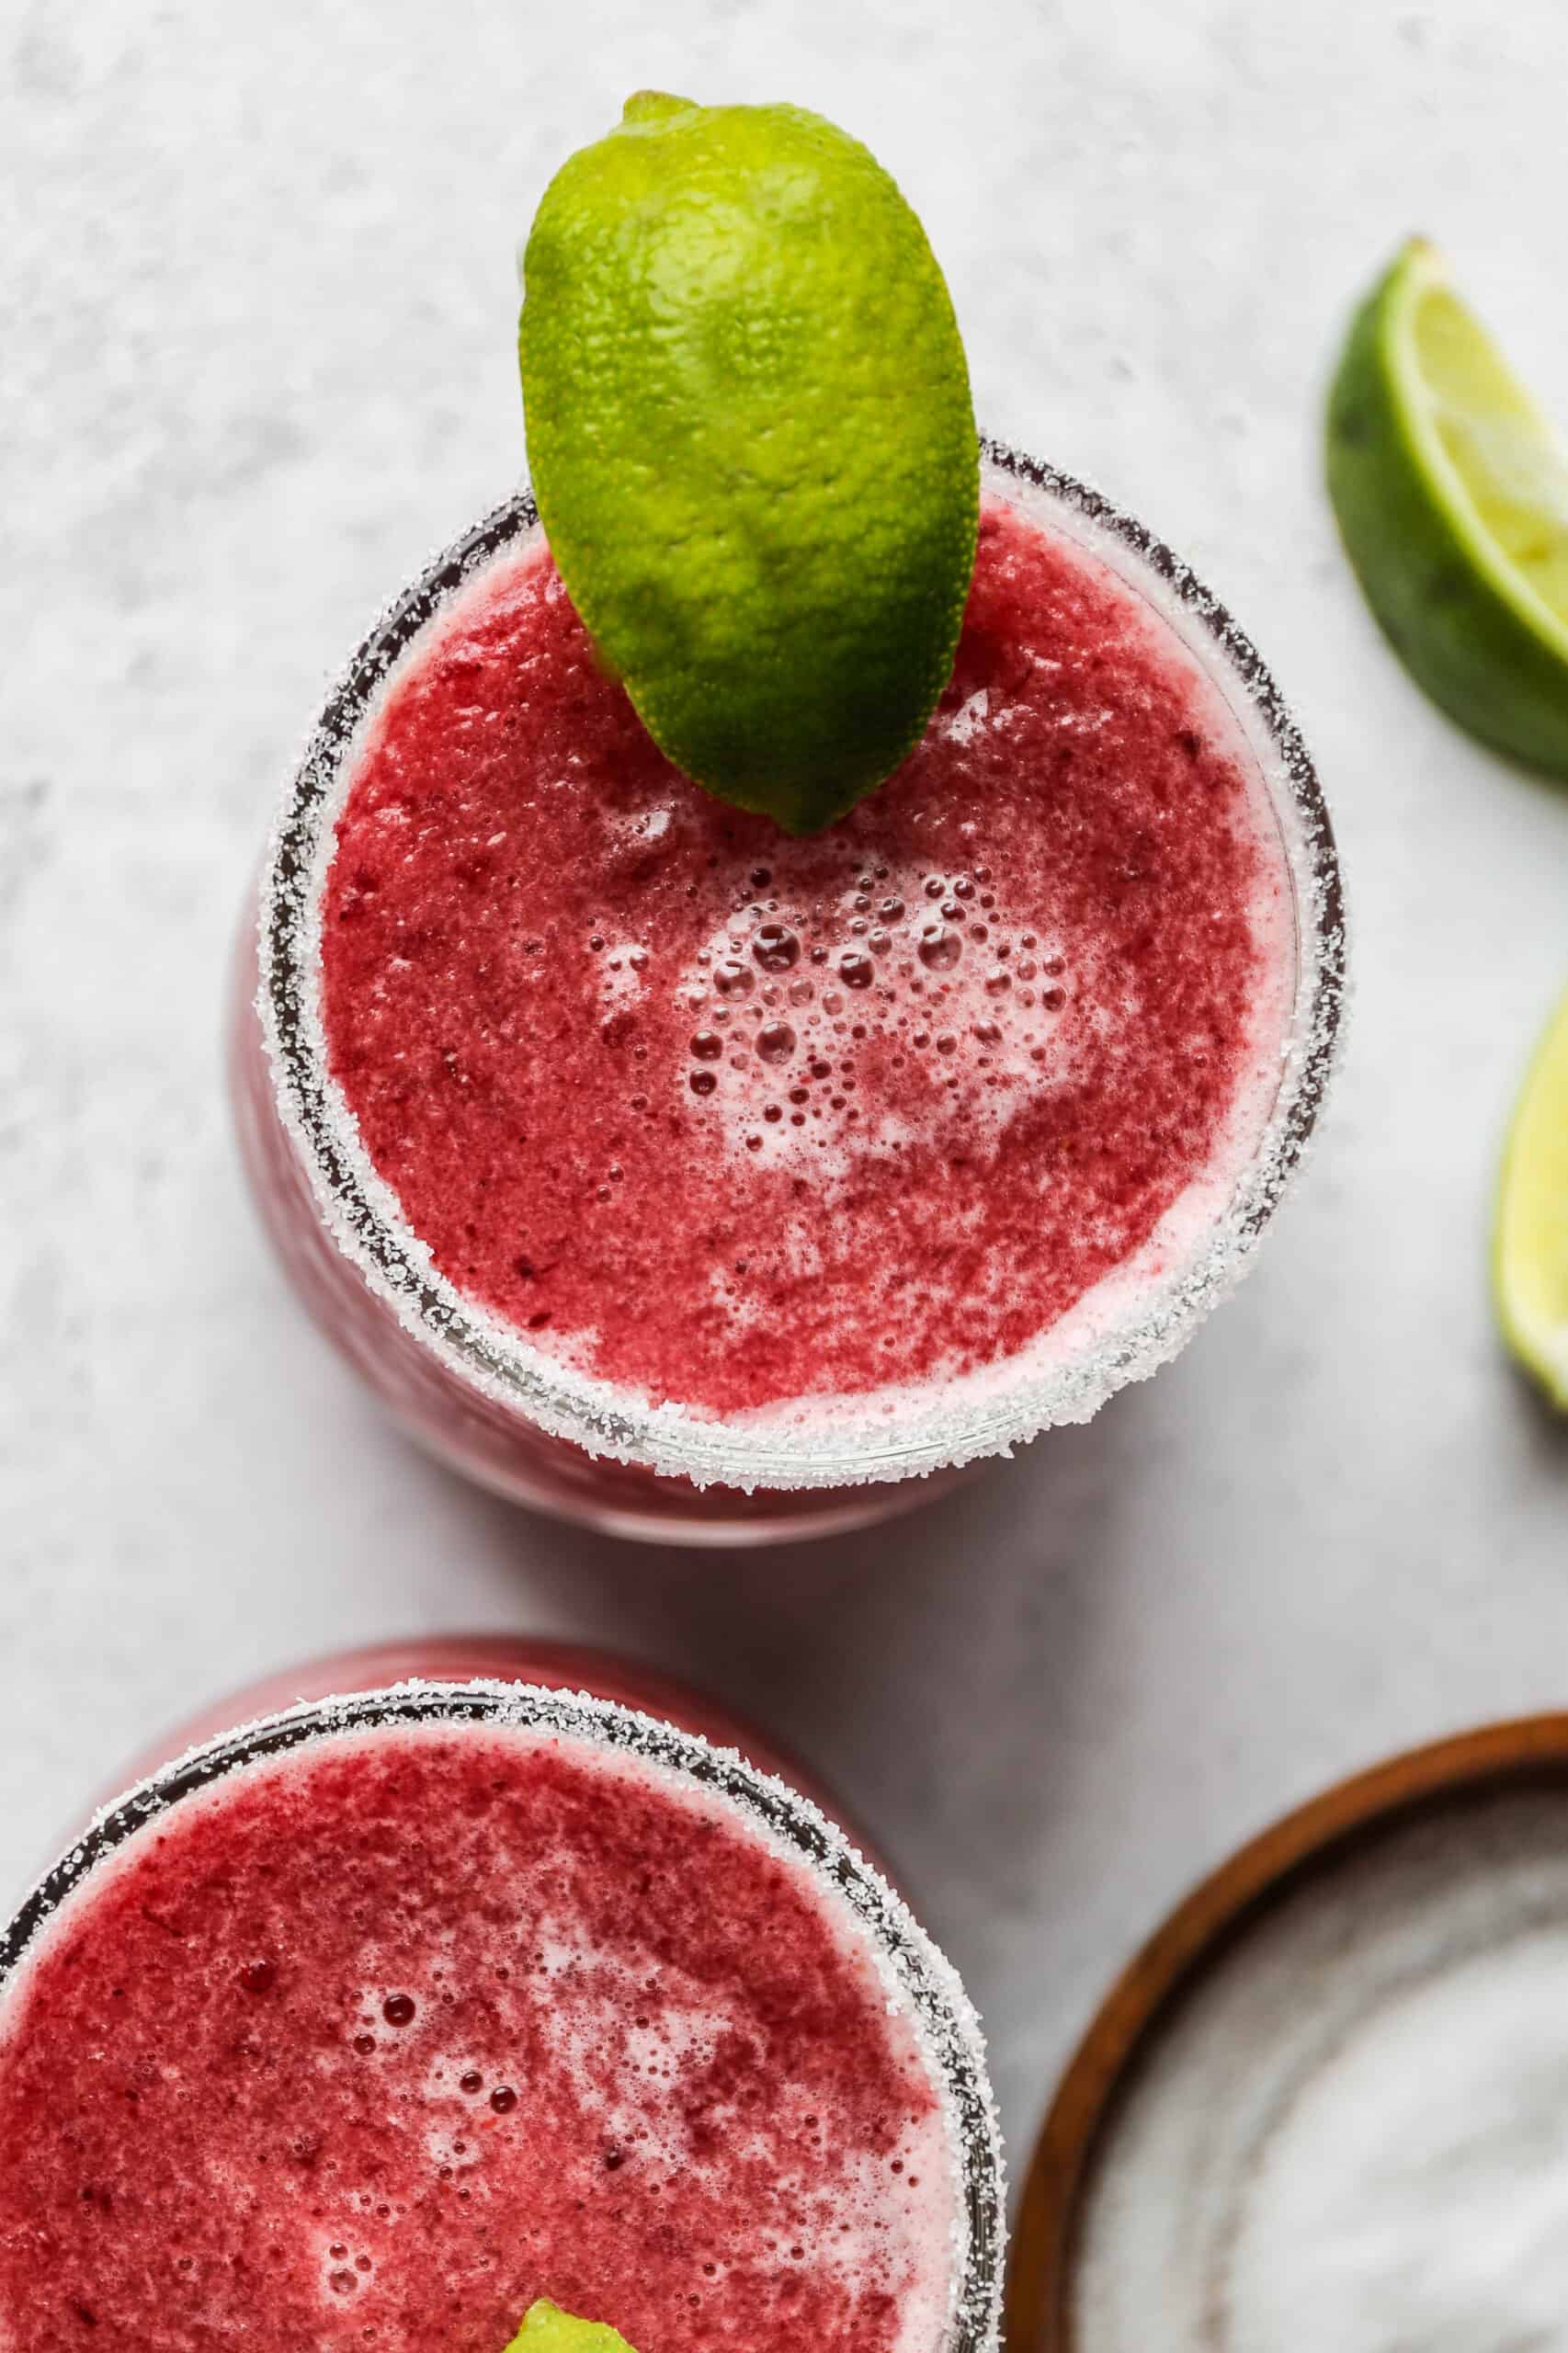
    This frozen cranberry margarita mocktail is one of my favorite ways to use up leftover cranberry sauce after Thanksgiving or Christmas dinner. Blended with orange juice, lime juice, and a little salt, it has all the tart, festive flavor of a margarita without any of the alcohol.

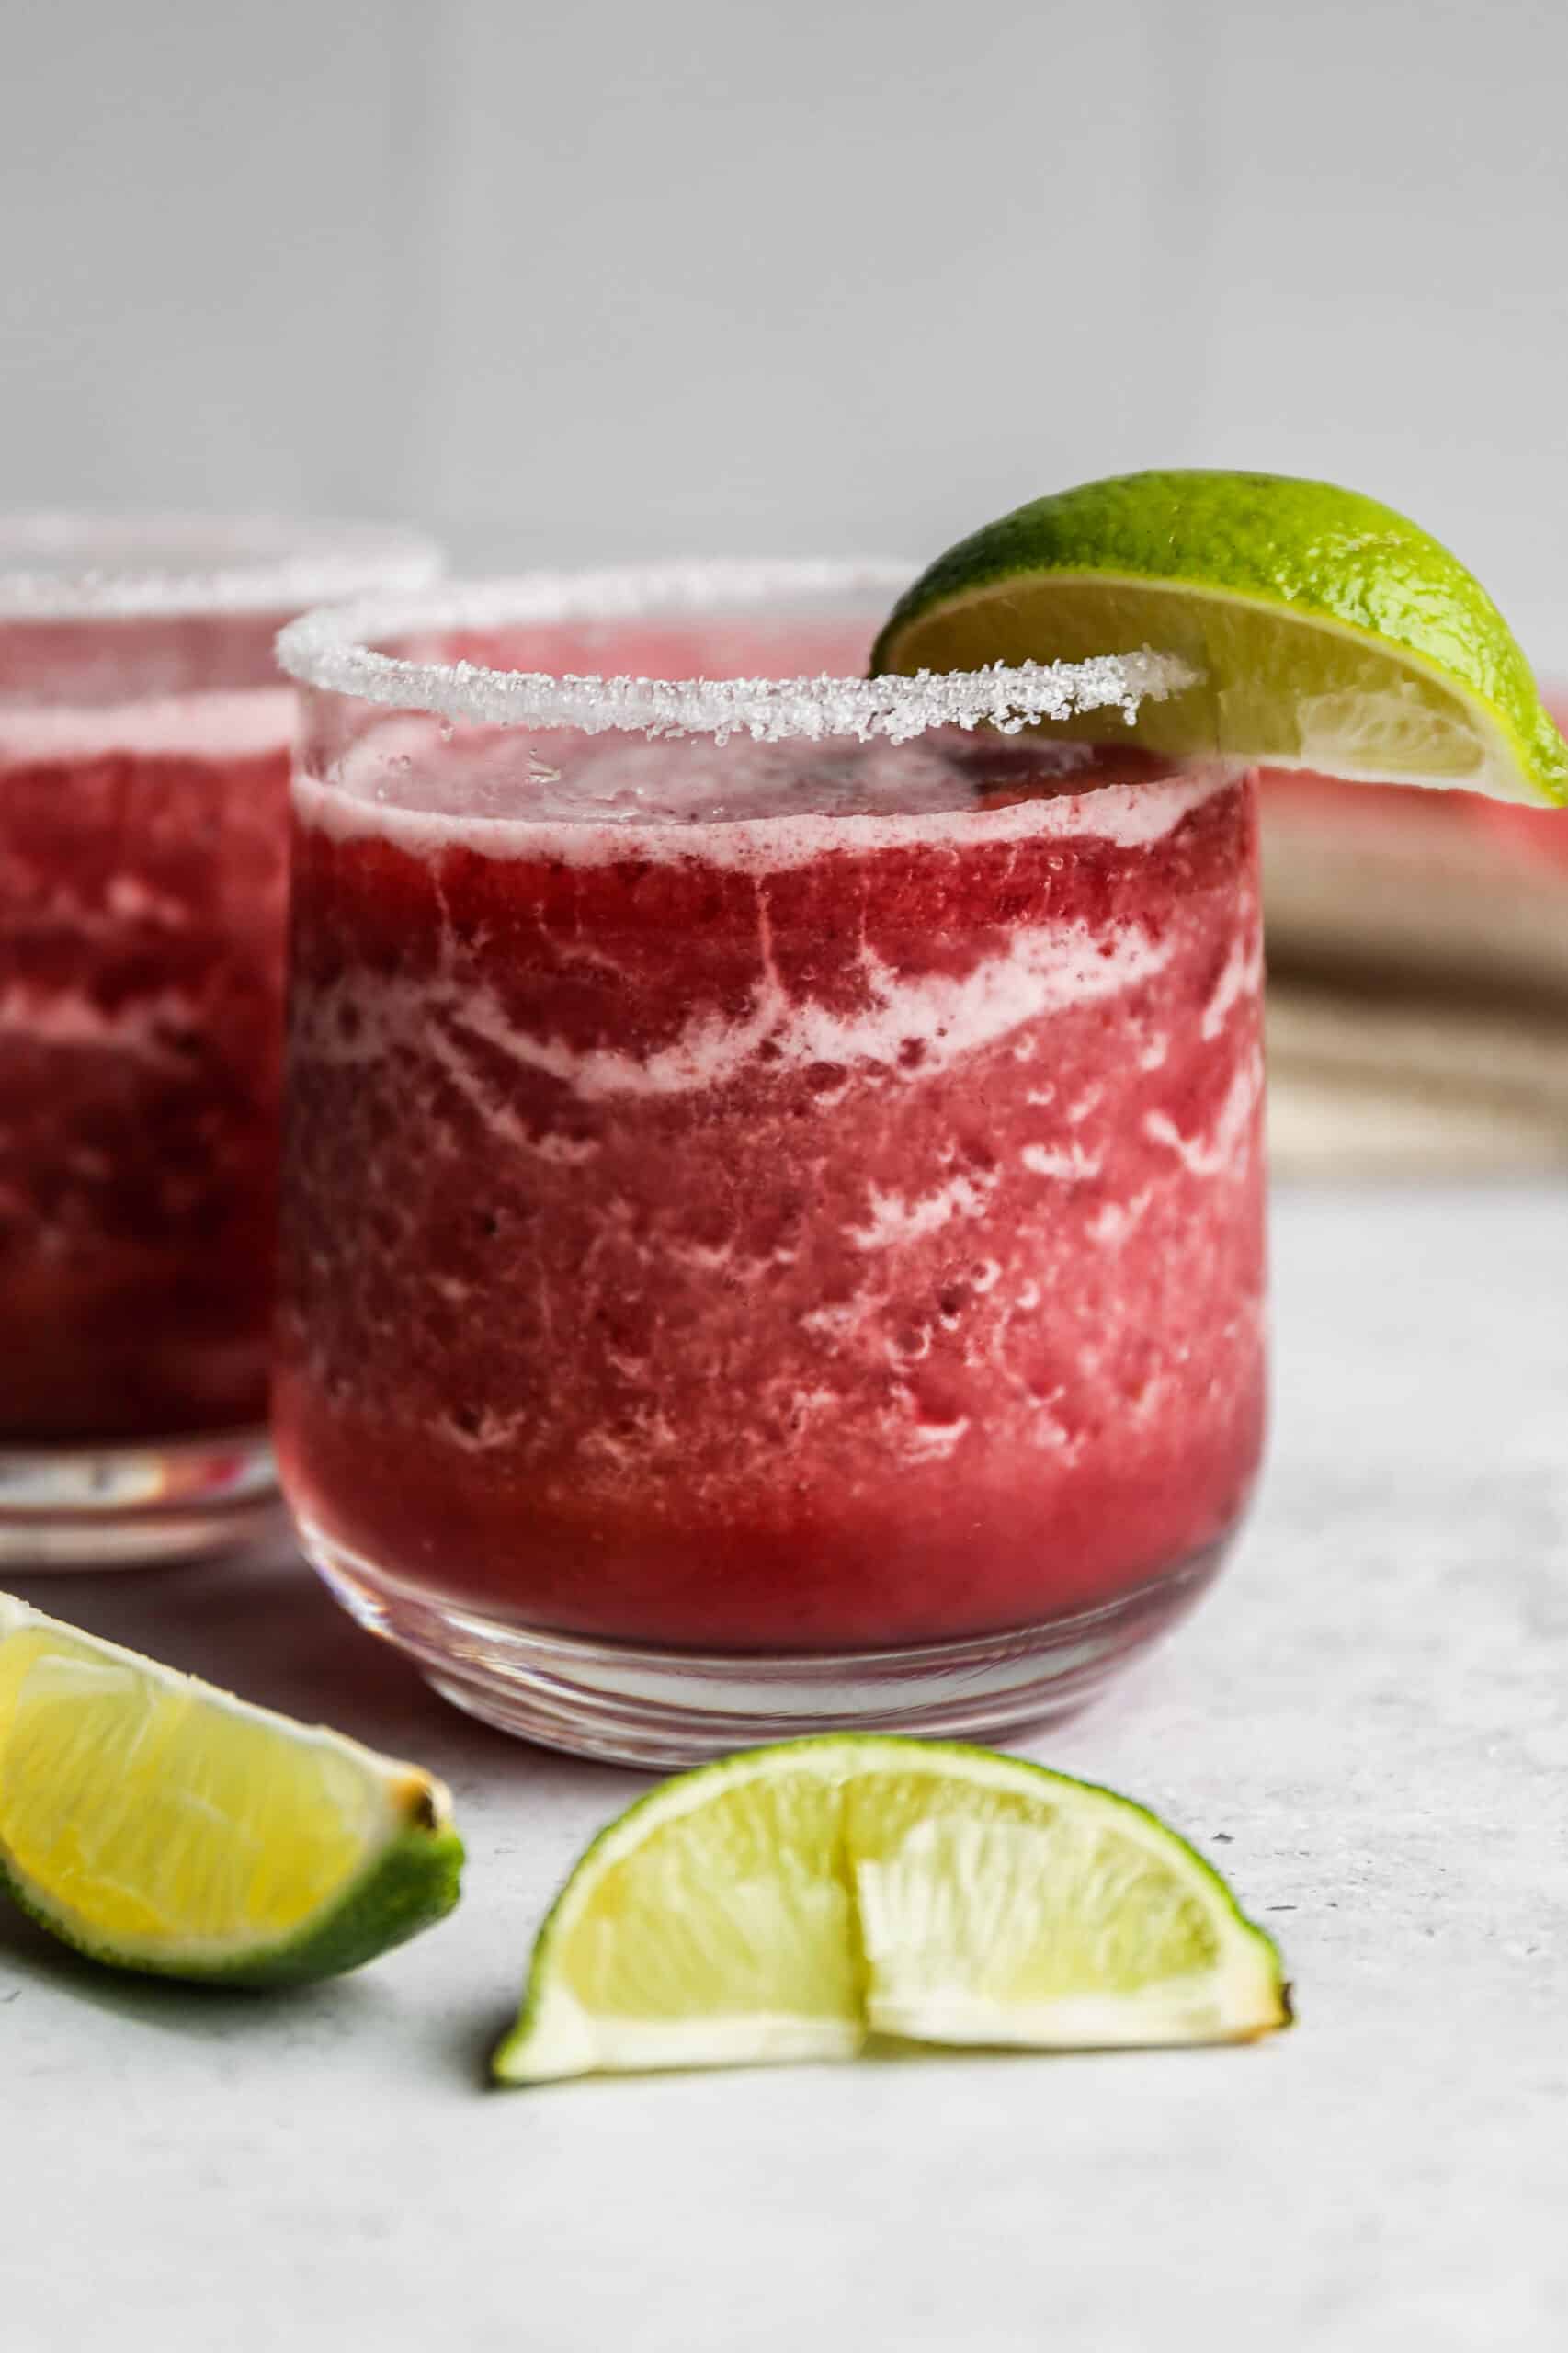
    two glasses of frozen cranberry margarita mocktails with salt on the rim and a lime wedge.

    This is an easy drink to make for a holiday party since it comes together in the blender in just 5 minutes, and it's a gluten free option everyone can enjoy, whether or not they're drinking.

    It's also a great, crowd friendly choice for anyone who wants a festive drink without the alcohol.

    If you are looking for other mocktail options you might also enjoy my Pina Colada Mocktail, this Strawberry Daiquiri Mocktails, my Classic Margarita Mocktail, this Non Alcoholic Spiced Apple Fizz Drink or my Homemade Blueberry Lemonade made with Frozen Blueberries recipes.

    You can find all of my drink recipes here: Gluten Free Drink Recipes

    You can find all of my Christmas recipes here: Gluten Free Christmas Recipes

    a glass of frozen cranberry margarita mocktail with salt on the rim and a lime wedge.
    [feast_advanced_jump_to]

    Why You'll Love This Recipe

    • A festive, non alcoholic drink everyone at the party can enjoy
    • A smart way to use up leftover cranberry sauce after Thanksgiving or Christmas
    • Ready in 5 minutes with just a blender and a handful of ingredients
    • Easy to make a big batch for a crowd

    Ingredient Notes and Substitutions

    Whole berry cranberry sauce gives this mocktail its thick, frozen texture, but my Gluten Free Cranberry Jam works beautifully here too if you have some on hand. Fresh squeezed lime and orange juice will give you the brightest flavor, though bottled juice works in a pinch. If you'd like a slightly sweeter, bubblier drink, swap the soda water for ginger ale.

    How to Make This a Cocktail

    If you're serving a mixed crowd, this recipe is easy to turn into a real margarita for the adults at the party. Simply add 1 ½ to 2 ounces of tequila per serving to the blender along with the other ingredients, and blend as usual. It's an easy way to serve one drink that works for everyone at your holiday gathering.

    Tips for Serving a Crowd

    This recipe doubles or triples easily for a party, just blend it in batches so your blender doesn't get too full. For a festive touch, garnish each glass with a few fresh or sugared cranberries and a sprig of rosemary. Since this mocktail is best served immediately, plan to blend it in smaller batches throughout your party rather than making it all at once ahead of time.

    Storage

    This frozen cranberry margarita mocktail doesn't store well after it has been made.

    To speed up the process of making them fresh you could premeasure the cranberry sauce, orange juice, lime juice and salt into a sealed container in the refrigerator. Then, when you want to make drinks you can pour everything into your blender.

    Top Tip

    For a drink that doesn't get watered down, freeze extra orange juice and lime juice into ice cubes ahead of time and use those instead of regular ice cubes when you blend. It keeps the flavor strong all the way to the last sip.

    FAQ

    What does virgin margarita mean?

    A virgin margarita, or margarita mocktail, has all the flavor of a classic margarita without any alcohol. This frozen cranberry version gets its kick from fresh lime and orange juice and a pinch of salt instead of tequila.

    Can I make this into a real margarita?

    Yes. Add 1 ½ to 2 ounces of tequila per serving to the blender along with the other ingredients and blend as usual. See the How to Make This a Cocktail section above for details.

    Can I use fresh cranberries instead of cranberry sauce?

    I recommend sticking with cranberry sauce for this recipe, since it's already sweetened and gives the mocktail its thick, frozen texture. Fresh cranberries on their own would be too tart and wouldn't blend as smoothly.

    Can I make a big batch for a party?

    Yes, this recipe doubles or triples easily. Just blend it in batches so you don't overfill your blender, and plan to serve it soon after blending since it doesn't hold well once made.

    Didn't find the answer you're looking for?

    Ask AI to answer based on this recipe:

    ChatGPT
    Google AI
    Perplexity
    Grok
    Claude

    Supplies

    More Recipes You Might Enjoy

    • Classic Margarita Mocktail
    • Non Alcoholic Spiced Apple Fizz Drink
    • Blueberry Lemon Sparkling Mocktail
    • 3 Ingredient Strawberry Lemonade Mocktail

    I get a lot of my ingredients from Thrive Market. Thrive Market has been a game changer for me eating gluten free. They have so many options I can't get at my rural grocery stores! Use this link to get 40% off your first order!

    Print
    clock clock iconcutlery cutlery iconflag flag iconfolder folder iconinstagram instagram iconpinterest pinterest iconfacebook facebook iconprint print iconsquares squares iconheart heart iconheart solid heart solid icon

    Frozen Cranberry Margarita Mocktail


    5 Stars 4 Stars 3 Stars 2 Stars 1 Star

    No reviews

    • Author: Elaine VanVleck
    • Total Time: 5 minutes
    • Yield: 2 servings 1x
    • Diet: Gluten Free
    Print Recipe
    Pin Recipe

    Description

    This frozen cranberry margarita mocktail is a festive, non alcoholic drink that comes together in the blender in just 5 minutes. It's the perfect way to use up leftover cranberry sauce and makes a fun, crowd friendly drink for any Christmas gathering.


    Ingredients

    Scale
    • ¾ cup Whole Berry Cranberry Sauce
    • ¼ cup Orange Juice
    • 2 Tbsp Lime Juice
    • ½ cup Soda Water
    • 1 cup Ice
    • Pinch of Sea Salt
      Fresh Lime, for the glass

    Instructions

    In a blender add the cranberry sauce, orange juice, lime juice, soda water, ice and salt. Blend until smooth.

    Add some salt to a small plate. Cut a lime into wedges. Slice the center of a lime wedge and run around the rim of your glass. Dip the glass into the salt. Repeat for the next glass.

    Pour the frozen cranberry margarita mocktail into each glass. Serve immediately.

    If you made this recipe please leave a star rating and comment below. It helps other readers find this recipe and means so much to me.

    • Prep Time: 5 minutes
    • Category: Drinks
    • Method: Blender
    • Cuisine: American

    Did you make this recipe?

    Tag @smallfarmbiglife on Instagram and hashtag it #smallfarmbiglife

    If you make this frozen cranberry margarita mocktail, I would love to hear how it turned out. Leave a comment and a star rating below, and tag @smallfarmbiglife on Instagram so I can see your holiday drink cart. Looking for more festive drinks? Check out my full collection of mocktail recipes, including my Classic Margarita Mocktail and Pina Colada Mocktail.

    Frozen Cranberry Margarita Mocktail Ingredients

    • Whole Berry Cranberry Sauce
    • Orange Juice
    • Lime Juice
    • Soda Water
    • Ice
    • Sea Salt
    • Fresh Lime

    Instructions

    In a blender add the cranberry sauce, orange juice, lime juice, soda water, ice and salt. Blend until smooth.

    Add some salt to a small plate. Cut a lime into wedges. Slice the center of a lime wedge and run around the rim of your glass. Dip the glass into the salt. Repeat for the next glass.

    Pour the frozen cranberry margarita mocktail into each glass. Serve immediately.

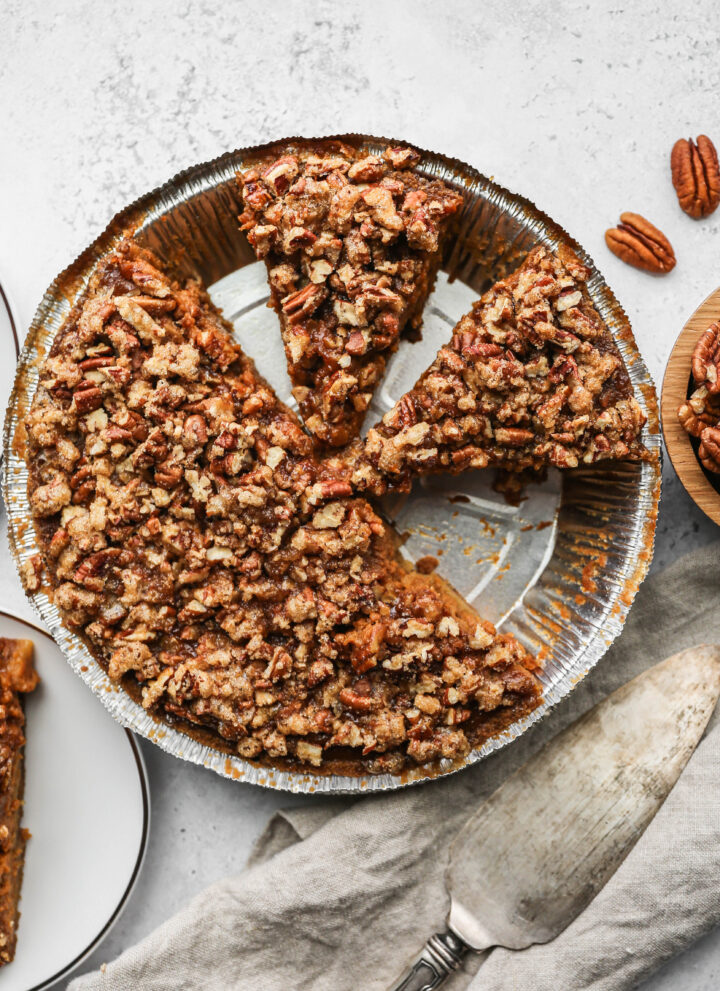
    Gluten Free Praline Pumpkin Pie

    Pumpkin pie is a Thanksgiving must, but this praline version takes it up a notch with a sweet, crunchy pecan topping baked right on top. It's rich, a little nutty, and every bit as easy as a classic pumpkin pie. This one is going to earn a permanent spot on your holiday table.

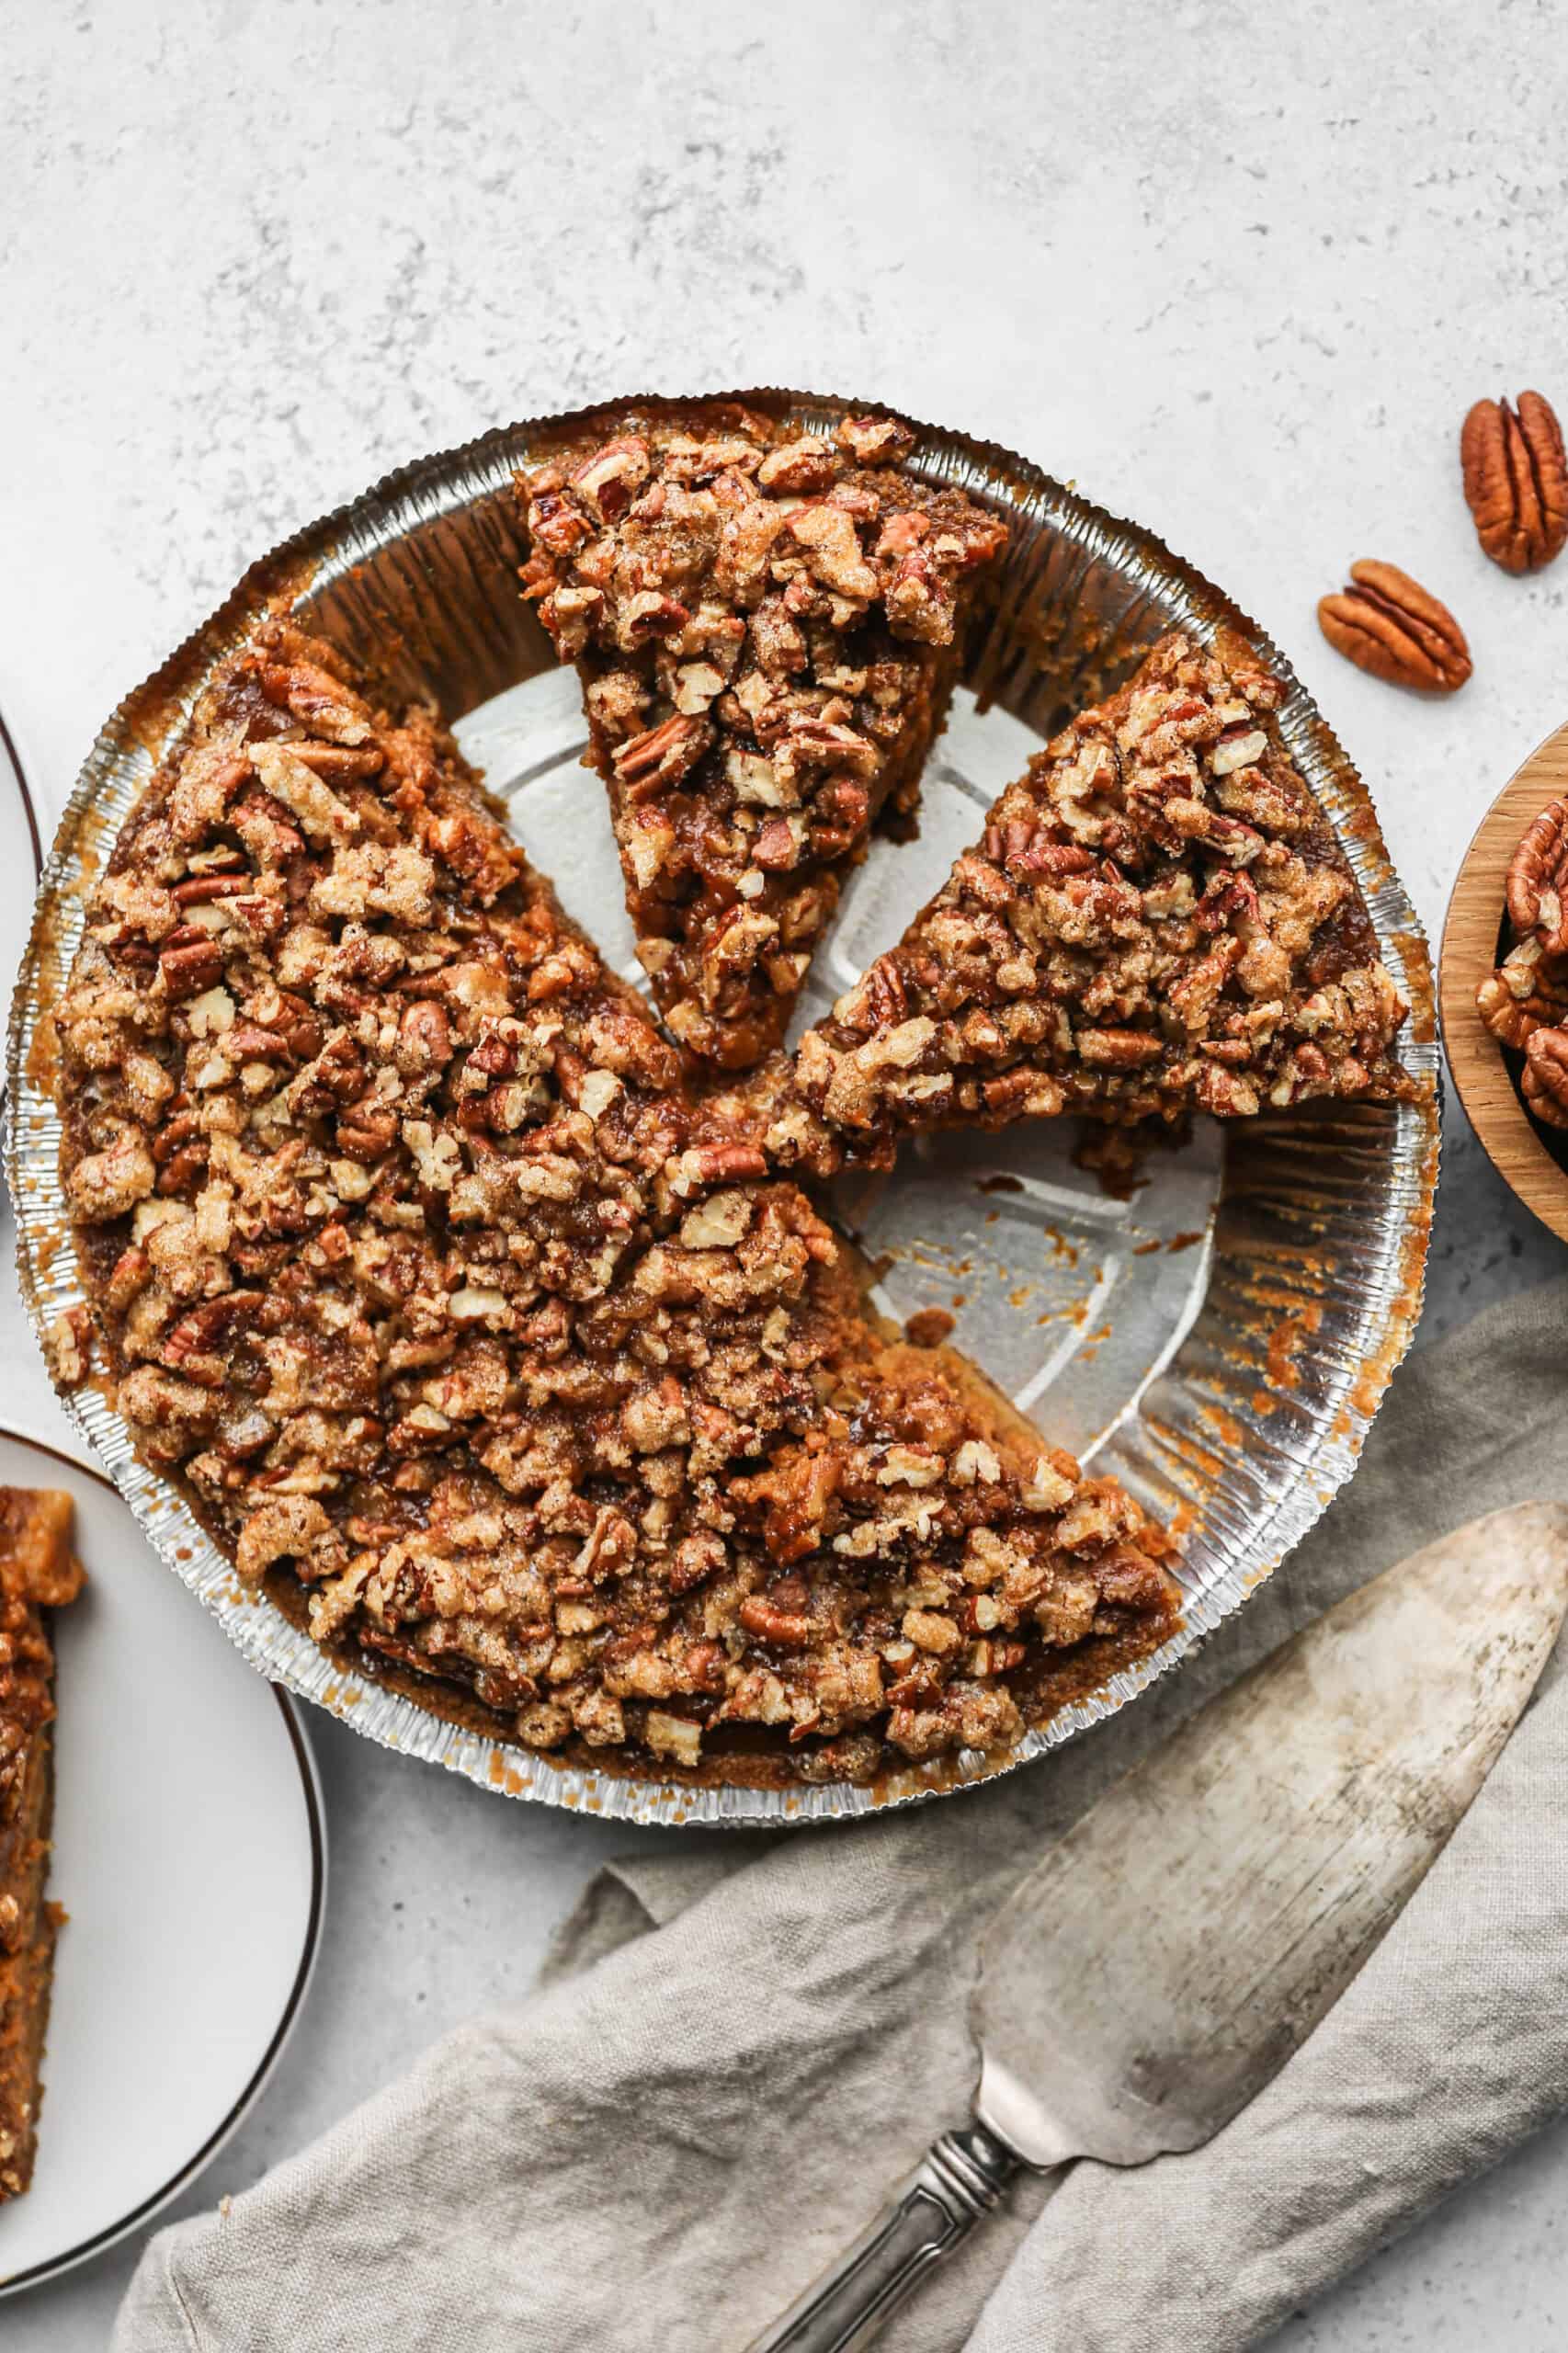
    a gluten free praline pumpkin pie with a slice on a plate next to small bowl of pecans.

    I love pumpkin pie! It is easily my favorite Thanksgiving dessert option. This gluten free praline pumpkin pie takes the classic pumpkin pie to a new level. The crunch from the pecan praline topping is so good!

    Rich, indulgent, and perfect for the holiday table, this Gluten Free Praline Pumpkin Pie is a decadent twist on a classic fall favorite.

    With a silky gluten free pumpkin pie filling layered beneath a sweet, nutty praline topping, it's the perfect centerpiece for your gluten free Thanksgiving.

    Whether you're hosting guests with dietary restrictions or simply want a wheat free recipe that doesn't compromise on taste, this pie offers all the cozy comfort of the season.

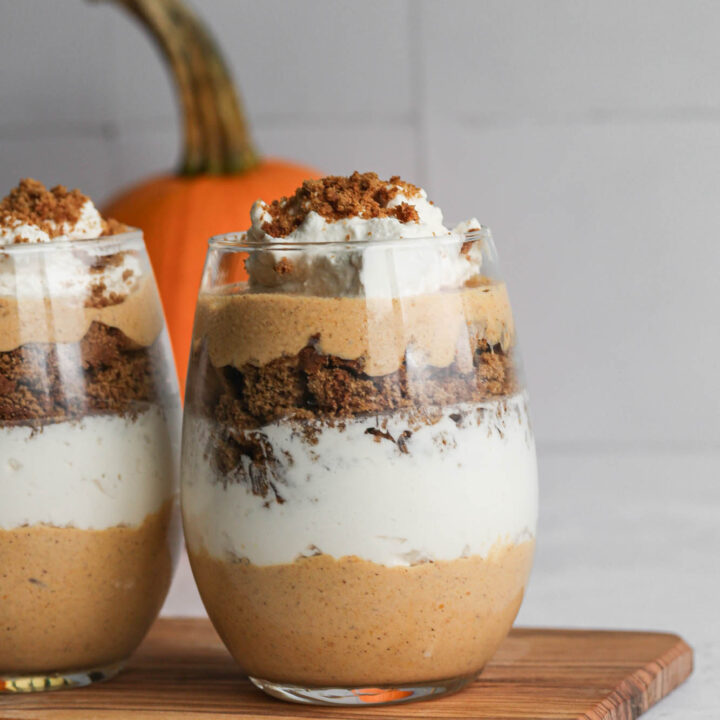
    If you are looking for more gluten free Thanksgiving recipes you might also enjoy my Gluten Free Pecan Pie Bars, this Gluten Free Sweet Potato Cake with Cream Cheese Frosting, my Gluten Free Pumpkin Gingersnap Parfait, this Cranberry Fluff Salad, or my Gluten Free Cranberry Apple Crisp recipes.

    You can also find all of my gluten free Thanksgiving recipes here: Delicious Gluten Free Thanksgiving Recipes

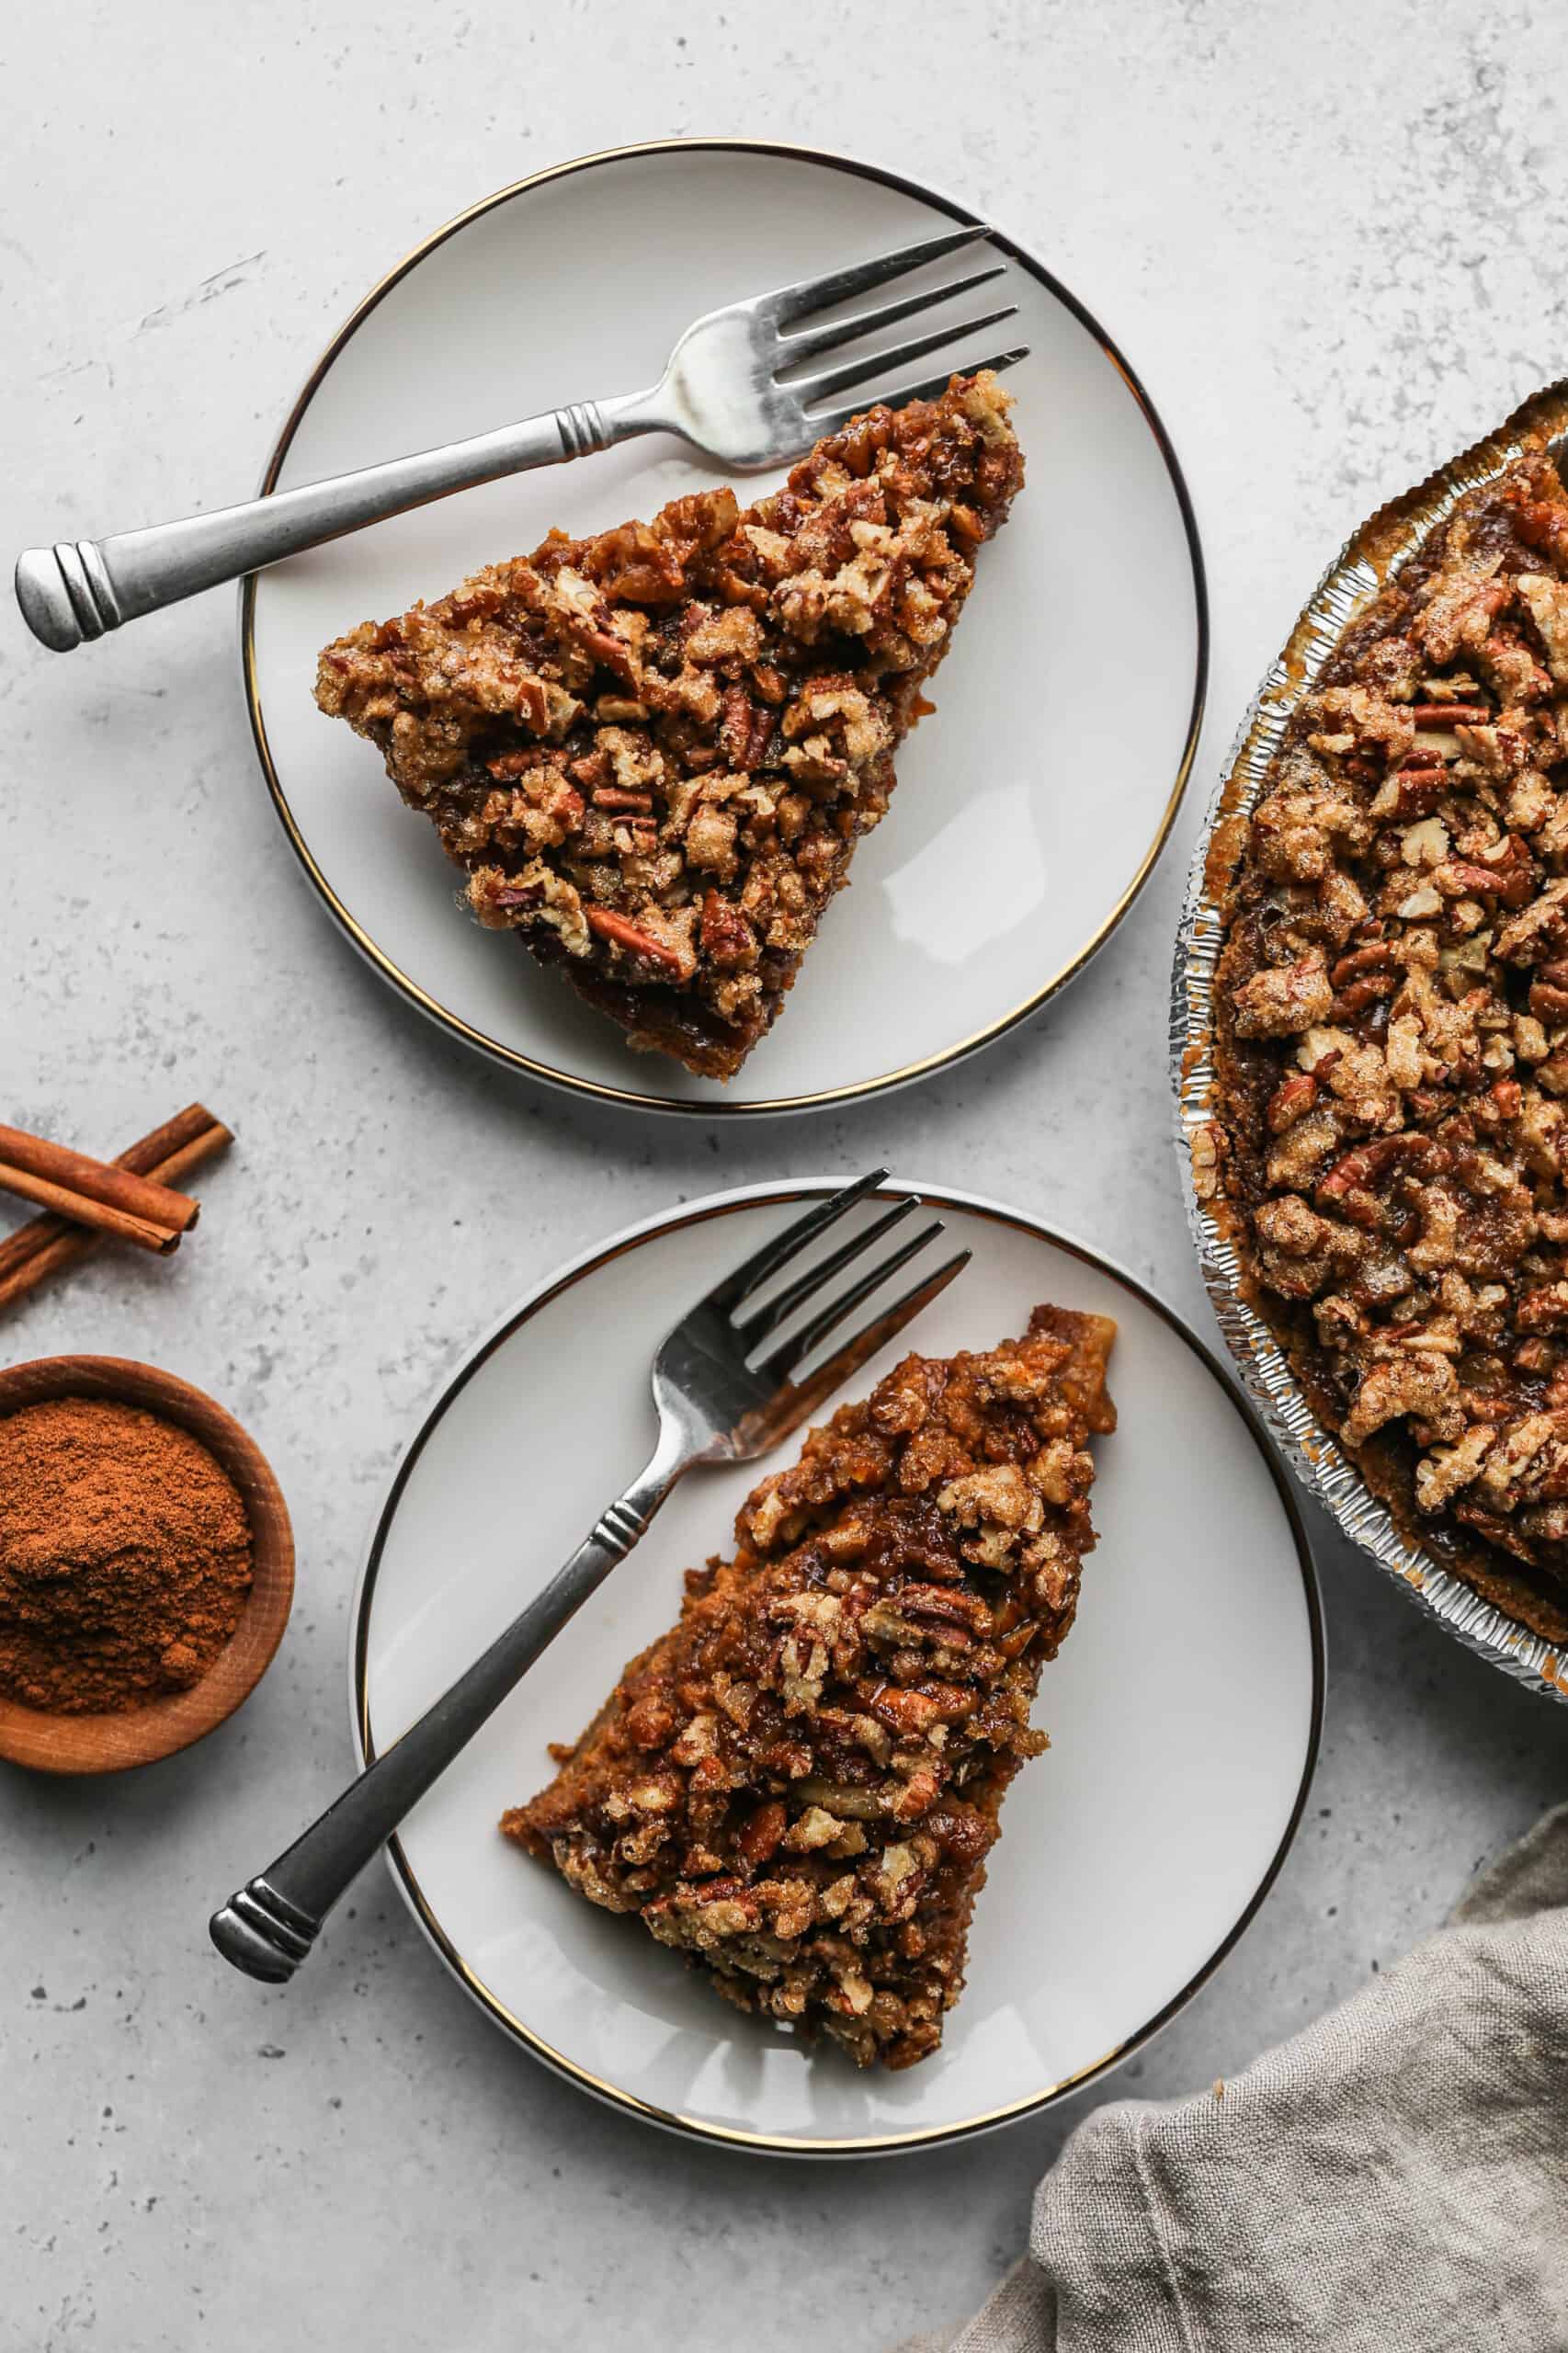
    two plates with slices of gluten free praline pumpkin pie.
    [feast_advanced_jump_to]

    Why You'll Love This Recipe

    • Combines two Thanksgiving favorites in one pie
    • Silky spiced pumpkin filling with a crunchy pecan topping
    • Made with a simple gluten free graham cracker crust
    • Easy to make ahead for a stress free holiday

    Ingredient Notes

    • Be sure to use pure pumpkin puree, not pumpkin pie filling, which contains added sugar and spices that will throw off the recipe.
    • A gluten free graham cracker crust keeps this recipe simple, but you can swap in your favorite gluten free pie crust if you prefer.
    • If the edges of the crust start browning too quickly during the second bake, loosely tent them with foil.

    Make Ahead Tips

    This pie is a great make ahead Thanksgiving dessert. Bake it up to two days in advance and store it covered in the refrigerator until you're ready to serve. Bring it to room temperature or serve it slightly chilled, whichever you prefer.

    Serving Suggestions

    Serve this pie with a dollop of fresh whipped cream and a light sprinkle of flaky sea salt to balance the sweetness of the praline topping.

    Storage

    Store the pie covered in the refrigerator for up to five days after it has cooled to room temperature.

    Top Tip

    If the edges of the crust start browning too quickly during the second bake, loosely tent them with foil. This protects the crust while the praline topping finishes getting golden and bubbly.

    Frequently Asked Questions

    What is praline topping made from?

    Praline is a mixture of pecans and brown sugar. It usually also includes vanilla extract and salt. For this recipe I also added maple syrup for the delicious flavor.

    Can I use a store bought crust for this recipe?

    Yes! I love the simplicity of using store bought gluten free crusts. For this recipe I used a gluten free graham cracker crust, but you could also use a regular gluten free crust.

    Can I make this pie ahead of time?

    Yes. Bake the pie up to two days in advance and store it covered in the refrigerator. This makes it a great option for a stress free Thanksgiving, since one less dessert needs to be made day of.

    Didn't find the answer you're looking for?

    Ask AI to answer based on this recipe:

    ChatGPT
    Google AI
    Perplexity
    Grok
    Claude

    Praline Pumpkin Pie Supplies

    More Recipes You Might Enjoy

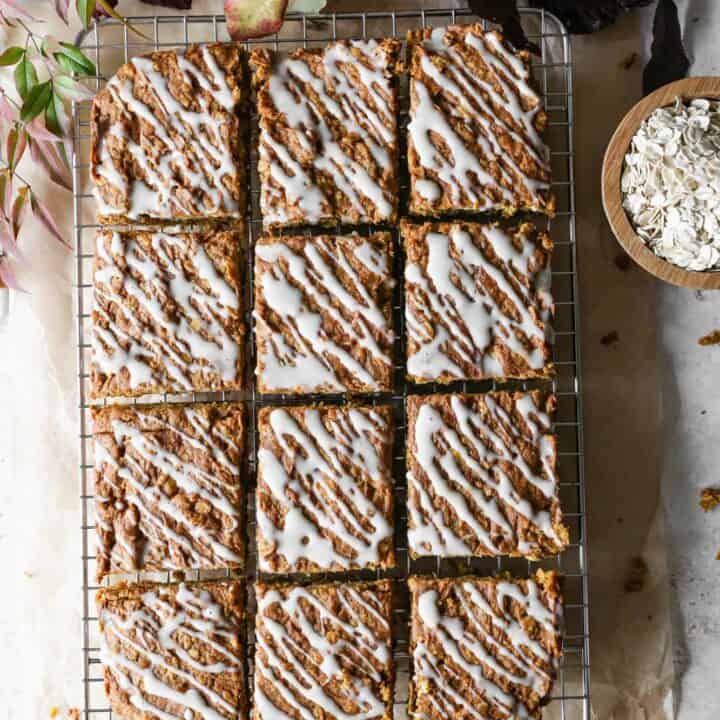
    • Gluten Free Pumpkin Cake with Cream Cheese Frosting
    • Gluten Free Pumpkin Gingersnap Parfait
    • Gluten Free Pumpkin Oatmeal Cake
    • Gluten Free Baked Pumpkin Donuts with Chocolate Glaze

    I get a lot of my ingredients from Thrive Market. Thrive Market has been a game changer for me eating gluten free. They have so many options I can't get at my rural grocery stores! Use this link to get 40% off your first order!

    Print
    clock clock iconcutlery cutlery iconflag flag iconfolder folder iconinstagram instagram iconpinterest pinterest iconfacebook facebook iconprint print iconsquares squares iconheart heart iconheart solid heart solid icon

    Gluten Free Praline Pumpkin Pie


    5 Stars 4 Stars 3 Stars 2 Stars 1 Star

    No reviews

    • Author: Elaine VanVleck
    • Total Time: 1 hour 15 minutes
    • Yield: 8 servings 1x
    • Diet: Gluten Free
    Print Recipe
    Pin Recipe

    Description

    This gluten free praline pumpkin pie combines a silky spiced pumpkin filling with a crunchy pecan praline topping for the ultimate Thanksgiving dessert. It comes together in a gluten free graham cracker crust for an easy make ahead pie. One bite and it might just become your new holiday favorite.


    Ingredients

    Scale

    1 Gluten Free Graham Cracker Pie Crust

    Pumpkin Filling:

    • 15 ounce can Pumpkin Puree
    • ¾ cup Brown Sugar
    • ½ cup Milk
    • 2 large Eggs
    • 1 tsp Vanilla Extract
    • 1 tsp Ground Cinnamon
    • ¼ tsp Ground Cloves
    • ¼ tsp Ground Ginger
    • ¼ tsp Ground Nutmeg
    • ¼ tsp Ground Allspice
    • ½ tsp Sea Salt

    Praline Topping:

    • 1 cup Pecans, chopped
    • ⅓ cup Brown Sugar
    • 1 Tbsp Maple Syrup
    • 1 tsp Vanilla Extract
    • ¼ tsp Sea Salt

    Instructions

    Preheat your oven to 350 degrees.

    In your stand mixer blend together the pumpkin puree, brown sugar, milk, eggs, vanilla, cinnamon, cloves, ginger, nutmeg, allspice and salt. Pour the pumpkin mixture into the gluten free graham cracker pie crust.

    Bake at 350 degrees for 40-45 minutes or until the top is slightly browned.

    While the pie is baking in a mixing bowl stir together the pecans, brown sugar, maple syrup, vanilla and salt until combined.

    When the pumpkin pie comes out of the oven sprinkle the pecan mixture over top while the pie is still hot.

    Bake at 350 degrees for 15 minutes or until a toothpick inserted in the center comes out clean.

    Let the pie cool to room temperature before cutting.

    If you made this recipe please leave a star rating and comment below. It helps other readers find this recipe and means so much to me.

    • Prep Time: 20 minutes
    • Cook Time: 55 minutes
    • Category: Dessert, Pie
    • Method: Baking
    • Cuisine: American

    Did you make this recipe?

    Tag @smallfarmbiglife on Instagram and hashtag it #smallfarmbiglife

    I'd love to hear how this gluten free praline pumpkin pie turns out for you! Leave a comment and star rating below, and let me know if it earns a spot on your Thanksgiving table. Don't forget to pin this recipe so you can find it again when the holidays roll around.

    Praline Pumpkin Pie Ingredients

    • Gluten Free Graham Cracker Pie Crust
    • Pumpkin Puree
    • Brown Sugar
    • Milk
    • Eggs
    • Vanilla Extract
    • Ground Cinnamon
    • Ground Cloves
    • Ground Ginger
    • Ground Nutmeg
    • Ground Allspice
    • Sea Salt
    • Pecans
    • Maple Syrup

    Instructions

    Preheat your oven to 350 degrees.

    In your stand mixer blend together the pumpkin puree, brown sugar, milk, eggs, vanilla, cinnamon, cloves, ginger, nutmeg, allspice and salt. Pour the pumpkin mixture into the gluten free graham cracker pie crust.

    Bake at 350 degrees for 40-45 minutes or until the top is slightly browned.

    While the pie is baking in a mixing bowl stir together the pecans, brown sugar, maple syrup, vanilla and salt until combined.

    When the pumpkin pie comes out of the oven sprinkle the pecan mixture over top while the pie is still hot.

    Bake at 350 degrees for 15 minutes or until a toothpick inserted in the center comes out clean.

    Let the pie cool to room temperature before cutting.

    Pumpkin Apple Baked Oatmeal with Streusel Topping

    Fall mornings on the farm call for something warm and make ahead. This pumpkin apple baked oatmeal with streusel topping has become one of my favorites. Pumpkin and apple bake together into a dense, cake like casserole with warm spices in every bite. It's finished with a sweet and salty walnut streusel.

    a white casserole dish of pumpkin apple baked oatmeal with streusel topping.

    It is just as good reheated as it is fresh from the oven, so I like to bake a full pan on Sunday and have breakfast ready to go all week.

    Whether you're serving a crowd for brunch or meal prepping for busy mornings, this one covers both.

    If you are looking for more breakfast recipes you might also enjoy my Gluten Free Pumpkin Cranberry Breakfast Cookies, this Gluten Free Tater Tot Breakfast Casserole, this Overnight Apple Pie Chia Pudding, my Gluten Free Oatmeal Raisin Overnight Oats.

    You can find all of my breakfast recipes here: Gluten Free Breakfast Recipes

    a white casserole dish and two white breakfast bowls of pumpkin apple baked oatmeal with streusel topping.
    [feast_advanced_jump_to]

    Why You'll Love This Recipe

    This pumpkin apple baked oatmeal comes together in one bowl and bakes into a warm, cake like casserole instead of standard stovetop oatmeal. It is easy to make ahead for the week, feeds a crowd, and the streusel topping adds the perfect sweet crunch. There's no special equipment needed.

    Tips for the Best Texture

    Baked oatmeal should be dense and slightly cake like, not mushy. Bake until the top is golden and the center is set with no jiggle, an extra few minutes goes a long way here. Letting the dish rest for 5 minutes after baking also helps it firm up before serving.

    Serving Suggestions

    This baked oatmeal is delicious on its own, but a few toppings take it up a notch. Try a drizzle of maple syrup, a dollop of Greek yogurt, or a splash of cold milk poured over a warm serving.

    How to Freeze

    Let the oatmeal cool completely, then portion it into individual freezer safe containers. Freeze for up to 3 months. Thaw overnight in the refrigerator, then reheat in the microwave or in a 250 degree oven until warmed through.

    Substitutions

    • Pumpkin Pie Filling - if using pumpkin pie filling instead of pumpkin puree omit the cinnamon, ginger, cloves and allspice in the baked oatmeal
    • Pecans - replace the walnuts with pecans
    • Pumpkin Seeds - for a nut free version replace the walnuts with pumpkin seeds

    Frequently Asked Questions

    Can you bake oatmeal in the oven?

    Yes! It's really simple to make multiple servings of oatmeal by baking it in the oven at 350 degrees for 40-45 minutes or until the oatmeal is browned on top and cooked through.

    Do you put egg in baked oats?

    Yes. The egg will help hold the oatmeal mixture together and give a nice light and fluffy texture to your baked oatmeal.

    Why are my baked oats mushy?

    This could be because the baked oatmeal didn't cook long enough. If your oats are mushy try baking for 5-8 more minutes. Also, remember to use rolled oats and not quick cooking oatmeal for baked oatmeal.

    Didn't find the answer you're looking for?

    Ask AI to answer based on this recipe:

    ChatGPT
    Google AI
    Perplexity
    Grok
    Claude

    Pumpkin Apple Baked Oatmeal Supplies

    More Recipes You Might Enjoy

    • Gluten Free Pumpkin Pie Granola
    • 60+ Gluten Free Fall Recipes You'll Make All Season
    • Vanilla Chai Protein Smoothie
    • Gluten Free Pumpkin Oatmeal Cake

    I get a lot of my ingredients from Thrive Market. Thrive Market has been a game changer for me eating gluten free. They have so many options I can't get at my rural grocery stores! Use this link to get 40% off your first order!

    Print
    clock clock iconcutlery cutlery iconflag flag iconfolder folder iconinstagram instagram iconpinterest pinterest iconfacebook facebook iconprint print iconsquares squares iconheart heart iconheart solid heart solid icon

    Pumpkin Apple Baked Oatmeal with Streusel Topping


    5 Stars 4 Stars 3 Stars 2 Stars 1 Star

    No reviews

    • Author: Elaine VanVleck
    • Total Time: 55 minutes
    • Yield: 10 servings 1x
    • Diet: Gluten Free
    Print Recipe
    Pin Recipe

    Description

    This baked oatmeal casserole combines pumpkin, apple, and warm fall spices, topped with a sweet walnut streusel. It bakes up dense and cake like, and reheats beautifully for easy make ahead breakfasts.


    Ingredients

    Scale

    Oatmeal:

    • 15 ounce can Pumpkin Puree
    • 2 cups Milk
    • 2 large Eggs
    • ¼ cup Brown Sugar
    • ¼ cup Maple Syrup
    • 1 tsp Vanilla Extract
    • 2 medium Apples, cored, peeled and finely diced
    • 3 cups Gluten Free Rolled Oats
    • 2 tsp Baking Powder
    • 1 tsp Sea Salt
    • 2 tsp Ground Cinnamon
    • ½ tsp Ground Ginger
    • ¼ tsp Ground Cloves
    • ¼ tsp Allspice

    Streusel Topping:

    • 1 ½ cups Gluten Free Rolled Oats
    • ¾ cup Brown Sugar
    • ½ cup Gluten Free Flour
    • 1 tsp Sea Salt
    • ½ cup Unsalted Butter, melted
    • ½ cup Walnuts, chopped

    Instructions

    In a mixing bowl blend together the pumpkin puree, milk, eggs, brown sugar, maple syrup, vanilla and apples.

    Add the rolled oats, baking powder salt, cinnamon, ginger, cloves and allspice to the wet mixture and blend just until combined.

    Pour the oatmeal mixture into a 9x13 baking dish or a 3 quart baking dish.

    In the bowl of your stand mixer add the rolled oats, brown sugar, flour, salt, melted butter and chopped walnuts. Mix just until they are combined and small clumps form.

    Pour the streusel topping over the oatmeal mixture in the baking dish.

    Bake at 350 degrees for 40-45 minutes or until the top is browned slightly and the oatmeal is baked through.

    Serve immediately while warm or let cool to room temperature and store in the refrigerator for up to five days.

    If you made this recipe please leave a star rating and comment below. It helps other readers find this recipe and means so much to me.

    Notes

    Hint: This recipe is great for meal prepping. I baked the oatmeal, let cool to room temperature and then store in individual serving size containers in the refrigerator for up to five days.

    • Prep Time: 15 minutes
    • Cook Time: 40 minutes
    • Category: Breakfast
    • Method: Baking
    • Cuisine: American

    Did you make this recipe?

    Tag @smallfarmbiglife on Instagram and hashtag it #smallfarmbiglife

    If you make this pumpkin apple baked oatmeal, I would love to hear how it turned out. Leave a star rating and a comment below, it helps other readers find this recipe too.

    Top Tip

    I love to bake this pumpkin apple baked oatmeal with streusel topping recipe that day before serving and then reheat on low heat in the oven the morning I want to serve. This is also a great breakfast to bake and then store in individual containers to have breakfast ready to go.

    Pumpkin Apple Baked Oatmeal Ingredients

    • Pumpkin Puree
    • Milk
    • Eggs
    • Brown Sugar
    • Maple Syrup
    • Vanilla Extract
    • Apples
    • Gluten Free Rolled Oats
    • Baking Powder
    • Sea Salt
    • Ground Cinnamon
    • Ground Ginger
    • Ground Cloves
    • Allspice
    • Gluten Free Flour
    • Unsalted Butter
    • Walnuts

    Instructions

    In a mixing bowl blend together the pumpkin puree, milk, eggs, brown sugar, maple syrup, vanilla and apples.

    Add the rolled oats, baking powder salt, cinnamon, ginger, cloves and allspice to the wet mixture and blend just until combined.

    Pour the oatmeal mixture into a 9x13 baking dish or a 3 quart baking dish.

    In the bowl of your stand mixer add the rolled oats, brown sugar, flour, salt, melted butter and chopped walnuts. Mix just until they are combined and small clumps form.

    Pour the streusel topping over the oatmeal mixture in the baking dish.

    Bake at 350 degrees for 40-45 minutes or until the top is browned slightly and the oatmeal is baked through.

    Serve immediately while warm or let cool to room temperature and store in the refrigerator for up to five days.

    Hint: This recipe is great for meal prepping. I baked the oatmeal, let cool to room temperature and then store in individual serving size containers in the refrigerator for up to five days.

    Gluten Free Peanut Butter Cup Cookies

    These gluten free peanut butter cup cookies are the perfect combination of creamy peanut butter and rich chocolate. Baked in a mini muffin tin and topped with a Reese's miniature cup, they come together quickly and are always a hit.

    a plate of gluten free peanut butter cup cookies next to a bowl of Reese's miniature peanut butter cups.

    Using Reese's Peanut Butter Cups as the centerpiece, these homemade cookies feature soft and chewy peanut butter cookie cups that are gluten free and full of flavor.

    I love making a batch to bring to parties, since they disappear fast and everyone asks for the recipe.

    If you are looking for more yummy gluten free cookie recipes you might also enjoy my Gluten Free Peanut Butter Kiss Cookies, these Gluten Free Oatmeal Raisin Cookies, my Gluten Free Monster Cookies, these Gluten Free Old Fashioned Iced Oatmeal Cookies or my Gluten Free Double Chocolate Chip Cookies recipe.

    You can find all of my favorite cookie recipes here: The Best Gluten Free Cookie Recipes

    a gluten free peanut butter cup cookie cut in half to show the reese's minature peanut butter cup inside.
    [feast_advanced_jump_to]

    Why You'll Love This Recipe

    • Perfect for parties or using up leftover Halloween candy
    • No dough chilling required
    • Freezer friendly
    • Fun and easy for kids to help make

    Tips for the Best Cookies

    Pull the cookies from the oven as soon as the edges start to turn golden, they'll continue to set as they cool, which keeps them soft. Let them cool in the pan for a few minutes before removing so the peanut butter cup has time to set in the center.

    Storage

    After the cookies have cooled completely store them in an air tight container for up to a week.

    These cookies freeze really well too. Store cookies in a freezer safe container or bag for up to one month in the freezer.

    Top Tip

    These cookies are a great way to use up leftover Halloween candy, any mini peanut butter cups you have on hand work perfectly here. They're also easy to double, so I like making a big batch and freezing half for whenever a craving hits.

    Frequently Asked Questions

    Are Reese's peanut butter cups gluten free?

    Yes, the package is marked as gluten free and doesn't contain gluten in the ingredients list. Always remember to check the packaging in case this changes.

    Can I freeze peanut butter cup cookies?

    Yes! These cookies freeze really well. Use a freezer safe container or bag and store in the freezer for up to 3 months.

    Can I make these dairy free without the peanut butter cups?

    Yes. Bake the cookies as directed, then press a small hole in the center right after baking and fill it with about 2 teaspoons of creamy peanut butter instead of a Reese's cup.

    Can I use almond milk instead of regular milk?

    Yes. Almond milk works well in this recipe and is what's typically used in most of my recipes.

    Didn't find the answer you're looking for?

    Ask AI to answer based on this recipe:

    ChatGPT
    Google AI
    Perplexity
    Grok
    Claude

    Peanut Butter Cup Cookies Supplies

    More Recipes You Might Enjoy

    • Gluten Free Peanut Butter Kiss Cookies
    • Gluten Free Peanut Butter Banana Muffins
    • The Best Gluten Free Cookie Recipes
    • Gluten Free Homemade Dog Biscuits

    I get a lot of my ingredients from Thrive Market. Thrive Market has been a game changer for me eating gluten free. They have so many options I can't get at my rural grocery stores! Use this link to get 40% off your first order!

    Print
    clock clock iconcutlery cutlery iconflag flag iconfolder folder iconinstagram instagram iconpinterest pinterest iconfacebook facebook iconprint print iconsquares squares iconheart heart iconheart solid heart solid icon

    Gluten Free Peanut Butter Cup Cookies


    5 Stars 4 Stars 3 Stars 2 Stars 1 Star

    No reviews

    • Author: Elaine VanVleck
    • Total Time: 25 minutes
    • Yield: 26 cookies 1x
    • Diet: Gluten Free
    Print Recipe
    Pin Recipe

    Description

    These gluten free peanut butter cup cookies are soft, chewy peanut butter cookies baked in a mini muffin tin and topped with a Reese's miniature cup. They come together quickly and are perfect for parties, lunches, or using up leftover Halloween candy.


    Ingredients

    Scale
    • ¼ cup Unsalted Butter, at room temperature
    • ¾ cup Creamy Peanut Butter
    • 1 cup Brown Sugar
    • ¼ cup Granulated Sugar
    • 1 large Egg
    • 2 Tbsp Milk
    • 1 tsp Vanilla Extract
    • 1 ¼ cup Gluten Free Flour
    • 1 tsp Baking Soda
    • ½ tsp Sea Salt
    • 26 Reese's Miniature Peanut Butter Cups

    Instructions

    Preheat your oven to 375 degrees.

    In the bowl of your stand mixer beat the butter, peanut butter, brown sugar and granulated sugar until combined and fluffy.

    Add the egg, milk and vanilla and beat just until they are combined into the mixture.

    Add the flour, baking soda and salt. Mix until just combined.

    Using a cookie scoop, scoop the dough, roll into a ball. Place the cookie dough ball into the cups of a miniature muffin pan and repeat these steps for the rest of the cookie dough.

    Bake at 375 degrees for 10 minutes or until the edges are just starting to get golden brown. Remove from the oven and immediately press Reese's miniature peanut butter cups in to the center of each cookie.

    Move the cookies to a cooling rack to cool completely. Store in an air tight container for up to a week.

    If you made this recipe please leave a star rating and comment below. It helps other readers find this recipe and means so much to me.

    Notes

    Hint: These cookies freeze really well in a freezer safe container or a freezer safe bag for up to a month. I love to double the batch and freeze half of the cookies for later.

    • Prep Time: 15 minutes
    • Cook Time: 10 minutes
    • Category: Cookies
    • Method: Baking
    • Cuisine: American

    Did you make this recipe?

    Tag @smallfarmbiglife on Instagram and hashtag it #smallfarmbiglife

    I'd love to hear how these gluten free peanut butter cup cookies turn out for you! Leave a comment and star rating below, and let me know if you make the dairy free version. Don't forget to pin this recipe so you can make it again for your next party or holiday cookie tray.

    Peanut Butter Cup Cookies Ingredients

    • Unsalted Butter
    • Creamy Peanut Butter
    • Brown Sugar
    • Granulated Sugar
    • Egg
    • Milk
    • Vanilla Extract
    • Gluten Free Flour
    • Baking Soda
    • Sea Salt
    • Reese's Miniature Peanut Butter Cups

    Instructions

    Preheat your oven to 375 degrees.

    In the bowl of your stand mixer beat the butter, peanut butter, brown sugar and granulated sugar until combined and fluffy.

    Add the egg, milk and vanilla and beat just until they are combined into the mixture.

    Add the flour, baking soda and salt. Mix until just combined.

    Using a cookie scoop, scoop the dough, roll into a ball. Place the cookie dough ball into the cups of a miniature muffin tin and repeat these steps for the rest of the cookie dough.

    Bake at 375 degrees for 10 minutes or until the edges are just starting to get golden brown. Remove from the oven and immediately press Reese's miniature peanut butter cups in to the center of each cookie.

    Move the cookies to a cooling rack to cool completely. Store in an air tight container for up to a week.

    Hint: These cookies freeze really well in a freezer safe container or bag for up to a month. I love to double the batch and freeze half of the cookies for later.

    • « Previous Page
    • 1
    • …
    • 12
    • 13
    • 14
    • 15
    • 16
    • …
    • 30
    • Next Page »

    Welcome! I'm Elaine

    I'm so glad you are here! I share easy gluten free recipes from my small farm in Washington.

    Be sure to sign up for my newsletter to stay up to date on all of my new recipes.

    More about me...
    • Instagram
    • Pinterest
    • Facebook
    • Twitter
    • Mail

    Load up on new recipes, exclusive goodies, + more!
    Sign up below to stay up-to-date on news, events, and special deals.
    Thank you for subscribing!

    Easy Meals Recipes

    • Gluten Free Instant Pot Chili Mac and Cheese
    • Gluten Free Taco Casserole
    • Gluten Free Cowboy Baked Beans
    • Gluten Free Walking Taco Casserole
    • Gluten Free Creamy Beef and Mushroom Pasta
    • Gluten Free Instant Pot Chicken and Dumplings
    • Instant Pot Mexican Style Beef and Rice
    • Gluten Free Chicken Parmesan Pasta Casserole
    • Gluten Free One Pot Hamburger Helper Copycat
    • Gluten Free Salisbury Steak with Mushroom Gravy
    • Gluten Free Air Fryer Fajitas
    • Gluten Free Sloppy Joe Casserole

    Footer

    back to top

    About

    • Privacy Policy
    • Shop my Amazon Page
    • Follow me on LTK

    Newsletter

    • Sign Up! for emails and updates

    Contact

    • Contact
    • Media Kit
    • About Me

    As an Amazon Associate I earn from qualifying purchases.

    I may get commissions for purchases made through links on this site.

    Copyright © 2026 Brunch Pro on the Brunch Pro Theme