Small Farm Big Life

  • Gluten Free Recipe Index
  • Subscribe
  • Resources
menu icon
go to homepage
  • Home
  • Gluten Free Recipe Index
  • Subscribe
  • My Story
  • Resources
  • Free Guides
    • Email
    • Facebook
    • Instagram
    • Pinterest
  • subscribe
    search icon
    Homepage link
    • Home
    • Gluten Free Recipe Index
    • Subscribe
    • My Story
    • Resources
    • Free Guides
    • Email
    • Facebook
    • Instagram
    • Pinterest
  • ×

    Gluten Free Cornbread Stuffing

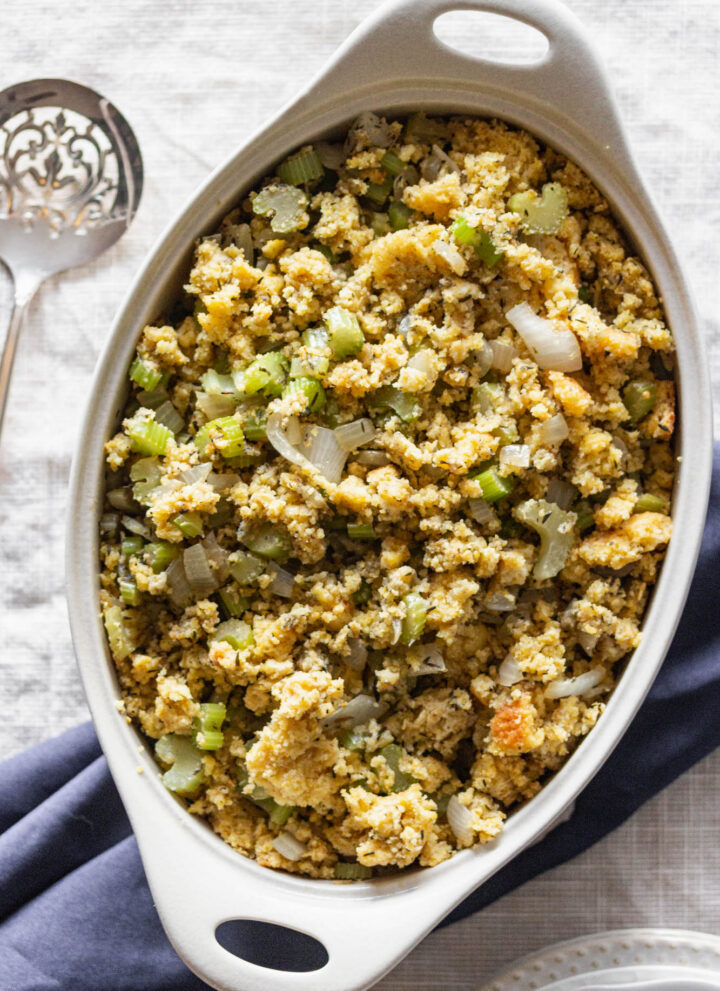
    This gluten free cornbread stuffing is easy to make homemade for Thanksgiving. This is the best recipe to make for a healthy, meatless stuffing. This savory stuffing is simple to make from scratch.
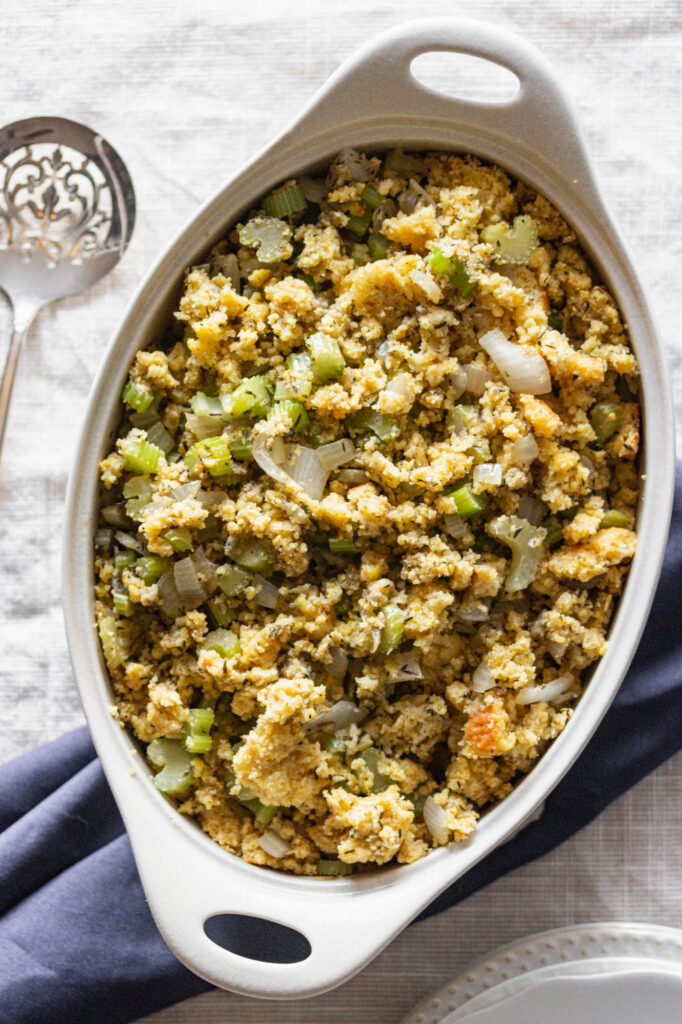
    a cream, oval casserole dish of gluten free cornbread stuffing next to a silver serving spoon

    This Gluten Free Cornbread Stuffing is a holiday casserole that brings all the cozy flavors of Thanksgiving to your table. Made with homemade cornbread for rich, authentic flavor.

    This easy cornbread stuffing recipe is the perfect side dish for your Thanksgiving dinner or any special Sunday gathering. It's Moist, flavorful, and comforting! It's the kind of stuffing recipe for Thanksgiving that pairs beautifully with turkey, gravy, and all your favorite holiday sides.

    Whether you call it stuffing or dressing, this dish delivers that nostalgic flavor you love while keeping it gluten free for everyone to enjoy.

    I love cornbread stuffing and was a little sad the first Thanksgiving that I thought I would be missing out. I was so happy to find gluten free cornmeal so I could make the cornbread for this recipe!

    If you are looking for more corn recipes try my Gluten Free Zucchini Squash and Corn Casserole, my Easy Fried Frozen Corn, my Cheesy Slow Cooker Creamed Corn or my Gluten Free Corn Pudding Skillet.

    You can find all of my side dish recipes here: Gluten Free Side Dish Recipes
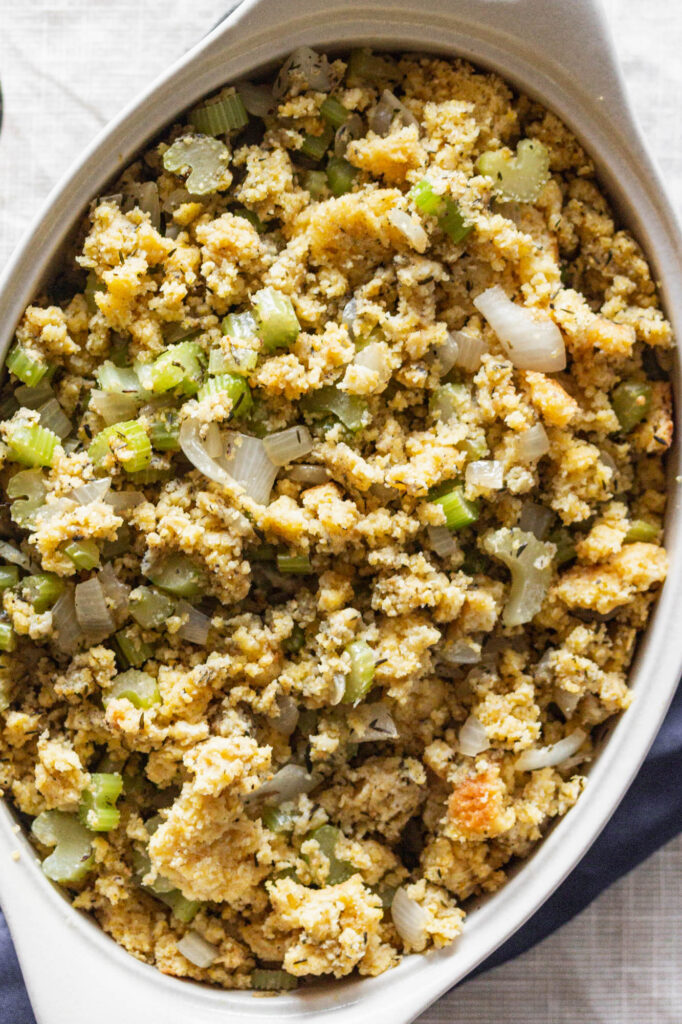
    a cream, oval casserole dish of gluten free cornbread stuffing next to a silver serving spoon
    [feast_advanced_jump_to]

    Ingredients

    • Unsalted Butter
    • Celery
    • Yellow Onion
    • Dried Ground Sage
    • Dried Thyme
    • Sea Salt
    • Coarse Ground Black Pepper
    • Milk
    • Eggs
    • Gluten Free Cornmeal
    • Gluten Free Flour
    • Granulated Sugar
    • Baking Powder

    Instructions

    Make a batch of my Gluten Free Cornbread at least a few hours in advance. I like to make it a day or two in advance so it gets a bit stale for the stuffing.

    Preheat your oven to 325 degrees.

    Melt ¼ cup of butter in a skillet. Cook the celery and onions until they are tender and a bit translucent. Add the sage, thyme, salt and pepper. Stir until the spices are blended with the celery and onions. Cook a couple of minutes more until the spices become fragrant.

    Add the crumbled cornbread to the celery and onion mixture. I like big crumbles of cornbread, but it's up to you how much you want to crumble your cornbread.

    Place the mixture into a covered baking dish. Slice the remaining ¼ cup butter on top of the stuffing.

    Bake at 325 degrees for 30 minutes.

    Remove the lid from the baking dish and let cool slightly before serving.

    Supplies

    Frequently Asked Questions

    Does cornbread stuffing have gluten?

    Yes, it does if you don't use gluten free cornmeal. It is very important to make sure the cornmeal you use has the gluten free certified label. Regular cornmeal is usually processed with wheat flour and can be contaminated with gluten.

    Can I make cornbread stuffing ahead of time?

    Yes, you definitely can. You can make the cornbread a day or two in advance. Then, you can sautés the onions, celery and spices in butter and add that cornbread in. The cornbread can go in the fridge until you are ready to cook it before serving. Cook at 350 degrees for 30 minutes and then serve.

    What should I serve with cornbread stuffing?

    Traditionally cornbread stuffing is served at Thanksgiving with turkey, cranberry sauce, sweet potatoes, etc. At our house we also like to eat it with pork chops or steaks year round. Cornbread stuffing is a delicious side dish that doesn't have to be reserved for just your Thanksgiving dinner.

    More Recipes You Might Enjoy

    • Gluten Free Corn Pudding Skillet
    • Cheesy Slow Cooker Creamed Corn
    • Gluten Free Plum Cornmeal Cake
    • Easy Gluten Free Tamale Pie

    I get a lot of my ingredients from Thrive Market. Thrive Market has been a game changer for me eating gluten free. They have so many options I can't get at my rural grocery stores! Use this link to get 40% off your first order!

    Print
    clock clock iconcutlery cutlery iconflag flag iconfolder folder iconinstagram instagram iconpinterest pinterest iconfacebook facebook iconprint print iconsquares squares iconheart heart iconheart solid heart solid icon

    Gluten Free Cornbread Stuffing


    5 Stars 4 Stars 3 Stars 2 Stars 1 Star

    No reviews

    • Author: Elaine VanVleck
    • Total Time: 50 minutes
    • Yield: 8 servings 1x
    • Diet: Gluten Free
    Print Recipe
    Pin Recipe

    Description

    This gluten free cornbread stuffing is easy to make homemade for Thanksgiving. This is the best recipe to make for a healthy, meatless stuffing.


    Ingredients

    Scale
    • ½ cup Unsalted Butter
    • 6 Celery Stocks, chopped (approximately 2 cups)
    • 1 medium Yellow Onion, chopped
    • 3 tsp. Dried Ground Sage
    • 3 tsp. Dried Thyme
    • 2 tsp. Sea Salt
    • ½ tsp. Coarse Ground Black Pepper
    • Gluten Free Cornbread, crumbled

    Instructions

    Make a batch of my Gluten Free Cornbread at least a few hours in advance. I like to make it a day or two in advance so it gets a bit stale for the stuffing.

    Preheat your oven to 325 degrees.

    Melt ¼ cup of butter in a skillet. Cook the celery and onions until they are tender and a bit translucent. Add the sage, thyme, salt and pepper. Stir until the spices are blended with the celery and onions. Cook a couple of minutes more until the spices become fragrant.

    Add the crumbled cornbread to the celery and onion mixture. I like big crumbles of cornbread, but it's up to you how much you want to crumble your cornbread.

    Place the mixture into a covered baking dish. Slice the remaining ¼ cup butter on top of the stuffing.

    Bake at 325 degrees for 30 minutes.

    Remove the lid from the baking dish and let cool slightly before serving.

    Notes

    I like to make the gluten free cornbread a day or two in advance.

    If your celery and onion mixture gets too dry add a bit more butter or some olive oil.

    • Prep Time: 20 minutes
    • Cook Time: 30 minutes
    • Category: Side Dishes
    • Method: Baking
    • Cuisine: Gluten Free

    Did you make this recipe?

    Tag @smallfarmbiglife on Instagram and hashtag it #smallfarmbiglife

    Top Tip

    To make this recipe you will first need to make a batch of my Gluten Free Cornbread. This recipe for gluten free cornbread is super simple. I like to make mine a day or two in advance. The gluten free cornbread stuffing is better if the cornbread is a bit stale.

    Gluten Free Burger Sauce

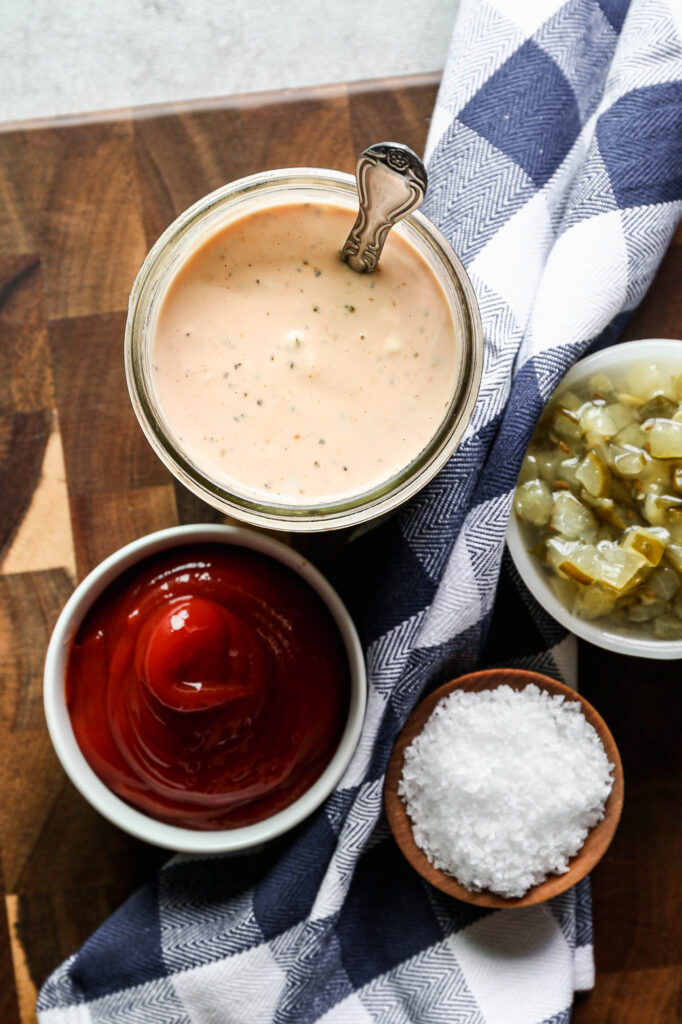
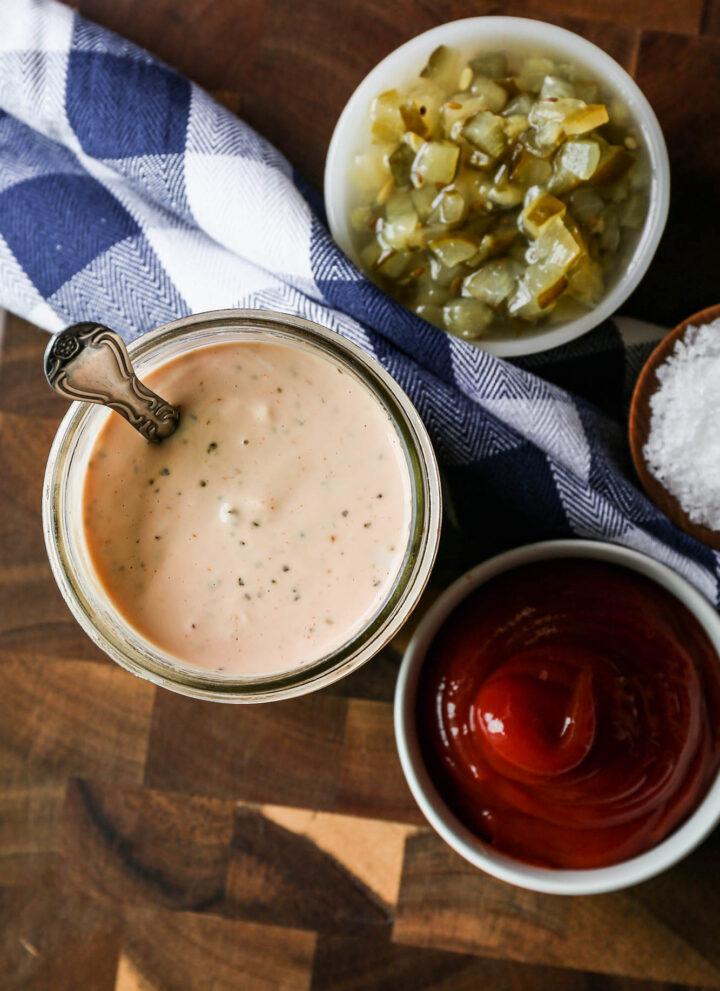
    This homemade gluten free burger sauce is easy to make and great on burgers or fries. The recipe just takes minutes to mix together with simple ingredients. This special sauce is perfect to have in the fridge to got with a quick meal of burgers and fries.

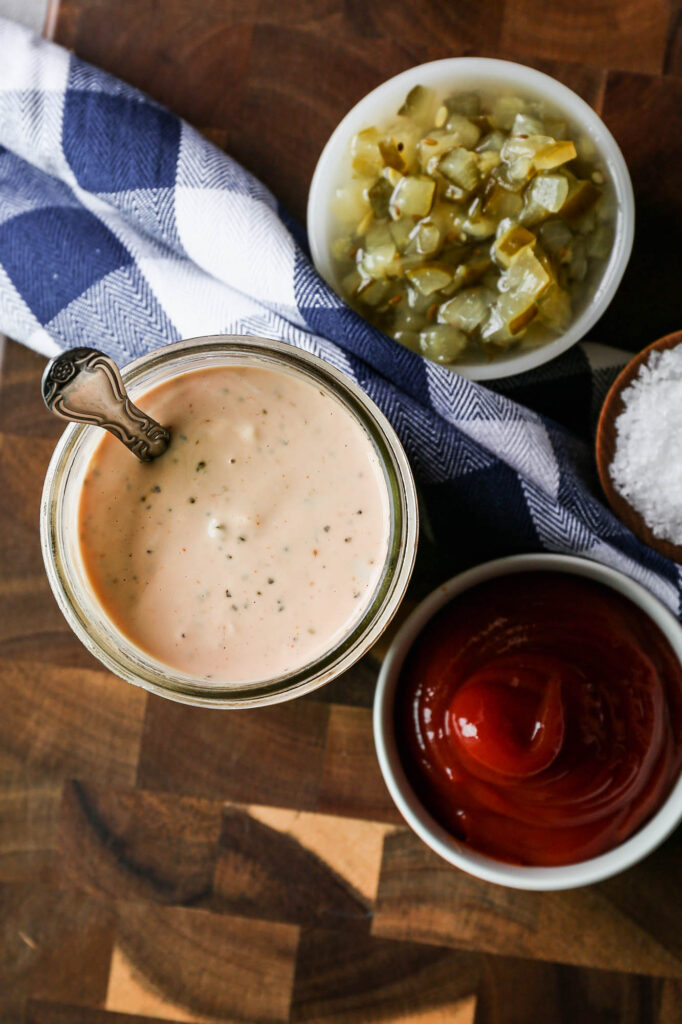
    a jar of gluten free burger sauce next to a bowl of dill relish, a bowl of ketchup and dish of salt

    I also use this sauce on my Gluten Free Cheeseburger Casserole recipe. Another favorite way to use this sauce is with our favorite frozen Alexia Sweet Potato Fries. I get them at Target or Walmart and air fry them at 400 degrees for 12 minutes.

    You might also enjoy my Gluten Free Homemade Ranch Dip or my Gluten Free Homemade Ranch Dip.

    a jar of gluten free burger sauce next to a bowl of dill relish, a bowl of ketchup and dish of salt
    [feast_advanced_jump_to]

    Ingredients

    • Mayonnaise
    • Ketchup
    • Dill Pickle Relish
    • Granulated Sugar
    • White Vinegar
    • Sea Salt
    • Ground Black Pepper

    Instructions

    In a jar or container mix together the mayonnaise, ketchup, dill pickle relish, sugar, white vinegar, salt and pepper with a spatula. You can also use a handheld mixer or an immersion blender to mix the ingredients together.

    Using an immersion blender will make a creamier sauce that is free of lumps from the relish.

    Supplies

    Frequently Asked Questions

    How do you make burger sauce from scratch?

    This recipe is so simple! You mix together the mayonnaise, ketchup, dill pickle relish, sugar, white vinegar, sea salt and black pepper in a jar or bowl. I find using my immersion blender or hand mixer is the easiest way to get the ingredients mixed together and to have a creamy sauce.

    How long does homemade gluten free burger sauce last?

    Honestly we go through this pretty quickly, but it should last in your refrigerator for up to a week. I like this sauce best after it's been in a refrigerator for a day and has really gotten flavorful.

    More Recipes You Might Enjoy

    Gluten Free Homemade Ranch Dip
    Gluten Free Caramelized Onion Dip
    Air Fryer Sweet Potato Wedges
    Gluten Free Cheeseburger Casserole
    10 Easy Gluten Free Beef Recipes

    I get a lot of my ingredients from Thrive Market. Thrive Market has been a game changer for me eating gluten free. They have so many options I can't get at my rural grocery stores! Use this link to get 25% off your first order!

    Print
    clock clock iconcutlery cutlery iconflag flag iconfolder folder iconinstagram instagram iconpinterest pinterest iconfacebook facebook iconprint print iconsquares squares iconheart heart iconheart solid heart solid icon

    Gluten Free Burger Sauce


    5 Stars 4 Stars 3 Stars 2 Stars 1 Star

    No reviews

    • Author: Elaine VanVleck
    • Total Time: 5 minutes
    • Yield: 1 cup 1x
    • Diet: Gluten Free
    Print Recipe
    Pin Recipe

    Description

    This homemade gluten free burger sauce is easy to make and great on burgers or fries. The recipe just takes minutes to mix together with simple ingredients. This special sauce is perfect to have in the fridge to got with a quick meal of burgers and fries.


    Ingredients

    Scale

    ½ cup Mayonnaise
    ¼ cup Ketchup
    2 tsp. Dill Pickle Relish
    1 tsp. Granulated Sugar
    1 tsp. White Vinegar
    ¼ tsp. Sea Salt
    ½ tsp. Coarse Ground Black Pepper


    Instructions

    In a jar or container mix together the mayonnaise, ketchup, dill pickle relish, sugar, white vinegar, salt and pepper with a spatula. You can also use a handheld mixer or an immersion blender to mix the ingredients together.

    Using an immersion blender will make a creamier sauce that is free of lumps from the relish.

    • Prep Time: 5 minutes
    • Category: Sauces
    • Cuisine: Gluten Free

    Did you make this recipe?

    Tag @smallfarmbiglife on Instagram and hashtag it #smallfarmbiglife

    Baked Kale and Zucchini Pilaf

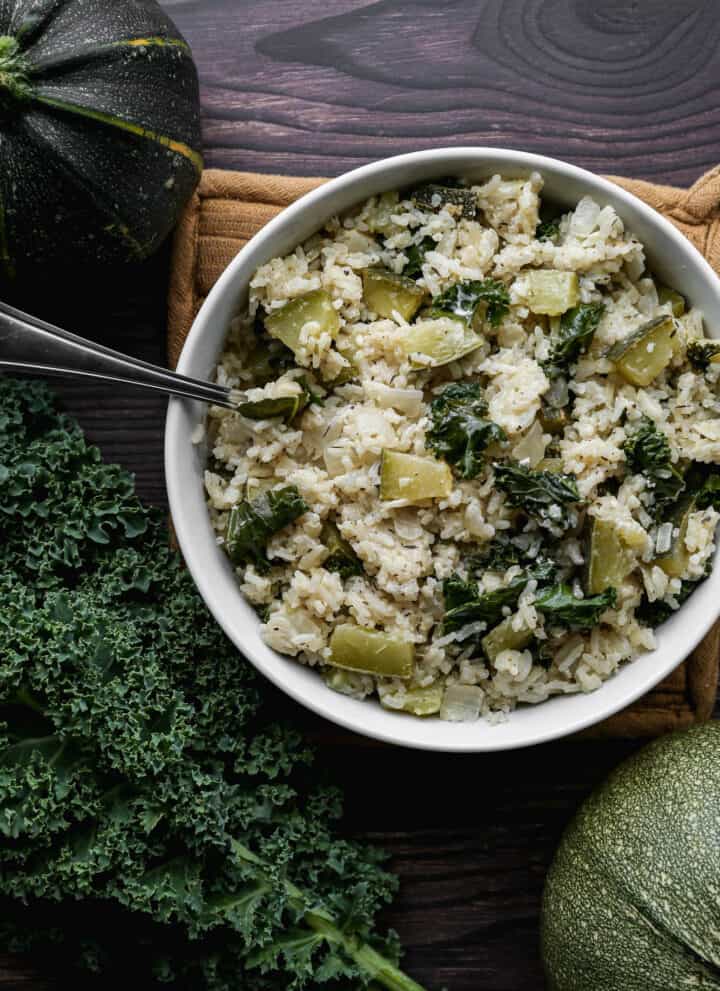
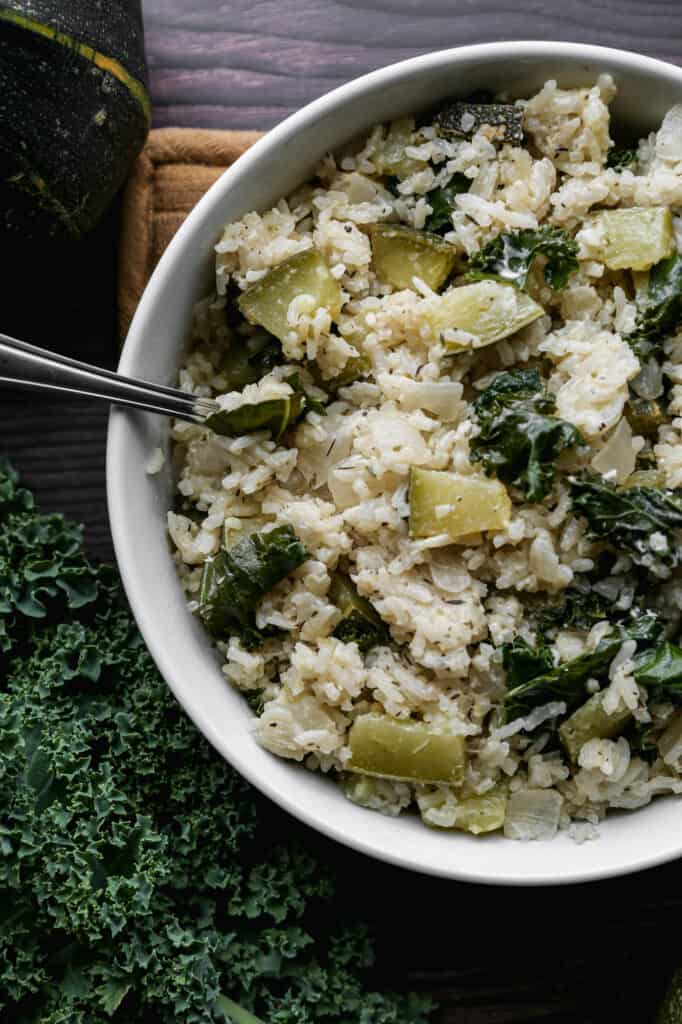
    This easy recipe for gluten free baked kale and zucchini pilaf is made with jasmine rice and lots of green veggies. It's a perfect side dish with steak, chicken or on it's own for a light meal. This rice casserole has cream cheese and spices for a delicious, creamy flavor.

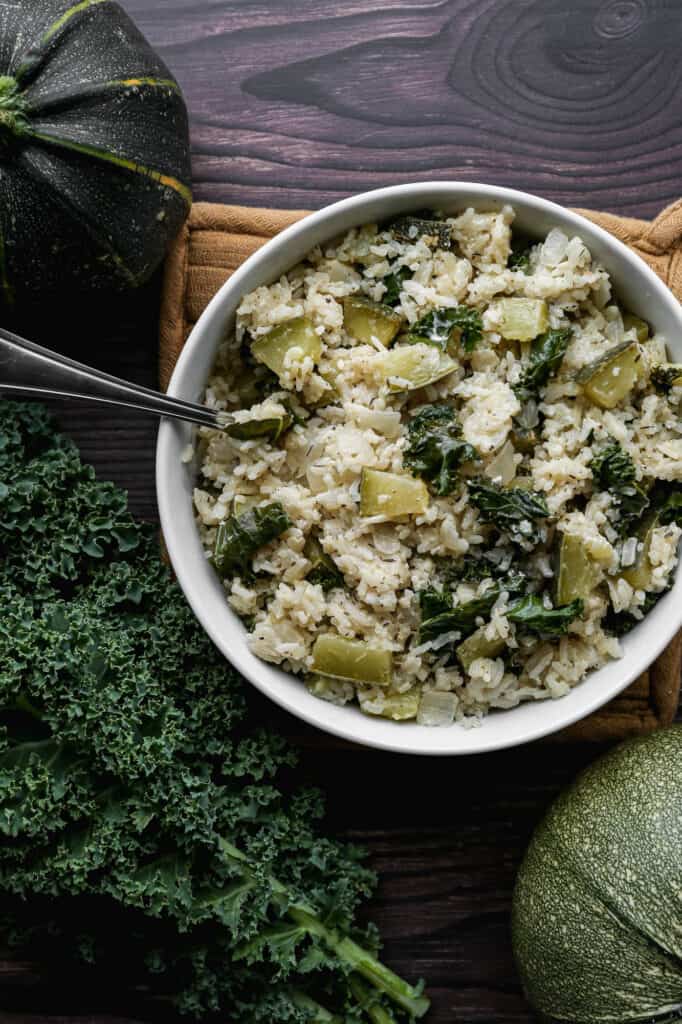
    a white bowl of gluten free baked kale and zucchini pilaf on a tan oven mitt next to two round zucchini and some kale leaves

    I'm always looking for ways to use all of the kale and zucchini I grow in our garden. It's my favorite to have savory recipes that aren't the typical baked goods. Don't get me wrong, I love a good gluten free zucchini bread or cookie, but adding more greens to a meal is always a win.

    If you are looking for more zucchini recipes try my Gluten Free Zucchini Squash and Corn Casserole, my Air Fryer Roasted Zucchini Squash, my Gluten Free Zucchini Chocolate Chip Cookies, or my Easy Gluten Free Zucchini Brownies.

    You can find all of my side dishes here: Gluten Free Side Dish Recipes

    a white bowl of gluten free baked kale and zucchini pilaf on a tan oven mitt next to two round zucchini and some kale leaves
    [feast_advanced_jump_to]

    Ingredients

    • Olive Oil
    • Yellow Onion
    • Minced Garlic
    • Jasmine Rice
    • Vegetable Stock
    • Cream Cheese
    • Dried Thyme
    • Dried Tarragon
    • Sea Salt
    • Ground Black Pepper
    • Zucchini
    • Kale

    Instructions

    Preheat your oven to 350 degrees.

    In an ovenproof, covered dutch oven or pot on medium heat saute the onions and garlic in olive oil until softened, 4-5 minutes. Add zucchini, thyme, tarragon, salt and pepper. Cook 4-5 minutes to soften the zucchini.

    Turn off the heat. Add the jasmine rice and vegetable stock to the pot. Stir to combine ingredients.

    Bake at 350 degrees for 30 minutes with the lid on the pot.

    Carefully remove the pot from the oven. Remove the lid and fluff the rice with a fork. Then add the cream cheese and kale. Stir the kale into the mixture and bury the cream cheese in the middle. 

    Place the dutch oven back in the oven and bake at 350 degrees for 2-3 minutes or until the cream cheese is softened and the kale is wilted.

    Remove from oven and stir the cream cheese into the mixture to create a creamy sauce. Serve immediately while still warm.

    Supplies

    Frequently Asked Questions

    What is pilaf?

    Pilaf is a rice dish that is usually cooked in stock or broth. It includes spices, vegetables and sometimes meat. The idea of pilaf is cooking the rice along with all the other ingredients. I love that pilaf makes for an easy side dish that can be cooking in the oven while I finish the rest of the meal.

    How do you keep kale and squash pilaf from getting watery?

    It's really important not to skip the step of cooking the zucchini on the stovetop before adding the rest of the ingredients and baking. Cooking down the vegetables will evaporate off some of the moisture. 

    Then you will add the rest of your ingredients and bake covered for 30 minutes. It's very important that you use a dutch oven or other dish with a tight fitting cover. This will allow the rice to absorb the vegetable stock and the excess moisture from the zucchini.

    More Recipes You Might Enjoy

    • Cheesy Gluten Free Summer Squash Casserole
    • Air Fryer Roasted Zucchini Squash
    • Gluten Free Zucchini Squash and Corn Casserole
    • Gluten Free Sausage, Kale and Potato Skillet

    I get a lot of my ingredients from Thrive Market. Thrive Market has been a game changer for me eating gluten free. They have so many options I can't get at my rural grocery stores! Use this link to get 25% off your first order!

    Print
    clock clock iconcutlery cutlery iconflag flag iconfolder folder iconinstagram instagram iconpinterest pinterest iconfacebook facebook iconprint print iconsquares squares iconheart heart iconheart solid heart solid icon

    Baked Kale and Zucchini Pilaf


    5 Stars 4 Stars 3 Stars 2 Stars 1 Star

    No reviews

    • Author: Elaine VanVleck
    • Total Time: 52 minutes
    • Yield: 8 servings 1x
    • Diet: Gluten Free
    Print Recipe
    Pin Recipe

    Description

    This easy recipe for gluten free baked kale and zucchini pilaf is made with jasmine rice and lots of green veggies. It's a perfect side dish with steak, chicken or on it's own for a light meal. This rice casserole has cream cheese and spices for a delicious, creamy flavor.


    Ingredients

    Scale

    1 Tbsp. Olive Oil
    1 small Yellow Onion, finely diced
    1 Tbsp. Minced Garlic
    1 cup Jasmine Rice
    2 cups Vegetable Broth
    2 ounces Cream Cheese
    1 tsp. Dried Thyme
    ½ tsp. Dried Tarragon
    ½ tsp. Sea Salt
    ½ tsp. Ground Black Pepper
    1 small Zucchini, seeds removed and diced into ½ inch chunks
    1 cup Kale, stem removed and chopped


    Instructions

    Preheat your oven to 350 degrees.

    In an ovenproof, covered dutch oven or pot on medium heat saute the onions and garlic in olive oil until softened, 4-5 minutes. Add zucchini, thyme, tarragon, salt and pepper. Cook 4-5 minutes to soften the zucchini.

    Turn off the heat. Add the jasmine rice and vegetable stock to the pot. Stir to combine ingredients.

    Bake at 350 degrees for 30 minutes with the lid on the pot.

    Carefully remove the pot from the oven. Remove the lid and fluff the rice with a fork. Then add the cream cheese and kale. Stir the kale into the mixture and bury the cream cheese in the middle. 

    Place the dutch oven back in the oven and bake at 350 degrees for 2-3 minutes or until the cream cheese is softened and the kale is wilted.

    Remove from oven and stir the cream cheese into the mixture to create a creamy sauce. Serve immediately while still warm.

    • Prep Time: 20 minutes
    • Cook Time: 32 minutes
    • Category: Side Dish
    • Method: Baking
    • Cuisine: Gluten Free

    Did you make this recipe?

    Tag @smallfarmbiglife on Instagram and hashtag it #smallfarmbiglife

    Cheesy Gluten Free Summer Squash Casserole

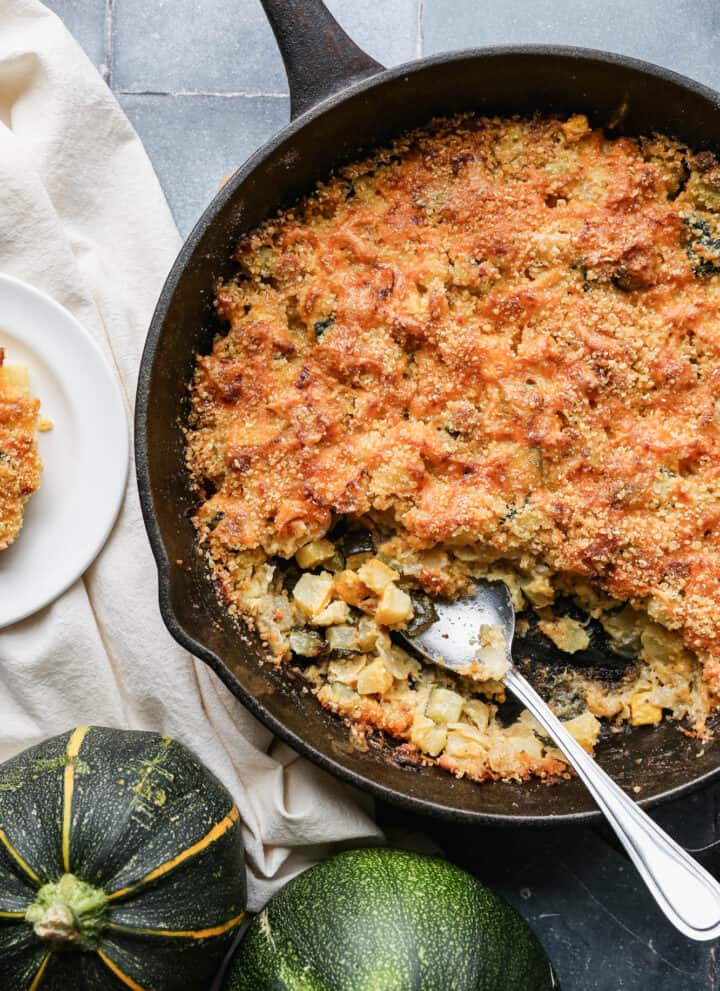
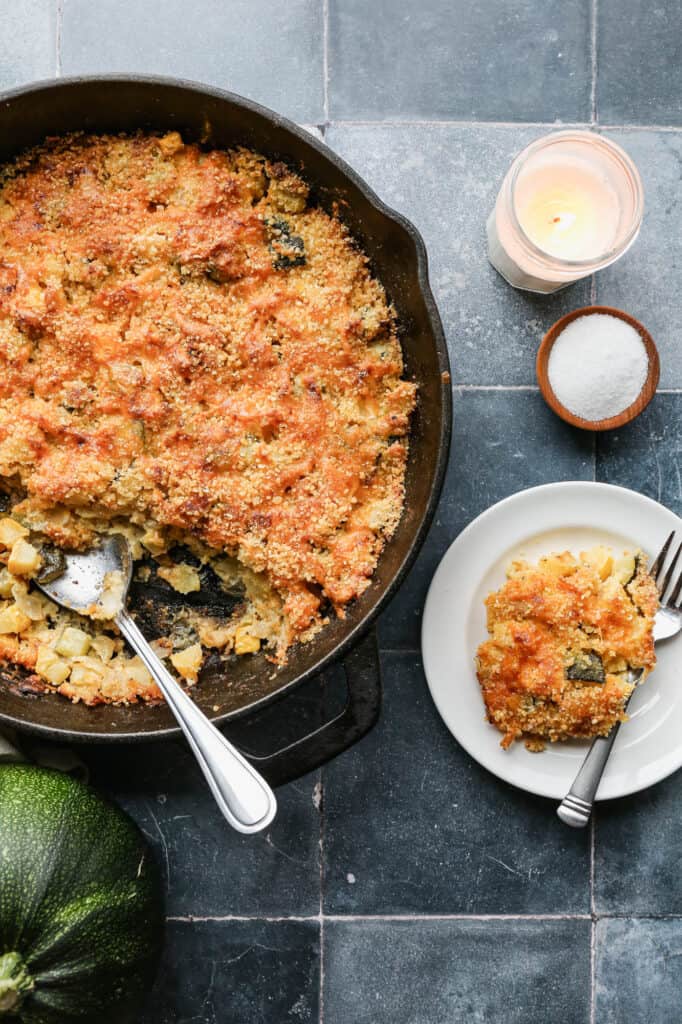
    This Gluten Free Summer Squash Casserole is one of those recipes that I look forward to making every single summer when the garden is overflowing with zucchini and yellow squash and I need a delicious way to use it all up. It is rich, creamy, and packed with sharp cheddar cheese in the most comforting and satisfying baked side dish that disappears fast at any dinner table or potluck.

    The combination of sour cream, mayonnaise, eggs, and cheese creates the most incredibly creamy filling and the gluten free bread crumb topping gets beautifully golden and crunchy under the broiler for the perfect finish.

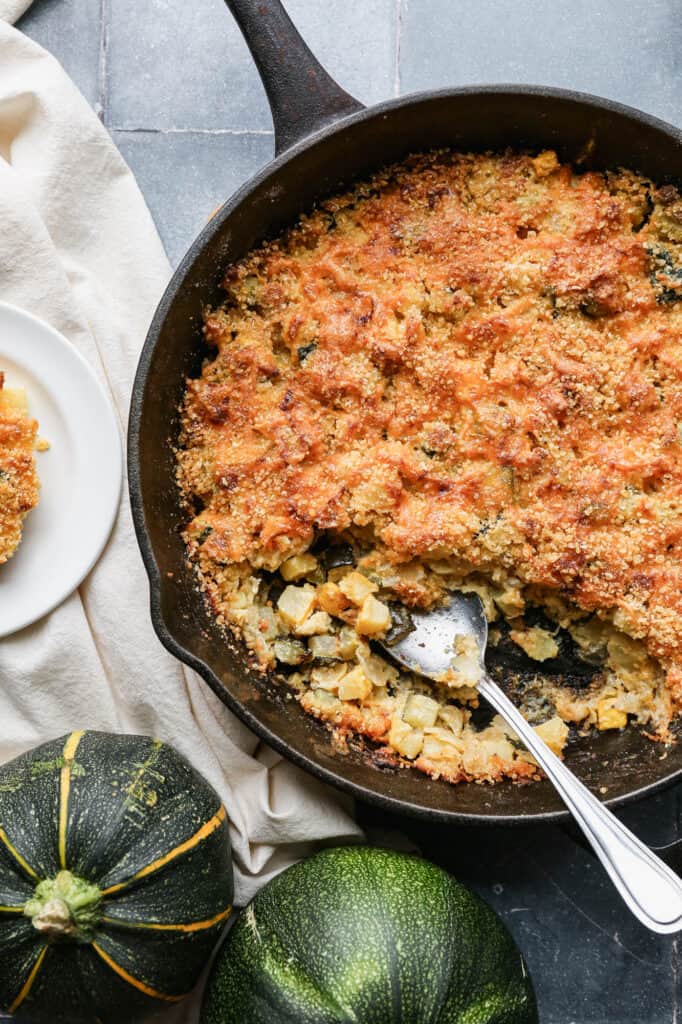
    a cast iron skillet of gluten free summer squash casserole with some served onto a white plate

    The most important thing to know about this recipe is that you need to saute the squash and zucchini on the stovetop before baking. This step cooks out a lot of the moisture from the vegetables which is what keeps your casserole from getting watery. Do not skip it.

    After that the rest of the recipe comes together quickly and the oven does all the work. This is genuinely one of my favorite summer side dishes and I think once you make it you are going to feel the same way.

    If you are looking for more zucchini recipes try my Gluten Free Zucchini Squash and Corn Casserole, my Air Fryer Roasted Zucchini Squash, my Baked Kale and Zucchini Pilaf or my Easy Gluten Free Zucchini Brownies.

    You can find all of my side dish recipes here: Gluten Free Side Dish Recipes

    a cast iron skillet of gluten free summer squash casserole with some served onto a white plate
    [feast_advanced_jump_to]

    Ingredients

    • Yellow Squash
    • Zucchini
    • Unsalted Butter
    • Yellow Onion
    • Minced Garlic
    • Cheddar Cheese
    • Sour Cream
    • Mayonnaise
    • Eggs
    • Sea Salt
    • Ground Black Pepper
    • Gluten Free Bread Crumbs

    Instructions

    Preheat your oven to 350 degrees. 

    In an oven safe pan or cast iron skillet on medium heat add butter and allow to melt. Add the diced onions and cook until they're almost translucent. Add the minced garlic and cook 1-2 minutes more.

    Add the diced yellow squash and zucchini to the onion mixture. Saute on medium heat until the squash starts to soften and the onions are completely translucent.

    Add the eggs to the skillet and mix around until they are creamy and mixed into the vegetables. Add 1 cup of cheddar cheese, sour cream, mayonnaise, salt, pepper and 1 cup of gluten free bread crumbs. Stir thoroughly until everything is mixed together.

    This mixture will be very thick and almost paste like. This will allow for the squash to continue to cook down in the oven and release water.

    Top the mixture with the other ½ cup of cheddar cheese and ½ cup of gluten free bread crumbs.

    Bake at 350 degrees for 45-50 minutes. The edges will be bubbling, the cheese will be melted and the top will be slightly browned when the casserole is done.

    At this point, I like to turn my broiler on high and broil the casserole for 1-2 minutes. This will brown the top and give it a bit of crunch. Watch the casserole very closely as the browning will happen quickly. 

    Supplies

    More Recipes You Might Enjoy

    • Gluten Free Zucchini Squash and Corn Casserole
    • Easy Gluten Free Zucchini Brownies
    • Gluten Free Zucchini Chocolate Chip Cookies
    • Air Fryer Roasted Zucchini Squash

    I get a lot of my ingredients from Thrive Market. Thrive Market has been a game changer for me eating gluten free. They have so many options I can't get at my rural grocery stores! Use this link to get 40% off your first order!

    Print
    clock clock iconcutlery cutlery iconflag flag iconfolder folder iconinstagram instagram iconpinterest pinterest iconfacebook facebook iconprint print iconsquares squares iconheart heart iconheart solid heart solid icon

    Gluten Free Summer Squash Casserole


    5 Stars 4 Stars 3 Stars 2 Stars 1 Star

    No reviews

    • Author: Elaine VanVleck
    • Total Time: 1 hour 15 minutes
    • Yield: 8 servings 1x
    • Diet: Gluten Free
    Print Recipe
    Pin Recipe

    Description

    This Gluten Free Summer Squash Casserole is a rich, creamy, and cheesy baked side dish made with fresh zucchini and yellow squash, sharp cheddar cheese, sour cream, and gluten free bread crumbs for the most delicious and satisfying summer vegetable casserole you will ever make. The squash is sauteed with butter, onion, and garlic before baking which prevents a watery casserole and creates incredible depth of flavor with a beautifully golden and crunchy bread crumb topping. Naturally gluten free and perfect for summer dinners, potlucks, and using up garden zucchini and yellow squash all season long!


    Ingredients

    Scale
    • 1 pound Yellow Squash, seeds removed and cut into ½ inch chunks
    • 1 pound Zucchini, seeds removed and cut into ½ inch chunks
    • 2 Tbsp. Unsalted Butter
    • 1 medium Yellow Onion, diced
    • 1 Tbsp. Minced Garlic
    • 1 ½ cups Cheddar Cheese, grated
    • ½ cup Sour Cream
    • ¼ cup Mayonnaise
    • 2 large Eggs, beaten
    • 1 tsp. Sea Salt
    • 1 tsp. Ground Black Pepper
    • 1 ½ cups Gluten Free Bread Crumbs

    Instructions

    Preheat your oven to 350 degrees. 

    In an oven safe pan or cast iron skillet on medium heat add butter and allow to melt. Add the diced onions and cook until they're almost translucent. Add the minced garlic and cook 1-2 minutes more.

    Add the diced yellow squash and zucchini to the onion mixture. Saute on medium heat until the squash starts to soften and the onions are completely translucent.

    Add the eggs to the skillet and mix around until they are creamy and mixed into the vegetables. Add 1 cup of cheddar cheese, sour cream, mayonnaise, salt, pepper and 1 cup of gluten free bread crumbs. Stir thoroughly until everything is mixed together.

    This mixture will be very thick and almost paste like. This will allow for the squash to continue to cook down in the oven and release water.

    Top the mixture with the other ½ cup of cheddar cheese and ½ cup of gluten free bread crumbs.

    Bake at 350 degrees for 45-50 minutes. The edges will be bubbling, the cheese will be melted and the top will be slightly browned when the casserole is done.

    At this point, I like to turn my broiler on high and broil the casserole for 1-2 minutes. This will brown the top and give it a bit of crunch. Watch the casserole very closely as the browning will happen quickly. 

    • Prep Time: 30 minutes
    • Cook Time: 45 minutes
    • Category: Side Dish
    • Method: Baking
    • Cuisine: American

    Did you make this recipe?

    Tag @smallfarmbiglife on Instagram and hashtag it #smallfarmbiglife

    If you made this Gluten Free Summer Squash Casserole I would love to hear what you thought! Please leave a star rating and a comment below. This is one of my favorite summer side dish recipes and I hope it becomes one of yours too!

    Storage

    After the casserole has cooled completely store in an air tight container in the refrigerator for up to 5 days.

    Top Tip

    Do not skip the step of sauteing the squash and zucchini on the stovetop before adding the remaining ingredients and baking. This is the most important step in the entire recipe. Summer squash holds a tremendous amount of water and cooking it down first allows that moisture to evaporate before the casserole goes into the oven. If you skip this step your casserole will be watery and soupy rather than creamy and set. Cook the squash until it has softened and the onions are completely translucent before moving on.

    Didn't find the answer you're looking for?

    Ask AI to answer based on this recipe:

    ChatGPT
    Google AI
    Perplexity
    Grok
    Claude

    Frequently Asked Questions

    How do you thicken summer squash casserole?

    This recipe has gluten free bread crumbs or rice crumbs in it for a thickener. After cooking the squash on the stovetop there is still a lot of liquid that hasn't evaporated you can add a bit more bread crumbs, but remember, that more moisture will evaporate as you bake this dish.

    How do you keep squash casserole from getting watery?

    It's really important not to skip the step of cooking the squash and zucchini on the stovetop before adding the rest of the ingredients and baking. Cooking down the vegetables will evaporate off some of the moisture.

    Then you will add the cheese, sour cream, mayonnaise, eggs, seasoning and bread crumbs. After adding these the casserole will be almost paste like and very thick. This is perfect because as the squash and zucchini continue to cook down and release water in the oven you will be left with a super creamy hot dish.

    How do I tell if this casserole is done?

    The edges will be bubbling and then cheese will be completely melted on top. The top will just be starting to brown a bit. I like to turn the broiler on high and finish browning the top of the casserole to give this dish a bit of crunch on top at this point.

    Gluten Free Herbes de Provence Almond Flour Bread

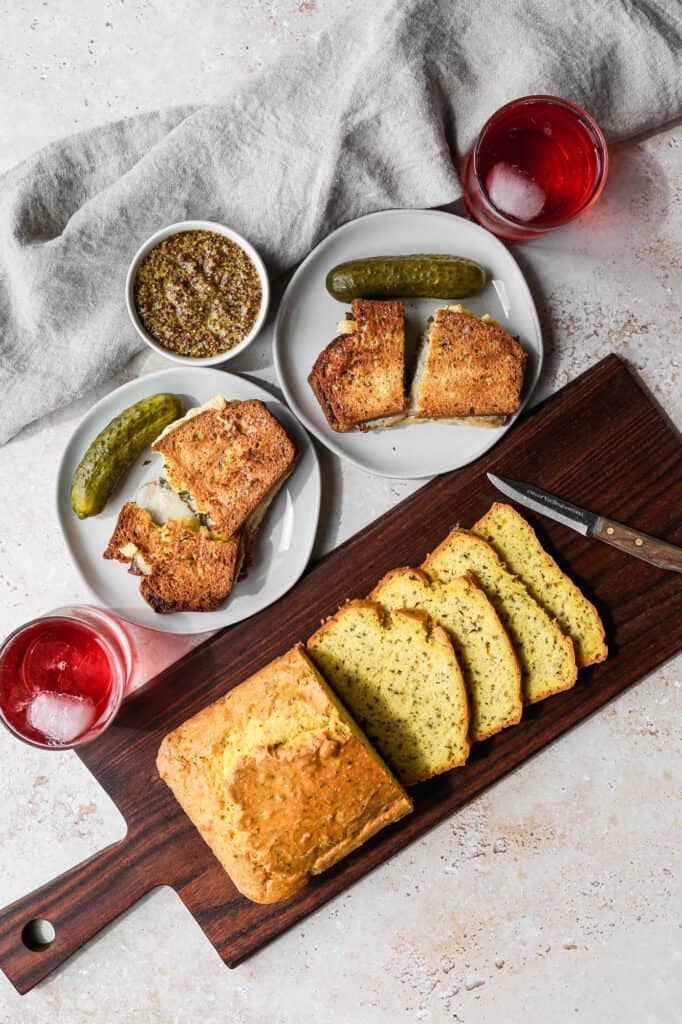
    This Gluten Free Herbes de Provence Almond Flour Bread is one of the most unique and flavorful gluten free breads I have ever made. Almond flour, parmesan cheese, and a generous tablespoon of Herbes de Provence are baked together into a golden and fragrant loaf that smells absolutely incredible coming out of the oven. The French herb blend gives this bread a flavor that is unlike any other almond flour bread you have tried.

    It is earthy, aromatic, and completely irresistible toasted with butter.

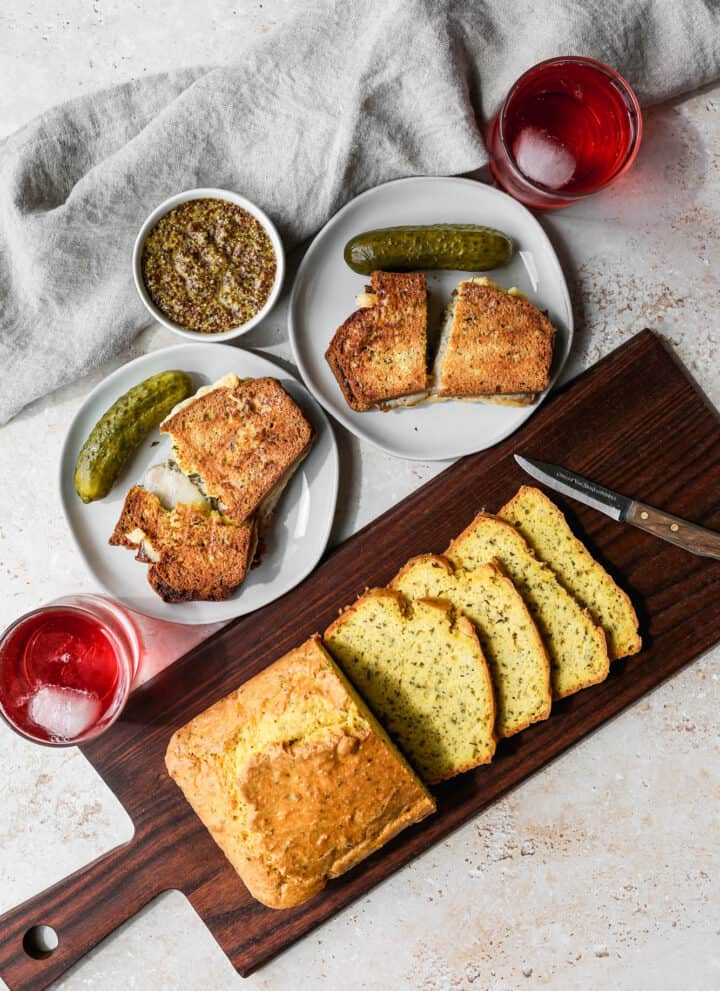
    a wooden cutting board with a loaf of gluten free herbes de provence keto bread with a few slices next to two plates of sandwiches made from the bread

    What I love most about this recipe is how effortless it is. No yeast, no kneading, and no rising time. The batter comes together in about ten minutes and the oven does the rest.

    I love this bread toasted and slathered with butter, made into a sandwich, or turned into quick garlic toast in the air fryer.

    If you are looking for a gluten free bread with real flavor and real character, this is the one to make.

    If you are looking for more bread recipes try my Gluten Free Italian Almond Flour Bread, my Gluten Free Sourdough Bread, my Gluten Free Cornbread or my Gluten Free Buttermilk Drop Biscuits.

    You can find all of my bread recipes here: Gluten Free Bread Recipes

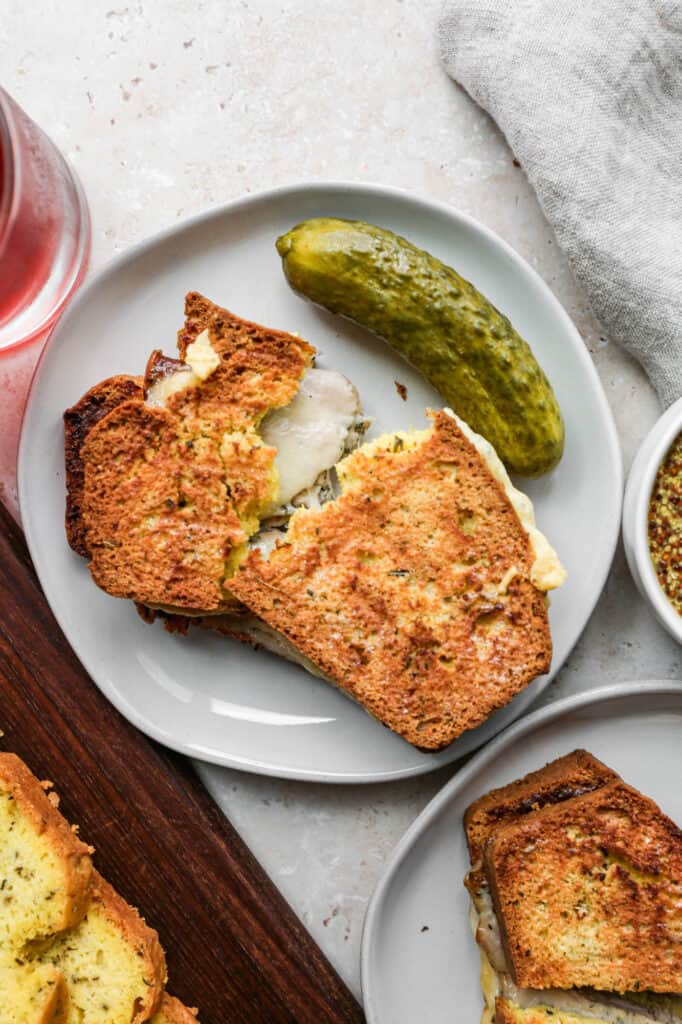
    a sandwich made from this gluten free herbes de provence keto bread on a white place with a dill pickle next to it
    [feast_advanced_jump_to]

    What Is Herbes de Provence?

    Herbes de Provence is a classic French herb blend that originated in the Provence region of southern France. It has a warm, earthy, and slightly floral flavor that is unlike any single herb on its own.

    The blend typically includes dried thyme, rosemary, oregano, marjoram, and savory. Some versions also include lavender which gives the blend a subtle floral note that pairs beautifully with the nuttiness of almond flour and the saltiness of parmesan cheese.

    You can find Herbes de Provence in the spice aisle of most grocery stores. McCormick makes a widely available version. Specialty spice shops and online retailers will often carry more complex blends if you want to explore the flavor further.

    What Makes Almond Flour Work for Gluten Free Bread

    Almond flour is one of the best gluten free flour alternatives for savory quick breads like this one. Here is why it works so well.

    • It is naturally gluten free and grain free. Almond flour is made from blanched almonds ground to a fine powder with no wheat, gluten, or grains involved.
    • It creates a moist and tender crumb. The natural fat content in almond flour keeps baked goods moist and prevents the dry crumbly texture that is common in many gluten free breads.
    • It does not require yeast or kneading. The eggs provide all the structure and lift this bread needs. No special techniques or equipment required beyond a stand mixer.
    • It pairs beautifully with savory flavors. The mild nutty flavor of almond flour is the perfect base for Herbes de Provence, parmesan, and other savory additions.

    Tips for Success

    Beat your eggs until slightly frothy before adding any other ingredients. This is the single most important step in this recipe. Frothy eggs create air in the batter which gives the bread better lift and a lighter texture.

    • Use finely ground blanched almond flour. Coarser almond meal will give your bread a grittier texture. Super fine almond flour gives you the best results.
    • Do not overbake. Start checking the bread at 45 minutes. The top should be golden brown and a toothpick inserted in the center should come out clean. Every oven runs slightly differently so check early rather than late.
    • Let the bread cool completely before slicing. Almond flour bread slices much more cleanly once fully cooled. Slicing it warm will cause it to crumble.
    • Use duck eggs if you can. I use farm fresh duck eggs which give the bread a richer color and flavor. Any large eggs work beautifully but farm fresh eggs will give you the best result.

    Serving Suggestions

    This Herbes de Provence almond flour bread is incredibly versatile. Here are some of my favorite ways to serve it.

    • Toasted with butter. The simplest and most satisfying way to enjoy this bread. Toast a slice until golden and spread generously with salted butter while it is still warm.
    • As a sandwich bread. This bread is sturdy enough for sandwiches. Turkey, swiss cheese, mayonnaise, and mustard on toasted slices with a quick trip through the air fryer makes an incredible toasted sandwich.
    • As gluten free garlic toast. Brush slices with butter, sprinkle with garlic powder, and toast in the air fryer or oven until golden. The Herbes de Provence already baked into the bread makes this garlic toast something special.
    • Dipped in olive oil. Slice and serve alongside a bowl of good olive oil for dipping. The French herb flavor makes this a natural pairing for a simple appetizer or starter.
    • Alongside soup. This bread pairs beautifully with gluten free soups and stews. Use it to soak up the broth from a bowl of tomato soup or chicken vegetable soup.

    Storage

    Store this bread in an airtight container in the refrigerator for up to five days. Because there are no preservatives it will spoil quickly at room temperature especially in warm weather.

    For longer storage this bread freezes beautifully. Wrap individual slices in foil and store them in a freezer safe bag for up to three months. Defrost slices at room temperature or toast them directly from frozen.

    Top Tip

    Do not rush beating the eggs. Add the eggs to your stand mixer first and beat them until they are visibly frothy before adding the butter, oil, or any dry ingredients. This step creates air in the batter that gives the bread a lighter texture and better rise. Skipping it or under beating the eggs is the most common reason almond flour bread comes out dense and flat.

    Frequently Asked Questions

    What is Herbes de Provence and where do I find it?

    Herbes de Provence is a classic French herb blend that typically includes dried thyme, rosemary, oregano, marjoram, and savory. Some blends also include a touch of lavender. You can find it in the spice aisle of most grocery stores. McCormick makes a widely available version that works perfectly in this recipe.

    Can I freeze this gluten free Herbes de Provence almond flour bread?

    Yes and I highly recommend it. This bread freezes beautifully for up to three months. Wrap individual slices in foil and store them in a freezer safe bag. Defrost at room temperature or toast directly from frozen for a quick and easy gluten free bread anytime.

    Why is my almond flour bread dense or flat?

    The most common reason is under beaten eggs. Beat the eggs until they are visibly frothy before adding any other ingredients. This creates air in the batter that gives the bread lift and a lighter texture. Also make sure your baking powder is fresh since old baking powder will not give the bread the rise it needs.

    Can I substitute the Herbes de Provence with another herb blend?

    Yes. Italian seasoning works beautifully as a substitute and gives the bread a more familiar flavor profile. You could also use just rosemary and thyme if you do not have Herbes de Provence on hand. The parmesan cheese carries a lot of the flavor in this bread so any savory herb combination you enjoy will work well.

    Didn't find the answer you're looking for?

    Ask AI to answer based on this recipe:

    ChatGPT
    Google AI
    Perplexity
    Grok
    Claude

    Supplies

    More Recipes You Might Enjoy

    • Gluten Free Italian Almond Flour Bread
    • Gluten Free Sourdough Bread
    • Gluten Free Cornbread
    • Gluten Free Buttermilk Drop Biscuits

    I get a lot of my ingredients from Thrive Market. Thrive Market has been a game changer for me eating gluten free. They have so many options I can't get at my rural grocery stores! Use this link to get 40% off your first order!

    Print
    clock clock iconcutlery cutlery iconflag flag iconfolder folder iconinstagram instagram iconpinterest pinterest iconfacebook facebook iconprint print iconsquares squares iconheart heart iconheart solid heart solid icon

    Gluten Free Herbes de Provence Keto Bread


    5 Stars 4 Stars 3 Stars 2 Stars 1 Star

    No reviews

    • Author: Elaine VanVleck
    • Total Time: 55 minutes
    • Yield: 1 loaf 1x
    • Diet: Gluten Free
    Print Recipe
    Pin Recipe

    Description

    A savory gluten free almond flour bread made with Herbes de Provence, parmesan cheese, and avocado oil. This French herb loaf bakes up golden and flavorful with no yeast and no kneading required. Perfect for gluten free sandwiches, garlic toast, and serving alongside soup.


    Ingredients

    Scale
    • 2 cups Almond Flour
    • 1 tsp. Baking Powder
    • ½ tsp. Xanthan Gum
    • 1 tsp. Sea Salt
    • 1 Tbsp. Herbes de Provence
    • ¼ cup Parmesan Cheese, finely grated
    • 7 large Eggs
    • ½ cup Unsalted Butter, melted
    • 2 Tbsp. Avocado Oil

    Instructions

    Preheat your oven to 350 degrees. Grease a 9x5 loaf pan with coconut oil or butter. Set aside.

    In the bowl of your stand mixer add the eggs and beat them until they are combined. Add the melted butter and avocado oil to the eggs and beat until they are slightly frothy.

    Add the almond flour, baking powder, xanthan gum, sea salt, herbes de Provence and parmesan cheese to the egg mixture and beat just until combined.

    Pour the batter into your greased 9x5 loaf pan.

    Bake at 350 degrees for 45-50 minutes or until the top is golden brown and toothpick comes out clean from the center.

    Let cool slightly and then transfer to a cutting board or cooling rack to finish cooling.

    After the bread has completely cooled you can store it in an air tight container on the counter for up to two days, store in the refrigerator or wrap in tinfoil and then put in a freezer safe container and freeze for up to a month.

    If you made this recipe please leave a star rating and comment below. It helps other readers find this recipe and means so much to me.

    • Prep Time: 10 minutes
    • Cook Time: 45 minutes
    • Category: Bread
    • Method: Baking
    • Cuisine: American

    Did you make this recipe?

    Tag @smallfarmbiglife on Instagram and hashtag it #smallfarmbiglife

    If you make this Gluten Free Herbes de Provence Almond Flour Bread I would love to hear what you think! Leave a comment below and let me know how it turned out or tag me on Instagram so I can see your loaf.

    This is one of those gluten free bread recipes that will surprise you with how much flavor a simple almond flour loaf can have, so save it to your favorite Pinterest board so you always have it ready when you need a delicious and unique gluten free bread!

    Ingredients

    • Almond Flour
    • Baking Powder
    • Xanthan Gum
    • Sea Salt
    • Herbes de Provence
    • Parmesan Cheese
    • Eggs
    • Unsalted Butter
    • Avocado Oil

    Instructions

    Preheat your oven to 350 degrees. Grease a 9x5 loaf pan with coconut oil or butter. Set aside.

    In the bowl of your stand mixer add the eggs and beat them until they are combined. Add the melted butter and avocado oil to the eggs and beat until they are slightly frothy.

    Add the almond flour, baking powder, xanthan gum, sea salt, herbes de Provence and parmesan cheese to the egg mixture and beat just until combined.

    Pour the batter into your greased 9x5 loaf pan.

    Bake at 350 degrees for 45-50 minutes or until the top is golden brown and toothpick comes out clean from the center.

    Let cool slightly and then transfer to a cutting board or cooling rack to finish cooling.

    After the bread has completely cooled you can store it in an air tight container on the counter for up to two days, store in the refrigerator or wrap in tinfoil and then put in a freezer safe container and freeze for up to a month.

    • « Previous Page
    • 1
    • …
    • 9
    • 10
    • 11
    • 12
    • 13
    • …
    • 16
    • Next Page »

    Welcome! I'm Elaine

    I'm so glad you are here! I share easy gluten free recipes from my small farm in Washington.

    Be sure to sign up for my newsletter to stay up to date on all of my new recipes.

    More about me...
    • Instagram
    • Pinterest
    • Facebook
    • Twitter
    • email

    Free gluten free recipe ebook
    My most loved recipes in one download, plus new recipes every Friday.
    Check your inbox! Your ebook is on its way.

    Easy Meals Recipes

    • Gluten Free Instant Pot Chili Mac and Cheese
    • Gluten Free Taco Casserole
    • Gluten Free Cowboy Baked Beans
    • Gluten Free Walking Taco Casserole
    • Gluten Free Creamy Beef and Mushroom Pasta
    • Gluten Free Instant Pot Chicken and Dumplings
    • Instant Pot Mexican Style Beef and Rice
    • Gluten Free Chicken Parmesan Pasta Casserole
    • Gluten Free One Pot Hamburger Helper Copycat
    • Gluten Free Salisbury Steak with Mushroom Gravy
    • Gluten Free Air Fryer Fajitas
    • Gluten Free Sloppy Joe Casserole

    Footer

    back to top

    About

    • Privacy Policy
    • Shop my Amazon Page
    • Follow me on LTK

    Newsletter

    • Sign Up! for emails and updates

    Contact

    • Contact
    • Media Kit
    • About Me

    As an Amazon Associate I earn from qualifying purchases.

    I may get commissions for purchases made through links on this site.

    Copyright © 2026 Brunch Pro on the Brunch Pro Theme