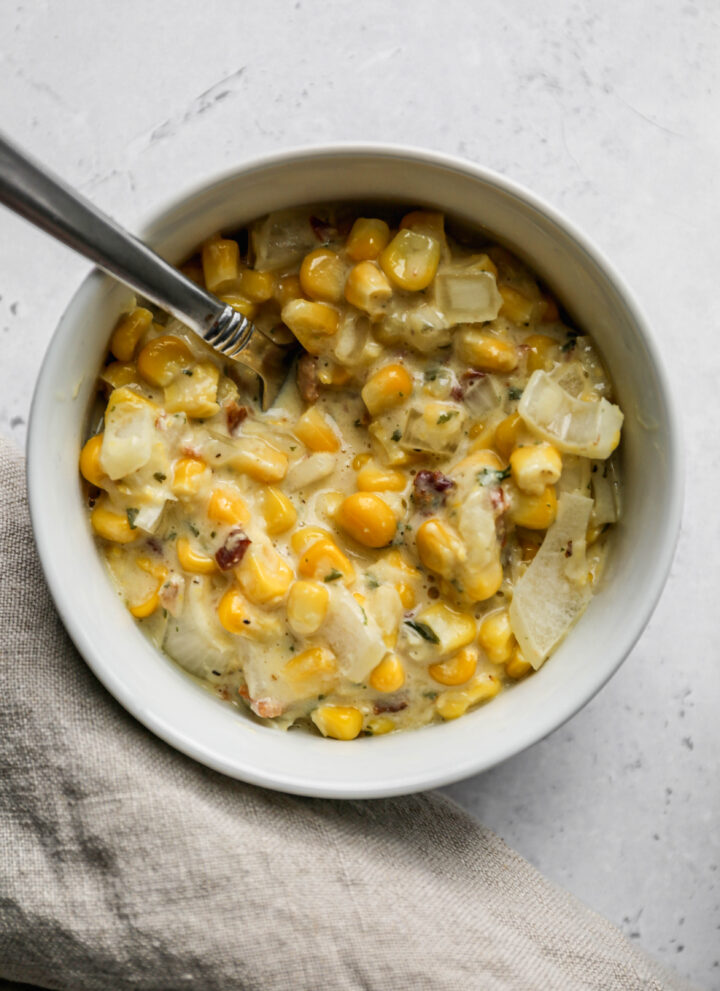
This easy recipe for cheesy slow cooker creamed corn is perfect for a side dish or a meal. Using your crockpot you add frozen corn, bacon, heavy cream and parmesan cheese for a loaded cream corn. You will never want canned cream corn again after making this homemade version!

This homemade creamed corn is an easy, fuss free dish that's perfect for busy cooks. The combination of frozen or canned corn, butter, and cheese creates a deliciously rich and satisfying veggie side dish.
Whether you're preparing for a holiday meal or just need a comforting addition to dinner, this slow cooker cheesy corn casserole is a must try. It's the best corn recipe for a flavorful side, and it can easily be made ahead, leaving you more time to enjoy your meal.
With its creamy texture and cheesy flavor, this is one corn dish that will never go out of style!
If you are looking for more slow cooker recipes you might also enjoy my Slow Cooker Hawaiin Meatballs, this Gluten Free Slow Cooker Meatloaf, my Gluten Free Slow Cooker Lasagna Soup, these Slow Cooker Cranberry Meatballs or my Slow Cooker Spaghetti recipes.
Instructions
In a blender or food processor add 1 ½ cups frozen corn and the heavy whipping cream. Blend until smooth.
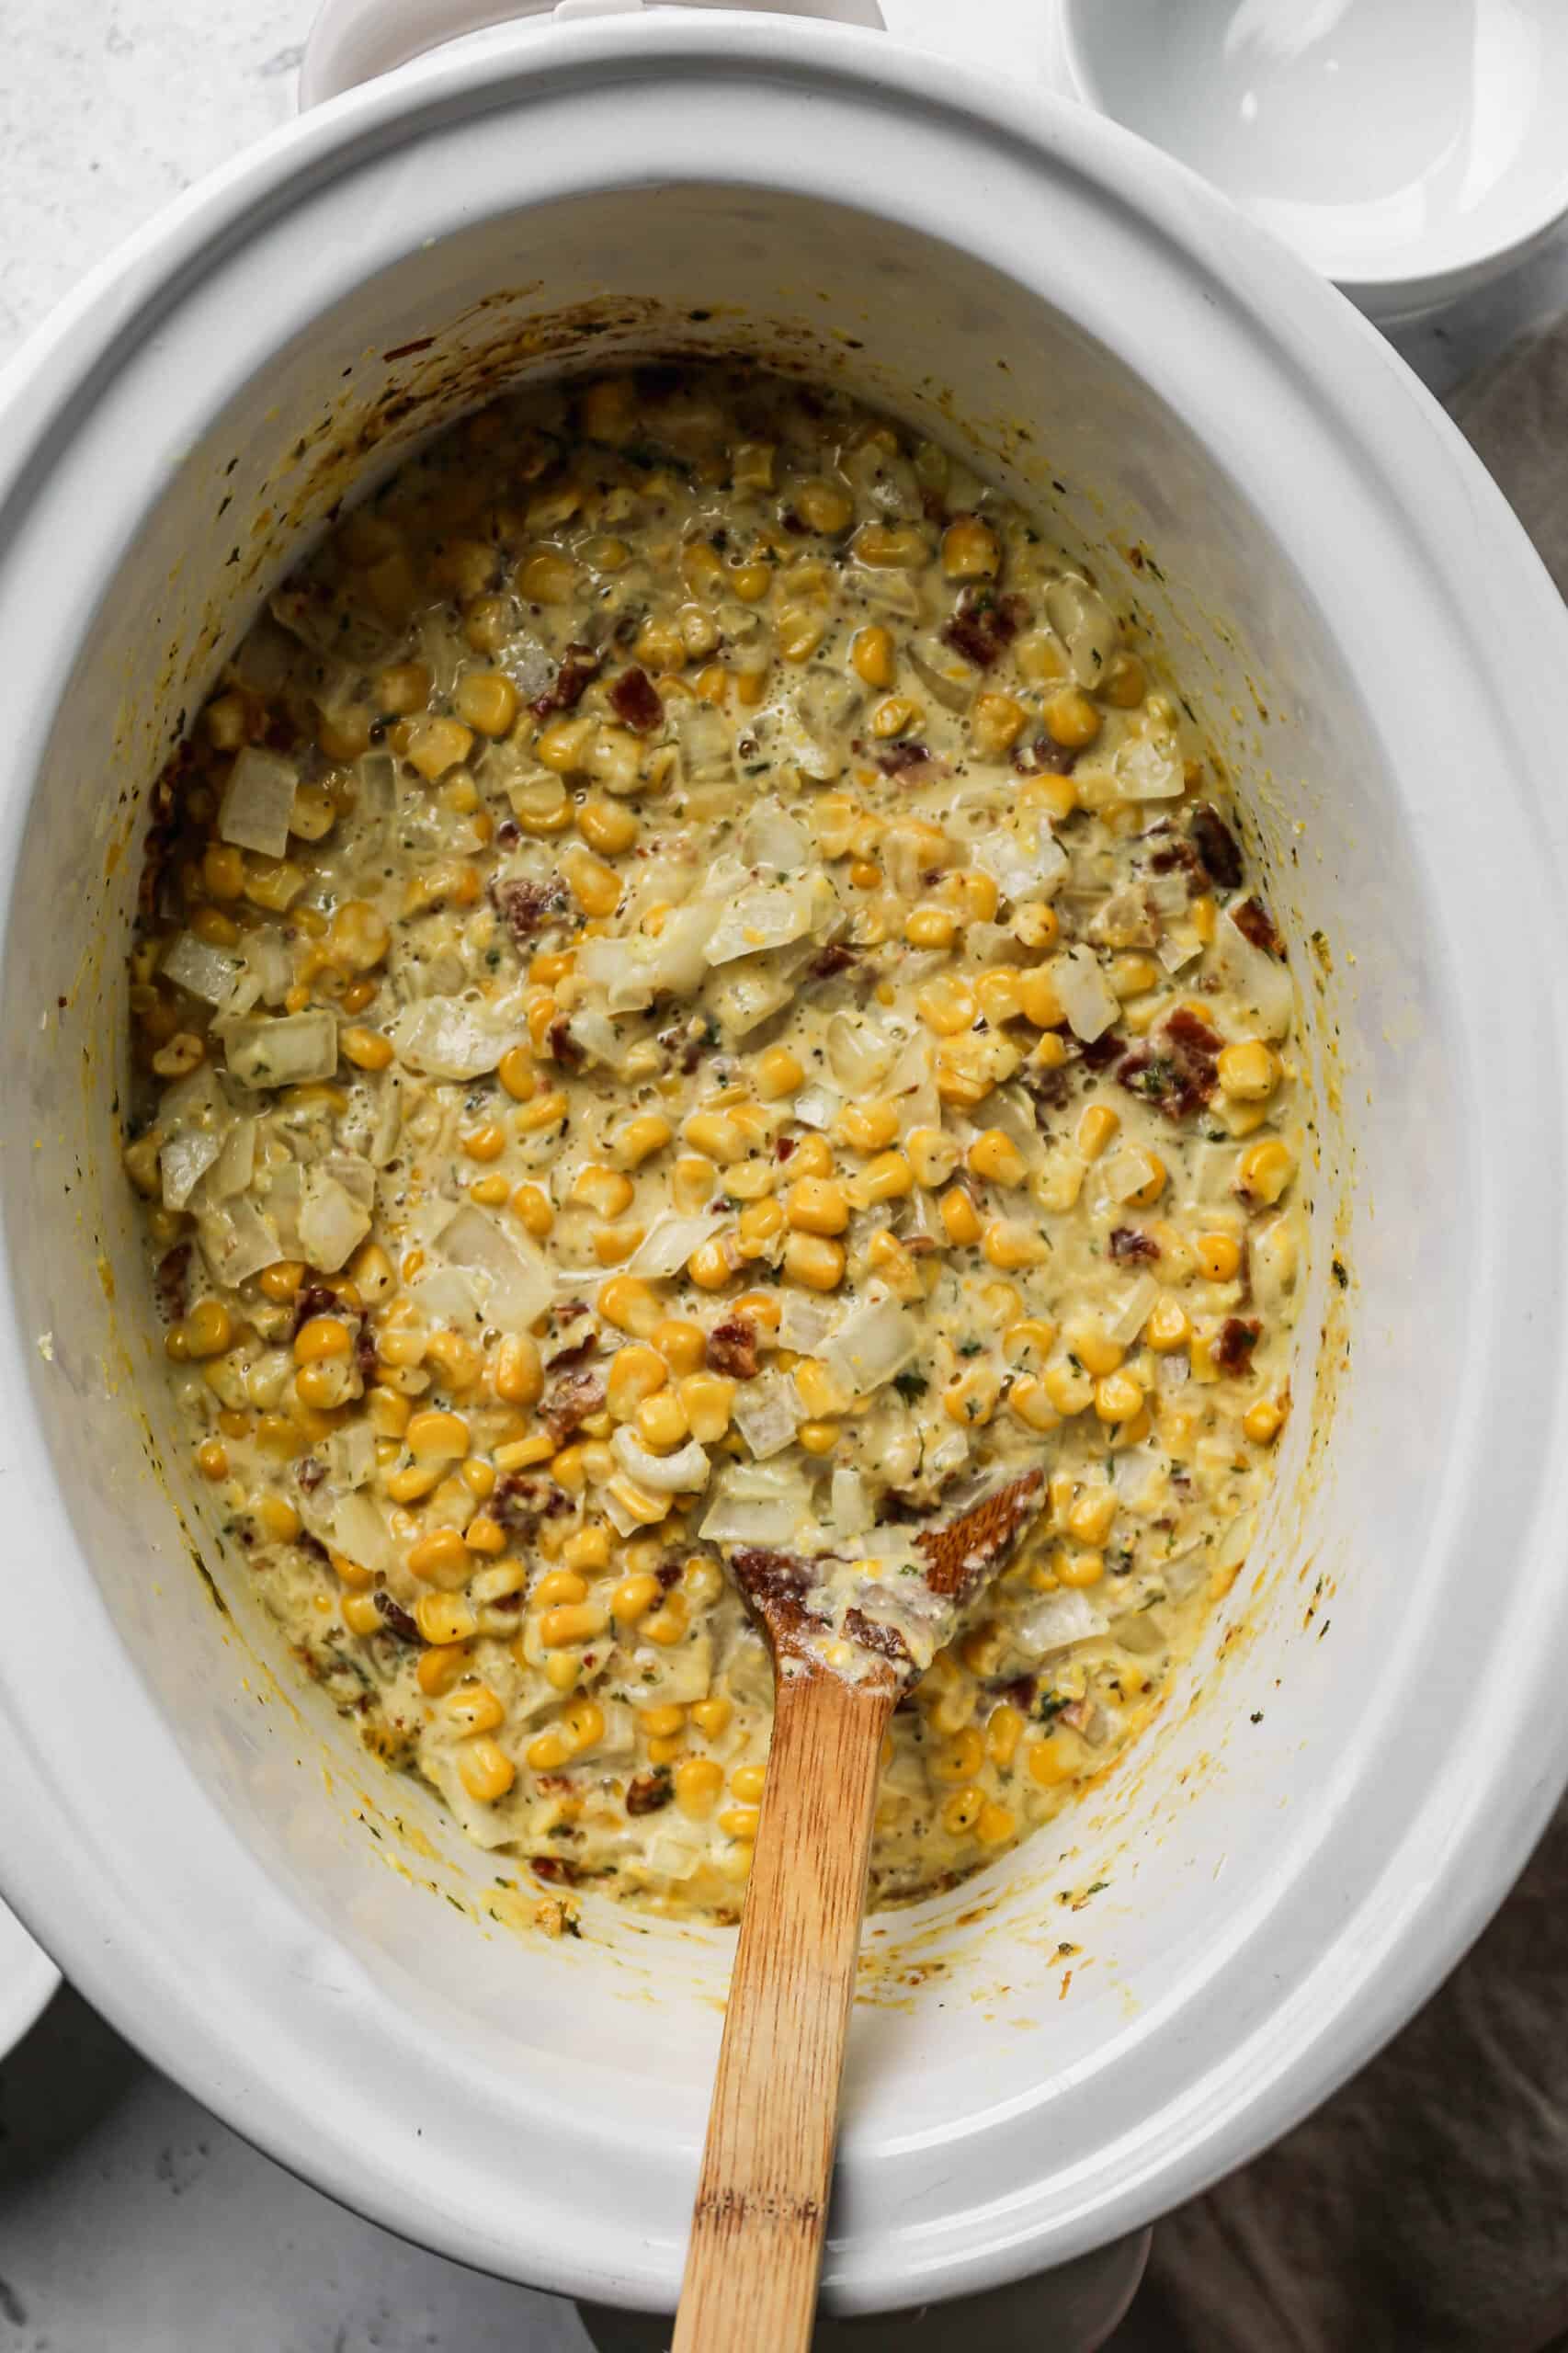
In the bowl of your crockpot add the rest of the frozen corn, the blended corn mixture, onion, parmesan cheese, butter, bacon, parsley, salt and pepper. Stir to combine.
Put the lid on your slow cooker and cook on high for about 1 hour. It will be bubbly and starting to brown around the sides when it's done.
Remove the lid and add the monterey jack cheese. Stir to combine all of the ingredients.
Serve immediately while hot.
Variations
- Spicy - add a 4 ounce can of diced green peppers for a bit of a kick
- Cheddar Cheese - replace the monterey cheese with cheddar or add a bit of both
- Meat Free - don't add the bacon (but I highly suggest keeping the bacon)
Supplies


More Recipes You Might Enjoy


I get a lot of my ingredients from Thrive Market. Thrive Market has been a game changer for me eating gluten free. They have so many options I can't get at my rural grocery stores! Use this link to get 40% off your first order!
PrintCheesy Slow Cooker Creamed Corn
- Total Time: 1 hour 15 minutes
- Yield: 8 servings 1x
- Diet: Gluten Free
Description
This easy recipe for cheesy slow cooker creamed corn is perfect for a side dish or a meal. Using your crockpot you add frozen corn, bacon, heavy cream and parmesan cheese for a loaded cream corn. You will never want canned cream corn again after making this homemade version!
Ingredients
- 32 ounce bag Frozen Corn
- 1 cup Heavy Whipping Cream
- 1 large Yellow Onion, chopped
- ½ cup Parmesan Cheese, finely grated
- ¼ cup Unsalted Butter, cut into cubes
- 8 slices Bacon, cooked and chopped
- 1 tsp Sea Salt
- 1 Tbsp Dried Parsley
- ½ tsp. Coarse Ground Black Pepper
- 1 cup Monterey Jack Cheese, shredded
Instructions
In a blender or food processor add 1 ½ cups frozen corn and the heavy whipping cream. Blend until smooth.
In the bowl of your crockpot add the rest of the frozen corn, the blended corn mixture, onion, parmesan cheese, butter, bacon, parsley, salt and pepper. Stir to combine.
Put the lid on your slow cooker and cook on high for about 1 hour. It will be bubbly and starting to brown around the sides when it's done.
Remove the lid and add the monterey jack cheese. Stir to combine all of the ingredients.
Serve immediately while hot.
- Prep Time: 15 minutes
- Cook Time: 1 hour
- Category: Side Dish, Vegetables
- Method: Slow Cooker, Crockpot
- Cuisine: Gluten Free
FAQ
Yes! Cream style corn and creamed corn (or cream corn) are the same thing. There are some variations in recipes, but ultimately they are all just cream corn.
Top Tip
I love homemade creamed corn and thought why not make it loaded creamed corn by adding bacon, parmesan cheese and monterey jack cheese! This amazing side dish is made in your crockpot so it doesn't take up any oven space.

Storage
Store the leftovers in a sealed container in the refrigerator for up to 5 days. This recipe freezes well too! Store in a freezer safe container for up to one month.
Top tip
This recipe is great for meal prepping! Cook the bacon and let cool. Cut up the bacon, shred the cheese and chop the onion so everything is ready to toss into the crockpot and be ready to serve in an hour.