Small Farm Big Life

  • Gluten Free Recipe Index
  • Subscribe
  • Resources
menu icon
go to homepage
  • Home
  • Gluten Free Recipe Index
  • Subscribe
  • My Story
  • Resources
  • Free Guides
    • Email
    • Facebook
    • Instagram
    • Pinterest
  • subscribe
    search icon
    Homepage link
    • Home
    • Gluten Free Recipe Index
    • Subscribe
    • My Story
    • Resources
    • Free Guides
    • Email
    • Facebook
    • Instagram
    • Pinterest
  • ×

    Gluten Free Zucchini Muffins

    These Gluten Free Zucchini Muffins are one of my favorite things to bake all summer long and the fact that they are packed with fresh garden zucchini makes me feel pretty good about eating two of them for breakfast. They are incredibly moist and fluffy with the most beautiful warm cinnamon flavor and they come together from scratch in just 45 minutes with simple ingredients you probably already have on hand.

    The fresh shredded zucchini practically disappears into the batter so even the pickiest eaters in your house will have no idea there is a vegetable hiding in their muffin.

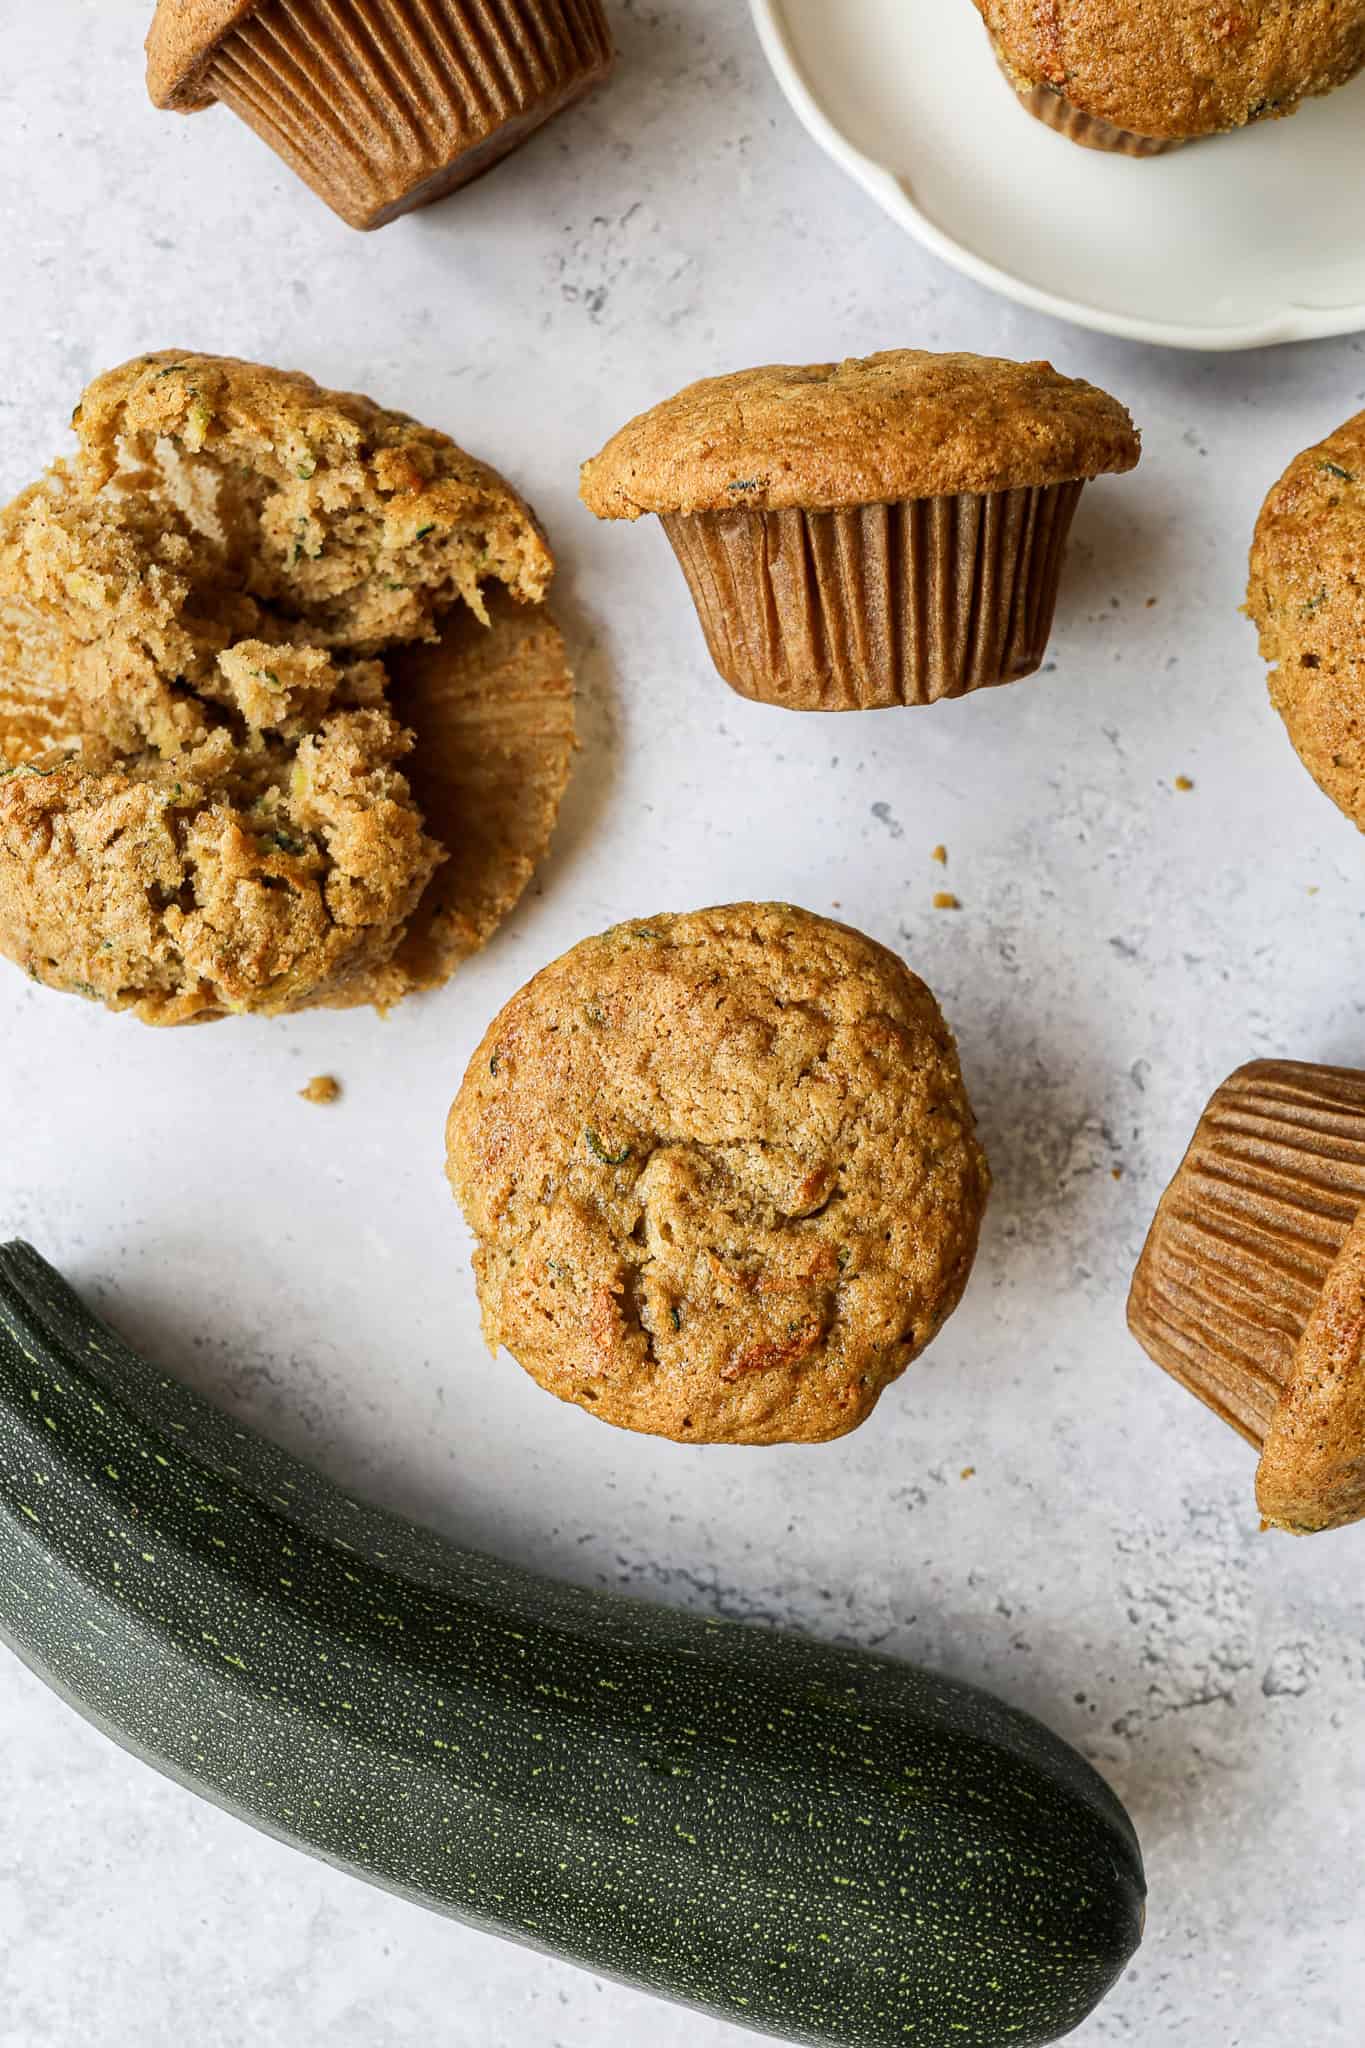
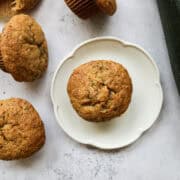
    gluten free zucchini muffins sitting on the counter with one on a plate and one torn in half to show the center

    I make a batch of these at the start of the week and they are perfect for grabbing on busy mornings, packing in lunchboxes, or just enjoying as an afternoon snack with a cup of tea.

    They freeze beautifully too which makes them one of my favorite gluten free meal prep recipes for summer.

    If you grow zucchini or find yourself with more than you know what to do with this is the recipe you are going to want to make first.

    You might also like my Gluten Free Zucchini Bread, my Easy Gluten Free Zucchini Brownies, my Gluten Free Zucchini Chocolate Chip Cookies or my Gluten Free Chocolate Chip Banana Muffins.

    You can find all of my breakfast recipes here: Gluten Free Breakfast Recipes

    [feast_advanced_jump_to]

    Ingredients

    • Gluten Free Flour
    • Granulated Sugar
    • Baking Soda
    • Baking Powder
    • Salt
    • Ground Cinnamon
    • Eggs
    • Zucchini
    • Avocado Oil or Vegetable Oil
    • Vanilla Extract

    Instructions

    Preheat your oven to 350 degrees.

    Line a 12 muffin pan with parchment cupcake liners or grease with coconut oil. Set the pan aside.

    In a mixing bowl whisk together the gluten free flour, sugar, baking soda, baking powder, salt and cinnamon. Set aside.

    In the bowl of your stand mixer add the eggs, zucchini, oil and vanilla. Beat until blended together. Add the dry ingredients and blend those into the wet ingredients.

    Remove the bowl from your stand mixer and using a spatula make sure the bottom ingredients are mixed in. Scoop the batter into the muffin pan filling each cup evenly.

    Bake at 350 degrees for 30-35 minutes or until a toothpick inserted in the center comes out clean.

    Let cool and then store in an air tight container.

    Supplies


    More Recipes You Might Enjoy

    • Easy Gluten Free Zucchini Brownies
    • Gluten Free Zucchini Chocolate Chip Cookies
    • Gluten Free Zucchini Bread
    • Gluten Free Chocolate Chip Banana Muffins

    I get a lot of my ingredients from Thrive Market. Thrive Market has been a game changer for me eating gluten free. They have so many options I can't get at my rural grocery stores! Use this link to get 40% off your first order!

    Print
    clock clock iconcutlery cutlery iconflag flag iconfolder folder iconinstagram instagram iconpinterest pinterest iconfacebook facebook iconprint print iconsquares squares iconheart heart iconheart solid heart solid icon

    Gluten Free Zucchini Muffins


    5 Stars 4 Stars 3 Stars 2 Stars 1 Star

    5 from 1 review

    • Author: Elaine VanVleck
    • Total Time: 45 minutes
    • Yield: 12 servings 1x
    • Diet: Gluten Free
    Print Recipe
    Pin Recipe

    Description

    These Gluten Free Zucchini Muffins are moist, fluffy, and perfectly spiced with cinnamon in every single bite making them the best gluten free breakfast muffin you will ever bake from scratch. Fresh shredded zucchini, gluten free flour, eggs, avocado oil, and vanilla come together in a simple batter that bakes into beautifully tender muffins in just 30 minutes. Naturally gluten free, perfect for breakfast meal prep, and the best way to use up summer garden zucchini all season long!


    Ingredients

    Units Scale

      • 2 cups Gluten Free Flour
      • 1 cup Granulated Sugar
      • 2 tsp Baking Soda
      • 1 tsp Baking Powder
      • 1 tsp Salt
      • 2 tsp Ground Cinnamon
      • 3 large Eggs
      • 2 cups Shredded Zucchini
      • ¾ cup Avocado Oil or Vegetable Oil
      • 2 tsp Vanilla Extract


    Instructions

    Preheat your oven to 350 degrees.

    Line a 12 muffin pan with parchment cupcake liners or grease with coconut oil. Set the pan aside.

    In a mixing bowl whisk together the gluten free flour, sugar, baking soda, baking powder, salt and cinnamon. Set aside.

    In the bowl of your stand mixer add the eggs, zucchini, oil and vanilla. Beat until blended together. Add the dry ingredients and blend those into the wet ingredients.

    Remove the bowl from your stand mixer and using a spatula make sure the bottom ingredients are mixed in. Scoop the batter into the muffin pan filling each cup evenly.

    Bake at 350 degrees for 30-35 minutes or until a toothpick inserted in the center comes out clean.

    Let cool and then store in an air tight container.

    Notes

    If it's hot out baked goods won't last as long on the countertop, so you may want to store them in the refrigerator. These also freeze really well for a snack or breakfast option later.

    • Prep Time: 15 minutes
    • Cook Time: 30 minutes
    • Category: Muffins
    • Method: Baking
    • Cuisine: American

    Did you make this recipe?

    Tag @smallfarmbiglife on Instagram and hashtag it #smallfarmbiglife

    If you made these Gluten Free Zucchini Muffins I would love to hear what you thought! Please leave a star rating and a comment below. This is one of my favorite easy gluten free breakfast recipes and I hope it becomes a staple in your kitchen too!

    Storage

    Store these gluten free zucchini muffins in an airtight container at room temperature for up to 3 days. If the weather is hot store them in the refrigerator for up to 5 days. These muffins also freeze exceptionally well! Place cooled muffins in a freezer safe bag or container and freeze for up to 3 months. Thaw at room temperature or microwave for 20 to 30 seconds for a quick and delicious breakfast straight from the freezer.

    Top Tip

    Do not wring out or squeeze the moisture from your shredded zucchini before adding it to the batter. That moisture is exactly what makes these muffins so incredibly moist and tender in every bite. Simply shred the zucchini on the large side of a box grater, measure out two cups, and add it directly to the wet ingredients. The zucchini will release its moisture into the batter as it bakes and that is what gives you that perfect soft and fluffy texture.

    Didn't find the answer you're looking for?

    Ask AI to answer based on this recipe:

    ChatGPT
    Google AI
    Perplexity
    Grok
    Claude

    Frequently Asked Questions

    What is the best gluten free flour to use for muffins?

    My favorite gluten free flours for baking are King Arthur Measure for Measure Gluten Free Flour and Bob's Redmill Gluten Free 1-to-1 Baking Flour. I've had really good success using these two flours in my recipes.

    Do I need to peel the zucchini before shredding it for these muffins?

    No you do not need to peel the zucchini before shredding it. The skin is thin and soft and completely disappears into the muffins as they bake. If you are trying to hide the zucchini from picky eaters you can peel it first so there are no visible green flecks in the muffins.

    Can I add mix ins to these gluten free zucchini muffins?

    Absolutely! Chocolate chips, chopped walnuts, or chopped pecans are all delicious additions to this recipe. Fold in about half a cup of your preferred mix in at the very end after the batter is mixed. Chocolate chips are my personal favorite addition and make these muffins taste like a special treat.

    Can I make mini muffins with this recipe?

    Yes! Pour the batter into a greased mini muffin tin and bake at 350 degrees for 15 to 18 minutes or until a toothpick inserted in the center comes out clean. Mini muffins are a great option for kids lunches and snack time and are perfect for portion control.

    Gluten Free Zucchini Bread

    This Gluten Free Zucchini Bread is one of those recipes I look forward to making every single summer and honestly it is one of the best things to come out of my kitchen all year. It is incredibly moist, perfectly spiced with cinnamon and vanilla, and so simple to pull together from scratch that even beginner bakers will nail it on the first try.

    The grated zucchini practically disappears into the batter and what you are left with is the most tender and flavorful gluten free quick bread that nobody will ever believe is gluten free.

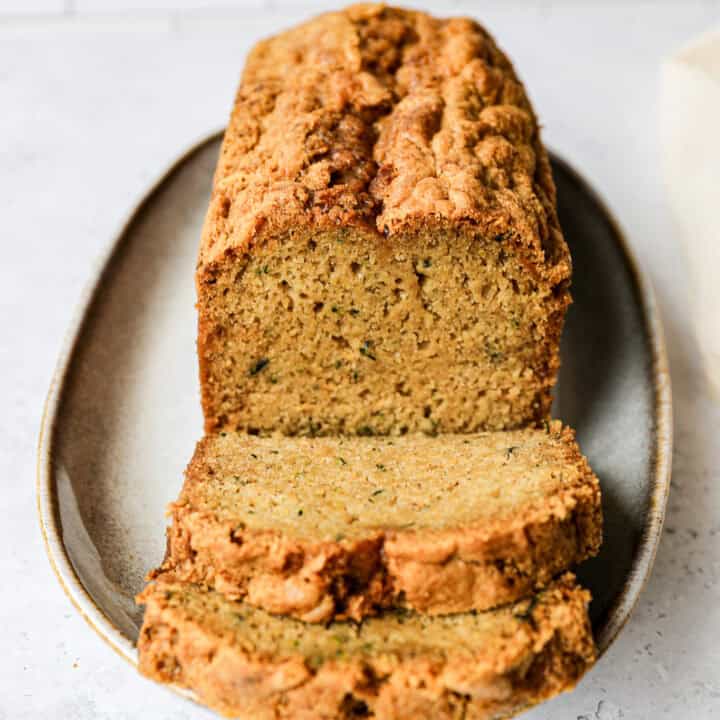
    an oval serving plate with a loaf of gluten free zucchini bread on it with two slices cut and laying in front of the bread loaf

    If you grow zucchini or have a neighbor who does you know that summer zucchini has a way of multiplying faster than you can use it up. This bread is my favorite solution to that problem.

    Two cups of grated zucchini go into every loaf and the result is a beautifully moist and delicious bread that is perfect for breakfast, an afternoon snack, or anytime you need something homemade and satisfying.

    I have been making this recipe on repeat every summer and it never gets old.

    You may also like my Easy Gluten Free Zucchini Brownies, my Gluten Free Zucchini Chocolate Chip Cookies, my Gluten Free Summer Squash Casserole or my Air Fryer Roasted Zucchini Squash.

    You can find all of my dessert recipes here: Gluten Free Dessert Recipes

    a loaf of gluten free zucchini bread on an oval plate with two slices cut from the loaf laying in front of it and one slice on a plate beside the oval plate
    [feast_advanced_jump_to]

    Ingredients

    • Gluten Free Flour
    • Granulated Sugar
    • Baking Soda
    • Baking Powder
    • Salt
    • Cinnamon
    • Eggs
    • Zucchini
    • Avocado Oil or Vegetable Oil
    • Vanilla Extract

    Instructions

    Cut your zucchini into chunks and remove the core and seeds. Using the large side of our box grater grate the zucchini. You will need two cups for this recipe.

    Preheat your oven to 350 degrees.

    It's important to use a 9x4 baking pan for this recipe. I highly recommend this 9x4 baking pan because I've had the best results with it for gluten free breads. Grease the pan with coconut oil or butter and set aside.

    In a large bowl whisk together the gluten free flour, sugar, baking soda, baking powder, salt and cinnamon until combined. Set aside.

    In the bowl of your stand mixer add the eggs, zucchini, oil and vanilla. Beat until blended together.

    Add the wet ingredients and beat until just blended together. You may need to scrape the sides and stir together with a spatula to make sure all the ingredients from the bottom of the bowl are mixed in.

    Pour the batter into the greased 9x4 baking pan.

    Bake at 350 degrees for 1 hour and 5 minutes.

    When the bread is done test with a toothpick to make sure the center in cooked through. Leave the bread in the baking pan to cool.

    After the bread has cooled transfer it to a plate and enjoy.

    Supplies


    More Recipes You Might Enjoy

    • Easy Gluten Free Zucchini Brownies
    • Gluten Free Zucchini Chocolate Chip Cookies
    • Gluten Free Zucchini Squash and Corn Casserole
    • Air Fryer Roasted Zucchini Squash

    I get a lot of my ingredients from Thrive Market. Thrive Market has been a game changer for me eating gluten free. They have so many options I can't get at my rural grocery stores! Use this link to get 40% off your first order!

    Print
    clock clock iconcutlery cutlery iconflag flag iconfolder folder iconinstagram instagram iconpinterest pinterest iconfacebook facebook iconprint print iconsquares squares iconheart heart iconheart solid heart solid icon

    Gluten Free Zucchini Bread


    5 Stars 4 Stars 3 Stars 2 Stars 1 Star

    No reviews

    • Author: Elaine VanVleck
    • Total Time: 1 hour 25 minutes
    • Yield: 12 servings 1x
    • Diet: Gluten Free
    Print Recipe
    Pin Recipe

    Description

    This Gluten Free Zucchini Bread is incredibly moist, perfectly spiced with cinnamon, and so simple to make from scratch with fresh grated zucchini and gluten free flour. The zucchini keeps every slice tender and delicious and the warm cinnamon and vanilla flavor makes this the most irresistible gluten free quick bread you will ever pull out of the oven. Perfect for breakfast, snacking, and using up all that summer garden zucchini!


    Ingredients

    Units Scale
    • 2 cups Gluten Free Flour
    • 1 cup Granulated Sugar
    • 2 tsp Baking Soda
    • 1 tsp Baking Powder
    • 1 tsp Salt
    • 2 tsp Ground Cinnamon
    • 3 large Eggs
    • 2 cups Grated Zucchini
    • ¾ cup Avocado Oil or Vegetable Oil
    • 2 tsp Vanilla Extract

    Instructions

    Cut your zucchini into chunks and remove the core and seeds. Using the large side of our box grater grate the zucchini. You will need two cups for this recipe.

    Preheat your oven to 350 degrees.

    It's important to use a 9x4 baking pan for this recipe. I highly recommend this 9x4 baking pan because I've had the best results with it for gluten free breads. Grease the pan with coconut oil or butter and set aside.

    In a large bowl whisk together the gluten free flour, sugar, baking soda, baking powder, salt and cinnamon until combined. Set aside.

    In the bowl of your stand mixer add the eggs, zucchini, oil and vanilla. Beat until blended together.

    Add the wet ingredients and beat until just blended together. You may need to scrape the sides and stir together with a spatula to make sure all the ingredients from the bottom of the bowl are mixed in.

    Pour the batter into the greased 9x4 baking pan.

    Bake at 350 degrees for 1 hour and 5 minutes.

    When the bread is done test with a toothpick to make sure the center in cooked through. Leave the bread in the baking pan to cool.

    After the bread has cooled transfer it to a plate and enjoy.

    Notes

    It's important to use a 9x4 baking pan for this recipe. I highly recommend this 9x4 baking pan because I've had the best results with it for gluten free breads.

    • Prep Time: 20 minutes
    • Cook Time: 1 hour, 5 minutes
    • Category: Breads
    • Method: Baking
    • Cuisine: American

    Did you make this recipe?

    Tag @smallfarmbiglife on Instagram and hashtag it #smallfarmbiglife

    If you made this Gluten Free Zucchini Bread I would love to hear what you thought! Please leave a star rating and a comment below. This is one of my favorite summer baking recipes and I hope it becomes one of yours too!

    Storage

    Store this gluten free zucchini bread wrapped tightly or in an airtight container at room temperature for up to 3 days. For longer storage wrap the loaf or individual slices tightly in plastic wrap and then in foil and freeze for up to 3 months. Let frozen slices thaw at room temperature or pop them in the toaster for a quick and delicious breakfast. I do not recommend storing this bread in the refrigerator as it tends to dry out faster when refrigerated.

    Top Tip

    Do not wring out or squeeze the moisture from your grated zucchini before adding it to the batter. I know it seems counterintuitive but that moisture is exactly what makes this bread so incredibly moist and tender. Simply grate the zucchini on the large side of a box grater, measure out two cups, and add it directly to the wet ingredients. The zucchini will release its moisture into the batter as it bakes and that is what gives you that perfect soft and moist texture in every slice.

    Didn't find the answer you're looking for?

    Ask AI to answer based on this recipe:

    ChatGPT
    Google AI
    Perplexity
    Grok
    Claude

    Frequently Asked Questions

    Can you use gluten free flour in zucchini bread?

    Yes! This recipe has been tested and is one of my personal favorites. It uses gluten free flour to make moist and fluffy zucchini bread.

    What is a good gluten free substitute for bread flour?

    I like King Arthur Measure for Measure gluten free flour for all my baking including breads. Another great choice is Bob's Redmill Gluten Free 1-to-1 Baking Flour.

    Do I need to peel the zucchini before grating it?

    No you do not need to peel the zucchini before grating it for this recipe. The skin is very thin and soft and completely disappears into the bread as it bakes. Simply wash the zucchini well, cut it into chunks, remove the core and seeds, and grate it on the large side of your box grater. You will never know the skin is in there.

    Can I add mix ins to this gluten free zucchini bread?

    Absolutely! This recipe works beautifully with chocolate chips, chopped walnuts, or chopped pecans folded into the batter. Start with about half a cup of your preferred mix in and fold it in gently at the very end after the batter is mixed. Chocolate chips are my personal favorite addition and make this bread taste like dessert.

    Can I make this zucchini bread into muffins?

    Yes! Pour the batter into a greased or lined muffin tin and bake at 350 degrees for 20 to 25 minutes or until a toothpick inserted in the center comes out clean. This recipe makes approximately 12 to 14 standard size muffins. Muffins are a great option for portion control and meal prep since they freeze just as well as the full loaf.

    Creamy Cucumber Salad

    This Creamy Cucumber Salad is one of those simple recipes that I make on repeat all summer long because it is so easy, so refreshing, and goes with absolutely everything. Crisp English cucumbers are tossed in a rich homemade dressing made with sour cream, mayonnaise, dried dill, garlic powder, and white vinegar and the result is a cool and creamy salad that is completely addictive.

    It is ready in just 15 minutes and the flavor only gets better as it sits in the refrigerator which makes it one of my favorite make ahead side dishes for summer.

    a bowl of creamy cucumber salad next to small bowls of salt and pepper

    This is the kind of salad that disappears fast at any gathering. It pairs beautifully with grilled chicken, pulled pork, fish tacos, burgers, and really any summer main dish you can think of.

    It is naturally gluten free, made with simple pantry ingredients, and so easy to throw together even on the busiest weeknights.

    If you love a classic cucumber salad but want something a little creamier and more flavorful this recipe is exactly what you have been looking for.

    You might also enjoy my Cucumber Salad with Vinegar Dressing, my Watermelon Cucumber and Feta Salad, my Refrigerator Bread and Butter Pickles or my Pineapple Coleslaw.

    You can find all of my salad recipes here: Gluten Free Salad Recipes

    a bowl of creamy cucumber salad next to small wooden bowls of salt and pepper
    [feast_advanced_jump_to]

    Ingredients

    • English Cucumbers
    • Sour Cream
    • Mayonnaise
    • Dried Dillweed
    • Dried Parsley Flakes
    • Salt
    • Coarse Ground Black Pepper
    • Onion Powder
    • Garlic Powder
    • White Vinegar

    Instructions

    Clean the cucumbers and then chopped them into rounds. Cut the rounds into halves or quarters and place into a medium size bowl.

    In a small bowl or 2 cup measuring cup add the sour cream, mayonnaise, dillweed, parsley, salt, pepper, onion powder, garlic powder and vinegar. Stir until all the ingredients are blended together and you have a smooth dressing.

    Pour the dressing over the cucumbers and stir together.

    Refrigerate the salad for at least one hour before serving.

    Supplies


    More Recipes You Might Enjoy

    • Cucumber Salad with Vinegar Dressing
    • Watermelon Cucumber and Feta Salad
    • The Best Gluten Free Summer Salads (25+ Recipes)
    • 75+ Easy Gluten Free Summer Recipes

    I get a lot of my ingredients from Thrive Market. Thrive Market has been a game changer for me eating gluten free. They have so many options I can't get at my rural grocery stores! Use this link to get 40% off your first order!

    Print
    clock clock iconcutlery cutlery iconflag flag iconfolder folder iconinstagram instagram iconpinterest pinterest iconfacebook facebook iconprint print iconsquares squares iconheart heart iconheart solid heart solid icon

    Creamy Cucumber Salad


    5 Stars 4 Stars 3 Stars 2 Stars 1 Star

    No reviews

    • Author: Elaine VanVleck
    • Total Time: 15 minutes
    • Yield: 6 servings 1x
    • Diet: Gluten Free
    Print Recipe
    Pin Recipe

    Description

    This Creamy Cucumber Salad is a cool, crisp, and refreshing side dish made with English cucumbers and a rich homemade dill dressing with sour cream, mayonnaise, garlic, and white vinegar that comes together in just 15 minutes. It is naturally gluten free, completely make ahead friendly, and the perfect cold salad for summer barbecues, picnics, potlucks, and easy weeknight dinners. The longer it chills in the refrigerator the more flavorful and delicious it gets making it one of the best make ahead summer side dishes you will ever make!


    Ingredients

    Scale

      • 3 large English Cucumbers
      • ½ cup Sour Cream
      • ¼ cup Mayonnaise
      • 1 tsp Dried Dillweed
      • 1 tsp Dried Parsley Flakes
      • 1 tsp Salt
      • ½ tsp Coarse Ground Black Pepper
      • ½ tsp Onion Powder
      • ½ tsp Garlic Powder
      • 2 Tbsp White Vinegar


    Instructions

    Clean the cucumbers and then chopped them into rounds. Cut the rounds into halves or quarters and place into a medium size bowl.

    In a small bowl or 2 cup measuring cup add the sour cream, mayonnaise, dillweed, parsley, salt, pepper, onion powder, garlic powder and vinegar. Stir until all the ingredients are blended together and you have a smooth dressing.

    Pour the dressing over the cucumbers and stir together.

    Refrigerate the salad for at least one hour before serving.

    • Prep Time: 15 minutes
    • Cook Time: 0 minutes
    • Category: Side Dish, Salads
    • Method: Chopped
    • Cuisine: American

    Did you make this recipe?

    Tag @smallfarmbiglife on Instagram and hashtag it #smallfarmbiglife

    If you made this Creamy Cucumber Salad I would love to hear what you thought! Please leave a star rating and a comment below. This is one of my favorite easy summer side dishes and I hope it becomes one of yours too!

    Storage

    Store this creamy cucumber salad in an airtight container in the refrigerator for up to 3 days. The cucumbers will release some liquid as the salad sits which is completely normal. Give it a good stir before serving to redistribute the dressing. I do not recommend freezing this salad as the cucumbers will become mushy and the creamy dressing does not hold up well to freezing.

    Top Tip

    I recommend using English cucumbers for this recipe because they have very small seeds and thin skin that does not need to be peeled. If you are using regular garden cucumbers or a variety with larger seeds scoop out the seeds before slicing so the salad does not become watery or bitter.

    You can also salt the cucumbers lightly and let them drain in a colander for 20 to 30 minutes before adding the dressing if you want an even crispier salad with less liquid.

    Didn't find the answer you're looking for?

    Ask AI to answer based on this recipe:

    ChatGPT
    Google AI
    Perplexity
    Grok
    Claude

    Frequently Asked Questions

    How much vinegar do you put in a cucumber salad?

    I used 2 tablespoons in this recipe. I don't like to add too much vinegar because I don't want to add a lot of liquid to the salad.

    What vinegar goes with cucumbers?

    I think white vinegar or apple cider vinegar are both delicious with cucumbers. For this recipe I used white vinegar, but you could also use apple cider vinegar if that's what you have.

    Gluten Free Sloppy Joe Tater Tot Casserole

    This Gluten Free Sloppy Joe Tater Tot Casserole is the ultimate easy dinner recipe! It blends hearty ground beef and sloppy joe flavor with crispy, cheesy tater tots for a family-friendly meal that satisfies every time. Whether you're feeding a crowd or just looking for easy food to make on a busy night, this savory, comforting dish is packed with flavor.

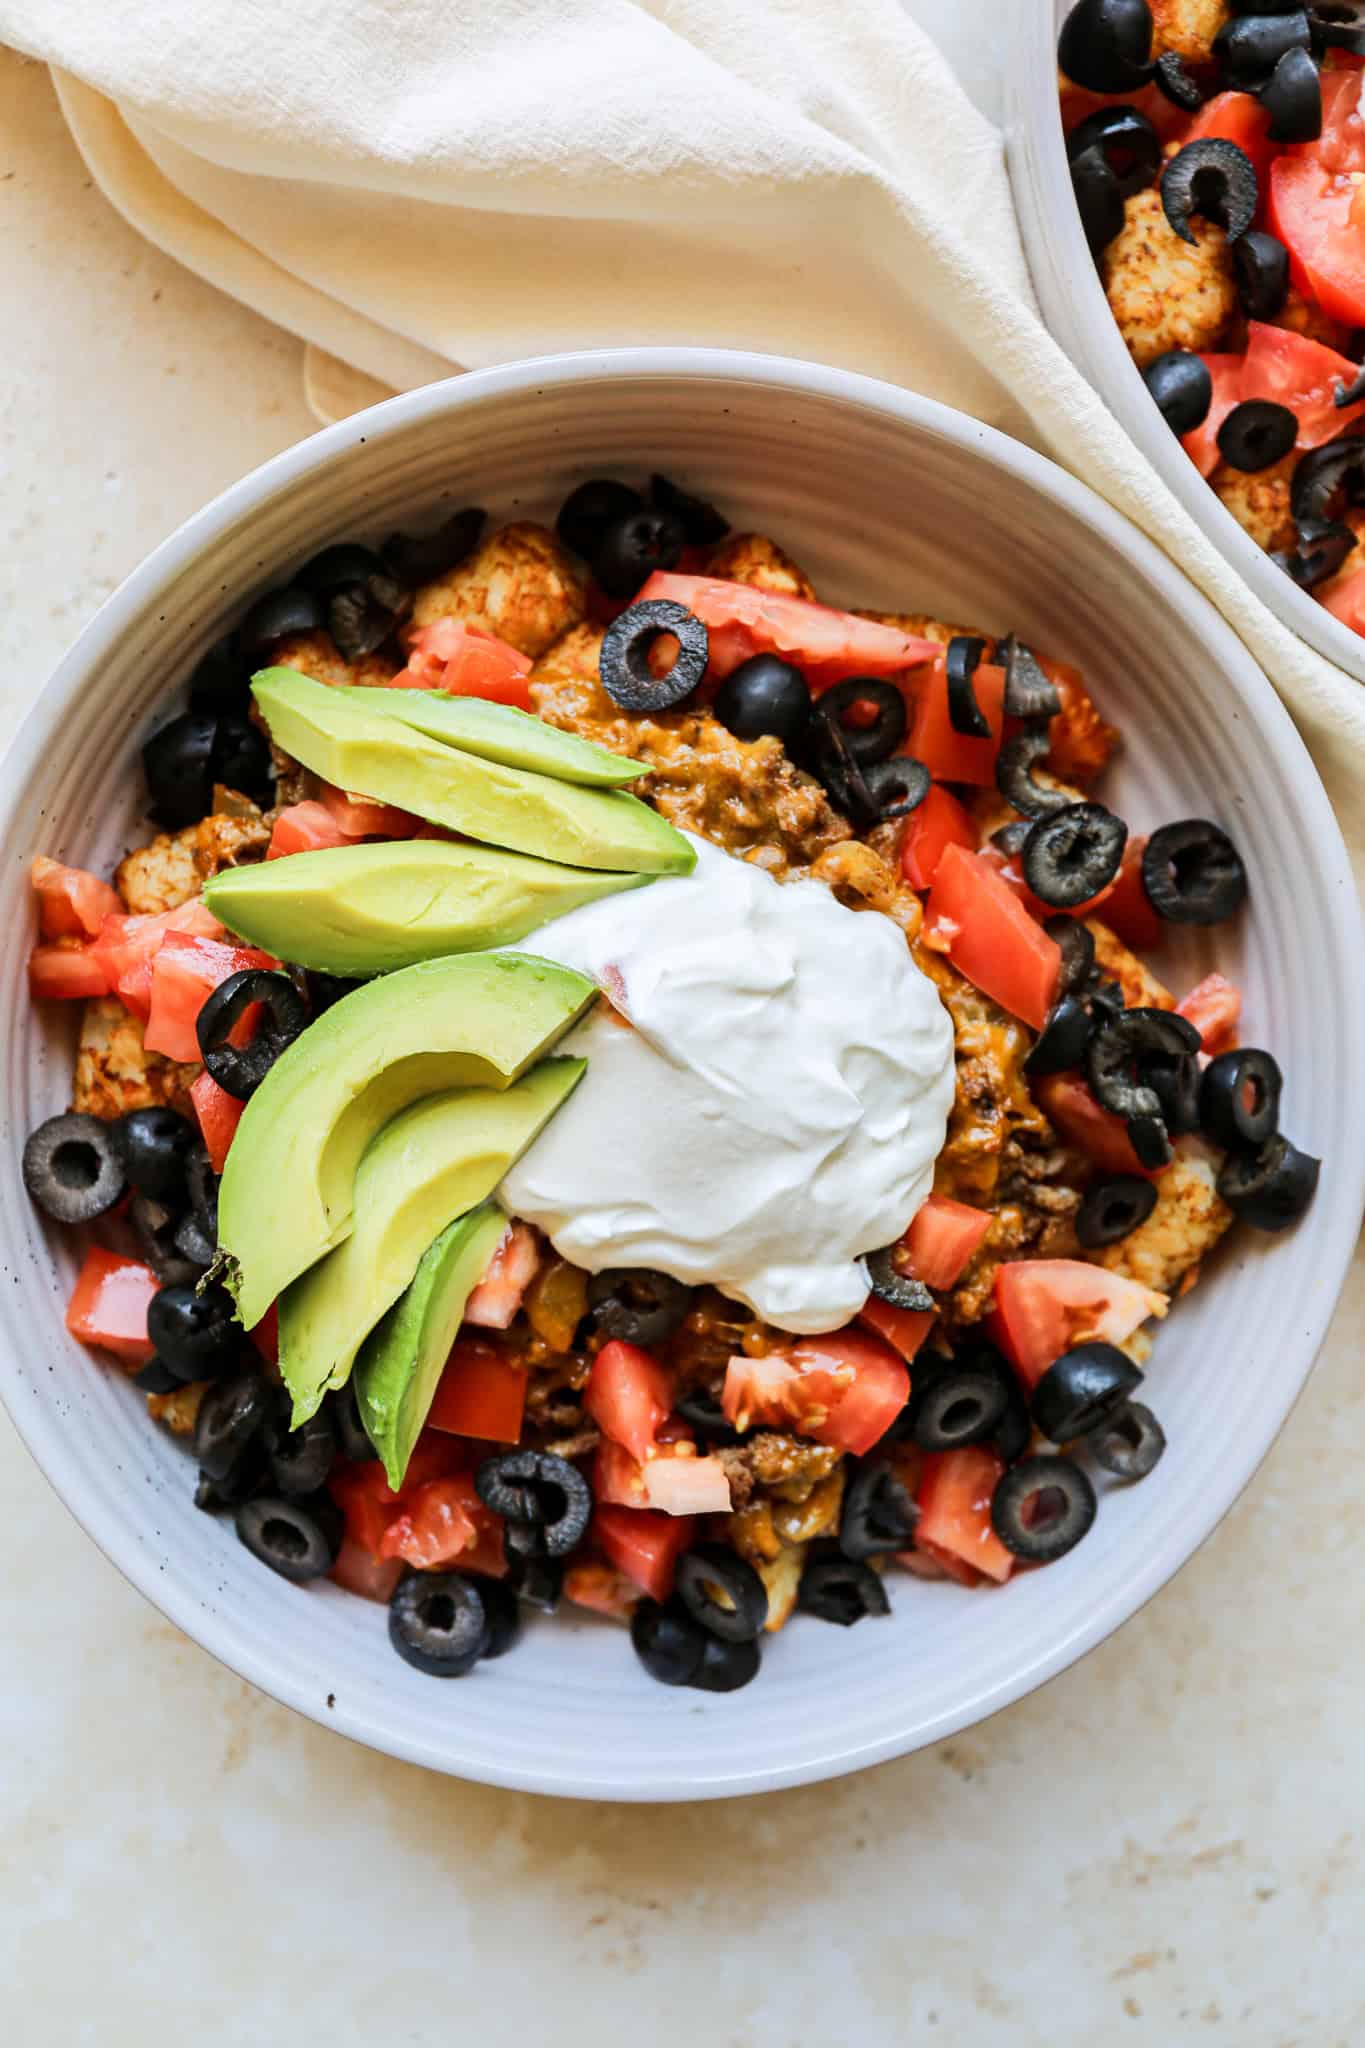
    a glass 9x13 baking dish of gluten free sloppy joe tater tot casserole next to plates of the meal dished up.

    A fun twist on a classic, this sloppy joe and tater tot casserole is a kid-friendly, cheesy tater tot bake that makes dinner simple and delicious.

    With homemade sloppy joe sauce, juicy ground beef, and golden tots on top, this has become a family favorite meal. I think this is one of the best tater tot casserole recipes out there.

    You might also enjoy my Gluten Free Cheesy Tater Tot Casserole, my Gluten Free Tater Tot Breakfast Casserole, my Gluten Free Sloppy Joe Casserole or my 25 Inexpensive Gluten Free Dinners Your Family Will Love.

    You can find all my meal recipes here: Gluten Free Dinner Recipes

    a plate of gluten free sloppy joe tater tot casserole next to the baking dish of the meal.
    [feast_advanced_jump_to]

    Ingredients

    Ground Beef
    Yellow Onion
    Minced Garlic
    Tomato Paste
    Canned Diced Tomatoes
    Tomato Sauce
    Salt
    Ground Black Pepper
    Worcestershire Sauce
    Yellow Mustard
    Brown Sugar
    Cheddar Cheese
    Tater Tots

    Instructions

    Preheat your oven to 375 degrees.

    In a large skillet over medium heat add the ground beef, onion and garlic. Cook and break up the ground beef for 8-10 minutes until there's no pink left in the meat.

    Add the tomato paste, diced tomatoes (don't drain them), tomato sauce, salt, pepper, worcestershire sauce, mustard and brown sugar to the skillet. Stir until combined.

    Pour into 9x13 baking dish. Top with the shredded cheddar cheese and an even layer of frozen tater tots.

    Bake at 375 degrees for 30-35 minutes. The filling will be bubbling and the tater tots will be browned when the casserole is done.

    Supplies


    More Recipes You Might Enjoy

    • Gluten Free Sloppy Joe Casserole
    • 25 Inexpensive Gluten Free Dinners Your Family Will Love
    • Gluten Free Cheesy Tater Tot Casserole
    • Gluten Free Tater Tot Breakfast Casserole

    I get a lot of my ingredients from Thrive Market. Thrive Market has been a game changer for me eating gluten free. They have so many options I can't get at my rural grocery stores! Use this link to get 40% off your first order!

    Print
    clock clock iconcutlery cutlery iconflag flag iconfolder folder iconinstagram instagram iconpinterest pinterest iconfacebook facebook iconprint print iconsquares squares iconheart heart iconheart solid heart solid icon

    Gluten Free Sloppy Joe Tater Tot Casserole


    5 Stars 4 Stars 3 Stars 2 Stars 1 Star

    No reviews

    • Author: Elaine VanVleck
    • Total Time: 50 minutes
    • Yield: 6 servings 1x
    • Diet: Gluten Free
    Print Recipe
    Pin Recipe

    Description

    This Gluten Free Sloppy Joe Tater Tot Casserole is the ultimate easy dinner recipe! It blends hearty ground beef and sloppy joe flavor with crispy, cheesy tater tots for a family-friendly meal that satisfies every time.


    Ingredients

    Scale
    • 1 pound Ground Beef
    • medium Yellow Onion, chopped
    • 1 Tbsp Minced Garlic
    • 1 - 6 ounce can Tomato Paste
    • 1 - 14.5 ounce can Canned Diced Tomatoes
    • 1 - 15 ounce can Tomato Sauce
    • 2 tsp Salt
    • 1 tsp Ground Black Pepper
    • 2 Tbsp Worcestershire Sauce
    • 2 Tbsp Yellow Mustard
    • 1 Tbsp Brown Sugar
    • 2 cups Cheddar Cheese, shredded
    • 1 - 32 ounce bag Frozen Tater Tots

    Instructions

    Preheat your oven to 375 degrees.

    In a large skillet over medium heat add the ground beef, onion and garlic. Cook and break up the ground beef for 8-10 minutes until there's no pink left in the meat.

    Add the tomato paste, diced tomatoes (don't drain them), tomato sauce, salt, pepper, worcestershire sauce, mustard and brown sugar to the skillet. Stir until combined.

    Pour into 9x13 baking dish. Top with the shredded cheddar cheese and an even layer of frozen tater tots.

    Bake at 375 degrees for 30-35 minutes. The filling will be bubbling and the tater tots will be browned when the casserole is done.

    • Prep Time: 20 minutes
    • Cook Time: 30 minutes
    • Category: Meals
    • Method: Baking
    • Cuisine: Gluten Free

    Did you make this recipe?

    Tag @smallfarmbiglife on Instagram and hashtag it #smallfarmbiglife

    Didn't find the answer you're looking for?

    Ask AI to answer based on this recipe:

    ChatGPT
    Google AI
    Perplexity
    Grok
    Claude

    Frequently Asked Questions

    Is tater tot casserole gluten free?

    Yes! This gluten free sloppy joe tater tot casserole is made gluten free by using tater tots that are gluten free. Most tater tots should automatically be gluten free, but that doesn't mean they aren't processed with other items that have gluten. Always read your labels and make sure your tater tots are gluten free!

    Can tater tot casserole be frozen?

    Yes. This casserole makes a great freezer meal. Simply follow the instructions to make this sloppy joe tater tot casserole and then once it has cooled completely freeze it. This recipe would be perfect to double and make one meal for dinner and one meal to freeze for later.

    How to Feed and Maintain a Gluten Free Sourdough Starter

    If you have a gluten free sourdough starter (whether you made it from scratch using my gluten free sourdough starter recipe or purchased one) keeping it alive and healthy is the key to baking delicious gluten free sourdough bread. This guide walks you through everything you need to know about feeding and maintaining your gluten free sourdough starter, including daily maintenance, how to store it in the refrigerator when you need a break, and how to troubleshoot common problems along the way.

    Feeding and maintaining a gluten free sourdough starter is a rewarding process that supports flavorful, naturally fermented baking without gluten. If you're a beginner, this method offers a simple, step-by-step approach to creating a strong, active gluten free sourdough starter from scratch.

    With the right sourdough starter feeding ratio and consistent care, you can build a thriving culture that forms the base for homemade sourdough bread and other recipes. This guide focuses on sourdough starter for beginners and provides easy, manageable instructions for keeping your starter healthy and active.

    a gluten free sourdough starter in the jar bubbling up over the rubber band on the outside so I know it's fermenting.
    [feast_advanced_jump_to]

    Supplies You Will Need

    Gluten Free Flour - My favorites are King Arthur's Measure for Measure Gluten Free Flour and Bob's Red Mill 1-to-1 Baking Gluten Free Flour.

    Hot Water - the water needs to be hot, but not so hot you can't put your hand under it. So, slightly warmer than hot bath water. If you use water that is too hot you could kill the fermentation process.

    32 ounce Wide Mouth Glass Jar - my favorite is the Ball 1 Quart Canning Jar.

    Rubber Band or Dry Erase Marker - You need something to mark where the starter is at in the jar after you add to it so you can make sure it starts to grow. By the seventh day you should be seeing it bubble above your marker on the jar.

    Spatula - You need to get the starter out of the jar, add to it, stir it and wipe down the inside of the jar so you can see fermentation happening.

    Simple Sourdough Starter Instructions

    If you already have a sourdough starter, skip the maintenance instructions below.

    Making a gluten free sourdough starter is really simple, but requires daily attention. If you are going to be away or too busy that is not the time to take on making your starter. But, if you have a small amount of time each day you can make your own starter and being enjoying gluten free sourdough bread.

    I list everything you will need out in detail in my gluten free sourdough recipe, but here's a quick breakdown:

    • Put gluten free flour and hot water in one quart jar.
    • Stir the flour and water until combined.
    • Sit a lid on top or use a coffee filter and rubber band so it can breathe.
    • Put the jar in a warm place that is around 70-74 degrees.
    • Everyday at the same time discard half the starter and add ⅓ cup flour and ⅓ cup hot water. This will take about 6 days for you to start seeing fermentation.
    • On the seventh day place half the starter in a container in the fridge.
    • Add ⅓ cup flour and ⅓ cup hot water to your starter.
    • On the 8th day place half the starter in a container in the fridge.
    • Add ⅓ cup flour and ⅓ cup hot water to your starter.
    • Place the discard container from your fridge on the counter to bring back up to room temperature. This sourdough starter is now ready to bake with. Yay!


    Sourdough Starter Maintenance Instructions

    Your gluten free sourdough starter needs to be maintained daily unless you put it in the refrigerator to rest. Maintaining your starter is simple and just takes a few minutes each day.

    Start by removing half the starter. Then, add flour and hot water back in. Stir the starter, flour and water until completely combined. Place the lid on the jar (don't tighten it) or put your coffee filter and rubber band over the jar. Place a rubber band or mark with a dry erase marker where the starter is on the jar.

    The next day when you go to repeat these maintenance steps you should see that the starter has bubbled up with fermentation above your marker on the jar. If that isn't happening yet then you must discard the half of the starter you take from the jar.

    A starter that isn't bubbling up above your marker hasn't started the fermentation process yet and won't allow your bread to rise.


    How To Maintain Sourdough Starter In Fridge

    When you get to a point when you want to take a break from feeding and caring for your gluten free sourdough starter daily you can place it in your fridge. I leave mine in the same jar, but screw the lid down and then place in the refrigerator.

    You will still need to feed the starter weekly to keep it alive and ready to revive when you want to use it again. Set a reminder on your calendar weekly to add ⅓ cup gluten free flour and ⅓ cup warm water to the starter.

    Mix the starter with the flour and water completely and then place back in the fridge. Set another reminder on your calendar to feed it again in one week.

    The calendar reminder is key for me because it's really easy for your starter to get pushed to the back of the fridge and forgotten about. It will get moldy and you don't want to have to clean up if that happens.

    Gluten Free Sourdough Recipes

    • Gluten Free Sourdough Starter
    • Gluten Free Sourdough Bread
    • Gluten Free Sourdough Pizza Crust
    • Gluten Free Sourdough Croutons

    I get a lot of my ingredients from Thrive Market. Thrive Market has been a game changer for me eating gluten free. They have so many options I can't get at my rural grocery stores! Use this link to get 40% off your first order!

    Frequently Asked Questions

    How will I know if my sourdough starter is hungry?

    It won't bubble very much and may maintain a flat line next to the marker you put on the jar. It could have a runny texture or even some gray looking liquid in it.

    This could also happen if your starter gets too cold. Either way, remove half and feed the starter to get it going again.

    Why isn't my sourdough starter rising?

    You may be starting to see some fermentation bubbles, but the starter isn't rising above your maker yet. This can be frustrating!

    There are a few reasons this could be happening. The spot you have your starter might be too cold. Move it somewhere between 70-74 degrees for the best results.

    Your starter might be hungry and need to be fed.

    Your starter might be too young and hasn't fully gotten into the fermentation process. Keep discarding and feeding your starter to see results.

    What do I do if my sourdough starter smells bad?

    Your starter should have a sweet, tangy smell. If it starts to smell bad all is not lost. Take a tablespoon of your starter and then discard the rest. Thoroughly wash the jar with hot water and soap.

    Then, start the fermentation process over again. Add ⅓ cup flour, ⅓ cup hot water and the tablespoon of sourdough starter to your clean jar. Mix together completely and continue this process until your starter is rising again.

    Side Note: If there is mold growing on your starter too then it's dead and you need to start over!

    What do I do with my sourdough discard?

    Do not throw away your sourdough discard! Every time you feed your starter you remove half of it and that portion is called the discard. I use my discard to make my Gluten Free Cheesy Sourdough Bread, my Gluten Free Chocolate Sourdough Bread, my Gluten Free Cinnamon Raisin Sourdough Bread, and my Gluten Free Sandwich Sourdough Bread.

    You can store your discard in a separate jar in the refrigerator and add to it each time you feed your starter until you have enough to bake with. Having a jar of discard in the fridge means you are always just a few steps away from a fresh loaf of homemade gluten free sourdough bread!

    Didn't find the answer you're looking for?

    Ask AI to answer based on this recipe:

    ChatGPT
    Google AI
    Perplexity
    Grok
    Claude

    Do you have questions about feeding or maintaining your gluten free sourdough starter? Leave a comment below and I will do my best to help! I love hearing how your sourdough baking is going.

    • « Previous Page
    • 1
    • …
    • 17
    • 18
    • 19
    • 20
    • 21
    • …
    • 100
    • Next Page »

    Welcome! I'm Elaine

    I'm so glad you are here! I share easy gluten free recipes from my small farm in Washington.

    Be sure to sign up for my newsletter to stay up to date on all of my new recipes.

    More about me...
    • Instagram
    • Pinterest
    • Facebook
    • Twitter
    • Mail

    Load up on new recipes, exclusive goodies, + more!
    Sign up below to stay up-to-date on news, events, and special deals.
    Thank you for subscribing!

    Easy Meals Recipes

    • Gluten Free Instant Pot Chili Mac and Cheese
    • Gluten Free Taco Casserole
    • Gluten Free Cowboy Baked Beans
    • Gluten Free Walking Taco Casserole
    • Gluten Free Creamy Beef and Mushroom Pasta
    • Gluten Free Instant Pot Chicken and Dumplings
    • Instant Pot Mexican Style Beef and Rice
    • Gluten Free Chicken Parmesan Pasta Casserole
    • Gluten Free One Pot Hamburger Helper Copycat
    • Gluten Free Salisbury Steak with Mushroom Gravy
    • Gluten Free Air Fryer Fajitas
    • Gluten Free Sloppy Joe Casserole

    Footer

    back to top

    About

    • Privacy Policy
    • Shop my Amazon Page
    • Follow me on LTK

    Newsletter

    • Sign Up! for emails and updates

    Contact

    • Contact
    • Media Kit
    • About Me

    As an Amazon Associate I earn from qualifying purchases.

    I may get commissions for purchases made through links on this site.

    Copyright © 2026 Brunch Pro on the Brunch Pro Theme