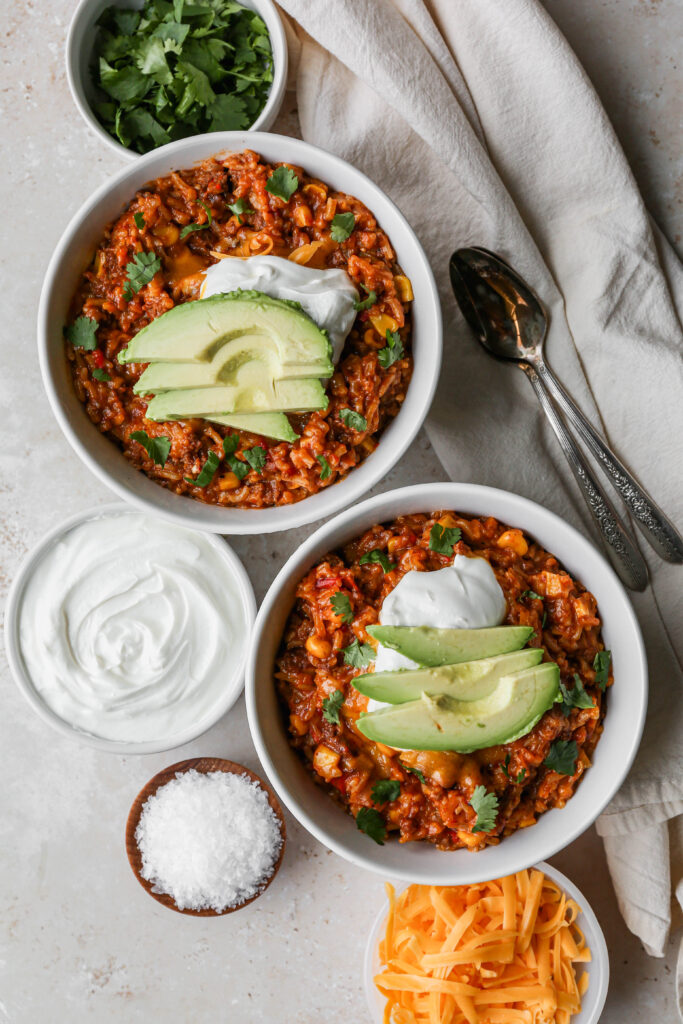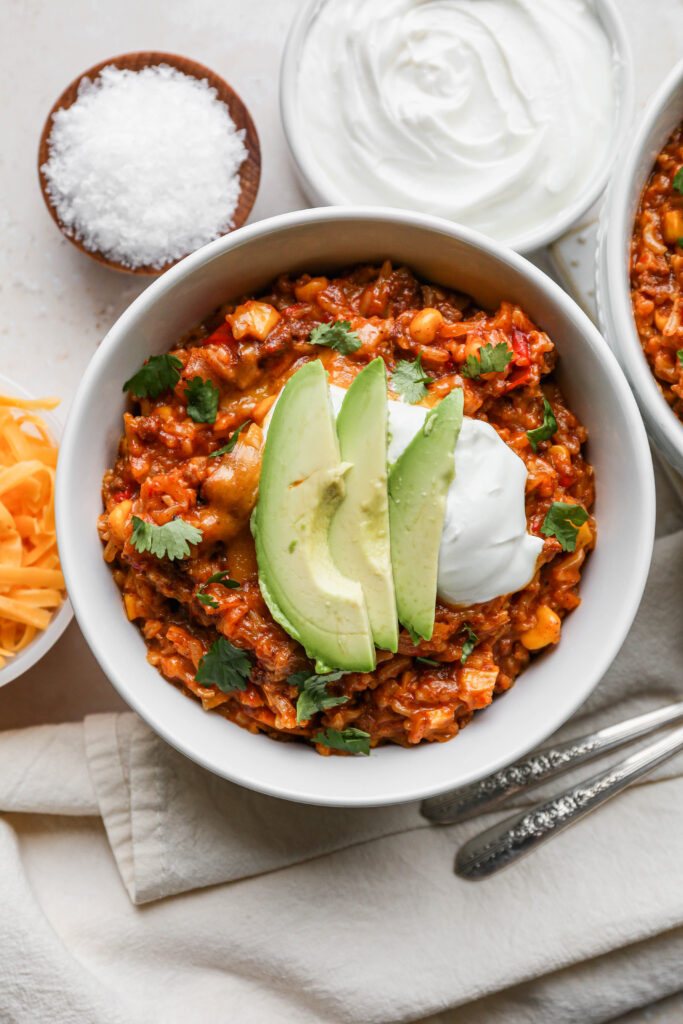
Small Farm Big Life

  • Gluten Free Recipe Index
  • Subscribe
  • Resources
menu icon
go to homepage
  • Home
  • Gluten Free Recipe Index
  • Subscribe
  • My Story
  • Resources
  • Free Guides
    • Email
    • Facebook
    • Instagram
    • Pinterest
  • subscribe
    search icon
    Homepage link
    • Home
    • Gluten Free Recipe Index
    • Subscribe
    • My Story
    • Resources
    • Free Guides
    • Email
    • Facebook
    • Instagram
    • Pinterest
  • ×

    Gluten Free Biscuits and Gravy Casserole

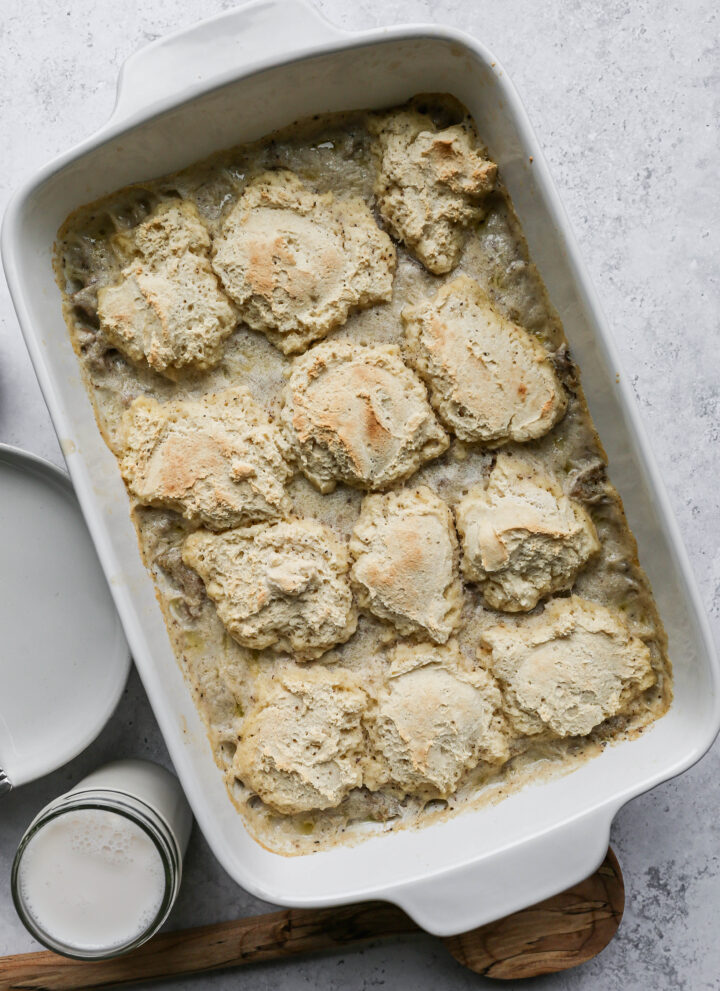
    This easy breakfast recipe for gluten free biscuits and gravy casserole uses sausage gravy and buttermilk biscuits. This gluten free breakfast casserole is baked and comes out of the oven ready to serve. The white gravy is made without cornstarch while still being creamy and delicious!

    a white baking dish of gluten free biscuits and gravy casserole next to plates and a small bowl of black pepper.

    This gluten-free breakfast casserole is a twist on the classic biscuits and gravy dish, made completely gluten-free to accommodate dietary needs without compromising on flavor.

    It's an easy-to-make biscuits and gravy bake that brings together the best of both worlds-sausage gravy and flaky biscuits-in one convenient dish.

    Whether you're hosting a weekend brunch or looking for a filling family breakfast, this casserole is sure to satisfy. It's a simple and savory breakfast casserole that brings the taste of Southern comfort food into your kitchen with ease, making it the perfect gluten-free brunch option for any occasion.

    If you are looking for more sausage recipes try my Creamy Sausage Bean Dip, my Gluten Free Sautéed Brussels Sprouts with Sausage, my Gluten Free Instant Pot Sausage and Kale Soup or my Gluten Free Sausage, Kale and Potato Skillet.

    For more breakfast recipes try: Gluten Free Breakfast Recipes

    two white plates of gluten free biscuits and gravy casserole nexts to a white baking dish and a small bowl of black pepper
    [feast_advanced_jump_to]

    Ingredients

    • Olive Oil
    • Italian Style Turkey Sausage
    • Gluten Free Flour
    • Milk
    • Sea Salt
    • Coarse Ground Black Pepper
    • Baking Powder
    • Buttermilk
    • Egg

    Instructions

    Preheat your oven to 350 degrees.

    In a large skillet or frying pan heat the olive oil on medium high heat. Add the turkey sausage and cook until completely done. Sprinkle the gluten free flour over the meat to absorb the grease and juices.

    Pour the milk, salt and pepper over the sausage mixture and stir together. Pour the sausage mixture into a 9x13 baking dish.

    In the bowl of your stand mixer add the gluten free flour, baking powder, salt, pepper, buttermilk and egg. Mix together just until blended. The biscuit mixture will be very sticky.

    Using a tablespoon dollop equal size portions of the buttermilk biscuit dough over the sausage gravy mixture.

    Bake at 350 degrees for 30 minutes or until the sausage is bubbling and the biscuits are done.

    Supplies

    Frequently Asked Questions

    Can this casserole be made ahead of time?

    Yes, you could make the gravy portion of this casserole ahead of time, pour it into the baking dish and then cover and refrigerate overnight. Then, before you want to make the casserole the next morning you could quickly mix together the biscuits for the top.

    If you do refrigerate the white sausage gravy overnight you may need to add 5 more minutes to the baking time. The casserole will be done when the gravy is bubbling and the biscuits are cooked through.

    How do I make gluten free biscuits and gravy casserole?

    This gluten free breakfast casserole recipe is so easy to make! In a 12-inch frying pan on your stovetop add the olive oil and breakfast sausage. Cook the breakfast sausage until there isn't any pink and it is done. Sprinkle the gluten free flour overtop to soak up the excess grease and juices.

    Pour the milk, salt and pepper over top. Stir to combine. Pour the gravy mixture into a 9x13 baking dish.

    To make the buttermilk biscuits add the gluten free flour, baking powder, salt, pepper, buttermilk and eggs in the bowl of your stand. Mix just until the ingredients are blended together. The dough will be really sticky!

    Using a tablespoon dollop the gluten free buttermilk biscuit dough over the sausage gravy evenly. Bake at 350 degrees for 30 minutes or until the gravy is bubbling and the biscuits are done.

    More Recipes You Might Enjoy

    Gluten Free Tater Tot Breakfast Casserole
    Gluten Free Apple Cinnamon French Toast Casserole
    Gluten Free Air Fryer Apple Fritters
    Gluten Free Millet Drop Biscuits
    Gluten Free Pumpkin Spice Pancakes

    I get a lot of my ingredients from Thrive Market. Thrive Market has been a game changer for me eating gluten free. They have so many options I can't get at my rural grocery stores! Use this link to get 40% off your first order!

    Print

    clock clock iconcutlery cutlery iconflag flag iconfolder folder iconinstagram instagram iconpinterest pinterest iconfacebook facebook iconprint print iconsquares squares iconheart heart iconheart solid heart solid icon

    Gluten Free Biscuits and Gravy Casserole


    5 Stars 4 Stars 3 Stars 2 Stars 1 Star

    No reviews

    • Author: Elaine VanVleck
    • Total Time: 40 minutes
    • Yield: 6 servings 1x
    • Diet: Gluten Free
    Print Recipe
    Pin Recipe

    Description

    This easy breakfast recipe for gluten free biscuits and gravy casserole uses sausage gravy and buttermilk biscuits. This gluten free breakfast casserole is baked and comes out of the oven ready to serve. The white gravy is made without cornstarch while still being creamy and delicious!


    Ingredients

    Scale

    Gravy:

    • 1 Tbsp. Olive Oil
    • 1 pound Italian Turkey Sausage
    • 6 Tbsp. Gluten Free Flour
    • 2 cups Milk
    • 1 tsp. Sea Salt
    • ¼ tsp. Coarse Ground Black Pepper

    Buttermilk Biscuits:

    • 1 ½ Gluten Free Flour
    • 2 tsp. Baking Powder
    • ½ tsp. Sea Salt
    • ¼ tsp. Coarse Ground Black Pepper
    • 1 cup Buttermilk
    • 1 large Egg

    Instructions

    Preheat your oven to 350 degrees.

    In a large skillet or frying pan heat the olive oil on medium high heat. Add the turkey sausage and cook until completely done. Sprinkle the gluten free flour over the meat to absorb the grease and juices.

    Pour the milk, salt and pepper over the sausage mixture and stir together. Pour the sausage mixture into a 9x13 baking dish.

    In the bowl of your stand mixer add the gluten free flour, baking powder, salt, pepper, buttermilk and egg. Mix together just until blended. The biscuit mixture will be very sticky.

    Using a tablespoon dollop equal size portions of the buttermilk biscuit dough over the sausage gravy mixture.

    Bake at 350 degrees for 30 minutes or until the sausage is bubbling and the biscuits are done.

    • Prep Time: 10 minutes
    • Cook Time: 30 minutes
    • Category: Breakfast Casserole
    • Method: Baking
    • Cuisine: Gluten Free

    Did you make this recipe?

    Tag @smallfarmbiglife on Instagram and hashtag it #smallfarmbiglife

    Top Tip

    We enjoy this gluten free biscuits and gravy casserole for breakfast, brunch or dinner. I use Italian turkey sausage in the recipe because I like the flavor and I can get a brand that doesn't have nitrates. But, you can use whatever type of sausage that works for you.

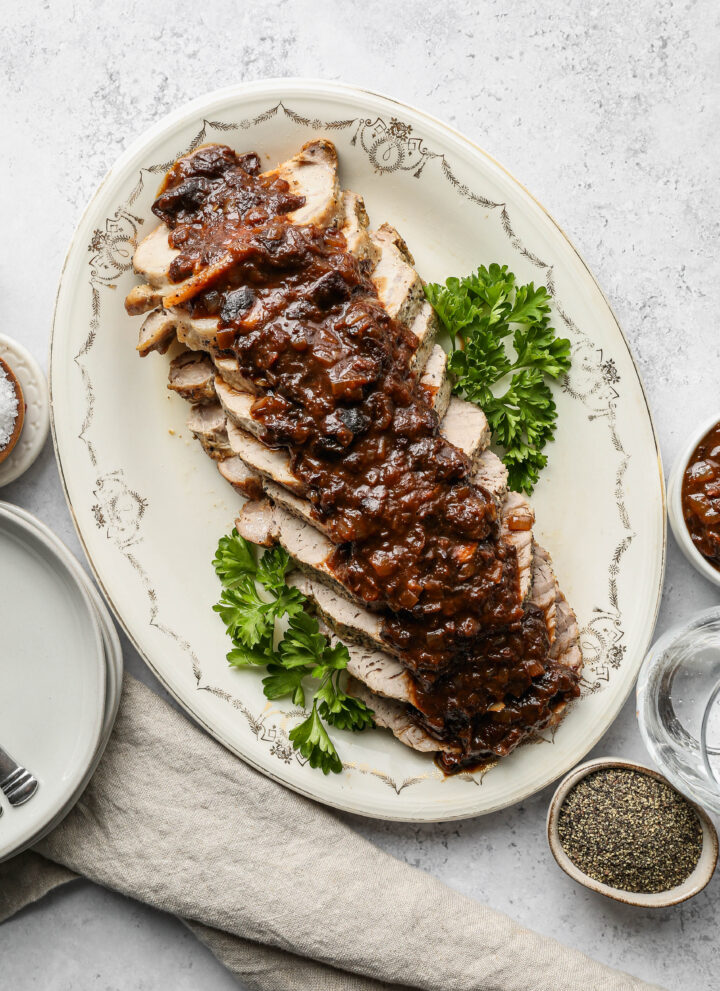
    Pork Tenderloin with Prune Sauce

    This pork tenderloin with prune sauce is an elegant dinner that comes together with simple ingredients. Seared until golden, then baked until juicy, the pork gets topped with a tangy sweet sauce made from dried plums and balsamic vinegar. It looks like it took hours, but it's ready in under an hour.

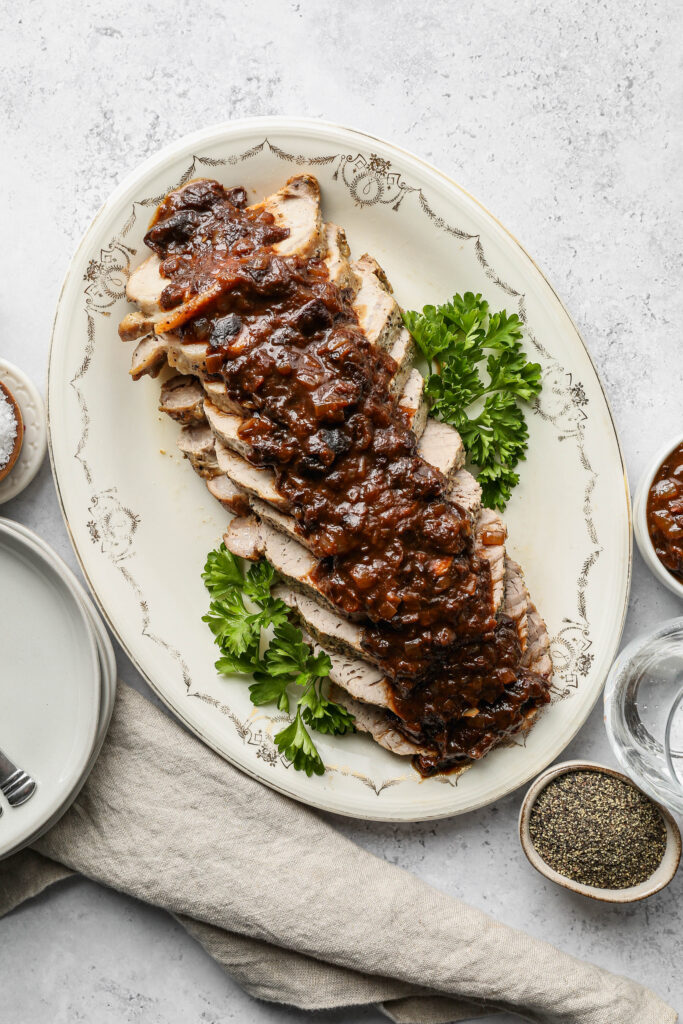
    a cream platter of pork tenderloin with prune sauce next to a stack of plates and a small white bowl of sauce

    I love to make this recipe for holidays and gatherings. It's easy to make and always well loved for meals. It's easy to pair any vegetable side dishes with this to make a complete meal.

    If you are looking for side dishes you might enjoy my Gluten Free Zucchini Squash and Corn Casserole, my Easy Fried Frozen Corn, my Cheesy Slow Cooker Creamed Corn, or my Pineapple Coleslaw.

    You can find all of my meal recipes here: Gluten Free Meal Recipes

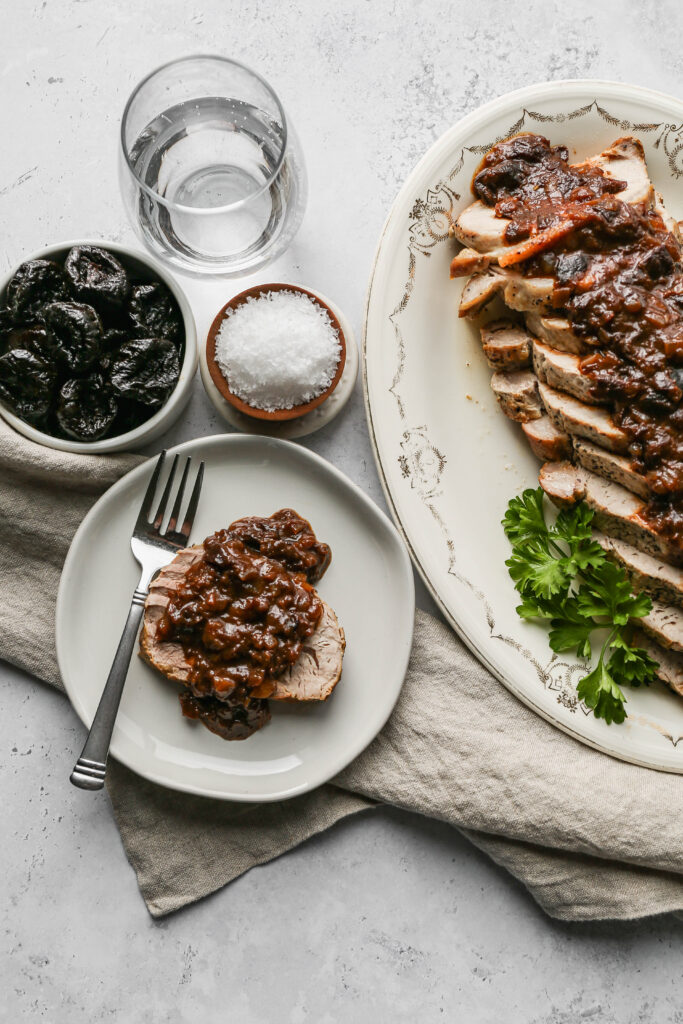
    a cream platter of pork tenderloin with prune sauce next to a plate of tenderloin and a small white bowl of dried plums
    [feast_advanced_jump_to]

    Why You'll Love This Recipe

    • Tangy, sweet sauce made from simple pantry ingredients
    • Dutch oven keeps the pork juicy while it bakes
    • Elegant enough for holidays, easy enough for a weeknight
    • Ready in under an hour

    Ingredient Notes

    • Dried prunes break down into a rich, slightly sweet sauce as they simmer with the balsamic vinegar and chicken broth.
    • Letting the pork rest after it comes out of the oven is what keeps it juicy, the juices redistribute through the meat instead of running out when you slice it right away.

    Serving Suggestions

    This pairs wonderfully with mashed potatoes, rice, or roasted vegetables to soak up the extra sauce. Any of the side dishes linked above make a great addition to round out the meal.

    Storage and Freezing

    Store the leftovers in an air tight container in the refrigerator for up to 5 days. Store the pork and sauce separately if possible.

    To freeze, wrap the cooled pork tightly in plastic wrap and place in a freezer safe bag or container for up to 3 months. Freeze the sauce separately in its own container. Thaw both in the refrigerator overnight before reheating.

    Top Tip

    To reheat the pork tenderloin place a piece of pork on your plate and cover with a damp paper towel. In the microwave heat for 30 seconds. Pour sauce over the pork and heat for another 15-20 seconds without the paper towel.

    Frequently Asked Questions

    How do you keep pork tenderloin from drying out?

    First, it's important to sear the pork tenderloin on all sides in oil before putting it in the oven to bake. Next, make sure the pork loin is facing with the fat side up. The fat will melt and baste the meat as it cooks.

    I also like to cook my pork tenderloin in a dutch oven with the lid on. This allows the moisture to stay in the pan and helps the meat not to dry out. If you don't have a dutch oven you can cover your baking dish with tin foil.

    Should you sear pork tenderloin?

    Yes! Searing the pork tenderloin on all sides before putting it in the oven to bake will help keep the juices in and help you have moist and tender meat.

    I put my dutch oven on the stove top over medium high heat. I put about two tablespoons of olive oil in the pan and let it heat up a bit. While the oil is heating I pat my spices into the pork tenderloin.

    Then, I carefully put the meat into the pan. I let each side brown in the oil before rotating to the next side. Once all sides are browned I put the pork tenderloin in the oven to finish cooking.

    What temperature should pork tenderloin be cooked to?

    The USDA recommends cooking whole cuts of pork like tenderloin to at least 145°F, followed by a 3 minute rest. This recipe calls for a slightly higher temperature of 155°F for a more well done result, so feel free to pull it a little earlier if you prefer it juicier.

    Can I substitute the prunes with another dried fruit?

    Yes. Dried apricots or dried cherries both work well in place of prunes if you'd like to switch up the flavor of the sauce.

    Didn't find the answer you're looking for?

    Ask AI to answer based on this recipe:

    ChatGPT
    Google AI
    Perplexity
    Grok
    Claude

    Pork Tenderloin Supplies

    More Recipes You Might Enjoy

    • Slow Cooker Hawaiin Pork Tenderloin
    • Cheesy Slow Cooker Creamed Corn
    • Gluten Free Buttermilk Drop Biscuits
    • Pineapple Coleslaw

    I get a lot of my ingredients from Thrive Market. Thrive Market has been a game changer for me eating gluten free. They have so many options I can't get at my rural grocery stores! Use this link to get 40% off your first order!

    Print
    clock clock iconcutlery cutlery iconflag flag iconfolder folder iconinstagram instagram iconpinterest pinterest iconfacebook facebook iconprint print iconsquares squares iconheart heart iconheart solid heart solid icon

    Pork Tenderloin with Prune Sauce


    5 Stars 4 Stars 3 Stars 2 Stars 1 Star

    No reviews

    • Author: Elaine VanVleck
    • Total Time: 1 hour
    • Yield: 3 pound Pork Tenderloin 1x
    • Diet: Gluten Free
    Print Recipe
    Pin Recipe

    Description

    This pork tenderloin with prune sauce is a simple yet impressive dinner, seared and baked until juicy, then topped with a tangy balsamic prune sauce. It's an easy dish for holidays and gatherings, but simple enough for a weeknight too. Serve it sliced into medallions with your favorite side dishes.


    Ingredients

    Scale

    Pork Tenderloin:

    • 3 Tbsp. Olive Oil
    • 3 pound Pork Tenderloin
    • 2 tsp. Sea Salt
    • 1 tsp. Coarse Ground Black Pepper
    • 1 tsp. Garlic Powder
    • ½ tsp. Ground Mustard

    Prune Sauce:

    • 2 Tbsp. Olive Oil
    • 1 Tbsp. Unsalted Butter
    • 1 small Yellow Onion, finely chopped
    • 1 cup Dried Prunes, finely chopped
    • 1 cup Chicken Stock
    • 1 Tbsp. Balsamic Vinegar
    • ¼ tsp. Sea Salt

    Instructions

    Heat your oven to 350 degrees.

    In your dutch oven over medium high heat add the olive oil. Let it heat up while you pat the salt, pepper, garlic powder and ground mustard into the pork tenderloin.

    Carefully place the tenderloin into the heated dutch oven. Sear on each side until browned. This should take about 10 minutes total.

    Put the lid on the dutch oven and cook at 350 degrees for 30-40 minutes or until the internal temperature of the thickest part of the tenderloin is at least 155 degrees.

    Carefully remove the pork tenderloin from the hot pan and place on a cutting board to rest.

    While the meat is resting make the prune sauce. In a 2 quart saucepan over medium heat add the olive oil and butter. Add the onion and saute until translucent, about 3 minutes.

    Add the prunes, chicken broth, balsamic vinegar and salt. Bring the mixture to a simmer and reduce heat to medium low. Cook until the mixture reduces to a sauce, about 5 minutes.

    Cut the pork tenderloin into medallions and serve with prune sauce over top.

    If you made this recipe please leave a star rating and comment below. It helps other readers find this recipe and means so much to me.

    Notes

    If you reduce your prune sauce too much add 1-2 tablespoons of chicken broth to thin.

    • Prep Time: 20 minutes
    • Cook Time: 40 minutes
    • Category: Meat
    • Method: Oven Baked
    • Cuisine: American

    Did you make this recipe?

    Tag @smallfarmbiglife on Instagram and hashtag it #smallfarmbiglife

    Pork Tenderloin Ingredients

    • Olive Oil
    • Pork Tenderloin
    • Sea Salt
    • Coarse Ground Black Pepper
    • Garlic Powder
    • Ground Mustard
    • Unsalted Butter
    • Yellow Onion
    • Dried Prunes
    • Chicken Broth
    • Balsamic Vinegar

    Instructions

    Heat your oven to 350 degrees.

    In your dutch oven over medium high heat add the olive oil. Let it heat up while you pat the salt, pepper, garlic powder and ground mustard into the pork tenderloin.

    Carefully place the tenderloin into the heated dutch oven. Sear on each side until browned. This should take about 10 minutes total.

    Put the lid on the dutch oven and cook at 350 degrees for 30-40 minutes or until the internal temperature of the thickest part of the tenderloin is at least 155 degrees.

    Carefully remove the pork tenderloin from the hot pan and place on a cutting board to rest.

    While the meat is resting make the prune sauce. In a 2 quart saucepan over medium heat add the olive oil and butter. Add the onion and saute until translucent, about 3 minutes.

    Add the prunes, chicken broth, balsamic vinegar and salt. Bring the mixture to a simmer and reduce heat to medium low. Cook until the mixture reduces to a sauce, about 5 minutes.

    Cut the pork tenderloin into medallions and serve with prune sauce over top.

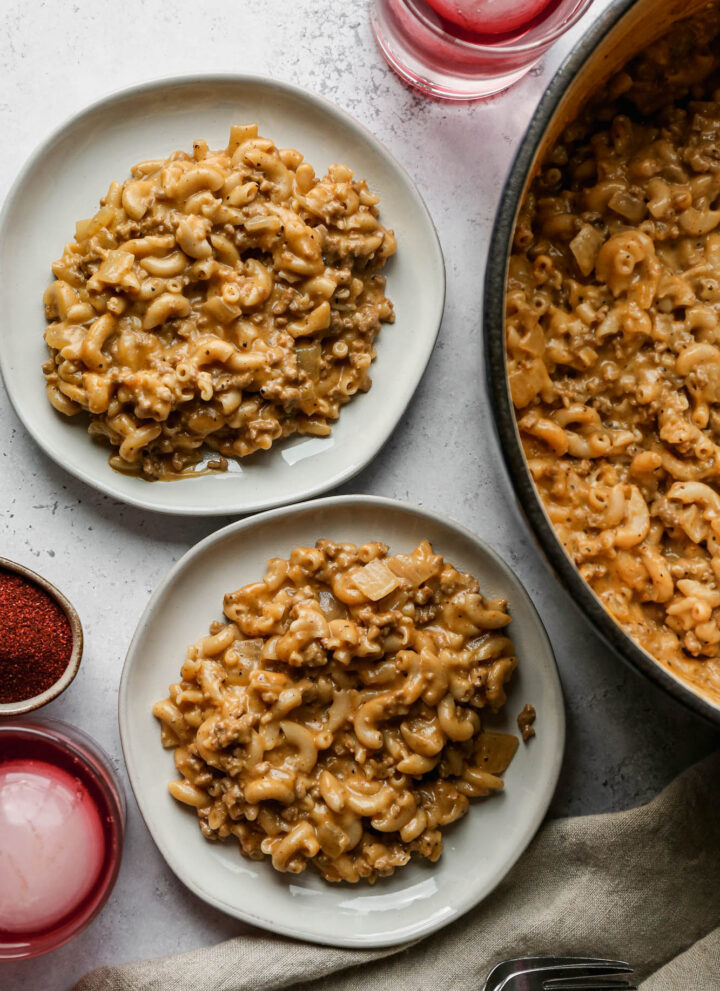
    Gluten Free One Pot Hamburger Helper Copycat

    This easy, homemade gluten free one pot hamburger helper copycat recipe is perfect for weeknight meals! It uses ground beef, gluten free macaroni noodles and cheese. This one skillet burger casserole is so simple and quick for dinner.

    a dutch oven and two white plates of gluten free one pot hamburger helper copycat casserole

    If you are looking for more easy gluten free meals you might also enjoy my Gluten Free Creamy Beef and Mushroom Pasta, my Gluten Free Slow Cooker Spaghetti, my Gluten Free Instant Pot Chicken & Dumplings, my Gluten Free Chicken Parmesan Pasta Casserole, or my Gluten Free Taco Casserole.

    I also have a round up of my favorite gluten free beef recipes here: 10 Easy Gluten Free Beef Recipes

    a dutch oven and two white plates of gluten free one pot hamburger helper copycat casserole
    [feast_advanced_jump_to]

    Ingredients

    • Olive Oil
    • Ground Beef
    • Onion
    • Minced Garlic
    • Sea Salt
    • Coarse Ground Black Pepper
    • Chili Powder
    • Paprika
    • Gluten Free Brown Rice Elbow Pasta
    • Beef Broth
    • Milk
    • Cheddar Cheese
    • Worcestershire Sauce
    • Ketchup
    • Spicy Brown Mustard

    Instructions

    In a large 6-quart dutch oven over medium heat add the olive oil and begin to brown the ground beef. After most of the ground beef is cooked with just a little pink showing add the onion and minced garlic. Cook for a couple more minutes until the onion is translucent. 

    Add the salt, pepper, chili powder and paprika and cook for about one minute.

    Add the elbow pasta, beef broth and milk to the mixture. Bring to a gentle boil and simmer for 7-8 minutes stirring often until the pasta is el dente. I like to test my pasta with a fork to make sure I can easily cut it in half and there isn't any crunch left to the pasta.

    Remove the dutch oven from heat and stir in the shredded cheese, Worcestershire sauce, ketchup and mustard until well blended and creamy.

    Serve immediately.

    Supplies

    More Recipes You Might Enjoy

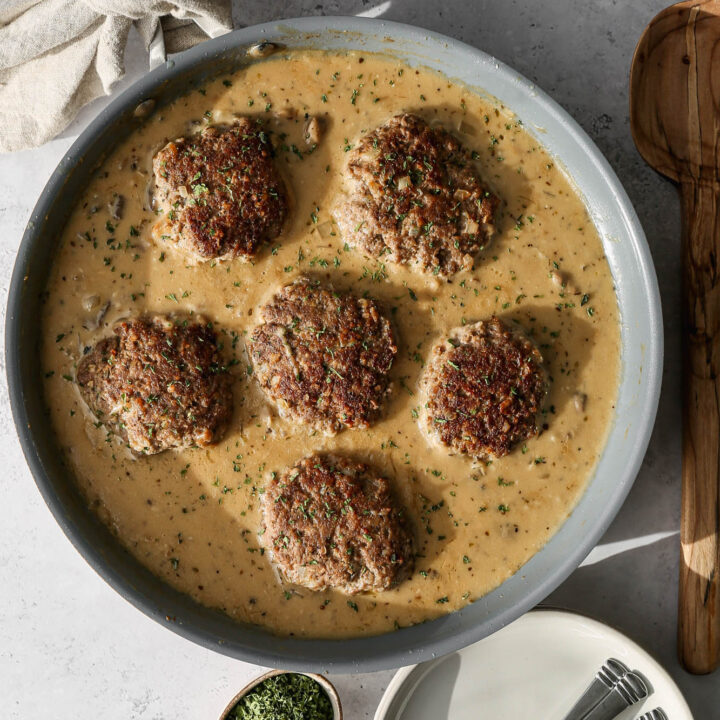
    • Gluten Free Salisbury Steak with Mushroom Gravy
    • Gluten Free Air Fryer Fajitas
    • 10 Easy Gluten Free Beef Recipes
    • Instant Pot Beef and Bean Burrito Casserole

    I get a lot of my ingredients from Thrive Market. Thrive Market has been a game changer for me eating gluten free. They have so many options I can't get at my rural grocery stores! Use this link to get 40% off your first order!

    Print
    clock clock iconcutlery cutlery iconflag flag iconfolder folder iconinstagram instagram iconpinterest pinterest iconfacebook facebook iconprint print iconsquares squares iconheart heart iconheart solid heart solid icon

    Gluten Free One Pot Hamburger Helper Copycat


    5 Stars 4 Stars 3 Stars 2 Stars 1 Star

    No reviews

    • Author: Elaine VanVleck
    • Total Time: 30 minutes
    • Yield: 6 servings 1x
    • Diet: Gluten Free
    Print Recipe
    Pin Recipe

    Description

    This easy, homemade gluten free one pot hamburger helper copycat recipe is perfect for weeknight meals! It uses ground beef, gluten free macaroni noodles and cheese. This one skillet burger casserole is so simple and quick for dinner.


    Ingredients

    Scale
    • 1 Tbsp. Olive Oil
    • 1 pound Ground Beef
    • 1 medium Yellow Onion, chopped
    • 1 Tbsp. Minced Garlic
    • 1 ½ tsp. Sea Salt
    • 1 tsp. Coarse Ground Black Pepper
    • 1 tsp. Chili Powder
    • 1 tsp. Paprika
    • 16 ounce bag Gluten Free Brown Rice Elbow Pasta
    • 3 ½ cups Beef Broth
    • 2 cups Milk
    • 1 cup Cheddar Cheese, shredded
    • 2 Tbsp. Worcestershire Sauce
    • 1 Tbsp. Ketchup
    • 2 tsp. Spicy Brown Mustard

    Instructions

    In a large 6-quart dutch oven over medium heat add the olive oil and begin to brown the ground beef. After most of the ground beef is cooked with just a little pink showing add the onion and minced garlic. Cook for a couple more minutes until the onion is translucent. 

    Add the salt, pepper, chili powder and paprika and cook for about one minute.

    Add the elbow pasta, beef broth and milk to the mixture. Bring to a gentle boil and simmer for 7-8 minutes stirring often until the pasta is el dente. I like to test my pasta with a fork to make sure I can easily cut it in half and there isn't any crunch left to the pasta.

    Remove the dutch oven from heat and stir in the shredded cheese, Worcestershire sauce, ketchup and mustard until well blended and creamy.

    Serve immediately.

    • Prep Time: 10 minutes
    • Cook Time: 20 minutes
    • Category: Meals
    • Method: Stove Top
    • Cuisine: Gluten Free

    Did you make this recipe?

    Tag @smallfarmbiglife on Instagram and hashtag it #smallfarmbiglife

    Didn't find the answer you're looking for?

    Ask AI to answer based on this recipe:

    ChatGPT
    Google AI
    Perplexity
    Grok
    Claude

    Frequently Asked Questions

    What side dish goes well with this recipe?

    Steamed vegetables are a great side dish with this recipe. My seven layer salad or easy pea salad would also be really great options for a side dishes.

    What type of pot should I use for this recipe?

    I use my 6-quart cast iron dutch oven to make this recipe. This allows me to brown the meat and saute the onions all in one pot. Then I just add the rest of the ingredients and simmer until the meal is done.

    I don't think you need an expensive dutch oven for making meals. This Lodge dutch oven or this Beautiful dutch oven are also really great choices.

    Gluten Free Air Fryer Fajitas

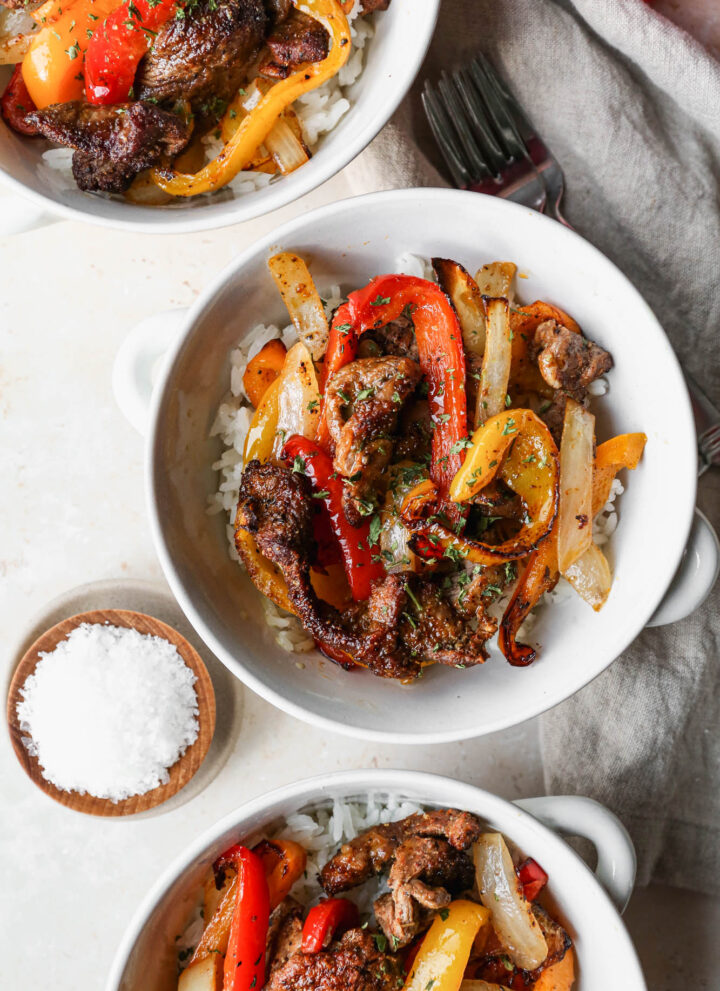
    These Gluten Free Air Fryer Fajitas are one of my favorite quick weeknight dinners because they are ready in just 27 minutes, require almost no cleanup, and taste so good that my family requests them constantly. Steak strips with red, orange, and yellow bell peppers and onion get tossed in a homemade fajita seasoning of chili powder, smoked paprika, cumin, garlic powder, and oregano and then air fried at 390 degrees for 12 minutes.

    Everything comes out perfectly cooked with beautifully caramelized peppers and juicy tender steak every single time.

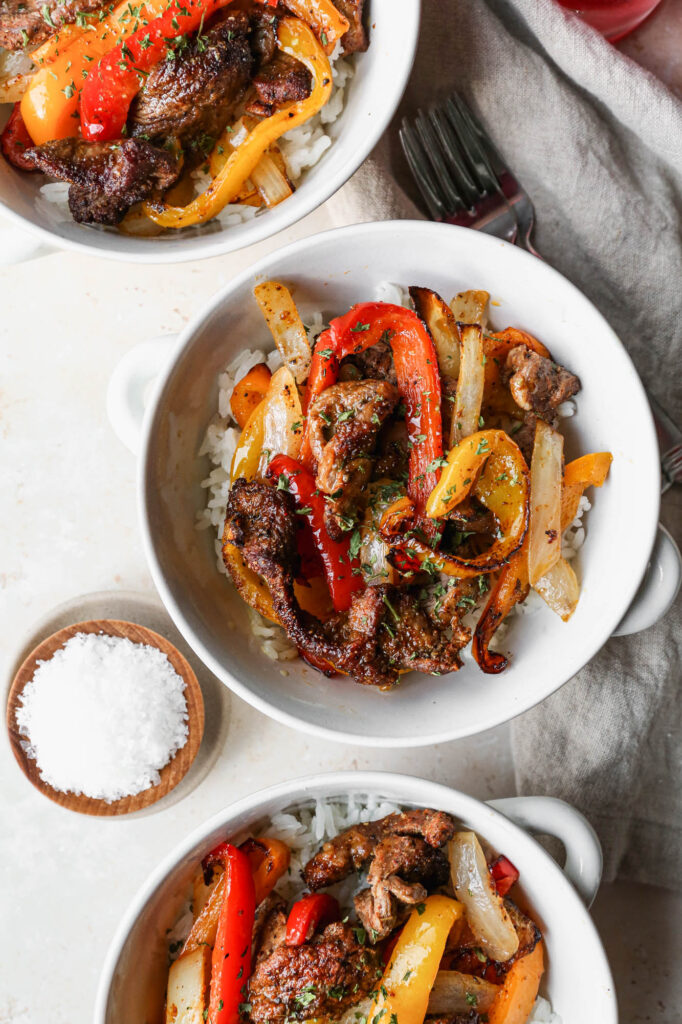
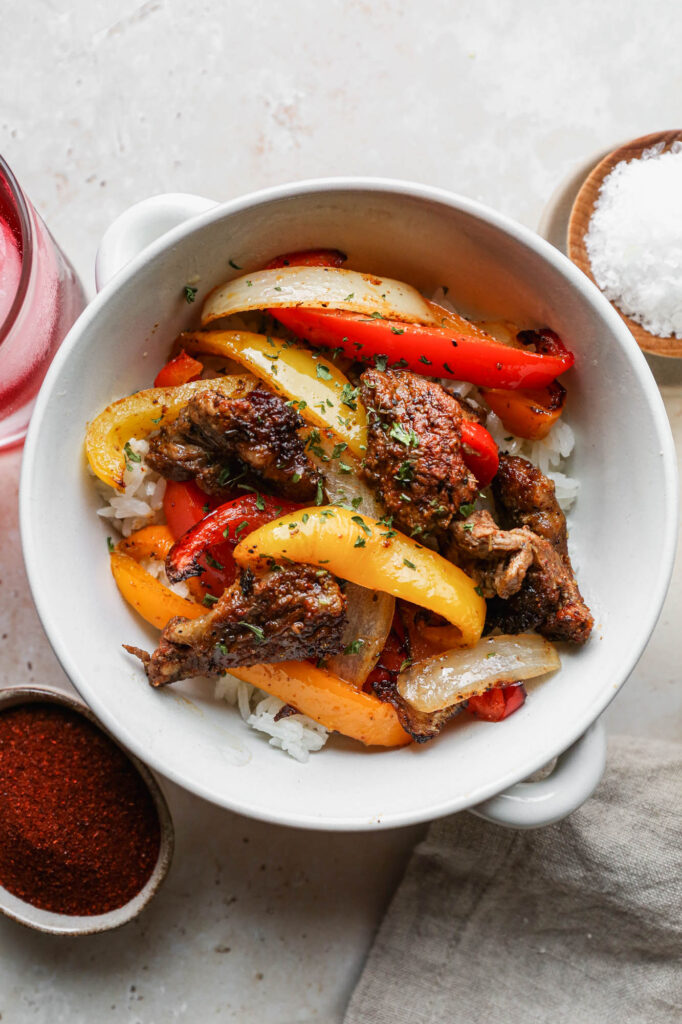
    three white bowls of air fryer gluten free fajitas over jasmine rice

    I love serving these in a bowl over jasmine rice with a big scoop of guacamole on top but they are equally delicious in gluten free tortillas with all your favorite fajita toppings.

    The homemade seasoning blend is so much better than a store bought packet and you probably already have everything you need in your spice cabinet.

    This is one of those recipes that looks and tastes impressive but is genuinely simple enough for any weeknight.

    You can find more air fryer recipes here: My Favorite Gluten Free Air Fryer Recipes

    If you are looking fore more beef recipes try these: 10 Easy Gluten Free Beef Recipes

    three white bowls of air fryer gluten free fajitas over jasmine rice
    [feast_advanced_jump_to]

    Ingredients

    • Steak
    • Red Bell Pepper
    • Orange Bell Pepper
    • Yellow Bell Pepper
    • Onion
    • Sea Salt
    • Coarse Ground Black Pepper
    • Garlic Powder
    • Chili Powder
    • Smoked Paprika
    • Ground Cumin
    • Dried Oregano
    • Avocado Oil

    Instructions

    Slice steak, peppers and onion. Add to a large mixing bowl. Cover mixture with spices and avocado oil. Mix thoroughly to make sure the steak, peppers and onion are evenly coated with spices and oil. 

    Place mixture in the basket of your air fryer. Fry at 390 degrees for 12 minutes. At 6 minutes stir the mixture to make sure it doesn't stick together and cooks evenly.

    I serve my fajitas in a bowl with jasmine rice and guacamole. 

    Supplies

    More Recipes You Might Enjoy

    • Slow Cooker Steak and Mushrooms
    • Air Fryer Garlic Steak Bites
    • Southwestern Style Coleslaw
    • Easy Fresh Pineapple Salsa

    I get a lot of my ingredients from Thrive Market. Thrive Market has been a game changer for me eating gluten free. They have so many options I can't get at my rural grocery stores! Use this link to get 40% off your first order!

    Print
    clock clock iconcutlery cutlery iconflag flag iconfolder folder iconinstagram instagram iconpinterest pinterest iconfacebook facebook iconprint print iconsquares squares iconheart heart iconheart solid heart solid icon

    Gluten Free Air Fryer Fajitas


    5 Stars 4 Stars 3 Stars 2 Stars 1 Star

    No reviews

    • Author: Elaine VanVleck
    • Total Time: 27 minutes
    • Yield: 5 servings 1x
    • Diet: Gluten Free
    Print Recipe
    Pin Recipe

    Description

    These Gluten Free Air Fryer Fajitas are juicy steak strips with red, orange, and yellow bell peppers and onion tossed in a bold homemade seasoning of chili powder, smoked paprika, cumin, garlic, and oregano and air fried at 390 degrees for just 12 minutes. The result is the most flavorful and satisfying steak fajitas that are perfectly cooked every single time with minimal prep and almost no cleanup. Naturally gluten free and dairy free and perfect served in tortillas or over jasmine rice with guacamole for an easy weeknight dinner the whole family will love!


    Ingredients

    Scale
    • 1 ½ pounds Steak, cut into strips
    • 1 Red Bell Pepper, sliced
    • 1 Orange Bell Pepper, sliced
    • 1 Yellow Bell Pepper, sliced
    • 1 medium Yellow Onion, sliced
    • 1 tsp. Sea Salt
    • 1 tsp. Coarse Ground Black Pepper
    • 1 tsp. Garlic Powder
    • 1 tsp. Chili Powder
    • 1 tsp. Smoked Paprika
    • 1 tsp. Ground Cumin
    • ½ tsp. Dried Oregano
    • 2 Tbsp. Avocado Oil

    Instructions

    Slice steak, peppers and onion. Add to a large mixing bowl. Cover mixture with spices and avocado oil. Mix thoroughly to make sure the steak, peppers and onion are evenly coated with spices and oil. 

    Place mixture in the basket of your air fryer. Fry at 390 degrees for 12 minutes. At 6 minutes stir the mixture to make sure it doesn't stick together and cooks evenly.

    I serve my fajitas in a bowl with jasmine rice and guacamole. 

    • Prep Time: 15
    • Cook Time: 12
    • Category: Meals
    • Method: Air Fryer
    • Cuisine: American

    Did you make this recipe?

    Tag @smallfarmbiglife on Instagram and hashtag it #smallfarmbiglife

    If you made these Gluten Free Air Fryer Fajitas I would love to hear what you thought! Please leave a star rating and a comment below. This is one of my favorite quick and easy gluten free weeknight dinners and I hope it becomes one of yours too!

    Storage

    Store leftover gluten free air fryer fajitas in an airtight container in the refrigerator for up to 4 days. To reheat place the fajita mixture back in the air fryer at 350 degrees for 3 to 4 minutes until heated through or reheat in a skillet over medium heat for a few minutes. The steak and peppers reheat beautifully and are just as delicious the next day in a bowl over rice or wrapped in a warm gluten free tortilla.

    Top Tip

    Do not overcrowd the air fryer basket. If you are making the full recipe with 1.5 pounds of steak and all the peppers and onion you may need to work in two batches depending on the size of your air fryer. Overcrowding causes the vegetables and steak to steam rather than caramelize which means you lose the beautiful color and slightly charred flavor that makes these fajitas so good. Give everything room to breathe and stir at the 6 minute mark for even cooking.

    Didn't find the answer you're looking for?

    Ask AI to answer based on this recipe:

    ChatGPT
    Google AI
    Perplexity
    Grok
    Claude

    Frequently Asked Questions

    What cut of steak works best for air fryer fajitas?

    Sirloin steak is my top choice for this recipe because it has excellent flavor, cooks quickly at high heat, and stays tender without needing a long marinade. Flank steak and skirt steak are also great options and are very traditional for fajitas. Whatever cut you use make sure to slice the steak against the grain into thin strips for the most tender result.

    Can I use chicken instead of steak in this air fryer fajita recipe?

    Yes! Boneless skinless chicken breast or chicken thighs both work beautifully in this recipe with the same seasoning blend and cooking method. Slice the chicken into strips about the same size as the steak strips and air fry at 390 degrees for 12 to 15 minutes until cooked through to 165 degrees. Chicken thighs will be more forgiving and stay juicier than chicken breast.

    Can I prep these fajitas ahead of time?

    Yes! You can slice the steak and vegetables and toss everything with the seasoning and oil up to 24 hours ahead of time. Store the marinated mixture in a sealed container in the refrigerator and then just pour it into the air fryer basket when you are ready to cook. The extra marinating time actually deepens the flavor which makes this an even better make ahead meal prep option.

    What should I serve with these gluten free air fryer fajitas?

    I love serving these in a bowl over jasmine rice with a big scoop of guacamole on top. They are also delicious in gluten free tortillas with sour cream, salsa, shredded cheese, and fresh lime juice. For a lower carb option serve them over cauliflower rice or in lettuce wraps. My Southwestern Style Coleslaw and Easy Fresh Pineapple Salsa are both great side dishes that pair beautifully with the bold fajita flavors.

    Gluten Free Slow Cooker Barbecue Meatballs

    This easy recipe for gluten free slow cooker barbecue meatballs are perfect for an appetizer or a meal. These homemade meatballs are made with ground beef and a brown sugar bbq sauce. It's so simple to use your crockpot to slow cook the best gluten-free meatballs recipe.

    two white plates of gluten free slow cooker barbecue meatballs next to a white crockpot of meatballs and a cheese grater with parmesan cheese

    These Gluten Free Slow Cooker Barbecue Meatballs are a delicious and easy-to-make appetizer or meal, perfect for anyone looking for a gluten-free option. Made with homemade meatballs, this recipe uses gluten-free breadcrumbs to ensure it's suitable for those with dietary restrictions.

    The meatballs cook to tender perfection in a slow cooker, absorbing the tangy, zesty barbecue sauce that's both sweet and savory.

    It's a great family-friendly recipe that's both flavorful and juicy, making it a favorite comfort food for gatherings or casual dinners.

    If you are looking for more easy slow cooker recipes you might also enjoy my Gluten Free Slow Cooker Meatloaf, my Gluten Free Slow Cooker Hawaiin Meatballs, my Slow Cooker Steak and Mushrooms, or my Cheesy Slow Cooker Creamed Corn.

    You can also find more easy beef recipes here: 10 Easy Gluten Free Beef Recipes

    two white plates of gluten free slow cooker barbecue meatballs next to a white crockpot of meatballs and a cheese grater with parmesan cheese
    [feast_advanced_jump_to]

    Ingredients

    • Ground Beef
    • Gluten Free Bread Crumbs
    • Egg
    • Parmesan Cheese
    • Yellow Onion
    • Minced Garlic
    • Tomato Paste
    • Sea Salt
    • Coarse Ground Black Pepper
    • Chili Powder
    • Ketchup
    • Brown Sugar
    • Apple Cider Vinegar
    • Beef Broth
    • Ground Paprika
    • Ground Cumin
    • Worcestershire Sauce

    Instructions

    In a four cup measuring cup or small bowl mix together the barbecue sauce ingredients: ketchup, brown sugar, finely chopped yellow onion, apple cider vinegar, beef broth, sea salt, coarse ground black pepper, ground paprika, ground cumin and worcestershire sauce.

    Pour enough of the barbecue sauce into the bowl of your slow cooker to cover the bottom. Set the rest aside.

    In a mixing bowl blend together the ground beef, bread crumbs, egg, parmesan cheese, grated onion, minced garlic, tomato paste, sea salt, coarse ground black pepper and chili powder with your hands or a spoon.

    Form the meatball mixture into golf ball sized balls and place them in your slow cooker. Do not stack any of them on top of each other. Make sure you have them on the bottom of the slow cooker bowl.

    Pour the remaining barbecue sauce over the meatballs.

    Cover your slow cooker and cook on low for 3-4 hours. Meatballs should be browned and a minimum of 160 degrees on the inside when tested with a thermometer.

    Serve hot as an appetizer or over buttered pasta or with mashed potatoes for dinner.

    Supplies

    Frequently Asked Questions

    How do I make gluten free meatballs from scratch?

    The key is gluten free breadcrumbs. There are several brands that have certified gluten free breadcrumbs. You can also use rice crumbs. I've used both and been happy with both options.

    The gluten free bread or rice crumbs along with the egg will help the meatballs to hold their shape. Once the meatballs are in the crockpot I don't stir them until they are fully cooked so they don't fall apart.

    What do you serve barbecue meatballs with?

    I like to use these meatballs as an appetizer and I serve them on their own with toothpicks. They are also delicious served with mashed potatoes or buttered pasta for a meal.

    More Recipes You Might Enjoy

    • Gluten Free Slow Cooker Hawaiin Meatballs
    • Gluten Free Slow Cooker Meatballs
    • Gluten Free Slow Cooker Cranberry Meatballs
    • Gluten Free Swedish Style Meatballs

    I get a lot of my ingredients from Thrive Market. Thrive Market has been a game changer for me eating gluten free. They have so many options I can't get at my rural grocery stores! Use this link to get 40% off your first order!

    Print
    clock clock iconcutlery cutlery iconflag flag iconfolder folder iconinstagram instagram iconpinterest pinterest iconfacebook facebook iconprint print iconsquares squares iconheart heart iconheart solid heart solid icon

    Gluten Free Slow Cooker Barbecue Meatballs


    5 Stars 4 Stars 3 Stars 2 Stars 1 Star

    No reviews

    • Author: Elaine VanVleck
    • Total Time: 3 hours 20 minutes
    • Yield: 5 servings 1x
    • Diet: Gluten Free
    Print Recipe
    Pin Recipe

    Description

    This easy recipe for gluten free slow cooker barbecue meatballs are perfect for an appetizer or a meal. These homemade meatballs are made with ground beef and a brown sugar bbq sauce. It's so simple to use your crockpot to slow cook the best gluten-free meatballs recipe.


    Ingredients

    Scale

    Meatballs:

    • 1 ½ pounds Ground Beef
    • ½ cup Gluten Free Bread Crumbs
    • 1 large Egg
    • ¼ cup Parmesan Cheese, finely grated
    • 1 small Yellow Onion, grated
    • 2 Tbsp. Minced Garlic
    • 3 Tbsp. Tomato Paste
    • 1 tsp. Sea Salt
    • ½ tsp. Coarse Ground Black Pepper
    • 1 tsp. Chili Powder

    Barbecue Sauce:

    • 1 cup Ketchup
    • 1 cup Brown Sugar
    • 1 small Yellow Onion, finely chopped
    • ½ cup Apple Cider Vinegar
    • ½ cup Beef Broth
    • 1 tsp. Sea Salt
    • ½ tsp. Coarse Ground Black Pepper
    • 2 tsp. Ground Paprika
    • 1 tsp. Ground Cumin
    • 1 Tbsp. Worcestershire Sauce

    Instructions

    In a four cup measuring cup or small bowl mix together the barbecue sauce ingredients: ketchup, brown sugar, finely chopped yellow onion, apple cider vinegar, beef broth, sea salt, coarse ground black pepper, ground paprika, ground cumin and worcestershire sauce.

    Pour enough of the barbecue sauce into the bowl of your slow cooker to cover the bottom. Set the rest aside.

    In a mixing bowl blend together the ground beef, bread crumbs, egg, parmesan cheese, grated onion, minced garlic, tomato paste, sea salt, coarse ground black pepper and chili powder with your hands or a spoon.

    Form the meatball mixture into golf ball sized balls and place them in your slow cooker. Do not stack any of them on top of each other. Make sure you have them on the bottom of the slow cooker bowl.

    Pour the remaining barbecue sauce over the meatballs.

    Cover your slow cooker and cook on low for 3-4 hours. Meatballs should be browned and a minimum of 160 degrees on the inside when tested with a thermometer.

    Serve hot as an appetizer or over buttered pasta or with mashed potatoes for dinner.

    • Prep Time: 20 minutes
    • Cook Time: 3 hours
    • Category: Meals
    • Method: Slow Cooker
    • Cuisine: Gluten Free

    Did you make this recipe?

    Tag @smallfarmbiglife on Instagram and hashtag it #smallfarmbiglife

    • « Previous Page
    • 1
    • …
    • 51
    • 52
    • 53
    • 54
    • 55
    • …
    • 88
    • Next Page »

    Welcome! I'm Elaine

    I'm so glad you are here! I share easy gluten free recipes from my small farm in Washington.

    Be sure to sign up for my newsletter to stay up to date on all of my new recipes.

    More about me...
    • Instagram
    • Pinterest
    • Facebook
    • Twitter
    • Mail

    Load up on new recipes, exclusive goodies, + more!
    Sign up below to stay up-to-date on news, events, and special deals.
    Thank you for subscribing!

    Easy Meals Recipes

    • Gluten Free Instant Pot Chili Mac and Cheese
    • Gluten Free Taco Casserole
    • Gluten Free Cowboy Baked Beans
    • Gluten Free Walking Taco Casserole
    • Gluten Free Creamy Beef and Mushroom Pasta
    • Gluten Free Instant Pot Chicken and Dumplings
    • Instant Pot Mexican Style Beef and Rice
    • Gluten Free Chicken Parmesan Pasta Casserole
    • Gluten Free One Pot Hamburger Helper Copycat
    • Gluten Free Salisbury Steak with Mushroom Gravy
    • Gluten Free Air Fryer Fajitas
    • Gluten Free Sloppy Joe Casserole

    Footer

    back to top

    About

    • Privacy Policy
    • Shop my Amazon Page
    • Follow me on LTK

    Newsletter

    • Sign Up! for emails and updates

    Contact

    • Contact
    • Media Kit
    • About Me

    As an Amazon Associate I earn from qualifying purchases.

    I may get commissions for purchases made through links on this site.

    Copyright © 2026 Brunch Pro on the Brunch Pro Theme