Small Farm Big Life

  • Gluten Free Recipe Index
  • Subscribe
  • Resources
menu icon
go to homepage
  • Home
  • Gluten Free Recipe Index
  • Subscribe
  • My Story
  • Resources
  • Free Guides
    • Email
    • Facebook
    • Instagram
    • Pinterest
  • subscribe
    search icon
    Homepage link
    • Home
    • Gluten Free Recipe Index
    • Subscribe
    • My Story
    • Resources
    • Free Guides
    • Email
    • Facebook
    • Instagram
    • Pinterest
  • ×

    Easy Gluten Free White Cake

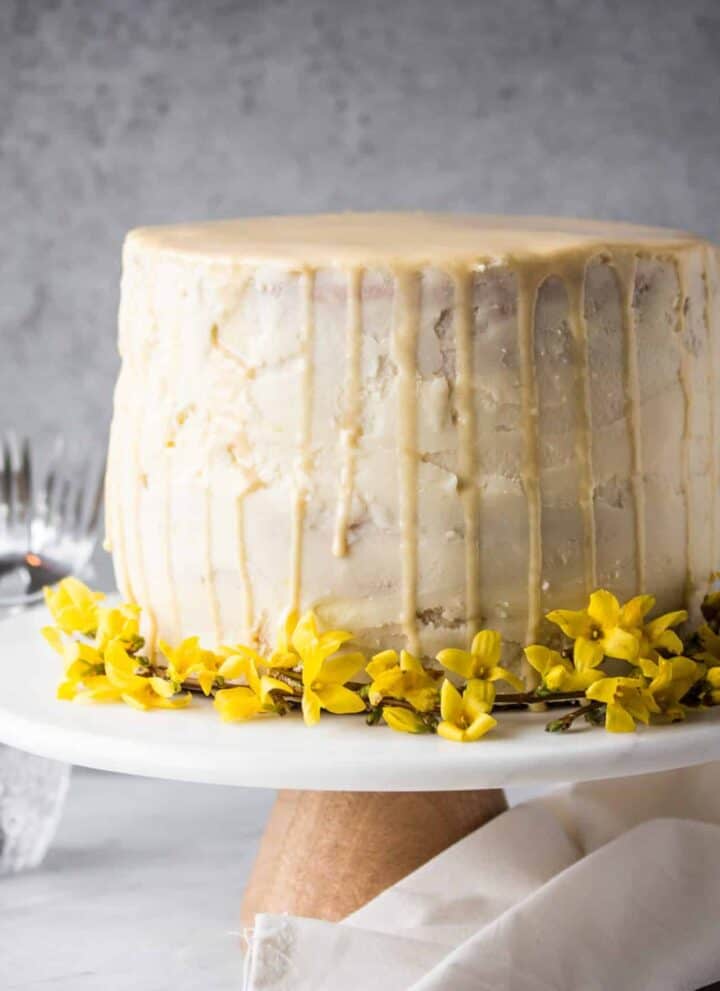
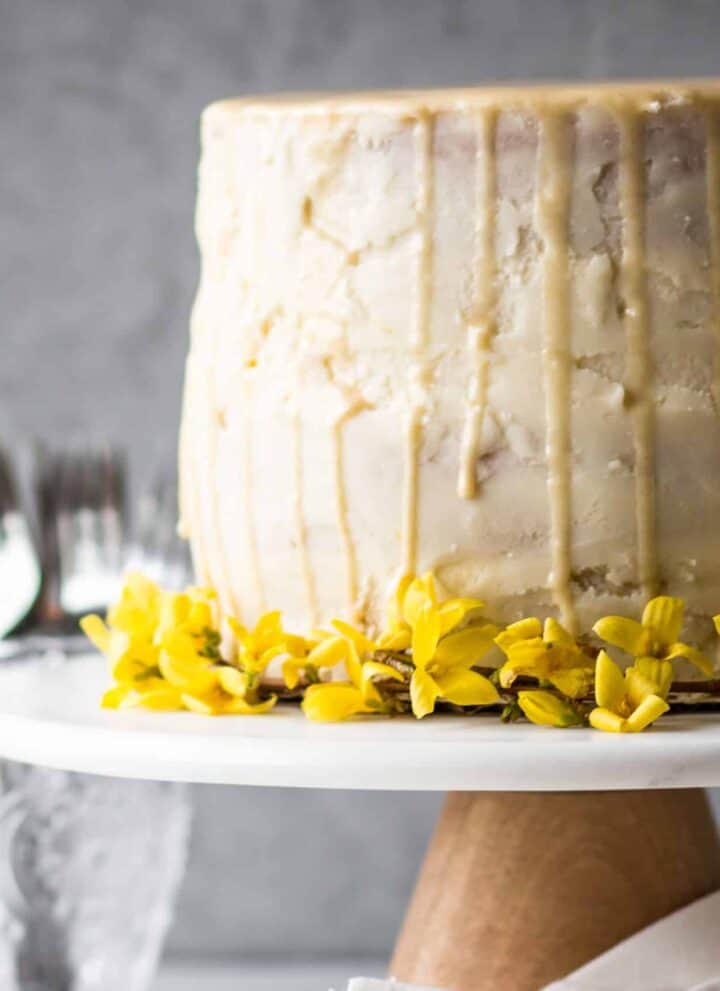
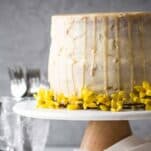
    easy gluten free white cake on a cake stand

    This simple recipe for easy gluten free white cake is moist and perfect for special occasions. I love this homemade fluffy cake for my birthday. This recipe makes the best vanilla cake from scratch.

    You can use any filling you would like for this cake, but I used my gluten free lemon curd. It adds the perfect amount of tartness with the light fluffy cake and rich buttercream frosting. This cake is also lovely with strawberry jam, raspberry preserves or buttercream frosting as the filling between layers.

    the overhead view of my easy gluten free white cake

    Do I need to use gluten free cake flour?

    No, you don't need gluten free cake flour for this recipe. I use regular gluten free baking flour in my recipes. If you wanted gluten free cake flour you can substitute two tablespoons of the gluten free flour with arrowroot powder or tapioca flour. But, as I said you don't need to do that with this recipe.

    Do gluten free cakes take longer to bake?

    Yes, in my experience gluten free baking does take a bit longer to bake than regular gluten flour recipes. If I'm converting a recipe to gluten free I usually add 5 minutes and then watch the item closely in the last couple of minutes.

    I test the cake with a toothpick or check the cookies for color and then add minutes if needed. For this recipe I've already set the appropriate baking time for gluten free. With that said, ovens may run a bit warmer or cooler so I like to turn on the oven light and take a look at the five minute mark.

    If you like this recipe you may also enjoy:

    Gluten Free Lemon Shortbread Bars
    Gluten Free Apple Carrot Muffins
    Lemon Lime Homemade Gatorade
    Gluten Free Cinnamon Coffee Cake
    Gluten Free Chocolate Cake with Cream Cheese Frosting

    I get my ingredients from Thrive Market. Thrive Market has been a game changer for me eating gluten free. They have so many options I can't get at my rural grocery stores! Use this link to get 25% off your first order!

    slice of easy gluten free white cake with gluten free lemon curd filling

    For the frosting I use my recipe for Easy Vanilla Buttercream Frosting.

    For the filling I use my recipe for Gluten Free Lemon Curd.

    Print
    clock clock iconcutlery cutlery iconflag flag iconfolder folder iconinstagram instagram iconpinterest pinterest iconfacebook facebook iconprint print iconsquares squares iconheart heart iconheart solid heart solid icon

    Easy Gluten Free White Cake


    5 Stars 4 Stars 3 Stars 2 Stars 1 Star

    5 from 1 review

    • Author: Elaine VanVleck
    • Total Time: 40 minutes
    • Yield: 2 - 9 inch cakes 1x
    • Diet: Gluten Free
    Print Recipe
    Pin Recipe

    Description

    This simple recipe for easy gluten free white cake is moist and perfect for special occasions. I love this homemade fluffy cake for my birthday. This recipe makes the best vanilla cake from scratch.


    Ingredients

    Scale

    2 cups Gluten Free Flour
    1 tsp. Baking Powder
    ½ tsp. Baking Soda
    ½ tsp. Sea Salt
    ½ cup Unsalted Butter, at room temperature
    1 ½ cups Granulated Sugar
    4 large Egg Whites, at room temperature
    1 tsp. Vanilla Extract
    ⅔ cups Milk
    ⅔ cups Sour Cream


    Instructions

    Preheat your oven to 350 degrees.

    Grease two - 9 inch cake pans.

    In a bowl whisk together the flour, baking powder, baking soda and salt. Set aside.

    In the bowl of your stand mixer using the paddle attachment cream together the butter and sugar for about 3 minutes until creamy. Add the eggs whites and vanilla. Beat until you have a smooth batter.

    Add the flour mixture, milk and sour cream and beat until combined. 

    Divide the batter evenly between your pans. 

    Bake at 350 degrees for 22-25 minutes. The cakes will be golden brown and spring back slightly when touched. You can test with a tooth pick to see if it comes out clean.

    Let the cakes cool for 10 minutes in the pans and then flip onto a cooling rack. Let the cakes cool completely before frosting them.

    For the frosting I use my recipe for Easy Vanilla Buttercream Frosting.

    For the filling I use my recipe for Gluten Free Lemon Curd.

    Notes

    I like to bake my cakes the day before I want to assemble my cake with filling and frosting.

    • Prep Time: 15 minutes
    • Cook Time: 25 minutes
    • Category: Cake
    • Method: Baking
    • Cuisine: Gluten Free

    Did you make this recipe?

    Tag @smallfarmbiglife on Instagram and hashtag it #smallfarmbiglife

    Easy Vanilla Buttercream Frosting

    cake frosted with easy vanilla buttercream frosting

    This recipe makes the best easy vanilla buttercream frosting! I love the whipped texture for cakes and for piping on frosting. It's so simple to make homemade, fluffy frosting. This recipe shows you how to make this classic smooth frosting.

    It's very important to take your butter out of the refrigerator at least an hour before making the frosting. You want it at room temperature so it mixes together and makes a light, fluffy frosting.

    To prevent clumps of confectioners' sugar I pour the sugar through a mesh strainer and work through with a spoon into the mixing bowl. This will make the confectioner's sugar airy and help keep your frosting fluffy.

    a cake frosted with easy vanilla buttercream frosting

    How do you make vanilla buttercream icing from scratch?

    It is really simple. The key is to make sure your butter is at room temperature. It's best to take it out of the refrigerator at least an hour before you want to make the frosting.

    If you try to soften the butter in the microwave it will become warm and too soft. This will make the frosting thinner and less fluffy. You also want to make sure you put the confectioners' sugar through a mesh strainer so you remove all lumps.

    User your mixer and whisk attachment mix together the sugar and butter for 3-4 minutes until smooth and creamy. Add the vanilla and 1 tablespoon for whipping cream. Beat for another minute. If needed add another 1 tablespoons of whipping cream to make the frosting spreadable.

    Which KitchenAid attachment should I use for buttercream frosting?

    The whisk attachment whips the frosting making it fluffy and airy. It's really hard with the paddle attachment to get the same light consistency you get with the whisk attachment.

    I know some people don't like to clean the whisk attachment, but if you spray it will hot water as soon as you are done using it the clean up is simple and easy.

    Where should I store buttercream frosting?

    I like to use my buttercream frosting as soon as I make it. I put a crumb layer on my cake, freeze it for 30 minutes and then finish frosting. While the cake is in the freezer I leave the buttercream frosting on the counter at room temperature.

    If you have leftover frosting or aren't going to use it that same day I put the frosting in a sealed container and leave on the counter overnight. If you need to store the frosting for longer you can put it in the refrigerator, but will need to take it out several hours or overnight before using it.

    If you have refrigerated the frosting you might also need to put it back in your mixer with the whisk attachment after it comes back up to room temperature to get it back to a fluffy texture. Overall, it's easier to make and use the frosting the same day.

    If you like this recipe you might also enjoy:

    Gluten Free Lemon Shortbread Bars
    Gluten Free Cinnamon Coffee Cake
    Paleo Chocolate Cupcakes
    Gluten Free Chocolate Cake with Cream Cheese Frosting
    Gluten Free Pumpkin Cake with Cream Cheese Frosting

    I get my ingredients from Thrive Market. Thrive Market has been a game changer for me eating gluten free. They have so many options I can't get at my rural grocery stores! Use this link to get 25% off your first order!

    Print
    clock clock iconcutlery cutlery iconflag flag iconfolder folder iconinstagram instagram iconpinterest pinterest iconfacebook facebook iconprint print iconsquares squares iconheart heart iconheart solid heart solid icon

    Easy Vanilla Buttercream Frosting


    5 Stars 4 Stars 3 Stars 2 Stars 1 Star

    No reviews

    • Author: Elaine VanVleck
    • Total Time: 10 minutes
    • Yield: 4 cups 1x
    • Diet: Gluten Free
    Print Recipe
    Pin Recipe

    Description

    This recipe makes the best easy vanilla buttercream frosting! I love the whipped texture for cakes and for piping on frosting. It's so simple to make homemade, fluffy frosting. This recipe shows you how to make this classic smooth frosting. 


    Ingredients

    Scale

    3 cups Confectioners' Sugar
    1 cup Unsalted Butter, at room temperature
    1 tsp. Vanilla Extract
    1-2 Tbsp. Whipping Cream


    Instructions

    In the bowl of your stand mixer using the whisk attachment cream together the confectioners' sugar and butter 3-4 minutes until creamy. 

    Add the vanilla and 1 tablespoon whipping cream. Beat for another minute until they are incorporated. If needed to make the frosting spreadable add 1 more tablespoon whipping cream and mix together. 

    Notes

    I like to use the frosting immediately while it's at room temperature. You can store in a sealed container on the counter overnight if you are going to frost your cake the next day.

    • Prep Time: 10 minutes
    • Category: Frosting
    • Method: Mixing
    • Cuisine: Gluten Free

    Did you make this recipe?

    Tag @smallfarmbiglife on Instagram and hashtag it #smallfarmbiglife

    Gluten Free Lemon Shortbread Bars

    a baking dish of gluten free lemon shortbread bars

    These easy gluten free lemon shortbread bars use tart lemon curd and a buttery shortbread crust. They are a simple take on classic lemon bars. These homemade bars use common ingredients and make a rich treat!

    The crust is a crumbly layer of shortbread that uses five ingredients you likely have on hand. The top layer is my gluten free lemon curd recipe. I bake the shortbread crust and then after it has cooled spread the lemon curd over top and refrigerate.

    I like to make a double batch of the lemon curd and then use part of it for a cake or pancake topping and then save the remaining for this gluten free lemon shortbread recipe. I store the lemon curd in the refrigerator for a week until I need it for this recipe.

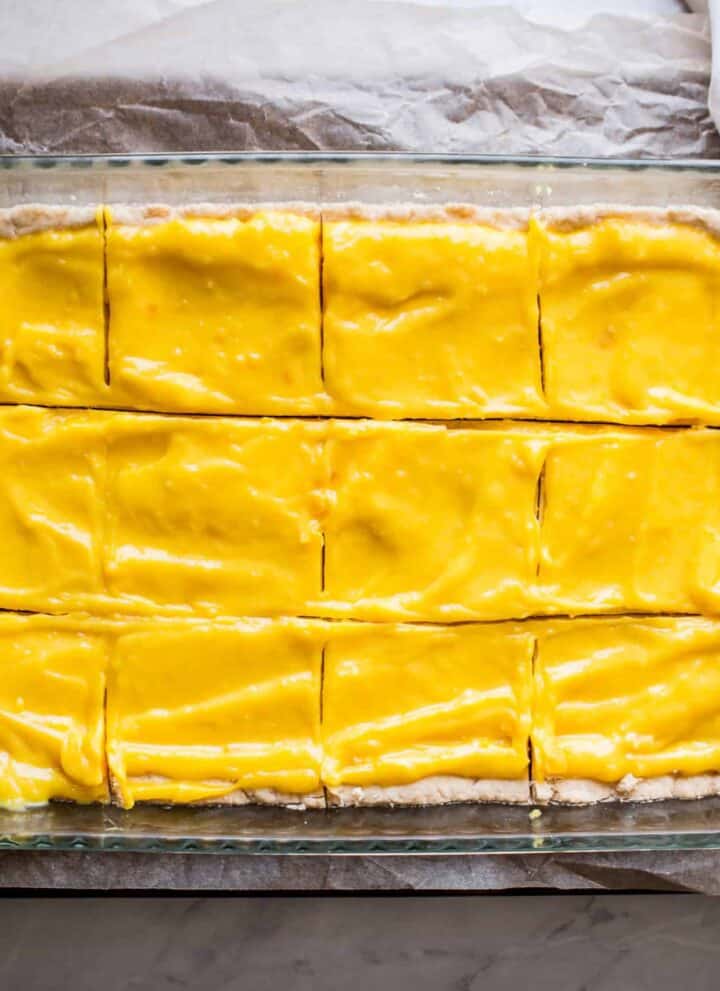
    a 9x13 baking dish of gluten free lemon shortbread bars

    Do I need to refrigerate lemon bars?

    Yes. If you don't refrigerate these bars the lemon won't hold together as nicely. I also like the texture and flavor a lot more when the bars are cold.

    What should lemon bars look like when done?

    For these bars you will just bake the shortbread crust. It will have a light brown color. Be sure not to take it out of the oven while it's still very pale. This will cause it to become mushy and it won't have the texture of shortbread. You want a nice light golden brown color.

    Do lemon bars rise?

    No. The gluten free shortbread crust might become a bit puffy but it won't rise. When you take it out of the oven if it has become puffy at all it will flatten as it cools.

    If you like this recipe you might also enjoy:

    Gluten Free Lemon Bars
    Gluten Free Lemon Bundt Cake with Lemon Glaze
    Lemon Lime Homemade Gatorade
    Healthy Lemon Ginger Tea
    Easy Pea Salad

    I get my ingredients from Thrive Market. Thrive Market has been a game changer for me eating gluten free. They have so many options I can't get at my rural grocery stores! Use this link to get 25% off your first order!

    Print
    clock clock iconcutlery cutlery iconflag flag iconfolder folder iconinstagram instagram iconpinterest pinterest iconfacebook facebook iconprint print iconsquares squares iconheart heart iconheart solid heart solid icon

    Gluten Free Lemon Shortbread Bars


    5 Stars 4 Stars 3 Stars 2 Stars 1 Star

    No reviews

    • Author: Elaine VanVleck
    • Total Time: 30 minutes
    • Yield: 12 bars 1x
    • Diet: Gluten Free
    Print Recipe
    Pin Recipe

    Description

    These easy gluten free lemon shortbread bars use tart lemon curd and a buttery shortbread crust. They are a simple take on classic lemon bars. These homemade bars use common ingredients and make a rich treat! 


    Ingredients

    Units Scale

    1 cup Unsalted Butter, at room temperature
    ⅓ cup Confectioners' Sugar
    2 cups Gluten Free Flour
    ½ tsp. Baking Powder
    ¼ tsp. Sea Salt


    Instructions

    Preheat your oven to 350 degrees.

    Grease a 9x13 baking dish with butter or coconut oil. Set aside.

    In the bowl of your stand mixer cream together the butter and confectioners' sugar. Add the flour, baking powder and salt. Mix just until the ingredients are combined. Don't over mix your ingredients!

    Pour the dough into your 9x13 baking dish and press into an even layer on the bottom of the pan. Use a fork to pierce the dough lightly all over. You don't need to pierce all the way through.

    Bake at 350 degrees for 20 to 25 minutes until the shortbread is golden brown.

    Let the crust cool completely before you top it with the Gluten Free Lemon Curd.

    Notes

    You could sprinkle confectioners' sugar over the bars, but I think the crust is sweet enough and I like to keep the lemon curd tart.

    • Prep Time: 10 minutes
    • Cook Time: 20 minutes
    • Category: Dessert
    • Method: Baking
    • Cuisine: Gluten Free

    Did you make this recipe?

    Tag @smallfarmbiglife on Instagram and hashtag it #smallfarmbiglife

    Lemon Lime Homemade Gatorade

    This Lemon Lime Homemade Gatorade is one of the most useful recipes I make all summer long. I have celiac disease and Hashimoto's disease and I have never been able to drink store bought sports drinks because of the artificial dyes, processed sugars, and mystery ingredients that come with them. After years of just drinking plain water during farm chores, workouts, and hot summer days I finally decided to make my own and I have not looked back since.

    This recipe tastes like a cleaner and more refreshing version of the lemon lime Gatorade you grew up with, made entirely from real whole ingredients you can feel good about.

    a ball canning jar with lemon lime homemade sports drink with ice cubes and lemon and lime slices

    The base is coconut water which is packed with natural potassium, sodium, and magnesium making it a genuinely effective electrolyte source.

    Fresh lemon juice, lime juice, and orange juice give it a bright three citrus flavor with a serious vitamin C boost.

    A touch of honey sweetens it just enough without the blood sugar spike that comes from the processed sugar in commercial sports drinks and a pinch of sea salt completes the electrolyte profile.

    The whole thing comes together in your blender in about five minutes and keeps in the refrigerator for up to two weeks.

    Whether you are recovering from a workout, spending the day outside in the heat, or fighting off a cold this drink has you covered.

    If you are looking for more refreshing drink recipes try my Iced Chai Tea Latte Concentrate, my Homemade Blueberry Lemonade made with Frozen Blueberries, my Pina Colada Mocktail or my Homemade Raspberry Lemonade.

    You can find all of my drink recipes here: Gluten Free Drink Recipes

    Two glasses of lemon lime homemade sports drink with ice and lemon wedges on top sitting next to a small bowl of pink salt
    [feast_advanced_jump_to]

    What Electrolytes Are and Why You Need Them

    Electrolytes are minerals that carry an electrical charge and are essential for keeping your body functioning properly. When you sweat during exercise, spend time in the heat, or are sick with a fever or stomach illness you lose electrolytes that need to be replaced. Drinking plain water alone does not replace them.

    The four most important electrolytes for hydration are sodium, potassium, magnesium, and calcium. When these drop too low you may feel muscle cramps, fatigue, headaches, or dizziness even if you have been drinking plenty of water.

    Commercial sports drinks like Gatorade replace electrolytes but they also come loaded with artificial dyes, high fructose corn syrup, and processed ingredients that many people including those with celiac disease, Hashimoto's disease, and other autoimmune conditions cannot or do not want to consume. This homemade lemon lime Gatorade replaces those electrolytes using only real whole food ingredients with nothing artificial added.

    What Each Ingredient Does

    Every ingredient in this recipe has a specific purpose. Here is why each one matters.

    • Coconut water is the base of this recipe and often called nature's Gatorade for good reason. It naturally contains potassium, sodium, and magnesium making it one of the most effective natural electrolyte sources available. It also adds a subtle natural sweetness that makes this drink more pleasant than plain water.
    • Fresh lemon juice adds bright citrus flavor and a meaningful dose of vitamin C and potassium. Use freshly squeezed lemon juice for the best flavor rather than bottled juice.
    • Fresh lime juice adds tartness and more vitamin C. The combination of lemon and lime together gives this drink a flavor profile that genuinely mimics the classic lemon lime Gatorade taste.
    • Fresh orange juice adds sweetness, vitamin C, folate, potassium, and magnesium. This is what gives the drink a slightly richer and more complex flavor than a basic lemon lime version. Even a small amount makes a noticeable difference.
    • Honey is the natural sweetener that provides just enough energy fuel without the processed sugar spike of commercial sports drinks. Honey also contains natural antioxidants and antimicrobial properties. If you are new to this recipe you may want to start with a little more honey and reduce it gradually as your taste buds adjust to a less sweet drink.
    • Sea salt completes the electrolyte profile by providing sodium which is the primary electrolyte lost through sweat. It also brings out the citrus flavor and gives the drink that slightly savory finish that makes it taste like a sports drink rather than plain lemonade.

    When to Drink This Homemade Gatorade

    This drink works any time your body needs electrolyte replenishment. Here are the situations I reach for it most often.

    • After a workout or long walk. This is the most obvious use and it works beautifully for replenishing what you sweat out during exercise. I make a batch before outdoor farm chores on hot summer days and keep it in a mason jar in the refrigerator.
    • During illness. When you are fighting a stomach bug, fever, or cold this is one of the best things you can drink to replace electrolytes lost through sweating, vomiting, or diarrhea. It is much gentler on the stomach than a sugary commercial sports drink.
    • On hot summer days. You do not have to be exercising to need electrolytes. Spending time outdoors in the heat depletes them just as effectively as a workout. A glass of this over ice on a hot afternoon is genuinely refreshing and functional.
    • After spending time in the garden or doing yard work. Any sustained outdoor physical activity in warm weather calls for more than just water.

    Flavor Variations

    This recipe is easy to customize based on what juices you have on hand. Here are a few variations worth trying.

    • Pure lemon lime. Skip the orange juice and increase the lemon and lime juice slightly for a cleaner and more tart flavor.
    • Orange citrus. Replace the lemon and lime juice entirely with fresh orange juice for a milder and sweeter version.
    • Grapefruit. Substitute grapefruit juice for some or all of the citrus for a slightly more bitter and sophisticated flavor profile.
    • Add sparkling water. Replace the plain water with sparkling water for a fizzy version that feels more like a soda.

    Supplies

    Storage

    Store your homemade lemon lime Gatorade in a sealed mason jar or airtight container in the refrigerator for up to two weeks. Since the honey and salt can settle give the jar a good shake or stir before each serving. This recipe makes a small batch which your family will likely go through well before the two week mark.

    Top Tip

    Shake or stir your homemade Gatorade well before every serving. The honey and sea salt settle to the bottom of the jar as it sits in the refrigerator and the citrus juice can separate from the coconut water over time. A good shake before pouring ensures every glass has the right balance of sweetness, salt, and citrus flavor rather than a bland first glass and an overly sweet last one.

    Frequently Asked Questions

    How do I make my own gatorade?

    It is so easy and you can control every ingredient. Start with a coconut water and regular water base then add fresh lemon, lime, and orange juices. Use honey to sweeten slightly and sea salt to complete the electrolyte profile. If you are used to drinking regular Gatorade this recipe may taste less sweet at first. Start with a little more honey and reduce it gradually each time you make it until your taste buds adjust to a less sweet drink.

    How long will homemade sports drink last?

    Store your homemade lemon lime Gatorade in a sealed jar or airtight container in the refrigerator for up to two weeks. Give it a good shake or stir before each serving since the honey and salt can settle at the bottom. This recipe makes a small batch so you will likely finish it well before the two week mark.

    Can I make this without coconut water?

    Yes. If you do not have coconut water or prefer not to use it you can substitute plain filtered water. The drink will still taste good but you will lose some of the natural potassium and magnesium that coconut water contributes. If you substitute plain water you may want to add a small pinch of additional sea salt to compensate for the lost electrolytes.

    Is this homemade Gatorade good when you are sick?

    Yes and it is one of the best things you can drink when you are sick with a stomach bug, fever, or cold. When you are ill your body loses electrolytes through sweating, vomiting, or diarrhea and plain water alone does not replace them. This recipe is much gentler on the stomach than a sugary commercial sports drink and gives your body the sodium, potassium, and natural sugar it needs to recover.

    Didn't find the answer you're looking for?

    Ask AI to answer based on this recipe:

    ChatGPT
    Google AI
    Perplexity
    Grok
    Claude

    More Recipes You Might Enjoy

    • Homemade Blueberry Lemonade made with Frozen Blueberries
    • Long Island Iced Tea Mocktails
    • Strawberry Daiquiri Mocktails
    • Cantaloupe Agua Fresca

    I get a lot of my ingredients from Thrive Market. Thrive Market has been a game changer for me eating gluten free. They have so many options I can't get at my rural grocery stores! Use this link to get 40% off your first order!

    Print
    clock clock iconcutlery cutlery iconflag flag iconfolder folder iconinstagram instagram iconpinterest pinterest iconfacebook facebook iconprint print iconsquares squares iconheart heart iconheart solid heart solid icon

    Lemon Lime Homemade Sports Drink


    5 Stars 4 Stars 3 Stars 2 Stars 1 Star

    No reviews

    • Author: Elaine VanVleck
    • Total Time: 10 minutes
    • Yield: 5 cups 1x
    • Diet: Gluten Free
    Print Recipe
    Pin Recipe

    Description

    A refreshing lemon lime homemade Gatorade made with coconut water, fresh lemon juice, lime juice, orange juice, honey, and sea salt. No artificial dyes, no processed sugar, and no mystery ingredients. A natural electrolyte drink that replenishes sodium and potassium and is ready in just five minutes.


    Ingredients

    Scale
    • 3 cups Water
    • 1 cup Coconut Water
    • ½ cup Orange Juice
    • ¼ cup Lemon Juice
    • ¼ cup Lime Juice
    • 3 Tbsp. Honey
    • ½ tsp. Pink Himalayan Salt

    Instructions

    In your blender add the waters, juices, honey and salt. Pulse until all the ingredients are combined.

    Serve over ice.

    If you have any leftover store it in the refrigerator in a sealed container.

    If you made this recipe please leave a star rating and comment below. It helps other readers find this recipe and means so much to me.

    Notes

    You can also add this recipe to a pitcher and stir. I think the honey and salt mix in better in the blender though.

    • Prep Time: 10 minutes
    • Cook Time: 0 minutes
    • Category: Drink
    • Method: Blended
    • Cuisine: American

    Did you make this recipe?

    Tag @smallfarmbiglife on Instagram and hashtag it #smallfarmbiglife

    If you make this Lemon Lime Homemade Gatorade I would love to hear what you think! Leave a comment below and let me know how it turned out or tag me on Instagram so I can see your glass.

    Once you make your own homemade sports drink you will never want to go back to the store bought version so save this recipe to your favorite Pinterest board so you always have it ready for your next workout, hot summer day, or farm chore marathon!

    Ingredients

    • Water
    • Coconut Water
    • Orange Juice
    • Lemon Juice
    • Lime Juice
    • Honey
    • Pink Himalayan Salt

    Instructions

    In your blender add the waters, juices, honey and salt. Pulse until all the ingredients are combined.

    Serve over ice.

    Easy Pea Salad

    This recipe for easy pea salad is made with bacon and green peas. This cold and creamy old fashioned salad is perfect for Spring! My classic recipe is made with sour cream and vinegar dressing.

    a bowl of easy pea salad with shredded cheddar cheese sprinkled on top next to a little wooden bowl of pepper and a little ceramic bowl of salt

    Easy Pea Salad is a classic, creamy salad that's perfect for any occasion, from casual dinners to holiday gatherings. This simple pea salad combines green peas with bacon, cheese, and a tangy dressing for a satisfying, cold vegetable salad that everyone will love.

    It's a versatile, easy vegetable salad that can be customized to your tastes, whether you prefer a classic southern pea salad or want to add extra veggies.

    The creamy peas and savory bacon make this pea salad a hit as a refreshing, gluten-free side dish that complements any meal.

    If you are looking for more easy salads you might also enjoy my Seven Layer Salad, my Thai Style Cabbage Salad, my Sugar Free Broccoli Salad or my Gluten Free Green Goddess Pasta Salad.

    You can find all of my salad recipes here: Gluten Free Salad Recipes

    a bowl of easy pea salad with shredded cheddar cheese sprinkled on top next to a little wooden bowl of pepper and a little ceramic bowl of salt
    [feast_advanced_jump_to]

    Ingredients

    • Frozen Peas
    • Bacon
    • White Onion
    • Cheddar Cheese
    • Mayonnaise
    • Sour Cream
    • Sea Salt
    • Coarse Ground Black Pepper
    • White Vinegar

    Instructions

    Pour your frozen peas into a bowl and place in the refrigerator the night before to thaw. If you don't have time for that you can thaw them in the microwave using the defrost setting.

    Cook the bacon. I like to place my bacon on a baking sheet and bake at 400 degrees for 30-35 minutes until it is crispy. Once the bacon is cooled crumble it into pieces.

    Once the peas are thawed and the bacon is cooled mix the ingredients together in a bowl.

    Mix together the peas, bacon, onion, cheese, mayonnaise, sour cream, salt, pepper and vinegar until all the ingredients are blended completely.

    Store the salad in and air tight container in the refrigerator until you are ready to serve it.

    Supplies

    More Recipes You Might Enjoy

    • Seven Layer Salad
    • Cranberry Fluff Salad
    • Sugar Free Broccoli Salad
    • Gluten Free Coleslaw

    I get a lot of my ingredients from Thrive Market. Thrive Market has been a game changer for me eating gluten free. They have so many options I can't get at my rural grocery stores! Use this link to get 40% off your first order!

    Print
    clock clock iconcutlery cutlery iconflag flag iconfolder folder iconinstagram instagram iconpinterest pinterest iconfacebook facebook iconprint print iconsquares squares iconheart heart iconheart solid heart solid icon

    Easy Pea Salad


    5 Stars 4 Stars 3 Stars 2 Stars 1 Star

    No reviews

    • Author: Elaine VanVleck
    • Total Time: 45 minutes
    • Yield: 9 servings 1x
    • Diet: Gluten Free
    Print Recipe
    Pin Recipe

    Description

    This easy pea salad is a cold and creamy classic that is perfect for spring potlucks, Easter, cookouts, and holiday gatherings. Sweet green peas are tossed with crispy bacon, shredded cheddar cheese, white onion, and a simple tangy dressing made with mayonnaise, sour cream, and white vinegar for a gluten free side dish everyone will love. Best of all it can be made a day ahead making it the ultimate stress-free make ahead salad for any occasion!


    Ingredients

    Scale
    • 1 - 32 ounce bag Frozen Peas, thawed
    • 1 pound Bacon, cooked and crumbled
    • 1 small White Onion, finely chopped
    • 1 cup Cheddar Cheese, shredded
    • ½ cup Mayonnaise
    • ½ cup Sour Cream
    • ½ tsp. Sea Salt
    • ½ tsp. Coarse Ground Black Pepper
    • 2 tsp. White Vinegar

    Instructions

    Pour your frozen peas into a bowl and place in the refrigerator the night before to thaw. If you don't have time for that you can thaw them in the microwave using the defrost setting.

    Cook the bacon. I like to place my bacon on a baking sheet and bake at 400 degrees for 30-35 minutes until it is crispy. Once the bacon is cooled crumble it into pieces.

    Once the peas are thawed and the bacon is cooled mix the ingredients together in a bowl.

    Mix together the peas, bacon, onion, cheese, mayonnaise, sour cream, salt, pepper and vinegar until all the ingredients are blended completely.

    Store the salad in and air tight container in the refrigerator until you are ready to serve it.

    Notes

    I like to make this salad the day before so it's cold and ready to serve in the refrigerator.

    • Prep Time: 15 minutes
    • Cook Time: 30 minutes
    • Category: Salad
    • Method: Mixed
    • Cuisine: American

    Did you make this recipe?

    Tag @smallfarmbiglife on Instagram and hashtag it #smallfarmbiglife

    Storage

    Store leftover pea salad in an airtight container in the refrigerator for up to three days. Keep in mind that the longer the salad sits the more the dressing will absorb into the peas and other ingredients, so the salad may be a little thicker on day two or three. If you want to freshen it up you can stir in a small spoonful of sour cream or mayonnaise before serving. Do not freeze this salad as the creamy dressing does not hold up well to freezing and the peas will become mushy when thawed.

    Top Tip

    This recipe is a staple for spring in our house. It is perfect for a gathering and Easter. I like to make this salad the day before I need it so it's ready to go. I love having one less step to do the day of an event!

    Didn't find the answer you're looking for?

    Ask AI to answer based on this recipe:

    ChatGPT
    Google AI
    Perplexity
    Grok
    Claude

    Frequently Asked Questions

    What kind of peas are used in this salad?

    I use frozen green peas in this salad. I purchase a 32 ounce bag and let them thaw before putting together the salad. If you try to put the salad together while the peas are still frozen it is much harder to stir in the dressing and mix the ingredients together.

    Save yourself the headache of a clumped salad and thaw your peas first!

    Do I need to cook the frozen peas for this salad?

    No. You thaw the peas and put them directly into the salad. There is no need to cook them for this salad.

    How long does pea salad last in the refrigerator?

    This easy pea salad can be made a day ahead and will last in your refrigerator for up to three days. We don't usually have salad left for that long though. It is delicious and gets eaten pretty quickly around here.

    Does the bacon in this pea salad need to be gluten free and nitrite free?

    Yes to both if you can find it! All of the ingredients in this easy pea salad are naturally gluten free, but you do want to make sure the bacon you purchase is certified gluten free since some bacon is processed in facilities that also handle gluten containing products.

    I also personally prefer bacon that is nitrite and nitrate free. I have found that nitrites and nitrates cause an inflammatory reaction for me that is very similar to a gluten reaction, so it is something worth paying attention to when you are shopping. Look for bacon that is labeled both gluten free and uncured without added nitrites or nitrates for the best result in this recipe.

    • « Previous Page
    • 1
    • …
    • 90
    • 91
    • 92
    • 93
    • 94
    • …
    • 100
    • Next Page »

    Welcome! I'm Elaine

    I'm so glad you are here! I share easy gluten free recipes from my small farm in Washington.

    Be sure to sign up for my newsletter to stay up to date on all of my new recipes.

    More about me...
    • Instagram
    • Pinterest
    • Facebook
    • Twitter
    • Mail

    Load up on new recipes, exclusive goodies, + more!
    Sign up below to stay up-to-date on news, events, and special deals.
    Thank you for subscribing!

    Easy Meals Recipes

    • Gluten Free Instant Pot Chili Mac and Cheese
    • Gluten Free Taco Casserole
    • Gluten Free Cowboy Baked Beans
    • Gluten Free Walking Taco Casserole
    • Gluten Free Creamy Beef and Mushroom Pasta
    • Gluten Free Instant Pot Chicken & Dumplings
    • Instant Pot Mexican Style Beef and Rice
    • Gluten Free Chicken Parmesan Pasta Casserole
    • Gluten Free One Pot Hamburger Helper Copycat
    • Gluten Free Salisbury Steak with Mushroom Gravy
    • Gluten Free Air Fryer Fajitas
    • Gluten Free Sloppy Joe Casserole

    Footer

    back to top

    About

    • Privacy Policy
    • Shop my Amazon Page
    • Follow me on LTK

    Newsletter

    • Sign Up! for emails and updates

    Contact

    • Contact
    • Media Kit
    • About Me

    As an Amazon Associate I earn from qualifying purchases.

    I may get commissions for purchases made through links on this site.

    Copyright © 2026 Brunch Pro on the Brunch Pro Theme