Small Farm Big Life

  • Gluten Free Recipe Index
  • Subscribe
  • Resources
menu icon
go to homepage
  • Home
  • Gluten Free Recipe Index
  • Subscribe
  • My Story
  • Resources
  • Free Guides
    • Email
    • Facebook
    • Instagram
    • Pinterest
  • subscribe
    search icon
    Homepage link
    • Home
    • Gluten Free Recipe Index
    • Subscribe
    • My Story
    • Resources
    • Free Guides
    • Email
    • Facebook
    • Instagram
    • Pinterest
  • ×

    Gluten Free Oatmeal Scotchie Cookies

    This easy recipe for gluten free oatmeal scotchie cookies uses oatmeal and butterscotch chips for a chewy, classic cookie made completely gluten free. These were my dad's favorite growing up, and mine too. I used to love baking a batch to pack in our lunches.

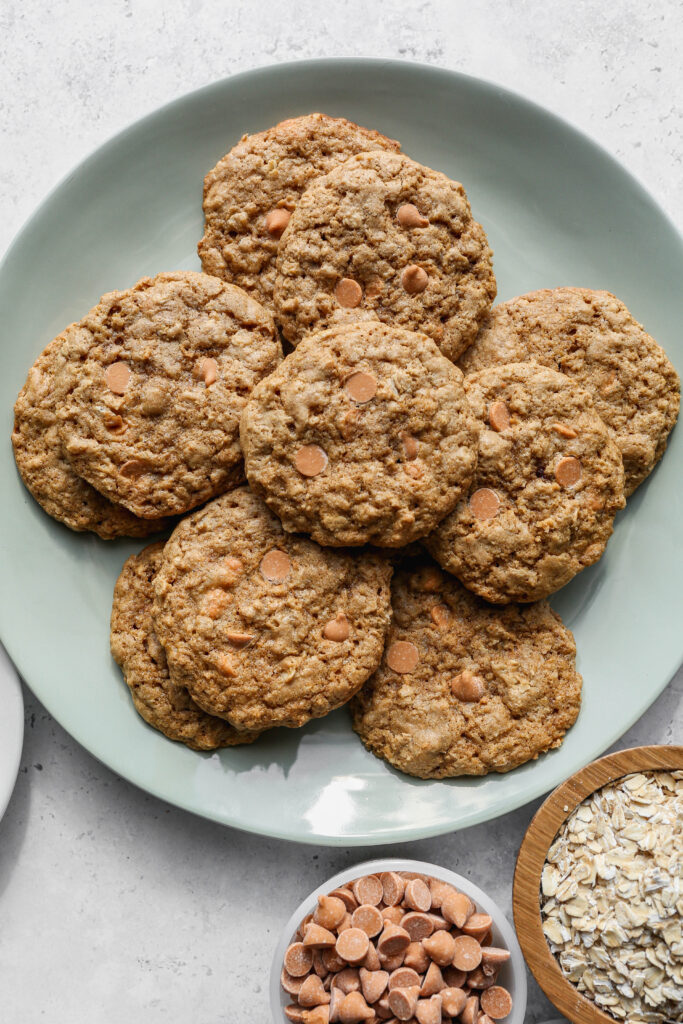
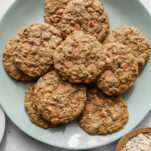
    a sage green plate of gluten free scotchie cookies next to a small white bowl of butterscotch chips and a small wooden bowl of gluten free rolled oats.

    One thing worth knowing before you start: not every brand of butterscotch chips is gluten free. The chill time is worth planning around too, since it makes the difference between a cookie that holds its shape and one that spreads thin.

    If you are looking for more oatmeal recipes try my Gluten Free Oatmeal Raisin Cookies, my Gluten Free Pumpkin Oatmeal Cake, my Gluten Free Oatmeal Raisin Overnight Oats or my Pumpkin Apple Baked Oatmeal with Streusel Topping.

    You can find all of my gluten free cookie recipes here: Gluten Free Cookie Recipes
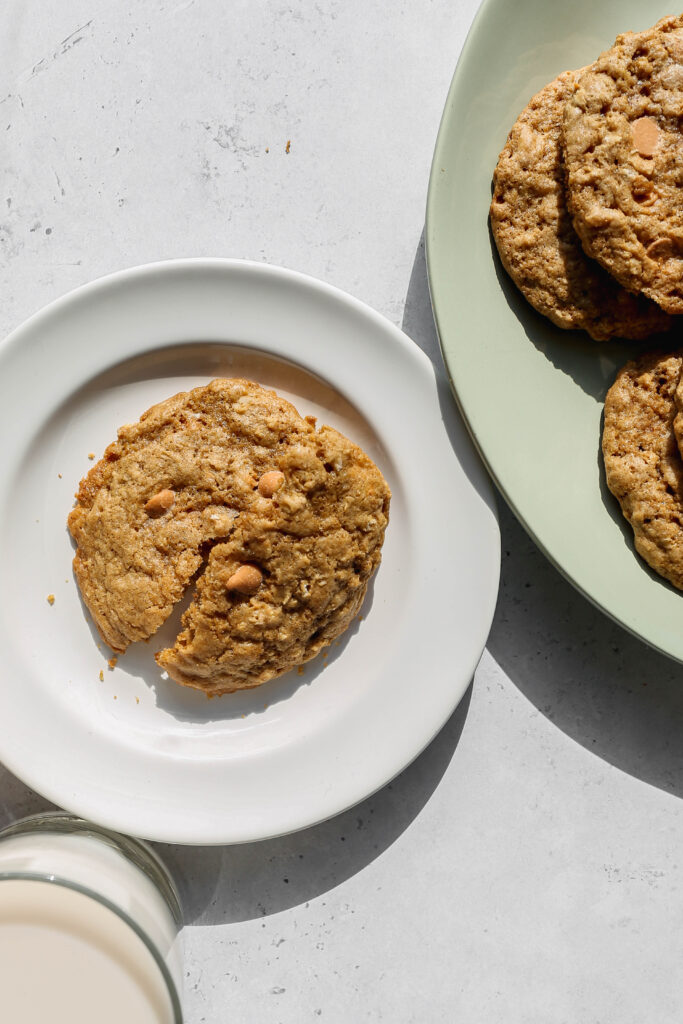
    a small white plate with a gluten free scotchie cookie on it next to a small white bowl of butterscotch chips.
    [feast_advanced_jump_to]

    Why You'll Love These Cookies

    • Soft, chewy centers with just the right amount of spice
    • Loaded with butterscotch chips in every bite
    • A classic cookie made completely gluten free
    • Freezes well for lunches or a quick treat

    A Note on Gluten Free Butterscotch Chips

    Not all butterscotch chips are gluten free, so it's worth double checking the label before you buy. Guittard's butterscotch chips are a reliable gluten free option. Nestle's butterscotch chips and Great Value butterscotch chips have historically not been labeled gluten free, though packaging can change over time, so always check the current label.

    Ingredient Notes

    • Gluten free flour: a 1 to 1 gluten free blend like Bob's Red Mill 1 to 1 or King Arthur Measure for Measure works well here.
    • Gluten free rolled oats: oats are naturally gluten free, but cross contamination during processing is common. Look for oats labeled certified gluten free.
    • Butterscotch chips: see the note above, not every brand is safe for a gluten free diet.

    How to Store and Freeze

    Store cookies in an airtight container at room temperature for up to a week.

    To freeze, bake and cool the cookies completely first, then place them in a freezer safe container for up to a month. They rarely last that long! This is a great one to double batch: freeze half and pull them out for lunches whenever you need a quick treat.

    Top Tip

    If your dough feels sticky when you're rolling it into balls, wet your hands with a little water instead of adding more flour. Adding extra flour can make the cookies dry, while a little water on your hands keeps the dough from sticking without changing the texture.

    Frequently Asked Questions

    Can I freeze these cookies?

    Yes. I like to freeze the cookies after they have been baked. I put the baked cookies in a freezer safe container and freeze them for up to a month, but they rarely last that long.

    I love to make a double batch of cookies and freeze half of them for lunches on days that I don't have any treats prepared.

    How do you keep these cookies from spreading too much when I bake them?

    It is important that you refrigerate this gluten free oatmeal scotchie cookie dough for at least one hour before baking. If you don't refrigerate the dough it's harder to work with and the cookies will spread too much when you bake them.

    Are butterscotch chips gluten free?

    Not always. Check the label before you buy, since brands and formulations can change. Guittard's butterscotch chips are a reliable gluten free option.

    Can I use quick oats instead of rolled oats?

    Yes, either will work in this recipe. Rolled oats give a slightly heartier, more traditional texture.

    Didn't find the answer you're looking for?

    Ask AI to answer based on this recipe:

    ChatGPT
    Google AI
    Perplexity
    Grok
    Claude

    Oatmeal Scotchie Cookies Supplies

    More Recipes You Might Enjoy

    • Gluten Free Oatmeal Raisin Cookies
    • Gluten Free Old Fashioned Iced Oatmeal Cookies
    • Gluten Free Monster Cookies
    • Gluten Free Pumpkin Cranberry Breakfast Cookies

    I get a lot of my ingredients from Thrive Market. Thrive Market has been a game changer for me eating gluten free. They have so many options I can't get at my rural grocery stores! Use this link to get 40% off your first order!

    Print
    clock clock iconcutlery cutlery iconflag flag iconfolder folder iconinstagram instagram iconpinterest pinterest iconfacebook facebook iconprint print iconsquares squares iconheart heart iconheart solid heart solid icon

    Gluten Free Oatmeal Scotchie Cookies


    5 Stars 4 Stars 3 Stars 2 Stars 1 Star

    No reviews

    • Author: Elaine VanVleck
    • Total Time: 1 hour
    • Yield: 36 cookies 1x
    • Diet: Gluten Free
    Print Recipe
    Pin Recipe

    Description

    These gluten free oatmeal scotchie cookies are soft, chewy, and loaded with butterscotch chips in every bite. A classic oatmeal cookie made completely gluten free, with a quick chill time that keeps them from spreading too thin.


    Ingredients

    Scale
    • 2 cups Gluten Free Flour
    • 1 ½ cups Gluten Free Rolled Oats
    • 1 Tbsp. Baking Powder
    • 1 tsp. Sea Salt
    • ½ tsp. Baking Soda
    • 2 tsp. Ground Cinnamon
    • 1 cup Unsalted Butter, at room temperature
    • 1 cup Brown Sugar
    • ½ cup Granulated Sugar
    • 3 large Eggs
    • 2 tsp. Vanilla Extract
    • 1 cup Butterscotch Chips

    Instructions

    Preheat your oven to 350 degrees. Line three baking sheets with parchment paper and set aside.

    In a mixing bowl whisk together the gluten free flour, gluten free oats, baking powder, salt, baking soda and cinnamon. Set aside.

    In the bowl of your stand mixer add the unsalted butter, brown sugar and granulated sugar. Beat together about 3-4 minutes until combined and fluffy. Add the eggs and vanilla and beat to combine.

    Add the dry ingredients to the wet ingredients and beat just until combined. Add the butterscotch chips and blend or hand mix them with a spatula into the cookie dough.

    Refrigerate the dough for 20-30 minutes so it's easier to work with and won't spread as much in the oven.

    Using a cookie scoop or tablespoon place twelve cookies on each baking sheet. Press them down slightly with your hand. If the dough is sticking to your hand wet your hand with a little water.

    Bake the cookies at 350 degrees for 12-15 minutes. The cookies will be dark golden brown when they are done.

    Place the cookies on cooling racks and let them cool completely before you store them in an air tight container.

    If you made this recipe please leave a star rating and comment below. It helps other readers find this recipe and means so much to me.

    • Prep Time: 45 minutes
    • Cook Time: 15 minutes
    • Category: Cookies
    • Method: Baking
    • Cuisine: American

    Did you make this recipe?

    Tag @smallfarmbiglife on Instagram and hashtag it #smallfarmbiglife

    If you make these gluten free oatmeal scotchie cookies, I would love to hear how they turned out. Leave a comment and a star rating below, and snap a photo to tag me on Instagram @smallfarmbiglife. Looking for more cozy cookie recipes? Check out my other gluten free cookie recipes for more inspiration.

    Oatmeal Scotchie Cookies Ingredients

    • Gluten Free Flour
    • Gluten Free Rolled Oats
    • Baking Powder
    • Sea Salt
    • Baking Soda
    • Ground Cinnamon
    • Unsalted Butter
    • Brown Sugar
    • Granulated Sugar
    • Eggs
    • Vanilla Extract
    • Butterscotch Chips

    Instructions

    Preheat your oven to 350 degrees. Line three baking sheets with parchment paper and set aside.

    In a mixing bowl whisk together the gluten free flour, gluten free oats, baking powder, salt, baking soda and cinnamon. Set aside.

    In the bowl of your stand mixer add the unsalted butter, brown sugar and granulated sugar. Beat together about 3-4 minutes until combined and fluffy. Add the eggs and vanilla and beat to combine.

    Add the dry ingredients to the wet ingredients and beat just until combined. Add the butterscotch chips and blend or hand mix them with a spatula into the cookie dough.

    Refrigerate the dough for 20-30 minutes so it's easier to work with and won't spread as much in the oven.

    Using a cookie scoop or tablespoon place twelve cookies on each baking sheet. Press them down slightly with your hand. If the dough is sticking to your hand wet your hand with a little water.

    Bake the cookies at 350 degrees for 12-15 minutes. The cookies will be dark golden brown when they are done.

    Place the cookies on cooling racks and let them cool completely before you store them in an air tight container.

    Gluten Free Chocolate Chip Banana Muffins

    These gluten free chocolate chip banana muffins are the recipe I make every single time I have overripe bananas sitting on the counter and they never last more than a day or two in our house. Moist and fluffy gluten free muffins loaded with sweet ripe banana flavor and studded with semi-sweet chocolate chips throughout, they are ready in just 30 minutes with simple everyday ingredients and one bowl to clean up.

    No complicated steps required. Just mix everything together in your stand mixer, scoop into a muffin tin, and bake until perfectly golden.

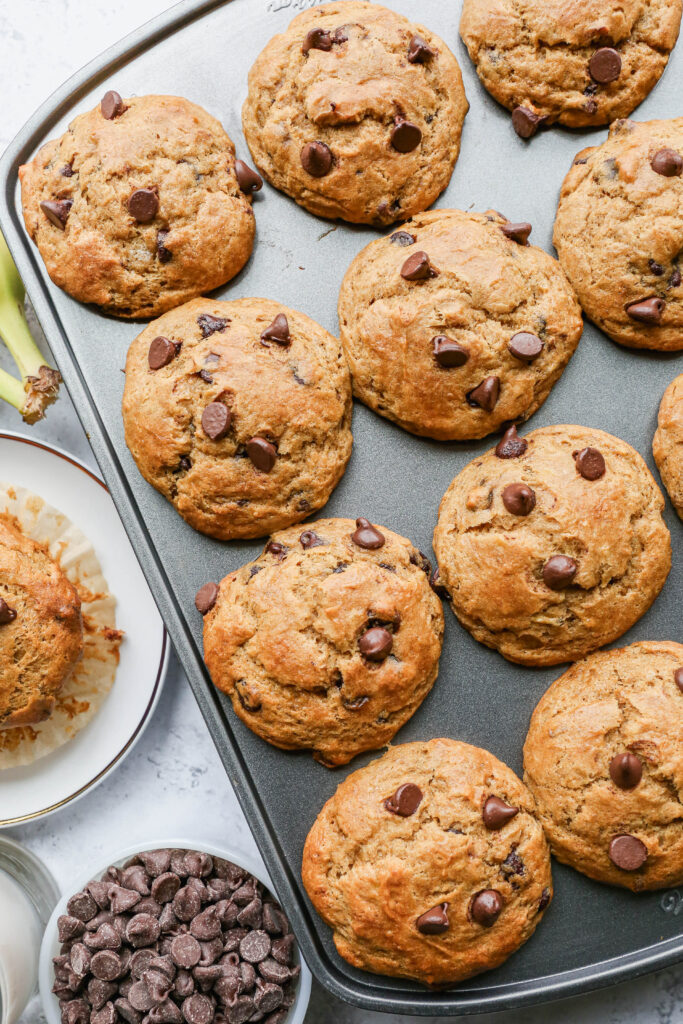
    a muffin tin of gluten free chocolate chip banana muffins next to a small bowl of chocolate chips and white plate with a muffin on it.

    What makes these gluten free banana muffins so good is the combination of both brown sugar and granulated sugar along with the natural sweetness of very ripe bananas. The browner and spottier your bananas are the sweeter and more flavorful these muffins will be so do not throw those overripe bananas away.

    A touch of cinnamon in the batter adds a subtle warmth that pairs beautifully with the chocolate chips and makes these taste like something from a really good bakery.

    They are the perfect gluten free breakfast muffin, an easy after school snack, and a great option for meal prep since they store well all week and freeze beautifully for later.

    If you are looking for banana recipes you might also like my Gluten Free Banana Cake, my Gluten Free Banana Oat Muffins, my Gluten Free Peanut Butter Banana Muffins or my Homemade Strawberry Banana Popsicles.

    You can find more breakfast recipes here: Gluten Free Breakfast Recipes

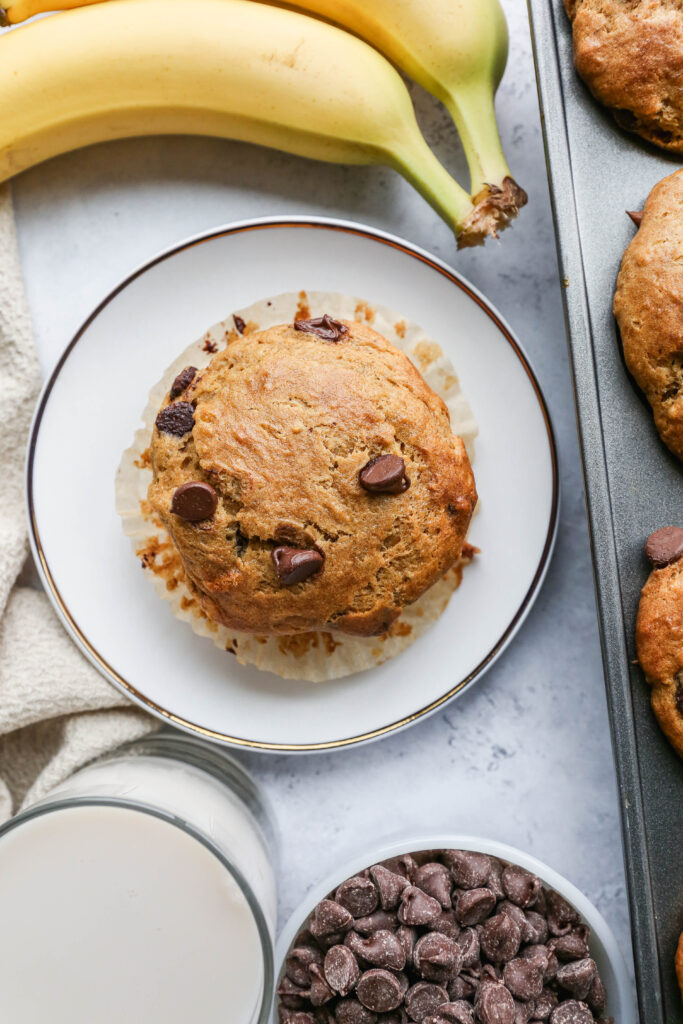
    a white plate with a gluten free chocolate chip banana muffin on it next to a small bowl of chocolate chips, a pan of muffins and a couple of bananas.
    [feast_advanced_jump_to]

    Ingredients

    • Gluten Free Flour
    • Baking Powder
    • Sea Salt
    • Ground Cinnamon
    • Bananas
    • Brown Sugar
    • Granulated Sugar
    • Unsalted Butter
    • Eggs
    • Milk
    • Semi-Sweet Chocolate Chips

    Instructions

    Preheat oven to 350 degrees.

    Add bananas, brown sugar, sugar, butter, egg and milk to the bowl of your stand mixer. Beat until bananas are broken into little pieces. If your bananas aren't overripe you will need to mash them before adding them.

    Add the gluten free flour, baking powder, salt and cinnamon to the wet ingredients. Blend until just combined. Add the chocolate chips and blend just until they are mixed into the batter.

    Using a tablespoon place two heaping tablespoons in each cup of your muffin pan. I like to line my muffin tins for easy clean up.

    Bake at 350 degrees for 20-22 minutes.

    Let the muffins cool completely before storing in an air tight container.

    Supplies

    More Recipes You Might Enjoy

    • Gluten Free Banana Bread Muffins
    • Gluten Free Peanut Butter Banana Muffins
    • Gluten Free Banana Cake
    • Gluten Free Banana Oat Muffins

    I get a lot of my ingredients from Thrive Market. Thrive Market has been a game changer for me eating gluten free. They have so many options I can't get at my rural grocery stores! Use this link to get 40% off your first order!

    Print
    clock clock iconcutlery cutlery iconflag flag iconfolder folder iconinstagram instagram iconpinterest pinterest iconfacebook facebook iconprint print iconsquares squares iconheart heart iconheart solid heart solid icon

    Gluten Free Chocolate Chip Banana Muffins


    5 Stars 4 Stars 3 Stars 2 Stars 1 Star

    3 from 1 review

    • Author: Elaine VanVleck
    • Total Time: 30 minutes
    • Yield: 12 muffins 1x
    • Diet: Gluten Free
    Print Recipe
    Pin Recipe

    Description

    These easy gluten free chocolate chip banana muffins are moist, fluffy, and loaded with semi-sweet chocolate chips in every bite! Made with ripe bananas, gluten free flour, brown sugar, butter, and a touch of cinnamon and ready in just 30 minutes with no baking soda required. The perfect easy gluten free breakfast muffin and the best way to use up overripe bananas!


    Ingredients

    Scale
    • 2 cups Gluten Free Flour
    • 2 tsp. Baking Powder
    • 1 tsp. Sea Salt
    • ½ tsp. Ground Cinnamon
    • 2 medium Bananas, very ripe
    • ½ cup Brown Sugar
    • ¼ cup Granulated Sugar
    • ½ cups Unsalted Butter, melted
    • 1 large Egg
    • ¼ cup Milk
    • 1 cup Semi-Sweet Chocolate Chips

    Instructions

    Preheat oven to 350 degrees.

    Add bananas, brown sugar, sugar, butter, egg and milk to the bowl of your stand mixer. Beat until bananas are broken into little pieces. If your bananas aren't overripe you will need to mash them before adding them.

    Add the gluten free flour, baking powder, salt and cinnamon to the wet ingredients. Blend until just combined. Add the chocolate chips and blend just until they are mixed into the batter.

    Using a tablespoon place two heaping tablespoons in each cup of your muffin pan. I like to line my muffin tins for easy clean up.

    Bake at 350 degrees for 20-22 minutes.

    Let the muffins cool completely before storing in an air tight container.

    If you made this recipe please leave a star rating and comment below. It helps other readers find this recipe and means so much to me.

    Notes

    If you use a banana that isn't overripe you may want to add 2 tablespoons of honey for a little extra sweetness.

    • Prep Time: 10 minutes
    • Cook Time: 20 minutes
    • Category: Muffins
    • Method: Baking
    • Cuisine: American

    Did you make this recipe?

    Tag @smallfarmbiglife on Instagram and hashtag it #smallfarmbiglife

    If you make these Gluten Free Chocolate Chip Banana Muffins I would love to hear what you think! Leave a star rating and a comment below and let me know how they turned out.

    Don't forget to save this recipe to your Pinterest boards so you can find it again every time you have ripe bananas ready to use!

    Storage

    Store these gluten free chocolate chip banana muffins in an airtight container at room temperature for up to 3 days. For longer storage place the muffins in a sealed airtight container in the refrigerator for up to 5 days. These muffins also freeze beautifully which makes them perfect for meal prep.

    Once completely cooled place individual muffins in a freezer safe bag or airtight container and freeze for up to 3 months. Thaw individual muffins at room temperature for about an hour or warm them in the microwave for 30 to 45 seconds straight from the freezer for a quick and easy gluten free breakfast any morning of the week.

    Top Tip

    The riper your bananas are the better these muffins will be. Perfectly yellow bananas will work in a pinch but very ripe bananas with lots of brown spots are what give these muffins their natural sweetness, deep banana flavor, and incredibly moist texture.

    If your bananas are not quite ripe enough you can speed up the process by placing unpeeled bananas on a baking sheet and baking them at 300 degrees for 15 to 20 minutes until the skins turn black and the bananas are soft and sweet all the way through. Let them cool before adding them to the batter and you will get the same result as naturally overripe bananas every single time.

    Didn't find the answer you're looking for?

    Ask AI to answer based on this recipe:

    ChatGPT
    Google AI
    Perplexity
    Grok
    Claude

    Frequently Asked Questions

    Why are my gluten free banana muffins dry?

    The most common reason for dry gluten free banana muffins is the flour blend you are using. Different gluten free flour blends absorb moisture at very different rates and some absorb significantly more liquid than others. If your batter seems very thick and dry before baking add a tablespoon or two of extra milk to loosen it up slightly.

    Also make sure you are using very ripe bananas as they provide the most natural moisture and sweetness. Measuring your gluten free flour by spooning it into the measuring cup and leveling off the top rather than scooping directly from the bag can also help prevent using too much flour which leads to a dry muffin.

    What is the best gluten free flour for banana muffins?

    I use Bob's Red Mill 1 to 1 Gluten Free Baking Flour and King Arthur Measure for Measure Gluten Free Flour work well. Keep in mind that different flour blends absorb moisture differently so you may need to adjust the amount of milk slightly depending on which brand you use. Always look for a blend that contains xanthan gum for the best texture and rise.

    Can I use frozen bananas for this recipe?

    Yes! Frozen bananas work beautifully in this recipe and are a great way to use up bananas you have frozen before they went bad. Thaw the bananas completely at room temperature or in the microwave before adding them to the batter. Drain off any excess liquid that has collected as the bananas thaw and then add them to the mixer as you would fresh ripe bananas. Frozen and thawed bananas are often even sweeter and more flavorful than fresh overripe bananas so your muffins will be incredibly delicious.

    Can I make these muffins without chocolate chips?

    Absolutely! If you prefer plain banana muffins simply leave out the chocolate chips and the recipe works exactly the same way. You can also substitute other mix ins for the chocolate chips to customize the muffins to your taste. Chopped walnuts or pecans add a wonderful crunch, dried cranberries add a tart and chewy element, and white chocolate chips are a delicious and slightly sweeter alternative to semi sweet chocolate chips.

    Can I make these muffins dairy free?

    Yes! To make these muffins dairy free substitute your favorite unsweetened dairy free milk for the regular milk and use melted coconut oil or a dairy free butter alternative in place of the unsalted butter. The texture and flavor will be very similar to the original recipe and the muffins will still be moist and delicious. Make sure your chocolate chips are also dairy free if you need a completely dairy free muffin.

    Can I double this recipe?

    Yes but keep in mind that different gluten free flour blends absorb moisture at different rates so if you are doubling the recipe may need to adjust the amount of milk to get the right batter consistency. The batter should be thick but scoopable and not crumbly or dry before baking. If the doubled batter seems too dry add extra milk one tablespoon at a time until it reaches the right consistency. Bake in two muffin tins at the same temperature and keep an eye on the bake time as it may vary slightly.

    Gluten Free Orange Bundt Cake

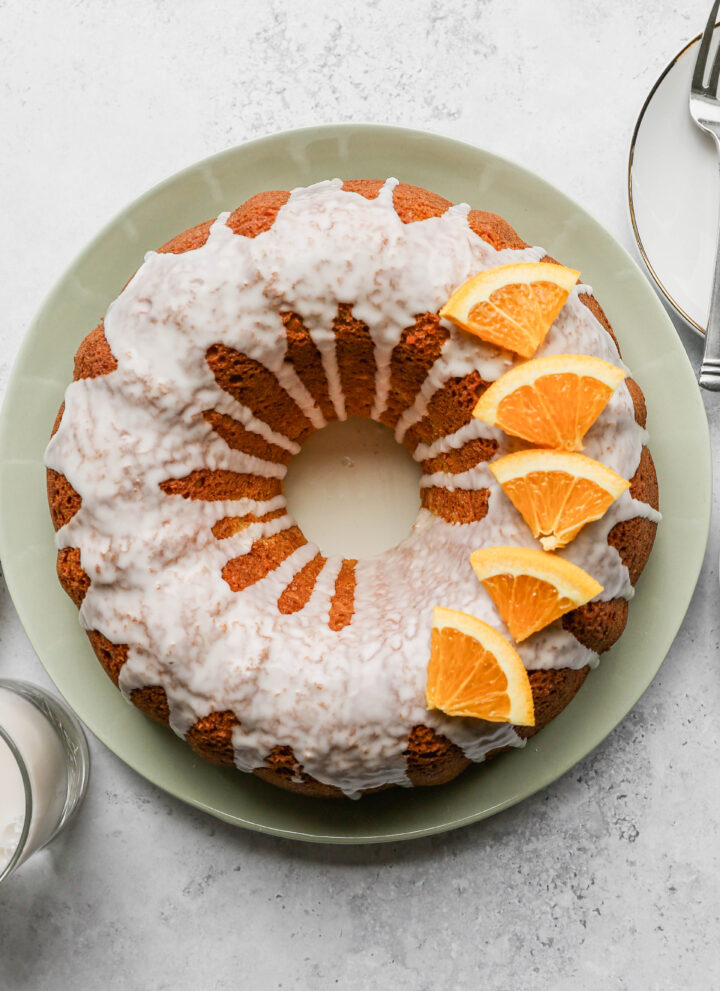
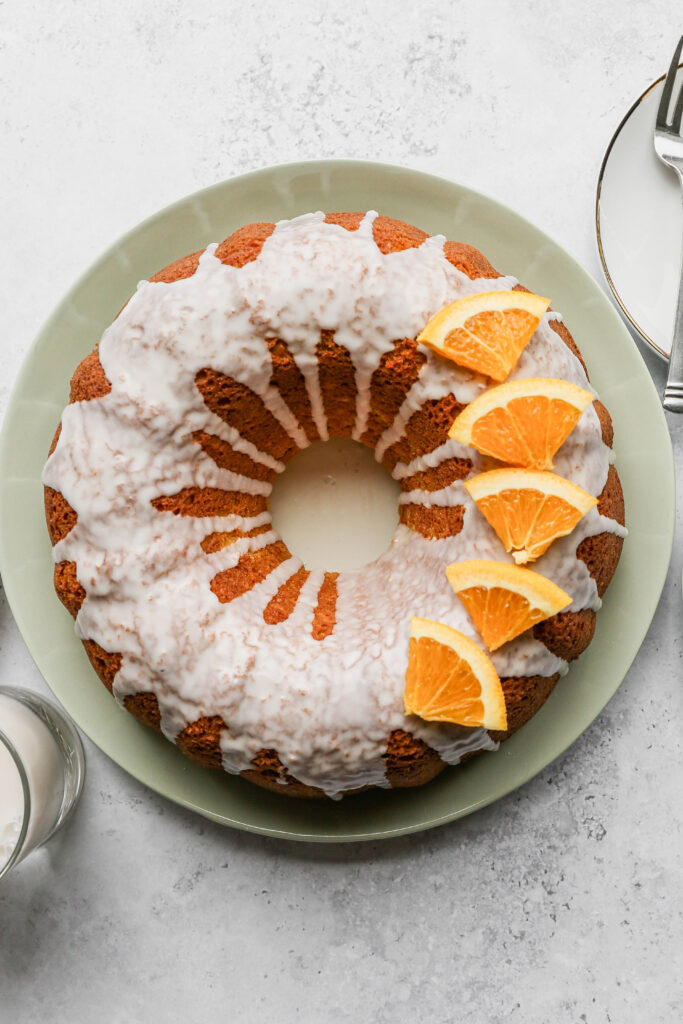
    This recipe for gluten free orange bundt cake is easy to make from scratch. This moist cake is citrus infused and delicious. I used a simple, homemade glaze to top it off.

    a gluten free orange bundt cake with orange icing and small orange wedges on top on a sage green plate next to a bowl of sliced oranges.

    This Gluten Free Orange Bundt Cake is the perfect treat for anyone craving a moist, citrus flavored dessert. Made with fresh orange juice, it's a delightful twist on a traditional orange pound cake that's completely gluten free.

    This easy to make cake is perfect for a brunch cake or a gluten free holiday gathering. With a homemade orange glaze made from scratch, this tasty cake is a crowd pleaser.

    The light, zesty flavor of the citrus bundt cake pairs perfectly with a simple powdered sugar glaze, giving it that irresistible finish that will have everyone asking for the recipe.

    If you are looking for more gluten free bundt cakes try my Gluten Free Lemon Bundt Cake with Lemon Glaze, my Gluten Free Eggnog Bundt Cake, my Gluten Free Gingerbread Bundt Cake or my Gluten Free Double Chocolate Bundt Cake.

    You can find more cake recipes here: Gluten Free Cake Recipes

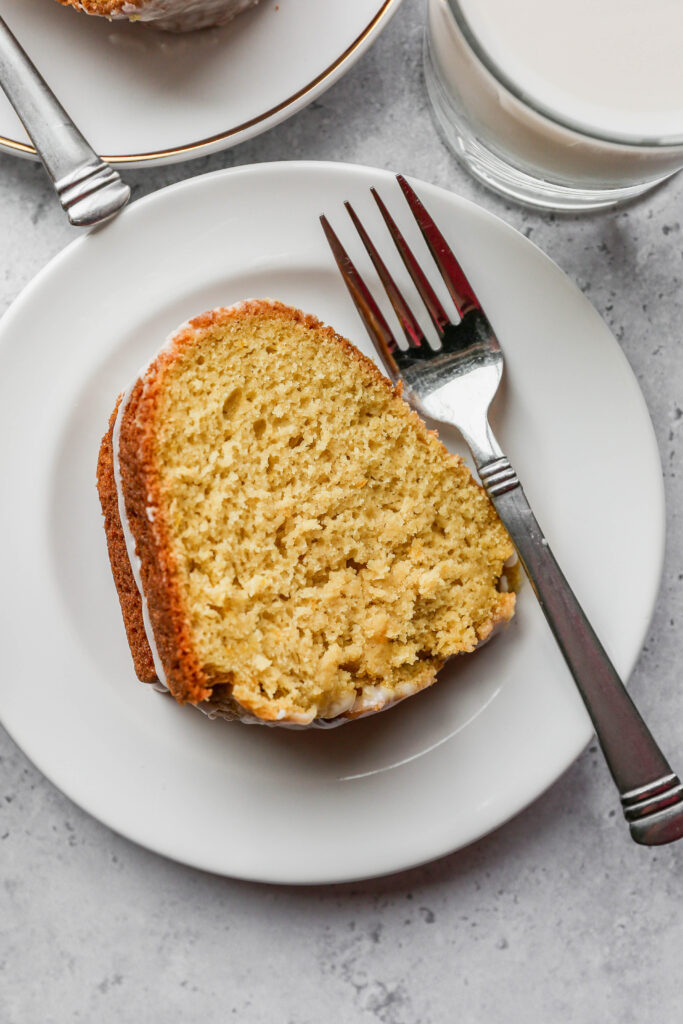
    a slice of gluten free orange bundt cake on a white plate next to a glass of almond milk.
    [feast_advanced_jump_to]

    Ingredients

    • Unsalted Butter
    • Granulated Sugar
    • Eggs
    • Sour Cream
    • Orange Juice
    • Milk
    • Orange Zest or Dried Orange Peel
    • Gluten Free Flour
    • Baking Powder
    • Baking Soda
    • Sea Salt
    • Powdered Sugar
    • Orange Extract or Orange Oil

    Instructions

    Preheat your oven to 350 degrees.

    Grease a bundt pan with butter or coconut oil. Set aside.

    In a mixing bowl whisk together the gluten free flour, baking powder, baking soda and salt. Set aside.

    In the bowl of your stand mixer beat together the butter, sugar and orange zest until smooth, about 2-3 minutes. Add the eggs, sour cream, milk and orange juice. Beat together just until combined.

    Add the dry ingredients to the wet ingredients and beat together until blended and smooth, about 1-2 minutes. 

    Pour the batter into your greased bundt pan.

    Bake at 350 degrees for 45 minutes. The cake will be golden brown and spring back when lightly touched. Let set for 10-15 minutes and then turn the cake out of the pan onto your cake stand or cooling rack.

    After the cake has cooled for at least two hours mix together the glaze and pour evenly over the cake. 

    Supplies

    Frequently Asked Questions

    How do I add orange flavor to the cake?

    To get the best pop of orange flavor it's best to use fresh orange zest and fresh orange juice. You can use two large oranges to get the two teaspoons of zest and half cup of juice that you need.

    This is a great way to use up the last oranges in your fruit bowl. Even if they are starting to get too ripe they will work perfect for this recipe and give a sweet citrus flavor.

    How long should a bundt cake cool before glazing?

    It is best to let your gluten free orange bundt cake cool completely before adding the glaze. I like to let mine set for at least two hours.

    I prefer to make the cake the day before I need it and glaze it the next day before serving or guests arrive. This lets the cake cool completely and allows the glaze to be fresh.

    How can I enhance the orange flavor?

    If you are using orange juice from a carton and/or dried zest you could also add ½ teaspoon of orange extract or orange oil to enhance the orange flavor.
    There is nothing wrong with using juice from a carton or dried zest.

    Sometimes that's all I have access to depending on the season. However, the orange flavor won't be as strong, so adding the orange oil will enhance your cake.

    More Recipes You Might Enjoy

    • Gluten Free Lemon Bundt Cake with Lemon Glaze
    • Gluten Free Eggnog Bundt Cake
    • Gluten Free Pear Bundt Cake
    • Gluten Free Hummingbird Bundt Cake

    I get a lot of my ingredients from Thrive Market. Thrive Market has been a game changer for me eating gluten free. They have so many options I can't get at my rural grocery stores! Use this link to get 40% off your first order!

    Print
    clock clock iconcutlery cutlery iconflag flag iconfolder folder iconinstagram instagram iconpinterest pinterest iconfacebook facebook iconprint print iconsquares squares iconheart heart iconheart solid heart solid icon

    Gluten Free Orange Bundt Cake


    5 Stars 4 Stars 3 Stars 2 Stars 1 Star

    No reviews

    • Author: Elaine VanVleck
    • Total Time: 55 minutes
    • Yield: 8 servings 1x
    • Diet: Gluten Free
    Print Recipe
    Pin Recipe

    Description

    This recipe for gluten free orange bundt cake is easy to make from scratch. This moist cake is citrus infused and delicious. I used a simple, homemade glaze to top it off. 


    Ingredients

    Scale
    • ¾ cup Unsalted Butter, at room temperature
    • 1 cup Granulated Sugar
    • 3 large Eggs
    • 1 cup Sour Cream
    • ⅓ cup Orange Juice
    • ½ cup Milk
    • 2 Tbsp. Orange Zest or Dried Orange Peel
    • 3 cups Gluten Free Flour
    • 2 tsp. Baking Powder
    • 1 tsp. Baking Soda
    • ½ tsp. Sea Salt

    Icing:

    • 1 cup Powdered Sugar
    • 1 tsp. Orange Extract or Orange Oil
    • 1-2 Tbsp. Milk

    Instructions

    Preheat your oven to 350 degrees.

    Grease a bundt pan with butter or coconut oil. Set aside.

    In a mixing bowl whisk together the gluten free flour, baking powder, baking soda and salt. Set aside.

    In the bowl of your stand mixer beat together the butter, sugar and orange zest until smooth, about 2-3 minutes. Add the eggs, sour cream, milk and orange juice. Beat together just until combined.

    Add the dry ingredients to the wet ingredients and beat together until blended and smooth, about 1-2 minutes. 

    Pour the batter into your greased bundt pan.

    Bake at 350 degrees for 45 minutes. The cake will be golden brown and spring back when lightly touched. Let set for 10-15 minutes and then turn the cake out of the pan onto your cake stand or cooling rack.

    After the cake has cooled for at least two hours mix together the glaze and pour evenly over the cake. 

    Notes

    For the cake if you are using dried orange zest and/or orange juice from a carton also add ½ tsp. orange flavoring to the cake batter.

    • Prep Time: 20 minutes
    • Cook Time: 35 minutes
    • Category: Cake
    • Method: Baking
    • Cuisine: Gluten Free

    Did you make this recipe?

    Tag @smallfarmbiglife on Instagram and hashtag it #smallfarmbiglife

    Top Tip

    This cake is a great way to use up those last two oranges that are in your fruit bowl. Fresh orange zest and fresh squeezed orange juice make this cakes flavor pop! If you only have orange juice in a carton and dried zest that will work too.

    This is a great recipe to use with a smaller individual bundt cake pan too. The individual little cakes look so pretty served with the glaze at a gathering or on a dessert table.

    Gluten Free Creamy Beef and Mushroom Pasta

    This Gluten Free Creamy Beef and Mushroom Pasta is the weeknight dinner I come back to again and again when I want something that feels indulgent and comforting without taking a lot of time or effort. Ground beef and mushrooms come together in a rich and creamy sauce made with both sour cream and cream cheese. Then it gets tossed with gluten free egg noodles for a pasta dish that tastes like a homemade beef stroganoff but comes together in about 30 minutes.

    It is one of those dinners that feels like you put in a lot more effort than you actually did.

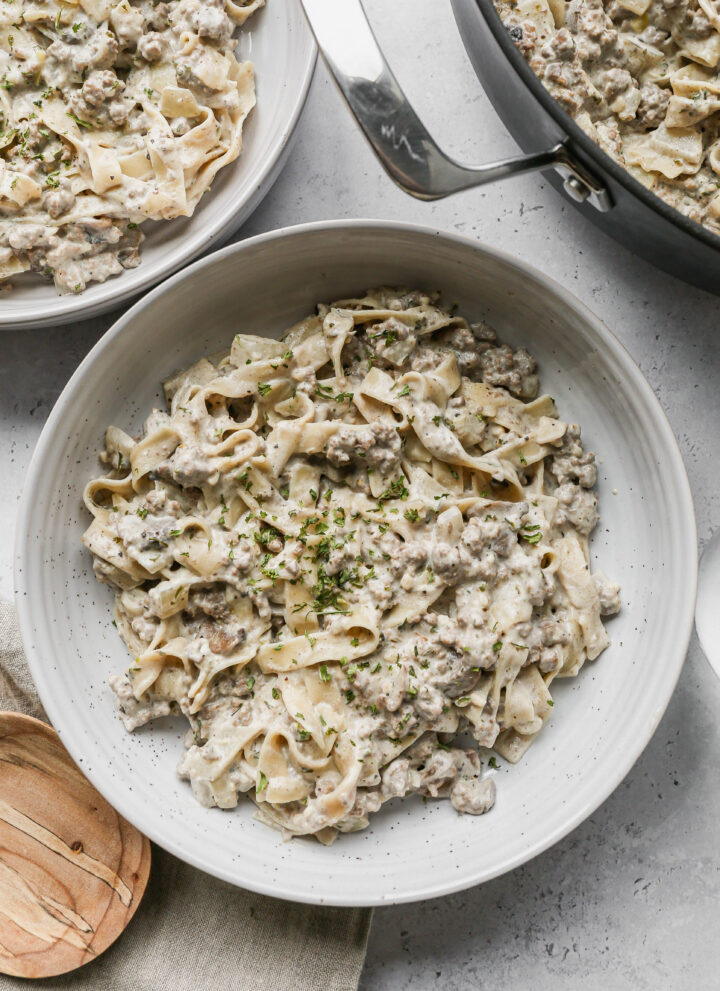
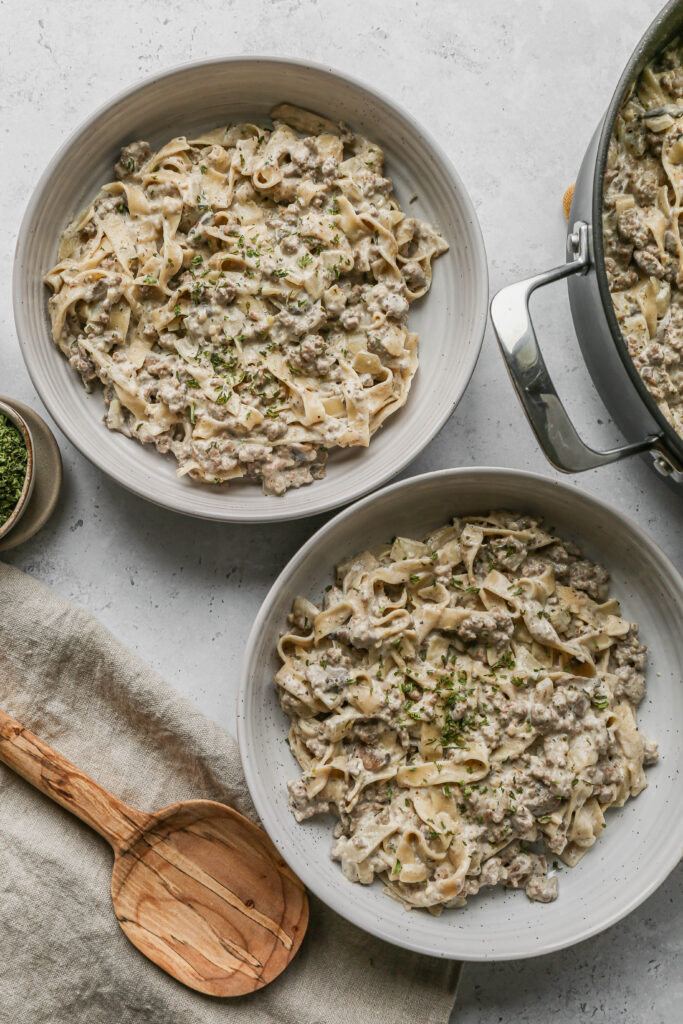
    two large white stoneware bowls of gluten free creamy beef and mushroom pasta next to a large pot of pasta and a small bowl of parsley.

    The secret to the sauce is using both cream cheese and sour cream rather than just one or the other. The cream cheese melts into the hot beef mixture and adds a rich and velvety body to the sauce while the sour cream adds the tangy and slightly acidic flavor that makes a good stroganoff taste complete.

    Together they create a sauce that is thicker, richer, and more stable than a sour cream only version.

    I use Jovial Gluten Free Brown Rice Egg Tagliatelle because the wide noodles hold the creamy sauce beautifully and the egg noodle flavor is the closest thing to a traditional stroganoff noodle in the gluten free pasta world.

    If you are looking for more gluten free pasta recipes you might also enjoy my Gluten Free Chicken Parmesan Pasta Casserole, my Gluten Free Taco Pasta Bake, my Gluten Free Instant Pot Chili Mac and Cheese or my Gluten Free One Pot Hamburger Helper Copycat.

    You can find all my meal recipes here: Gluten Free Meal Recipes

    two large white stoneware bowls of gluten free creamy beef and mushroom pasta next to a large pot of pasta and a small bowl of parsley.
    [feast_advanced_jump_to]

    Why This Sauce Is Better Than Standard Stroganoff

    Most creamy beef pasta and stroganoff recipes use only sour cream in the sauce. This recipe uses both cream cheese and sour cream and the difference is significant.

    • Cream cheese adds body and richness. When cream cheese melts into the hot beef and mushroom mixture it creates a thick and velvety texture that coats every noodle beautifully. It also acts as an emulsifier which means the sauce holds together and does not break or become greasy even as it sits.
    • Sour cream adds tang and flavor complexity. The slightly acidic flavor of sour cream is what gives this dish its stroganoff character. Without it the sauce would taste rich but flat. The combination of both gives you a sauce that is thick, creamy, tangy, and completely satisfying.
    • The result is a sauce that is significantly more stable and flavorful than a sour cream only version. It reheats better, holds together longer, and tastes more like a restaurant quality stroganoff than most homemade versions.

    Why Gluten Free Egg Noodles Make This Recipe

    The pasta choice matters more in this recipe than in most gluten free pasta dishes. Here is why egg noodles are the right choice.

    • Traditional beef stroganoff is always served over wide egg noodles. The egg noodle flavor and texture is deeply associated with the dish and using a rice noodle or a corn pasta produces a version that tastes good but does not have the same comforting familiarity.
    • I use Jovial Gluten Free Brown Rice Egg Tagliatelle because the wide flat noodles hold the creamy mushroom sauce beautifully and the egg content gives them a flavor and texture that is the closest available match to traditional stroganoff egg noodles.
    • If you cannot find Jovial egg tagliatelle any wide gluten free pasta shape works. Pappardelle, fettuccine, or even a wide rotini will all hold the sauce well. Avoid thin pasta shapes like spaghetti or angel hair since they do not hold a cream sauce as effectively.

    Tips for the Best Gluten Free Creamy Beef and Mushroom Pasta

    • Drain most of the grease after browning the beef. Too much grease will make the sauce oily rather than creamy. Tilt the pan and use a spoon to remove most of the excess fat. You do not need to remove every drop since a small amount adds flavor but too much will ruin the sauce texture.
    • Reserve one cup of pasta water before draining. The starchy pasta water is the best way to thin out the sauce if it becomes too thick without making it watery or breaking the cream sauce. Add it a splash at a time and stir until the sauce reaches your desired consistency.
    • Cut the cream cheese into small cubes before adding it to the pan. Small pieces melt much faster and more evenly than large chunks. If the cream cheese is not melting smoothly lower the heat and stir constantly until it is fully incorporated.
    • Do not overcook the pasta. Gluten free pasta can go from perfectly cooked to mushy very quickly. Cook it to just al dente since it will continue to soften slightly when tossed with the hot sauce.

    Variations and Substitutions

    This recipe is easy to customize based on what you have on hand.

    • Swap the protein. Ground turkey or ground chicken work well as lighter alternatives to ground beef. Ground pork also works beautifully and adds a slightly richer flavor. The sauce technique is identical regardless of which ground meat you use.
    • Use fresh mushrooms. This recipe uses frozen mushrooms for convenience but fresh cremini, baby bella, or white button mushrooms are excellent substitutes. Add them after the onion and cook until they release their moisture and begin to brown.
    • Add vegetables. A handful of baby spinach stirred in at the end adds color and nutrients without changing the flavor profile. Frozen peas work the same way and are a natural fit with the creamy mushroom sauce.
    • Make it dairy free. Substitute dairy free cream cheese and dairy free sour cream for the regular versions. The sauce will be slightly less rich but still very good.
    • Serve over rice. If you do not have gluten free pasta on hand this sauce is delicious served over white or brown rice.

    Storage and Reheating

    Store leftover gluten free creamy beef and mushroom pasta in an airtight container in the refrigerator for up to four days. The pasta will absorb some of the sauce as it sits which is normal.

    To reheat add the pasta to a skillet over medium low heat with a small splash of water or chicken broth. Stir gently until warmed through. The extra liquid helps bring the sauce back to its original creamy consistency. You can also reheat in the microwave at 50 percent power in 60 second intervals stirring between each one.

    This recipe does not freeze well since cream cheese and sour cream based sauces can separate and become grainy after freezing and thawing.

    Top Tip

    Reserve one cup of pasta water before you drain the noodles and do not skip this step. The starchy pasta water is the easiest way to loosen the sauce to the perfect consistency without watering down the flavor. Add it one splash at a time until the sauce coats every noodle just right.

    Frequently Asked Questions

    What type of pasta should I use for this recipe?

    I used Jovial Gluten Free Brown Rice Pasta Egg Tagliatelle noodles for this gluten free creamy beef and mushroom pasta recipe. They are very similar in texture to regular egg noodles.

    I boil the noodles while I cook the ground beef and make the sauce. Then, I add the gluten free egg noodles to the sauce mixture and use tongs to coat the pasta. I serve the pasta hot with some dried parsley sprinkled on top.

    Do I need to thicken beef stroganoff with flour?

    This recipe for ground beef and mushroom stroganoff does not need to be thickened with flour. I brown the ground beef, cook the onion, garlic and mushrooms. Then, add the spices, gluten free Worcestershire sauce, sour cream and cheese.

    The sauce will thicken quickly while cooking over medium low heat. If the sauce gets too thick I add heavy cream, milk or beef broth one tablespoon at a time until the sauce is the consistency I want.

    Can I use a different type of mushroom in this recipe?

    Yes. This recipe uses frozen mushrooms for convenience but fresh cremini, baby bella, or white button mushrooms work beautifully as substitutes. Add them after the onion and cook until they release their moisture and begin to brown before adding the remaining ingredients. Shiitake mushrooms are another great option for a deeper and more earthy mushroom flavor. Use the same amount as the frozen mushrooms called for in the recipe.

    Can I substitute the ground beef in this recipe?

    Yes. Ground turkey or ground chicken work well as lighter alternatives and produce a delicious cream sauce with the same technique. Ground pork also works beautifully and adds a slightly richer flavor that pairs well with the mushrooms and cream sauce. If using ground turkey cook it until fully cooked through since it has less fat than beef and can dry out if overcooked. Drain any excess liquid from the pan before adding the sauce ingredients regardless of which ground meat you use.

    Didn't find the answer you're looking for?

    Ask AI to answer based on this recipe:

    ChatGPT
    Google AI
    Perplexity
    Grok
    Claude

    Supplies

    More Recipes You Might Enjoy

    • Gluten Free Taco Pasta Bake
    • 10 Easy Gluten Free Beef Recipes
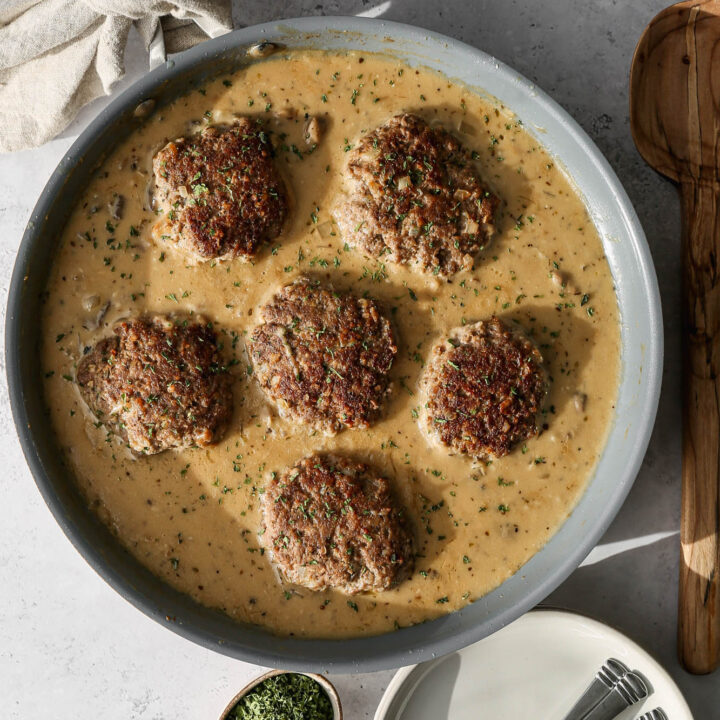
    • Gluten Free Salisbury Steak with Mushroom Gravy
    • Gluten Free One Pot Hamburger Helper Copycat

    I get a lot of my ingredients from Thrive Market. Thrive Market has been a game changer for me eating gluten free. They have so many options I can't get at my rural grocery stores! Use this link to get 40% off your first order!

    Print
    clock clock iconcutlery cutlery iconflag flag iconfolder folder iconinstagram instagram iconpinterest pinterest iconfacebook facebook iconprint print iconsquares squares iconheart heart iconheart solid heart solid icon

    Gluten Free Creamy Beef and Mushroom Pasta


    5 Stars 4 Stars 3 Stars 2 Stars 1 Star

    No reviews

    • Author: Elaine VanVleck
    • Total Time: 30 minutes
    • Yield: 5 servings 1x
    • Diet: Gluten Free
    Print Recipe
    Pin Recipe

    Description

    Ground beef, frozen mushrooms, and a rich cream sauce made with both sour cream and cream cheese tossed with gluten free egg tagliatelle. This gluten free creamy beef and mushroom pasta tastes like a simplified stroganoff and comes together in just 25 minutes with simple pantry ingredients.


    Ingredients

    Scale
    • 1 pound Ground Beef
    • 1 medium Yellow Onion, chopped
    • 2 Tbsp. Minced Garlic
    • 10 ounce bag Frozen Mushrooms
    • 1 tsp. Sea Salt
    • 1 Tbsp. Dried Parsley
    • 1 tsp. Dried Sage
    • ½ tsp. Coarse Ground Black Pepper
    • ½ tsp. Dried Oregano
    • 1 Tbsp. Gluten Free Worcestershire Sauce
    • ½ cup Sour Cream
    • 4 ounces Cream Cheese, chopped into small chunks
    • 9 ounce box Gluten Free Jovial Brown Rice Egg Tagliatelle

    Instructions

    In a large stock pot boil water and cook the pasta according to the instructions on the box.

    While the pasta is cooking in a large deep sided skillet over medium heat brown the ground beef. Add the onion, garlic and mushrooms and cook until softened.

    Add the salt, parsley, sage, pepper, oregano, Worcestershire sauce, sour cream and cream cheese to the beef mixture. Stir the ingredients together letting the cream cheese melt into the mixture.

    When the pasta is done, drain reserving one cup of liquid.

    Add the pasta to the sauce mixture and stir to coat. If the sauce is too thick add some of the reserved pasta liquid until the sauce is to your desired consistency.

    If you made this recipe please leave a star rating and comment below. It helps other readers find this recipe and means so much to me.

    • Prep Time: 10 minutes
    • Cook Time: 20 minutes
    • Category: Pasta
    • Method: Stove Top
    • Cuisine: American

    Did you make this recipe?

    Tag @smallfarmbiglife on Instagram and hashtag it #smallfarmbiglife

    If you make this Gluten Free Creamy Beef and Mushroom Pasta I would love to hear what you think! Leave a comment below and let me know how it turned out or tag me on Instagram so I can see your bowl.

    This is one of those easy gluten free weeknight dinners that earns a permanent spot in your dinner rotation so save it to your favorite Pinterest board so you always have it ready when you need a quick and comforting meal on the table fast!

    Ingredients

    • Ground Beef
    • Yellow Onion
    • Minced Garlic
    • Mushrooms
    • Sea Salt
    • Dried Parsley
    • Dried Sage
    • Coarse Ground Black Pepper
    • Dried Oregano
    • Gluten Free Worcestershire Sauce
    • Sour Cream
    • Cream Cheese
    • Jovial Brown Rice Egg Tagliatelle

    Instructions

    In a large stock pot boil water and cook the pasta according to the instructions on the box.

    While the pasta is cooking in a large deep sided skillet over medium heat brown the ground beef. Add the onion, garlic and mushrooms and cook until softened.

    Add the salt, parsley, sage, pepper, oregano, gluten free Worcestershire sauce, sour cream and cream cheese to the beef mixture. Stir the ingredients together letting the cream cheese melt into the mixture.

    When the pasta is done, drain reserving one cup of liquid.

    Add the pasta to the sauce mixture and stir to coat. If the sauce is too thick add some of the reserved pasta liquid until the sauce is to your desired consistency.

    Gluten Free Lemon Bundt Cake with Lemon Glaze

    This Gluten Free Lemon Bundt Cake with Lemon Glaze is one of those recipes that looks like it took a lot of effort but comes together so easily and the result is absolutely stunning. The combination of fresh lemon juice and lemon zest gives this cake the most beautiful bright citrus flavor and the sour cream keeps it incredibly moist.

    a gluten free lemon bundt cake with lemon glaze on a yellow glass plate next to a sliced lemon and a white colander of lemons.

    There's nothing gritty or dry like so many gluten free cakes can be. I love serving this slightly warm with the glaze drizzled over the top right before it hits the table. It is the perfect spring and Easter dessert and honestly one of my favorite gluten free cakes in my entire collection.

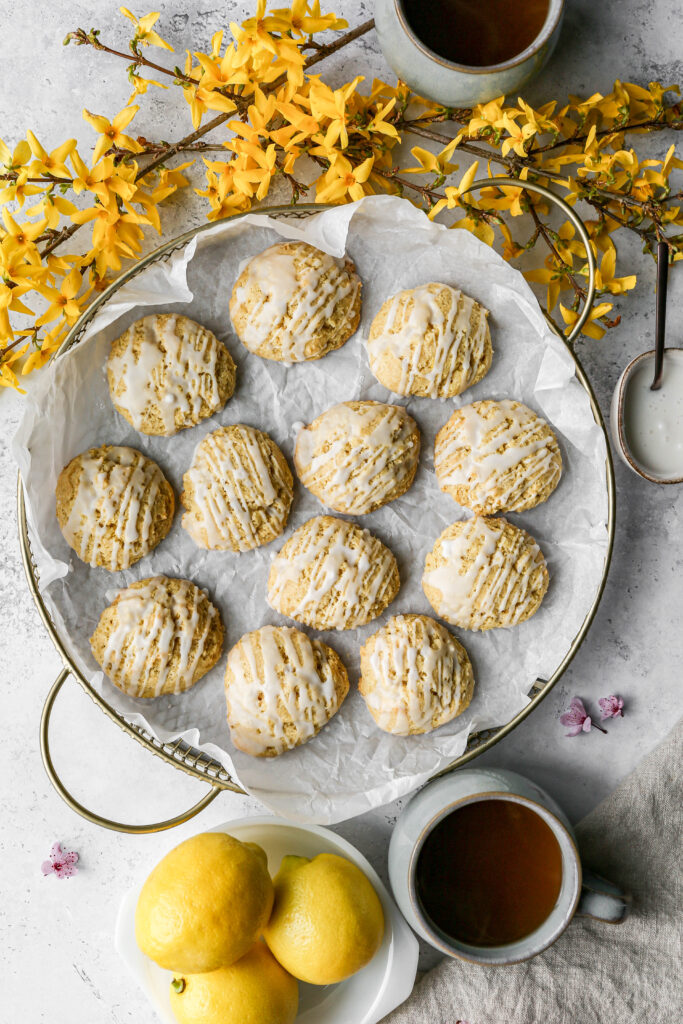
    If you are looking for more lemon recipes try my Gluten Free Iced Lemon Cookies, my Gluten Free Lemon Shortbread Bars, my Gluten Free Lemon Curd or my Gluten Free No Bake Lemon Icebox Pie.

    You can find all of my cake recipes here: Gluten Free Cake Recipes

    a slice of gluten free lemon bundt cake with lemon glaze on a white plate next to a sliced lemon.
    [feast_advanced_jump_to]

    Ingredients

    • Unsalted Butter
    • Granulated Sugar
    • Eggs
    • Lemon Juice
    • Milk
    • Sour Cream
    • Lemon Zest
    • Gluten Free Flour
    • Baking Powder
    • Baking Soda
    • Sea Salt
    • Powdered Sugar
    • Lemon Extract

    Instructions

    Preheat oven to 350 degrees. Grease a bundt cake pan with coconut oil or butter. Set aside.

    In the bowl of your stand mixer beat the softened unsalted butter with the sugar until creamed together. Add the eggs one at a time beating until mixed together. Add the sour cream, lemon juice, milk and lemon zest. Beat until blended into the batter.

    In a mixing bowl whisk together the gluten free flour, baking powder, baking soda and salt. Add this dry mixture ½ cup at a time to the wet ingredients. Mix until all ingredients are just combined. 

    Pour batter evenly in the greased bundt pan and tap a couple of times on the counter to get air bubbles out.

    Bake at 350 degrees for 45-50 minutes or until a toothpick inserted in the center comes out clean.

    Let cake cool for 10 minutes in the pan and then invert onto a cooling rack.

    In a small bowl whisk together the powdered sugar, lemon extract, and 1 tablespoon of milk until smooth. Add the second tablespoon of milk only if needed to reach a pourable consistency. Pour over the completely cooled cake right before serving.

    Supplies

    More Recipes You Might Enjoy

    • Gluten Free Orange Bundt Cake
    • Gluten Free Eggnog Bundt Cake
    • Gluten Free Hummingbird Bundt Cake
    • Gluten Free Double Chocolate Bundt Cake

    I get a lot of my ingredients from Thrive Market. Thrive Market has been a game changer for me eating gluten free. They have so many options I can't get at my rural grocery stores! Use this link to get 40% off your first order!

    Print
    clock clock iconcutlery cutlery iconflag flag iconfolder folder iconinstagram instagram iconpinterest pinterest iconfacebook facebook iconprint print iconsquares squares iconheart heart iconheart solid heart solid icon

    Gluten Free Lemon Bundt Cake with Lemon Glaze Recipe


    5 Stars 4 Stars 3 Stars 2 Stars 1 Star

    No reviews

    • Author: Elaine VanVleck
    • Total Time: 1 hour
    • Yield: 10 servings 1x
    • Diet: Gluten Free
    Print Recipe
    Pin Recipe

    Description

    This gluten free lemon bundt cake with lemon glaze is moist, bright, and bursting with fresh lemon flavor in every single bite. Made with real lemon juice, lemon zest, and sour cream for incredible moisture, this is the easiest and most delicious gluten free lemon cake you will ever bake. Finished with a simple homemade lemon glaze it is the perfect spring dessert for Easter, Mother's Day, brunch gatherings, and any occasion where you want to serve something beautiful and impressive without spending hours in the kitchen!


    Ingredients

    Scale

    Cake:

    • ¾ cup Unsalted Butter, at room temperature
    • 1 cup Granulated Sugar
    • 3 large Eggs
    • ⅓ cup Lemon Juice
    • 1 cup Sour Cream
    • ½ cup Milk
    • 2 Tbsp. Lemon Zest
    • 3 cups Gluten Free Flour
    • 2 tsp. Baking Powder
    • 1 tsp. Baking Soda
    • ½ tsp. Sea Salt

    Glaze:

    • 1 cup Powdered Sugar
    • 1 tsp. Lemon Extract
    • 1-2 Tbsp. Milk

    Instructions

    Preheat oven to 350 degrees. Grease a bundt cake pan with coconut oil or butter. Set aside.

    In the bowl of your stand mixer beat the softened unsalted butter with the sugar until creamed together. Add the eggs one at a time beating until mixed together. Add the sour cream, lemon juice, milk and lemon zest. Beat until blended into the batter.

    In a mixing bowl whisk together the gluten free flour, baking powder, baking soda and salt. Add this dry mixture ½ cup at a time to the wet ingredients. Mix until all ingredients are just combined. 

    Pour batter evenly in the greased bundt pan and tap a couple of times on the counter to get air bubbles out.

    Bake at 350 degrees for 45-50 minutes or until a toothpick inserted in the center comes out clean.

    Let cake cool for 10 minutes in the pan and then invert onto a cooling rack.

    In a small bowl whisk together the powdered sugar, lemon extract, and 1 tablespoon of milk until smooth. Add the second tablespoon of milk only if needed to reach a pourable consistency. Pour over the completely cooled cake right before serving.

    • Prep Time: 15 minutes
    • Cook Time: 45 minutes
    • Category: Cake
    • Method: Baking
    • Cuisine: American

    Did you make this recipe?

    Tag @smallfarmbiglife on Instagram and hashtag it #smallfarmbiglife

    Top Tip

    Make sure your butter is truly at room temperature before you begin. Cold butter will not cream properly with the sugar and you will end up with a denser, less fluffy cake. I take my butter out of the refrigerator at least an hour before I start baking. Room temperature butter is the single most important step for getting a light and moist bundt cake every time.

    Didn't find the answer you're looking for?

    Ask AI to answer based on this recipe:

    ChatGPT
    Google AI
    Perplexity
    Grok
    Claude

    Frequently Asked Questions

    What is the difference between a cake and a bundt cake?

    There really isn't that much difference in the cake batter itself. The bundt cake recipe may call for a bit more moisture and/or baking powder as the cake is going to rise higher than a regular layer cake or sheet cake.
     
    The main difference you might find is that a bundt cake tends to have a crunchier texture on the top. I also love the ease of a bundt cake. The cake gets baked in one pan and then I either drizzle it with a glaze or sprinkle powdered sugar over the top. So much easier than frosting a layer cake!

    How do I make my gluten free cakes more moist?

    Gluten free baking tends to require more moisture or oil than when you are using regular wheat flour. For this gluten free lemon bundt cake recipe I added the sour cream to make it moist and delicious.

    If you are using a cake recipe that isn't turning out moist I would suggest adding a bit more oil or butter. You can also add mashed banana or applesauce to help your baked goods have more moisture.

    Storage

    Store this gluten free lemon bundt cake covered at room temperature for up to 3 days. If you have already added the glaze store it loosely covered so the glaze does not stick. For longer storage wrap the cake tightly and refrigerate for up to 5 days. I recommend adding the glaze fresh right before serving rather than storing the cake with glaze on it for the best presentation.

    If you made this gluten free lemon bundt cake I would love to hear what you thought! Please leave a star rating and a comment below. This is one of my favorite spring desserts and I hope it becomes one of yours too!

    • « Previous Page
    • 1
    • …
    • 48
    • 49
    • 50
    • 51
    • 52
    • …
    • 88
    • Next Page »

    Welcome! I'm Elaine

    I'm so glad you are here! I share easy gluten free recipes from my small farm in Washington.

    Be sure to sign up for my newsletter to stay up to date on all of my new recipes.

    More about me...
    • Instagram
    • Pinterest
    • Facebook
    • Twitter
    • Mail

    Load up on new recipes, exclusive goodies, + more!
    Sign up below to stay up-to-date on news, events, and special deals.
    Thank you for subscribing!

    Easy Meals Recipes

    • Gluten Free Instant Pot Chili Mac and Cheese
    • Gluten Free Taco Casserole
    • Gluten Free Cowboy Baked Beans
    • Gluten Free Walking Taco Casserole
    • Gluten Free Creamy Beef and Mushroom Pasta
    • Gluten Free Instant Pot Chicken and Dumplings
    • Instant Pot Mexican Style Beef and Rice
    • Gluten Free Chicken Parmesan Pasta Casserole
    • Gluten Free One Pot Hamburger Helper Copycat
    • Gluten Free Salisbury Steak with Mushroom Gravy
    • Gluten Free Air Fryer Fajitas
    • Gluten Free Sloppy Joe Casserole

    Footer

    back to top

    About

    • Privacy Policy
    • Shop my Amazon Page
    • Follow me on LTK

    Newsletter

    • Sign Up! for emails and updates

    Contact

    • Contact
    • Media Kit
    • About Me

    As an Amazon Associate I earn from qualifying purchases.

    I may get commissions for purchases made through links on this site.

    Copyright © 2026 Brunch Pro on the Brunch Pro Theme