• Skip to primary navigation
  • Skip to main content
  • Skip to primary sidebar
  • Skip to footer
Small Farm Big Life logo
  • Recipe Index
  • Subscribe
  • Resources
  • Home Decor
  • Nav Social Menu

    • Email
    • Facebook
    • Instagram
    • Pinterest
menu icon
go to homepage
subscribe
search icon
Homepage link
  • Home
  • Recipe Index
  • Subscribe
  • My Story
  • Resources
  • Free Guides
  • Home Decor
    • Email
    • Facebook
    • Instagram
    • Pinterest
  • ×

    Gluten Free Strawberry Icebox Bars

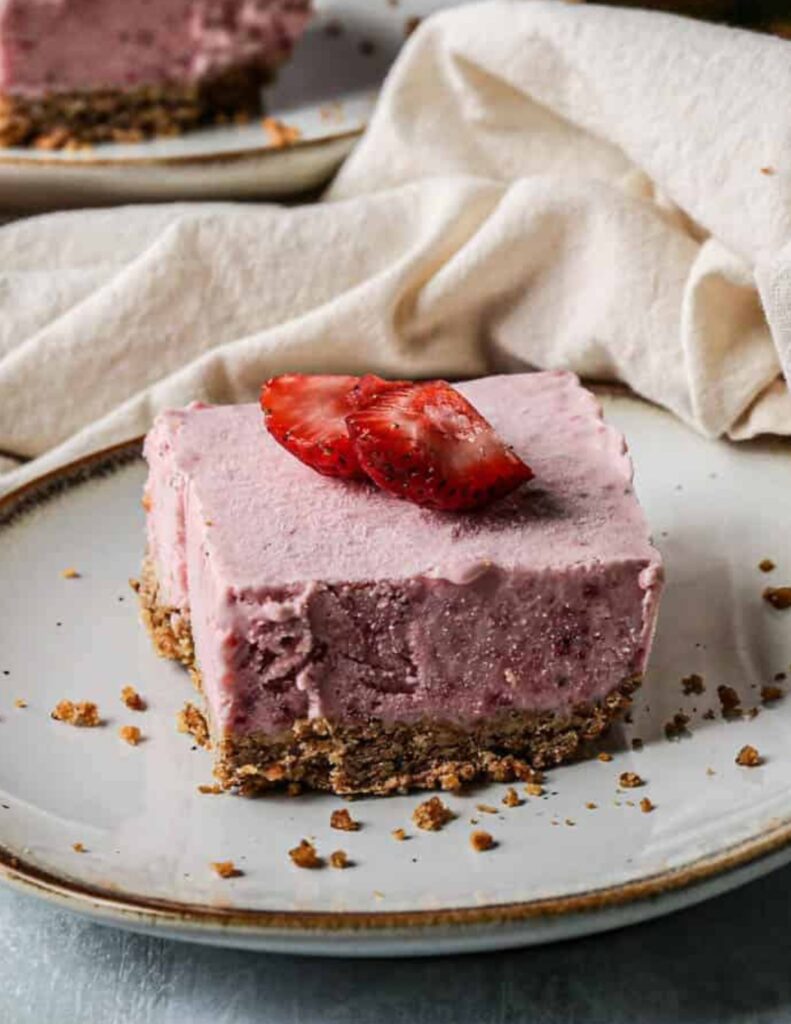
    This recipe for gluten free strawberry icebox bars is the perfect dessert for summer. They are easy to make with cream cheese, sweetened condensed milk, whipping cream and strawberries. I love a quick and easy homemade dessert for summer get togethers.  

    This dessert can be made a day or two before you need it. These gluten free strawberry icebox bars store really well in your freezer so you don't have to be rushing to make dessert. The bars are easy to cut with a sharp knife. I served mine with fresh strawberries and you could also serve with fresh or purchased whipped cream.

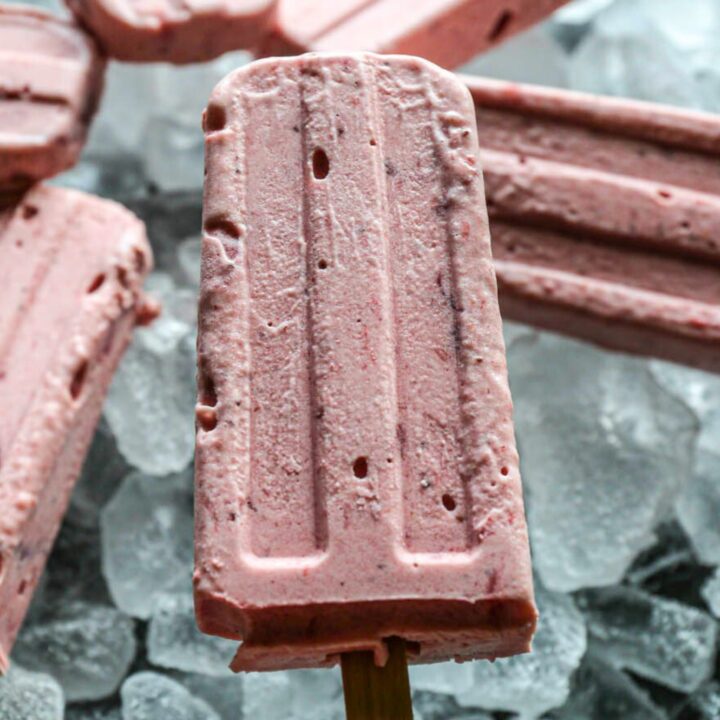
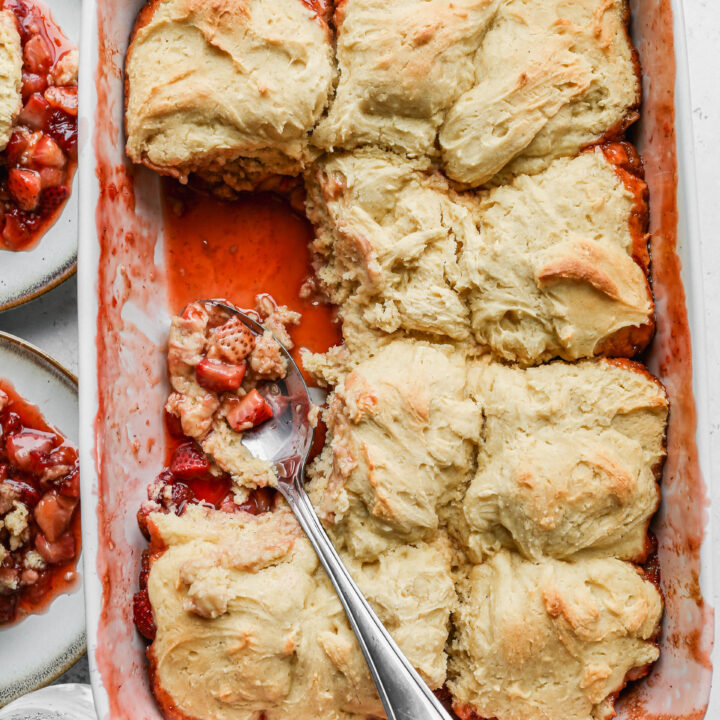
    If you are looking for more strawberry recipes try my Gluten Free Strawberry Cobbler, my Gluten Free Strawberry Jam Bars, my Homemade Strawberry Banana Popsicles or my Strawberry Daiquiri Mocktails.

    You can find all of my dessert recipes here: Gluten Free Dessert Recipes

    [feast_advanced_jump_to]

    Ingredients

    Gluten Free Pretzels
    Maple Syrup
    Unsalted Butter
    Cold Water
    Strawberries
    Sweetened Condensed Milk
    Cream Cheese
    Strawberry Gelatin
    Heavy Whipping Cream
    Sea Salt
    Granulated Sugar

    Instructions

    Preheat your oven to 375 degrees. 

    Grease a 9x13 baking dish with coconut oil or butter. Set aside

    In a food processor pulse the pretzels into crumbles. Add the maple syrup and butter. Pulse into small clumps. Add water 1 tablespoon as a time and pulse until a dough begins to form.

    Press the pretzel mixture into the bottom of the greased 9x13 baking dish. Bake at 375 degrees for 12-15 minutes. The crust will be slightly browned. Set aside to cool.

    Process the strawberries in a blender until they are finely chopped.

    In a stand mixer whisk the sweetened condensed milk, cream cheese and strawberry gelatin using the whisk attachment until they are smooth. Add the pureed strawberries and whisk together until blended.

    In a separate bowl whisk the heavy cream and sea salt on medium high until soft peaks form. Fold the strawberry mixture into the whipped cream mixture until it's folded together. 

    Pour the strawberry and cream mixture over the cooled pretzel crust. Freeze for at least 8 hours before serving. 

    Prior to serving whisk the heavy whipping cream and sugar together on medium high speed until stiff peaks form. Serve over the bars.

    Top Tip

    When I say fold I mean to pour the whipped cream on top of the strawberry mixture, then take a spatula and gently pull strawberry mixture over the whipped cream until they mix together. You want to keep the airiness of the whipped cream so you don't just want to stir them together.

    Supplies

    Frequently Asked Questions

    What does icebox bars mean?

    Iceboxes where used prior to the invention of electrical refrigerators and freezers. They literally had a large block of ice in them that kept the food cold. These gluten free strawberry icebox bars are stored in the freezer. The texture is very similar to ice cream.

    Icebox cakes have been around for a long time. They generally involve fruit, cream, nuts and/or some kind of wafer. For these icebox bars I used fruit, cream and gluten free pretzels.

    How do you make Cool Whip from scratch?

    I love to serve these gluten free strawberry icebox bars with fresh whipped cream (Cool Whip). It is so easy to make and the texture is so much lighter and fluffier than store bought Cool Whip.

    Using you stand mixer and the whisk attachment add 1 cup of heavy whipping cream and 2 tablespoons granulated sugar. Whip on medium high for 5-8 minutes. You will be able to see the whipped cream get thicker and hear the motor on your mixer bog down as the whipped cream forms.

    To test if the whipped cream is done lift the mixer and see if a stiff peak forms. the whipped cream should be very light and fluffy and should stand up into a peak. If the peak flattens or one doesn't form the mixture needs to be whisked more.

    How do you store icebox bars?

    After you have made the gluten free strawberry icebox bars they need to be stored in your freezer for at least 8 hours to fully set. Serve them right out of the freezer as they will start to melt in warm weather.

    Store leftovers in the freezer covered well so they don't get freezer burnt. Make sure you use a baking dish that can also go in the freezer and is freezer safe.

    More Recipes You Might Enjoy

    • Strawberry Daiquiri Mocktails
    • Homemade Strawberry Banana Popsicles
    • Gluten Free Strawberry Rhubarb Bars
    • Gluten Free Strawberry Cobbler

    I get my ingredients from Thrive Market. Thrive Market has been a game changer for me eating gluten free. They have so many options I can't get at my rural grocery stores! Use this link to get 25% off your first order!

    Print
    clock clock iconcutlery cutlery iconflag flag iconfolder folder iconinstagram instagram iconpinterest pinterest iconfacebook facebook iconprint print iconsquares squares iconheart heart iconheart solid heart solid icon

    Gluten Free Strawberry Icebox Bars


    5 Stars 4 Stars 3 Stars 2 Stars 1 Star

    No reviews

    • Author: Elaine VanVleck
    • Total Time: 45 minutes
    • Yield: 12 bars 1x
    • Diet: Gluten Free
    Print Recipe
    Pin Recipe

    Description

    This recipe for gluten free strawberry icebox bars is the perfect dessert for summer. They are easy to make with cream cheese, sweetened condensed milk, whipping cream and strawberries. I love a quick and easy homemade dessert for summer get togethers. 


    Ingredients

    Scale

    4 cups Gluten Free Pretzels, crushed
    2 Tbsp. Maple Syrup
    ½ cup Unsalted Butter, cold and cubed
    1-2 tablespoon Cold Water
    2 cups Strawberries, cored and sliced
    1 - 14 ounce can Sweetened Condensed Milk
    4 ounces Cream Cheese, softened
    1 - 3 ounce package Strawberry Gelatin
    1 cup Heavy Whipping Cream
    ¼ tsp. Sea Salt

    Whipped Cream:
    1 cup Heavy Whipping Cream
    2 Tbsp. Granulated Sugar


    Instructions

    Preheat your oven to 375 degrees. 

    Grease a 9x13 baking dish with coconut oil or butter. Set aside

    In a food processor pulse the pretzels into crumbles. Add the maple syrup and butter. Pulse into small clumps. Add water 1 tablespoon as a time and pulse until a dough begins to form.

    Press the pretzel mixture into the bottom of the greased 9x13 baking dish. Bake at 375 degrees for 12-15 minutes. The crust will be slightly browned. Set aside to cool.

    Process the strawberries in a blender until they are finely chopped.

    In a stand mixer whisk the sweetened condensed milk, cream cheese and strawberry gelatin using the whisk attachment until they are smooth. Add the pureed strawberries and whisk together until blended.

    In a separate bowl whisk the heavy cream and sea salt on medium high until soft peaks form. Fold the strawberry mixture into the whipped cream mixture until it's folded together. 

    Pour the strawberry and cream mixture over the cooled pretzel crust. Freeze for at least 8 hours before serving. 

    Prior to serving whisk the heavy whipping cream and sugar together on medium high speed until stiff peaks form. Serve over the bars.

    Notes

    When I say fold I mean to pour the whipped cream on top of the strawberry mixture, then take a spatula and gently pull strawberry mixture over the whipped cream until they mix together. You want to keep the airiness of the whipped cream so you don't just want to stir them together.

    • Prep Time: 30 minutes
    • Cook Time: 15 minutes
    • Category: Dessert
    • Method: Frozen
    • Cuisine: Gluten Free

    Did you make this recipe?

    Tag @smallfarmbiglife on Instagram and hashtag it #smallfarmbiglife

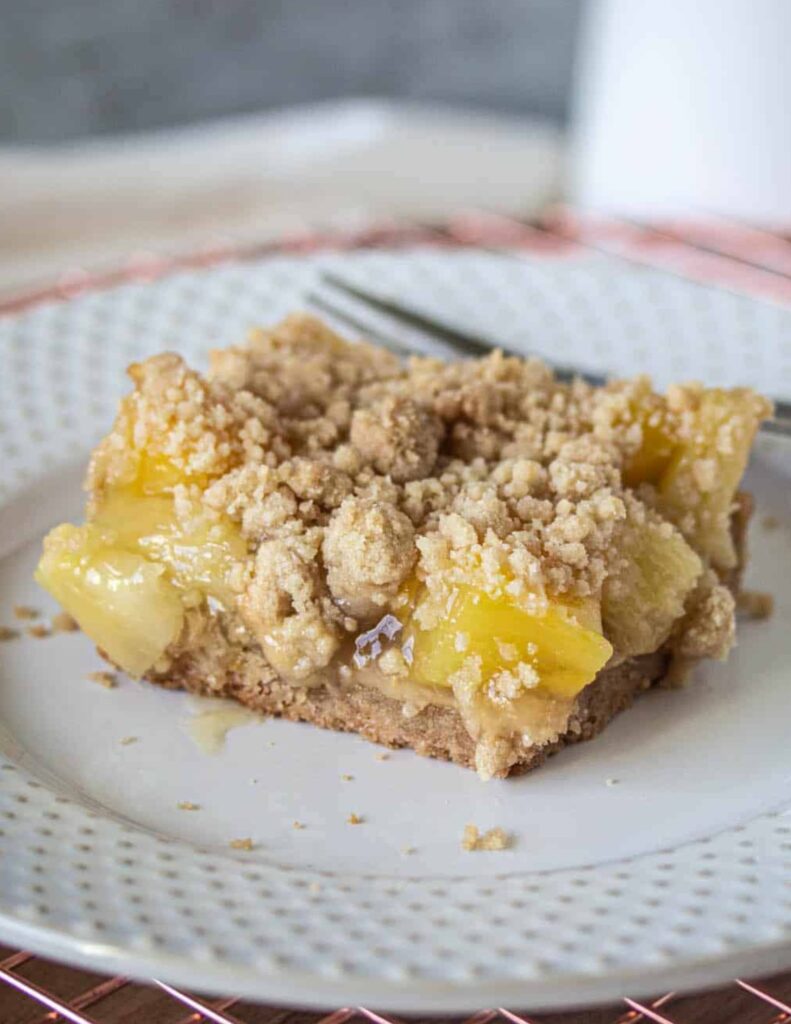
    Gluten Free Pineapple Bars

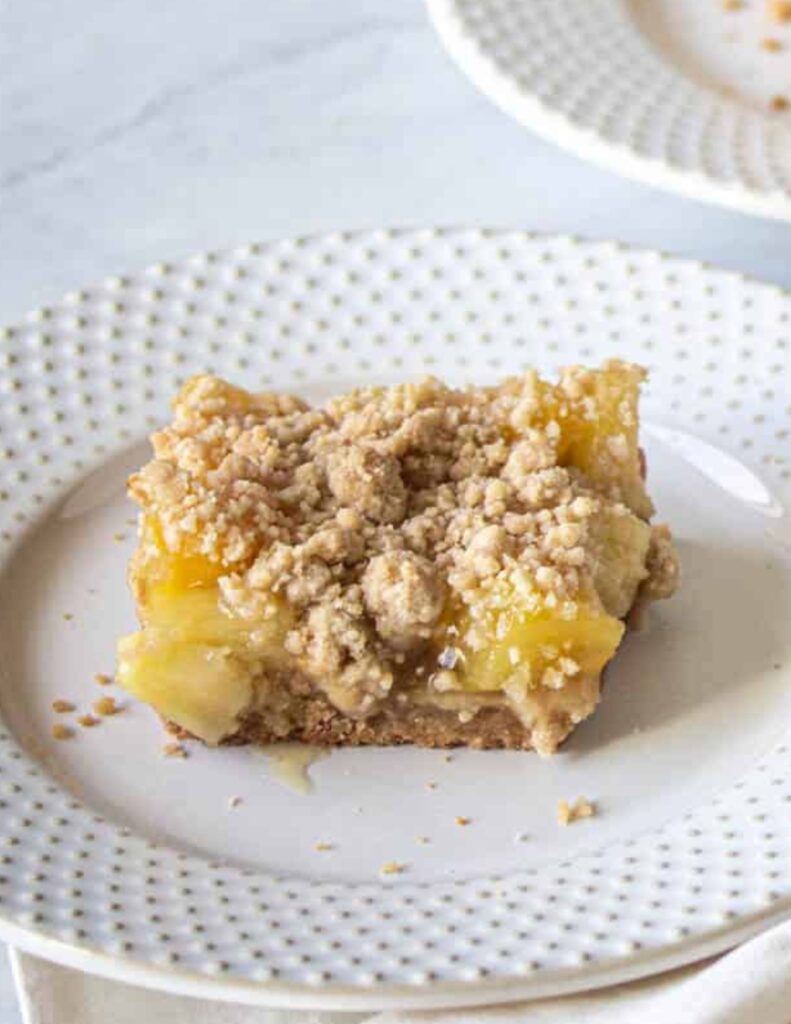
    This easy recipe for gluten free pineapple bars is the perfect summer dessert. The gooey pineapple filling makes me dream of Hawaii. These are the best bars for lots of delicious pineapple.

    I used canned pineapple in this recipe because it's more readily available to me in my area and because these bars were made during social distancing and fresh pineapples weren't something I could get.

    If you want to use fresh pineapple you can easily replace it with the canned pineapple in this recipe. Just dice up the fresh pineapple and add about four cups.

    As I mentioned, we were staying home when I made this recipe. For me staying home means I dream of other places. All I could do as I made these bars was thinking about floating in the warm ocean and laying on the beach on Maui.

    [feast_advanced_jump_to]

    Ingredients

    Gluten Free Flour
    Unsalted Butter
    Coconut Oil
    Vanilla Extract
    Granulated Sugar
    Brown Sugar
    Sea Salt
    Canned Pineapple Chunks
    Arrowroot Powder
    Lemon Juice
    Sliced Almonds

    Instructions

    Preheat your oven to 375 degrees.

    Grease a 9x13-inch baking dish with butter or coconut oil. Set aside

    In the bowl of your stand mixer beat together the gluten free flour, butter, coconut oil, vanilla, sugar, brown sugar and sea salt until a crumbly mixture forms. 

    Reserve 1 cup of the crumbly mixture for the topping.

    Press the remaining crumbly mixture into the greased 9-inch baking dish. I use my hands or the bottom of a measuring cup to get it pressed down well. 

    Bake the crust at 375 degrees for 18-20 minutes or until light golden brown.

    In a mixing bowl stir together the pineapple, arrowroot powder, lemon juice and sugar. 

    When the crust is done let it stand for 10-15 minutes to cool.

    Pour the pineapple mixture over the crust and then top with the withheld 1 cup of crumbly mixture. I then spread ¼ cup of sliced almonds over top for a nice crunch.

    Bake at 375 degrees for 30-35 minutes. The topping will be lightly browned and the pineapple mixture will be bubbling around the edges. 

    Let the bars cool before you slice them. I enjoy the bars warm or at room temperature.

    Supplies

    Frequently Asked Questions

    How do I make pineapple bars?

    These gluten free pineapple bars are so easy! You make the shortbread crust first. You will save one cup of the crust mixture for the topping. Press the shortbread crust into the greased nine inch baking dish and bake it first.

    While the crust is baking you can make the filling. I used canned pineapple, but you could easily use fresh pineapple chopped into chunks. Stir the filling mixture in a mixing bowl and let it stand until the crust is done.

    Once the crust is done baking and is lightly golden brown let it cool for 10 minutes. Then, pour the pineapple filling over the crust and top with the reserved crust mixture. I also added some sliced almonds to the top for crunch.

    Bake the bars at 375 degrees for 30-35 minutes. Let them cool slightly before you cut them into bars. I like them warm as much as I like them at room temperature.

    Can I use fresh pineapple with this recipe?

    Yes. You can chop up a fresh pineapple for this recipe. You will need about four cups. Chop the fresh pineapple into bite size chunks similar to the size of canned pineapple chunks.

    More Recipes You Might Enjoy

    Gluten Free Pineapple Upside Down Cake
    Gluten Free Mango Pineapple Smoothie
    Gluten Free Strawberry Rhubarb Bars
    Gluten Free Orange Bundt Cake
    Gluten Free Lemon Shortbread Bars

    I get my ingredients from Thrive Market. Thrive Market has been a game changer for me eating gluten free. They have so many options I can't get at my rural grocery stores! Use this link to get 25% off your first order!

    Print
    clock clock iconcutlery cutlery iconflag flag iconfolder folder iconinstagram instagram iconpinterest pinterest iconfacebook facebook iconprint print iconsquares squares iconheart heart iconheart solid heart solid icon

    Gluten Free Pineapple Bars


    5 Stars 4 Stars 3 Stars 2 Stars 1 Star

    4 from 1 review

    • Author: Elaine VanVleck
    • Total Time: 1 hour 15 minutes
    • Yield: 8 bars 1x
    • Diet: Gluten Free
    Print Recipe
    Pin Recipe

    Description

    This easy recipe for gluten free pineapple bars is the perfect summer dessert. The gooey pineapple filling makes me dream of Hawaii. These are the best bars for lots of delicious pineapple. 


    Ingredients

    Scale

    2 cups Gluten Free Flour
    ½ cup Unsalted Butter
    ¼ cup Coconut Oil, melted
    ½ tsp. Vanilla Extract
    ½ cup Granulated Sugar
    ½ cup Brown Sugar
    ½ tsp. Sea Salt
    2 - 20 ounce cans Pineapple Chunks, drained or 4 cups fresh Pineapple, diced
    ¼ cup Arrowroot Powder
    2 Tbsp. Lemon Juice
    ¼ cup Granulated Sugar
    ¼ cup Sliced Almonds


    Instructions

    Preheat your oven to 375 degrees.

    Grease a 9x13-inch baking dish with butter or coconut oil. Set aside

    In the bowl of your stand mixer beat together the gluten free flour, butter, coconut oil, vanilla, sugar, brown sugar and sea salt until a crumbly mixture forms. 

    Reserve 1 cup of the crumbly mixture for the topping.

    Press the remaining crumbly mixture into the greased 9-inch baking dish. I use my hands or the bottom of a measuring cup to get it pressed down well. 

    Bake the crust at 375 degrees for 18-20 minutes or until light golden brown.

    In a mixing bowl stir together the pineapple, arrowroot powder, lemon juice and sugar. 

    When the crust is done let it stand for 10-15 minutes to cool.

    Pour the pineapple mixture over the crust and then top with the withheld 1 cup of crumbly mixture. I then spread ¼ cup of sliced almonds over top for a nice crunch.

    Bake at 375 degrees for 30-35 minutes. The topping will be lightly browned and the pineapple mixture will be bubbling around the edges. 

    Let the bars cool before you slice them. I enjoy the bars warm or at room temperature.

    Notes

    I store the bars in the refrigerator either in the baking dish or in individual containers for easy servings to place in lunches or to have for dessert.

    • Prep Time: 20 minutes
    • Cook Time: 55 minutes
    • Category: Dessert
    • Method: Baking
    • Cuisine: Gluten Free
    Did you make this recipe?

    Tag @smallfarmbiglife on Instagram and hashtag it #smallfarmbiglife

    Gluten Free Strawberry Rhubarb Bars

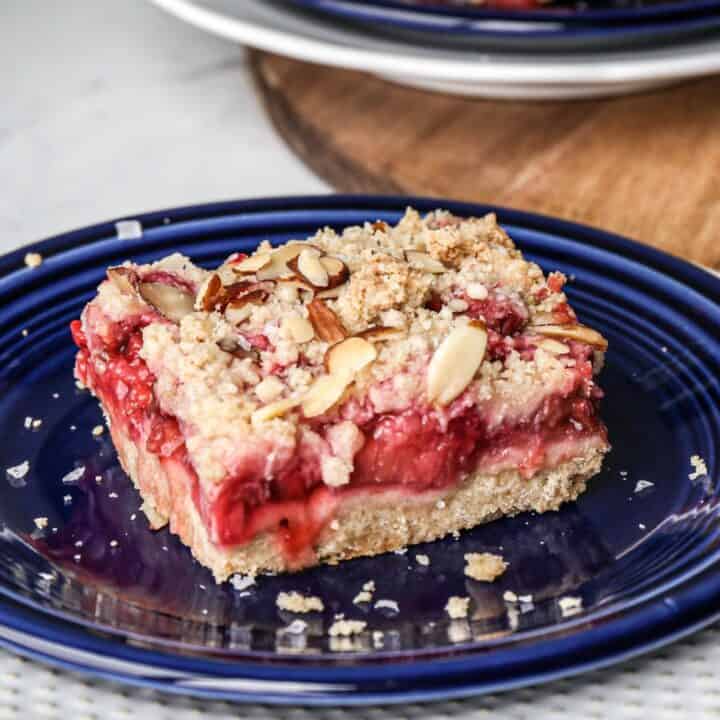
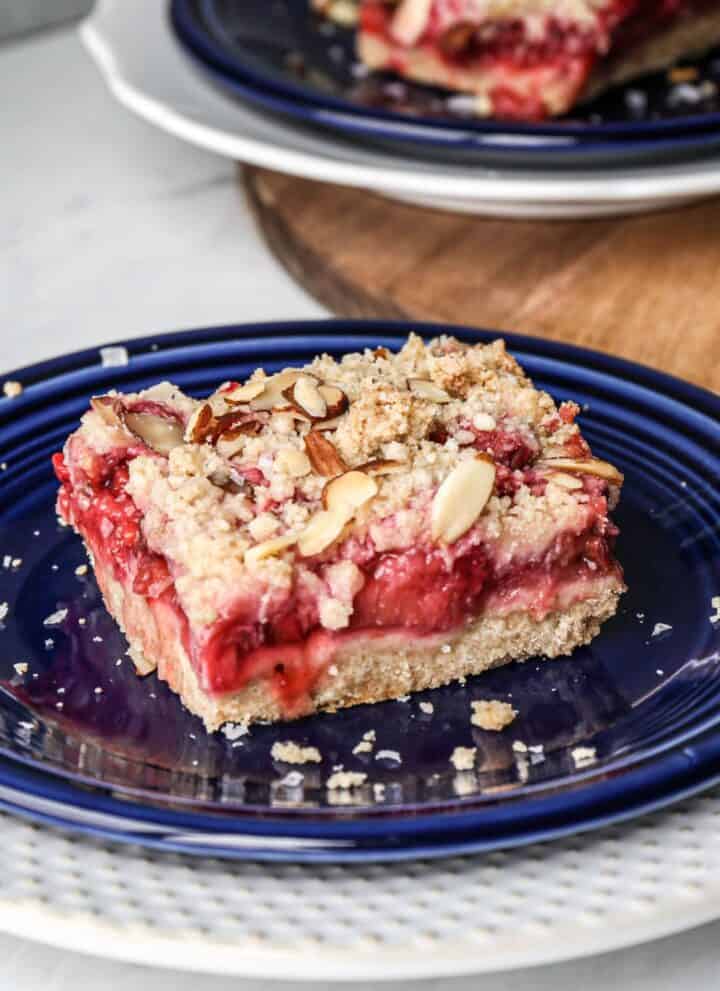
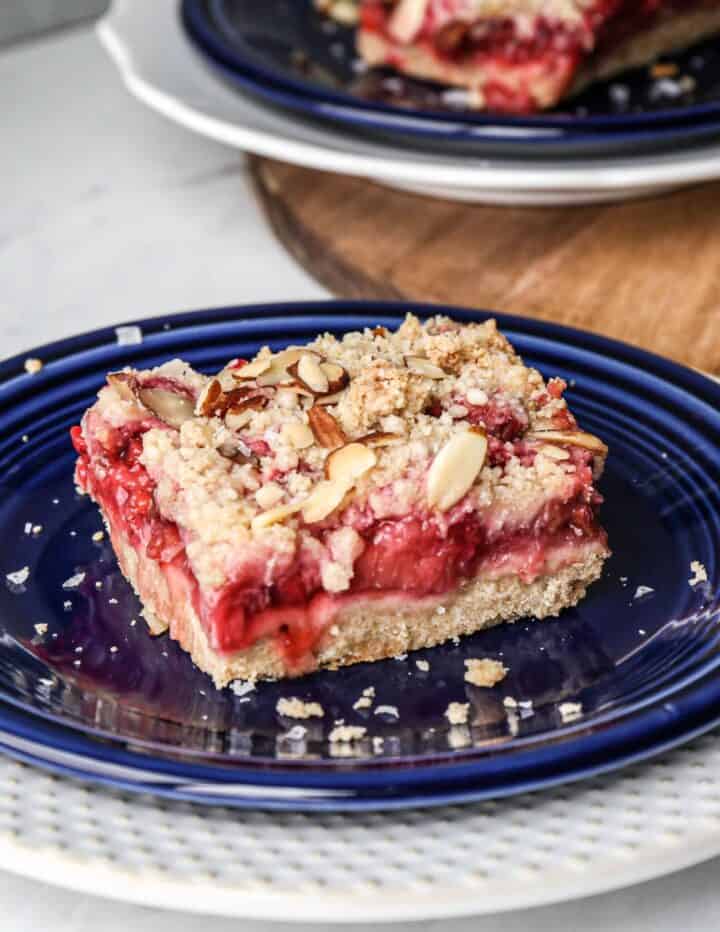
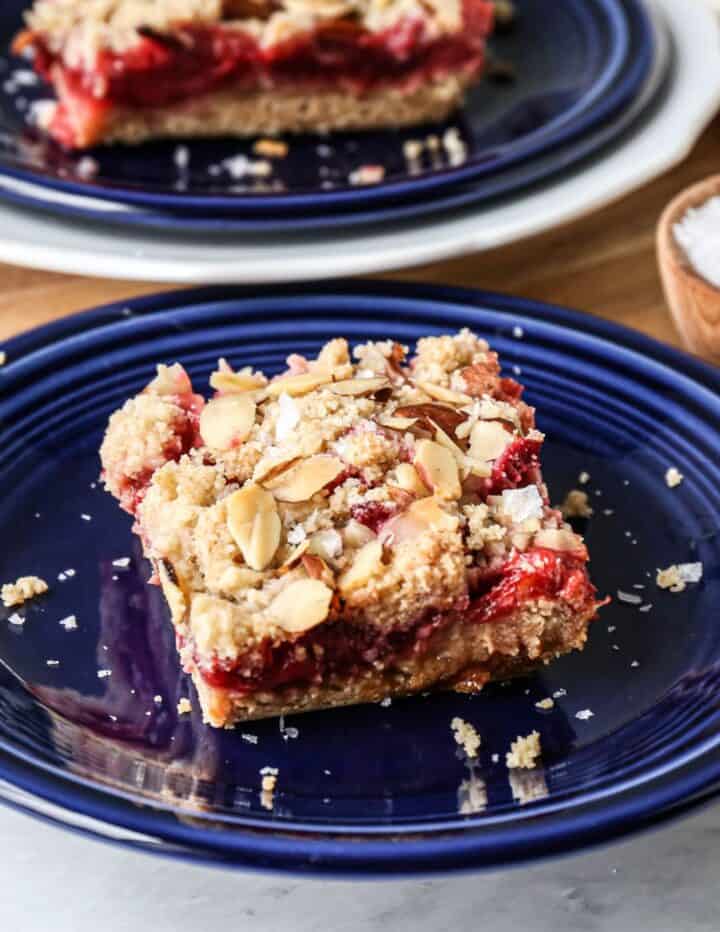
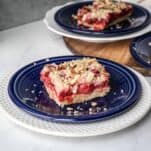
    These gluten free strawberry rhubarb bars are one of my favorite things to bake during rhubarb season and once you make them you will understand why. A buttery gluten free shortbread crust gets pressed into a 9x13 baking dish and pre baked until lightly golden, then topped with a sweet and tart strawberry rhubarb filling made with fresh lemon juice and finished with the reserved crumb mixture and sliced almonds before going back in the oven until bubbly and perfectly golden.

    The best part about this recipe is that the shortbread mixture does double duty as both the crust and the crumb topping so you only need two bowls and one crust recipe to make the whole thing.

    a blue plate with one gluten free strawberry rhubarb bar on it

    These bars are perfect for making ahead which makes them one of my favorite gluten free desserts to bring to spring gatherings, potlucks, and summer parties.

    I like to make them the day before, let them cool completely, and then refrigerate them overnight so they are perfectly set and easy to slice into clean bars before serving.

    Serve them cold straight from the refrigerator or warm them slightly and add a generous scoop of vanilla ice cream or a dollop of whipped cream for the most satisfying gluten free spring dessert.

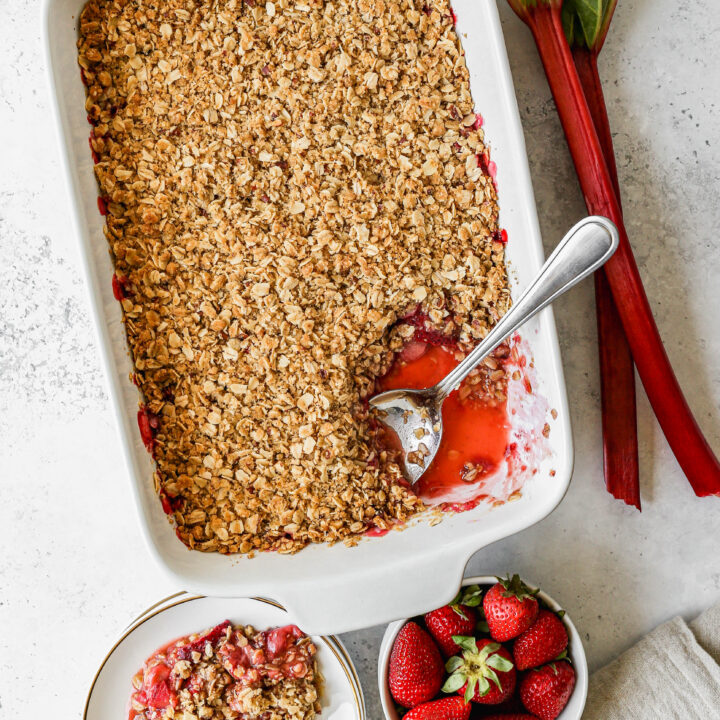
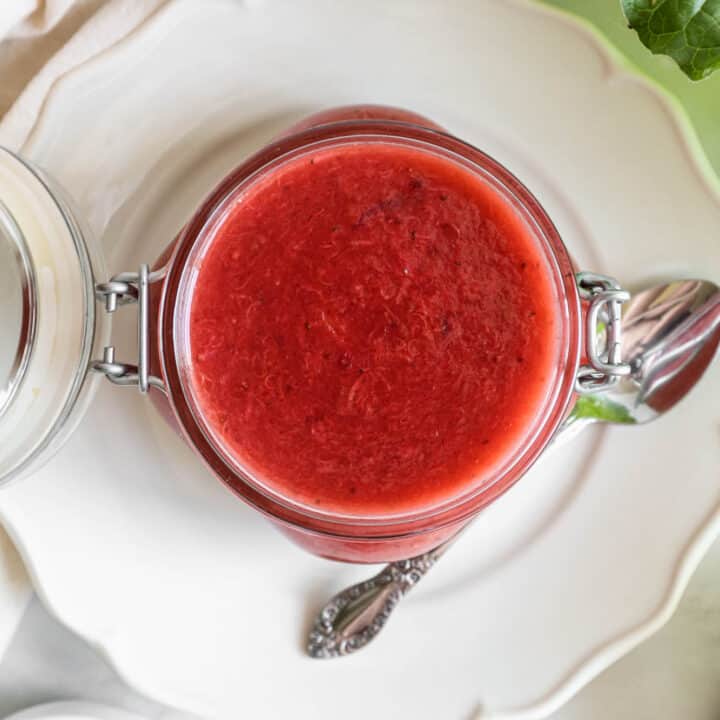
    If you are looking for more rhubarb recipes try my Gluten Free Strawberry Rhubarb Muffins with Almond Streusel, my Gluten Free Strawberry Rhubarb Crumble, my Gluten Free Strawberry Rhubarb Sauce or my Instant Pot Rhubarb Simple Syrup.

    You can find all my dessert recipes here: Gluten Free Dessert Recipes

    a blue plate with one gluten free strawberry rhubarb bar on it
    [feast_advanced_jump_to]

    Ingredients

    Gluten Free Flour
    Unsalted Butter
    Coconut Oil
    Vanilla Extract
    Granulated Sugar
    Brown Sugar
    Sea Salt
    Strawberries
    Rhubarb
    Lemon Juice
    Arrowroot Powder or Cornstarch
    Sliced Almonds

    Instructions

    Preheat your oven to 375 degrees.

    Grease a 9x13 baking dish with butter or coconut oil. Set aside.

    In a large bowl mix together the strawberries, rhubarb, lemon juice, sugar and arrowroot powder. Set aside and stir occasionally while you make the crust.

    In the bowl of your stand mixer blend together gluten free flour, butter, coconut oil, vanilla, granulated sugar, brown sugar and salt until a crumbly mixture forms. 

    Reserve 1 cup of the crumbly mixture in a dish for the topping.

    Press the rest of the crumbly mixture into the greased 9x13 baking dish using your hand, the bottom of a measure cup or a glass. Bake at 375 degrees for 15-18 minutes until lightly browned.

    Let the crust cool for 10 minutes.

    Stir the fruit mixture and then pour over top of the crust. Sprinkle the crumbly mixture over the fruit mixture. Sprinkle the slivered almonds over top.

    Bake at 375 degrees for 30-35 minutes. The crust will be browned and the fruit mixture will be bubbly around the edges when it's done.

    Remove from the oven and let cool before slicing into bars.

    I like to serve with vanilla ice cream or whipped cream.

    Supplies

    More Recipes You Might Enjoy

    • Gluten Free Strawberry Rhubarb Muffins with Almond Streusel
    • Gluten Free Strawberry Rhubarb Crumble
    • Gluten Free Strawberry Rhubarb Sauce
    • Instant Pot Rhubarb Simple Syrup

    I get a lot of my ingredients from Thrive Market. Thrive Market has been a game changer for me eating gluten free. They have so many options I can't get at my rural grocery stores! Use this link to get 40% off your first order!

    Print
    clock clock iconcutlery cutlery iconflag flag iconfolder folder iconinstagram instagram iconpinterest pinterest iconfacebook facebook iconprint print iconsquares squares iconheart heart iconheart solid heart solid icon

    Gluten Free Strawberry Rhubarb Bars


    5 Stars 4 Stars 3 Stars 2 Stars 1 Star

    No reviews

    • Author: Elaine VanVleck
    • Total Time: 1 hour 5 minutes
    • Yield: 12 bars 1x
    • Diet: Gluten Free
    Print Recipe
    Pin Recipe

    Description

    These easy gluten free strawberry rhubarb bars have the most incredible buttery shortbread crust that doubles as a golden crumb topping! A sweet and tart strawberry rhubarb filling made with fresh lemon juice bubbles between the golden layers and sliced almonds add the perfect crunch. Completely gluten free, perfect for making ahead, and absolutely delicious served with vanilla ice cream or whipped cream!


    Ingredients

    Scale
    • 2 cups Gluten Free Flour
    • ½ cup Unsalted Butter
    • ¼ cup Coconut Oil, melted
    • ½ tsp. Vanilla Extract
    • ½ cup Granulated Sugar
    • ½ cup Brown Sugar
    • ½ tsp. Sea Salt
    • 1 ½ cups Strawberries, hulled and diced
    • 1 ½ cups Rhubarb, diced
    • 1 Tbsp. Lemon Juice
    • ⅓ cup Granulated Sugar
    • 1 Tbsp. Arrowroot Powder or Cornstarch
    • ¼ cup Sliced Almonds

    Instructions

    Preheat your oven to 375 degrees.

    Grease a 9x13 baking dish with butter or coconut oil. Set aside.

    In a large bowl mix together the strawberries, rhubarb, lemon juice, sugar and arrowroot powder. Set aside and stir occasionally while you make the crust.

    In the bowl of your stand mixer blend together gluten free flour, butter, coconut oil, vanilla, granulated sugar, brown sugar and salt until a crumbly mixture forms. 

    Reserve 1 cup of the crumbly mixture in a dish for the topping.

    Press the rest of the crumbly mixture into the greased 9x13 baking dish using your hand, the bottom of a measure cup or a glass. Bake at 375 degrees for 15-18 minutes until lightly browned.

    Let the crust cool for 10 minutes.

    Stir the fruit mixture and then pour over top of the crust. Sprinkle the crumbly mixture over the fruit mixture. Sprinkle the slivered almonds over top.

    Bake at 375 degrees for 30-35 minutes. The crust will be browned and the fruit mixture will be bubbly around the edges when it's done.

    Remove from the oven and let cool before slicing into bars.

    I like to serve with vanilla ice cream or whipped cream.

    Notes

    If you don't have slivered almonds you can use chopped pecans or walnuts. You can also omit the nuts completely. They are just there to add a bit of crunch to the bars.

    • Prep Time: 20 minutes
    • Cook Time: 45 minutes
    • Category: Dessert
    • Method: Baking
    • Cuisine: American

    Did you make this recipe?

    Tag @smallfarmbiglife on Instagram and hashtag it #smallfarmbiglife

    If you make these Gluten Free Strawberry Rhubarb Bars I would love to hear what you think! Leave a star rating and a comment below and let me know what you served them with.

    Don't forget to save this recipe to your Pinterest boards so you can find it again next rhubarb season!

    Storage

    Store these gluten free strawberry rhubarb bars covered tightly or in an airtight container in the refrigerator for up to 3 to 5 days. Because the fruit filling contains fresh strawberries and rhubarb the bars need to be refrigerated and should not be left out at room temperature for more than a couple of hours.

    I love storing individual bars in small glass containers in the fridge so they are ready to grab for a quick treat or to pop into a lunch box.

    Top Tip

    Make sure to let the pre baked shortbread crust cool for the full 10 minutes before adding the strawberry rhubarb filling. If you pour the fruit filling over a crust that is still very hot the bottom layer will get soggy and the bars will not hold their shape properly when sliced. The cooling time also allows the crust to firm up slightly so it creates a sturdy base that holds the juicy fruit filling beautifully during the second bake.

    While the crust is cooling give the fruit filling a good stir since the strawberries and rhubarb will have released some of their juices as they sat and you want everything evenly coated before spreading it over the crust.

    Frequently Asked Questions

    Can I make these gluten free strawberry rhubarb bars ahead of time?

    Yes and I actually recommend it! These bars are best made the day before you plan to serve them. Making them ahead gives the fruit filling time to set up completely in the refrigerator overnight which makes slicing into clean and beautiful bars so much easier. Simply bake the bars, let them cool completely at room temperature, then cover and refrigerate overnight. Slice into bars right before serving and add vanilla ice cream or whipped cream for the perfect finishing touch.

    Can I use frozen strawberries and rhubarb in this recipe?

    Yes! Frozen fruit works well in this recipe which means you can make these bars year round even after rhubarb season is over. Thaw the strawberries and rhubarb completely before using and drain off as much excess liquid as possible by patting them dry with paper towels. Too much extra moisture from frozen fruit can make the filling too runny and prevent the bars from setting up properly. Fresh fruit will always give you the best result but frozen is a great option when fresh is not available.

    Can I substitute a different nut for the sliced almonds?

    Absolutely! Chopped pecans or walnuts both work beautifully as a substitute for the sliced almonds on top of these bars. You can also leave the nuts out entirely if you need a nut free version. The bars will still be delicious without them but the sliced almonds do add a lovely crunch and a slightly toasty flavor that makes the topping feel more special and bakery worthy.

    How do I get clean cuts when slicing these bars?

    The key to clean and beautiful bar cuts is to make sure the bars are completely cooled and well chilled in the refrigerator before slicing. Warm or room temperature bars will fall apart when cut because the fruit filling is still too soft and runny. I like to refrigerate the bars for at least a few hours or ideally overnight before slicing. Use a sharp knife and wipe the blade clean between each cut for the neatest results.

    Can I make this recipe in a smaller pan?

    Yes! You can cut the recipe in half and bake it in an 8x8 or 9x9 square baking dish for a smaller batch. The bake times will be similar but keep an eye on the crust during the first bake and the bars during the second bake as they may finish a few minutes earlier in a smaller pan. This is a great option if you are baking for a smaller household or just want a smaller quantity of bars.

    Can I use cornstarch instead of arrowroot powder in the fruit filling?

    Yes! Cornstarch works perfectly as a substitute for arrowroot powder in this recipe and can be used in the exact same amount. Both arrowroot powder and cornstarch act as thickeners that help the strawberry rhubarb filling set up properly and hold together when the bars are sliced. Either one will give you a beautifully thick and jammy fruit filling.

    Gluten Free Chocolate Buttercream Frosting

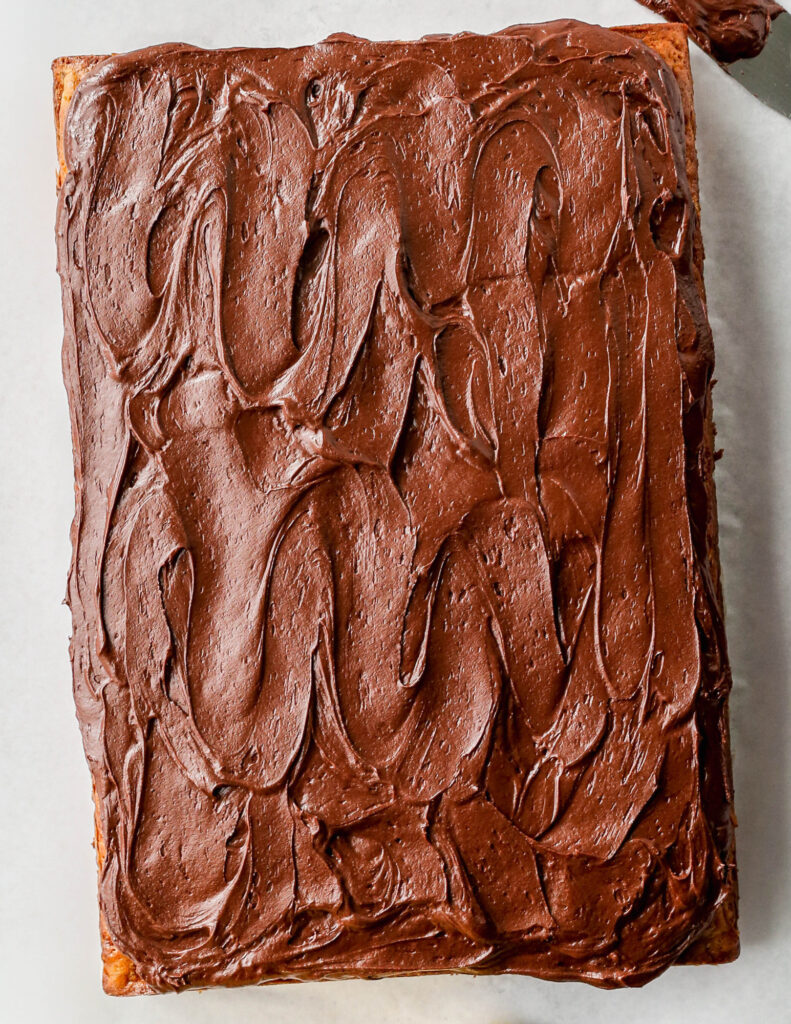
    This easy recipe for gluten free chocolate buttercream frosting is the best! It is homemade with powdered sugar and milk whipped together. The results is a simple frosting that is rich and fluffy. This frosting is super versatile. I use it for cakes, cupcakes and cake filling. It has a creamy texture and delicious chocolate flavor.

    If you are looking for more chocolate recipes try my Gluten Free Chocolate Pound Cake, my Gluten Free Double Chocolate Chip Cookies, my Gluten Free Double Chocolate Bundt Cake or my Gluten Free Triple Chocolate Brownies.

    You can find all of my cake recipes here: Gluten Free Cake Recipes

    [feast_advanced_jump_to]

    Ingredients

    Unsalted Butter
    Cocoa Powder
    Milk
    Vanilla Extract
    Powdered Sugar

    Instructions

    In the bowl of your stand mixer beat together the room temperature butter, sifted cocoa powder, milk and vanilla until well combined and without lumps.

    Add one cup of sifted powdered sugar at a time to the butter mixture. Mixing completely before adding the next cup of sifted powdered sugar. I like to use four cups, but you may want a thinner frosting to use for cake filling and would want to use less powdered sugar.

    Supplies

    Frequently Asked Questions

    Does buttercream frosting need to be refrigerated?

    Yes, if you are going to store the frosting for more than a day or two. I like to make my frosting the same day I'm going to use it because I think it's easier to work with on the same day.

    Once I use the frosting if the cake or cupcakes don't get eaten that day I store them in the refrigerator. I personally like the stiffer, cold frosting but most people take the dessert out of the fridge and bring the frosting back up to room temperature before serving.

    Does the type of cocoa powder matter for chocolate frosting?

    Yes! I think it gives you a much richer, deeper chocolate flavor if you use a good dutch processed baking cocoa. My favorite baking powder is Rodelle Gourmet Baking Cocoa.

    More Recipes You Might Enjoy

    • Pink Vanilla Buttercream Frosting
    • White Chocolate Buttercream Frosting
    • Easy Vanilla Buttercream Frosting
    • Gluten Free Chocolate Glaze

    I get my ingredients from Thrive Market. Thrive Market has been a game changer for me eating gluten free. They have so many options I can't get at my rural grocery stores! Use this link to get 25% off your first order!

    Print
    clock clock iconcutlery cutlery iconflag flag iconfolder folder iconinstagram instagram iconpinterest pinterest iconfacebook facebook iconprint print iconsquares squares iconheart heart iconheart solid heart solid icon

    Gluten Free Chocolate Buttercream Frosting


    5 Stars 4 Stars 3 Stars 2 Stars 1 Star

    No reviews

    • Author: Elaine VanVleck
    • Total Time: 15 minutes
    • Yield: 2 cups, approximately 1x
    • Diet: Gluten Free
    Print Recipe
    Pin Recipe

    Description

    This easy recipe for gluten free chocolate buttercream frosting is the best! It is homemade with powdered sugar and milk whipped together. The results is a simple frosting that is rich and fluffy.


    Ingredients

    Scale

    ½ cup Unsalted Butter, at room temperature
    ½ cup Cocoa Powder
    ⅓ cup Milk
    2 tsp. Vanilla Extract
    4 cups Powdered Sugar


    Instructions

    In the bowl of your stand mixer beat together the room temperature butter, sifted cocoa powder, milk and vanilla until well combined and without lumps.

    Add one cup of sifted powdered sugar at a time to the butter mixture. Mixing completely before adding the next cup of sifted powdered sugar. I like to use four cups, but you may want a thinner frosting to use for cake filling and would want to use less powdered sugar.

    Notes

    To sift your dry ingredients using a fine mesh strainer place ½ cup at a time in the strainer and then shake through. Whatever lumps are remaining gently break them up with a spoon through the strainer or toss them out.

    • Prep Time: 15 minutes
    • Category: Dessert
    • Method: Electric Mixer
    • Cuisine: Gluten Free

    Did you make this recipe?

    Tag @smallfarmbiglife on Instagram and hashtag it #smallfarmbiglife

    Top Tip

    For the milk I put it in a microwave safe container and microwave for 10 seconds. You don't want the milk to be hot. If you overheat, then add a bit more milk to bring it to room temp and measure what you need from the microwave safe bowl.

    Gluten Free Pineapple Upside Down Cake

    This recipe for gluten free pineapple upside down cake is really easy to make from scratch. This homemade cake uses canned pineapple and is made with no cherries. The yellow cake is moist and tastes like the old fashioned cake I loved before going gluten free.  

    a gluten free pineapple upside down cake on a yellow glass plate next to a ripe pineapple and a glass of pineapple juice

    I love this cake all year round, but it's always perfect for spring. It's perfect for an easy dessert after a meal. You can make this cake a day ahead and have it ready to serve at a gathering.

    The cake is really thick and dense. The batter for the cake is also very thick. I spoon it onto the butter, brown sugar, and pineapples and spread around with a spatula or the back of a spoon. It will spread and fill in around the pineapple as it bakes.

    You can find all of my cake recipes here: Gluten Free Cake Recipes

    a gluten free pineapple upside down cake on a yellow glass plate next to a ripe pineapple and a glass of pineapple juice
    [feast_advanced_jump_to]

    Ingredients

    • Unsalted Butter
    • Brown Sugar
    • Pineapple Slices
    • Gluten Free Flour
    • Baking Powder
    • Baking Soda
    • Sea Salt
    • Palm Shortening
    • Granulated Sugar
    • Egg
    • Vanilla Extract
    • Milk

    Instructions

    Preheat your oven to 350 degrees.

    In an 8x8 baking dish place the butter. Put the dish in the oven to melt the butter. Once the butter is melted carefully remove the dish from the oven. Spread the brown sugar over the butter. Then place the pineapple slices over that. You may need to break apart some of the rings to fill the bottom of the baking dish.

    In your stand mixer beat the palm shortening and sugar for 3-4 minutes until combined. Add the egg, vanilla and milk. Beat until combined. The mixture will be wet and lumpy. 

    Add the gluten free flour, baking powder, baking soda and salt to the wet ingredients. Mix until blended together. The batter will be thick and a little lumpy. 

    Spoon the batter over the pineapples in the baking dish. Spread the batter with a spatula or the back of a spoon. The batter is dense and will spread around the pineapple as it bakes.

    Bake at 350 degrees for 30 minutes or until golden brown.

    Let the cake cool for 10 minutes and then turn it onto a plate or serving platter.

    Supplies

    Frequently Asked Questions

    Can pineapple upside down cake be make ahead of time?

    Yes! I like to make this cake the day before I want to serve it. It takes one more thing off the to-do list on the day of a gathering and I think this cake is tastier the second day.

    Can you leave pineapple upside down cake out?

    Yes. This cake does not need to be refrigerated if it's going to be eaten in a day or two. If you have leftovers for longer than that I would suggest placing them in an air tight container and storing them in the refrigerator so the cake doesn't get dried out.

    More Recipes You Might Enjoy

    Gluten Free Angel Food Cake
    Gluten Free Coconut Cake
    Easy Gluten Free White Cake
    Gluten Free Double Chocolate Bundt Cake
    Gluten Free Pumpkin Oatmeal Cake

    I get most of my ingredients from Thrive Market. Thrive Market has been a game changer for me eating gluten free. They have so many options I can't get at my rural grocery stores! Use this link to get 25% off your first order!

    Print
    clock clock iconcutlery cutlery iconflag flag iconfolder folder iconinstagram instagram iconpinterest pinterest iconfacebook facebook iconprint print iconsquares squares iconheart heart iconheart solid heart solid icon

    Gluten Free Pineapple Upside Down Cake


    5 Stars 4 Stars 3 Stars 2 Stars 1 Star

    No reviews

    • Author: Elaine VanVleck
    • Total Time: 50 minutes
    • Yield: 9 slices 1x
    • Diet: Gluten Free
    Print Recipe
    Pin Recipe

    Description

    This recipe for gluten free pineapple upside down cake is really easy to make from scratch. This homemade cake uses canned pineapple and is made with no cherries. The yellow cake is moist and tastes like the old fashioned cake I loved before going gluten free.


    Ingredients

    Scale

    3 Tbsp. Unsalted Butter
    ½ cup Brown Sugar
    8-9 Pineapple Slices, drained
    1 ½ cups Gluten Free Flour
    2 tsp. Baking Powder
    1 tsp. Baking Soda
    ½ tsp. Sea Salt
    ⅓ cup Palm Shortening
    ½ cup Granulated Sugar
    1 large Egg
    1 tsp. Vanilla Extract
    ⅔ cup Milk


    Instructions

    Preheat your oven to 350 degrees.

    In an 8x8 baking dish place the butter. Put the dish in the oven to melt the butter. Once the butter is melted carefully remove the dish from the oven. Spread the brown sugar over the butter. Then place the pineapple slices over that. You may need to break apart some of the rings to fill the bottom of the baking dish.

    In your stand mixer beat the palm shortening and sugar for 3-4 minutes until combined. Add the egg, vanilla and milk. Beat until combined. The mixture will be wet and lumpy. 

    Add the gluten free flour, baking powder, baking soda and salt to the wet ingredients. Mix until blended together. The batter will be thick and a little lumpy. 

    Spoon the batter over the pineapples in the baking dish. Spread the batter with a spatula or the back of a spoon. The batter is dense and will spread around the pineapple as it bakes.

    Bake at 350 degrees for 30 minutes or until golden brown.

    Let the cake cool for 10 minutes and then turn it onto a plate or serving platter.

    Notes

    I like to make this cake the day before a gathering. I think it's even tastier the second day.

    • Prep Time: 20 minutes
    • Cook Time: 30 minutes
    • Category: Cake
    • Method: Baking
    • Cuisine: Gluten Free
    Did you make this recipe?

    Tag @smallfarmbiglife on Instagram and hashtag it #smallfarmbiglife

    • « Go to Previous Page
    • Page 1
    • Interim pages omitted …
    • Page 11
    • Page 12
    • Page 13
    • Page 14
    • Page 15
    • Interim pages omitted …
    • Page 17
    • Go to Next Page »

    Primary Sidebar

    Welcome! I'm Elaine

    I'm so glad you are here! I share easy gluten free recipes from my small farm in Washington.

    Be sure to sign up for my newsletter to stay up to date on all of my new recipes.

    More about me...
    • Instagram
    • Pinterest
    • Facebook
    • Twitter
    • Mail

    Load up on new recipes, exclusive goodies, + more!
    Sign up below to stay up-to-date on news, events, and special deals.
    Thank you for subscribing!

    Easy Meals Recipes

    • Gluten Free Instant Pot Chili Mac and Cheese
    • Gluten Free Taco Casserole
    • Gluten Free Cowboy Baked Beans
    • Gluten Free Walking Taco Casserole
    • Gluten Free Creamy Beef and Mushroom Pasta
    • Gluten Free Instant Pot Chicken & Dumplings
    • Instant Pot Mexican Style Beef and Rice
    • Gluten Free Chicken Parmesan Pasta Casserole
    • Gluten Free One Pot Hamburger Helper Copycat
    • Gluten Free Salisbury Steak with Mushroom Gravy
    • Gluten Free Air Fryer Fajitas
    • Gluten Free Sloppy Joe Casserole

    Footer

    Disclaimer:

    “We are a participant in the Amazon Services LLC Associates Program, an affiliate advertising program designed to provide a means for us to earn fees by linking to Amazon.com and affiliated sites.”

    Footer

    back to top

    About

    • Privacy Policy
    • Shop my Amazon Page
    • Follow me on LTK

    Newsletter

    • Sign Up! for emails and updates

    Contact

    • Contact
    • Media Kit
    • About Me

    As an Amazon Associate I earn from qualifying purchases.

    I may get commissions for purchases made through links on this site.

    Copyright © 2026 Brunch Pro on the Brunch Pro Theme