Small Farm Big Life

  • Gluten Free Recipe Index
  • Subscribe
  • Resources
menu icon
go to homepage
  • Home
  • Gluten Free Recipe Index
  • Subscribe
  • My Story
  • Resources
  • Free Guides
    • Email
    • Facebook
    • Instagram
    • Pinterest
  • subscribe
    search icon
    Homepage link
    • Home
    • Gluten Free Recipe Index
    • Subscribe
    • My Story
    • Resources
    • Free Guides
    • Email
    • Facebook
    • Instagram
    • Pinterest
  • ×

    Gluten Free Banana Cream Pie

    Most gluten free banana cream pie recipes reach for a box of instant pudding and a tub of Cool Whip, and while that gets the job done, it isn't really banana cream pie. This recipe skips the shortcuts entirely and builds a true stovetop custard from eggs, whole milk, and vanilla, cooked low and slow until it's thick and silky.

    Tempering the eggs is the one step that makes or breaks this method, and once you understand why it matters, you will never look at a box of instant pudding the same way again.
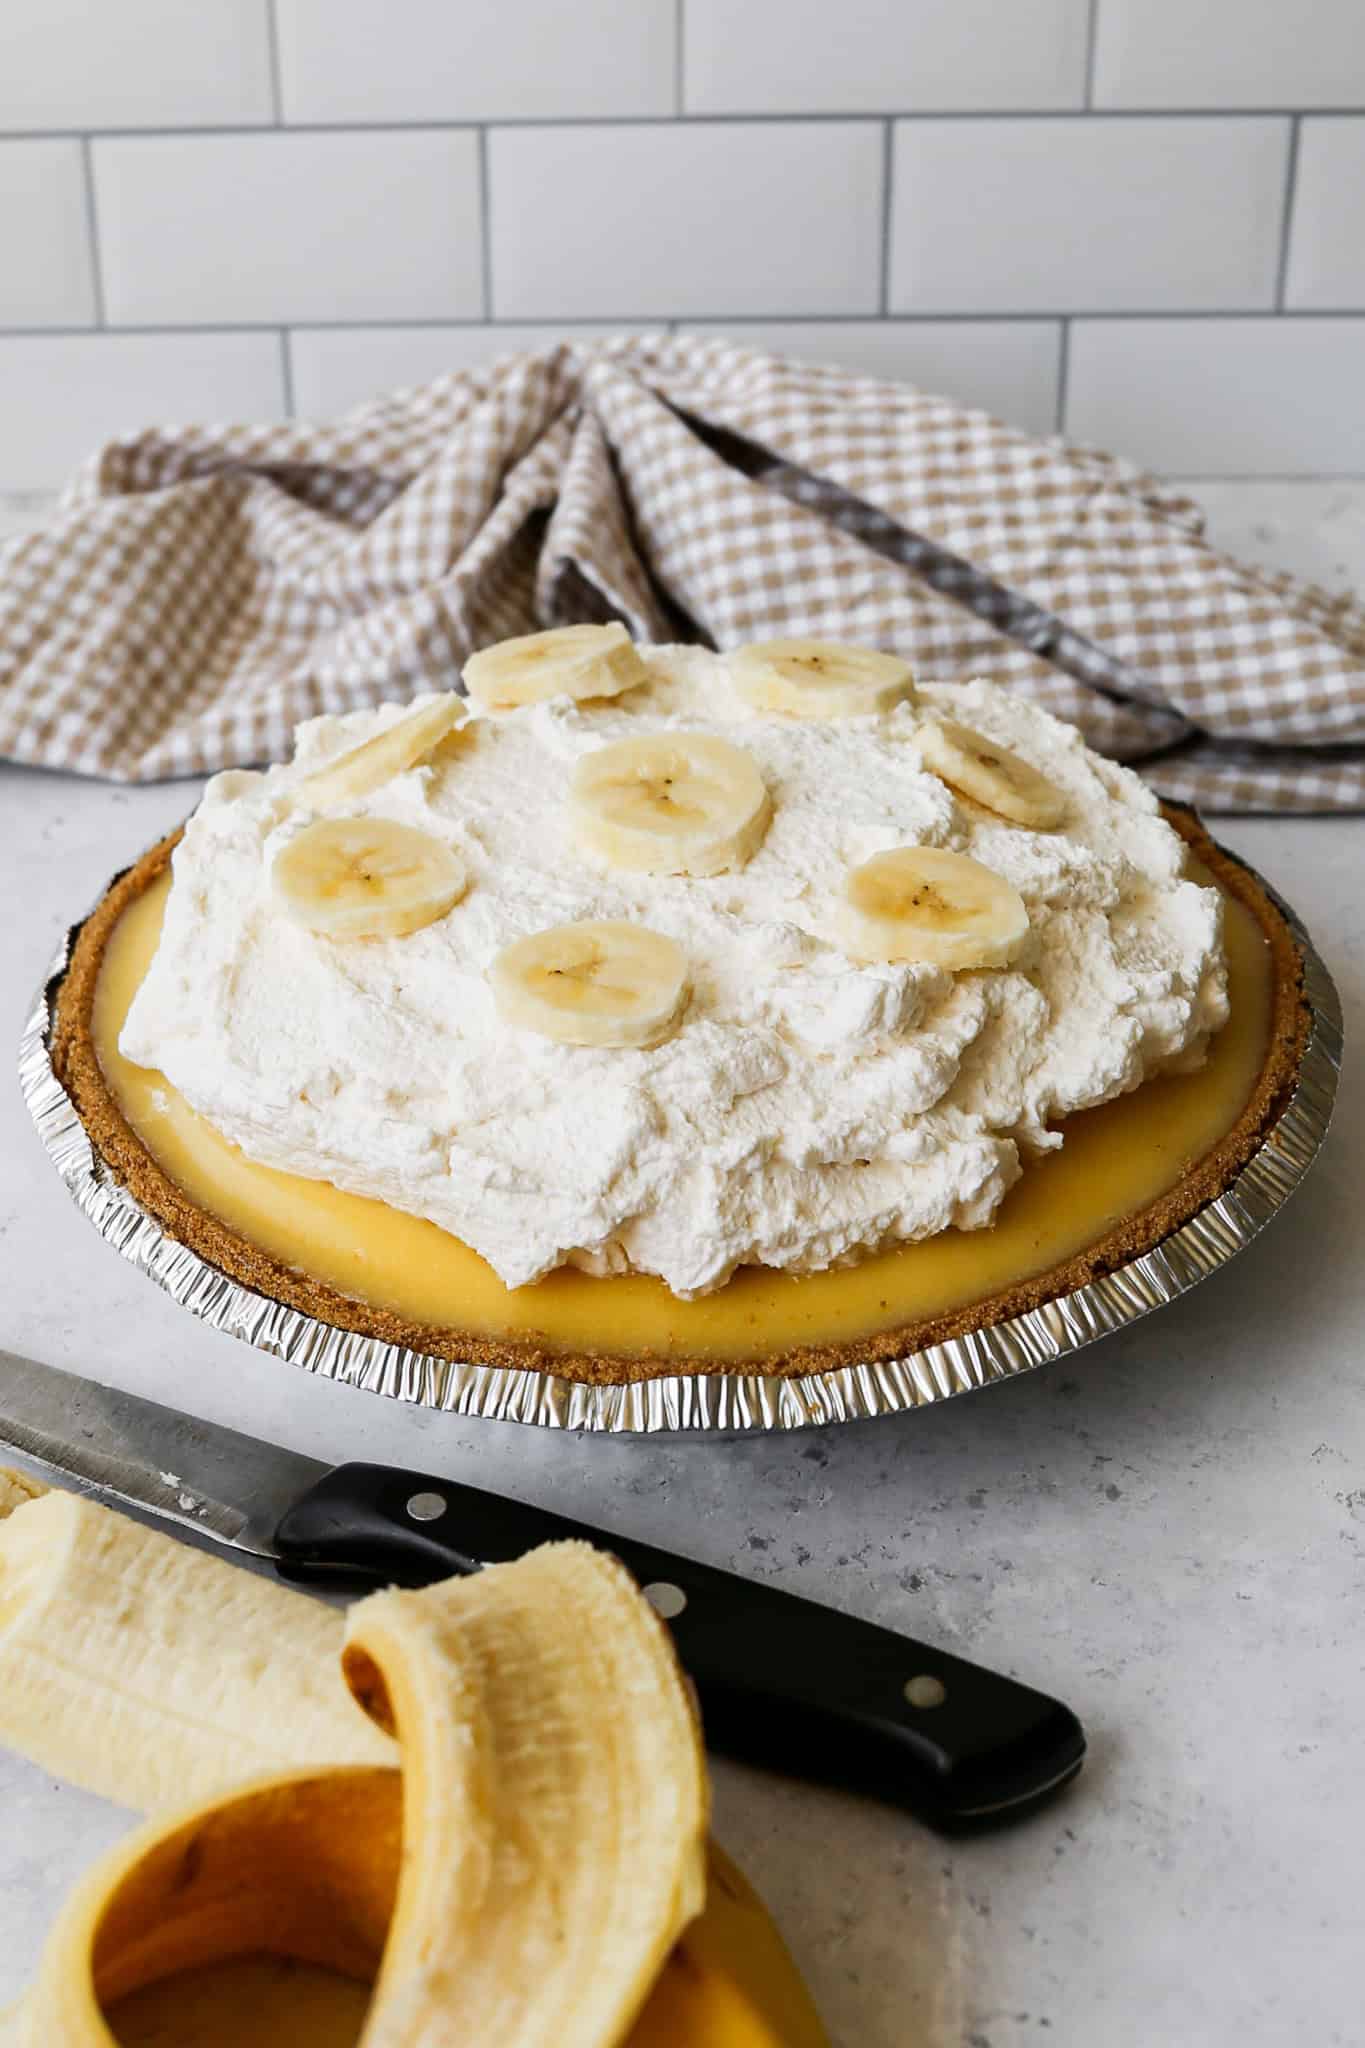
    a gluten free banana cream pie in a silver pie pan next to a banana, a knife and a tan gingham kitchen towel

    Layered over fresh banana slices in a gluten free graham crust and finished with real homemade whipped cream, this pie tastes like something from a bakery case, not something assembled from a few packages.

    It takes a little more patience than the shortcut version, about 15 minutes of active cooking plus a few hours to chill, but the texture and flavor are worth every extra minute.

    Make it the day before you need it and let it set up completely in the fridge overnight for the best slice.

    If you are looking for more gluten free banana recipes try my Gluten Free Banana Cake, my Gluten Free Banana Bread Muffins, my Gluten Free Chocolate Chip Banana Muffins or my Homemade Strawberry Banana Popsicles.

    You can find all my dessert recipes here: Gluten Free Desserts
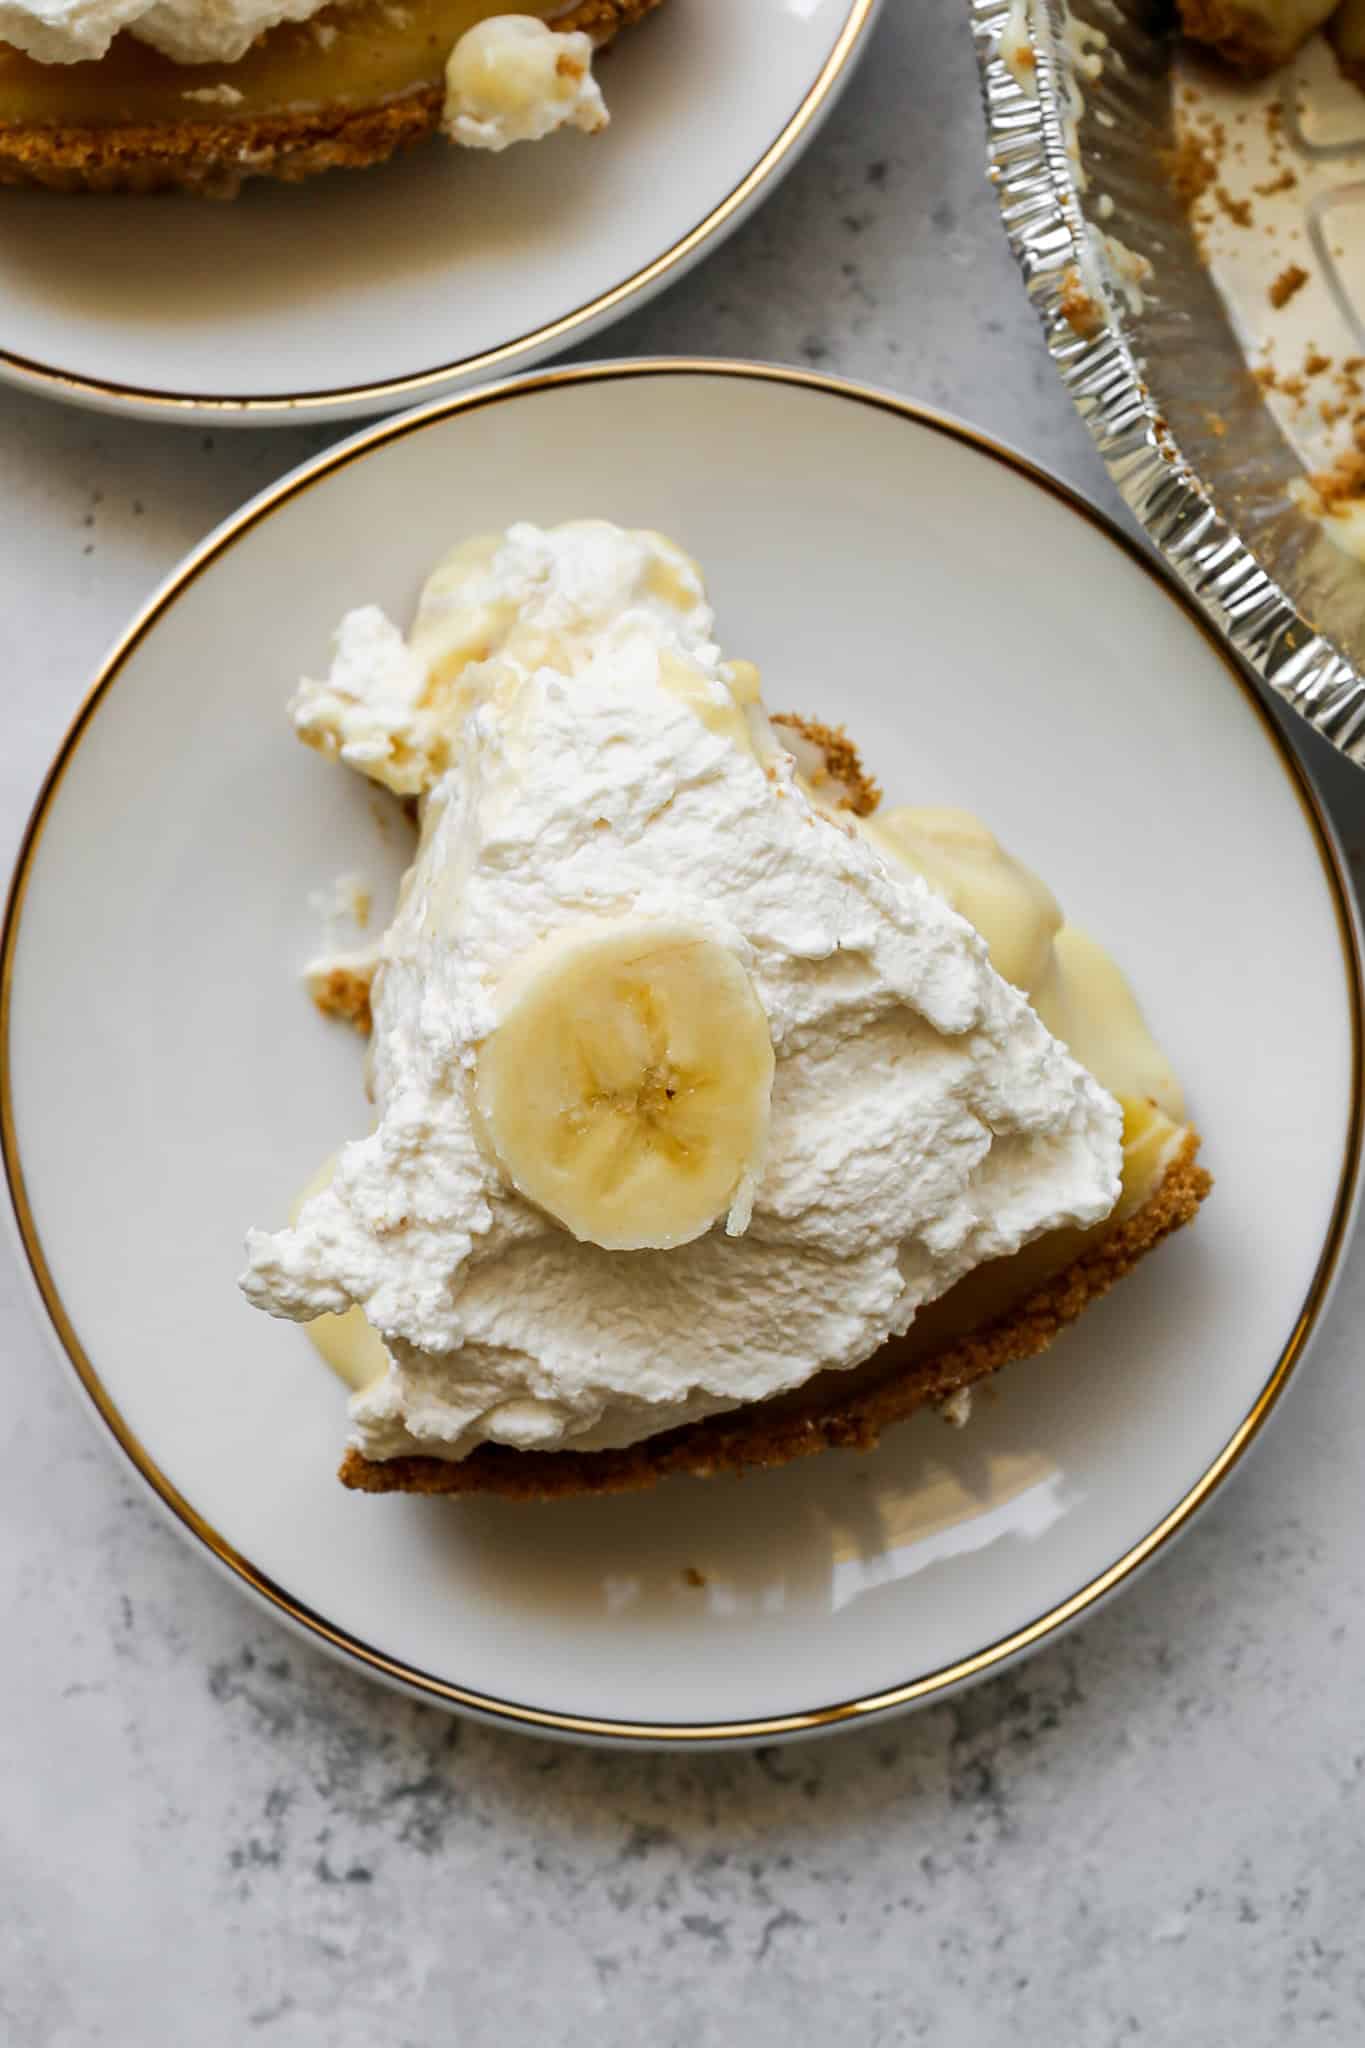
    a slice of gluten free banana cream pie on a white plate with a gold trim
    [feast_advanced_jump_to]

    Why a Real Custard Beats Instant Pudding

    Most gluten free banana cream pie recipes lean on instant pudding mix because it's fast and foolproof, but it also means giving up a lot of flavor and texture. A stovetop custard made with real eggs, whole milk, and vanilla has a richness and silkiness that powdered pudding mix simply can't match.

    It takes a little more attention on the stove, but the payoff is a pie that tastes like it came from a real bakery instead of a box.

    Understanding the Tempering Step

    Tempering is the part of this recipe that trips people up, but it's simpler than it sounds. The goal is to slowly raise the temperature of the eggs before they hit direct heat, so they thicken smoothly instead of scrambling.

    Pouring about a cup of the hot milk mixture into the eggs first, while whisking constantly, does exactly that. Once the eggs are warmed through, they can go back into the saucepan with the rest of the mixture without any risk of curdling.

    Keeping the Bananas Fresh Looking

    Because this pie needs a few hours to chill before serving, banana browning is a real concern. Choosing bananas that are ripe but still firm, rather than very soft and spotted, goes a long way toward preventing mushiness.

    Slicing the bananas right before you layer them into the crust, instead of prepping them ahead of time, also helps keep them looking fresh by the time the pie is ready to slice.

    Top Tip

    Don't skip the tempering step or rush through it. Pouring the hot milk mixture into the eggs too quickly, or all at once, is what causes scrambled bits in your custard. Add it slowly in a thin stream while whisking constantly, and your custard will come out perfectly smooth every time.

    Supplies

    Storage Instructions

    This pie needs to be refrigerated since it contains both eggs and dairy, and shouldn't sit at room temperature for more than an hour or two. Store it covered in the refrigerator for up to 3 days. For the best texture and the cleanest slices, make the pie the day before serving so the custard has a full night to set up completely.

    Frequently Asked Questions

    Can I use instant pudding instead of making the custard from scratch?

    You can, but the texture and flavor will be noticeably different. The from scratch custard in this recipe has a richer, silkier texture and real vanilla flavor that instant pudding doesn't replicate, which is exactly why this method is worth the extra few minutes.

    Why do I need to temper the eggs?

    Pouring hot liquid directly into eggs can cook them too quickly and turn your custard into scrambled eggs. Slowly whisking in a small amount of the hot mixture first raises the temperature of the eggs gradually, so they blend smoothly into the custard instead of curdling.

    How do I keep the bananas from browning?

    Use bananas that are ripe but still firm, and slice them right before assembling the pie rather than ahead of time. Layering them directly under the custard also helps protect them from air exposure while the pie chills.

    Are all of the ingredients in this recipe gluten free?

    The custard ingredients themselves are naturally gluten free, but as with any recipe, it's worth double checking your specific brands of cornstarch and powdered sugar, since anticaking agents can occasionally vary by manufacturer.

    Didn't find the answer you're looking for?

    Ask AI to answer based on this recipe:

    ChatGPT
    Google AI
    Perplexity
    Grok
    Claude

    More Recipes You Might Enjoy

    • Gluten Free No Bake S'mores Pie
    • Gluten Free No Bake Lemon Icebox Pie
    • Gluten Free Praline Pumpkin Pie
    • Gluten Free No Bake Key Lime Pie

    I get a lot of my ingredients from Thrive Market. Thrive Market has been a game changer for me eating gluten free. They have so many options I can't get at my rural grocery stores! Use this link to get 40% off your first order!
    Print
    clock clock iconcutlery cutlery iconflag flag iconfolder folder iconinstagram instagram iconpinterest pinterest iconfacebook facebook iconprint print iconsquares squares iconheart heart iconheart solid heart solid icon

    Gluten Free Banana Cream Pie


    5 Stars 4 Stars 3 Stars 2 Stars 1 Star

    No reviews

    • Author: Elaine VanVleck
    • Total Time: 3 hours 35 minutes
    • Yield: 8 servings 1x
    • Diet: Gluten Free
    Print Recipe
    Pin Recipe

    Description

    A classic banana cream pie made with a real stovetop egg custard instead of instant pudding, layered over fresh bananas in a gluten free graham crust and topped with homemade whipped cream.


    Ingredients

    Scale
    • 2 large Eggs, at room temperature
    • 2 large Egg Yolks, at room temperature
    • 1 cup Granulated Sugar
    • 6 Tbsp Cornstarch
    • ¼ tsp Salt
    • 2 cups Whole Milk
    • 1 Tbsp Vanilla Extract
    • ¼ cup Butter, cubed
    • 2-3 Bananas

    Whipped Cream:

    • 2 cups Heavy Whipping Cream
    • ¼ cup Powdered Sugar, sifted
    • 2 tsp Vanilla Extract

    Instructions

    In a heat proof bowl for glass measuring cup, whisk together the eggs and egg yolks. Set aside.

    In a 2.5 quart saucepan add the granulated sugar, cornstarch and salt. Whisk these ingredients together. Place the saucepan over medium heat and add the milk. Whisk to combine and get rid of any clumps that may form.

    Cook this mixture over medium heat 8-10 minutes whisking constantly until the mixture starts to bubble and thicken. (This mixture may get a bit of foam on top, that is not the bubbling. Continuing heating until the mixture bubbles.)

    Remove the saucepan from heat.

    Slowly pour about 1 cup of the hot mixture into your eggs while whisking to temper the eggs. (This step is very important and will keep the eggs from clumping)

    Slowly pour the tempered eggs mixture into your saucepan while whisking.

    Return the saucepan to medium heat and whisk constantly until the mixture bubbles again. Cook like this until the mixture thickens, about 6-8 minutes.

    Remove the saucepan from heat. Add the butter and vanilla extract and whisk until combined.

    Layer round slices for banana onto the bottom of your gluten free graham pie crust. Put the crust on a plate before filling so it's easy to move to your refrigerator.

    Pour the custard mixture over the bananas in your pie crust. Let it cool for 30 minutes on your counter. Then move the pie to your refrigerator to cool completely. Refrigerate for at least 3 hours before serving, but I prefer to make this pie the day before so it has plenty of time to chill and set up.

    Before serving the pie make your whipped cream. For homemade whipped cream add the heavy whipping cream, powdered sugar and vanilla extract to your stand mixer. Using the whisk attachment beat on medium-high speed until stiff peaks form.

    Spread the whipped cream over the top of the pie and this if you like add a few slices of banana for decoration.

    If you made this recipe please leave a star rating and comment below. It helps other readers find this recipe and means so much to me.

    • Prep Time: 3 hours, 15 minutes
    • Cook Time: 20 minutes
    • Category: Dessert, Pie
    • Method: Stove Top
    • Cuisine: American

    Did you make this recipe?

    Tag @smallfarmbiglife on Instagram and hashtag it #smallfarmbiglife

    Give this gluten free banana cream pie a try for your next holiday or family gathering, and let me know how it turns out in the comments below.

    Ingredients

    • Gluten Free Graham Pie Crust
    • Eggs
    • Granulated Sugar
    • Cornstarch
    • Salt
    • Whole Milk
    • Vanilla Extract
    • Butter
    • Bananas
    • Heavy Whipping Cream
    • Powdered Sugar

    Instructions

    In a heat proof bowl for glass measuring cup, whisk together the eggs and egg yolks. Set aside.

    In a 2.5 quart saucepan add the granulated sugar, cornstarch and salt. Whisk these ingredients together. Place the saucepan over medium heat and add the milk. Whisk to combine and get rid of any clumps that may form.

    Cook this mixture over medium heat 8-10 minutes whisking constantly until the mixture starts to bubble and thicken. (This mixture may get a bit of foam on top, that is not the bubbling. Continuing heating until the mixture bubbles.)

    Remove the saucepan from heat.

    Slowly pour about 1 cup of the hot mixture into your eggs while whisking to temper the eggs. (This step is very important and will keep the eggs from clumping)

    Slowly pour the tempered eggs mixture into your saucepan while whisking.

    Return the saucepan to medium heat and whisk constantly until the mixture bubbles again. Cook like this until the mixture thickens, about 6-8 minutes.

    Remove the saucepan from heat. Add the butter and vanilla extract and whisk until combined.

    Layer round slices for banana onto the bottom of your gluten free graham pie crust. Put the crust on a plate before filling so it's easy to move to your refrigerator.

    Pour the custard mixture over the bananas in your pie crust. Let it cool for 30 minutes on your counter. Then move the pie to your refrigerator to cool completely. Refrigerate for at least 3 hours before serving, but I prefer to make this pie the day before so it has plenty of time to chill and set up.

    Before serving the pie make your whipped cream. For homemade whipped cream add the heavy whipping cream, powdered sugar and vanilla extract to your stand mixer. Using the whisk attachment beat on medium-high speed until stiff peaks form.

    Spread the whipped cream over the top of the pie and this if you like add a few slices of banana for decoration.
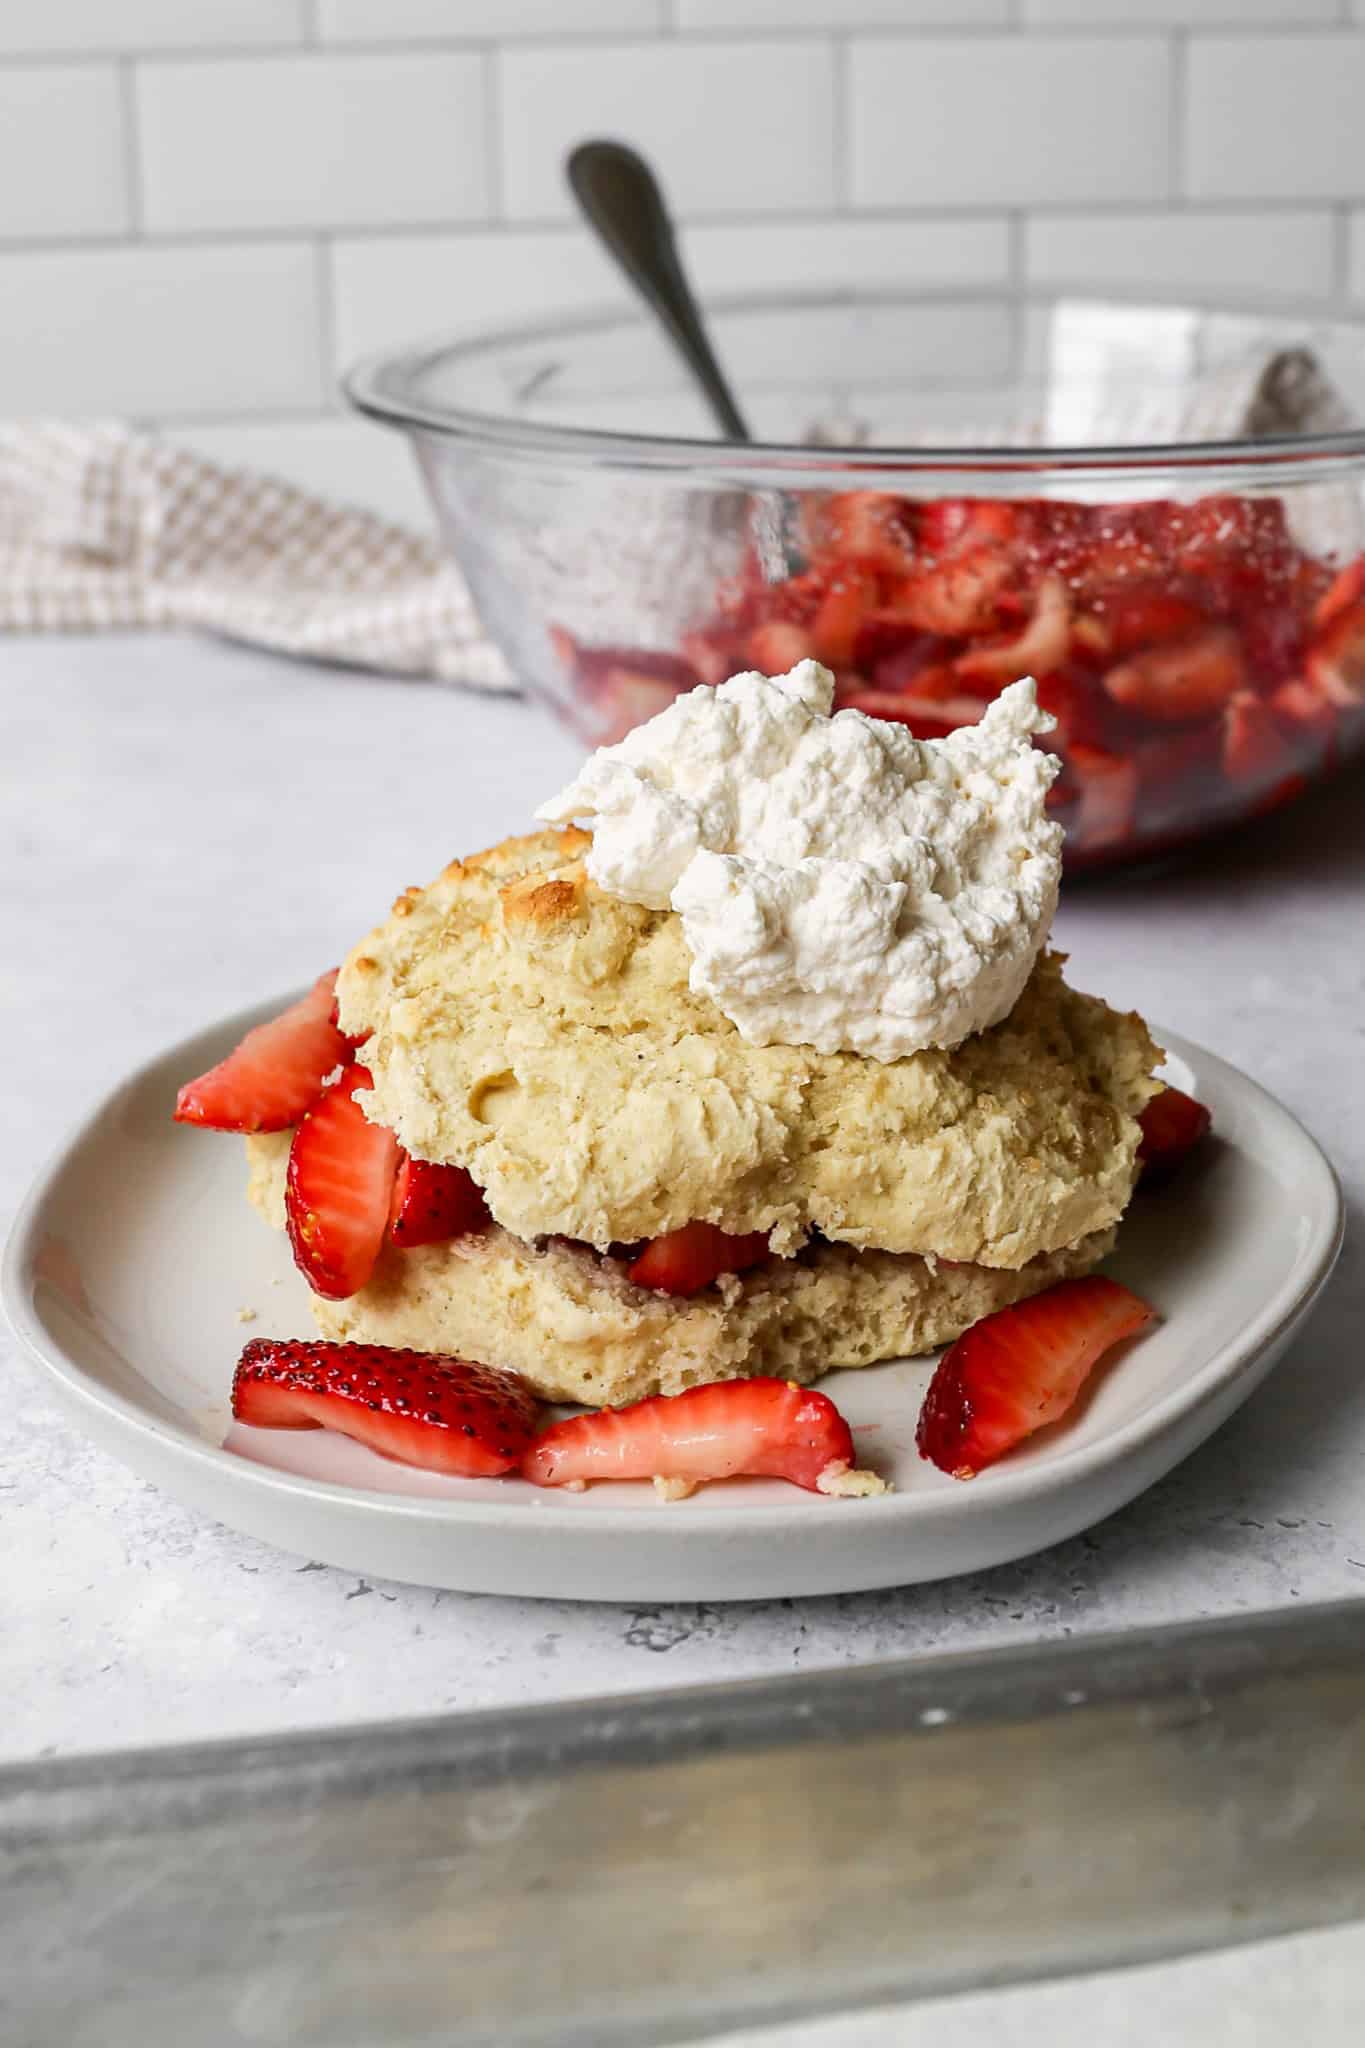
    Gluten Free Homemade Strawberry Shortcake

    Strawberry shortcake is one of those classic summer desserts that never goes out of style, and this gluten free homemade strawberry shortcake is every bit as good as the original. Fresh strawberries are macerated in sugar until they release a sweet, glossy syrup, then piled high on fluffy drop biscuits made from scratch and finished with a generous cloud of homemade whipped cream.

    Every bite is light, fresh, and absolutely worth the effort.

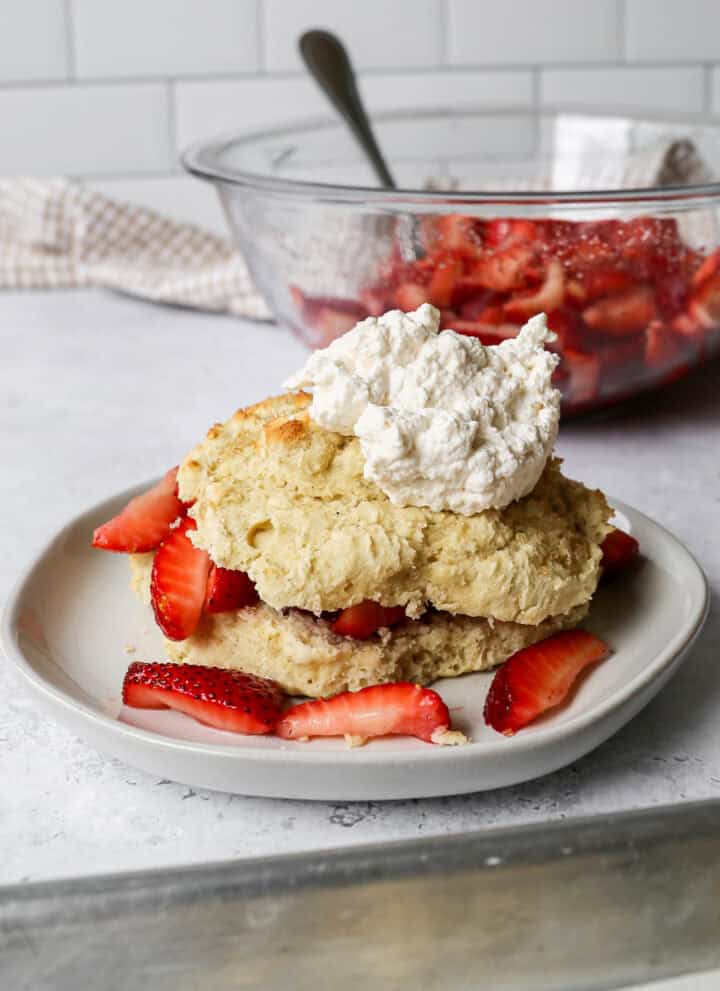
    a gluten free shortcake biscuit cut in half with sliced strawberries and homemade whipped cream on top in front of a clear glass bowl of sliced strawberries

    The biscuits in this recipe are the real star. Made with buttermilk and eggs and topped with a sprinkle of turbinado sugar before baking, they come out with a lightly crisp top, a tender crumb, and just enough sweetness to complement the fruit.

    Whether you are serving this at a summer cookout, a Fourth of July gathering, or just because strawberries are at peak season, this easy gluten free strawberry shortcake is guaranteed to impress everyone at the table.

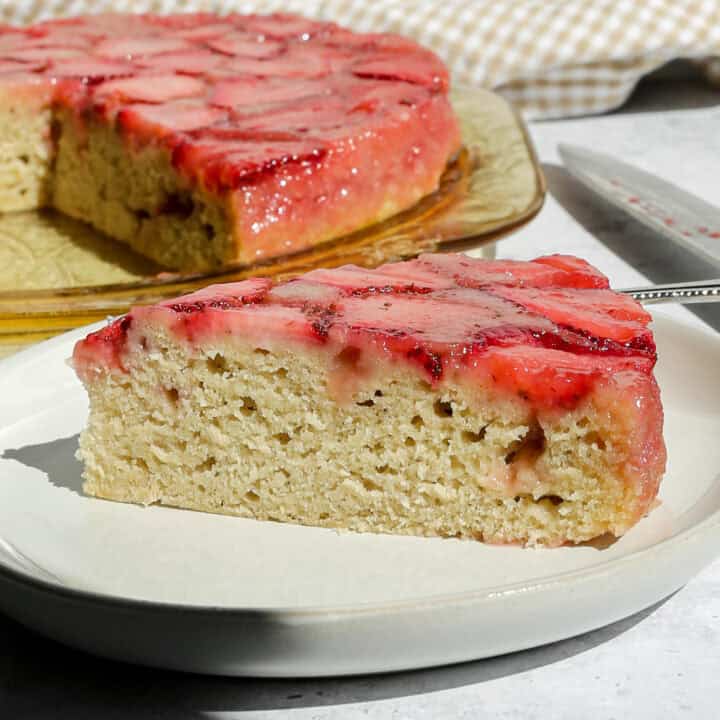
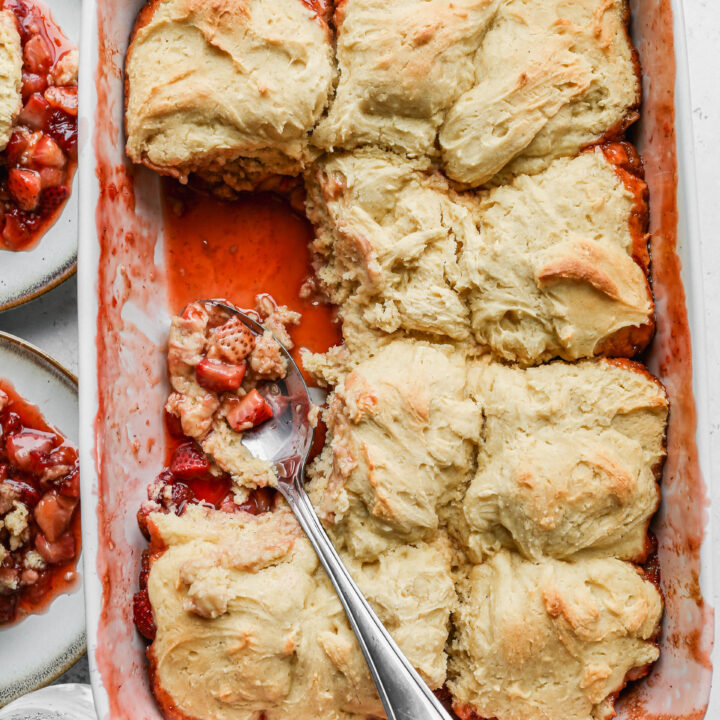
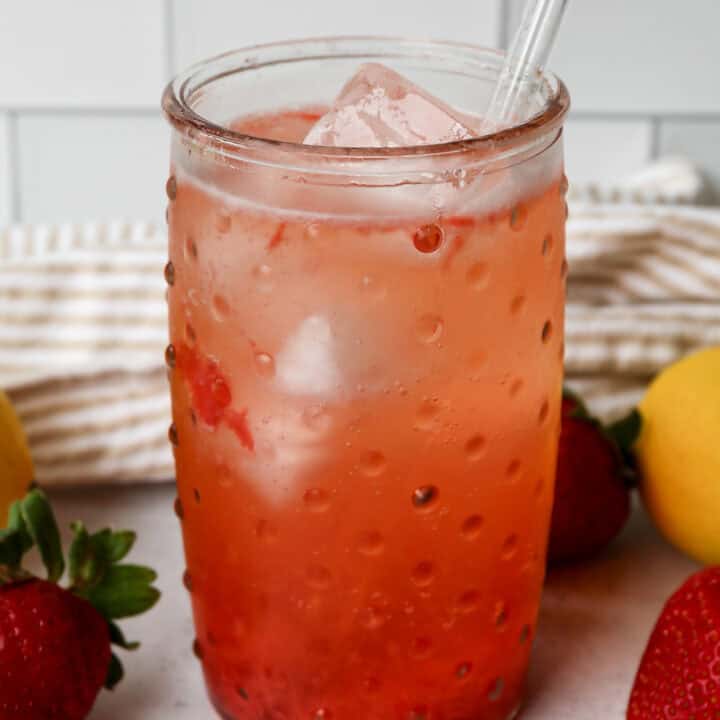
    If you are looking for more gluten free strawberry recipes try my Gluten Free Strawberry Muffins, my Gluten Free Strawberry Upside Down Cake, my Gluten Free Strawberry Cobbler or my 3 Ingredient Strawberry Lemonade Mocktail.

    You can find all of my dessert recipes here: Gluten Free Dessert Recipes

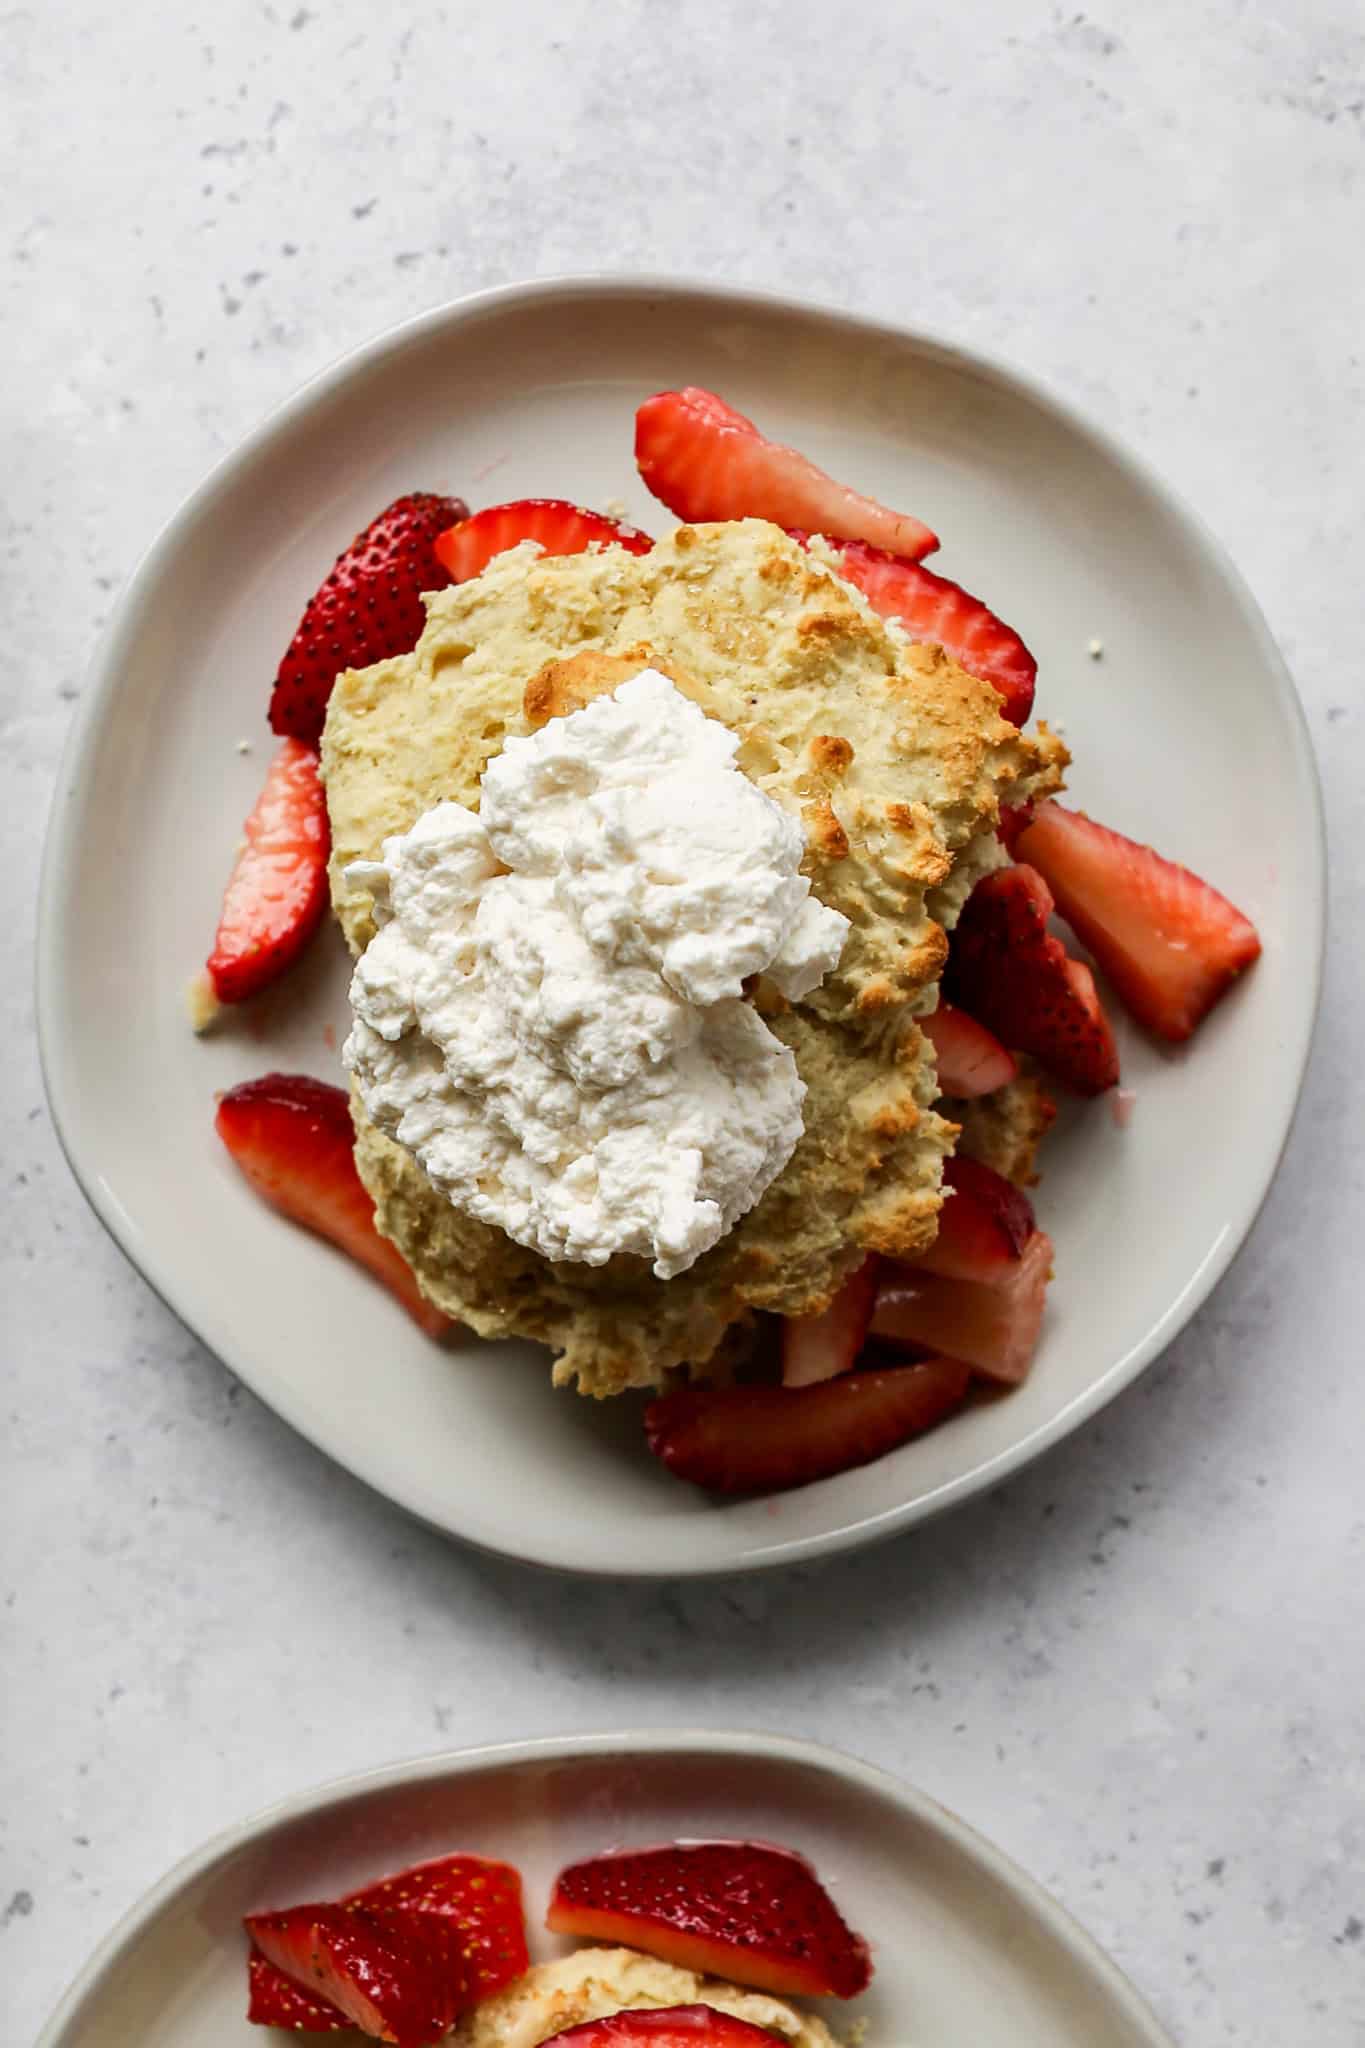
    an off white plate with a gluten free shortcake biscuit cut in half with sliced strawberries on the inside and homemade whipped cream on top
    [feast_advanced_jump_to]

    Ingredients

    • Fresh Strawberries
    • Granulated Sugar
    • Heavy Cream
    • Powdered Sugar
    • Vanilla Extract
    • Gluten Free Flour
    • Baking Powder
    • Salt
    • Baking Soda
    • Buttermilk
    • Eggs
    • Turbinado Sugar Crystals

    Instructions

    In a large mixing bowl, stir together the sliced and hulled strawberries and the sugar. Cover and set in the refrigerator until you're ready to use them.

    Preheat your oven to 375 degrees. Line a baking sheet with parchment paper and set aside.

    In the bowl of your stand mixer add the gluten free flour, granulated sugar, baking powder, salt, baking soda, buttermilk and eggs. Beat together until all ingredients are incorporated. The dough will be slightly lumpy.

    Using a spatula or tablespoon drop even portions of the dough onto the baking sheet leaving room for the biscuits to spread and rise. I make 7-8 generous sized biscuits with this recipe. Sprinkle the biscuits with the turbinado sugar crystals.

    Bake the biscuits at 375 degrees for 15 minutes. The biscuits will be firm and lightly browned on the bottom when done.

    While the biscuits are baking make the whipped cream. In the bowl of your stand mixer add the heavy cream, sifted powdered sugar and vanilla. Using the whisk attachment beat on medium-high for about 3-4 minutes until soft peaks form.

    Slice the cooled biscuits in half and place in bowls or on plates. Add the strawberries and whipped cream on top and serve immediately.

    Supplies


    More Recipes You Might Enjoy

    • Gluten Free Strawberry Muffins
    • Gluten Free Strawberry Upside Down Cake
    • Gluten Free Strawberry Cobbler
    • 3 Ingredient Strawberry Lemonade Mocktail

    I get a lot of my ingredients from Thrive Market. Thrive Market has been a game changer for me eating gluten free. They have so many options I can't get at my rural grocery stores! Use this link to get 40% off your first order!

    Print
    clock clock iconcutlery cutlery iconflag flag iconfolder folder iconinstagram instagram iconpinterest pinterest iconfacebook facebook iconprint print iconsquares squares iconheart heart iconheart solid heart solid icon

    Gluten Free Homemade Strawberry Shortcake


    5 Stars 4 Stars 3 Stars 2 Stars 1 Star

    No reviews

    • Author: Elaine VanVleck
    • Total Time: 40 minutes
    • Yield: 8 servings 1x
    • Diet: Gluten Free
    Print Recipe
    Pin Recipe

    Description

    Fresh strawberries macerated in sugar, fluffy gluten free drop biscuits made from scratch, and homemade whipped cream come together in this classic summer dessert. Simple to make and stunning to serve, this gluten free strawberry shortcake is the perfect way to celebrate strawberry season.


    Ingredients

    Scale

    Strawberries

    • 2 pounds Fresh Strawberries, cored and quartered
    • ¼ cup Granulated Sugar

    Whipped Cream

    • 1 cup Heavy Cream
    • 2 Tbsp Powdered Sugar, sifted
    • 1 tsp Vanilla Extract

    Biscuits

    • 2 ½ cups Gluten Free Flour
    • ¼ cup Granulated Sugar
    • 3 tsp Baking Powder
    • 1 tsp Salt
    • ½ tsp Baking Soda
    • 1 ½ cups Buttermilk
    • 2 large Eggs
    • 2 Tbsp Turbinado Sugar Crystals, for topping biscuits

    Instructions

    In a large mixing bowl, stir together the sliced and hulled strawberries and the sugar. Cover and set in the refrigerator until you're ready to use them.

    Preheat your oven to 375 degrees. Line a baking sheet with parchment paper and set aside.

    In the bowl of your stand mixer add the gluten free flour, granulated sugar, baking powder, salt, baking soda, buttermilk and eggs. Beat together until all ingredients are incorporated. The dough will be slightly lumpy.

    Using a spatula or tablespoon drop even portions of the dough onto the baking sheet leaving room for the biscuits to spread and rise. I make 7-8 generous sized biscuits with this recipe. Sprinkle the biscuits with the turbinado sugar crystals.

    Bake the biscuits at 375 degrees for 15 minutes. The biscuits will be firm and lightly browned on the bottom when done.

    While the biscuits are baking make the whipped cream. In the bowl of your stand mixer add the heavy cream, sifted powdered sugar and vanilla. Using the whisk attachment beat on medium-high for about 3-4 minutes until soft peaks form.

    Slice the cooled biscuits in half and place in bowls or on plates. Add the strawberries and whipped cream on top and serve immediately.

    If you made this recipe please leave a star rating and comment below. It helps other readers find this recipe and means so much to me.

    Notes

    If you can't find liquid buttermilk, I like to use this powdered buttermilk. Follow the direction on the package for how much water to add. It keeps in your refrigerator for quite a while to use in other recipes later.

    • Prep Time: 25 minutes
    • Cook Time: 15 minutes
    • Category: Dessert
    • Method: Baking
    • Cuisine: American

    Did you make this recipe?

    Tag @smallfarmbiglife on Instagram and hashtag it #smallfarmbiglife

    If you make this gluten free homemade strawberry shortcake, I would love to hear how it turned out! Leave a comment below and let me know, or tag me on Instagram so I can see your creation. This is one of those recipes you will want to make all summer long, so save it to your favorite Pinterest board so you can find it again when strawberry season is in full swing.

    Storage

    Store the components separately for best results. Biscuits can be kept in an airtight container at room temperature for up to two days. The macerated strawberries should be refrigerated and used within two days. Whipped cream is best made fresh but can be stored in the refrigerator for up to 24 hours. Assemble just before serving.

    Top Tip

    For the juiciest strawberries, macerate them at least 30 minutes before serving. The longer they sit with the sugar, the more syrup they release, which soaks into the biscuit and makes every bite even better.

    Didn't find the answer you're looking for?

    Ask AI to answer based on this recipe:

    ChatGPT
    Google AI
    Perplexity
    Grok
    Claude

    Frequently Asked Questions

    Can I make this strawberry shortcake ahead of time?

    Yes, but assemble it just before serving. You can macerate the strawberries and bake the biscuits a day ahead. Store the biscuits at room temperature in an airtight container and keep the strawberries refrigerated. Make the whipped cream fresh right before you are ready to serve.

    Can I use frozen strawberries instead of fresh?

    Fresh strawberries are strongly recommended for this recipe. Frozen strawberries release too much liquid as they thaw and can make the biscuits soggy. If fresh strawberries are out of season, this is a great recipe to save for when they are at peak ripeness.

    What gluten free flour works best for the biscuits?

    Bob's Red Mill 1 to 1 Gluten Free Baking Flour and King Arthur Measure for Measure Gluten Free Flour both work beautifully in this recipe and are the two flours recommended on this site.

    Can I use store bought whipped cream instead of homemade?

    You can, but homemade whipped cream makes a big difference here. It takes just a few minutes to whip up and the flavor and texture are so much better than anything from a can. If you are short on time, it is still worth making the whipped cream from scratch.

    Gluten Free Slow Cooker Berry Cobbler

    This Slow Cooker Berry Cobbler is a warm, cozy dessert that couldn't be easier to make. Whether you call it slow cooker mixed berry cobbler, triple berry cobbler, or a classic crockpot berry cobbler, this recipe delivers sweet, bubbling fruit with a soft, tender topping every time.

    It's a super easy berry cobbler recipe that's perfect when you want a comforting slow cooker dessert without turning on the oven.

    a plate with gluten free slow cooker berry cobbler and a fork on it

    Perfect for busy days and casual gatherings, this gluten free berry cobbler is a reliable crowd pleaser. Made as a gluten free crockpot dessert recipe, it works beautifully as a slow cooker fruit dessert you can prep ahead and serve warm.

    If you're wondering how to make berry cobbler in the crockpot, this favorite dessert recipe proves that simple, homemade desserts can be just as satisfying as bakery style treats.

    If you are looking for more berry dessert recipes try my Gluten Free Blueberry Coffee Cake, my Gluten Free Strawberry Cobbler, my Gluten Free Cranberry Apple Crisp or my Gluten Free Strawberry Jam Bars.

    You can find all my dessert recipes here: Gluten Free Dessert Recipes

    a plate of gluten free slow cooker berry cobbler sitting in front of a white crockpot
    [feast_advanced_jump_to]

    Ingredients

    • Frozen Mixed Berries
    • Blueberry Pie Filling
    • Granulated Sugar
    • Gluten Free Flour
    • Baking Powder
    • Salt
    • Buttermilk
    • Eggs
    • Vanilla Extract

    Instructions

    Add the frozen mixed berries, blueberry pie filling and sugar to the bowl of your slow cooker. Stir to combine. Cook on low heat for 2 hours until the mixture is bubbling.

    Turn the slow cooker to high heat.

    In a large mixing bowl stir together the gluten free flour, baking powder, salt, sugar, buttermilk, eggs and vanilla extract to make the topping.

    Spoon the topping mixture over the berry mixture.

    Cook in the slow cooker on high for 1 hour or until a toothpick inserted in the center of the topping comes out clean.

    Serve warm on its own or with vanilla ice cream.

    Supplies


    More Recipes You Might Enjoy

    • Gluten Free Strawberry Cobbler
    • Gluten Free Canned Peach Cobbler
    • Gluten Free Blackberry Cobbler
    • Gluten Free Apple Crisp

    I get a lot of my ingredients from Thrive Market. Thrive Market has been a game changer for me eating gluten free. They have so many options I can't get at my rural grocery stores! Use this link to get 40% off your first order!

    Print
    clock clock iconcutlery cutlery iconflag flag iconfolder folder iconinstagram instagram iconpinterest pinterest iconfacebook facebook iconprint print iconsquares squares iconheart heart iconheart solid heart solid icon

    Gluten Free Slow Cooker Berry Cobbler


    5 Stars 4 Stars 3 Stars 2 Stars 1 Star

    No reviews

    • Author: Elaine VanVleck
    • Total Time: 3 hours 15 minutes
    • Yield: 6 servings 1x
    • Diet: Gluten Free
    Print Recipe
    Pin Recipe

    Description

    This Slow Cooker Berry Cobbler is a warm, cozy dessert that couldn't be easier to make. Whether you call it slow cooker mixed berry cobbler, triple berry cobbler, or a classic crockpot berry cobbler, this recipe delivers sweet, bubbling fruit with a soft, tender topping every time. 


    Ingredients

    Scale
    • 12 ounce bag Frozen Mixed Berries
    • 21 ounce can Blueberry Pie Filling
    • 2 Tbsp Granulated Sugar

    Buttermilk Topping:

    • 2 ½ cups Gluten Free Flour
    • 3 tsp Baking Powder
    • 1 tsp Salt
    • 1 cup Granulated Sugar
    • 1 cup Buttermilk
    • 2 large Eggs
    • 1 tsp Vanilla Extract

    Instructions

    Add the frozen mixed berries, blueberry pie filling and sugar to the bowl of your slow cooker. Stir to combine. Cook on low heat for 2 hours until the mixture is bubbling.

    Turn the slow cooker to high heat.

    In a large mixing bowl stir together the gluten free flour, baking powder, salt, sugar, buttermilk, eggs and vanilla extract to make the topping.

    Spoon the topping mixture over the berry mixture.

    Cook in the slow cooker on high for 1 hour or until a toothpick inserted in the center of the topping comes out clean.

    Serve warm on its own or with vanilla ice cream.

    • Prep Time: 15 minutes
    • Cook Time: 3 hours
    • Category: Dessert
    • Method: Slow Cooker, Crockpot
    • Cuisine: Gluten Free

    Did you make this recipe?

    Tag @smallfarmbiglife on Instagram and hashtag it #smallfarmbiglife

    Top Tip

    If you can't get canned blueberry pie filling you could also use canned cherry pie filling. It is important that it's the pie filling and not just the fruit canned. The pie filling is thick and is what gives thickness to this berry cobbler's filling.

    Didn't find the answer you're looking for?

    Ask AI to answer based on this recipe:

    ChatGPT
    Google AI
    Perplexity
    Grok
    Claude

    Frequently Asked Questions

    Can you make berry cobbler in the slow cooker?

    Yes! Slow cooker berry cobbler is an easy, hands off way to make a warm fruit dessert with minimal prep and no oven required.

    Can I use frozen berries for crockpot berry cobbler?

    Absolutely. Frozen berries works great and makes this dessert even more convenient, with no need to thaw the fruit first.

    Gluten Free Blueberry Coffee Cake

    This Gluten Free Blueberry Coffee Cake is an easy, homemade recipe that works just as well for breakfast as it does for dessert. With juicy blueberries throughout and a soft, moist crumb, it's the kind of blueberry breakfast cake that feels special without being complicated.

    Whether you're serving it for brunch, a casual morning treat, or an afternoon coffee break, this easy blueberry coffee cake delivers classic comfort in every slice.

    This recipe is designed with beginner bakers in mind. This gluten free blueberry coffee cake recipe comes together simply and bakes up beautifully every time. It's a reliable gluten free breakfast cake that doubles as a fruity dessert option, making it perfect for entertaining or everyday baking.

    Moist, delicious, and full of blueberry flavor, this coffee cake is one of those easy recipes you'll come back to again and again.

    If you are looking for more blueberry recipes try my Gluten Free Blueberry Oat Muffins, my Gluten Free Oven Baked Pancakes with Blueberry Sauce or my Homemade Blueberry Lemonade made with Frozen Blueberries.

    You can find all of my cake recipes here: Gluten Free Cake Recipes

    a gluten free blueberry coffee cake on a dark blue plate with glaze drizzled on it in front of a white bowl of glaze
    [feast_advanced_jump_to]

    Ingredients

    • Gluten Free Flour
    • Baking Powder
    • Salt
    • Butter
    • Avocado Oil or Vegetable Oil
    • Granulated Sugar
    • Eggs
    • Vanilla Extract
    • Milk
    • Fresh Blueberries or Frozen Blueberries
    • Powdered Sugar

    Instructions

    Preheat your oven to 350 degrees. Grease a 9" cake pan or 9"x9" baking pan with butter or coconut oil and set aside.

    In the bowl of your stand mixer add the softened butter, vegetable oil and sugar. Blend until combined. Add the eggs, vanilla and milk. Blend until combined.

    In a mixing bowl whisk together the gluten free flour, baking powder and salt. Add these dry ingredients to the wet ingredients in your stand mixer. Blend just until combined.

    Remove the bowl from your stand mixer and add the blueberries. Using a spatula stir the blueberries into the cake batter.

    Pour the cake batter into your grease 9" cake pan or 9"x9" baking pan and spread evenly.

    Bake at 350 degrees for 30-35 minutes. The top of the cake will be browned and when you insert a toothpick it will come out clean when the cake is done.

    Let cool for 15 minutes before removing from the cake onto a plate.

    After the cake has cooled in a small bowl whisk together the sifted powdered sugar and milk. Drizzle the glaze over your cake and serve.

    Supplies


    More Recipes You Might Enjoy

    • Gluten Free Cinnamon Coffee Cake
    • Gluten Free Sock It To Me Cake
    • Gluten Free Cream Cheese Pound Cake
    • Gluten Free Cherry Almond Cake

    I get a lot of my ingredients from Thrive Market. Thrive Market has been a game changer for me eating gluten free. They have so many options I can't get at my rural grocery stores! Use this link to get 40% off your first order!

    Print
    clock clock iconcutlery cutlery iconflag flag iconfolder folder iconinstagram instagram iconpinterest pinterest iconfacebook facebook iconprint print iconsquares squares iconheart heart iconheart solid heart solid icon

    Gluten Free Blueberry Coffee Cake


    5 Stars 4 Stars 3 Stars 2 Stars 1 Star

    No reviews

    • Author: Elaine VanVleck
    • Total Time: 45 minutes
    • Yield: 8 servings 1x
    • Diet: Gluten Free
    Print Recipe
    Pin Recipe

    Description

    This Gluten Free Blueberry Coffee Cake is an easy, homemade recipe that works just as well for breakfast as it does for dessert. With juicy blueberries throughout and a soft, moist crumb, it's the kind of blueberry breakfast cake that feels special without being complicated. 


    Ingredients

    Scale
    • 2 cups Gluten Free Flour
    • 2 tsp Baking Powder
    • 1 tsp Salt
    • ½ cup Butter, softened
    • ¼ cup Avocado Oil or Vegetable Oil
    • 1 cup Granulated Sugar
    • 2 large Eggs
    • 1 tsp Vanilla Extract
    • ¼ cup Milk
    • 2 cups Fresh Blueberries or Frozen Blueberries (do not defrost)

    Glaze:

    • 1 cup Powdered Sugar
    • 1-2 tablespoon Milk

    Instructions

    Preheat your oven to 350 degrees. Grease a 9" cake pan or 9"x9" baking pan with butter or coconut oil and set aside.

    In the bowl of your stand mixer add the softened butter, vegetable oil and sugar. Blend until combined. Add the eggs, vanilla and milk. Blend until combined.

    In a mixing bowl whisk together the gluten free flour, baking powder and salt. Add these dry ingredients to the wet ingredients in your stand mixer. Blend just until combined.

    Remove the bowl from your stand mixer and add the blueberries. Using a spatula stir the blueberries into the cake batter.

    Pour the cake batter into your grease 9" cake pan or 9"x9" baking pan and spread evenly.

    Bake at 350 degrees for 30-35 minutes. The top of the cake will be browned and when you insert a toothpick it will come out clean when the cake is done.

    Let cool for 15 minutes before removing from the cake onto a plate.

    After the cake has cooled in a small bowl whisk together the sifted powdered sugar and milk. Drizzle the glaze over your cake and serve.

    • Prep Time: 15 minutes
    • Cook Time: 30 minutes
    • Category: Cake, Dessert
    • Method: Baking
    • Cuisine: Gluten Free

    Did you make this recipe?

    Tag @smallfarmbiglife on Instagram and hashtag it #smallfarmbiglife

    Top Tip

    You can use fresh or frozen blueberries for this recipe. If you are going to use frozen blueberries do not defrost them. Stir them into the cake batter frozen. This may lead to the cake needing to bake a few extra minutes.

    Didn't find the answer you're looking for?

    Ask AI to answer based on this recipe:

    ChatGPT
    Google AI
    Perplexity
    Grok
    Claude

    Frequently Asked Questions

    Can I make this gluten free blueberry coffee cake ahead of time?

    Yes! This gluten free blueberry coffee cake can be made a day in advance and stored tightly covered at room temperature or in the refrigerator. The cake stays moist and the blueberry flavor actually develops even more overnight, making it perfect for breakfast, brunch, or entertaining.

    How do I store and freeze gluten free blueberry coffee cake?

    Store leftover coffee cake in an airtight container at room temperature for up to 2 days or in the refrigerator for up to 5 days. To freeze, wrap individual slices tightly and freeze for up to 3 months. When you are ready to eat the cake thaw at room temperature or gently warm before serving for the best texture.

    Gluten Free Frog Eye Salad

    This Gluten Free Frog Eye Salad is an easy fruit salad that's been loved for generations, and for good reason. Inspired by an old fashioned, vintage recipe, this classic dessert salad is creamy, sweet, and incredibly delicious! It's the best dessert salad for gatherings and holidays.

    It's a true Frog Eye Salad Recipe Original style treat that feels nostalgic while still being simple to make.

    a big cream bowl of gluten free frog eye salad sitting next to two smaller white bowls of the dessert salad

    Perfect as a potluck dessert, holiday salad, or easy no bake dessert, this gluten free version comes together quickly and always disappears fast. The creamy texture and fluffy finish make it a standout fluff dessert and sweet pasta salad.

    It can double as an easy side dish recipe. Whether you're serving it for a celebration or a casual get together, this easy Frog Eye Salad is a family favorite and a guaranteed crowd pleaser.

    If you are looking for more recipes like this one you might also like my Cranberry Fluff Salad, my Seven Layer Salad, my Easy Pea Salad or my Gluten Free Million Dollar Cake.

    You can find all of my desserts here: Gluten Free Dessert Recipes

    a small white bowl of gluten free frog eye salad sitting on a cream colored scallop edge plate next to a large cream colored bowl of the dessert salad
    [feast_advanced_jump_to]

    Ingredients

    • Gluten Free Stelline Pasta
    • Pineapple Juice (use from canned pineapple)
    • Granulated Sugar
    • Eggs
    • Cornstarch
    • Salt
    • Lemon Juice
    • Mandarin Oranges
    • Pineapple Tidbits
    • Crushed Pineapple
    • Whipped Cream (purchase or make your own with my recipe below)
    • Mini Marshmallows
    • Optional To Make Whipped Cream: Heavy Whipping Cream, Powdered Sugar, Vanilla Extract

    Instructions

    In a large bowl add the drained mandarin oranges and drained pineapple. *Be sure to save the pineapple juice! You will need it for the custard.

    If you are going to make your own whipped cream add 1 cup heavy whipping cream, 4 tablespoons of sifted powdered sugar and 1 teaspoon of vanilla extract to the bowl of your stand mixer. Using the whisk attachment whisk the mixture until stiff peaks form. I do this step while I'm making the sauce.

    In a 2-quart saucepan over medium heat combine the pineapple juice, sugar, salt and the cornstarch mixed with 4 tablespoons of pineapple juice. Adding the cornstarch dry may cause lumps in your custard. Let the mixture heat up and then before it simmers add the beaten eggs very slowly while whisking. Let the mixture simmer until it thickens. This usually takes 8-10 minutes. Remove from heat and add the lemon juice. The mixture will thicken more as it cools.

    In a large pot bring 4 cups of water to a boil. Add the gluten free stelline pasta and boil while stirring often for 8 minutes. Drain the pasta and rinse it with cold water. Once the pasta is cooled add it to the pineapple and mandarin mixture and stir.

    Add either the whipped cream you made or store bought whipped cream to the pineapple and mandarin mixture and fold in. This means using your spoon roll the mixture in from the sides over top of itself moving in circles as you turn the bowl.

    Add the cooled custard mixture to the bowl and fold in.

    If you want this to truly be the classic recipe you would add one cup of coconut flakes at this point, but I hate the texture and always omit them.

    Refrigerate the dessert salad for at least 8 hours.

    Before serving stir in the miniature marshmallows.

    Supplies


    More Recipes You Might Enjoy

    • Cranberry Fluff Salad
    • Gluten Free Million Dollar Cake
    • Easy Pea Salad
    • Seven Layer Salad

    I get a lot of my ingredients from Thrive Market. Thrive Market has been a game changer for me eating gluten free. They have so many options I can't get at my rural grocery stores! Use this link to get 40% off your first order!

    Print
    clock clock iconcutlery cutlery iconflag flag iconfolder folder iconinstagram instagram iconpinterest pinterest iconfacebook facebook iconprint print iconsquares squares iconheart heart iconheart solid heart solid icon

    Gluten Free Frog Eye Salad


    5 Stars 4 Stars 3 Stars 2 Stars 1 Star

    No reviews

    • Author: Elaine VanVleck
    • Total Time: 35 minutes
    • Yield: 12 servings 1x
    • Diet: Gluten Free
    Print Recipe
    Pin Recipe

    Description

    This Gluten Free Frog Eye Salad is an easy fruit salad that's been loved for generations, and for good reason. Inspired by an old fashioned, vintage recipe, this classic dessert salad is creamy, sweet, and incredibly delicious! It's the best dessert salad for gatherings and holidays. 


    Ingredients

    Units Scale
    • 1 - 12 ounce box Jovial Gluten Free Stelline Pasta, cooked
    • 1 ¾ cup Pineapple Juice, reserved from cans
    • 1 cup Granulated Sugar
    • 2 large Eggs, beaten
    • 2 Tbsp Cornstarch, mixed with 4 tablespoon pineapple juice
    • ½ tsp Salt
    • 1 Tbsp Lemon Juice
    • 3 - 15 ounce cans Mandarin Oranges, drained
    • 2 - 20 ounce cans Pineapple Tidbits, drained & save the juice
    • 1 - 20 ounce can Crushed Pineapple, drained & save the juice
    • 2 cups Whipped Cream
    • 2 cups Mini Marshmallows

    Homemade Whipped Cream:

    • 1 cup Heavy Whipping Cream
    • 4 Tbsp Powdered Sugar, sifted
    • 1 tsp Vanilla Extract

    Instructions

    In a large bowl add the drained mandarin oranges and drained pineapple. *Be sure to save the pineapple juice! You will need it for the custard.

    If you are going to make your own whipped cream add 1 cup heavy whipping cream, 4 tablespoons of sifted powdered sugar and 1 teaspoon of vanilla extract to the bowl of your stand mixer. Using the whisk attachment whisk the mixture until stiff peaks form. I do this step while I'm making the sauce.

    In a 2-quart saucepan over medium heat combine the pineapple juice, sugar, salt and the cornstarch mixed with 4 tablespoons of pineapple juice. Adding the cornstarch dry may cause lumps in your custard. Let the mixture heat up and then before it simmers add the beaten eggs very slowly while whisking. Let the mixture simmer until it thickens. This usually takes 8-10 minutes. Remove from heat and add the lemon juice. The mixture will thicken more as it cools.

    In a large pot bring 4 cups of water to a boil. Add the gluten free stelline pasta and boil while stirring often for 8 minutes. Drain the pasta and rinse it with cold water. Once the pasta is cooled add it to the pineapple and mandarin mixture and stir.

    Add either the whipped cream you made or store bought whipped cream to the pineapple and mandarin mixture and fold in. This means using your spoon roll the mixture in from the sides over top of itself moving in circles as you turn the bowl.

    Add the cooled custard mixture to the bowl and fold in.

    If you want this to truly be the classic recipe you would add one cup of coconut flakes at this point, but I hate the texture and always omit them.

    Refrigerate the dessert salad for at least 8 hours.

    Before serving stir in the miniature marshmallows.

    • Prep Time: 20 minutes
    • Cook Time: 15 minutes
    • Category: Dessert, Salad, Holidays
    • Method: Stove Top
    • Cuisine: Christmas, Gluten Free

    Did you make this recipe?

    Tag @smallfarmbiglife on Instagram and hashtag it #smallfarmbiglife

    Top Tip

    This recipe is best made one day before you want to serve it. For the holidays I always put it on my day before prep list. This gives the salad time to set up and get really flavorful.

    It also makes it simple the day of your gathering to get it out and just stir in marshmallows before serving it.

    Didn't find the answer you're looking for?

    Ask AI to answer based on this recipe:

    ChatGPT
    Google AI
    Perplexity
    Grok
    Claude

    Frequently Asked Questions

    Are there actual frog eyes in the salad?

    No. It's one of those old salads with a weird name. Since I'm using gluten free stelline pasta (means star shaped in Italian) I wanted to change the name to Star Eyed Salad. Sounds so much more appealing. Because this salad is delicious and deserves a better name.

    Is frog eye salad a salad or a dessert?

    This dish is versatile and can be served as a sweet side dish at gatherings or holidays. It could also go on the dessert table and be served as a dessert.

    How long does frog eye salad last?

    The salad will last refrigerated for 4-5 days in an air tight container.

    • 1
    • 2
    • 3
    • …
    • 17
    • Next Page »

    Welcome! I'm Elaine

    I'm so glad you are here! I share easy gluten free recipes from my small farm in Washington.

    Be sure to sign up for my newsletter to stay up to date on all of my new recipes.

    More about me...
    • Instagram
    • Pinterest
    • Facebook
    • Twitter
    • Mail

    Load up on new recipes, exclusive goodies, + more!
    Sign up below to stay up-to-date on news, events, and special deals.
    Thank you for subscribing!

    Easy Meals Recipes

    • Gluten Free Instant Pot Chili Mac and Cheese
    • Gluten Free Taco Casserole
    • Gluten Free Cowboy Baked Beans
    • Gluten Free Walking Taco Casserole
    • Gluten Free Creamy Beef and Mushroom Pasta
    • Gluten Free Instant Pot Chicken & Dumplings
    • Instant Pot Mexican Style Beef and Rice
    • Gluten Free Chicken Parmesan Pasta Casserole
    • Gluten Free One Pot Hamburger Helper Copycat
    • Gluten Free Salisbury Steak with Mushroom Gravy
    • Gluten Free Air Fryer Fajitas
    • Gluten Free Sloppy Joe Casserole

    Footer

    back to top

    About

    • Privacy Policy
    • Shop my Amazon Page
    • Follow me on LTK

    Newsletter

    • Sign Up! for emails and updates

    Contact

    • Contact
    • Media Kit
    • About Me

    As an Amazon Associate I earn from qualifying purchases.

    I may get commissions for purchases made through links on this site.

    Copyright © 2026 Brunch Pro on the Brunch Pro Theme