Small Farm Big Life

  • Gluten Free Recipe Index
  • Subscribe
  • Resources
menu icon
go to homepage
  • Home
  • Gluten Free Recipe Index
  • Subscribe
  • My Story
  • Resources
  • Free Guides
    • Email
    • Facebook
    • Instagram
    • Pinterest
  • subscribe
    search icon
    Homepage link
    • Home
    • Gluten Free Recipe Index
    • Subscribe
    • My Story
    • Resources
    • Free Guides
    • Email
    • Facebook
    • Instagram
    • Pinterest
  • ×

    Gluten Free Lemon Bars

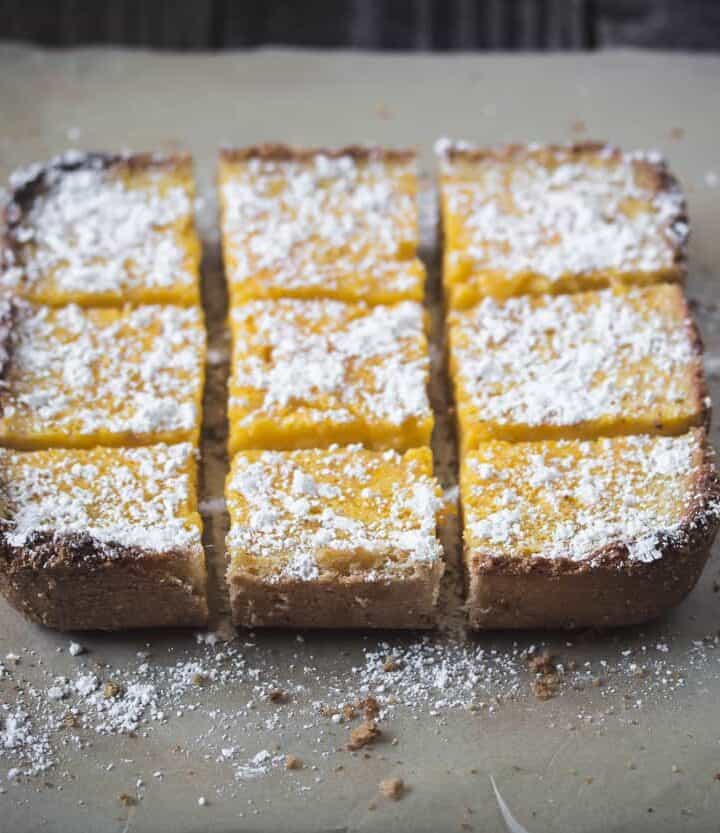
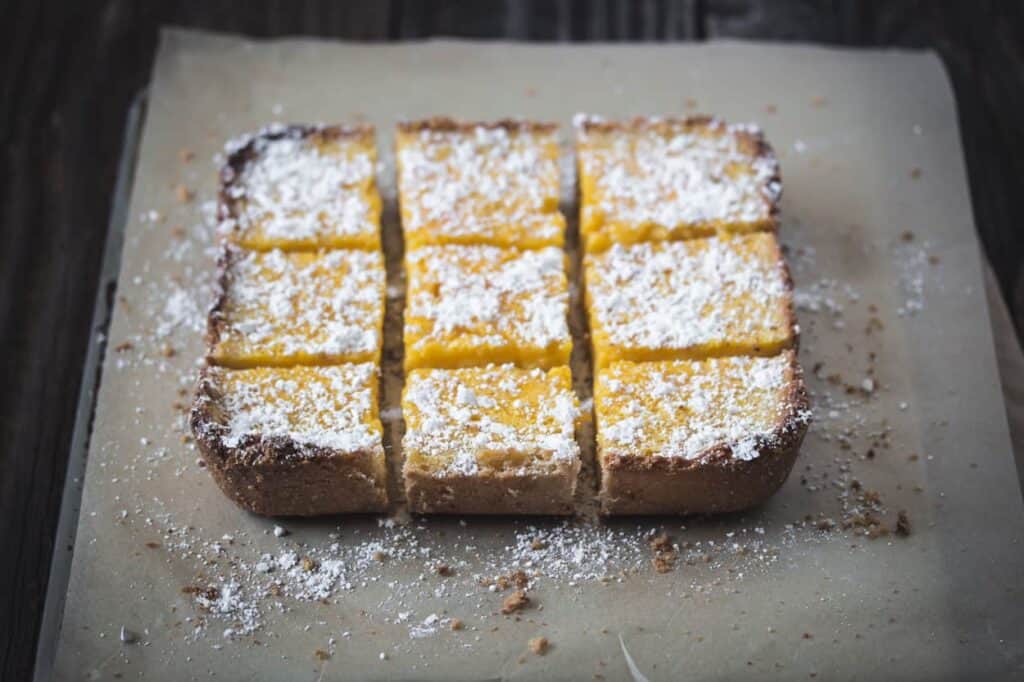
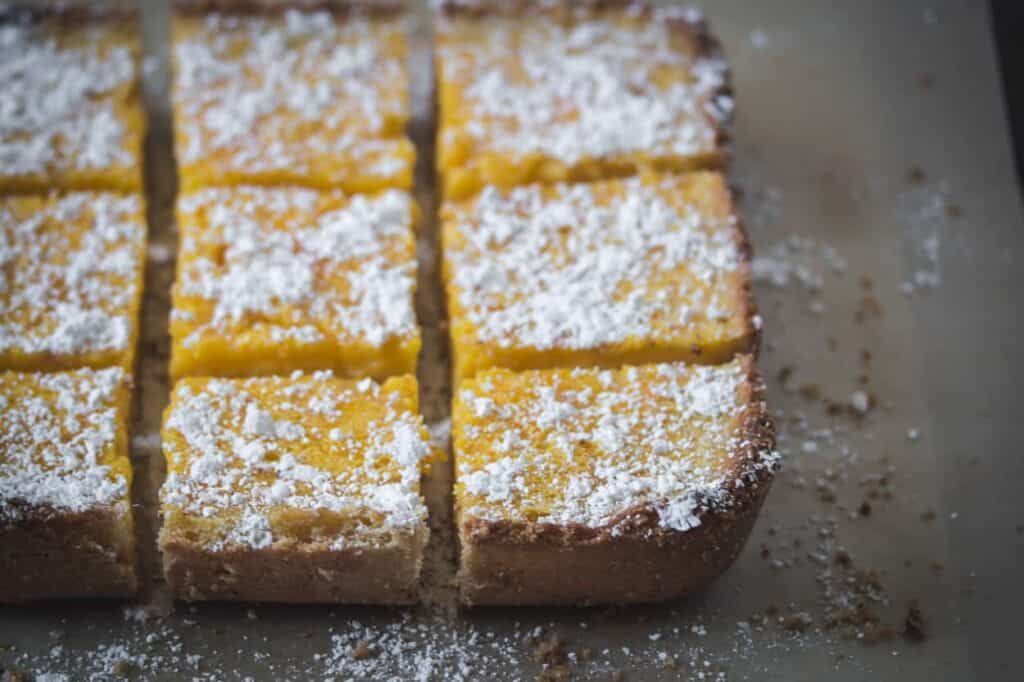
    It's starting to warm up in the PNW and that means I start craving lighter foods. We've been replacing soups with salads and heavy brownies with these delicious gluten free Lemon Bars.

    These gluten free Lemon Bars are easy to put together quickly and can be stored covered in the refrigerator for a couple of days. This makes them an easy dessert to make ahead and have ready to go.

    We also have an abundance of eggs right now, so any recipe that uses more than two eggs is on heavy rotation here. I made these gluten free Lemon Bars with goose eggs, so they may be darker than yours if you are using chicken eggs or store bought eggs. I love the dark yellow color goose and duck eggs produce!

    Print
    clock clock iconcutlery cutlery iconflag flag iconfolder folder iconinstagram instagram iconpinterest pinterest iconfacebook facebook iconprint print iconsquares squares iconheart heart iconheart solid heart solid icon

    Gluten Free Lemon Bars


    5 Stars 4 Stars 3 Stars 2 Stars 1 Star

    No reviews

    • Author: Elaine VanVleck
    • Total Time: 47 minutes
    • Yield: 9 servings
    • Diet: Gluten Free
    Print Recipe
    Pin Recipe

    Description

    Gluten free Lemon Bars are delicious right out of the fridge for a quick dessert. You can make these a couple of days in advance and store them covered in the fridge.


    Ingredients

    Crust:
    2 cups Almond Flour
    ¼ cup Coconut Flour
    5 Tbsp. Granulated Sugar
    3 Tbsp. Tapioca Flour
    ½ tsp. Sea Salt
    ½ cup Unsalted Butter, cold & diced

    Filling:
    4 large Eggs
    ½ cup Granulated Sugar
    ⅓ cup Lemon Juice
    2 Tbsp. Tapioca Flour
    ⅛ tsp. Sea Salt
    1 tsp. Beef Gelatin Powder


    Instructions

    Make the crust first. Grease an 8 x 8 pan with coconut oil. Place almond flour, coconut flour, sugar, tapioca flour and sea salt in a mixer bowl. Dice the cold butter into the bowl in little slivers. Beat ingredients together until crumbly. Press crumbly mixture into the greased 8x8 pan. Bake 10-12 minutes or until lightly golden.

    While the crust is baking, mix together the filling.

    Put eggs, sugar, lemon juice, lemon essential oil, tapioca flour, sea salt and gelatin into a mixing bowl. Beat at medium high until all ingredients are combined together. Leave in mixing bowl until ready to pour into crust. Prior to pouring into crust mix one more time to combine ingredients that may have settled.

    Pour filling into baked crust and return to oven for 18-20 minutes or until firm in the center. Cool completely before sprinkling with powdered sugar and cutting. Refrigerate until you are ready to serve. 

    Notes

    I used lemon juice from a bottle. I didn't have lemons and living rural I can't always get good lemons locally.

    • Prep Time: 15
    • Cook Time: 32
    • Category: Dessert
    • Method: Baking
    • Cuisine: Gluten Free

    Did you make this recipe?

    Tag @smallfarmbiglife on Instagram and hashtag it #smallfarmbiglife

    Air Fryer Salt & Pepper Roasted Cashews

    These Air Fryer Salt and Pepper Roasted Cashews are one of my oldest and most reliable snack recipes and one I come back to again and again when I want something crunchy, savory, and genuinely satisfying in about ten minutes. Raw cashews get tossed in avocado oil, rice flour, nutritional yeast, sea salt, and black pepper and then air fried for just six minutes until they are perfectly golden.

    The nutritional yeast gives them that deeply savory and slightly tangy flavor you taste in premium store bought seasoned cashews. The rice flour acts as a binder that helps every bit of seasoning stick to each cashew rather than falling off in the air fryer basket.

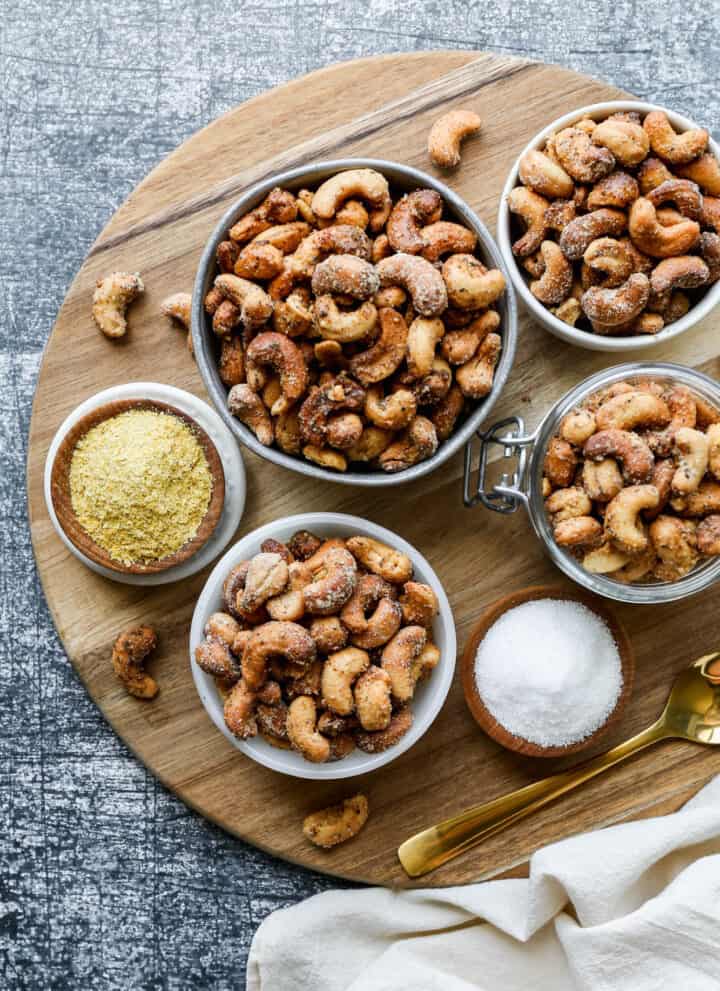
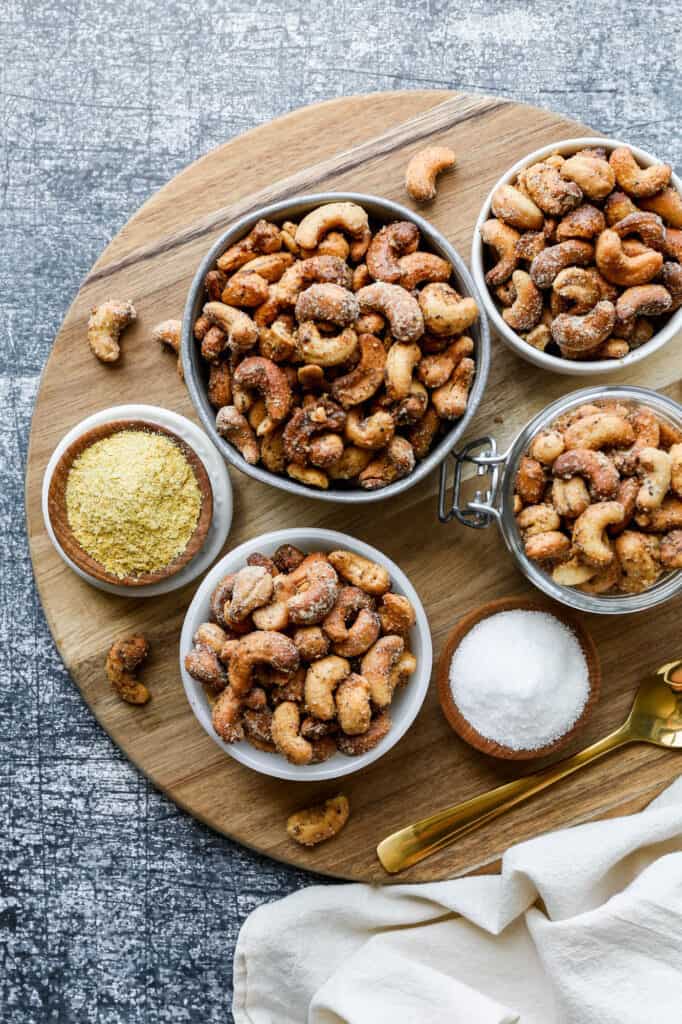
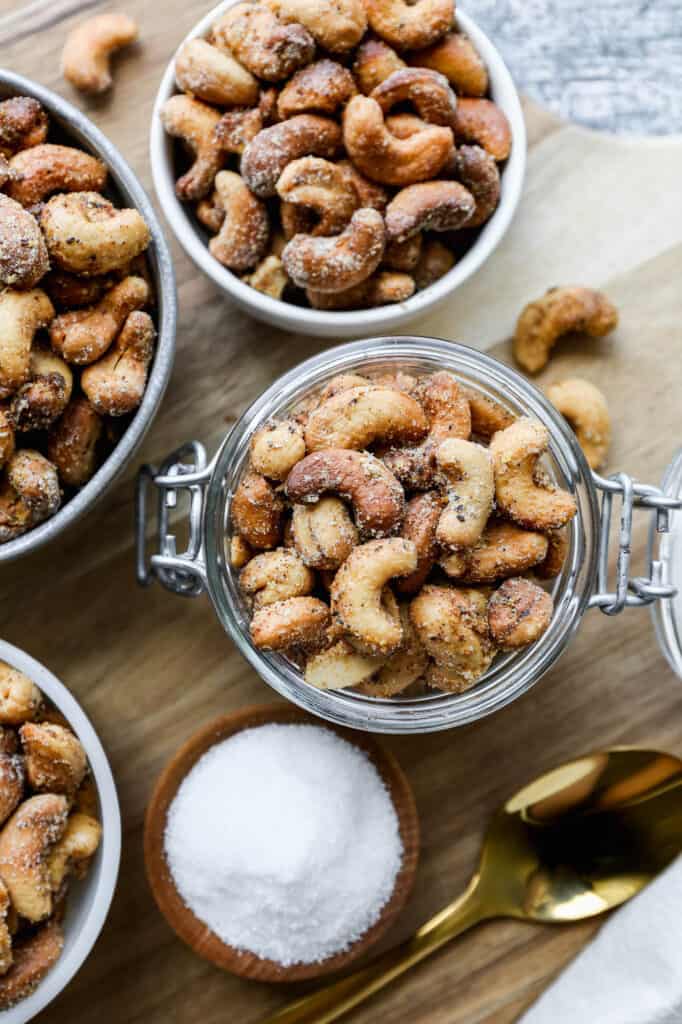
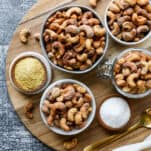
    small bowls of air fryer salt and pepper roasted cashews on a round wooden cutting board

    I buy my raw unsalted unroasted cashews in bulk from Costco which makes this one of the most affordable snacks I make. You can also find them at Thrive Market or in the bulk section of most natural grocery stores.

    Once you start making your own roasted cashews at home you will never want to go back to store bought because you control exactly what goes on them.

    No preservatives, no hidden gluten in the seasoning blend, and no ingredients you cannot pronounce. Just real food that tastes incredible and takes almost no effort to make.

    If you are looking for more air fryer recipes try my Air Fryer Spicy Roasted Peanuts, Air Fryer Sweet and Salty Roasted Cashew Nuts, Air Fryer Savory Herb Roasted Nuts or my Gluten Free Air Fryer Chex Mix.

    Here are more snack recipes: Gluten Free Snack Recipes

    small bowls of air fryer salt and pepper roasted cashews on a round wooden cutting board
    [feast_advanced_jump_to]

    Why This Coating Makes These Cashews Different

    • Most air fryer cashew recipes use only oil and salt. This recipe uses rice flour and nutritional yeast in addition to the oil and spices and the difference is significant.
    • The rice flour acts as a binder that helps the spices and seasoning stick to the cashews with the oil. The nutritional yeast is what gives them the tangy flavor you taste in store bought nut mixtures.
    • Nutritional yeast is a deactivated yeast with a naturally savory, nutty, and slightly cheesy flavor. It is completely gluten free and dairy free and adds depth to the salt and pepper seasoning that makes these cashews taste more complex and satisfying than a basic salt only version. You can leave it out if you do not have it on hand but the flavor will be noticeably simpler without it.
    • Rice flour is a fine gluten free flour that coats each cashew with a very thin layer of starch. This starch layer helps the oil and seasonings adhere evenly and produces a slightly crispier exterior on the finished cashew. It is subtle but worth including.

    Why You Should Use Raw Unsalted Cashews

    • Always start with raw unsalted unroasted cashews for this recipe. Pre salted cashews will make the finished snack too salty since the coating in this recipe already includes sea salt. Pre roasted cashews are a problem too because they have already been cooked once and will burn in the air fryer before the coating has time to develop properly.
    • Whole cashews work better than cashew pieces for this recipe. Pieces are smaller and thinner and will cook faster and more unevenly than whole nuts. If you only have pieces keep a very close eye on them and reduce the cook time by one to two minutes.
    • I buy my raw organic cashews in bulk from Costco which makes this one of the most affordable snacks I make. Thrive Market is another great source and most natural grocery stores carry them in the bulk section.

    Why Roasting Cashews Improves Their Flavor

    Raw cashews have a mild and creamy flavor that is pleasant on its own but roasting them completely transforms what they taste like. The heat of the air fryer brings out a deeper nuttiness and a natural buttery sweetness in the cashew that you simply cannot get from eating them raw. The outside becomes golden and crispy while the inside stays rich and creamy.

    The air fryer is the fastest and most consistent way to roast cashews at home. Six minutes at 350 degrees with a shake of the basket every two minutes produces perfectly golden cashews without standing over the stove or heating up the oven for a small batch.

    Cashews Are a High Protein Snack

    Cashews are one of the most nutritious snacks you can make at home. A one ounce serving provides about five grams of protein along with healthy fats, magnesium, copper, and zinc. The combination of protein and fat is genuinely satiating which makes a small handful much more filling than most processed snack foods.

    For anyone working toward daily protein targets keeping a jar of these on the counter is one of the easiest and most delicious ways to add protein between meals without reaching for a packaged snack bar.

    Tips for Perfect Air Fryer Salt and Pepper Cashews

    • Use a high heat oil. Avocado oil is the best choice for this recipe because it has a very high smoke point and a completely neutral flavor that lets the salt, pepper, and nutritional yeast shine. Olive oil also works but has a lower smoke point so watch the cashews closely if you use it.
    • Coat the cashews in the bowl before pouring them into the basket. Add the oil first and toss until every cashew is covered then add the rice flour, nutritional yeast, salt, and pepper and toss again. Do not pour the dry ingredients directly onto the cashews in the air fryer basket since they will not distribute evenly.
    • Spoon any remaining coating from the bowl over the cashews after you pour them into the basket. Do not leave that coating behind. Every bit of the rice flour and nutritional yeast mixture needs to make it onto the cashews for the best flavor.
    • Shake the basket every two minutes during the six minute cook time so the cashews cook evenly on all sides and no single cashew sits in one position long enough to burn.
    • Remove them from the basket immediately when the timer goes off. Pour them onto a parchment lined baking sheet to stop the cooking. They may look slightly pale when they first come out and that is completely normal. They will turn a beautiful light golden brown as they cool and the coating will crisp up significantly once they reach room temperature.

    Variations

    This recipe is easy to customize based on your flavor preferences.

    • For a garlic version add half a teaspoon of garlic powder to the coating mixture for a savory and aromatic twist on the classic salt and pepper flavor.
    • For a spicy version add a quarter teaspoon of cayenne pepper to the coating alongside the black pepper for a subtle heat that pairs beautifully with the savory nutritional yeast.
    • For a smoky version add half a teaspoon of smoked paprika for a deep and smoky flavor that makes these taste like something from a craft snack shop.
    • For a sweet and savory version add a small drizzle of honey or maple syrup to the oil before coating the cashews. The sweetness balances the salt and pepper beautifully.

    Oven Instructions

    No air fryer? These salt and pepper cashews work beautifully in the oven as well.

    Preheat your oven to 350 degrees. Coat the cashews exactly as directed in the recipe. Spread them in a single layer on a parchment lined baking sheet and bake for 12 to 15 minutes stirring once halfway through. Watch them closely in the final few minutes since cashews can go from perfectly golden to burnt quickly. Remove immediately and spread on a cool baking sheet to stop the cooking. Let cool completely before serving or storing.

    Storage Instructions

    After the cashews have completely cooled store them in an airtight container. They can last for up to four weeks but we go through them much quicker than that. You can also store them in the refrigerator for a longer shelf life. Make sure the cashews are fully cooled before sealing the container since storing warm nuts traps steam and softens the coating.

    Top Tip

    The most important step in this recipe is spooning any oil and spice mixture left in the bowl over the cashews after you pour them into the air fryer basket. Do not leave that coating behind in the bowl. Every bit of the rice flour, nutritional yeast, salt, and pepper mixture needs to make it onto the cashews for the best flavor. Tilt the bowl and spoon the remaining coating directly over the nuts in the basket before starting the air fryer.

    Frequently Asked Questions

    How do I roast nuts in my air fryer?

    It's so quick and easy to roast nuts in an air fryer! It takes a lot less time than the traditional oven roasting method.

    I simply coat my nuts in the seasoning and oil of my choice in a large bowl. In this recipe it's heavy on the salt and pepper flavor. I evenly pour the nut mixture into my air fryer basket and air fry. So easy!

    How do I get seasoning to stick to my air fried nuts?

    It is best to use oil, water or egg whites to get the seasoning to stick to the nuts you want to air fry. In a bowl mix the nuts, seasoning and the oil, water, or egg whites until the nuts are coated.

    Pour the nuts evenly into the basket of your air fryer and roast. So easy and delicious!

    Why do you use rice flour and nutritional yeast in this recipe?

    The rice flour acts as a binder that helps the salt, pepper, and nutritional yeast stick to the cashews evenly rather than falling off in the air fryer basket. The nutritional yeast is the secret ingredient that gives these cashews that deeply savory and slightly tangy flavor you taste in premium store bought seasoned nuts. You could leave either one out but the combination of both is what makes these taste so much better than a basic oil and salt version.

    Do I need to use raw unsalted cashews for this recipe?

    Yes. Always start with raw unsalted unroasted cashews. Pre salted cashews will make the finished snack too salty since this recipe already includes sea salt in the coating. Pre roasted cashews will cook too quickly in the air fryer and can burn before the coating has time to develop properly. I buy my raw cashews in bulk at Costco but you can also find them at Thrive Market or in the bulk section of most natural grocery stores.

    Didn't find the answer you're looking for?

    Ask AI to answer based on this recipe:

    ChatGPT
    Google AI
    Perplexity
    Grok
    Claude

    Air Fryers and Accessories

    More Recipes You Might Enjoy

    • Gluten Free Air Fryer Chex Mix
    • Air Fryer Savory Herb Roasted Nuts
    • Air Fryer Sweet and Salty Roasted Cashew Nuts
    • Air Fryer Spicy Roasted Peanuts

    I get a lot of my ingredients from Thrive Market. Thrive Market has been a game changer for me eating gluten free. They have so many options I can't get at my rural grocery stores! Use this link to get 40% off your first order!

    Print
    clock clock iconcutlery cutlery iconflag flag iconfolder folder iconinstagram instagram iconpinterest pinterest iconfacebook facebook iconprint print iconsquares squares iconheart heart iconheart solid heart solid icon

    Air Fryer Salt & Pepper Roasted Cashews (GF, DF)


    5 Stars 4 Stars 3 Stars 2 Stars 1 Star

    No reviews

    • Author: Elaine VanVleck
    • Total Time: 11 minutes
    • Yield: 2 cups 1x
    • Diet: Gluten Free
    Print Recipe
    Pin Recipe

    Description

    Raw cashews tossed in avocado oil, rice flour, nutritional yeast, sea salt, and black pepper then air fried at 350 degrees for just 6 minutes. These gluten free and dairy free air fryer salt and pepper roasted cashews have bold savory flavor from the nutritional yeast coating and are the perfect high protein snack ready in minutes.


    Ingredients

    Scale
    • 2 cups Raw Cashews
    • 2 Tbsp. Avocado Oil (or high heat oil of your choice)
    • 2 Tbsp. Brown Rice Flour (or flour of your choice)
    • 1 tsp. Sea Salt
    • 1 tsp. Nutritional Yeast
    • ½ tsp. Ground Black Pepper
    • ½ tsp. Garlic Powder
    • ½ tsp. Onion Powder

    Instructions

    Place cashews in a bowl. Pour oil over the nuts.

    Mix together the flour and spices. Pour the dry ingredients over the nuts and stir thoroughly.

    Pour nut mixture into air fryer basket and spoon any oil/spice mixture left in the bowl over them.

    Cook at 350 degrees for 6 minutes. Open and shake the basket every 2 minutes so the nuts get cooked evenly.

    Immediately remove the nuts from the air fryer and pour into a bowl to cool. The nuts will continue to cook in the bowl a little, so it's ok if they look a little pale. They will all be a light golden brown shortly.

    Notes

    Make sure the oil you choose to use is meant for hight heat cooking.

    The flour is to bind the spices to the nuts with the oil. You can use something other than rice flour.

    You could leave out the nutrional yeast, but it is what gives them the tangy flavor you taste in store bought nut mixtures.

    • Prep Time: 5 minutes
    • Cook Time: 6 minutes
    • Category: Snacks
    • Method: Air Fryer
    • Cuisine: American

    Did you make this recipe?

    Tag @smallfarmbiglife on Instagram and hashtag it #smallfarmbiglife

    If you make these Air Fryer Salt and Pepper Roasted Cashews I would love to hear what you think! Leave a comment below and let me know how they turned out or tag me on Instagram so I can see your batch.

    Once you start making your own roasted cashews at home you will never want to go back to store bought. Save this recipe to your favorite Pinterest board so you always have it ready when you need a quick and easy gluten free snack!

    Ingredients

    • Raw Cashews
    • Avocado Oil
    • Brown Rice Flour
    • Sea Salt
    • Nutritional Yeast
    • Ground Black Pepper
    • Onion Powder
    • Garlic Powder

    Instructions

    Place cashews in a bowl. Pour oil over the nuts.

    Mix together the flour and spices. Pour the dry ingredients over the nuts and stir thoroughly.

    Pour nut mixture into air fryer basket and spoon any oil/spice mixture left in the bowl over them.

    Cook at 350 degrees for 6 minutes. Open and shake the basket every 2 minutes so the nuts get cooked evenly.

    Immediately remove the nuts from the air fryer and pour into a bowl to cool. The nuts will continue to cook in the bowl a little, so it's ok if they look a little pale. They will all be a light golden brown shortly.

    Gluten Free Applesauce Waffles with Apple Topping Recipe (GF)

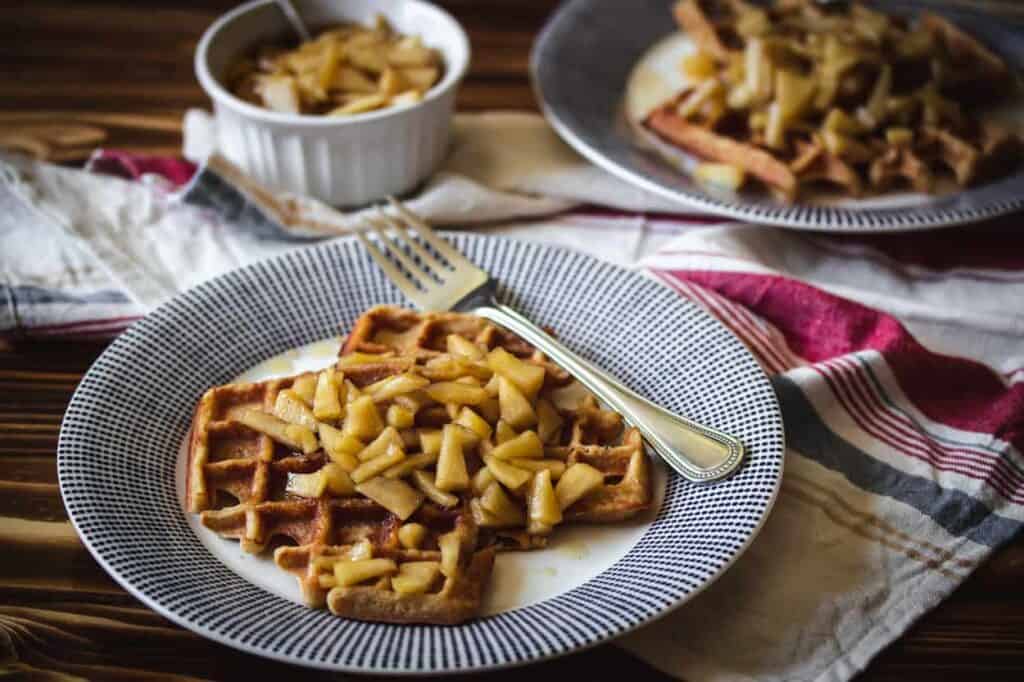
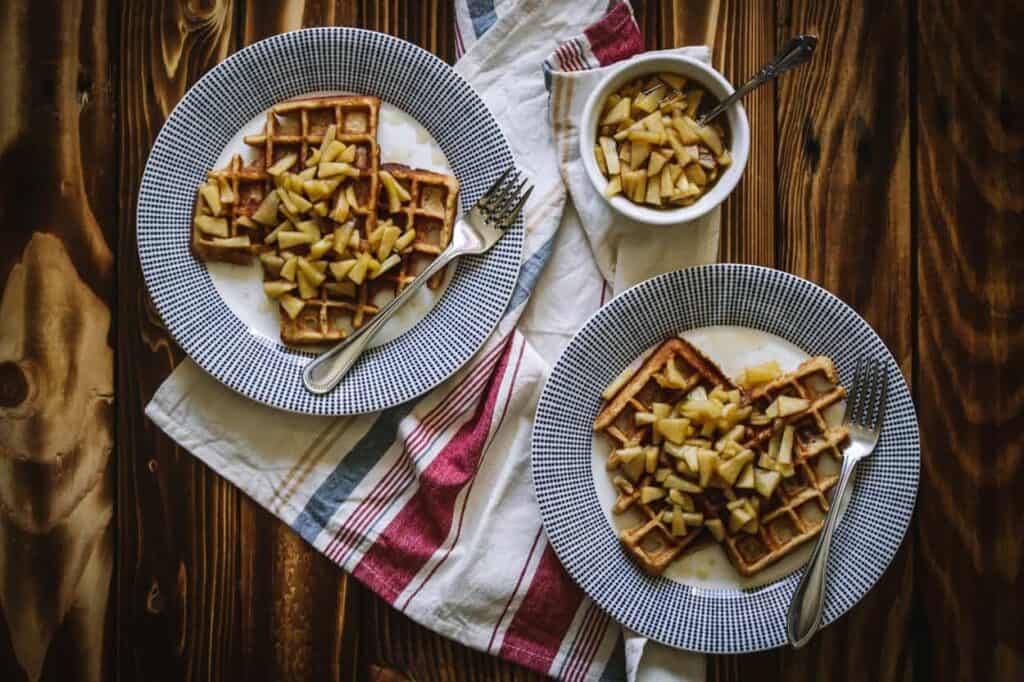
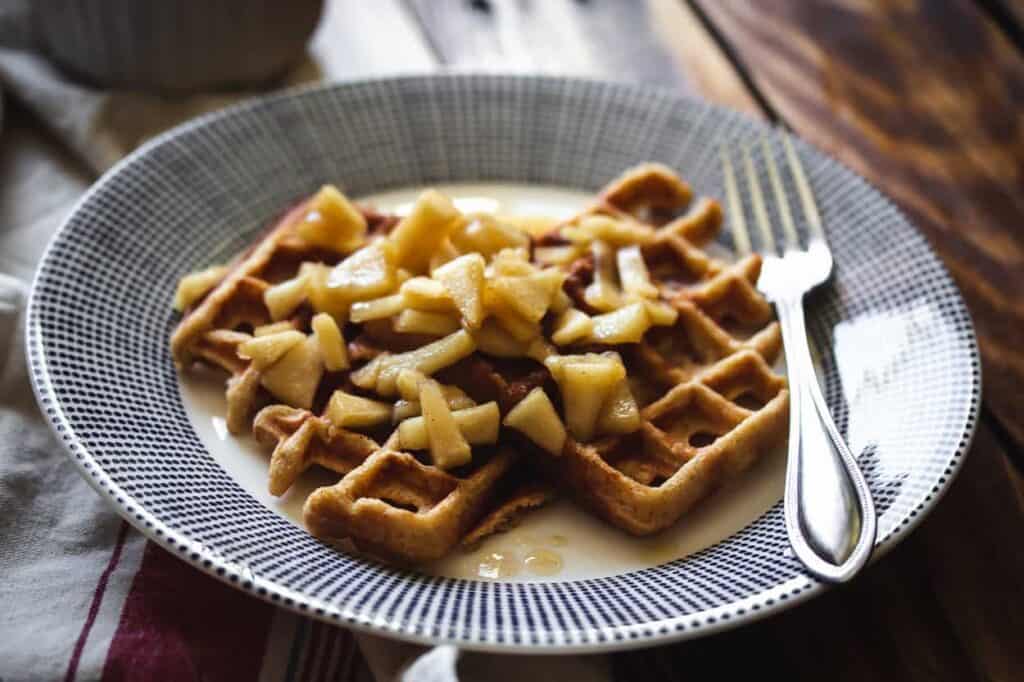
    two plates of gluten free applesauce waffles with apple topping

    This healthy recipe for gluten free applesauce waffles with apple topping is an easy, homemade breakfast. The delicious recipe has cinnamon and almond flour.

    I love breakfast food. When I went gluten free a few years ago breakfast was the first thing I worried about. At first I thought I would be eating eggs and never again get to indulge in waffles. Thankfully, I was wrong!

    These Applesauce Waffles with Apple Topping remind me of apple fritters. I like to cook the waffles until they have browned and are slightly crispy. This is important because if you take the waffles off the griddle too soon they will be soggy and you won't get that delicious crispiness.

    two plates of gluten free applesauce waffles with apple topping

    I mix up the batter for the waffles and begin cooking them first. Next, while I'm cooking waffles in the griddle I begin peeling and chopping the two apples needed for the topping.

    By the time I've gotten the five sets of large waffles cooked the apple topping is lightly boiling on the stove to cook the apples down and brown the ghee.

    I suggest serving the waffles and topping immediately while they are still hot. These apple sauce waffles and apple topping are a delicious way to start your day!

    a plate of gluten free applesauce waffles with apple topping

    Can you substitute applesauce for oil in waffles?

    Yes! It works perfectly and reduces the calories of the waffles. If you don't have a nonstick waffle maker you will still want to use a bit of oil on the waffle maker so your waffles don't stick to it.

    How do you make gluten free waffles from scratch?

    Waffles are really easy to make. They are as simple as beating all the ingredients together in a mixing bowl and then pressing in a waffle maker. I like to use a handheld mixer so that I get all the lumps from the flour out and have a really well mixed batter.

    If you like this recipe you might also enjoy:

    Gluten Free Oven Baked Pancake with Blueberry Sauce
    Gluten Free Buttermilk Pancakes
    Paleo Chocolate Pudding
    Gluten Free Millet Drop Biscuits
    Gluten Free Chia Pudding Breakfast Parfait

    I get my ingredients from Thrive Market. Thrive Market has been a game changer for me eating gluten free. They have so many options I can't get at my rural grocery stores! Use this link to get 25% off your first order!

    Print
    clock clock iconcutlery cutlery iconflag flag iconfolder folder iconinstagram instagram iconpinterest pinterest iconfacebook facebook iconprint print iconsquares squares iconheart heart iconheart solid heart solid icon

    Gluten Free Applesauce Waffles with Apple Topping


    5 Stars 4 Stars 3 Stars 2 Stars 1 Star

    No reviews

    • Author: Elaine VanVleck
    • Total Time: 30 minutes
    • Yield: 6 waffles
    • Diet: Gluten Free
    Print Recipe
    Pin Recipe

    Description

    These Applesauce Waffles with Apple Topping are a delicious way to start your day. You could make the batter the night before and enjoy hot waffles and topping in the morning.


    Ingredients

    Waffles:
    1 cup Almond Flour
    ¾ cup Tapioca Flour
    ¼ cup Coconut Flour
    2 tsp. Baking Powder
    2 tsp. Cinnamon, ground
    ½ tsp. Sea Salt
    2 eggs
    ¼ cup Coconut Oil, melted
    1 Tbsp. Apple Cider Vinegar
    1 cup Almond Milk
    1 tsp. Vanilla Extract
    ½ cup Apple Sauce

    Apple Topping:
    2 Tbsp. Ghee
    2 large Apples, peeled, cored and diced
    1 Tbsp. Brown Sugar
    1 Tbsp. Honey
    ½ tsp. Cinnamon, ground
    ⅛ tsp. Nutmeg, ground
    ⅛ tsp. Sea Salt
    ⅓ cup Maple Syrup


    Instructions

    Waffles:
    Combine all ingredients into a mixing bowl. I like to use a hand mixer to get a nice, lump free batter. Beat on medium-high until the batter is smooth. The batter should be fairly runny.

    Apple Topping:
    Cook ghee, apples, sugar, honey, and spices on medium heat until the apples are tender. Add maple syrup and heat through. Serve immediately over waffles. The topping can be stored in the fridge for a couple of days and reheated if needed.

    Notes

    I like to make a double batch of these waffles and then store them in the fridge. I pop them in the toaster to reheat and have easy weekday breakfast.

    • Prep Time: 15 minutes
    • Cook Time: 15 minutes
    • Category: Breakfast
    • Method: Baking
    • Cuisine: Gluten Free

    Did you make this recipe?

    Tag @smallfarmbiglife on Instagram and hashtag it #smallfarmbiglife

    Gluten-Free Cinnamon Roll Pancakes

    These are the pancakes I have had on rotation lately for breakfast. They are easy to mix together and will last a few days in the fridge. I like to make a double batch to have a quick breakfast for a few days in a row.

    Print
    clock clock iconcutlery cutlery iconflag flag iconfolder folder iconinstagram instagram iconpinterest pinterest iconfacebook facebook iconprint print iconsquares squares iconheart heart iconheart solid heart solid icon

    Gluten-Free Cinnamon Roll Pancakes


    5 Stars 4 Stars 3 Stars 2 Stars 1 Star

    No reviews

    • Author: Elaine VanVleck
    • Total Time: 30 minutes
    • Yield: 7 1x
    Print Recipe
    Pin Recipe

    Description

    These pancakes are easy to make and a delicious morning start.


    Ingredients

    Scale

    3 eggs, large
    ⅓ cup almond milk
    1 tablespoon apple cider vinegar
    3 tablespoon maple syrup
    1 teaspoon vanilla extract
    3 tablespoon coconut oil, melted
    ¼ cup coconut sugar
    1 ½ cups almond flour
    ⅓ cup tapioca flour
    ½ teaspoon baking soda
    1 teaspoon baking powder
    ¼ teaspoon sea salt
    1 ½ teaspoon cinnamon, ground


    Instructions

    Combine eggs, almond milk, ACV, maple syrup, vanilla together using a mixer. I like to make mine with my hand mixer in my batter bowl. Add dry ingredients with melted coconut oil on top. Doing the steps in this order will help the coconut oil to mix into the cold, wet ingredients without clumping.

    Cook pancakes on medium heat until beginning to bubble and flip. This should produce golden pancakes with a touch of crispiness at the edges.

    I highly suggest eating warm with syrup or sunbutter, but they can be stored in a sealed container in the fridge for up to five days.

    • Prep Time: 10 minutes
    • Cook Time: 20 minutes
    • Category: Breakfast
    • Method: Frying
    • Cuisine: Gluten Free

    Did you make this recipe?

    Tag @smallfarmbiglife on Instagram and hashtag it #smallfarmbiglife

    Cold Weather Favorites

    I have a few staple items that I wear that make chore time a little more bearable during the winter months. I have a jacket that I love from Duluth Trading Co, but they don't make it any longer. I was bummed because I truly love that coat! Here is my list of six simple items that I love.

    1. Berne Women's Insulated Overalls - These zip all the way up the front and up both legs. They also have a snap at the hem to keep them closer to your boots so you don't get a draft. Most mornings I pull these on over my pajamas and go do chores.
    2. Muck Women's Chore Boot (Mid Calf) - These boots last a long time. I just had to replace mine after five years of daily wear. The sole helps me not to slip and slide in the mud. They are very comfortable and keep my feet warm. They are well worth the price! If you have cheap chore boots you need to try a pair of these on.
    3. Crane Clothing Co (C.C.) Classic Beanie - This hat is warm but also vents well so my head doesn't get sweaty or itchy. It comes down low enough to cover the tops of my ears to keep them warm too. I toss mine in the washer and dryer without balling or issues.
    4. Eddie Bauer Multiclava - This can be worn over you hair, but my favorite way to wear it around my neck to keep wind and rain out. I pull it over my head before I put my hat on and it keeps my neck toasty. It's also great to pull over my mouth if it's really cold out.
    5. Cabela's Women's Wind Resistant Gloves - these will not keep your hands from getting wet, but they do keep my hands warm while packing buckets, checking fence, etc.
    6. Carhartt Women's Vest - I love my insulated vest! It's great for the cold season under my jacket or during the spring with a long sleeve t-shirt underneath. It's versatile and gets worn a lot.

    FYI - this isn't an ad. I'm not getting anything from these companies. I just wanted to share what is working for me this winter.

    • « Previous Page
    • 1
    • …
    • 97
    • 98
    • 99
    • 100
    • Next Page »

    Welcome! I'm Elaine

    I'm so glad you are here! I share easy gluten free recipes from my small farm in Washington.

    Be sure to sign up for my newsletter to stay up to date on all of my new recipes.

    More about me...
    • Instagram
    • Pinterest
    • Facebook
    • Twitter
    • Mail

    Load up on new recipes, exclusive goodies, + more!
    Sign up below to stay up-to-date on news, events, and special deals.
    Thank you for subscribing!

    Easy Meals Recipes

    • Gluten Free Instant Pot Chili Mac and Cheese
    • Gluten Free Taco Casserole
    • Gluten Free Cowboy Baked Beans
    • Gluten Free Walking Taco Casserole
    • Gluten Free Creamy Beef and Mushroom Pasta
    • Gluten Free Instant Pot Chicken & Dumplings
    • Instant Pot Mexican Style Beef and Rice
    • Gluten Free Chicken Parmesan Pasta Casserole
    • Gluten Free One Pot Hamburger Helper Copycat
    • Gluten Free Salisbury Steak with Mushroom Gravy
    • Gluten Free Air Fryer Fajitas
    • Gluten Free Sloppy Joe Casserole

    Footer

    back to top

    About

    • Privacy Policy
    • Shop my Amazon Page
    • Follow me on LTK

    Newsletter

    • Sign Up! for emails and updates

    Contact

    • Contact
    • Media Kit
    • About Me

    As an Amazon Associate I earn from qualifying purchases.

    I may get commissions for purchases made through links on this site.

    Copyright © 2026 Brunch Pro on the Brunch Pro Theme