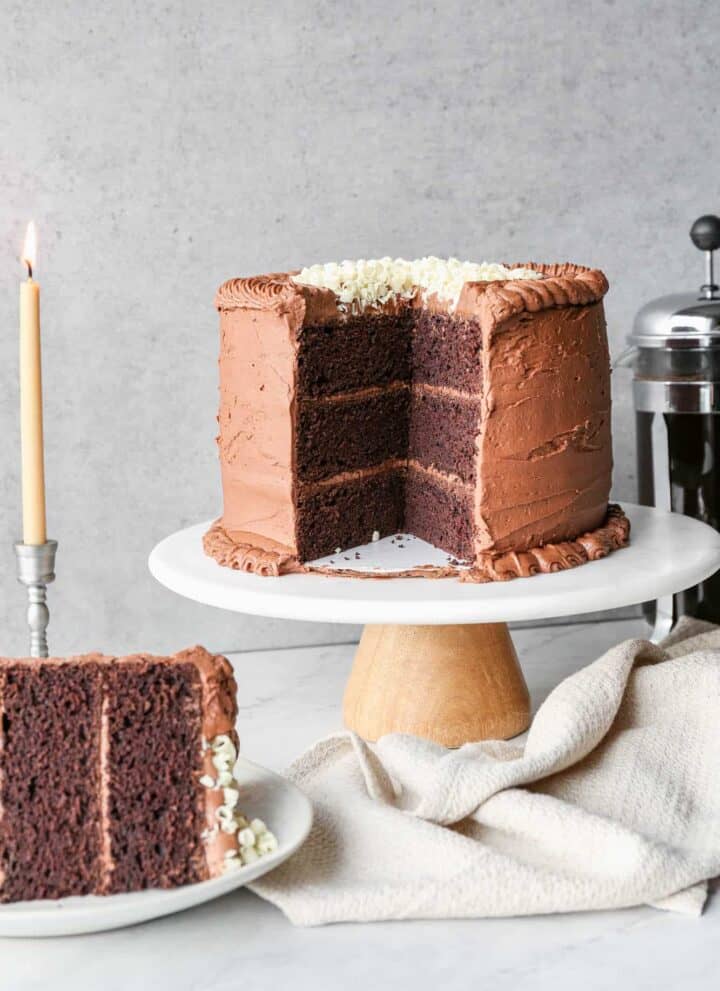
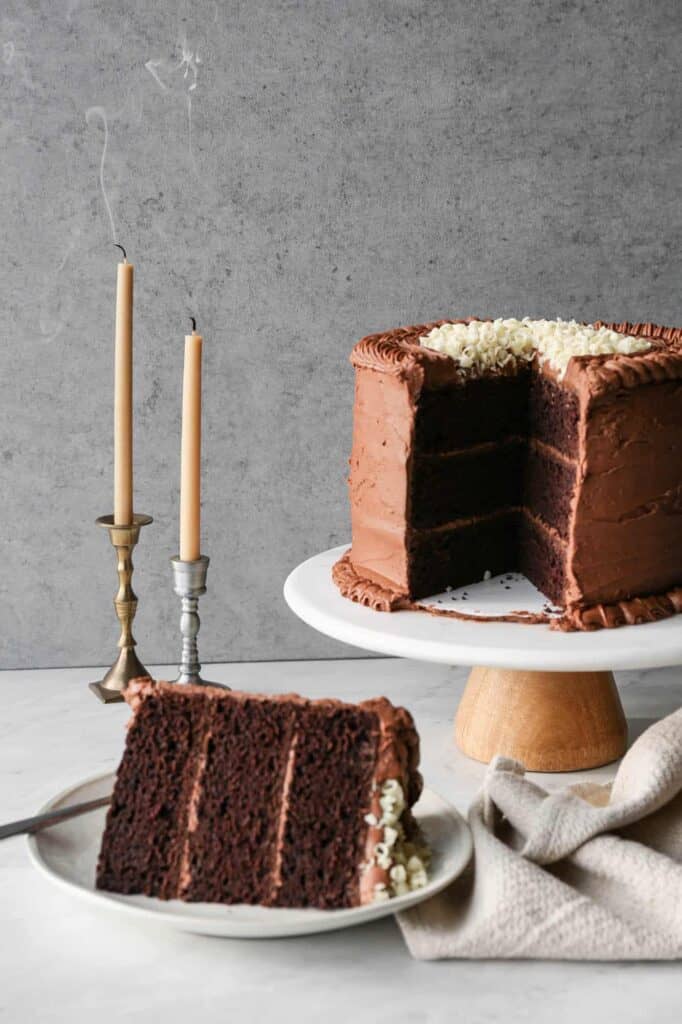
This Gluten Free Chocolate Mayonnaise Cake is a throwback 1950s, old fashioned dessert that proves timeless recipes never go out of style. Inspired by a vintage mayonnaise cake recipe, this chocolate cake made with mayonnaise bakes up incredibly moist, rich, and tender.
It's a true decadent chocolate mayo cake. Made from scratch, this easy chocolate mayonnaise cake delivers deep chocolate flavor and the soft texture you expect from a best moist cake recipe.
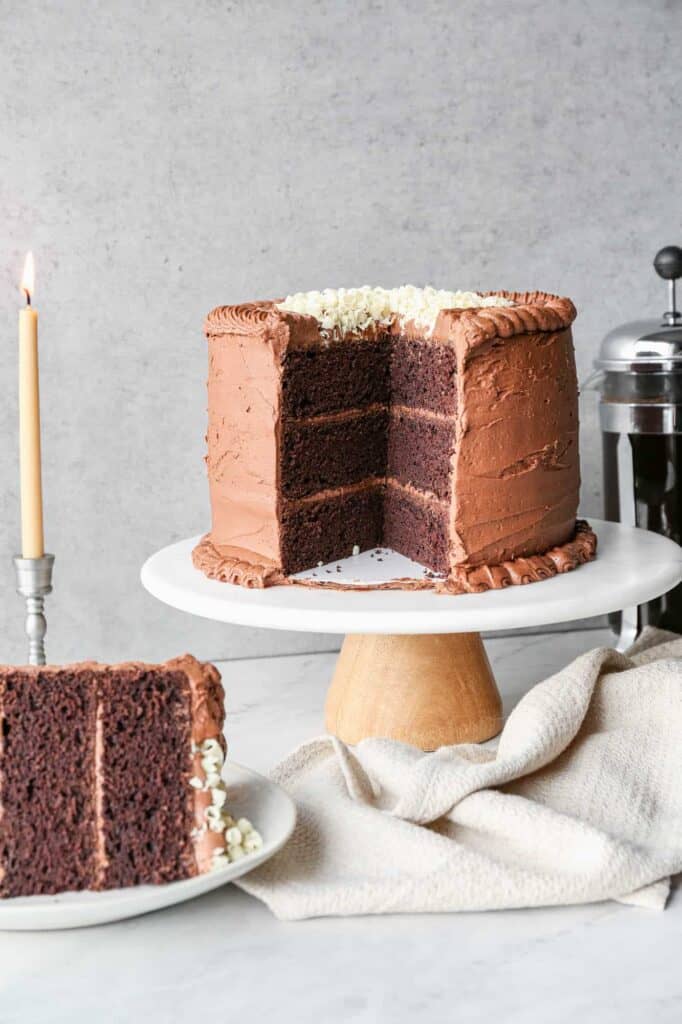
Perfect for celebrations or everyday baking, this moist chocolate cake recipe is a guaranteed crowd pleaser. Whether you're serving it as a homemade birthday cake or a cozy homemade chocolate dessert, this vintage chocolate cake feels special yet simple.
Finished with chocolate frosting, this gluten free mayonnaise chocolate cake is proof that baking with mayonnaise creates one unforgettable, rich dessert.
If you would rather have a sheet cake you can make this cake in a 9x13 baking dish instead of three nine inch round pans. Sometimes instead of frosting a layer cake I just want a simple sheet cake to quickly spread frosting onto and be done.
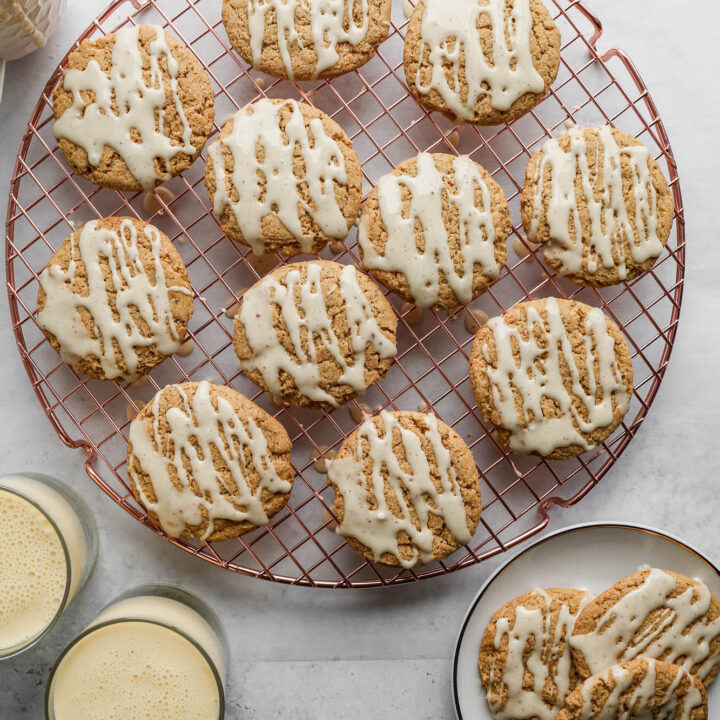
If you are looking for chocolate recipes you might also like my Gluten Free Chocolate Pound Cake, my Gluten Free Chocolate Zucchini Muffins, my Gluten Free Double Chocolate Chip Cookies or my Gluten Free Double Chocolate Bundt Cake.
Here's all of my cake recipes: Gluten Free Cake Recipes
Instructions
Preheat your oven to 350 degrees. Grease three 9-inch round cake pans with butter or coconut oil. Set aside.
In the bowl of your stand mixer add the sugar and eggs. Beat until light and fluffy, 3-4 minutes. Add the mayonnaise and vanilla. Beat until blended.
Add the coffee and cocoa powder to the egg mixture. Beat until incorporated.
In a medium bowl whisk together the gluten free flour, baking powder, baking soda, xanthan gum and sea salt.
Blend the dry ingredients into the wet ingredients until you get a smooth cake batter, 2-3 minutes.
Pour the cake batter evenly into each cake pan.
Bake at 350 degrees for 40-45 minutes. The cakes should spring back when lightly touched and be coming away from the edges of the pans.
Let the cakes stand in the pans for 10 minutes and then place them on a cooling rack to cool completely before frosting. I like to make the cakes the day before so they have plenty of time to cool.
For the frosting put the chocolate chips, honey and heavy cream into a microwave safe bowl. Microwave in 30 second increments stirring in between until the chocolate chips are melted.
In the bowl of your stand mixer beat the unsalted butter, sea salt, vanilla and 2 cups of powdered sugar until smooth. Add the chocolate mixture and blend until incorporated. Add 2 cups of powdered sugar and blend until the frosting is smooth and fluffy.
Supplies


More Recipes You Might Enjoy


I get a lot of my ingredients from Thrive Market. Thrive Market has been a game changer for me eating gluten free. They have so many options I can't get at my rural grocery stores! Use this link to get 40% off your first order!
PrintGluten Free Chocolate Mayonnaise Cake
- Total Time: 1 hour 5 minutes
- Yield: 3 - 9 inch cakes 1x
- Diet: Gluten Free
Description
This easy gluten free chocolate mayonnaise cake is my take on a classic 1950s southern recipe. The old fashioned homemade chocolate cake is moist and perfect for dessert. I added chocolate buttercream frosting for the filling and icing.
Ingredients
- 1 ½ cups Coffee, strongly brewed
- 1 cup Unsweetened Cocoa Powder
- 3 cups Gluten Free Flour
- 2 tsp. Baking Powder
- 1 ½ tsp. Baking Soda
- 1 tsp. Xanthan Gum
- 1 tsp. Sea Salt
- 2 cups Granulated Sugar
- 4 large Eggs
- 1 cup Mayonnaise
- 1 tsp. Vanilla Extract
Frosting:
- 1 ¼ cups Semi-Sweet Chocolate Chips
- 2 Tbsp. Honey
- 3 Tbsp. Heavy Cream
- 1 cup Unsalted Butter, softened
- ½ tsp. Sea Salt
- 1 tsp. Vanilla Extract
- 4 cups Powdered Sugar
Instructions
Preheat your oven to 350 degrees. Grease three 9-inch round cake pans with butter or coconut oil. Set aside.
In the bowl of your stand mixer add the sugar and eggs. Beat until light and fluffy, 3-4 minutes. Add the mayonnaise and vanilla. Beat until blended.
Add the coffee and cocoa powder to the egg mixture. Beat until incorporated.
In a medium bowl whisk together the gluten free flour, baking powder, baking soda, xanthan gum and sea salt.
Blend the dry ingredients into the wet ingredients until you get a smooth cake batter, 2-3 minutes.
Pour the cake batter evenly into each cake pan.
Bake at 350 degrees for 40-45 minutes. The cakes should spring back when lightly touched and be coming away from the edges of the pans.
Let the cakes stand in the pans for 10 minutes and then place them on a cooling rack to cool completely before frosting. I like to make the cakes the day before so they have plenty of time to cool.
For the frosting put the chocolate chips, honey and heavy cream into a microwave safe bowl. Microwave in 30 second increments stirring in between until the chocolate chips are melted.
In the bowl of your stand mixer beat the unsalted butter, sea salt, vanilla and 2 cups of powdered sugar until smooth. Add the chocolate mixture and blend until incorporated. Add 2 cups of powdered sugar and blend until the frosting is smooth and fluffy.
Notes
This recipe could be dairy free if you use a different frosting.
- Prep Time: 20 minutes
- Cook Time: 45 minutes
- Category: Cake
- Method: Baking
- Cuisine: Gluten Free
Storage
You can store the cake in an air tight container for up to 7 days in the refrigerator. I also like to freeze individual slices in freezer safe containers to enjoy later.
Top Tip
I love a layer cake but sometimes a sheet cake is just easier. This cake can be baked in a 9x13 baking pan. Cool the cake completely and then frost.
Didn't find the answer you're looking for?
Ask AI to answer based on this recipe:
Frequently Asked Questions
Yes! Since mayonnaise is usually made from eggs and oil (or in this case I used avocado oil mayonnaise so it's just oil) it will make your cake very moist and fluffy. It shouldn't matter what brand or type of mayonnaise you use in your cake. You are essentially just adding more oil to the cake batter.
Mayonnaise is typically gluten free. As always, I would check the label. In some cases the mayonnaise may be made in the same facility as other products that have gluten or other allergens. My favorites are Sir Kensington's Mayonnaise and Primal Kitchen Mayonnaise.
Yes! You will get the same delicious, fluffy chocolate cake if you use mayonnaise or sour cream. Using avocado oil mayonnaise is a great way to make a cake vegetarian or for any of your dairy free friends and family.