Small Farm Big Life

  • Gluten Free Recipe Index
  • Subscribe
  • Resources
menu icon
go to homepage
  • Home
  • Gluten Free Recipe Index
  • Subscribe
  • My Story
  • Resources
  • Free Guides
    • Email
    • Facebook
    • Instagram
    • Pinterest
  • subscribe
    search icon
    Homepage link
    • Home
    • Gluten Free Recipe Index
    • Subscribe
    • My Story
    • Resources
    • Free Guides
    • Email
    • Facebook
    • Instagram
    • Pinterest
  • ×

    Gluten Free Instant Pot Sausage and Kale Soup

    This healthy gluten free instant pot sausage and kale soup is perfect for a Keto or low carb diet. It's made with Italian sausage, Tuscan kale and sour cream. This delicious stew is creamy and perfect for lunch or dinner.

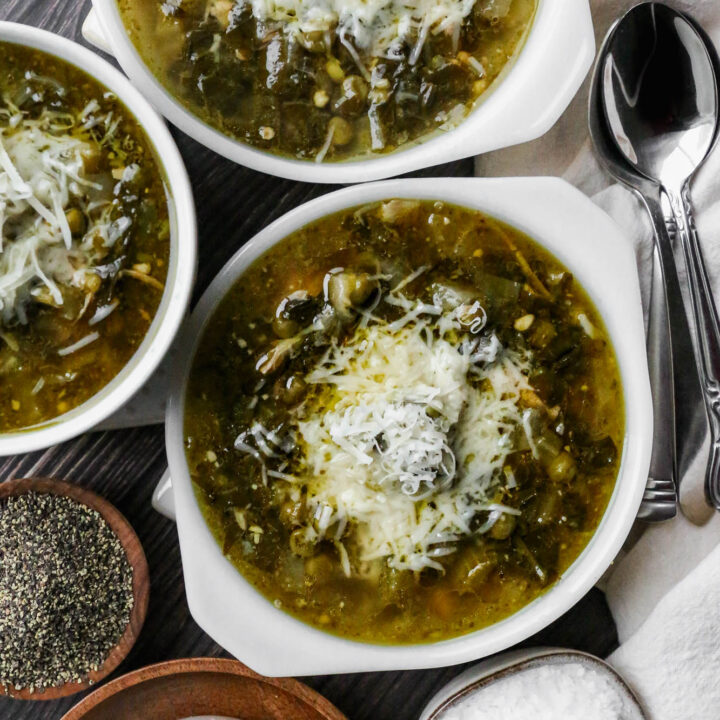
    three white bowls of gluten free instant pot sausage and kale soup

    Gluten Free Instant Pot Sausage and Kale Soup is a hearty and flavorful dish inspired by Instant Pot Zuppa Toscana. This Tuscan soup features savory Italian sausage and nutrient rich kale, making it a perfect choice for soup weather.

    Easy to prepare in the Instant Pot, it's one of the best Instant Pot recipes for a quick, healthy dinner on a budget. With its comforting flavors and wholesome ingredients, this sausage and kale soup is ideal for those seeking delicious and healthy recipes without compromising on taste.

    Enjoy a satisfying bowl of this meat soup that fits perfectly into any gluten free meal plan!

    If you are looking for more instant pot recipes try: The Best Gluten Free Instant Pot Recipes

    You can find more soup recipes here: My Favorite Gluten Free Soup Recipes

    three white bowls of gluten free instant pot sausage and kale soup
    [feast_advanced_jump_to]

    Ingredients

    Olive Oil
    Yellow Onion
    Minced Garlic
    Carrots
    Celery
    Ground Italian Sausage
    Chicken Stock
    Kale
    Sour Cream
    Heavy Whipping Cream
    Arrowroot Powder or Cornstarch
    Sea Salt
    Coarse Ground Black Pepper
    Dried Basil

    Instructions

    With your Instant Pot on the saute setting cook the onion, garlic, carrots and celery until the onions are translucent and the vegetables are starting to soften, about 3-5 minutes.

    Add the chicken stock, salt, pepper and basil. Let the chicken stock heat up until steaming, but not boiling.

    Add the turkey sausage in bite size chunks to the soup. The turkey sausage will finish cooking when under pressure. 

    Securely put the lid on your Instant Pot. Using manual mode cook the soup for 18 minutes. Let the steam release naturally.

    Once the steam has released naturally take the lid off and add the chopped kale. Turn the saute function back on and add the sour cream, heavy whipping cream and arrowroot powder. Stir the soup constantly to bring back up to steaming and allow the kale to wilt. This should only take 4-5 minutes.

    The soup will be very hot. Let cool slightly before serving.

    Supplies

    Frequently Asked Questions

    How do I thicken gluten free soups?

    I like to use arrowroot powder to thicken gluten free soups. You can also use gluten free flour or tapioca starch as gluten free thickeners. For this gluten free instant pot sausage and kale soup recipe I used arrowroot powder to slightly thicken the soup.

    If you can't have arrowroot powder or tapioca starch you can simply skip the step of thickening the soup. Your soup will be slightly more liquid, but will still taste amazing. You could also choose to cook the soup down more to remove some liquid. If you choose this step be sure to use medium low heat and to stir the soup constantly so it doesn't burn.

    How do I reheat soup in my Instant Pot?

    The first night I make soup in my Instant Pot I let it cool completely. Then I put the lid on or plastic wrap over top and store it in the refrigerator. The next night when I want to reheat the soup I take it out of the fridge and remove the plastic wrap.

    I place the stainless pot back in my Instant Pot and put the lid on making sure it's set to sealed. Then I press the manual button and set the time for 3 minutes. The soup will heat up while it's coming to pressure and it only takes a short amount of time to have hot soup ready to serve.

    How much liquid do you need in the instant pot for soups?

    The official instant pot manual calls for at least 8 ounces or 1 cup of liquid for the instant pot to come to pressure. For this recipe you will be using 32 ounces of chicken broth. That is more than enough liquid for your pressure pot to work properly.
    More Recipes You Might Enjoy

    • Gluten Free Instant Pot Chicken and Mushroom Soup
    • Gluten Free Instant Pot Cauliflower Cheeseburger Soup
    • My Favorite Gluten Free Soup Recipes
    • The Best Gluten Free Instant Pot Recipes

    I get a lot of my ingredients from Thrive Market. Thrive Market has been a game changer for me eating gluten free. They have so many options I can't get at my rural grocery stores! Use this link to get 40% off your first order!

    Print
    clock clock iconcutlery cutlery iconflag flag iconfolder folder iconinstagram instagram iconpinterest pinterest iconfacebook facebook iconprint print iconsquares squares iconheart heart iconheart solid heart solid icon

    Gluten Free Instant Pot Sausage and Kale Soup


    5 Stars 4 Stars 3 Stars 2 Stars 1 Star

    No reviews

    • Author: Elaine VanVleck
    • Total Time: 38 minutes
    • Yield: 5 servings 1x
    • Diet: Gluten Free
    Print Recipe
    Pin Recipe

    Description

    This healthy gluten free instant pot sausage and kale soup is perfect for a Keto or low carb diet. It's made with italian sausage, tuscan kale and sour cream. This delicious stew is creamy and perfect for lunch or dinner.


    Ingredients

    Scale
    • 1 Tbsp. Olive Oil
    • 1 medium Yellow Onion, diced
    • 2 Tbsp. Minced Garlic
    • ½ cup Carrots, chopped
    • 2 stalks Celery, chopped
    • 1 pound Ground Italian Turkey Sausage
    • 1 - 32 ounce Chicken Stock
    • 1 large bunch Kale, stems removed and chopped
    • ½ cup Sour Cream
    • ½ cup Heavy Whipping Cream
    • 1 Tbsp. Arrowroot Powder or Cornstarch
    • 1 tsp. Sea Salt
    • ½ tsp. Ground Black Pepper
    • ½ tsp. Dried Basil

    Instructions

    With your Instant Pot on the saute setting cook the onion, garlic, carrots and celery until the onions are translucent and the vegetables are starting to soften, about 3-5 minutes.

    Add the chicken stock, salt, pepper and basil. Let the chicken stock heat up until steaming, but not boiling.

    Add the turkey sausage in bite size chunks to the soup. The turkey sausage will finish cooking when under pressure. 

    Securely put the lid on your Instant Pot. Using manual mode cook the soup for 18 minutes. Let the steam release naturally.

    Once the steam has released naturally take the lid off and add the chopped kale. Turn the saute function back on and add the sour cream, heavy whipping cream and arrowroot powder. Stir the soup constantly to bring back up to steaming and allow the kale to wilt. This should only take 4-5 minutes.

    The soup will be very hot. Let cool slightly before serving.

    Notes

    When adding the arrowroot powder put the one tablespoon of arrowroot powder in a small bowl along with one tablespoon of water. Stir until the powder is completely dissolved and then add this mixture to the soup. This will prevent lumps in your soup.

    • Prep Time: 20 minutes
    • Cook Time: 18 minutes
    • Category: Soup
    • Method: Instant Pot
    • Cuisine: Gluten Free

    Did you make this recipe?

    Tag @smallfarmbiglife on Instagram and hashtag it #smallfarmbiglife

    Top Tip

    I love how simple this soup is to make. With very little preparation time I can have sausage and kale soup in the Instant Pot cooking for dinner. It's also simple if you do meal planning to cut the vegetables ahead of time so they are ready to be cooked.

    Thai Style Cabbage Salad

    This Thai Style Cabbage Salad is an easy, quick, and delicious take on a Thai crunchy slaw that works perfectly as a lunch salad recipe or a light easy dinner recipe. It's a refreshing Asian inspired salad with crisp texture, bold flavor, and a satisfying, hearty feel that makes it one of the best salads for lunch.

    If you love a cold Asian salad that is fresh but filling, this Thai cabbage salad recipe hits that sweet spot.

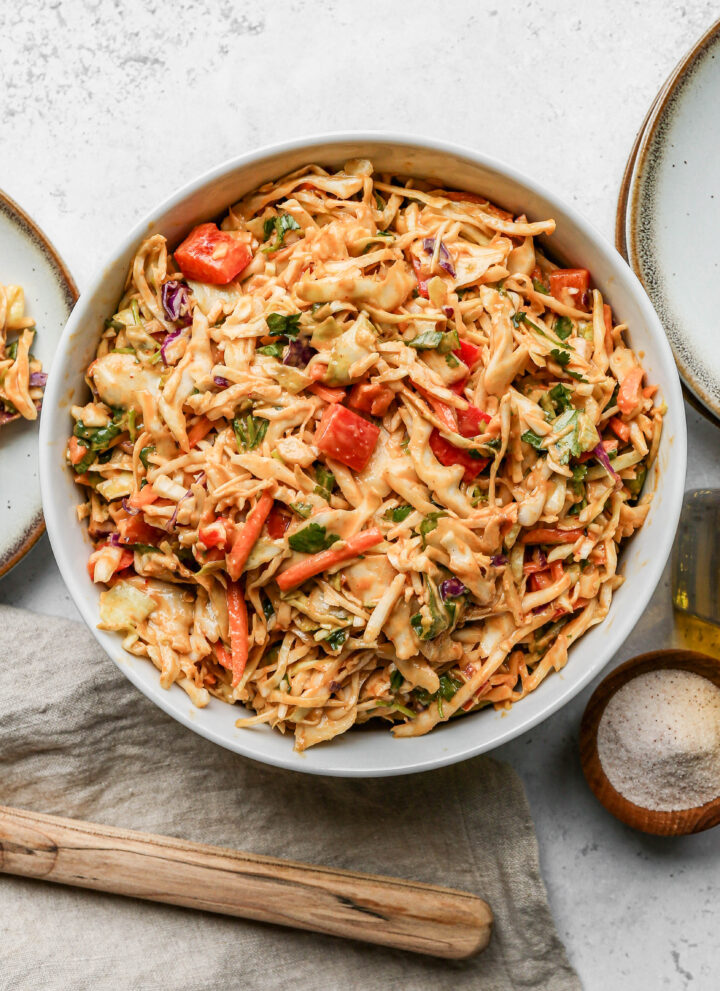
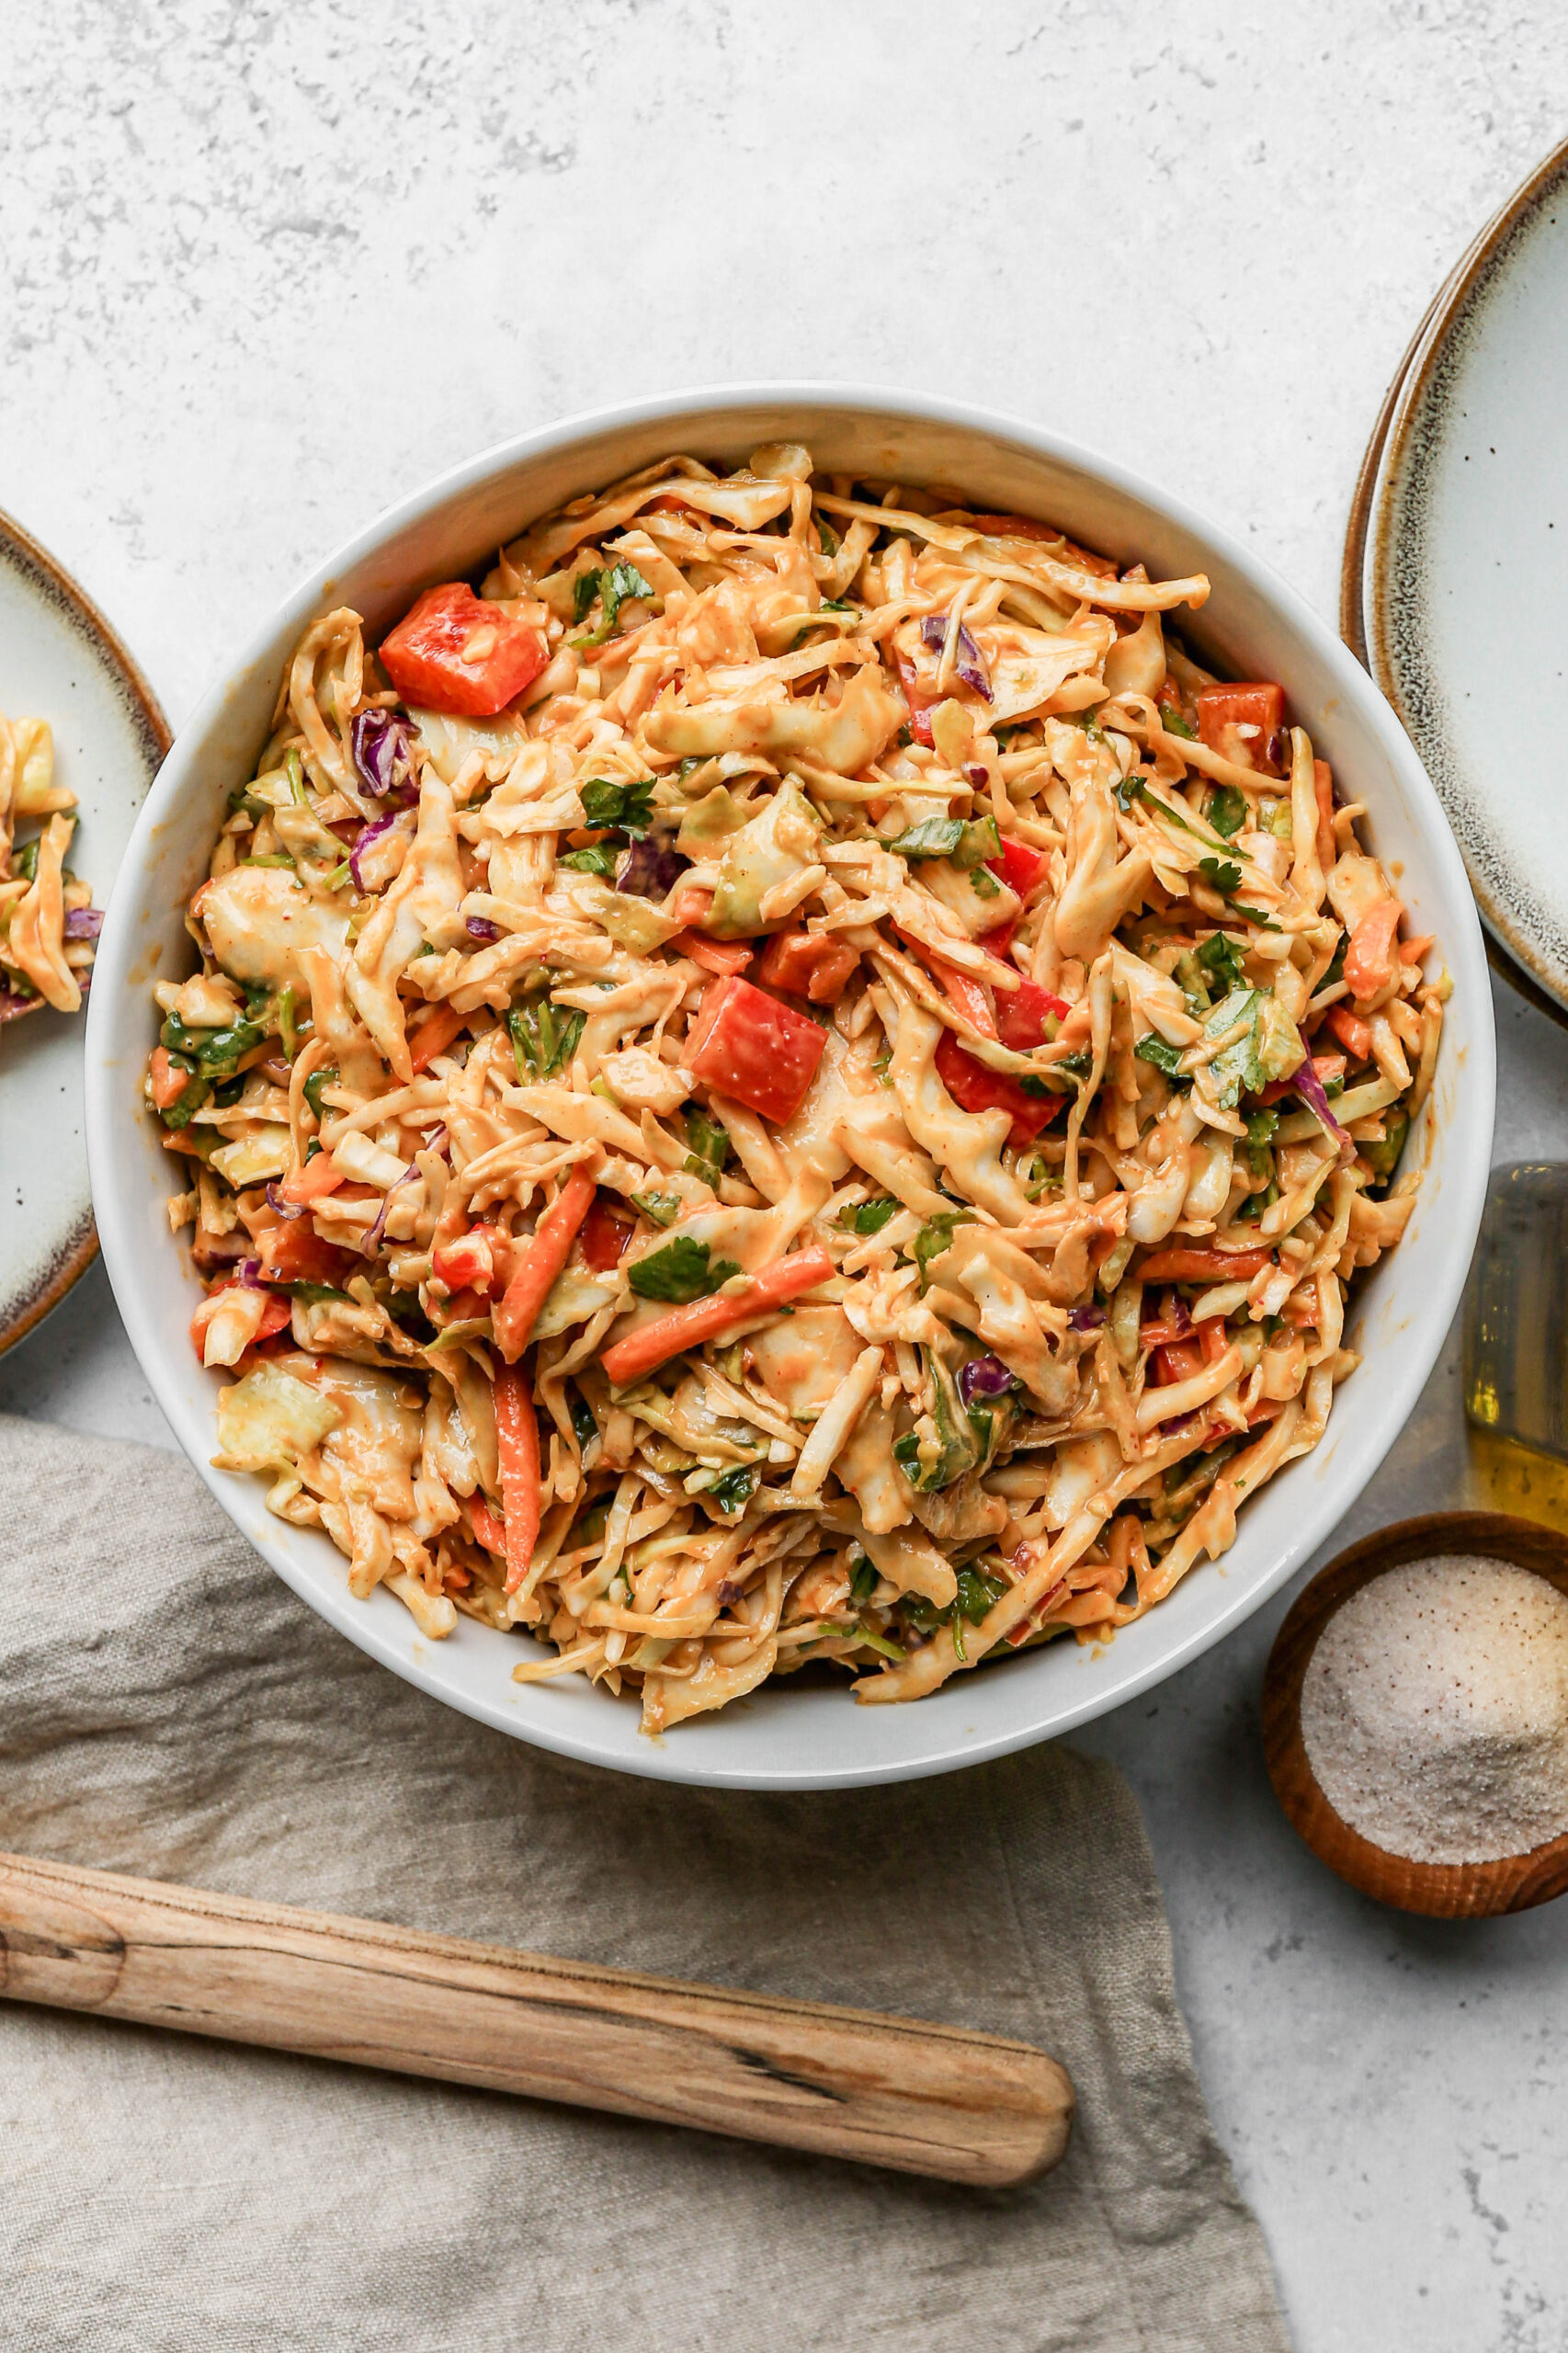
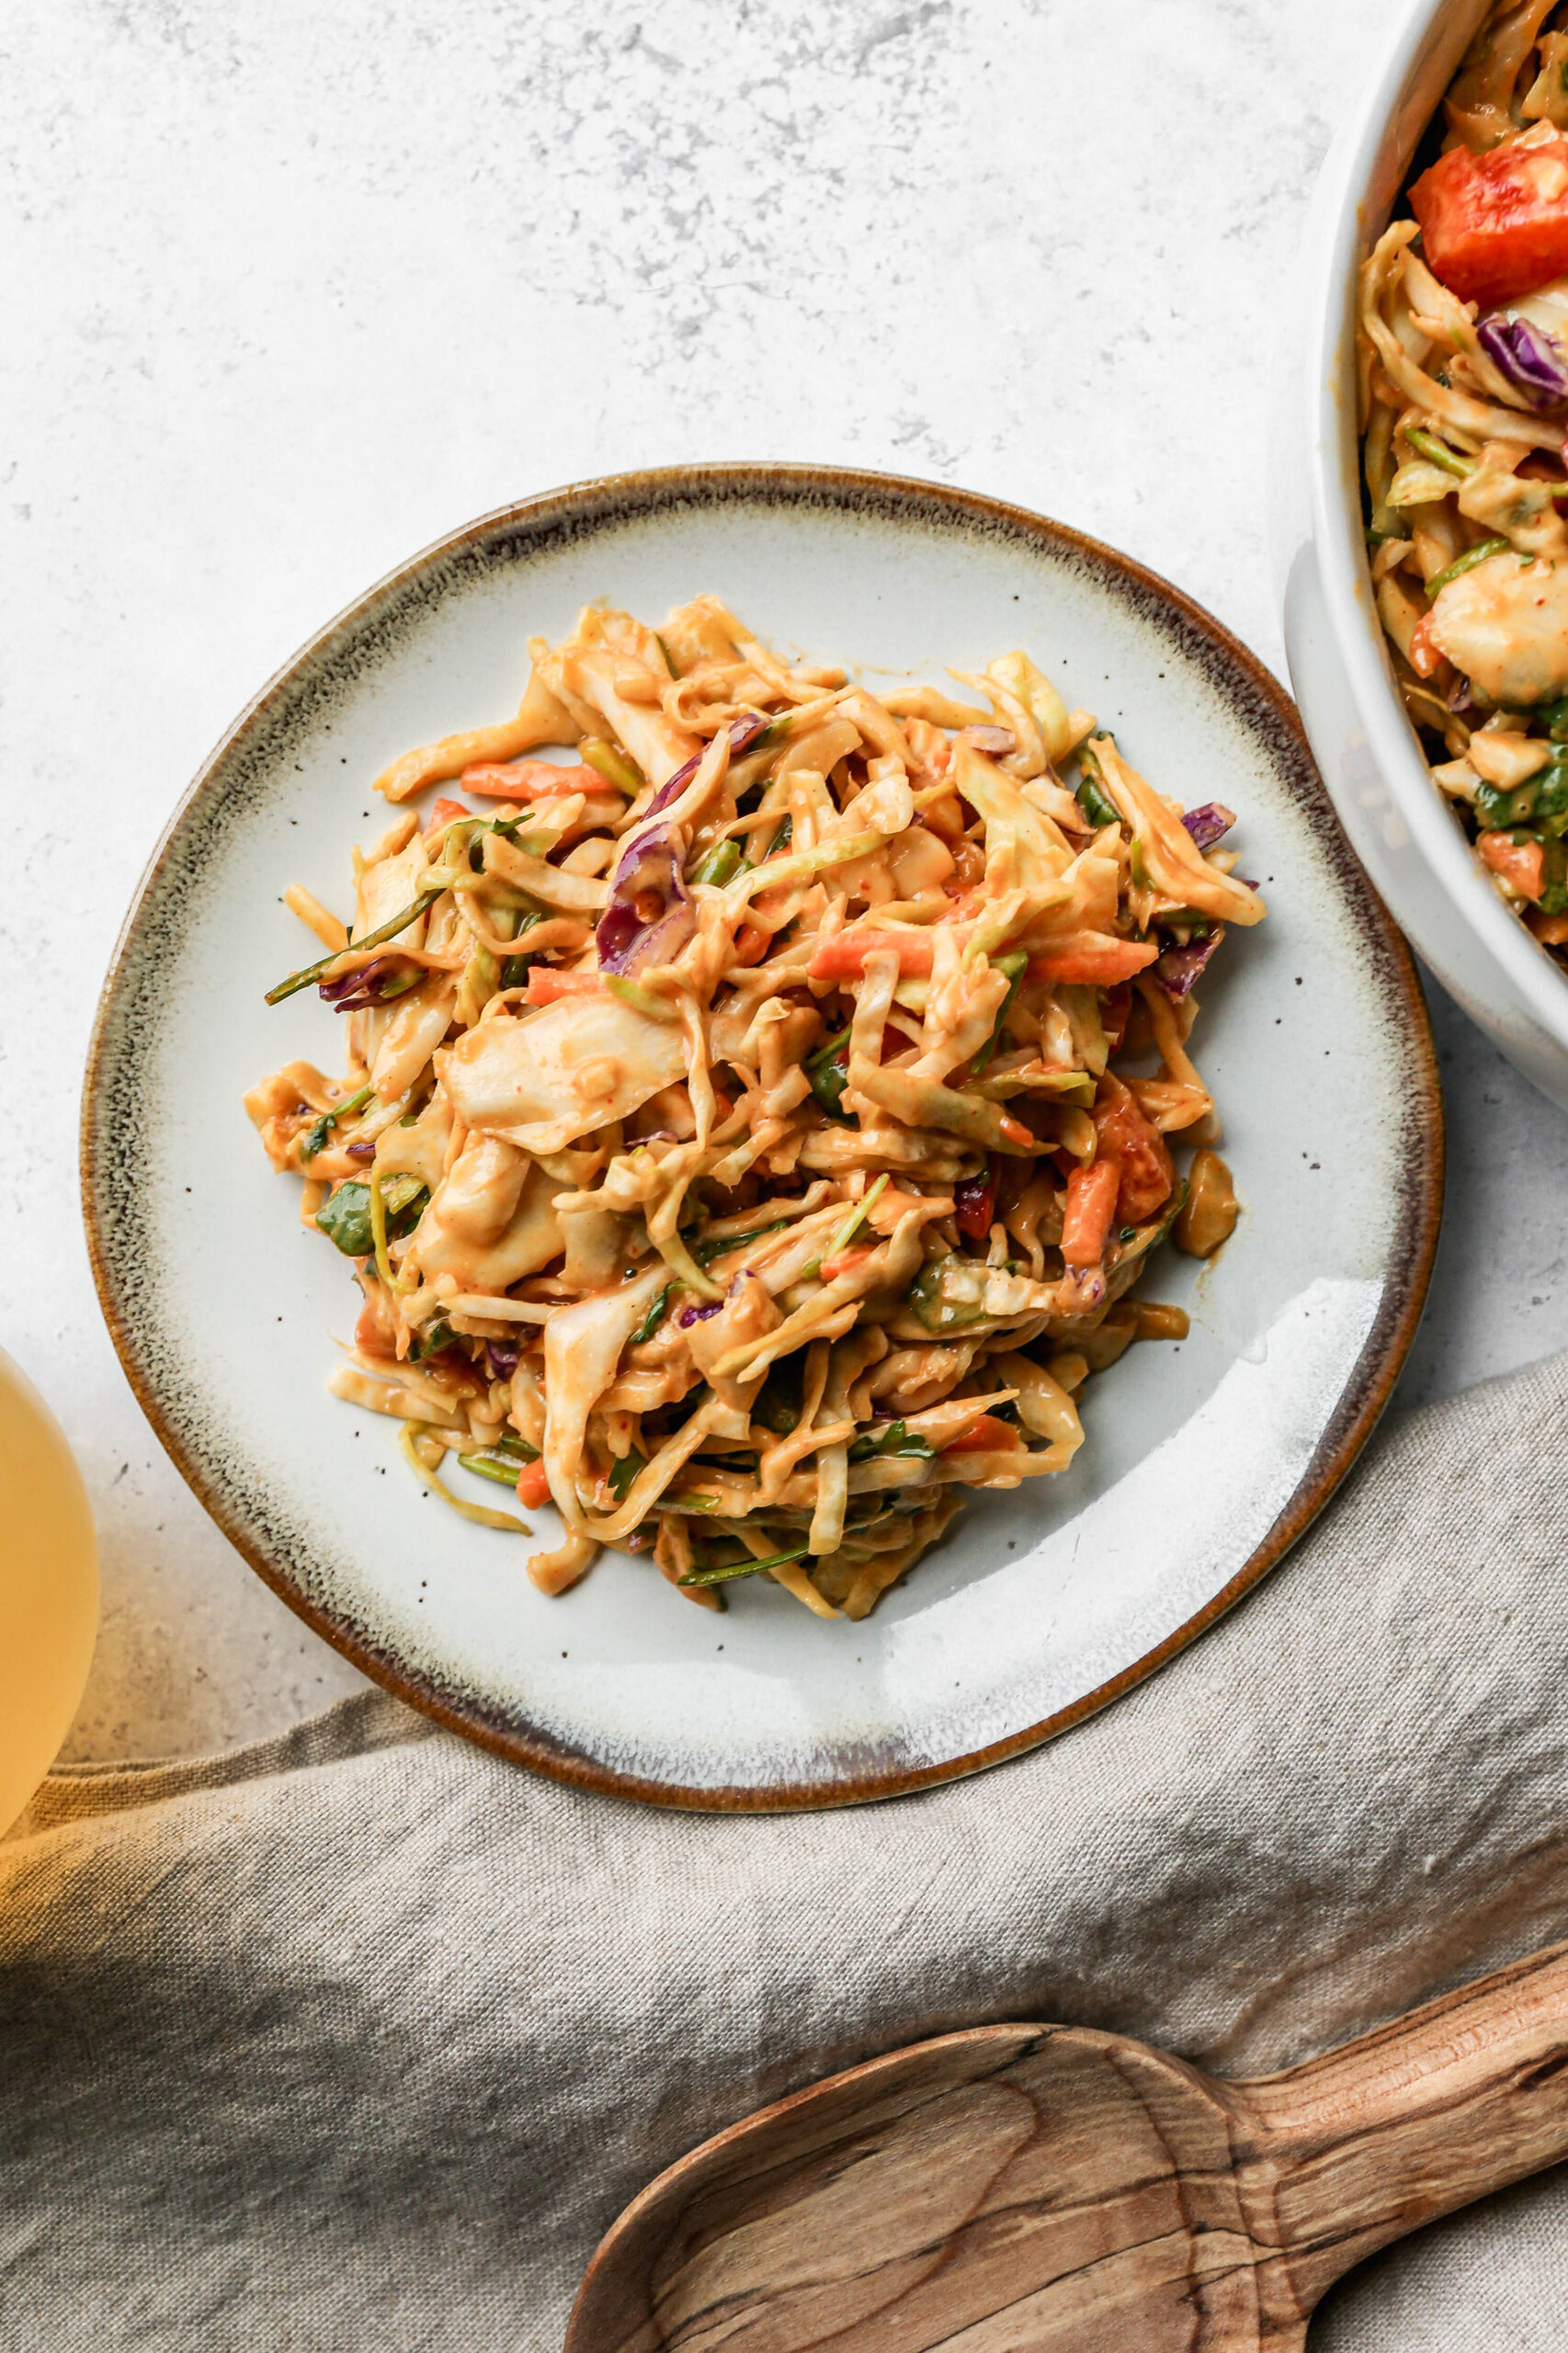
    a white serving bowl of thai style cabbage salad next to a small wooden bowl of salt.

    What really makes this Thai peanut cabbage salad shine is the creamy peanut dressing. It's rich, balanced, and absolutely the best for coating every bite. The result is a healthy Thai salad that feels indulgent while still fresh and vibrant, making it a standout Asian cabbage salad you'll want on repeat.

    Whether you're learning how to make Thai cabbage salad or looking for a new easy Thai salad, this Thai slaw with peanut dressing is a go to cabbage salad recipe that delivers big flavor with minimal effort.

    I love to make a batch of this salad and have it for lunch. It's similar to a Thai cabbage wrap, but much easier to make and store. I think this Thai style cabbage salad gets better the next day after the vegetables have soaked up some of the peanut dressing.

    Coleslaw is one of my favorite side dishes especially during the warmer months. You might also enjoy my recipes for Southwestern Style Coleslaw, Southwestern Style Coleslaw, Easy Apple Slaw with Poppyseed Dressing or Gluten Free Coleslaw.

    a salad plate of thai style cabbage salad next to a white serving bowl of the salad.
    [feast_advanced_jump_to]

    Ingredients

    Coleslaw Mix
    Green Onions
    Red Bell Pepper
    Cilantro
    Creamy Peanut Butter
    Coconut Aminos
    Sesame Oil
    Rice Vinegar
    Granulated Sugar
    Dried Ground Ginger
    Dried Ground Garlic
    Water
    Red Curry Paste
    Sea Salt
    Lime Juice

    Instructions

    In a wide mouth jar add the peanut dressing ingredients: peanut butter, coconut aminos, sesame oil, rice vinegar, sugar, dried ginger, dried garlic, water, red curry paste, salt and lime juice.

    Using an immersion blender mix the ingredients together until you have a creamy dressing. Set aside.

    In a large bowl pour the coleslaw mix, chopped green onions, chopped red bell pepper and chopped cilantro. Pour the dressing over top and mix until all the vegetables are coated.

    Refrigerate for at least two hours before serving.

    Serve as a side dish or add chicken to enjoy as a meal.

    Supplies

    More Recipes You Might Enjoy

    • Southwestern Style Coleslaw
    • Pineapple Coleslaw
    • Gluten Free Coleslaw
    • Seven Layer Salad

    I get a lot of my ingredients from Thrive Market. Thrive Market has been a game changer for me eating gluten free. They have so many options I can't get at my rural grocery stores! Use this link to get 40% off your first order!

    Print
    clock clock iconcutlery cutlery iconflag flag iconfolder folder iconinstagram instagram iconpinterest pinterest iconfacebook facebook iconprint print iconsquares squares iconheart heart iconheart solid heart solid icon

    Thai Style Cabbage Salad


    5 Stars 4 Stars 3 Stars 2 Stars 1 Star

    No reviews

    • Author: Elaine VanVleck
    • Total Time: 15 minutes
    • Yield: 6 servings 1x
    • Diet: Gluten Free
    Print Recipe
    Pin Recipe

    Description

    This healthy recipe for Thai style cabbage salad has an easy peanut dressing that is delicious! This cold salad uses peanut butter and sesame oil the dressing to give it great flavor. It makes a creamy side dish or is great on it's own.


    Ingredients

    Scale
    • 2 - 16 ounce bags Coleslaw Mix with Carrots
    • 1 bundle Green Onions, chopped
    • 1 Red Bell Pepper, seeded and chopped
    • 1 bundle Cilantro, stems removed and chopped

    Peanut Dressing:

    • ½ cup Creamy Peanut Butter
    • ⅓ cup Coconut Aminos
    • ¼ cup Sesame Oil
    • ¼ cup Rice Vinegar
    • 1 Tbsp. Granulated Sugar
    • ½ tsp. Dried Ground Ginger
    • ½ tsp. Dried Ground Garlic
    • 2 Tbsp. Water
    • 1 Tbsp. Red Curry Paste
    • ½ tsp. Sea Salt
    • 2 Tbsp. Lime Juice

    Instructions

    In a wide mouth jar add the peanut dressing ingredients: peanut butter, coconut aminos, sesame oil, rice vinegar, sugar, dried ginger, dried garlic, water, red curry paste, salt and lime juice.

    Using an immersion blender mix the ingredients together until you have a creamy dressing. Set aside.

    In a large bowl pour the coleslaw mix, green onions, red bell pepper and cilantro. Pour the dressing over top and mix until all the vegetables are coated.

    Refrigerate for at least two hours before serving.

    Serve as a side dish or add chicken to enjoy as a meal.

    Notes

    This salad is delicious with cubed, cooked chicken breast as an added protein.

    • Prep Time: 15 minutes
    • Category: Salad
    • Method: Chopped
    • Cuisine: Gluten Free

    Did you make this recipe?

    Tag @smallfarmbiglife on Instagram and hashtag it #smallfarmbiglife

    Storage

    Store the salad in an air tight container in the refrigerator for up to 5 days. Stir the leftover salad each time before serving.

    Top Tip

    I like to make this salad the day before I want to serve it. This gives the dressing enough time to coat all of the ingredients and for the cabbage to wilt slightly. The salad is my favorite on day two!

    Didn't find the answer you're looking for?

    Ask AI to answer based on this recipe:

    ChatGPT
    Google AI
    Perplexity
    Grok
    Claude

    Frequently Asked Questions

    Can I eat cabbage raw in a salad?

    Yes! For this recipe I used bags of cabbage salad mix, but you could slice up green cabbage and use that too. Cabbage belongs to the brassica family of vegetables (broccoli, cauliflower, etc.) and is full of vitamins K and C.

    How long does this Thai style cabbage salad last?

    After making this Thai style cabbage salad I like to store it in the refrigerator for a couple of hours at least before serving. Having some time for the dressing the cool and mix with the cabbage makes this dish really yummy.
    You can store the cabbage salad in a sealed container in the refrigerator for 3-5 days after making it.

    Gluten Free Instant Pot Chicken and Mushroom Soup

    This healthy recipe for gluten free instant pot chicken and mushroom soup makes a quick weeknight meal. It's so easy to combine the ingredients in your pressure pot and have dinnner in under 30 minutes. The combination of chicken breasts, vegetables, spices and sour cream make this a creamy and delicious dinner option.

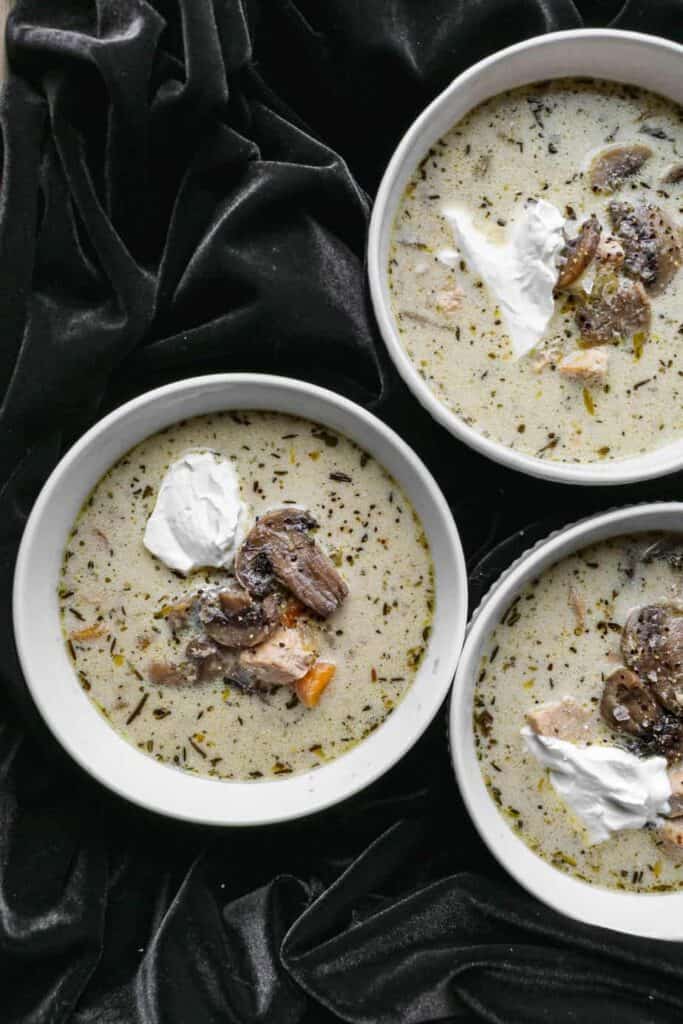
    three white bowls of gluten free instant pot chicken and mushroom soup with a dollop of sour cream on top

    Gluten Free Instant Pot Chicken and Mushroom Soup is a comforting and creamy dish that combines tender chicken with savory mushrooms and fresh vegetables. This easy-to-make soup features a rich flavor profile, making it a perfect meal in a bowl.

    Ideal for busy weeknights, this recipe is low carb and packed with healthy ingredients, showcasing the best of mushroom soup recipes. Whether you're looking for a comforting dinner or a homemade soup option, this Instant Pot recipe is sure to become a favorite in your collection of delicious soup recipes.

    If you are looking for more Instant Pot soup recipes try my Instant Pot Beef and Vegetable Soup, my Gluten Free Vegetarian Instant Pot Split Pea Soup, my Gluten Free Instant Pot Italian Style Pasta and Bean Soup or my Instant Pot Pesto Chicken Soup.

    You can find all of my soup recipes here: Gluten Free Soup Recipes

    You can find all of my Instant Pot recipes here: Gluten Free Instant Pot Recipes

    a white bowl of gluten free instant pot chicken and mushroom soup with a spoon full of it lifted above the bowl
    [feast_advanced_jump_to]

    Ingredients

    Olive Oil
    Yellow Onion
    Minced Garlic
    Carrots
    Celery
    Frozen Mushrooms or Fresh Mushrooms
    Chicken Breast
    Dried Rosemary
    Dried Thyme
    Dried Sage
    Sea Salt
    Coarse Ground Black Pepper
    Chicken Broth
    Sour Cream
    Heavy Whipping Cream

    Instructions

    With your instant pot on the saute function pour in the olive oil and add the onion, garlic, carrot, celery and mushrooms. Saute until the onions are translucent.

    Add the rosemary, thyme, sage, salt and pepper to the mixture and stir into the vegetables

    Turn off the saute function. Add the cubed chicken breast and chicken broth.

    Place the lid on the pressure pot being sure that it seals. Cook on the manual setting for 18 minutes.

    Let the instant pot release pressure naturally.

    After the pressure is released carefully take the lid off and add the sour cream and heavy whipping cream. Serve the soup hot.

    Supplies

    Frequently Asked Questions

    Can I put raw chicken in the instant pot?

    Yes. For this recipe I cube the raw chicken and then put it in the instant pot to cook. There is no need to cook the chicken before adding it to the soup ingredients to cook in the pressure pot.

    I like to cube the raw chicken so I don't have to shred the chicken in the hot soup. With the chicken breasts already cubed the soup is ready to serve when it's done cooking. I think it makes it so much easier.

    How do I reheat soup in my Instant Pot?

    The first night I make soup in my Instant Pot I let it cool completely. Then I put the lid on or plastic wrap over top and store it in the refrigerator. The next night when I want to reheat the soup I take it out of the fridge and remove the plastic wrap.

    I place the stainless pot back in my Instant Pot and put the lid on making sure it's set to sealed. Then I press the manual button and set the time for 3 minutes. The soup will heat up while it's coming to pressure and it only takes a short amount of time to have hot soup ready to serve.

    How much liquid do you need in the instant pot for soups?

    The official instant pot manual calls for at least 8 ounces or 1 cup of liquid for the instant pot to come to pressure. For this recipe you will be using 32 ounces of chicken broth. That is more than enough liquid for your pressure pot to work properly.

    More Recipes You Might Enjoy
    • Gluten Free Instant Pot Chicken and Dumplings
    • Instant Pot Pesto Chicken Soup
    • Gluten Free Instant Pot Italian Style Pasta and Bean Soup
    • Gluten Free Vegetarian Instant Pot Split Pea Soup

    I get a lot of my ingredients from Thrive Market. Thrive Market has been a game changer for me eating gluten free. They have so many options I can't get at my rural grocery stores! Use this link to get 25% off your first order!

    Print
    clock clock iconcutlery cutlery iconflag flag iconfolder folder iconinstagram instagram iconpinterest pinterest iconfacebook facebook iconprint print iconsquares squares iconheart heart iconheart solid heart solid icon

    Gluten Free Instant Pot Chicken and Mushroom Soup


    5 Stars 4 Stars 3 Stars 2 Stars 1 Star

    No reviews

    • Author: Elaine VanVleck
    • Total Time: 33 minutes
    • Yield: 5 servings 1x
    • Diet: Gluten Free
    Print Recipe
    Pin Recipe

    Description

    This healthy recipe for gluten free instant pot chicken and mushroom soup makes a quick weeknight meal. It's so easy to combine the ingredients in your pressure pot and have dinnner in under 30 minutes. The combination of chicken breasts, vegetables, spices and sour cream make this a creamy and delicious dinner option. 


    Ingredients

    Scale

    1 Tbsp. Olive Oil
    1 medium Yellow Onion, chopped
    2 Tbsp. Minced Garlic
    1 cup Carrots, chopped
    3 stalks Celery, chopped
    2 - 10 ounce bags Frozen Chopped White Mushrooms or Fresh Mushrooms
    3 Chicken Breasts, cubed
    1 tsp. Dried Rosemary
    1 tsp. Dried Thyme
    ½ tsp. Dried Sage
    1 tsp. Sea Salt
    1 tsp. Coarse Ground Black Pepper
    1 - 32 ounce container Chicken Broth
    ½ cup Sour Cream
    ½ cup Heavy Whipping Cream


    Instructions

    With your instant pot on the saute function pour in the olive oil and add the onion, garlic, carrot, celery and mushrooms. Saute until the onions are translucent.

    Add the rosemary, thyme, sage, salt and pepper to the mixture and stir into the vegetables

    Turn off the saute function. Add the cubed chicken breast and chicken broth.

    Place the lid on the pressure pot being sure that it seals. Cook on the manual setting for 18 minutes.

    Let the instant pot release pressure naturally.

    After the pressure is released carefully take the lid off and add the sour cream and heavy whipping cream. Serve the soup hot.

    Notes

    If you would like a dairy free version omit the sour cream and heavy whipping cream.

    • Prep Time: 15 minutes
    • Cook Time: 18 minutes
    • Category: Soup
    • Method: Instant Pot
    • Cuisine: Gluten Free

    Did you make this recipe?

    Tag @smallfarmbiglife on Instagram and hashtag it #smallfarmbiglife

    Air Fryer Spicy Roasted Peanuts

    These Air Fryer Spicy Roasted Peanuts are one of my favorite quick snacks to make and the recipe I reach for when I want something crunchy, bold, and satisfying that takes almost no effort to put together. Raw peanuts tossed in olive oil, cayenne pepper, smoked paprika, garlic powder, and sea salt go into the air fryer and come out perfectly golden and crispy in about twelve minutes.

    No stirring, no standing over a hot stove, and no burning the whole batch because you walked away for thirty seconds.

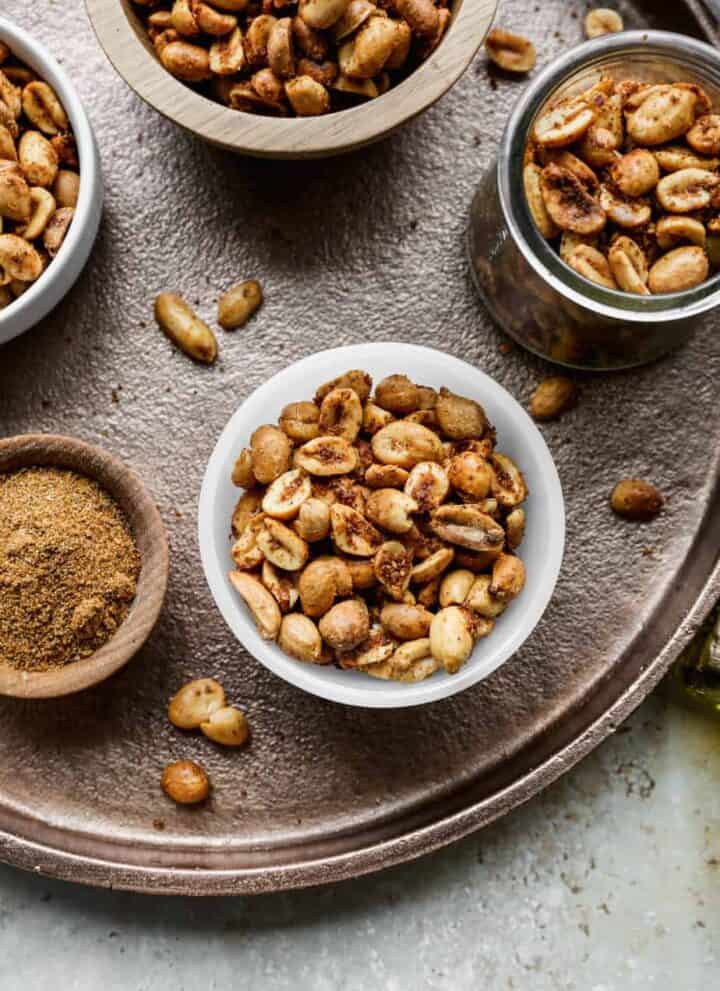
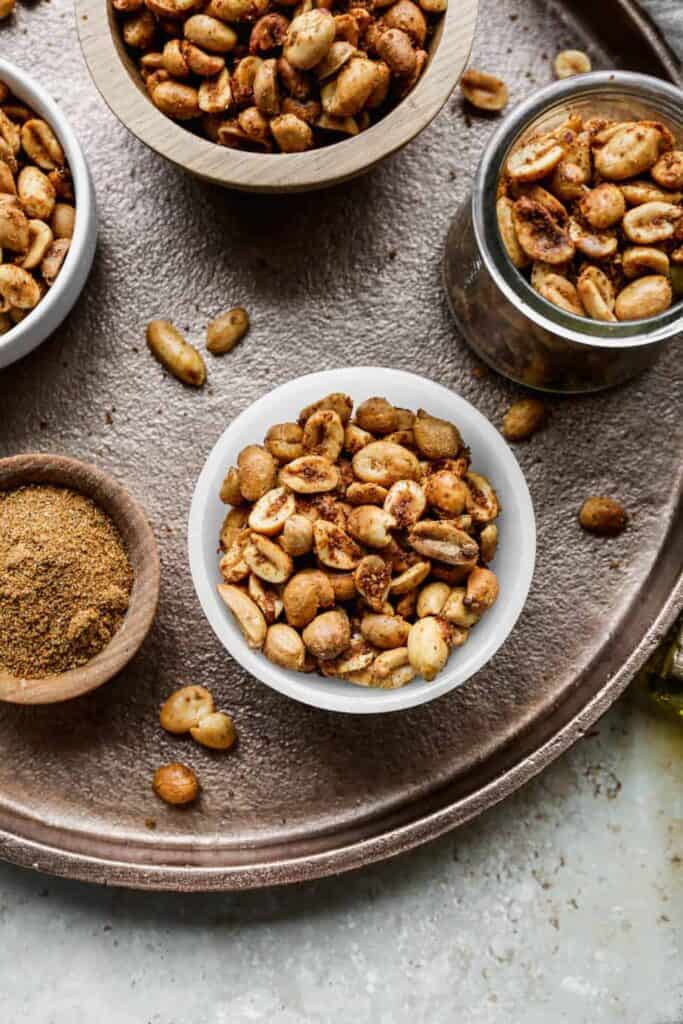
    small bowls of air fryer spicy roasted peanuts on a large copper tray

    What I love most about making my own spicy roasted peanuts is knowing exactly what is in them. Most store bought flavored and seasoned peanuts contain hidden gluten in the seasoning blend which makes them off limits for anyone with celiac disease.

    Making them at home with simple spices and raw peanuts means every ingredient is verified and every bite is safe.

    These are also a genuinely high protein snack which makes them one of the most nutritious things you can grab when you need something quick between meals.

    If you like this try my Gluten Free Air Fryer Chex Mix, my Air Fryer Sweet and Salty Roasted Cashew Nuts, my Air Fryer Savory Herb Roasted Nuts or my Air Fryer Salt & Pepper Roasted Cashews.

    If you are looking for more air fryer recipes try: Gluten Free Air Fryer Recipes

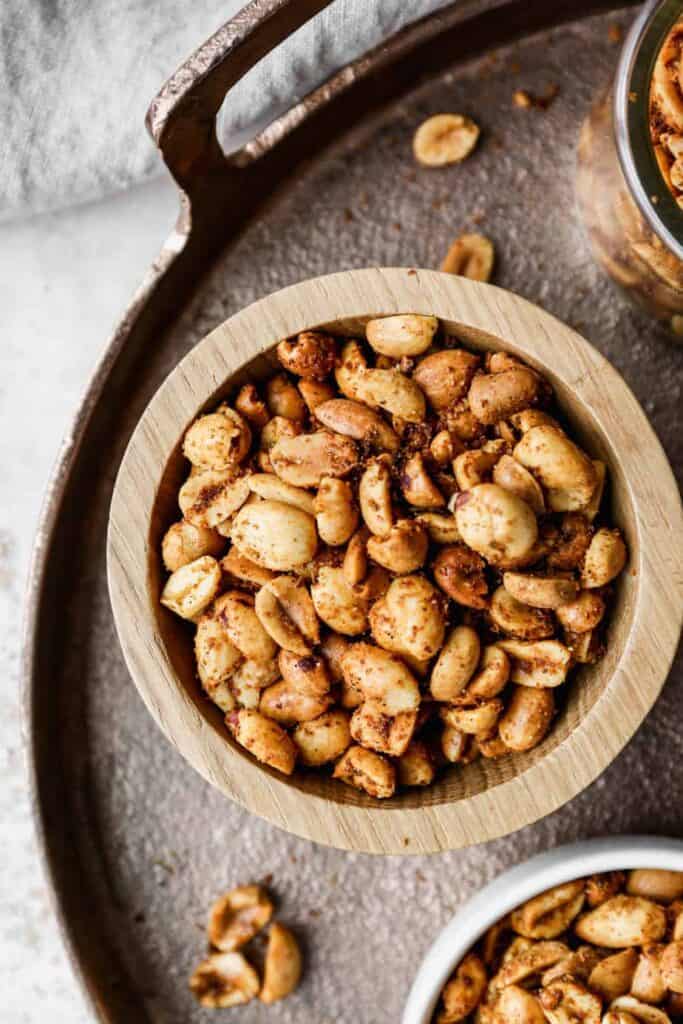
    a small wooden bowl of air fryer spicy roasted peanuts on a copper tray
    [feast_advanced_jump_to]

    Why Store Bought Flavored Peanuts Are Risky for Celiac Disease

    Plain raw peanuts are naturally gluten free but most commercially flavored and seasoned peanuts at the grocery store are a different story. Seasoning blends used on store bought flavored peanuts can contain hidden gluten from ingredients like soy sauce powder, malt vinegar flavoring, and modified food starch. Even products labeled as spicy or chili flavored can have gluten hiding in the seasoning.

    Making your own spicy roasted peanuts at home gives you complete control over every single ingredient. Raw peanuts, olive oil, cayenne pepper, smoked paprika, garlic powder, and sea salt are all naturally gluten free. There are no hidden additives and no shared facility concerns with a commercial seasoning operation. For anyone with celiac disease homemade is always the safer choice when it comes to flavored nuts.

    Peanuts Are a High Protein Snack

    Peanuts are one of the most protein dense snacks you can make at home. A one ounce serving of roasted peanuts provides approximately seven grams of protein along with healthy fats, fiber, magnesium, and vitamin E. That combination keeps you full and energized in a way that most packaged snack foods simply cannot match.

    If you are working toward daily protein targets a small handful of these spicy roasted peanuts between meals is one of the most practical and affordable options available. Peanuts cost significantly less per gram of protein than most protein bars or packaged snack bites and they taste infinitely better too.

    Tips for Perfect Air Fryer Spicy Roasted Peanuts

    • Coat the peanuts thoroughly before they go into the air fryer. Add all the peanuts, oil, and spices to a bowl and toss until every single peanut is completely and evenly coated. Unevenly coated peanuts mean some bites are intensely flavored and others taste like plain roasted peanuts.
    • Spread them in a single layer in the air fryer basket. Do not pile them on top of each other. The hot air needs to circulate around each peanut to roast rather than steam them. Work in batches if your basket is not large enough to hold them all in a single layer.
    • Shake the basket halfway through cooking to redistribute the peanuts and make sure all sides get equal exposure to the heat.
    • Watch closely in the final minute or two. Peanuts have a high natural fat content which means they can go from perfectly golden to burnt very quickly at the end of the cook time. Pull them out the moment they look golden rather than waiting until they look deeply browned.
    • Pour them onto a parchment lined baking sheet the moment they come out of the air fryer. Do not leave them in the hot basket. They will continue cooking from the residual heat and can overbrown if left sitting. Spreading them on a cool baking sheet stops the cooking immediately and lets each peanut cool individually so they do not clump together.

    Variations

    This recipe is easy to customize based on your heat preference and what spices you have on hand.

    • For more heat increase the cayenne pepper to half a teaspoon or add a pinch of red pepper flakes on top of the full cayenne amount.
    • For a sweet and spicy version add one tablespoon of honey or maple syrup to the oil and spice coating before tossing the peanuts. The sweetness balances the heat beautifully.
    • For a Cajun version substitute your favorite Cajun seasoning blend for the individual spices. Make sure your Cajun seasoning is certified gluten free before using.
    • For a garlic forward version double the garlic powder and add a half teaspoon of onion powder for a bold savory coating without the heat.

    Oven Instructions

    No air fryer? These spicy roasted peanuts work equally well in the oven.

    Preheat your oven to 350 degrees. Coat the peanuts exactly as directed in the recipe. Spread them in a single layer on a parchment lined baking sheet and bake for 15 to 20 minutes stirring once halfway through. Watch them closely in the final few minutes. Remove immediately when golden and spread on a cool baking sheet to stop the cooking process. Let cool completely before serving or storing.

    Serving Suggestions

    These spicy roasted peanuts are incredibly versatile beyond just a snack bowl. Here are my favorite ways to use them.

    • As a standalone snack. The most obvious and most satisfying use. Keep them in a jar on the counter and grab a handful when you need something crunchy and filling.
    • On a charcuterie board. A small bowl of these spicy peanuts alongside cheeses, gluten free crackers, and cured meats adds a bold and spicy element that guests always reach for first.
    • On a salad. Sprinkle a small handful over a green salad or grain bowl for a spicy and crunchy high protein topping.
    • As a trail mix base. Combine with dried cranberries, dark chocolate chips, and sunflower seeds for a homemade trail mix that is genuinely satisfying for hikes and road trips.
    • As a post workout snack. The protein and healthy fat combination makes these an ideal post workout snack that is easy to portion and carry anywhere.

    Storage Instructions

    Store your spicy roasted peanuts in an airtight container at room temperature for up to two weeks. To keep them fresh longer store them in the refrigerator. Make sure the peanuts have cooled completely before sealing them in a container since storing warm peanuts traps steam and softens the crispy coating.

    Top Tip

    Do not rush the cooling step. The peanuts need to cool completely at room temperature before you serve or store them. The spice coating firms up and crisps significantly as the peanuts cool and what looks slightly soft coming out of the air fryer will be perfectly crunchy after ten to fifteen minutes at room temperature. Eating them straight from the air fryer before they have cooled gives you a softer and less satisfying texture than waiting patiently for the full cooling time.

    Frequently Asked Questions

    Can I roast raw peanuts in an air fryer?

    Yes! I love to roast raw peanuts and other nut varieties in my air fryer. When you make homemade roasted peanuts you get to control the ingredients. This includes using healthier oils and controlling the spice level.

    How long does it take to roast peanuts in the air fryer?

    Its' so quick! I roasted the peanuts in this recipe for 11 minutes at 330 degrees. The key to perfect peanuts is to not leave them in the air fryer when they are done. As soon as they are done frying I pour them onto a parchment lined baking sheet to cool.

    Let the spicy roasted peanuts cool completely on the baking sheet before moving them to a sealed container or bag to store them. They are perfect for a snack or to pack in lunches.

    Do I need to wash peanuts before roasting?

    I buy my raw peanuts already shelled and I don't wash them before roasting. If you are shelling your own peanuts you may want to wash them before roasting, although I don't think it's completely necessary.

    If you do choose to wash your peanuts be sure that they are completely dry before you mix them with the coating ingredients. If the peanuts are still wet the oil and spices will not stick to them.

    Are store bought spicy peanuts gluten free?

    Not always. Plain raw peanuts are naturally gluten free but most commercially flavored and seasoned peanuts contain hidden gluten in the seasoning blend. Common culprits include soy sauce powder, malt vinegar flavoring, and modified food starch from wheat. Making your own spicy roasted peanuts at home is the safest option for anyone with celiac disease because you control every single ingredient and there are no hidden additives to worry about.

    Can I make these spicy roasted peanuts in the oven instead of the air fryer?

    Yes. Preheat your oven to 350 degrees and coat the peanuts exactly as directed in the recipe. Spread them in a single layer on a parchment lined baking sheet and bake for 15 to 20 minutes stirring once halfway through. Watch them closely in the final few minutes since peanuts can go from perfectly golden to burnt quickly. Remove them immediately when done and spread onto a cool parchment lined baking sheet to stop the cooking process. Let cool completely before serving or storing.

    Didn't find the answer you're looking for?

    Ask AI to answer based on this recipe:

    ChatGPT
    Google AI
    Perplexity
    Grok
    Claude

    Supplies

    More Recipes You Might Enjoy

    • Air Fryer Salt & Pepper Roasted Cashews
    • Air Fryer Savory Herb Roasted Nuts
    • Gluten Free Air Fryer Chex Mix
    • Air Fryer Sweet and Salty Roasted Cashew Nuts

    I get a lot of my ingredients from Thrive Market. Thrive Market has been a game changer for me eating gluten free. They have so many options I can't get at my rural grocery stores! Use this link to get 40% off your first order!

    Print
    clock clock iconcutlery cutlery iconflag flag iconfolder folder iconinstagram instagram iconpinterest pinterest iconfacebook facebook iconprint print iconsquares squares iconheart heart iconheart solid heart solid icon

    Air Fryer Spicy Roasted Peanuts


    5 Stars 4 Stars 3 Stars 2 Stars 1 Star

    No reviews

    • Author: Elaine VanVleck
    • Total Time: 16 minutes
    • Yield: 2 cups 1x
    • Diet: Gluten Free
    Print Recipe
    Pin Recipe

    Description

    Raw peanuts tossed in olive oil, cayenne pepper, smoked paprika, garlic powder, and sea salt then air fried until perfectly golden and crunchy. These gluten free air fryer spicy roasted peanuts are a high protein snack ready in minutes with no hidden ingredients and completely safe for celiac disease.


    Ingredients

    Scale
    • 2 Tbsp Olive Oil
    • 2 cups Raw Peanuts, unshelled
    • 2 tsp Old Bay Seasoning
    • ½ tsp Sea Salt
    • ¼ tsp Cayenne Pepper
    • 1 Tbsp Nutritional Yeast
    • 2 tsp Cholula Hot Sauce

    Instructions

    Place parchment paper on a baking sheet and set aside.

    Place all of the ingredients into a mixing bowl and stir to coat the peanuts thoroughly. 

    Pour the nut mixture into the air fryer and spread the peanuts around to create an even layer.

    Air fry at 330 degrees for 11 minutes. At 6 minutes shake the basket of your air fryer so the peanuts roast evenly.

    Pour the peanuts onto a parchment lined baking sheet to cool.

    Let the nuts cool completely before moving them to a sealed container or bag to store them.

    If you made this recipe please leave a star rating and comment below. It helps other readers find this recipe and means so much to me.

    Notes

    If you want more or less spice you can change how much cayenne pepper and Cholula Hot Sauce you use.

    • Prep Time: 5 minutes
    • Cook Time: 11 minutes
    • Category: Snacks
    • Method: Air Fryer
    • Cuisine: American

    Did you make this recipe?

    Tag @smallfarmbiglife on Instagram and hashtag it #smallfarmbiglife

    If you make these Air Fryer Spicy Roasted Peanuts I would love to hear what you think! Leave a comment below and let me know how they turned out or tag me on Instagram so I can see your batch.

    Once you start making your own roasted peanuts at home you will never want to go back to store bought. Save this recipe to your favorite Pinterest board so you always have it ready when you need a quick and easy high protein gluten free snack!

    Ingredients

    Olive Oil
    Raw Peanuts
    Old Bay Seasoning
    Sea Salt
    Cayenne Pepper
    Nutritional Yeast
    Cholula Hot Sauce

    Instructions

    Place parchment paper on a baking sheet and set aside.

    Place all of the ingredients into a mixing bowl and stir to coat the peanuts thoroughly. 

    Pour the nut mixture into the air fryer and spread the peanuts around to create an even layer.

    Air fry at 330 degrees for 11 minutes. At 6 minutes shake the basket of your air fryer so the peanuts roast evenly.

    Pour the peanuts onto a parchment lined baking sheet to cool.

    Let the nuts cool completely before moving them to a sealed container or bag to store them.

    Gluten Free Double Chocolate Bundt Cake

    This Gluten Free Double Chocolate Bundt Cake is rich, indulgent, and made for true chocolate lovers. With a moist chocolate bundt cake crumb and bursts of chocolate throughout, it delivers that classic death by chocolate bundt cake feel in every slice.

    Baked in a bundt pan, it's an easy double chocolate bundt cake that looks impressive while still being simple enough for everyday baking.

    two mini gluten free double chocolate bundt cakes on white plates with glossy chocolate glaze over them

    Finished with a smooth chocolate glaze, this dessert feels special without being fussy. It's the kind of gluten free chocolate bundt cake that works just as well for birthdays and celebrations as it does for a cozy night in.

    If you're searching for the best gluten free chocolate cake that's deeply chocolatey, super moist, and crowd pleasing, this one checks every box.

    You can make this cake in either a mini bundt cake pan that makes six mini cakes or you can use a regular size bundt pan. I've given instructions below for baking times of either cake.

    You can find all my cake recipes here: Gluten Free Cake Recipes

    a mini gluten free double chocolate bundt cake on a cream plate with a slice cut out of it
    [feast_advanced_jump_to]

    Ingredients

    Gluten Free Flour
    Cocoa Powder
    Baking Powder
    Sea Salt
    Unsalted Butter
    Coconut Oil
    Granulated Sugar
    Eggs
    Buttermilk
    Vanilla Extract
    Semi Sweet Chocolate Chips

    Instructions

    Preheat your oven to 325 degrees. Grease your mini bundt pan or regular bundt pan with coconut oil or butter. Set your pan aside.

    In the bowl of your stand mixer beat together the unsalted butter, coconut oil and sugar. Add the eggs, buttermilk and vanilla. Beat until combined. 

    In a bowl whisk together the gluten free flour, cocoa powder, baking powder and salt. Add the dry ingredients to the wet ingredients and blend together until a batter forms, 1-2 minutes.

    Add the chocolate chips to the batter and stir in to combine.

    Pour the batter into your greased bundt pan or mini bundt pan. 

    Bake at 325 degrees for 1 hour, 10 minutes for a regular bundt pan or 40 minutes for mini bundt pan.

    Test the cake with a toothpick. It should come out clean and the center of the cake should be firm when done.

    Let the cake cool for 10 minutes and then invert onto a cooling rack to finish cooling.

    After the cake has cooled use my recipe for Gluten Free Chocolate Glaze to pour over the cake.

    Bundt Pans

    More Recipes You Might Enjoy

    • Gluten Free Chocolate Pound Cake
    • Gluten Free Chocolate Zucchini Muffins
    • Gluten Free Double Chocolate Chip Cookies
    • Gluten Free Triple Chocolate Brownies

    I get a lot of my ingredients from Thrive Market. Thrive Market has been a game changer for me eating gluten free. They have so many options I can't get at my rural grocery stores! Use this link to get 40% off your first order!

    Print
    clock clock iconcutlery cutlery iconflag flag iconfolder folder iconinstagram instagram iconpinterest pinterest iconfacebook facebook iconprint print iconsquares squares iconheart heart iconheart solid heart solid icon

    Gluten Free Double Chocolate Bundt Cake


    5 Stars 4 Stars 3 Stars 2 Stars 1 Star

    No reviews

    • Author: Elaine VanVleck
    • Total Time: 1 hour 25 minutes
    • Yield: 10 servings 1x
    • Diet: Gluten Free
    Print Recipe
    Pin Recipe

    Description

    This easy recipe for gluten free double chocolate bundt cake is made from scratch. The cake includes cocoa powder, chocolate chips and a glossy chococlate glaze. This is such an easy gluten free chocolate cake!


    Ingredients

    Scale
    • 2 cups Gluten Free Flour
    • ¾ cup Cocoa Powder
    • 2 tsp. Baking Powder
    • 1 tsp. Sea Salt
    • 1 cup Unsalted Butter, at room temperature
    • ¼ cup Coconut Oil
    • 2 cups Granulated Sugar
    • 4 large Eggs, at room temperature
    • 1 cup Buttermilk
    • 2 tsp. Vanilla Extract
    • 1 cup Semi-Sweet Chocolate Chips

    Instructions

    Preheat your oven to 325 degrees. Grease your mini bundt pan or regular bundt pan with coconut oil or butter. Set your pan aside.

    In the bowl of your stand mixer beat together the unsalted butter, coconut oil and sugar. Add the eggs, buttermilk and vanilla. Beat until combined. 

    In a bowl whisk together the gluten free flour, cocoa powder, baking powder and salt. Add the dry ingredients to the wet ingredients and blend together until a batter forms, 1-2 minutes.

    Add the chocolate chips to the batter and stir in to combine.

    Pour the batter into your greased bundt pan or mini bundt pan. 

    Bake at 325 degrees for 1 hour, 10 minutes for a regular bundt pan or 40 minutes for mini bundt pan.

    Test the cake with a toothpick. It should come out clean and the center of the cake should be firm when done.

    Let the cake cool for 10 minutes and then invert onto a cooling rack to finish cooling.

    After the cake has cooled use my recipe for Gluten Free Chocolate Glaze to pour over the cake.

    • Prep Time: 15 minutes
    • Cook Time: 70 minutes
    • Category: Cake
    • Method: Baking
    • Cuisine: Gluten Free

    Did you make this recipe?

    Tag @smallfarmbiglife on Instagram and hashtag it #smallfarmbiglife

    Storage

    After the cake has completely cooled I store in an air tight container for up to 5 days. I also love to put individual slices into freezer safe containers and freeze for a chocolate snack later.

    Top Tip

    I made this cake recipe in a mini bundt pan for individual servings. You can also make this recipe in a regular sized bundt pan. For either size pan wait until the cake has completely cooled before drizzling the chocolate glaze over top.

    Didn't find the answer you're looking for?

    Ask AI to answer based on this recipe:

    ChatGPT
    Google AI
    Perplexity
    Grok
    Claude

    Frequently Asked Questions

    How do I make my gluten free cakes more moist?

    Gluten free baking tends to require more moisture or oil than when you are using regular wheat flour. For this recipe I added ¼ cup of coconut oil and buttermilk to make it moist and delicious.
    If you are using a cake recipe that isn't turning out moist I would suggest adding a bit more oil or butter. You can also add mashed banana or applesauce to help your baked goods have more moisture.

    What is the difference between a cake and a bundt cake?

    There really isn't that much difference in the cake batter itself. The bundt cake recipe may call for a bit more moisture and/or baking powder as the cake is going to raise higher than than a regular layer cake or sheet cake.
    The main difference you might find is that a bundt cake tends to have a crunchier texture on the top. I also love the ease of a bundt cake. The cake gets baked in one pan and then I either drizzle it with a glaze or sprinkle powdered sugar over the top. So much easier than frosting a layer cake!

    • « Previous Page
    • 1
    • …
    • 66
    • 67
    • 68
    • 69
    • 70
    • …
    • 88
    • Next Page »

    Welcome! I'm Elaine

    I'm so glad you are here! I share easy gluten free recipes from my small farm in Washington.

    Be sure to sign up for my newsletter to stay up to date on all of my new recipes.

    More about me...
    • Instagram
    • Pinterest
    • Facebook
    • Twitter
    • email

    Free gluten free recipe ebook
    My most loved recipes in one download, plus new recipes every Friday.
    Check your inbox! Your ebook is on its way.

    Easy Meals Recipes

    • Gluten Free Instant Pot Chili Mac and Cheese
    • Gluten Free Taco Casserole
    • Gluten Free Cowboy Baked Beans
    • Gluten Free Walking Taco Casserole
    • Gluten Free Creamy Beef and Mushroom Pasta
    • Gluten Free Instant Pot Chicken and Dumplings
    • Instant Pot Mexican Style Beef and Rice
    • Gluten Free Chicken Parmesan Pasta Casserole
    • Gluten Free One Pot Hamburger Helper Copycat
    • Gluten Free Salisbury Steak with Mushroom Gravy
    • Gluten Free Air Fryer Fajitas
    • Gluten Free Sloppy Joe Casserole

    Footer

    back to top

    About

    • Privacy Policy
    • Shop my Amazon Page
    • Follow me on LTK

    Newsletter

    • Sign Up! for emails and updates

    Contact

    • Contact
    • Media Kit
    • About Me

    As an Amazon Associate I earn from qualifying purchases.

    I may get commissions for purchases made through links on this site.

    Copyright © 2026 Brunch Pro on the Brunch Pro Theme