Small Farm Big Life

  • Gluten Free Recipe Index
  • Subscribe
  • Resources
menu icon
go to homepage
  • Home
  • Gluten Free Recipe Index
  • Subscribe
  • My Story
  • Resources
  • Free Guides
    • Email
    • Facebook
    • Instagram
    • Pinterest
  • subscribe
    search icon
    Homepage link
    • Home
    • Gluten Free Recipe Index
    • Subscribe
    • My Story
    • Resources
    • Free Guides
    • Email
    • Facebook
    • Instagram
    • Pinterest
  • ×

    Gluten Free Corn Salad with Bacon

    This Gluten Free Corn Salad with Bacon is one of those recipes that is impossible to stop eating once you start. Creamy, cheesy, salty, and loaded with crispy bacon, it is the kind of salad that disappears at every cookout, potluck, and summer gathering before anything else on the table.

    What makes it even better is that it works two ways: serve it as a side salad with a fork or set it out as a dip with a bowl of gluten free corn chips and watch it vanish in minutes.
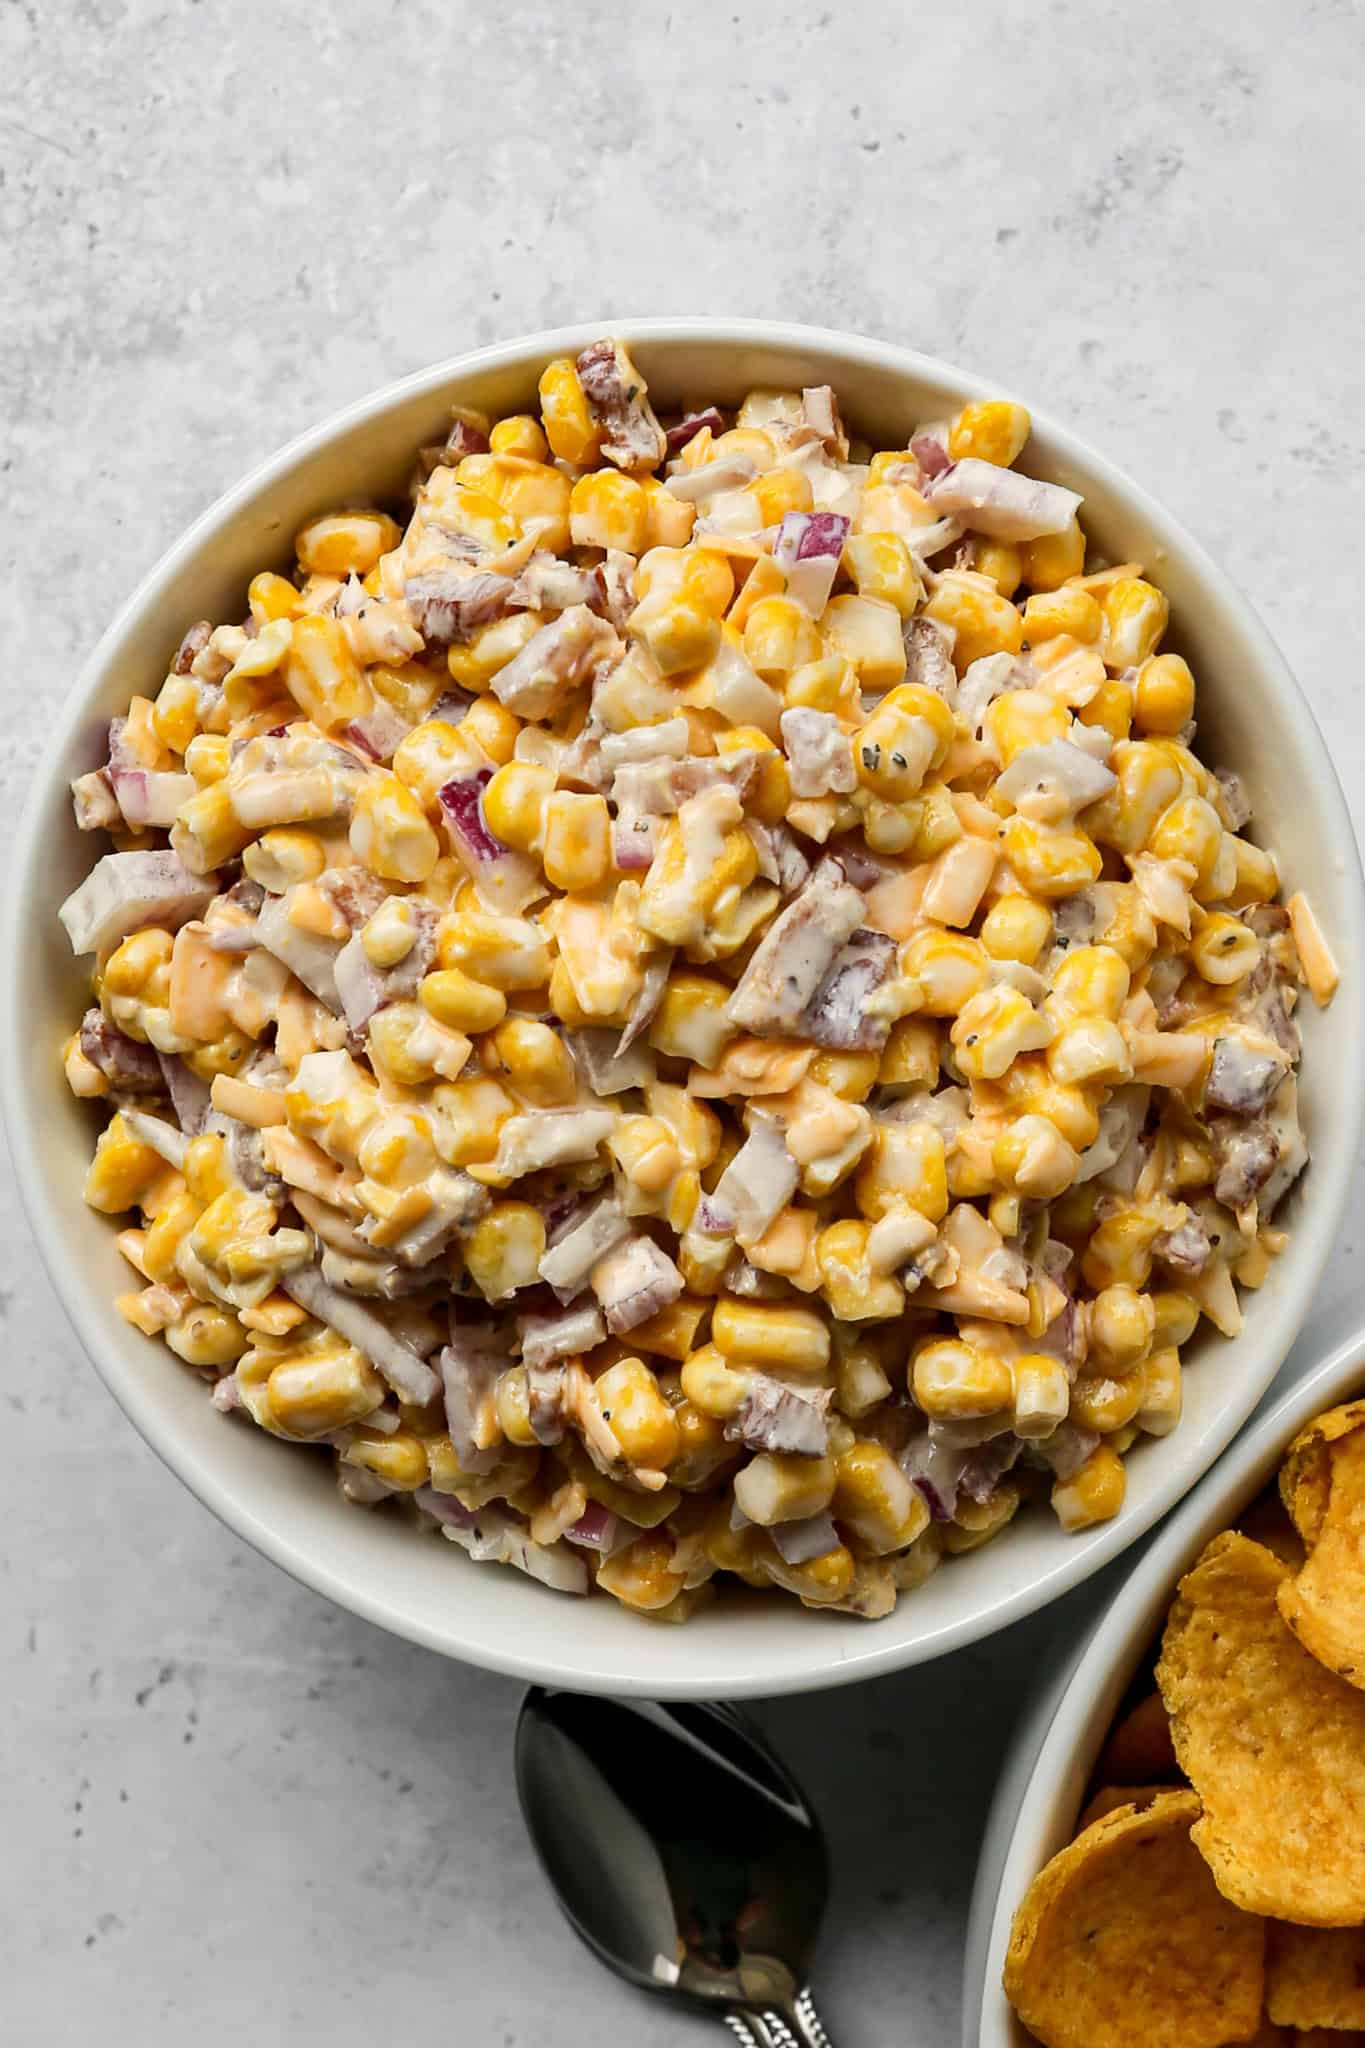
    a white bowl of gluten free corn salad with bacon next to a white bowl of corn chips.

    This recipe is made with canned corn which means it comes together in about ten minutes of hands on work and can be made completely ahead of time. In fact it gets better as it sits in the refrigerator, so making it the night before is not just convenient, it is the right move.

    The creamy dressing is a combination of mayonnaise and plain Greek yogurt which adds a protein boost and a lighter tang than sour cream without losing any of the richness.

    If you are looking for an easy make ahead side dish that works for everything from backyard barbecues to Fourth of July spreads, this is the one to make.

    If you are looking for more gluten free corn recipes try my Easy Fried Frozen Corn, my Cheesy Slow Cooker Creamed Corn, my Healthy Mexican Street Corn Salad or my Gluten Free Zucchini Squash and Corn Casserole.

    You can find all of my salad recipes here: Gluten Free Salad Recipes
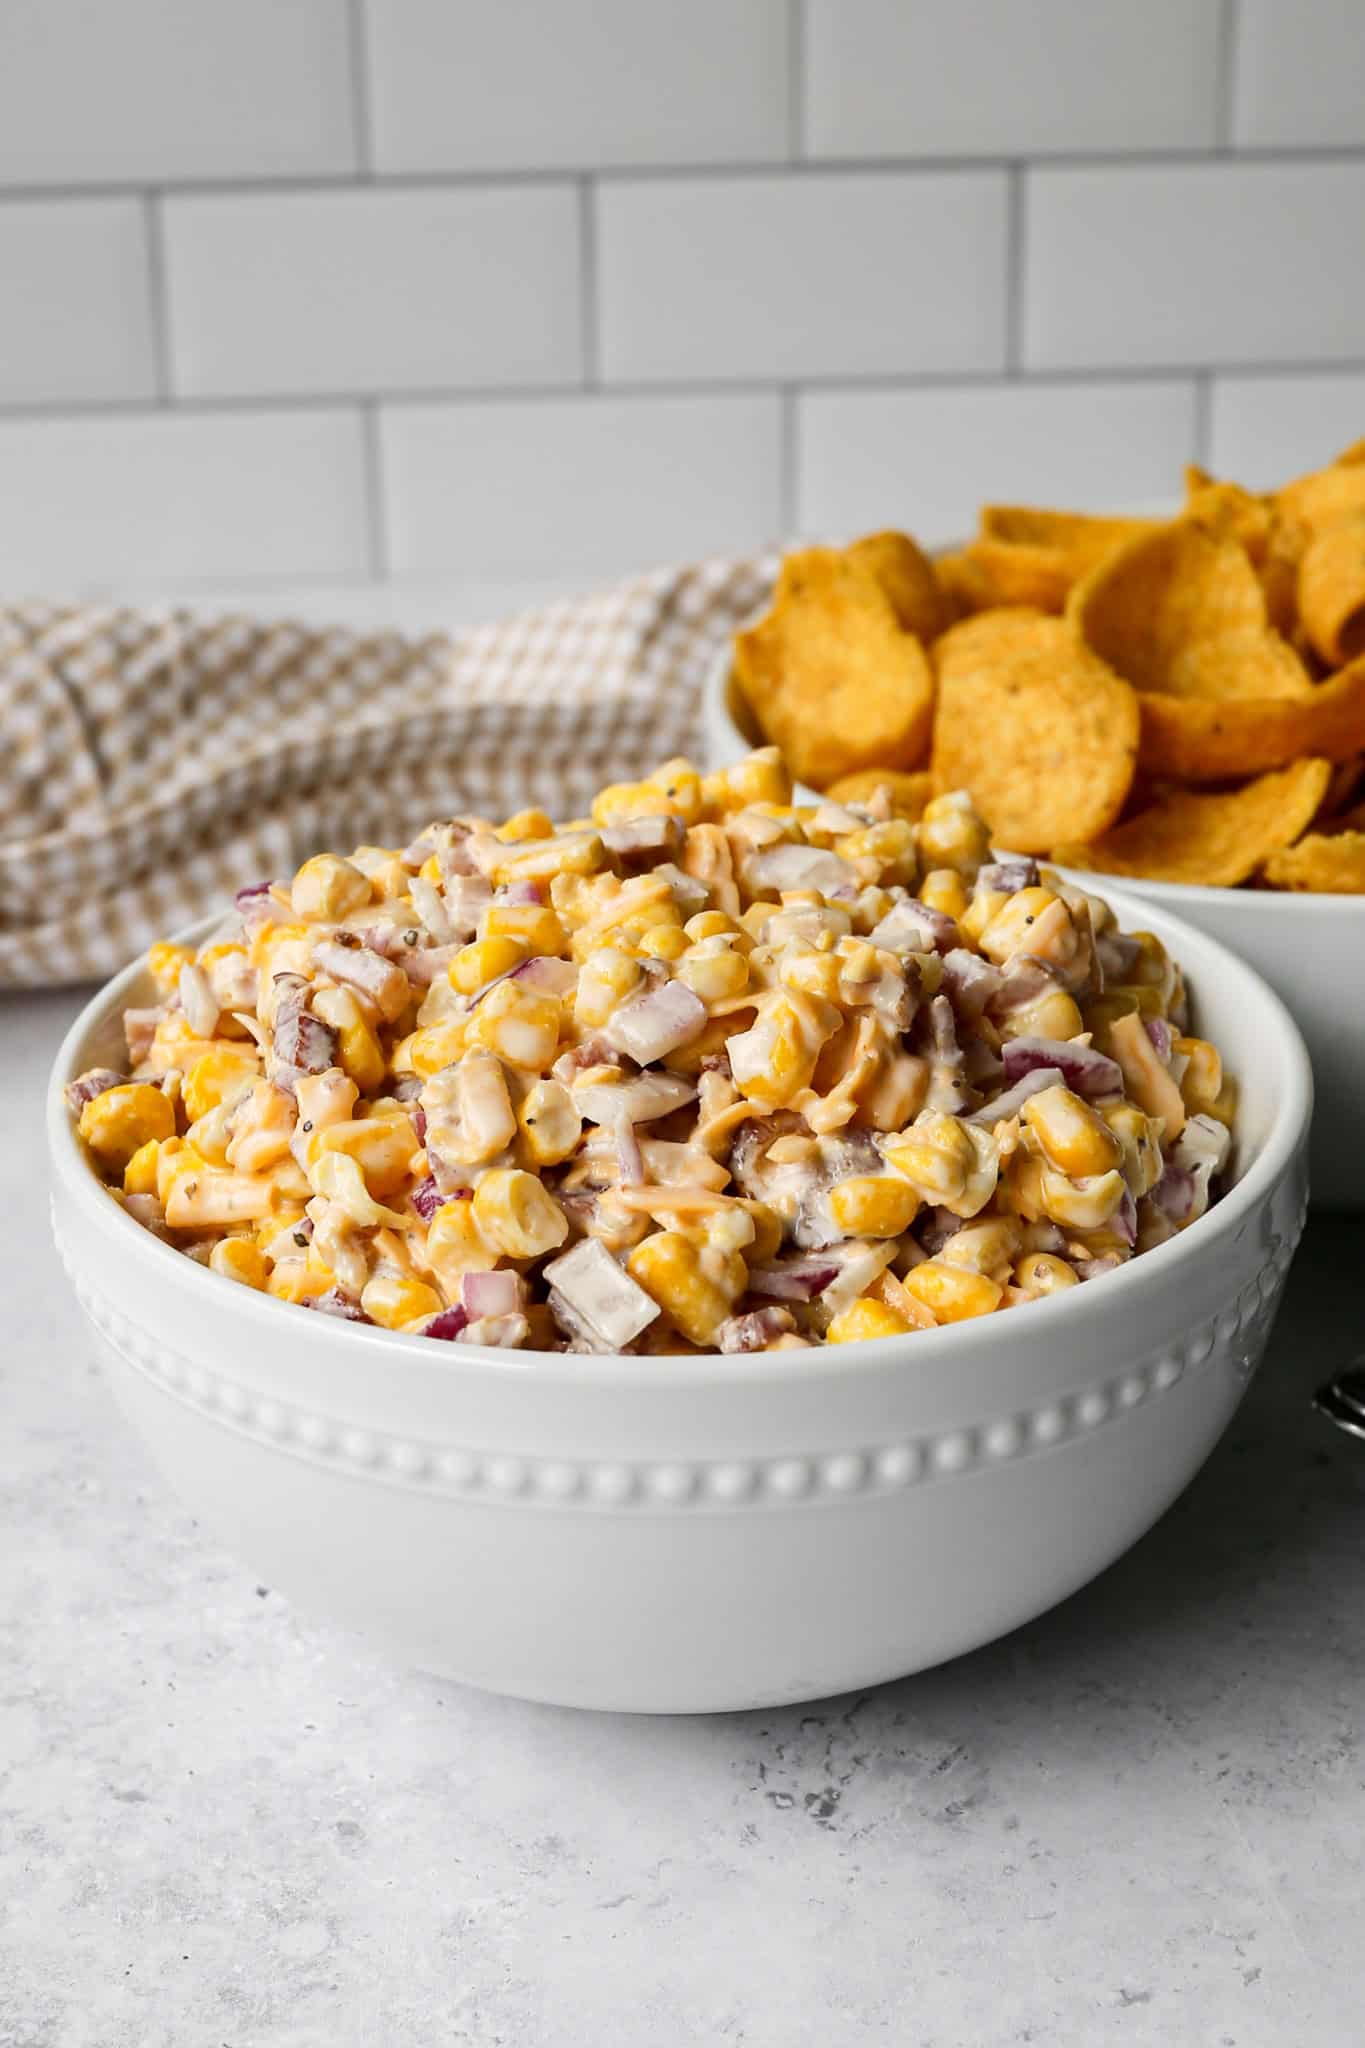
    a white bowl of gluten free corn salad with bacon next to a white bowl of corn chips and a tan gingham kitchen towel
    [feast_advanced_jump_to]

    Canned vs Fresh vs Frozen Corn

    This recipe uses canned corn for maximum convenience and year round availability. Here is how each option compares.

    • Canned corn is the most convenient option and what this recipe is written for. Drain it well before adding to the salad to keep the dressing from becoming watery. Two 15 ounce cans give you the right amount for this recipe.
    • Fresh corn cut from the cob is a beautiful option during summer when corn is at its peak. You will need about four ears of fresh corn to replace the two cans. You can use it raw for a crisp fresh texture or quickly char it in a hot skillet for a slightly smoky flavor.
    • Frozen corn works well and is a great option when fresh corn is out of season. Thaw it completely and pat it dry with paper towels before adding to the salad to prevent excess moisture in the dressing.

    How to Cook Bacon for This Salad

    Crispy bacon makes all the difference in this recipe. Here is the easiest way to get perfectly crispy bacon every time.

    • Line a large baking sheet with aluminum foil and lay the bacon strips out in a single layer with no overlapping. Bake at 375 degrees for 25 to 30 minutes until the bacon is as crispy as you want it. The foil makes cleanup nearly effortless and the oven method gives you evenly cooked bacon without standing over a stovetop.
    • Let the bacon cool completely on the baking sheet before chopping it into small pieces. Chopping warm bacon can cause it to tear unevenly. Fully cooled bacon chops cleanly and stays crispy longer in the salad.
    • Cook your bacon the night before you plan to make this salad. Chopped cooked bacon stores well in an airtight container in the refrigerator for up to five days which makes it a great make ahead component.

    Serving Suggestions

    This salad works beautifully in two different ways depending on your occasion.

    • As a side salad serve it chilled alongside grilled burgers, grilled chicken, air fryer steak bites, or your Gluten Free Buttermilk Cornbread for a complete summer spread.
    • As a dip transfer it to a serving bowl and surround it with gluten free corn chips for scooping. This is the version that always generates the most conversation at a party because nobody expects a corn salad to double as one of the best dips on the table.
    • For a potluck or cookout make it the night before and transport it in a covered bowl. It holds up beautifully for several hours at room temperature and tastes even better after chilling overnight.

    Variations

    This recipe is easy to customize based on what you have on hand or what flavors you are in the mood for.

    • Add jalapeño. Finely dice one jalapeño and stir it into the salad for a subtle kick that pairs beautifully with the sweet corn and salty bacon.
    • Add green onions. Thinly sliced green onions add a fresh mild onion flavor that is slightly different from the red onion in the base recipe.
    • Swap the cheese. Pepper jack gives the salad a spicy kick. Monterey Jack gives it a milder and creamier flavor. Colby Jack is another great option.
    • Add black beans. One drained and rinsed can of black beans adds fiber and makes the salad more substantial as a standalone dish.

    Supplies

    Storage Instructions

    Store leftover corn salad in an airtight container in the refrigerator for up to four days. Stir before serving since the dressing may settle slightly as it sits. This salad does not freeze well since the mayonnaise and Greek yogurt dressing will separate after thawing.

    Top Tip

    Make this salad the night before you plan to serve it. The dressing absorbs into the corn and the flavors of the bacon, cheddar, and red onion meld together as the salad chills overnight. A freshly made corn salad is good but a salad that has rested in the refrigerator overnight is significantly better. This also makes it one of the most stress free dishes you can bring to a cookout since all the work is done the day before.

    Frequently Asked Questions

    Can I use fresh or frozen corn instead of canned corn?

    Yes, both work well in this recipe. For fresh corn you will need about four ears to replace the two cans. Cut the kernels off the cob and use them raw for a crisp texture or quickly char them in a hot skillet for a slightly smoky flavor. For frozen corn thaw it completely and pat it dry with paper towels before adding to the salad to prevent excess moisture in the dressing.

    Can I make this corn salad ahead of time?

    Yes and I strongly recommend it. This salad gets significantly better after chilling in the refrigerator overnight. The dressing absorbs into the corn and all the flavors meld together beautifully. Make it the night before your cookout or gathering and it will be ready to serve with no last minute work required.

    Can I use sour cream instead of Greek yogurt in the dressing?

    es. Sour cream is a one to one substitute for the Greek yogurt in this recipe and gives the dressing a slightly richer and more traditional flavor. Greek yogurt is my preference because it adds a protein boost and a lighter tang but either option produces a delicious creamy dressing.

    How long does corn salad with bacon last in the refrigerator?

    Store this salad in an airtight container in the refrigerator for up to four days. Stir before each serving since the dressing may settle slightly as it sits. This salad does not freeze well since the mayonnaise and Greek yogurt dressing will separate after thawing.

    Didn't find the answer you're looking for?

    Ask AI to answer based on this recipe:

    ChatGPT
    Google AI
    Perplexity
    Grok
    Claude

    More Recipes You Might Enjoy

    • Easy Fried Frozen Corn
    • Cheesy Slow Cooker Creamed Corn
    • Black Beans and Corn Salad
    • Healthy Mexican Street Corn Salad

    I get a lot of my ingredients from Thrive Market. Thrive Market has been a game changer for me eating gluten free. They have so many options I can't get at my rural grocery stores! Use this link to get 40% off your first order!
    Print
    clock clock iconcutlery cutlery iconflag flag iconfolder folder iconinstagram instagram iconpinterest pinterest iconfacebook facebook iconprint print iconsquares squares iconheart heart iconheart solid heart solid icon

    Gluten Free Corn Salad with Bacon


    5 Stars 4 Stars 3 Stars 2 Stars 1 Star

    No reviews

    • Author: Elaine VanVleck
    • Total Time: 40 minutes
    • Yield: 8 servings 1x
    • Diet: Gluten Free
    Print Recipe
    Pin Recipe

    Description

    Creamy gluten free corn salad made with canned corn, crispy bacon, cheddar cheese, red onion, and a tangy mayonnaise and Greek yogurt dressing. Serve it as a side salad or set it out as a dip with gluten free corn chips. The perfect make ahead summer side dish for cookouts, potlucks, and Fourth of July gatherings.


    Ingredients

    Scale
    • 2 - 15 ounce cans Whole Kernel Corn, drained
    • 6 slices Bacon, cooked and chopped
    • 1 small Red Onion, finely diced
    • 2 cups Cheddar Cheese, shredded
    • ½ cup Mayonnaise
    • ½ cup Plain Greek Yogurt
    • ½ tsp Salt
    • ½ tsp Black Pepper
    • Gluten Free Corn Chips, for serving

    Instructions

    Cook your bacon the day before so it is ready to chop up and use in the salad. I like to cook my bacon in the oven. I line a baking sheet with aluminum foil and then lay out the bacon in a single layer. I bake at 375 degrees for 25-30 minutes until the bacon get as crispy as I want it. Let the bacon cool completely and then chop it into small pieces. Set aside.

    Open and drain the canned corn using a colander.

    In a large mixing bowl add the cans of drained corn, chopped bacon, red onion, cheddar cheese, mayonnaise, greek yogurt, salt and pepper. Stir to combine.

    Cover the bowl and chill the salad in the refrigerator for at least 30 minutes before serving.

    Serve this salad on it's own or with gluten free corn chips for dipping.

    If you made this recipe please leave a star rating and comment below. It helps other readers find this recipe and means so much to me.

    • Prep Time: 10 minutes
    • Cook Time: 30 minutes
    • Category: Side Dish, Salads
    • Method: Mixing
    • Cuisine: American

    Did you make this recipe?

    Tag @smallfarmbiglife on Instagram and hashtag it #smallfarmbiglife

    If you make this Gluten Free Corn Salad with Bacon I would love to hear what you think! Leave a comment below and let me know how it turned out or tag me on Instagram so I can see your bowl.

    This is one of those recipes that works equally well as a side salad and a dip so save it to your favorite Pinterest board so you always have it ready for your next cookout, potluck, or summer gathering!

    Ingredients

    • Canned Whole Kernel Corn
    • Bacon
    • Red Onion
    • Cheddar Cheese
    • Mayonnaise
    • Plain Greek Yogurt
    • Salt
    • Black Pepper
    • Gluten Free Corn Chips

    Instructions

    Cook your bacon the day before so it is ready to chop up and use in the salad. I like to cook my bacon in the oven. I line a baking sheet with aluminum foil and then lay out the bacon in a single layer. I bake at 375 degrees for 25-30 minutes until the bacon get as crispy as I want it. Let the bacon cool completely and then chop it into small pieces. Set aside.

    Open and drain the canned corn using a colander.

    In a large mixing bowl add the cans of drained corn, chopped bacon, red onion, cheddar cheese, mayonnaise, greek yogurt, salt and pepper. Stir to combine.

    Cover the bowl and chill the salad in the refrigerator for at least 30 minutes before serving.

    Serve this salad on it's own or with gluten free corn chips for dipping.
    Gluten Free High Protein Dill Pickle Pasta Salad

    If you love dill pickles, this is the pasta salad you have been waiting for. This Gluten Free High Protein Dill Pickle Pasta Salad is loaded with chopped dill pickles, fresh dill, cheddar cheese cubes, and a creamy tangy dressing made with both mayonnaise and Greek yogurt. The dill pickle juice goes right into the dressing for the most bold and briny flavor in every single bite.

    Make it the night before and let it chill overnight for the best flavor of all.

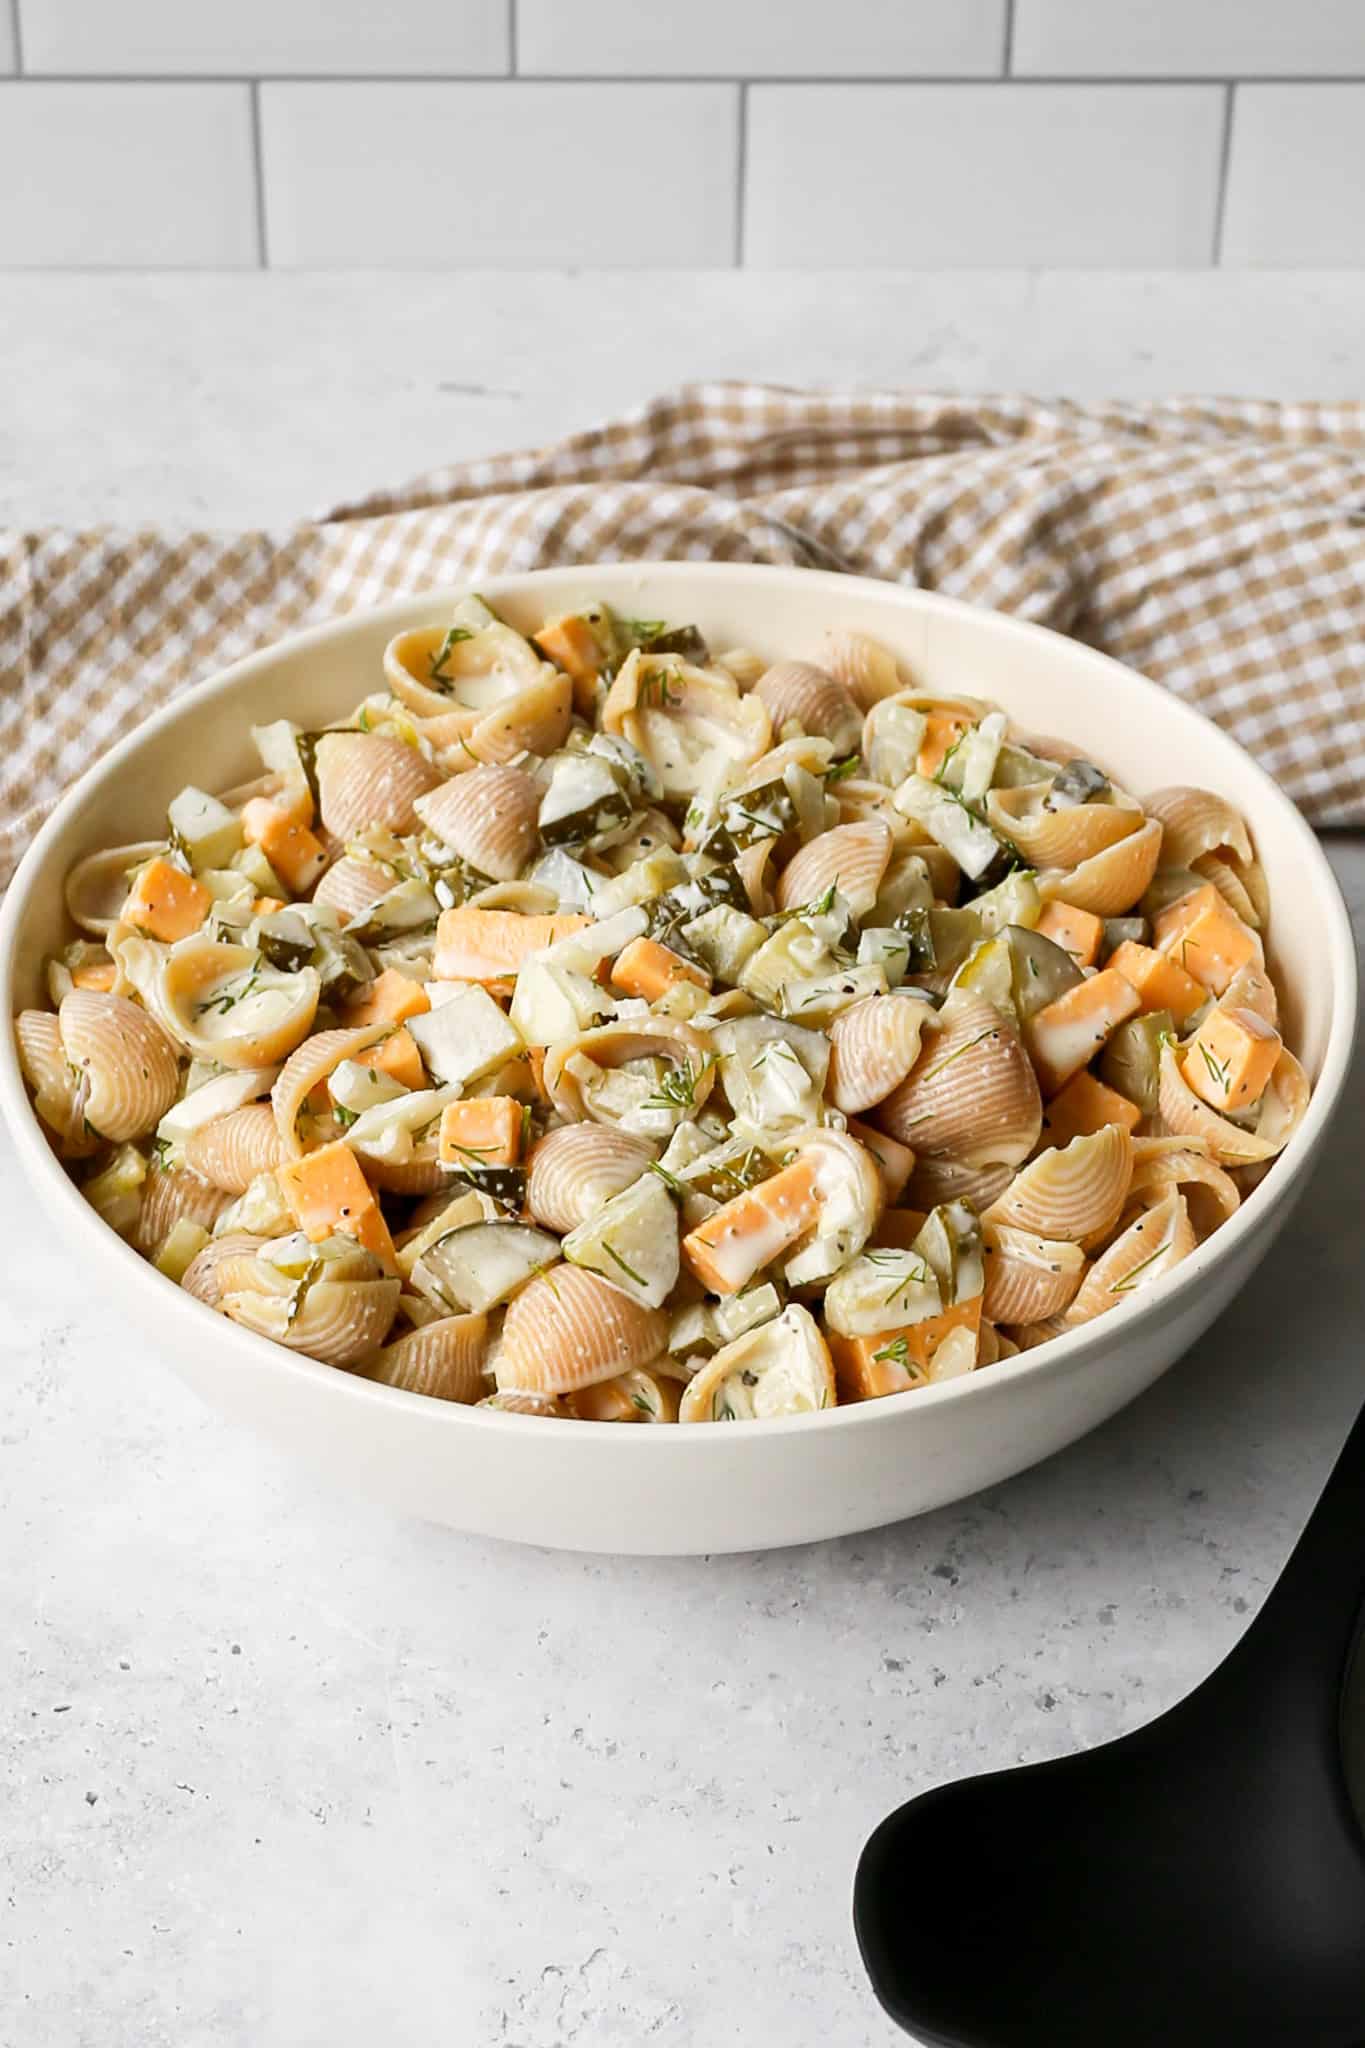
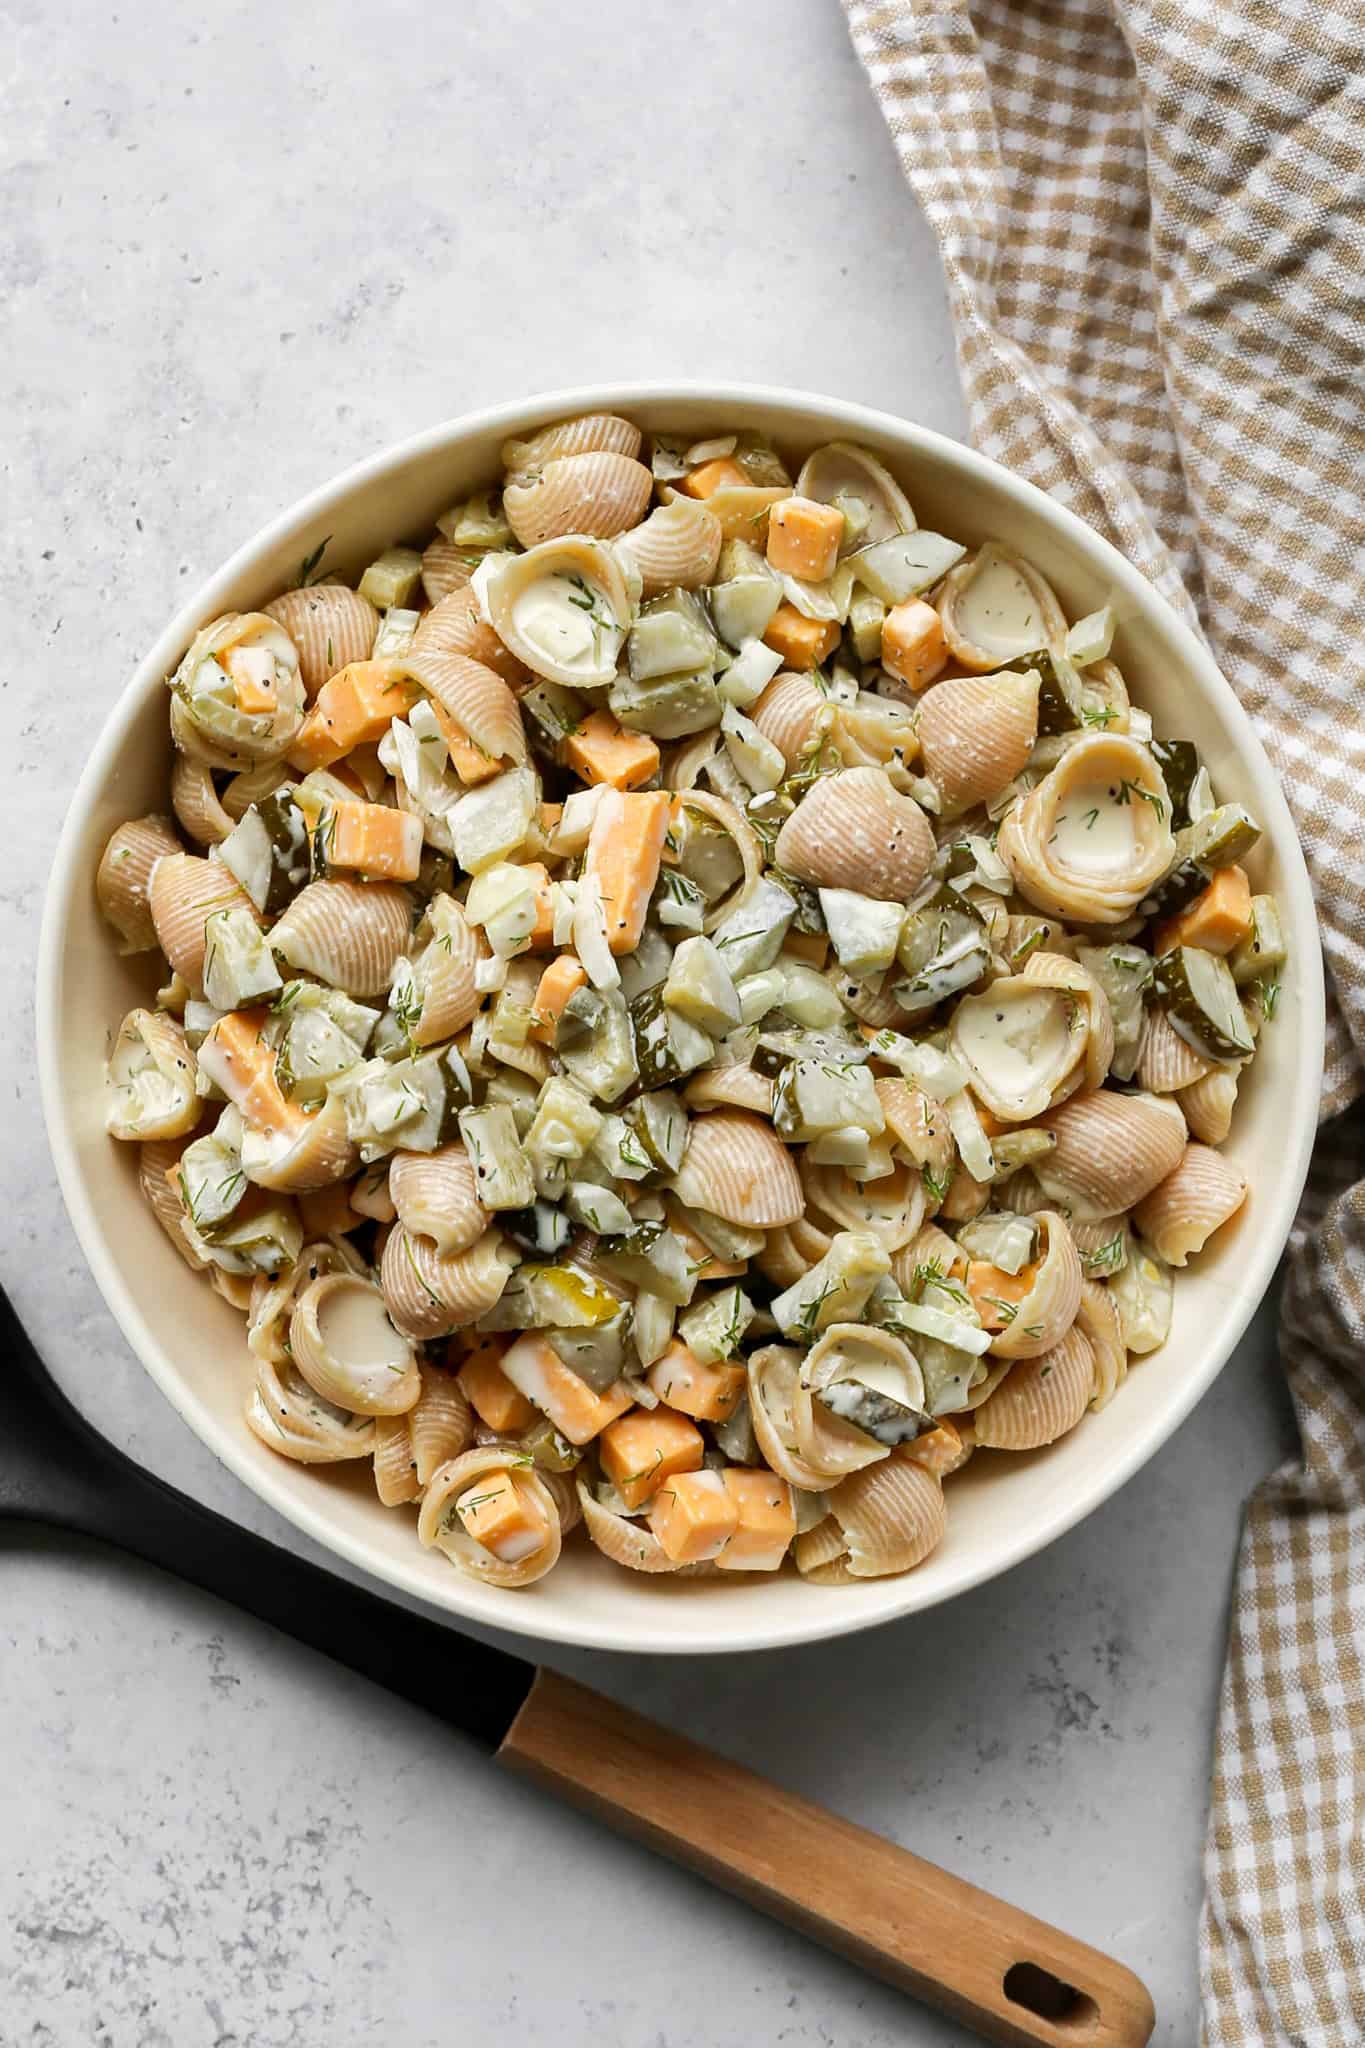
    a cream serving bowl of gluten free dill pickle pasta salad next to a black serving spoon and tan gingham kitchen towel

    What makes this version stand apart is the pasta. I use high protein chickpea shell pasta which packs in significantly more protein per serving than regular gluten free pasta and holds up beautifully in pasta salads without getting mushy.

    If you prefer a more traditional texture, gluten free brown rice shell pasta works just as well.

    Either way this salad is creamy, crunchy, tangy, and one of the best make ahead side dishes you can bring to a summer cookout, potluck, or Fourth of July gathering.

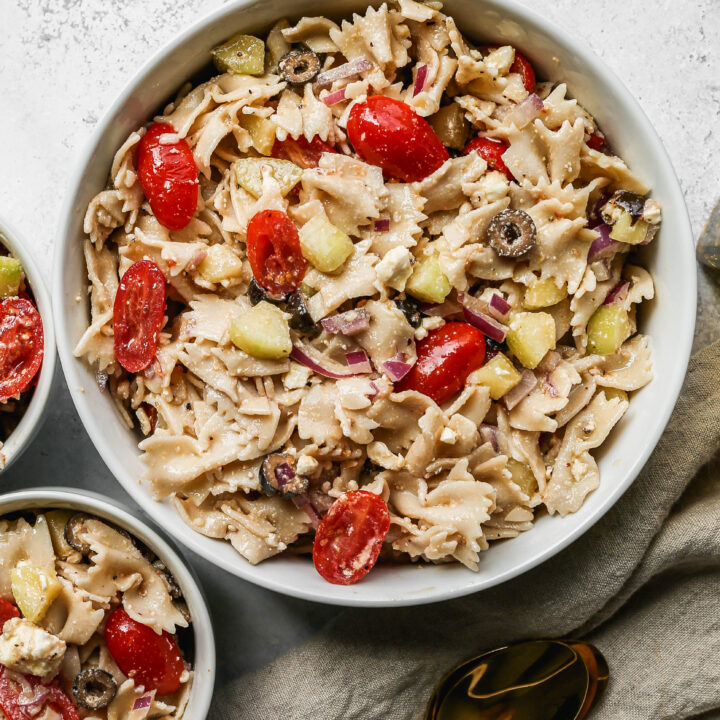
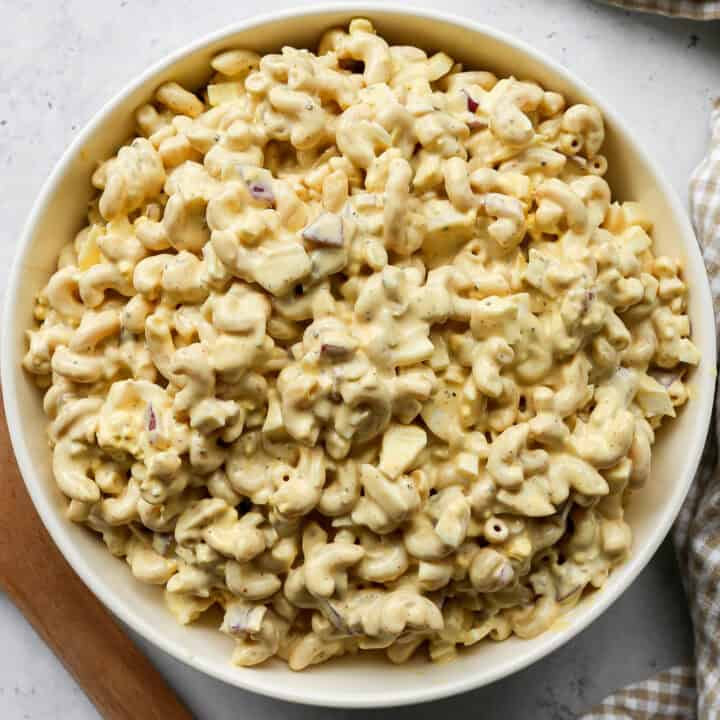
    If you're looking for more gluten free cold pasta salad recipes try my Gluten Free High Protein Deviled Egg Pasta Salad, my Gluten Free Lime Cilantro Pasta Salad, my Easy Gluten Free Bow Tie Pasta Salad or my Easy Gluten Free Macaroni Salad.

    You can find all of my salad recipes here: Gluten Free Salad Recipes

    a cream serving bowl of gluten free dill pickle pasta salad next to a black serving spoon and tan gingham kitchen towel
    [feast_advanced_jump_to]

    Why Chickpea Pasta Makes This High Protein

    Not all gluten free pasta is created equal when it comes to protein. Regular gluten free pasta made from rice or corn has very little protein per serving. Chickpea pasta changes that significantly.

    A serving of gluten free chickpea shell pasta has roughly twice the protein of regular gluten free pasta. It also has more fiber which helps you feel full longer. The flavor is mild and slightly nutty and it holds its shape beautifully in pasta salads without turning mushy overnight.

    If you want a more traditional pasta salad texture and flavor, gluten free brown rice shell pasta works equally well in this recipe. The protein content will be lower but the salad will still be delicious.

    Why Shell Pasta Works Best

    Shell pasta is the best shape for this salad because the curved shell shape scoops up the creamy dressing inside each piece so you get a little pocket of flavor in every bite. The shells are also similar in size to the chopped pickle pieces and cubed cheddar which means you get pasta, pickle, cheddar and dressing in every single forkful.

    Rotini and elbow macaroni are the next best options if you cannot find shell pasta in a gluten free or high protein version.

    Cheddar Cubes vs Shredded Cheese

    This recipe calls for cheddar cheese cut into small cubes rather than shredded and the difference matters. Shredded cheddar tends to clump together and dissolve into the dressing as the salad sits in the refrigerator. Cubed cheddar holds its shape, stays firm, and gives you a satisfying cheesy bite in every forkful even after the salad has been chilling overnight.

    Cut your cheddar into small quarter inch cubes so they are easy to scoop up with the pasta on a fork.

    Greek Yogurt vs Sour Cream

    This recipe gives you the option of using either plain Greek yogurt or sour cream in the dressing and both work well. Here is how they compare.

    • Greek yogurt gives the dressing a slightly tangier flavor and adds a meaningful protein boost to each serving. It is a little lighter than sour cream and blends beautifully with the mayonnaise for a creamy finish.
    • Sour cream gives the dressing a richer and more traditional pasta salad flavor. It is slightly thicker than Greek yogurt and produces a creamier and more indulgent dressing.
    • I use Greek yogurt in this recipe to keep the protein content high but sour cream is a great option if you want a more classic flavor.

    Make Ahead Instructions

    This salad gets significantly better as it sits. The pasta absorbs the dressing, the pickle flavor deepens, and everything comes together in a way that a freshly made salad simply cannot replicate.

    Make it the night before you plan to serve it and refrigerate it overnight. Give it a good stir before serving. If the dressing has been absorbed and the salad looks a little dry add a small spoonful of mayonnaise and a splash of pickle juice and stir to refresh it.

    Serving Suggestions

    This pasta salad is a natural companion to anything coming off the grill.

    • With burgers. The tangy pickle flavor pairs perfectly with a juicy burger and makes this the ideal cookout side dish.
    • With grilled chicken. Serve alongside grilled lemon garlic chicken thighs or air fryer chicken for a complete and satisfying summer meal.
    • At a potluck or cookout. This salad travels well and can be made completely ahead of time. It holds up beautifully in the refrigerator for the whole event.
    • For Fourth of July. A must make for your holiday spread. The make ahead nature makes it perfect for entertaining.
    • As a meal prep lunch. Portion into individual containers on Sunday and enjoy as a protein packed lunch all week long.

    Storage

    Store leftover dill pickle pasta salad in an airtight container in the refrigerator for up to four days. The pasta will absorb some of the dressing as it sits so give it a good stir before serving each time. If it looks a little dry add a small spoonful of mayonnaise and a splash of dill pickle juice and stir to refresh the dressing. Do not freeze this salad as the pasta and dressing do not hold up well after thawing.

    Top Tip

    Do not skip the overnight chill. This pasta salad is good after 30 minutes in the refrigerator but it is absolutely incredible the next day. The pasta absorbs the dill pickle dressing, the flavors meld together, and the pickle flavor deepens into every bite. Make it the night before your cookout or gathering and thank yourself later.

    Frequently Asked Questions

    Can I make this dill pickle pasta salad ahead of time?

    Yes and I strongly recommend it. Make it the night before and refrigerate it overnight. The pasta absorbs the dressing and the pickle flavor deepens significantly as it chills. Give it a good stir before serving and add a splash of pickle juice if it needs refreshing.

    Can I use regular gluten free pasta instead of chickpea pasta?

    Yes. Gluten free brown rice shell pasta works beautifully in this recipe. The texture and flavor of the salad will still be delicious. Keep in mind that the protein content will be lower since chickpea pasta has roughly twice the protein of regular gluten free pasta.

    What type of pickles work best in this recipe?

    Use dill pickles only. Sweet pickles and bread and butter pickles are too sweet for this salad and will change the flavor significantly. Baby dill pickles, kosher dill pickles, and homemade refrigerator dill pickles all work beautifully. Whatever dill pickle you love eating straight from the jar is the right one for this recipe.

    How long does dill pickle pasta salad last in the refrigerator?

    Store in an airtight container in the refrigerator for up to four days. The pasta will absorb some of the dressing as it sits so stir before each serving and add a small spoonful of mayonnaise and a splash of pickle juice if the salad needs refreshing.

    Didn't find the answer you're looking for?

    Ask AI to answer based on this recipe:

    ChatGPT
    Google AI
    Perplexity
    Grok
    Claude

    Supplies


    More Recipes You Might Enjoy

    • Easy Gluten Free Macaroni Salad
    • Gluten Free Lime Cilantro Pasta Salad
    • Easy Gluten Free Bow Tie Pasta Salad
    • Gluten Free High Protein Deviled Egg Pasta Salad

    I get a lot of my ingredients from Thrive Market. Thrive Market has been a game changer for me eating gluten free. They have so many options I can't get at my rural grocery stores! Use this link to get 40% off your first order!

    Print
    clock clock iconcutlery cutlery iconflag flag iconfolder folder iconinstagram instagram iconpinterest pinterest iconfacebook facebook iconprint print iconsquares squares iconheart heart iconheart solid heart solid icon

    Gluten Free Dill Pickle Pasta Salad


    5 Stars 4 Stars 3 Stars 2 Stars 1 Star

    No reviews

    • Author: Elaine VanVleck
    • Total Time: 25 minutes
    • Yield: 8 servings 1x
    • Diet: Gluten Free
    Print Recipe
    Pin Recipe

    Description

    Gluten free chickpea shell pasta tossed with chopped dill pickles, fresh dill, cheddar cheese cubes, and a creamy tangy dressing made with mayonnaise, Greek yogurt, and dill pickle juice. This high protein gluten free dill pickle pasta salad is a make ahead summer side dish perfect for cookouts, potlucks, and Fourth of July gatherings.


    Ingredients

    Scale
    • 8 ounce box High Protein Shell Pasta or 12 ounce Gluten Free Brown Rice Shell Pasta
    • 1 cup Dill Pickles, chopped
    • 1 cup Cheddar Cheese, cut into small cubes
    • ½ Yellow Onion, finely diced
    • 2 Tbsp Fresh Dill, minced
    • 2 Tbsp Dill Pickle Juice
    • ½ cup Mayonnaise
    • ½ cup Full Fat Plain Greek Yogurt or Sour Cream
    • 1 tsp Salt
    • ½ tsp Garlic Powder
    • ½ tsp Black Pepper

    Instructions

    Cook the pasta per the instructions on the package. Drain and rinse under cold water until cool. Pour into a large mixing bowl.

    Add the chopped pickles, cheddar cheese cubes, onion, dill, dill pickle juice, mayonnaise, yogurt, salt and pepper to the mixing bowl. Stir to combine.

    Chill in the refrigerator for at least 30 minutes before serving. I like this salad best the next day, so if you can make it the day before you want to serve it.

    If you made this recipe please leave a star rating and comment below. It helps other readers find this recipe and means so much to me.

    • Prep Time: 15 minutes
    • Cook Time: 10 minutes
    • Category: Side Dish, Salads
    • Method: Mixing
    • Cuisine: American

    Did you make this recipe?

    Tag @smallfarmbiglife on Instagram and hashtag it #smallfarmbiglife

    If you make this Gluten Free High Protein Dill Pickle Pasta Salad I would love to hear what you think! Leave a comment below and let me know how it turned out or tag me on Instagram so I can see your bowl.

    This is one of those summer pasta salads that earns a permanent spot in your cookout rotation so save it to your favorite Pinterest board so you always have it ready for your next potluck or Fourth of July gathering!

    Ingredients

    • Gluten Free High Protein Shell Pasta or Gluten Free Brown Rice Shell Pasta
    • Dill Pickles
    • Cheddar Cheese
    • Yellow Onion
    • Fresh Dill
    • Dill Pickle Juice
    • Mayonnaise
    • Full Fat Plain Greek Yogurt or Sour Cream
    • Salt
    • Garlic Powder
    • Black Pepper

    Instructions

    Cook the pasta per the instructions on the package. Drain and rinse under cold water until cool. Pour into a large mixing bowl.

    Add the chopped pickles, cheddar cheese cubes, onion, dill, dill pickle juice, mayonnaise, yogurt, salt and pepper to the mixing bowl. Stir to combine.

    Chill in the refrigerator for at least 30 minutes before serving. I like this salad best the next day, so if you can make it the day before you want to serve it.

    Gluten Free High Protein Deviled Egg Pasta Salad

    This High Protein Gluten Free Deviled Egg Pasta Salad is the pasta salad I bring to every summer gathering and it is always the first bowl to be scraped clean. Gluten free chickpea elbow pasta is tossed with chopped hard boiled eggs, finely diced red onion, and a creamy deviled egg inspired dressing made with both mayonnaise and Greek yogurt for the richest and most satisfying pasta salad you will ever make.

    The chickpea pasta adds a serious protein boost that makes this salad filling enough to serve as a light meal, not just a side dish.

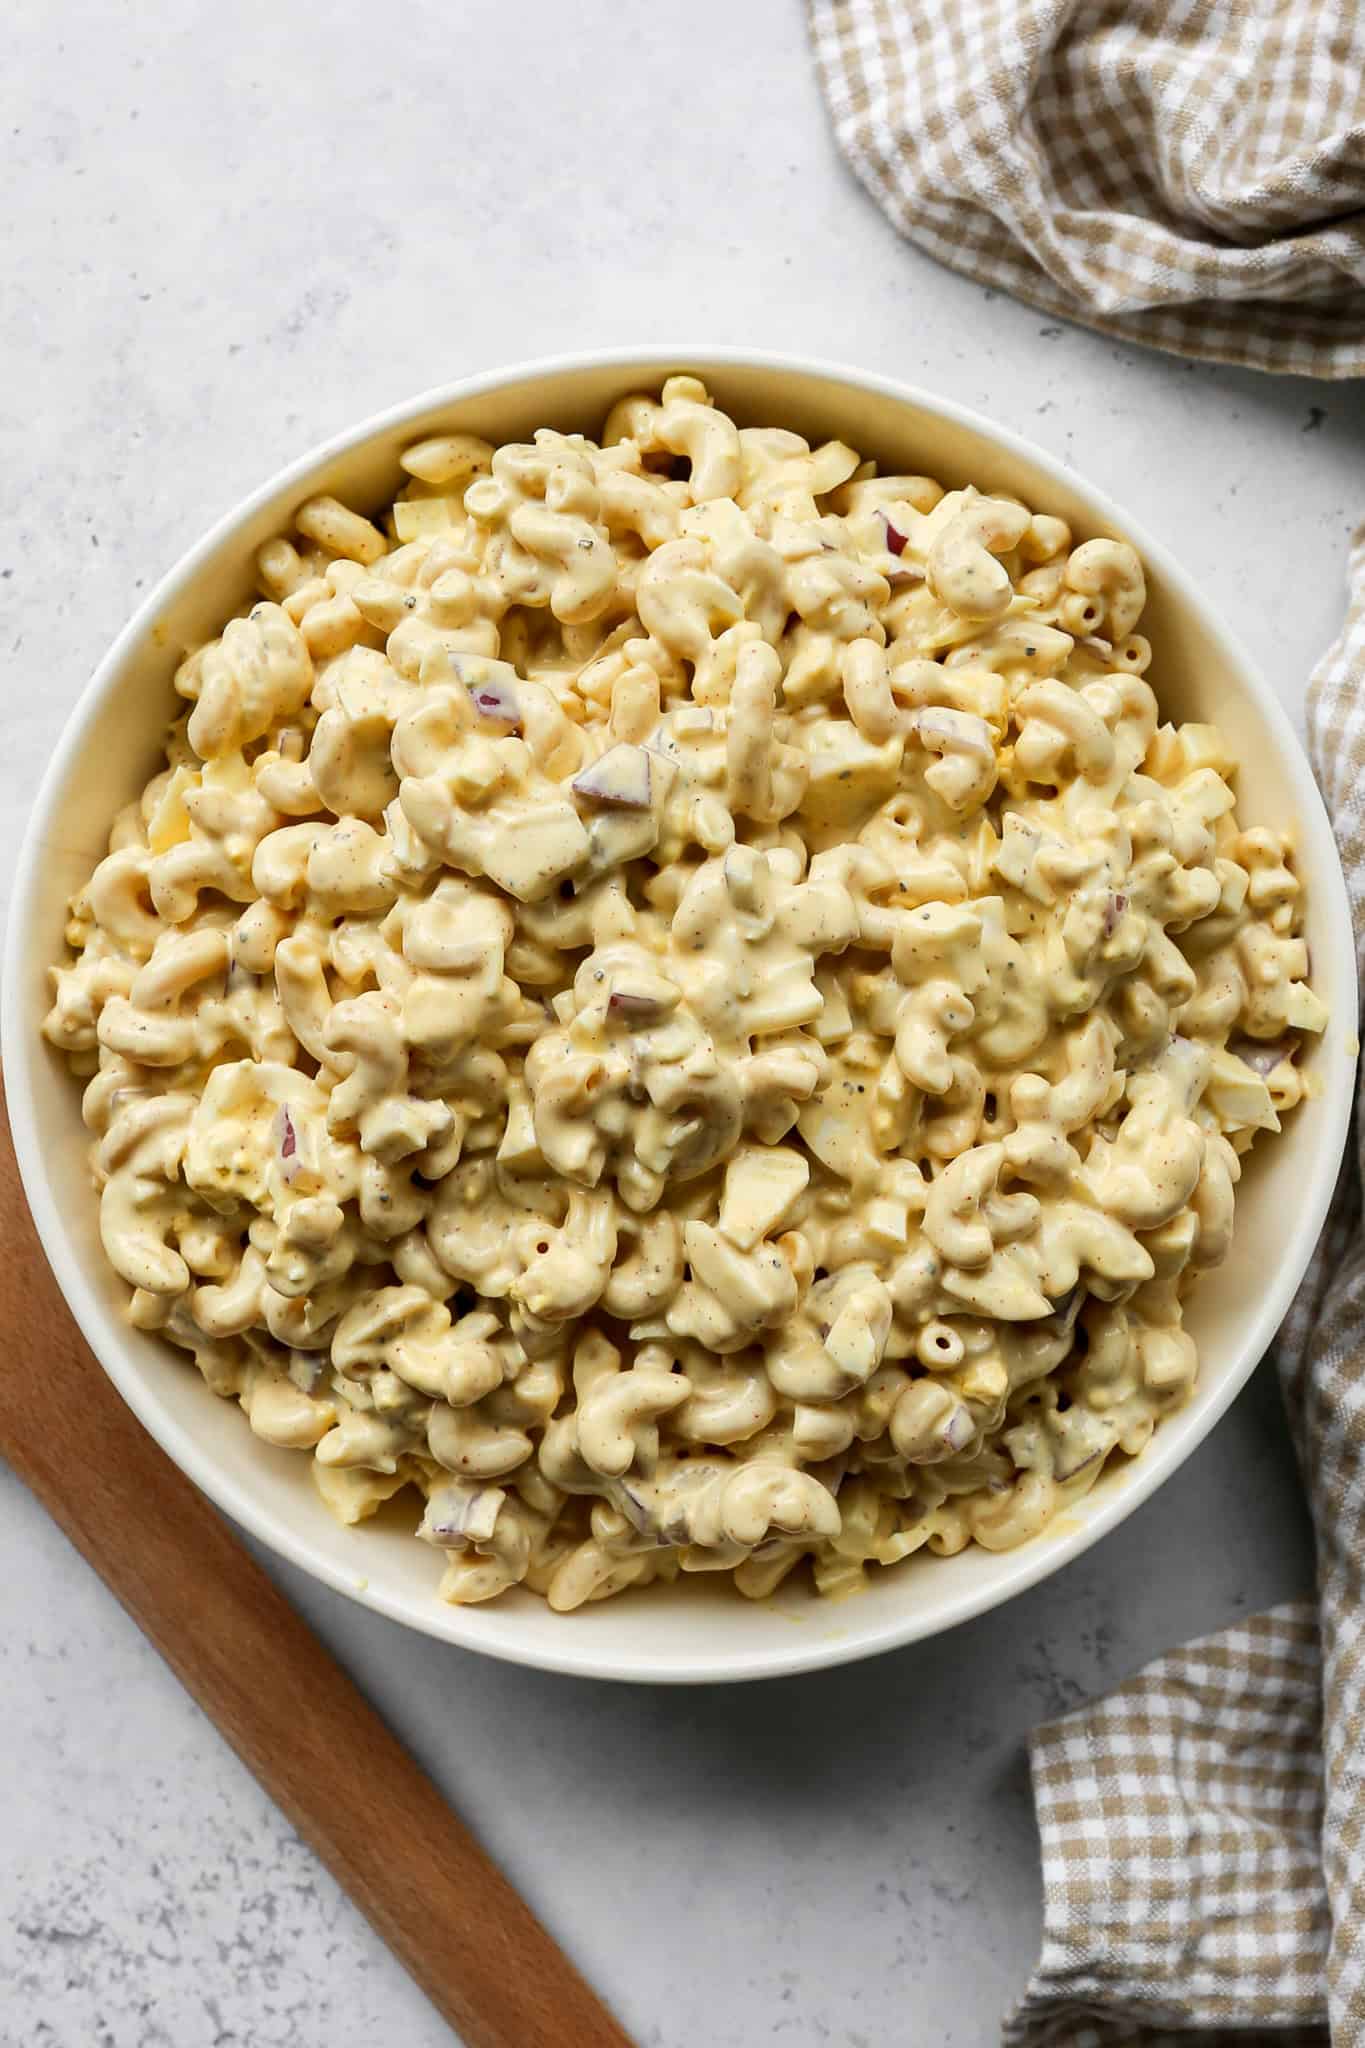
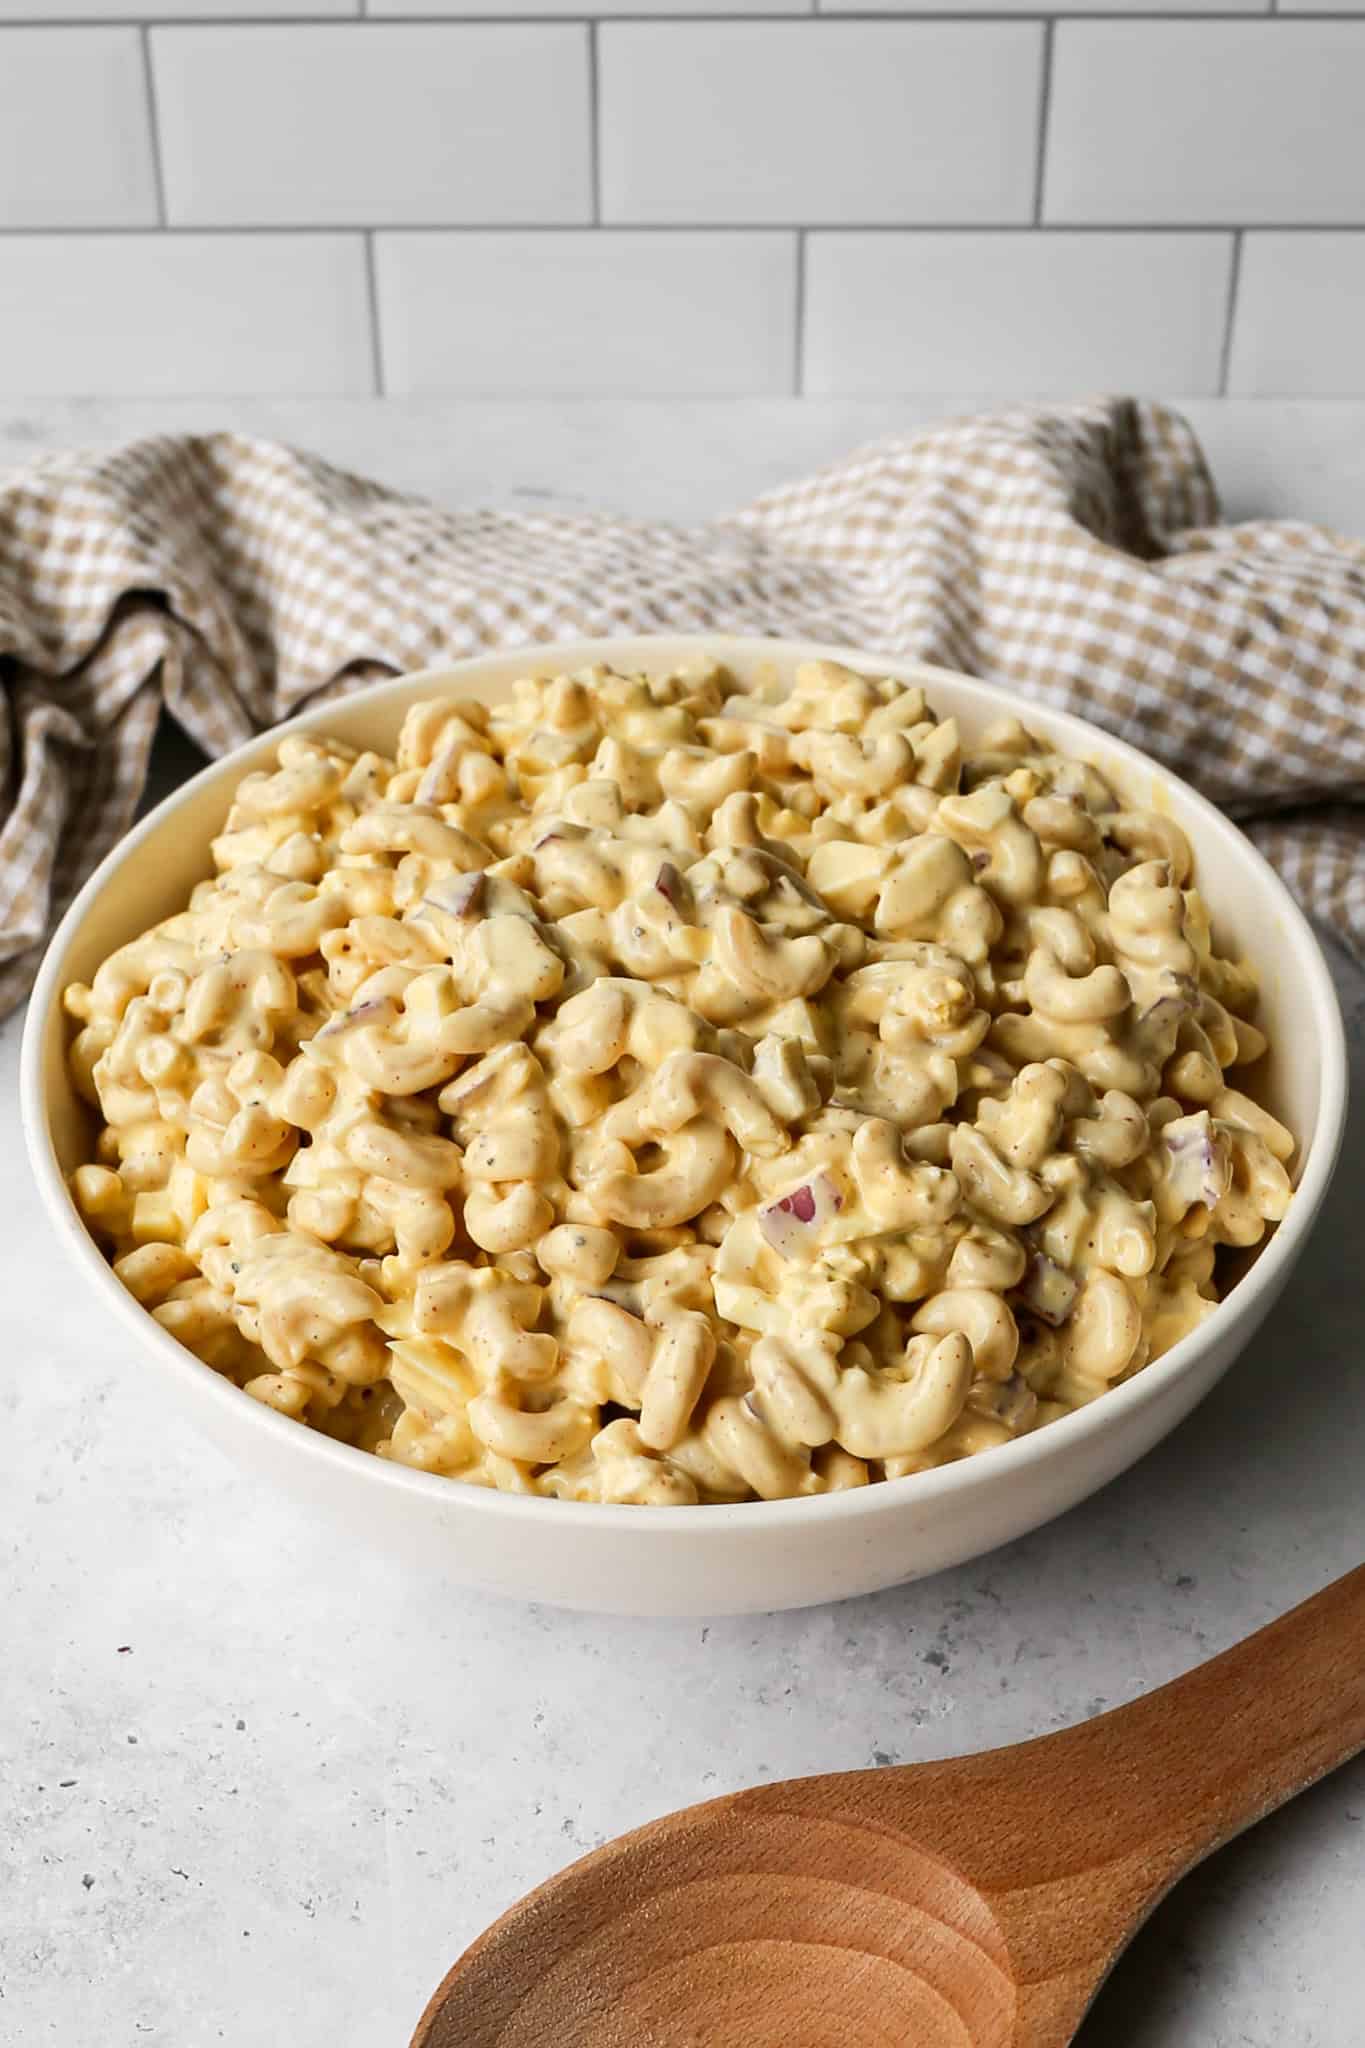
    a bowl of gluten free high protein deviled egg pasta salad next to a wooden spoon and a tan gingham kitchen towel

    What makes this recipe so easy is the Instant Pot method for hard boiling the eggs. Five minutes on manual pressure and a quick ice bath gives you perfectly cooked eggs every single time with no guesswork.

    Cook them the night before, refrigerate them, and the next day your pasta salad comes together in about 20 minutes.

    It is one of the best gluten free make ahead salads for summer cookouts, potlucks, and Fourth of July gatherings, and it gets even better the longer it chills in the refrigerator.

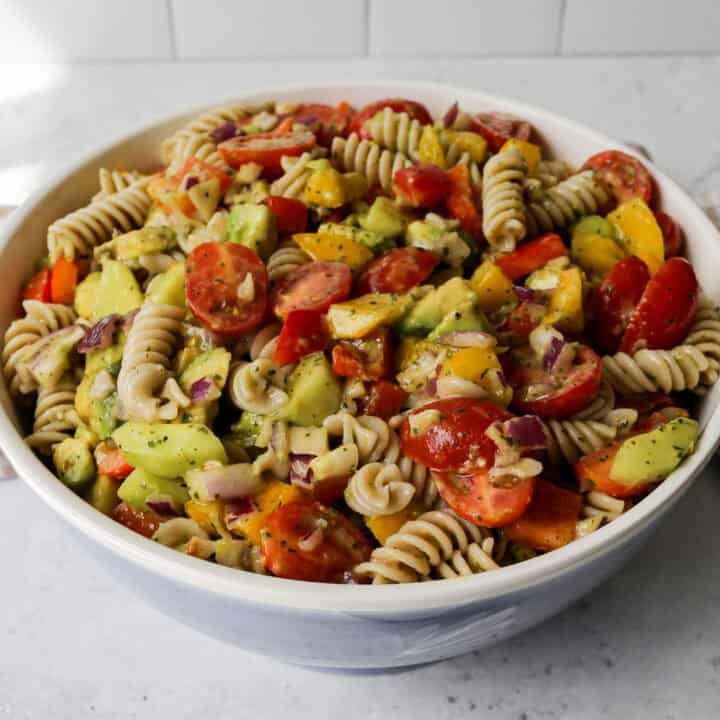
    If you are looking for more gluten free pasta salads try my Gluten Free Lime Cilantro Pasta Salad, my Easy Gluten Free Bow Tie Pasta Salad, my Easy Gluten Free Macaroni Salad or my Gluten Free Green Goddess Pasta Salad.

    You can find all my salad recipes here: Gluten Free Salad Recipes

    a bowl of gluten free high protein deviled egg pasta salad next to a wooden spoon and a tan gingham kitchen towel
    [feast_advanced_jump_to]

    Why Chickpea Pasta Makes This High Protein

    Not all pasta is created equal when it comes to protein content. Regular gluten free pasta made from rice or corn has very little protein per serving. Chickpea pasta changes that significantly.

    A serving of gluten free chickpea elbow pasta has roughly twice the protein of regular gluten free pasta. It also has more fiber, which helps you feel full longer. The flavor is mild and slightly nutty. It holds up well in pasta salads and does not get mushy after sitting in the refrigerator overnight.

    If you cannot find chickpea pasta, gluten free brown rice elbow pasta works in this recipe too. The protein content will be lower but the flavor and texture of the salad will still be delicious.

    Greek Yogurt and Mayo: Why You Need Both

    Most deviled egg pasta salad recipes use one or the other. This recipe uses both and here is why.

    • Mayo gives the dressing that rich and creamy deviled egg flavor everyone loves. It is the base of every classic deviled egg filling and it is non negotiable for getting the right taste.
    • Greek yogurt lightens the dressing without sacrificing creaminess. It adds protein, a subtle tanginess that mimics the vinegar in traditional deviled eggs, and a texture that holds up beautifully after chilling overnight.
    • Using both together gives you the best of both worlds. Rich and creamy like a classic deviled egg filling but lighter and higher in protein than a full mayo dressing.

    How to Hard Boil Eggs in the Instant Pot

    The Instant Pot is my preferred method for hard boiling eggs because it gives you perfectly cooked eggs every single time with no guesswork.

    • Add one cup of water to your Instant Pot and place the metal rack in the bottom. Add your eggs directly on the rack. Cook on manual high pressure for five minutes. Let the steam release naturally. Transfer the eggs immediately to a bowl of cold water with ice and let them sit for five minutes. The shells practically slide right off.
    • I like to hard boil my eggs the night before and store them peeled in a sealed container in the refrigerator. This makes assembling the pasta salad much faster the next day.

    Variations and Add-Ins

    This pasta salad is very easy to customize. Here are some great additions to try.

    • Crispy bacon adds a smoky and salty crunch that pairs perfectly with the creamy deviled egg dressing. Cook and crumble four to six strips and fold in before serving.
    • Dill pickles or bread and butter pickles are a classic deviled egg addition. Dice them small and fold into the salad for a tangy crunch.
    • Celery adds a fresh crisp texture that works beautifully in this salad. Dice two or three stalks finely and add with the red onion.
    • Avocado adds a creamy and buttery element. Dice and fold in right before serving so it does not brown.
    • Green onions make a great garnish and add a mild onion flavor on top of each serving.
    • Hot sauce or cayenne pepper stirred into the dressing adds heat for anyone who likes a spicy kick.

    Serving Suggestions

    This high protein deviled egg pasta salad works in so many different ways.

    • As a potluck or cookout side dish. Make it the night before and transport it cold. It is always one of the first dishes to disappear.
    • As a light lunch. A serving of this salad is filling enough to stand on its own as a meal thanks to the chickpea pasta and hard boiled eggs.
    • As a meal prep salad. Make a full batch on Sunday and portion it into individual containers for easy grab and go lunches all week.
    • Alongside grilled chicken or burgers. The cool and creamy salad is a perfect contrast to anything hot off the grill.
    • For Fourth of July and summer holidays. This salad travels well, feeds a crowd, and fits perfectly into any summer spread.

    Storage

    Store leftover deviled egg pasta salad in an airtight container in the refrigerator for up to three days. The pasta will absorb some of the dressing as it sits so give it a good stir before serving and add a small dollop of mayonnaise or Greek yogurt if the salad needs to be loosened up. Do not freeze this salad as the eggs and dressing do not hold up well after thawing.

    Top Tip

    Make this salad the night before you plan to serve it. The dressing soaks into the pasta and eggs as it chills overnight and the flavors come together in a way that a 30 minute chill simply cannot replicate. A pasta salad made the morning of a cookout is good. A pasta salad made the night before is so much better.

    Frequently Asked Questions

    Can I make this deviled egg pasta salad ahead of time?

    Yes, and I strongly recommend it. Make it the night before and refrigerate it overnight. The dressing soaks into the pasta and the flavors develop beautifully as it chills. Give it a good stir before serving and add a small dollop of mayo or Greek yogurt if it needs loosening up.

    Can I use regular gluten free pasta instead of chickpea pasta?

    Yes. Gluten free brown rice elbow pasta works well in this recipe. The texture and flavor of the salad will still be delicious. Keep in mind that the protein content will be lower since chickpea pasta has roughly twice the protein of regular gluten free pasta.

    Can I make this pasta salad without Greek yogurt?

    You can substitute the Greek yogurt with additional mayonnaise if you prefer. The dressing will be richer and slightly higher in fat but still delicious. Keep in mind that swapping the Greek yogurt for mayo will reduce the protein content of the finished salad.

    How long does deviled egg pasta salad last in the refrigerator?

    This salad keeps well in an airtight container in the refrigerator for up to three days. Stir before each serving and add a small amount of mayo or Greek yogurt to freshen up the dressing if needed.

    Didn't find the answer you're looking for?

    Ask AI to answer based on this recipe:

    ChatGPT
    Google AI
    Perplexity
    Grok
    Claude

    Supplies


    More Recipes You Might Enjoy

    • Easy Gluten Free Macaroni Salad
    • Gluten Free Green Goddess Pasta Salad
    • Gluten Free Lime Cilantro Pasta Salad
    • Easy Gluten Free Bow Tie Pasta Salad

    I get a lot of my ingredients from Thrive Market. Thrive Market has been a game changer for me eating gluten free. They have so many options I can't get at my rural grocery stores! Use this link to get 40% off your first order!

    Print
    clock clock iconcutlery cutlery iconflag flag iconfolder folder iconinstagram instagram iconpinterest pinterest iconfacebook facebook iconprint print iconsquares squares iconheart heart iconheart solid heart solid icon

    Gluten Free High Protein Deviled Egg Pasta Salad


    5 Stars 4 Stars 3 Stars 2 Stars 1 Star

    No reviews

    • Author: Elaine VanVleck
    • Total Time: 28 minutes
    • Yield: 8 servings 1x
    • Diet: Gluten Free
    Print Recipe
    Pin Recipe

    Description

    Gluten free chickpea elbow pasta tossed with chopped hard boiled eggs, finely diced red onion, and a creamy deviled egg inspired dressing made with both mayonnaise and Greek yogurt, seasoned with yellow mustard, smoked paprika, and black pepper. This high protein gluten free deviled egg pasta salad is the perfect make ahead dish for summer cookouts, potlucks, and Fourth of July gatherings.

    Ingredients

    Scale
    • 8 Hard Boiled Eggs, chopped
    • 8 ounces Gluten Free Chickpea Elbow Pasta or 12 Ounces Gluten Free Brown Rice Elbow Pasta
    • 1 small Red Onion, finely diced
    • ½ cup Mayonnaise
    • ½ cup Plain Greek Yogurt
    • 2 Tbsp Yellow Mustard
    • 1 tsp Salt
    • ½ tsp Smoked Paprika
    • ½ tsp Black Pepper

    Instructions

    I prefer to hard boil my eggs in the Instant Pot the day before so they're cool and ready to use. For this, I add one cup of water to my Instant Pot and put the metal rack in the bottom of the pot. I add my eggs and cook on manual for 5 minutes. I let the steam release naturally. I put the eggs into a cold water and ice bath to cool. Then I peel the eggs and store them in a sealed container in the fridge.

    Cook the pasta per the package instructions. Drain and rinse the pasta with cold water to cool. Pour the cooked pasta into a large mixing bowl.

    Then add the chopped hard boiled eggs, finely diced red onion, mayonnaise, yogurt, mustard, salt, paprika and pepper to the large mixing bowl. Stir to combine.

    Refrigerate the salad at least 30 minutes before serving. I prefer to refrigerate overnight so the salad is completely chilled before I serve it.

    If you made this recipe please leave a star rating and comment below. It helps other readers find this recipe and means so much to me.

    • Prep Time: 10 minutes
    • Cook Time: 18 minutes
    • Category: Side Dish, Salads
    • Method: Mixing
    • Cuisine: American

    Did you make this recipe?

    Tag @smallfarmbiglife on Instagram and hashtag it #smallfarmbiglife

    If you make this High Protein Gluten Free Deviled Egg Pasta Salad, I would love to hear what you think! Leave a comment below and let me know how it turned out, or tag me on Instagram so I can see your bowl.

    This is one of those summer salads that earns a permanent spot in your recipe rotation, so save it to your favorite Pinterest board so you always have it ready for your next cookout, potluck, or Fourth of July gathering!

    Ingredients

    • Eggs
    • Gluten Free Chickpea Elbow Pasta or Brown Rice Elbow Pasta
    • Red Onion
    • Mayonnaise
    • Plain Greek Yogurt
    • Yellow Mustard
    • Salt
    • Smoked Paprika
    • Black Pepper

    Instructions

    I prefer to hard boil my eggs in the Instant Pot the day before so they're cool and ready to use. For this, I add one cup of water to my Instant Pot and put the metal rack in the bottom of the pot. I add my eggs and cook on manual for 5 minutes. I let the steam release naturally. I put the eggs into a cold water and ice bath to cool. Then I peel the eggs and store them in a sealed container in the fridge.

    Cook the pasta per the package instructions. Drain and rinse the pasta with cold water to cool. Pour the cooked pasta into a large mixing bowl.

    Then add the chopped hard boiled eggs, finely diced red onion, mayonnaise, yogurt, mustard, salt, paprika and pepper to the large mixing bowl. Stir to combine.

    Refrigerate the salad at least 30 minutes before serving. I prefer to refrigerate overnight so the salad is completely chilled before I serve it.

    Taco Layer Salad

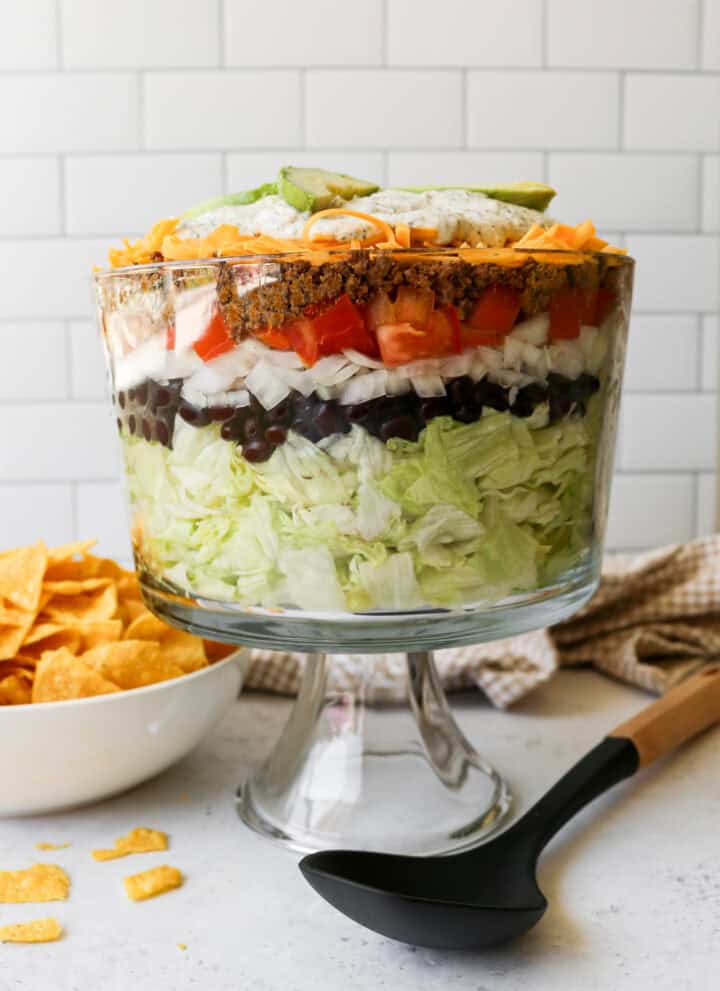
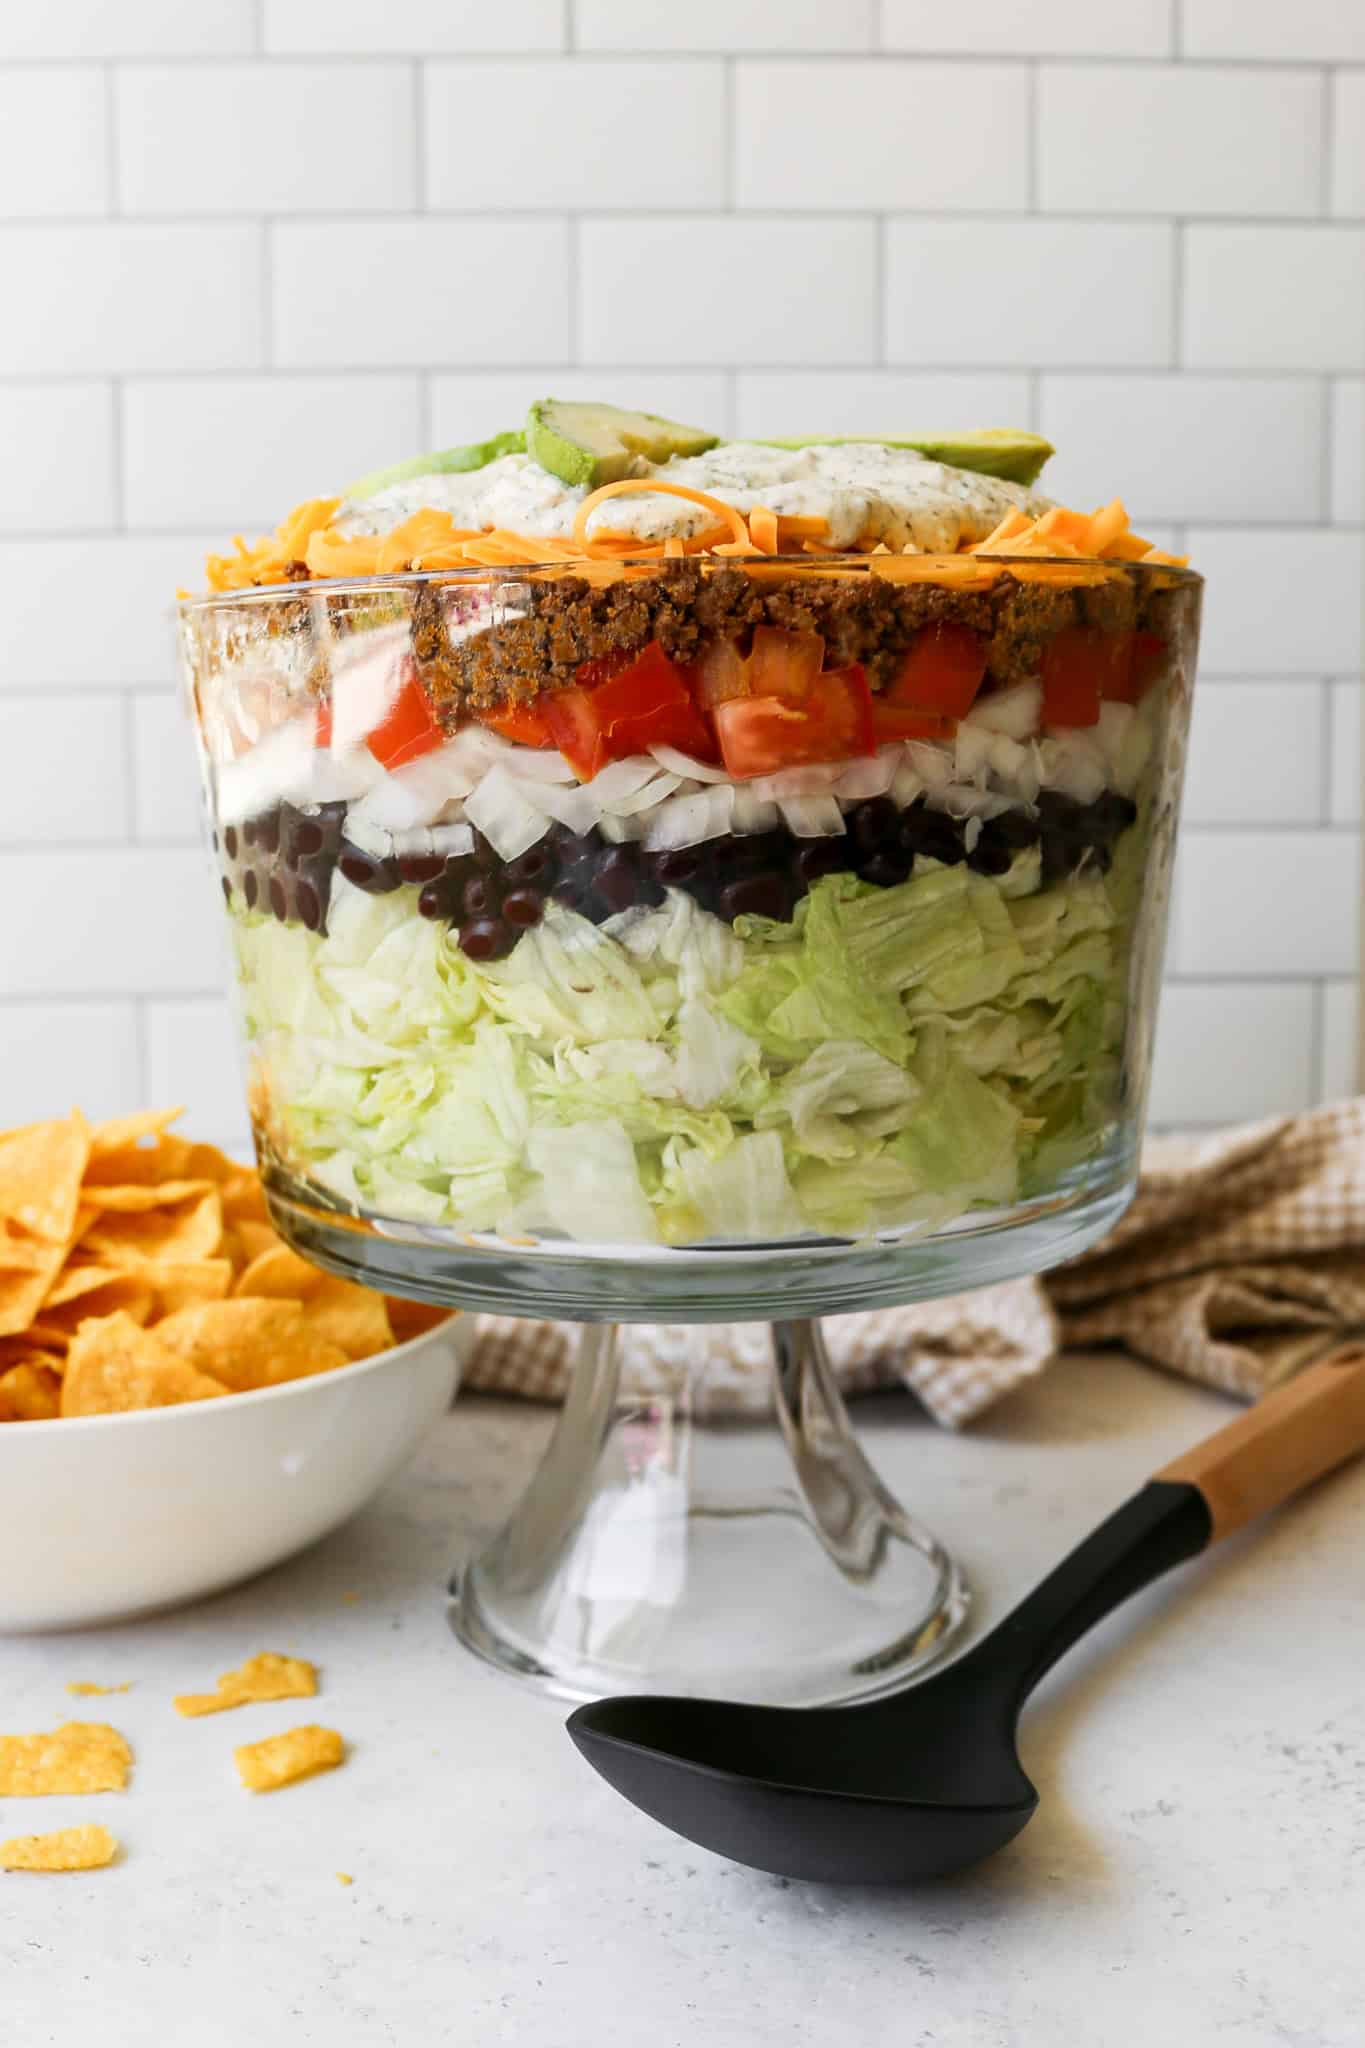
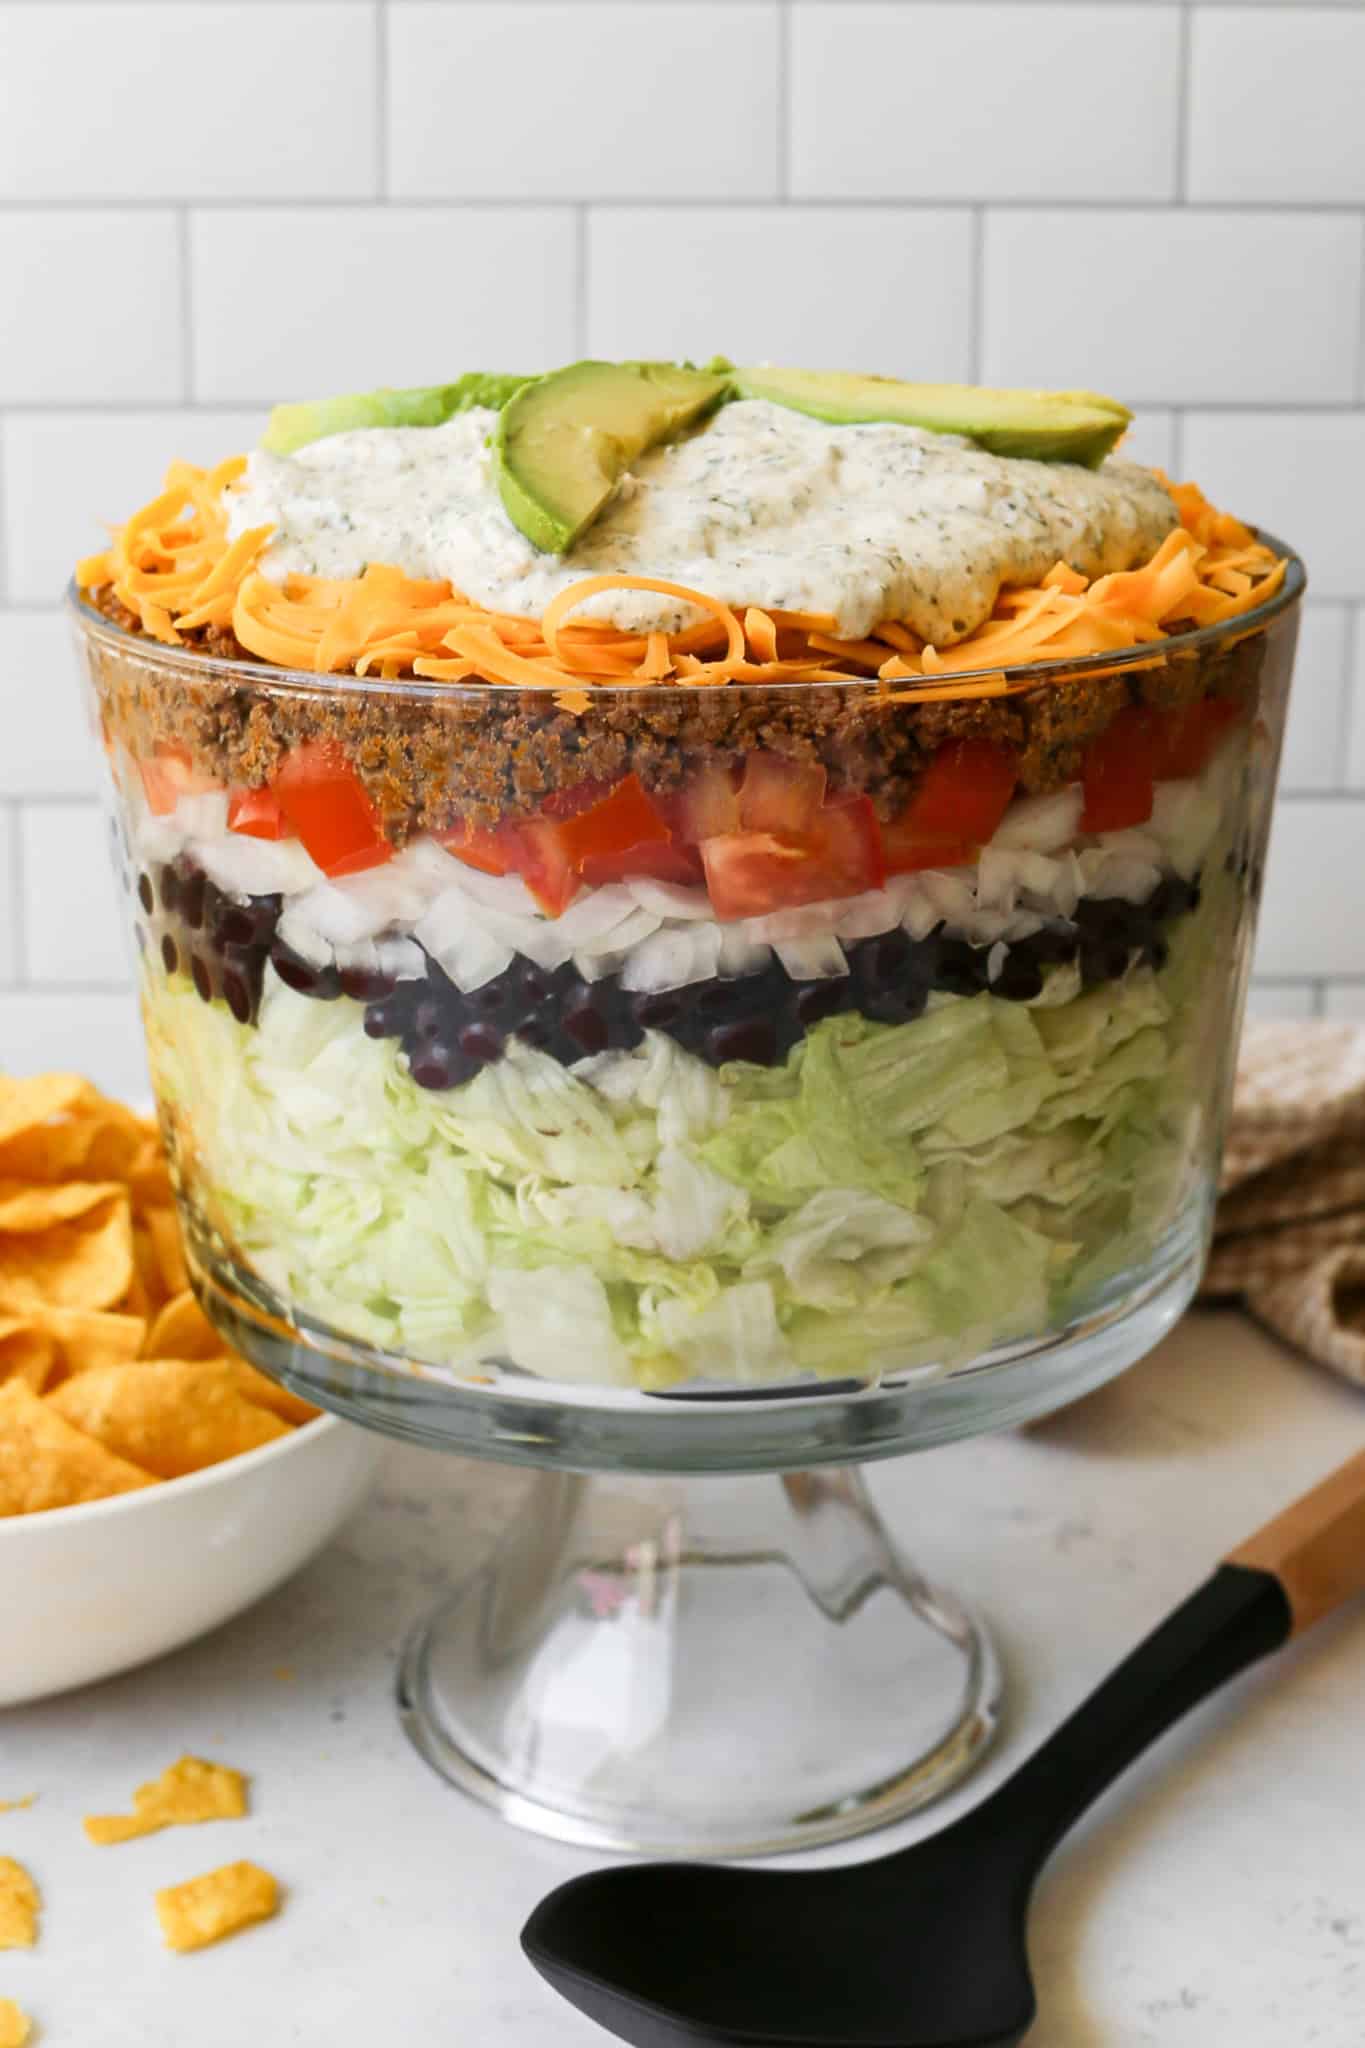
    This Taco Layer Salad is the ultimate crowd pleasing dish to bring to your next cookout, potluck, or summer gathering. Layers of shredded iceberg lettuce, seasoned taco meat, black beans, sweet onion, Roma tomatoes, and sharp cheddar cheese are piled high in a trifle dish and topped with a thick and creamy homemade ranch dressing that ties every layer together.

    Served with gluten free tortilla chips for scooping, this gluten free taco salad is a hearty and satisfying dish that feeds a crowd and disappears fast every single time.

    a clear trifle dish of layer taco salad next to a cream bowl of gluten free tortilla chips and a tan and white gingham kitchen towel

    What makes this layered taco salad stand out from the rest is the homemade ranch dressing made from scratch with sour cream, mayonnaise, buttermilk powder, and fresh herbs.

    It is thick, creamy, and so much better than anything from a bottle, and it holds up beautifully as the top layer of the salad without making everything soggy.

    This is the gluten free layer salad your seven layer salad fans are going to love just as much, with all the bold flavors of taco night built right in. Make it ahead, keep it chilled, and let everyone dig in.

    If you're looking for more salad recipes try my Seven Layer Salad, my Chopped Wedge Layer Salad, my High Protein Ranch Broccoli Cauliflower Salad or my Gluten Free BLT Pasta Salad.

    You can find all my salad recipe here: Gluten Free Salad Recipes

    a clear trifle dish of layer taco salad next to a cream bowl of gluten free tortilla chips and a tan and white gingham kitchen towel
    [feast_advanced_jump_to]

    Ingredients

    • Ground Beef
    • Chili Powder
    • Garlic Powder
    • Ground Coriander
    • Ground Cumin
    • Smoked Paprika
    • Salt
    • Black Pepper
    • Iceberg Lettuce
    • Black Beans
    • Sweet Onion
    • Roma Tomatoes
    • Cheddar Cheese
    • Gluten Free Tortilla Chips
    • Ranch Dressing (Use my recipe below for a thick version)

    Instructions

    In a skillet over medium heat add the ground beef. Brown and crumble the ground beef until it's cooked through without any pink left.

    In a small bowl while the beef is cooking whisk together the chili powder, garlic powder, ground coriander, ground cumin, smoked paprika, salt and pepper.

    Sprinkle the taco spice blend over the cooked ground beef over medium low heat and stir together until the spices are combined with the beef and heated through.

    Remove the taco meat mixture from heat and let cool while you prepare the salad.

    Chop the iceberg lettuce into bite size pieces and add as the first layer in your trifle dish.

    Next add the drained and rinsed black beans, then the chopped sweet onion, next the chopped Roma tomatoes. Then layer on the shredded cheddar cheese.

    In a small bowl make the ranch dressing by whisking together the buttermilk powder, dried parsley flakes, onion powder, garlic powder, salt, black pepper, dried chives, dried dill weed, sour cream, mayonnaise and milk. Pour the dressing over the top of the layer salad.

    If you don't want to make this thick ranch dressing you could also purchase ranch dressing, but it will be runnier so I would wait to add the dressing until right before you serve the salad.

    I topped the salad with slices from an avocado, but that's not necessary if you don't want to do that. I serve the salad with gluten free tortilla chips. I like to break mine into pieces and mix with my salad serving.

    Supplies


    More Recipes You Might Enjoy

    • Gluten Free Taco Casserole
    • Gluten Free Walking Taco Casserole
    • Healthy Mexican Street Corn Salad
    • Easy Ground Beef Nacho Casserole

    I get a lot of my ingredients from Thrive Market. Thrive Market has been a game changer for me eating gluten free. They have so many options I can't get at my rural grocery stores! Use this link to get 40% off your first order!

    Print
    clock clock iconcutlery cutlery iconflag flag iconfolder folder iconinstagram instagram iconpinterest pinterest iconfacebook facebook iconprint print iconsquares squares iconheart heart iconheart solid heart solid icon

    Taco Layer Salad


    5 Stars 4 Stars 3 Stars 2 Stars 1 Star

    No reviews

    • Author: Elaine VanVleck
    • Total Time: 30 minutes
    • Yield: 8 servings 1x
    • Diet: Gluten Free
    Print Recipe
    Pin Recipe

    Description

    Layers of shredded iceberg lettuce, seasoned taco meat, black beans, sweet onion, Roma tomatoes, and sharp cheddar cheese topped with a thick and creamy homemade ranch dressing and served with gluten free tortilla chips. This gluten free taco layer salad is the perfect make ahead dish for potlucks, cookouts, and summer gatherings.


    Ingredients

    Scale
    • 1 pound Ground Beef
    • 1 Tbsp Chili Powder
    • 2 tsp Garlic Powder
    • 2 tsp Ground Coriander
    • 1 tsp Ground Cumin
    • 1 tsp Smoked Paprika
    • ½ tsp Salt
    • ½ tsp Black Pepper
    • 1 head Iceberg Lettuce, shredded
    • 16 ounce can Black Beans, drained and rinsed
    • 1 large Sweet Onion, chopped
    • 4 Roma Tomatoes, chopped
    • 2 cups Cheddar Cheese, shredded
    • Gluten Free Tortilla Chips

    Ranch Dressing:

    • ⅓ cup Buttermilk Powder
    • 1 Tbsp Dried Parsley Flakes
    • 2 tsp Onion Powder
    • 2 tsp Garlic Powder
    • 1 tsp Salt
    • ½ tsp Black Pepper
    • 1 tsp Dried Chives
    • 1 tsp Dried Dill Weed
    • 1 cup Sour Cream
    • 1 cup Mayonnaise
    • ¼ cup Milk

    Instructions

    In a skillet over medium heat add the ground beef. Brown and crumble the ground beef until it's cooked through without any pink left.

    In a small bowl while the beef is cooking whisk together the chili powder, garlic powder, ground coriander, ground cumin, smoked paprika, salt and pepper.

    Sprinkle the taco spice blend over the cooked ground beef over medium low heat and stir together until the spices are combined with the beef and heated through.

    Remove the taco meat mixture from heat and let cool while you prepare the salad.

    Chop the iceberg lettuce into bite size pieces and add as the first layer in your trifle dish.

    Next add the drained and rinsed black beans, then the chopped sweet onion, next the chopped Roma tomatoes. Then layer on the shredded cheddar cheese.

    In a small bowl make the ranch dressing by whisking together the buttermilk powder, dried parsley flakes, onion powder, garlic powder, salt, black pepper, dried chives, dried dill weed, sour cream, mayonnaise and milk. Pour the dressing over the top of the layer salad.

    If you don't want to make this thick ranch dressing you could also purchase ranch dressing, but it will be runnier so I would wait to add the dressing until right before you serve the salad.

    I topped the salad with slices from an avocado, but that's not necessary if you don't want to do that. I serve the salad with gluten free tortilla chips. I like to break mine into pieces and mix with my salad serving.

    If you made this recipe please leave a star rating and comment below. It helps other readers find this recipe and means so much to me.

    • Prep Time: 15 minutes
    • Cook Time: 15 minutes
    • Category: Side Dish, Salads
    • Method: Chopped
    • Cuisine: American

    Did you make this recipe?

    Tag @smallfarmbiglife on Instagram and hashtag it #smallfarmbiglife

    If you make this Taco Layer Salad, I would love to hear what you think! Leave a comment below and let me know how it turned out, or tag me on Instagram so I can see your beautiful layers.

    This is one of those recipes that always gets compliments at a gathering, so save it to your favorite Pinterest board so you have it ready for every cookout and potluck on your summer calendar!

    Storage

    Store leftover taco layer salad covered tightly in the trifle dish or transferred to an airtight container in the refrigerator for up to two days. Keep in mind that the lettuce will soften and the layers will begin to mix together as it sits, so this salad is best served the day it is made or the day after. The ranch dressing can be made separately and stored in the refrigerator for up to five days.

    Top Tip

    Let the taco meat cool completely before adding it to the salad layers. Warm meat will wilt the iceberg lettuce and cause the cheese to melt, which affects both the texture and the presentation of the salad. Once the meat is fully cooled, the layers stay clean and distinct all the way down to the bottom of the trifle dish, which is what makes this salad so impressive when you serve it.

    Didn't find the answer you're looking for?

    Ask AI to answer based on this recipe:

    ChatGPT
    Google AI
    Perplexity
    Grok
    Claude

    Frequently Asked Questions

    Can I make this taco layer salad ahead of time?

    Yes, this salad is actually a great make ahead dish. Assemble all the layers up to 24 hours in advance and store it covered in the refrigerator. If you are concerned about the dressing making the salad soggy, you can also store the ranch dressing separately and add it right before you serve.

    Do I have to use a trifle dish to make this salad?

    A trifle dish is ideal because the clear sides let you see all the beautiful layers, which makes for a stunning presentation at a potluck or gathering. If you do not have one, a large clear glass bowl works just as well. The key is using a deep dish so you have enough room for all the layers.

    Can I use store bought ranch dressing instead of homemade?

    You can use store bought ranch dressing if you are short on time, but the homemade ranch in this recipe is thick and creamy in a way that store bought dressings are not. A thinner store bought dressing will run down through the layers more quickly, so if you go that route wait to add it until right before you serve the salad.

    Can I substitute the ground beef for another protein?

    Absolutely. Ground turkey or ground chicken seasoned with the same taco spice blend works beautifully in this recipe. You could also use shredded rotisserie chicken heated up with the taco seasoning for an even quicker version.

    High Protein Ranch Broccoli Cauliflower Salad

    This High Protein Ranch Broccoli Cauliflower Salad is the side dish you will want to bring to every summer gathering this season. Fresh broccoli and cauliflower are tossed with crispy bacon, shredded cheddar, red onion, and sunflower seeds, then coated in a creamy homemade ranch dressing made with plain Greek yogurt and buttermilk powder.

    It is packed with protein, full of flavor, and comes together in minutes with no cooking required beyond the bacon.

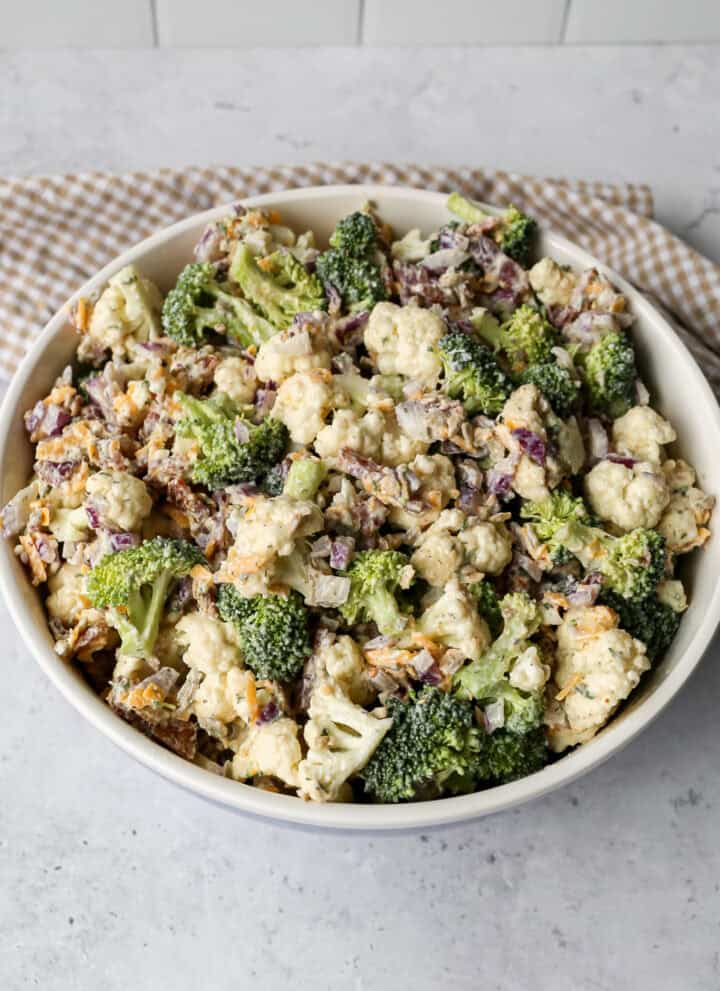
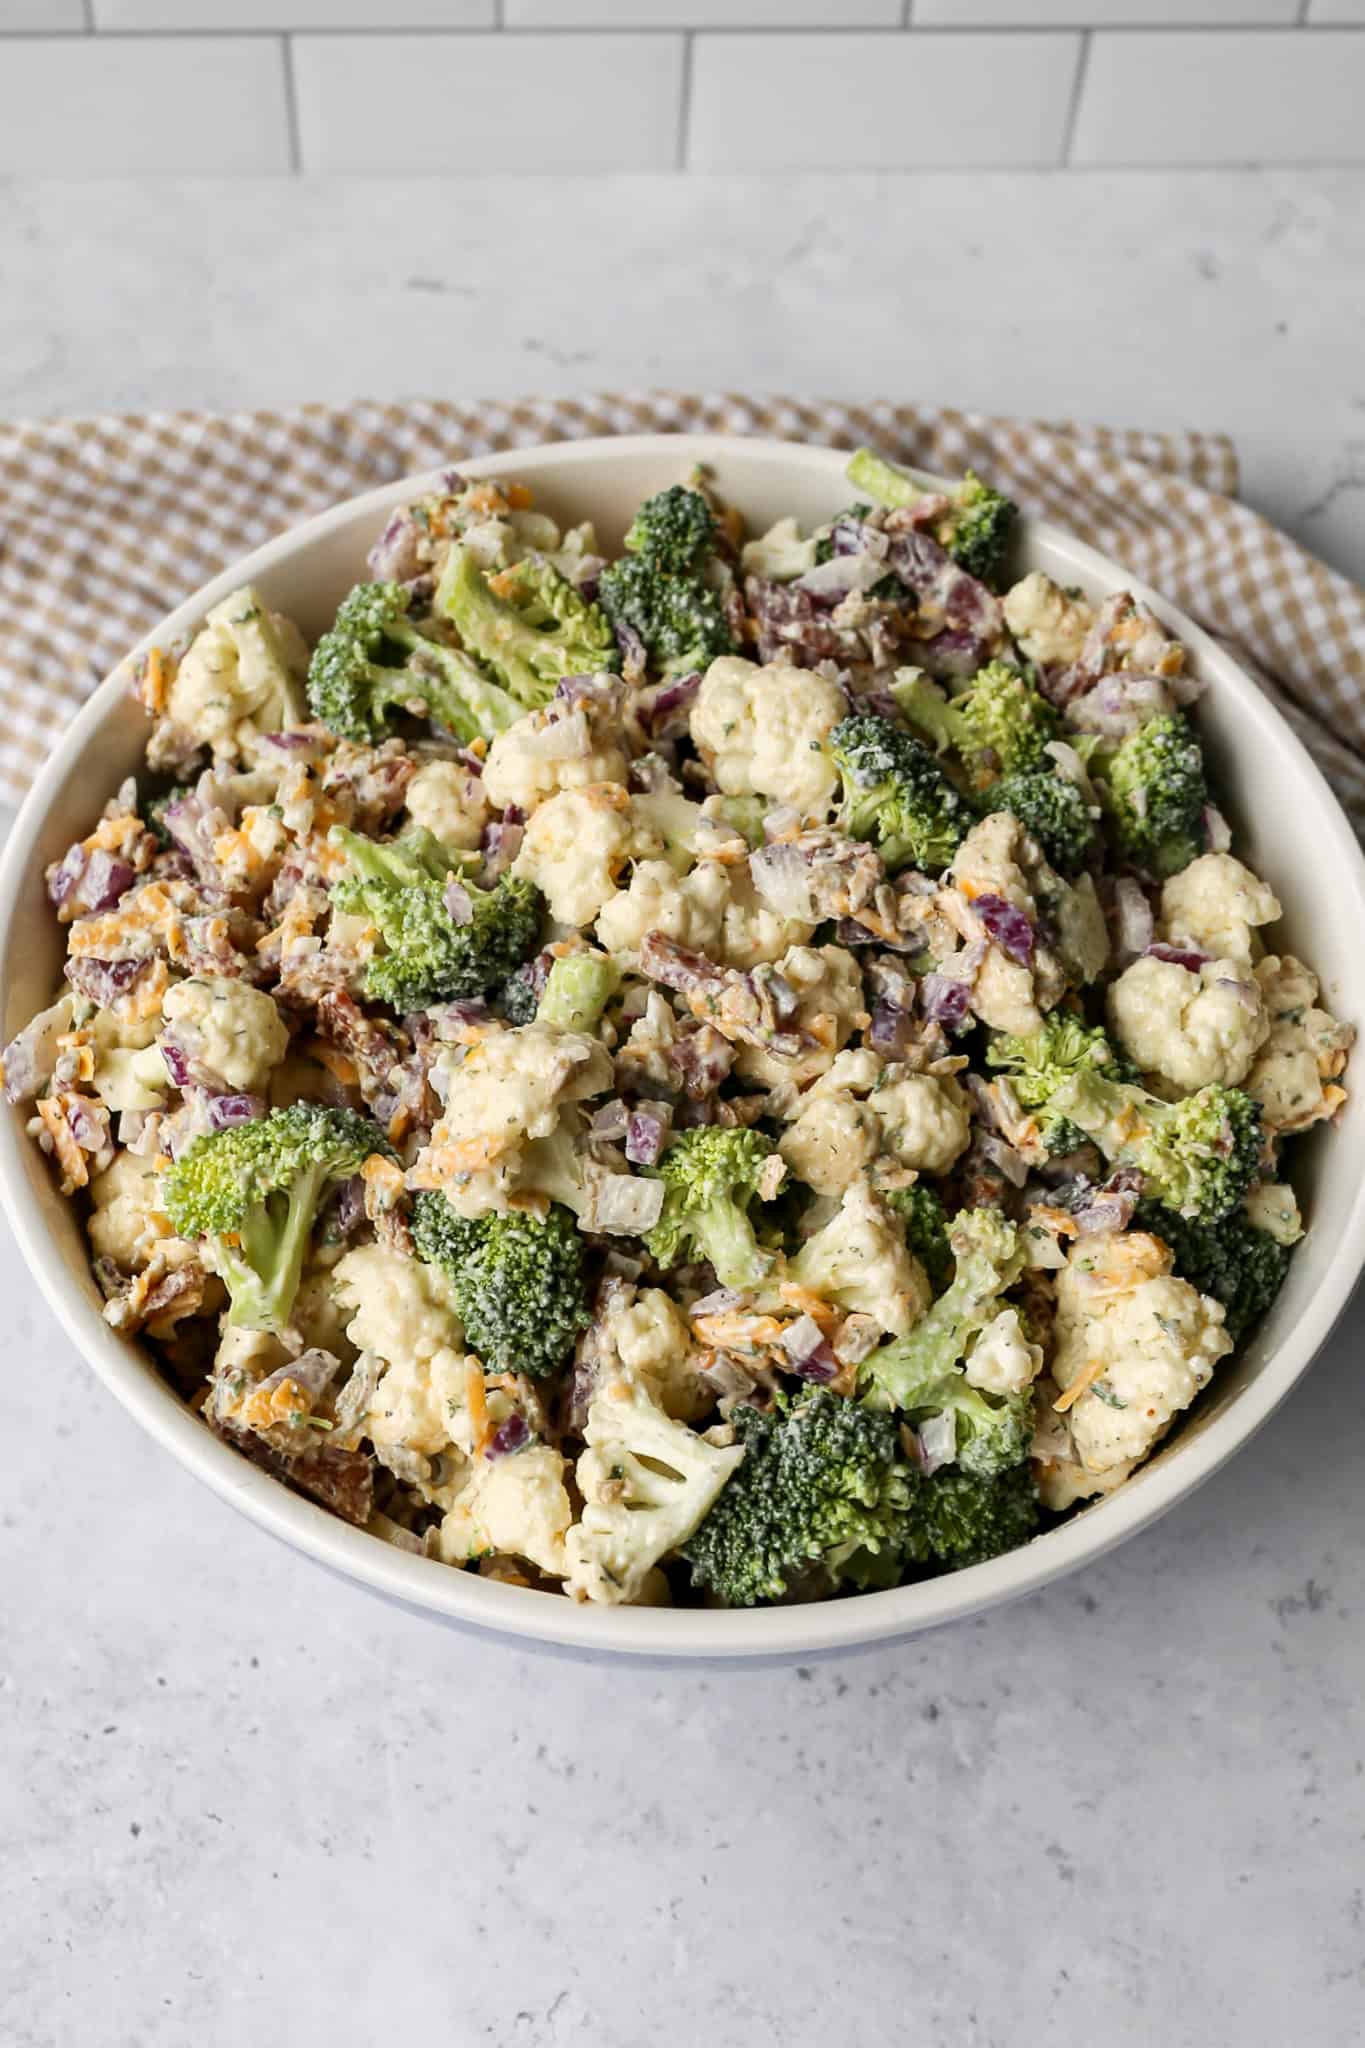
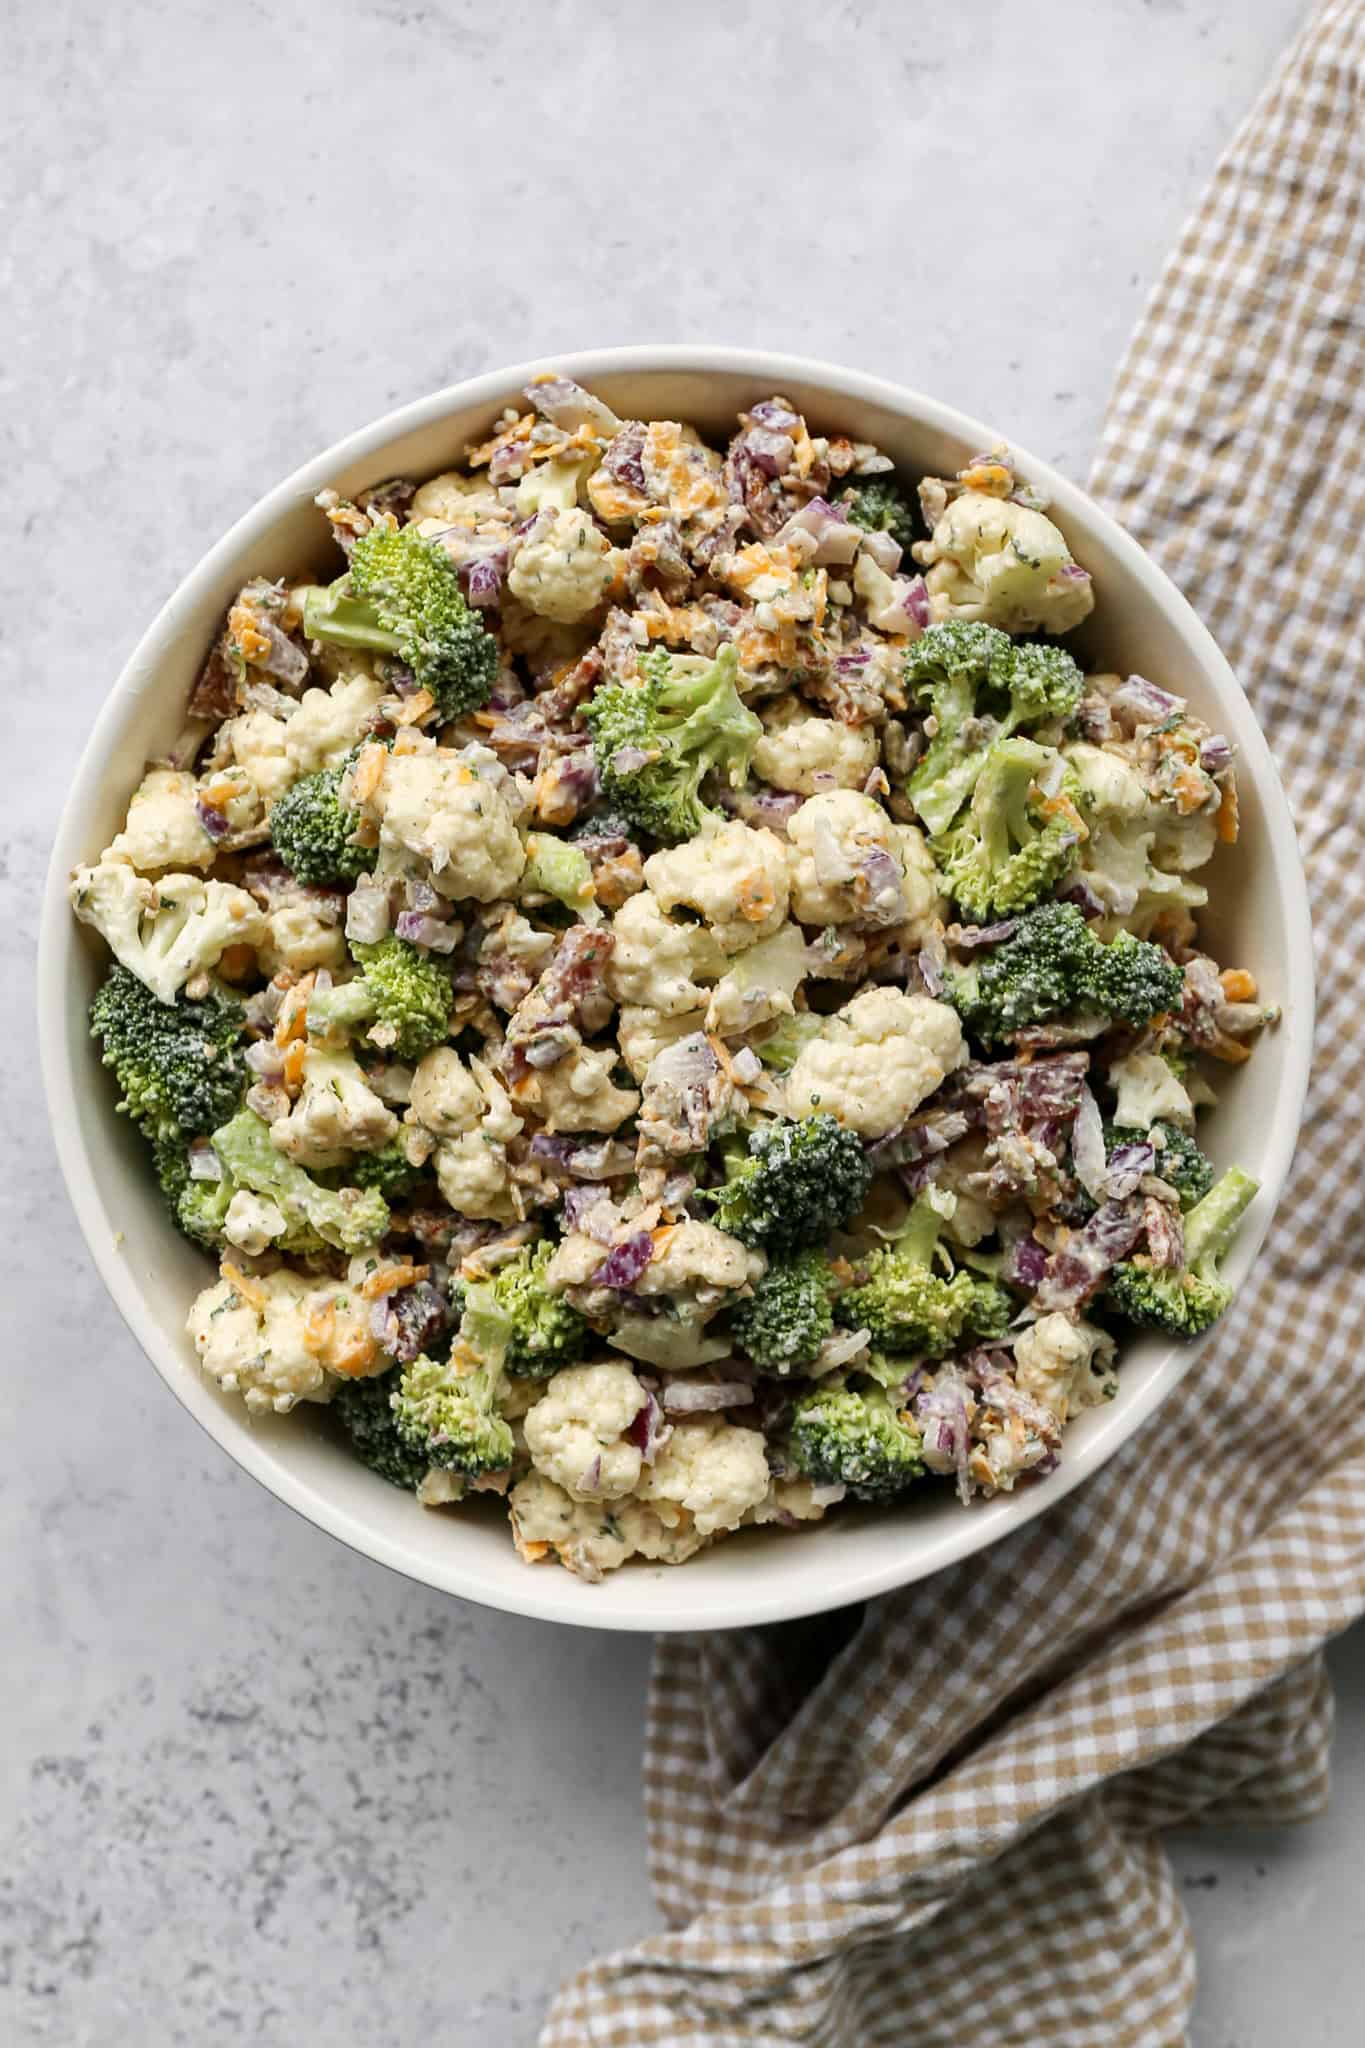
    a bowl of high protein ranch broccoli cauliflower salad next to a tan and white gingham kitchen towel

    What makes this broccoli cauliflower salad stand out is the dressing. Instead of a mayo based ranch, this recipe uses Greek yogurt as the base, which keeps it creamy and rich while adding a serious protein boost to every serving.

    The homemade ranch seasoning is made from scratch with garlic powder, onion powder, dill, and parsley, so the flavor is so much better than anything from a packet. Make it ahead and let it chill in the refrigerator before serving for the best results.

    If you're looking for more gluten free broccoli recipes try my Sugar Free Broccoli Salad, my Air Fryer Roasted Parmesan Broccoli, my Gluten Free Chicken and Broccoli Pasta Bake or my Gluten Free Slow Cooker Beef and Broccoli.

    You can find all my salad recipes here: Gluten Free Salad Recipes

    a bowl of high protein ranch broccoli cauliflower salad next to a tan and white gingham kitchen towel
    [feast_advanced_jump_to]

    Ingredients

    • Fresh Cauliflower
    • Fresh Broccoli
    • Bacon
    • Red Onion
    • Cheddar Cheese
    • Sunflower Seeds
    • Plain Greek Yogurt
    • Buttermilk Powder
    • Parsley Flakes
    • Onion Powder
    • Garlic Powder
    • Salt
    • Dried Dill Weed
    • Black Pepper
    • Milk

    Instructions

    I like to cook my bacon in the oven. I line a baking sheet with aluminum foil and then lay out the bacon in a single layer. I bake at 375 degrees for 25-30 minutes until the bacon get as crispy as I want it. Let the bacon cool and then chop it into pieces.

    In a large bowl add the bite size cauliflower florets, bite size broccoli florets, bacon, red onion, shredded cheese and sunflower seeds.

    In a small bowl whisk together the plain greek yogurt, buttermilk powder, parsley flakes, onion powder, garlic powder, salt, dried dill weed, black pepper, and milk.

    Pour the dressing over the salad mixture and stir to combine.

    You can serve immediately, but I like to chill the salad for at least 30 minutes.

    Supplies


    More Recipes You Might Enjoy

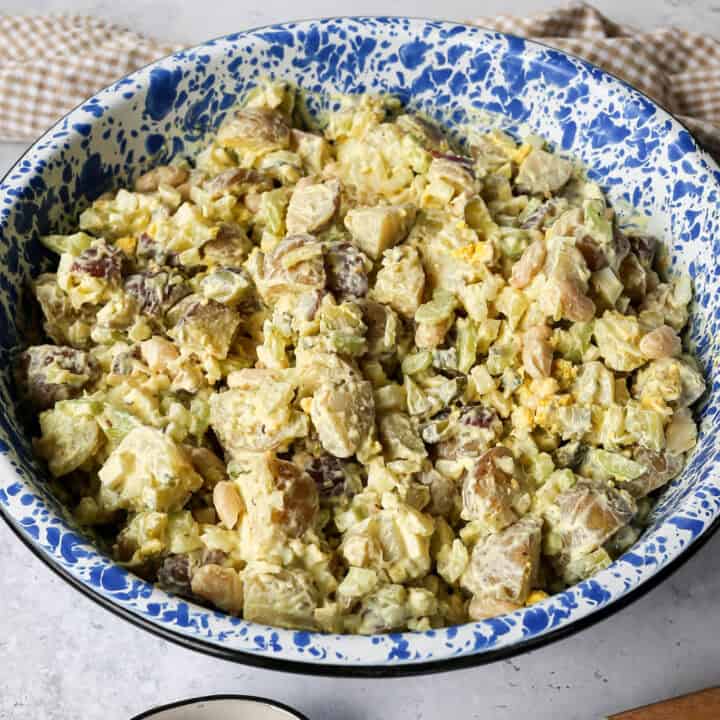
    • High Protein Potato Salad
    • Sugar Free Broccoli Salad
    • Gluten Free Slow Cooker Beef and Broccoli
    • Air Fryer Roasted Parmesan Broccoli

    I get a lot of my ingredients from Thrive Market. Thrive Market has been a game changer for me eating gluten free. They have so many options I can't get at my rural grocery stores! Use this link to get 40% off your first order!

    Print
    clock clock iconcutlery cutlery iconflag flag iconfolder folder iconinstagram instagram iconpinterest pinterest iconfacebook facebook iconprint print iconsquares squares iconheart heart iconheart solid heart solid icon

    High Protein Ranch Broccoli Cauliflower Salad


    5 Stars 4 Stars 3 Stars 2 Stars 1 Star

    No reviews

    • Author: Elaine VanVleck
    • Total Time: 50 minutes
    • Yield: 8 servings 1x
    • Diet: Gluten Free
    Print Recipe
    Pin Recipe

    Description

    Fresh broccoli and cauliflower tossed with crispy bacon, cheddar cheese, sunflower seeds, and a creamy homemade Greek yogurt ranch dressing. This high protein broccoli cauliflower salad is an easy make ahead side dish that is perfect for summer cookouts, potlucks, and busy weeknights.


    Ingredients

    Scale
    • 1 head Fresh Cauliflower, cut into bite size pieces
    • 2 heads Fresh Broccoli, cut into bite size pieces
    • 12 slices Bacon, cooked and chopped
    • 1 small Red Onion, finely diced
    • 1 cup Cheddar Cheese, shredded
    • ½ cup Sunflower Seeds

    Dressing

    • 1 cup Plain Greek Yogurt
    • ¼ cup Buttermilk Powder
    • 1 Tbsp Parsley Flakes
    • 1 tsp Onion Powder
    • 1 tsp Garlic Powder
    • ½ tsp Salt
    • ½ tsp Dried Dill Weed
    • ¼ tsp Black Pepper
    • ¼ cup Milk

    Instructions

    I like to cook my bacon in the oven. I line a baking sheet with aluminum foil and then lay out the bacon in a single layer. I bake at 375 degrees for 25-30 minutes until the bacon get as crispy as I want it. Let the bacon cool and then chop it into pieces.

    In a large bowl add the bite size cauliflower florets, bite size broccoli florets, bacon, red onion, shredded cheese and sunflower seeds.

    In a small bowl whisk together the plain greek yogurt, buttermilk powder, parsley flakes, onion powder, garlic powder, salt, dried dill weed, black pepper, and milk.

    Pour the dressing over the salad mixture and stir to combine.

    You can serve immediately, but I like to chill the salad for at least 30 minutes.

    If you made this recipe please leave a star rating and comment below. It helps other readers find this recipe and means so much to me.

    • Prep Time: 20 minutes
    • Cook Time: 30 minutes
    • Category: Side Dish, Salads
    • Method: Chopped
    • Cuisine: American

    Did you make this recipe?

    Tag @smallfarmbiglife on Instagram and hashtag it #smallfarmbiglife

    If you make this High Protein Ranch Broccoli Cauliflower Salad, I would love to know what you think! Drop a comment below and let me know how it turned out, or tag me on Instagram so I can see it. This is the kind of salad that disappears fast at every gathering, so pin it to your favorite Pinterest board so you always know where to find it.

    Storage

    Store leftover salad in an airtight container in the refrigerator for up to three days. The dressing will continue to soak into the vegetables as it sits, which actually makes it taste even better the next day. Stir before serving and add a splash of milk if you want to loosen the dressing a bit.

    Top Tip

    For the best flavor and texture, chill the salad for at least 30 minutes before serving. The resting time allows the dressing to soak into the broccoli and cauliflower and the flavors to come together, making every bite taste so much better than if you serve it right away.

    Didn't find the answer you're looking for?

    Ask AI to answer based on this recipe:

    ChatGPT
    Google AI
    Perplexity
    Grok
    Claude

    Frequently Asked Questions

    Can I make this broccoli cauliflower salad ahead of time?

    Yes, and it is actually better when you do. Make it up to 24 hours in advance and store it covered in the refrigerator. The dressing soaks into the vegetables as it chills and the flavors come together beautifully. Give it a good stir before serving.

    Can I use mayo instead of Greek yogurt in the dressing?

    You can substitute mayo for the Greek yogurt if you prefer a more traditional ranch dressing. Keep in mind that swapping the Greek yogurt for mayo will reduce the protein content of the salad. The Greek yogurt version is just as creamy and has a slightly tangy flavor that works really well with the ranch seasoning.

    Do I have to use buttermilk powder in the dressing?

    Buttermilk powder is what gives the dressing that classic ranch flavor, so it is worth tracking down if you can. It is usually found in the baking aisle at most grocery stores. I order my buttermilk powder from Amazon. If you cannot find it, you can substitute an equal amount of dry milk powder and add a small splash of white vinegar to mimic the tangy buttermilk flavor.

    Can I add other vegetables or mix ins to this salad?

    Absolutely. This salad is very flexible. Sliced black olives, diced celery, shredded carrots all make great additions. You can also swap the sunflower seeds for pumpkin seeds or chopped pecans if you want a different crunch.

    • 1
    • 2
    • 3
    • …
    • 9
    • Next Page »

    Welcome! I'm Elaine

    I'm so glad you are here! I share easy gluten free recipes from my small farm in Washington.

    Be sure to sign up for my newsletter to stay up to date on all of my new recipes.

    More about me...
    • Instagram
    • Pinterest
    • Facebook
    • Twitter
    • Mail

    Load up on new recipes, exclusive goodies, + more!
    Sign up below to stay up-to-date on news, events, and special deals.
    Thank you for subscribing!

    Easy Meals Recipes

    • Gluten Free Instant Pot Chili Mac and Cheese
    • Gluten Free Taco Casserole
    • Gluten Free Cowboy Baked Beans
    • Gluten Free Walking Taco Casserole
    • Gluten Free Creamy Beef and Mushroom Pasta
    • Gluten Free Instant Pot Chicken & Dumplings
    • Instant Pot Mexican Style Beef and Rice
    • Gluten Free Chicken Parmesan Pasta Casserole
    • Gluten Free One Pot Hamburger Helper Copycat
    • Gluten Free Salisbury Steak with Mushroom Gravy
    • Gluten Free Air Fryer Fajitas
    • Gluten Free Sloppy Joe Casserole

    Footer

    back to top

    About

    • Privacy Policy
    • Shop my Amazon Page
    • Follow me on LTK

    Newsletter

    • Sign Up! for emails and updates

    Contact

    • Contact
    • Media Kit
    • About Me

    As an Amazon Associate I earn from qualifying purchases.

    I may get commissions for purchases made through links on this site.

    Copyright © 2026 Brunch Pro on the Brunch Pro Theme