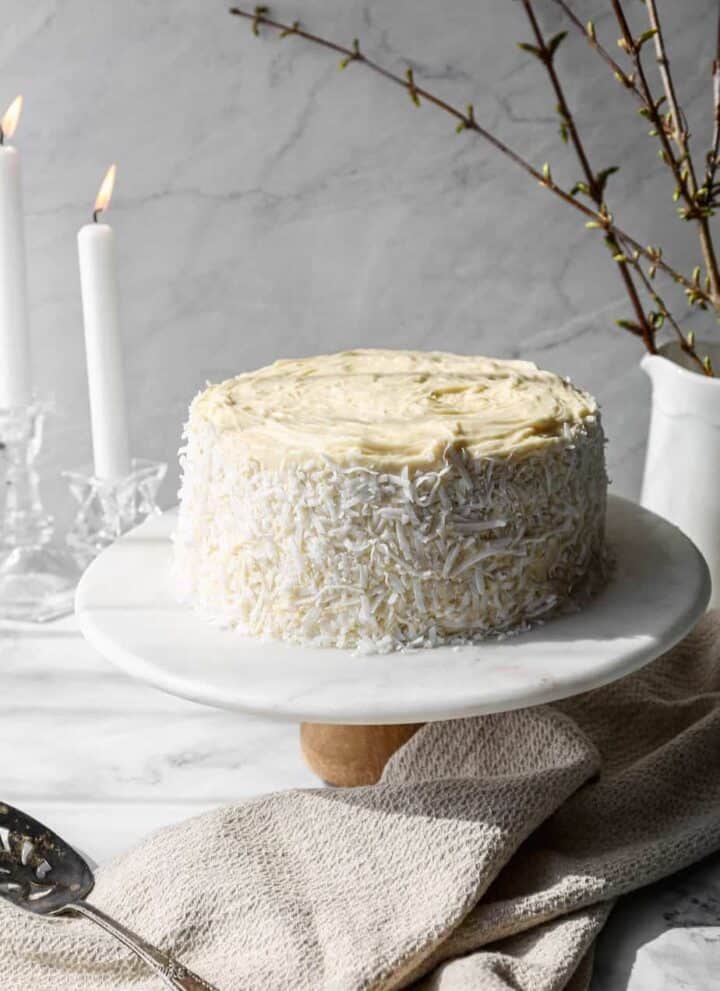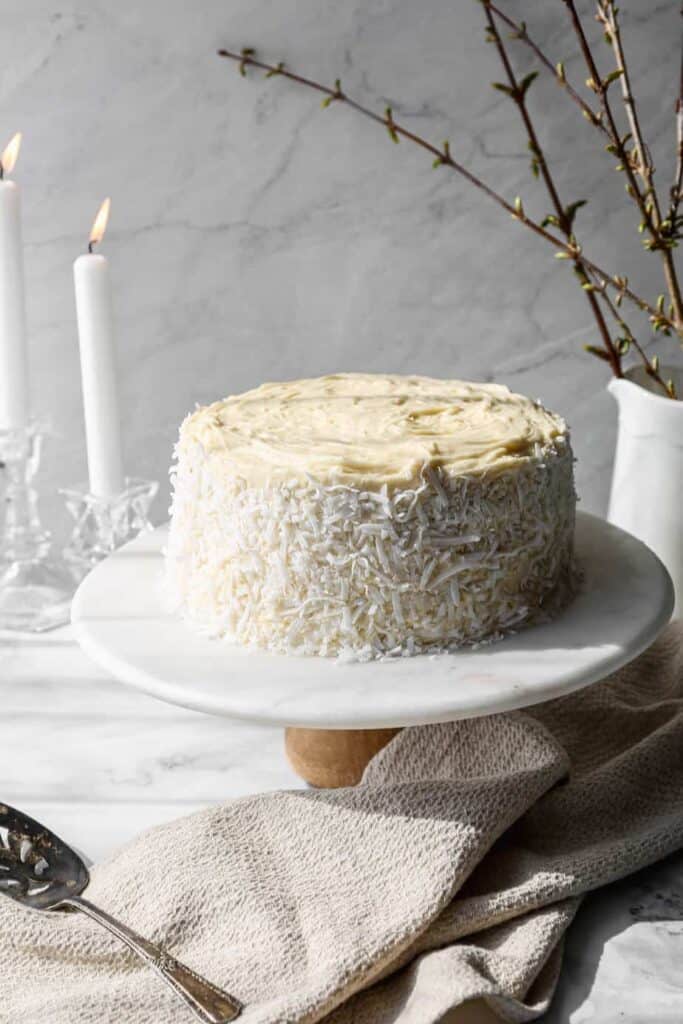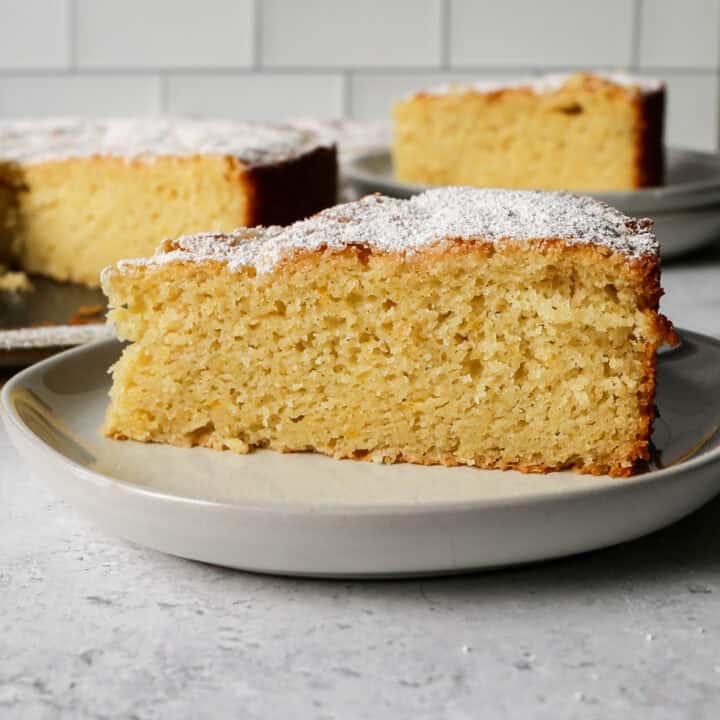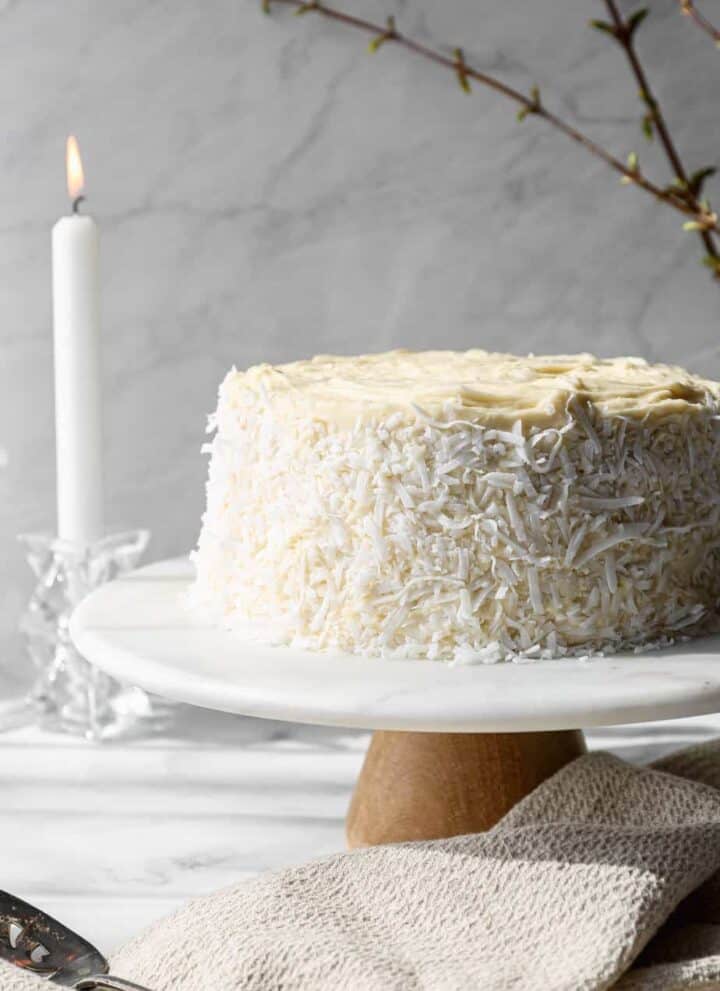
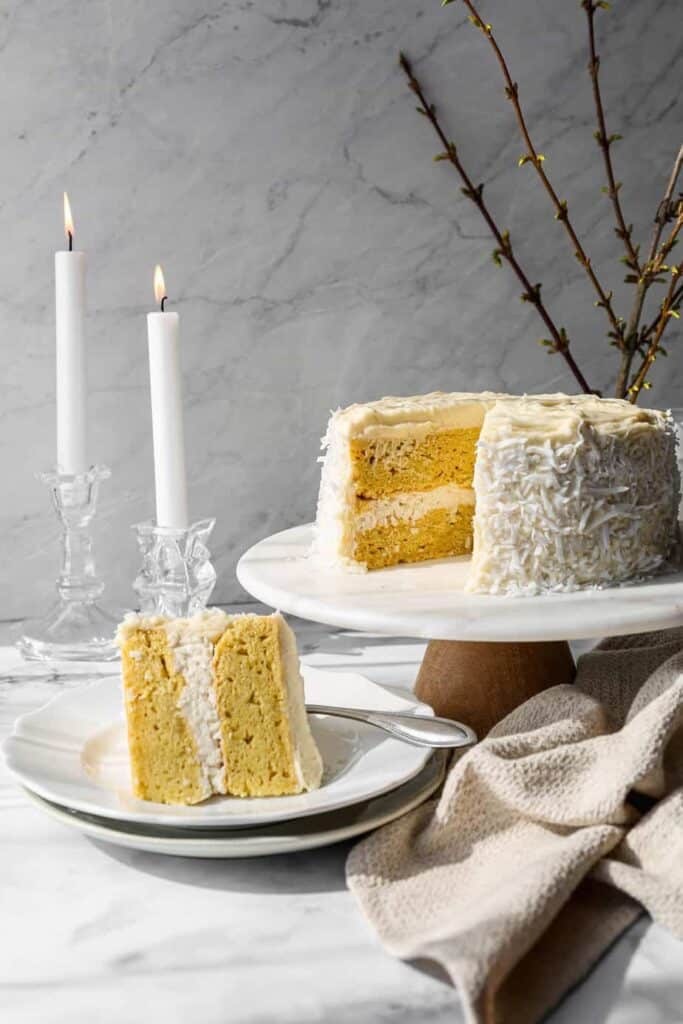
This Gluten Free Coconut Cake is made from scratch yet surprisingly easy to make. It makes a super moist coconut cake with a soft, fluffy crumb. If you've been searching for how to make a moist and fluffy coconut cake that truly tastes like the best coconut cake recipe, this one checks every box.
Baked as a beautiful layer cake in round cake pans, it's the kind of homemade coconut cake that feels bakery worthy while still being an approachable easy gluten free cake recipe.
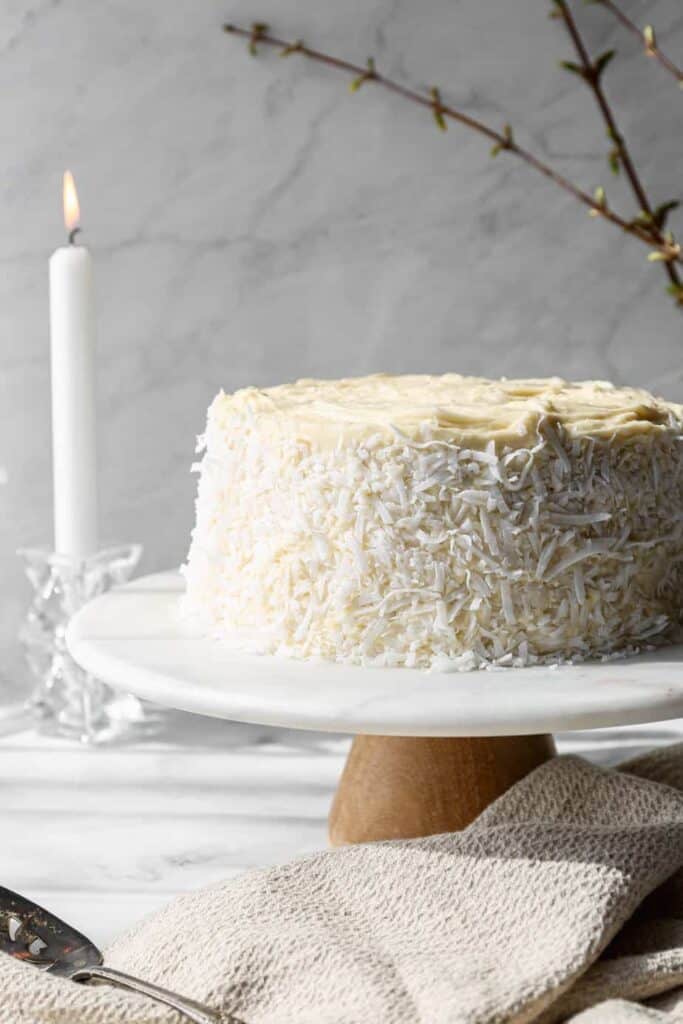
Perfect for celebrations or an everyday treat, this gluten free coconut cake recipe is a standout dessert that doesn't feel like a compromise. Each slice of coconut cake is rich, tender, and full of classic flavor, making it ideal as a coconut birthday cake or just a delicious dessert.
Whether you're learning how to make coconut cake gluten free or just want the best homemade coconut cake, this moist gluten free coconut layer cake is one you'll come back to again and again.
You can find more cake recipes here: Gluten Free Cake Recipes
Instructions
Preheat your oven to 350 degrees. Grease two nine inch cake pans with coconut oil or butter. Set aside.
In your stand mixer beat the egg whites and cream of tartar until they are fluffy. Set aside.
Using your stand mixer beat the egg yolks, sugar, melted coconut oil, avocado oil, vanilla and water until combined.
Add the gluten free flour, coconut flour, baking powder and salt to the wet mixture. Beat until combined into a nice batter.
Add the egg whites to the cake batter and gently fold in using a spatula. The batter should become lighter and fluffier with the combined egg whites.
Pour half of the batter into each greased, nine inch cake pan.
Bake at 350 degrees for 25-30 minutes. The cake will be slightly browned and a toothpick will come out clean when the cake is done.
Let stand for 10 minutes and then transfer the cakes to a cooling rack. Let the cakes cool completely before filling and frosting them.
Supplies


More Recipes You Might Enjoy


I get a lot of my ingredients from Thrive Market. Thrive Market has been a game changer for me eating gluten free. They have so many options I can't get at my rural grocery stores! Use this link to get 40% off your first order!
PrintGluten Free Coconut Cake
- Total Time: 55 minutes
- Yield: 10 slices 1x
- Diet: Gluten Free
Description
This easy recipe for gluten free coconut cake is dairy free. You make this moist cake from scratch using coconut flour. The frosting I used does have dairy, but you could switch that out for whipped coconut cream for a completely dairy free dessert.
Ingredients
Cake:
- 2 cups Gluten Free Flour
- ½ cup Coconut Flour
- 1 Tbsp. Baking Powder
- ½ tsp. Sea Salt
- 1 cup Granulated Sugar
- ¼ cup Coconut Oil, melted
- ½ cup Avocado Oil
- 1 Tbsp. Vanilla Extract
- ¾ cup Water, at room temperature
- 5 large Eggs, at room temperature & separated
- ½ tsp. Cream of Tartar
Filling:
- 4 ounces Mascarpone Cheese
- ½ cup Powdered Sugar
- 2 tsp. Vanilla Extract
- ½ cup Heavy Whipping Cream
- ½ cup Unsweetened Coconut Flakes
- 1 - 14 ounce bag Sweetened Coconut Flakes
Instructions
Preheat your oven to 350 degrees. Grease two nine inch cake pans with coconut oil or butter. Set aside.
In your stand mixer beat the egg whites and cream of tartar until they are fluffy. Set aside.
Using your stand mixer beat the egg yolks, sugar, melted coconut oil, avocado oil, vanilla and water until combined.
Add the gluten free flour, coconut flour, baking powder and salt to the wet mixture. Beat until combined into a nice batter.
Add the egg whites to the cake batter and gently fold in using a spatula. The batter should become lighter and fluffier with the combined egg whites.
Pour half of the batter into each greased, nine inch cake pan.
Bake at 350 degrees for 25-30 minutes. The cake will be slightly browned and a toothpick will come out clean when the cake is done.
Let stand for 10 minutes and then transfer the cakes to a cooling rack. Let the cakes cool completely before filling and frosting them.
Notes
I like to make the cakes the day before I'm going to frost them so they are completely cooled.
- Prep Time: 25 minutes
- Cook Time: 30 minutes
- Category: Cake
- Method: Baking
- Cuisine: Gluten Free
Frequently Asked Questions
Gluten free baking tends to require more moisture or oil than when you are using regular wheat flour. For this gluten free coconut cake I used coconut oil and avocado oil to make it moist and delicious.
If you are using a cake recipe that isn't turning out moist I would suggest adding a bit more oil or butter. You can also add mashed banana or applesauce to help your baked goods have more moisture.
Yes, gluten free baking in general takes a little bit longer to bake than a cake made with regular wheat flour. However, gluten free baked goods tend to brown faster. So you will want to test the cake with a tooth pick in the center to make sure it's actually done even if it looks browned.
Your cake should be a nice golden brown and a tooth pick inserted in the center of the cake should come out clean. You may need to bake your cake up to 5-8 minutes more. If your cake is already very brown, but not done in the center you will need to lower the oven temperature by 25 degrees and cook longer.
Your gluten free coconut cake will keep for 5-7 days if you store it in an air tight container in a cool place. Remember to keep the cake out of direct sunlight. If you still have leftover cake you can freeze it for later.