Small Farm Big Life

  • Gluten Free Recipe Index
  • Subscribe
  • Resources
menu icon
go to homepage
  • Home
  • Gluten Free Recipe Index
  • Subscribe
  • My Story
  • Resources
  • Free Guides
    • Email
    • Facebook
    • Instagram
    • Pinterest
  • subscribe
    search icon
    Homepage link
    • Home
    • Gluten Free Recipe Index
    • Subscribe
    • My Story
    • Resources
    • Free Guides
    • Email
    • Facebook
    • Instagram
    • Pinterest
  • ×

    Gluten Free Triple Chocolate Brownies

    These simple gluten free triple chocolate brownies are made from scratch and make a perfect dessert. These chocolate chip brownies are so easy and moist! I think you will love this homemade recipe. I like them plain or warm topped with vanilla ice cream.
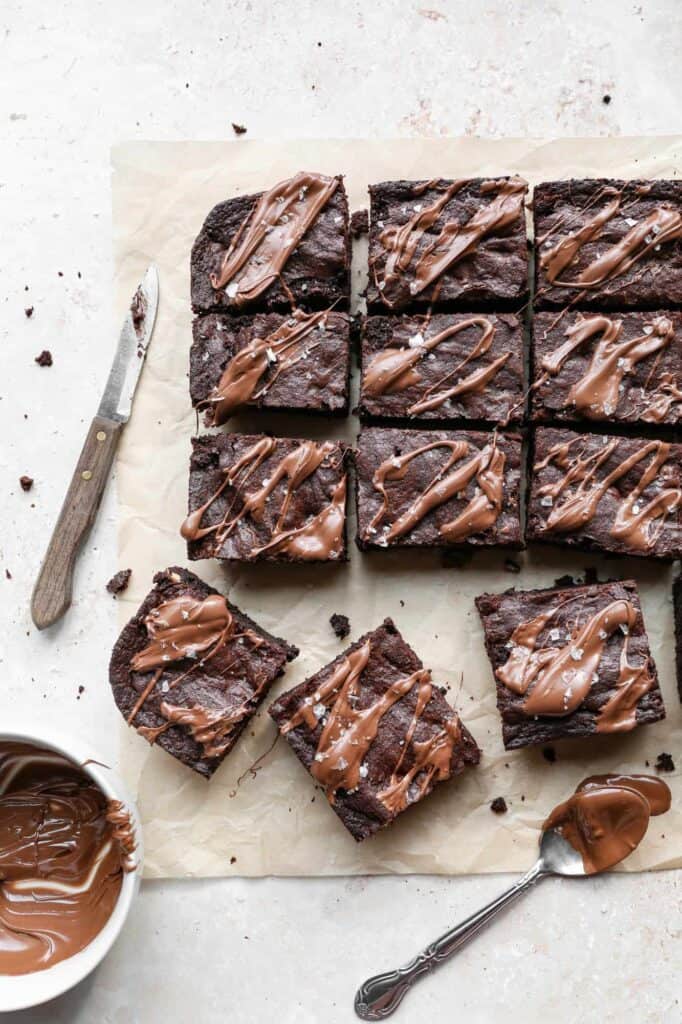
    gluten free triple chocolate brownies cut into bars with milk chocolate drizzled over top

    These Gluten Free Triple Chocolate Brownies are a dream for any chocolate lover. Combining cocoa, chocolate chips, and a rich fudgy base, these brownies deliver a deep chocolate flavor with a perfectly chewy texture.

    This gluten-free bars recipe is easy to make from scratch and is perfect for those who want a homemade treat that's both simple and indulgent. Whether you're baking for a special occasion or just craving a chocolate fix, these brownies are a must-try.

    The recipe is designed to be straightforward, making it a go-to for anyone looking for a delicious gluten-free dessert that's quick to prepare.

    If you are looking for more chocolate recipes try my Gluten Free Chocolate Pound Cake, my Gluten Free Double Chocolate Chip Cookies, my Gluten Free Double Chocolate Bundt Cake or my Gluten Free Chocolate Mayonnaise Cake.

    You can find all of my dessert recipes here: Gluten Free Dessert Recipes
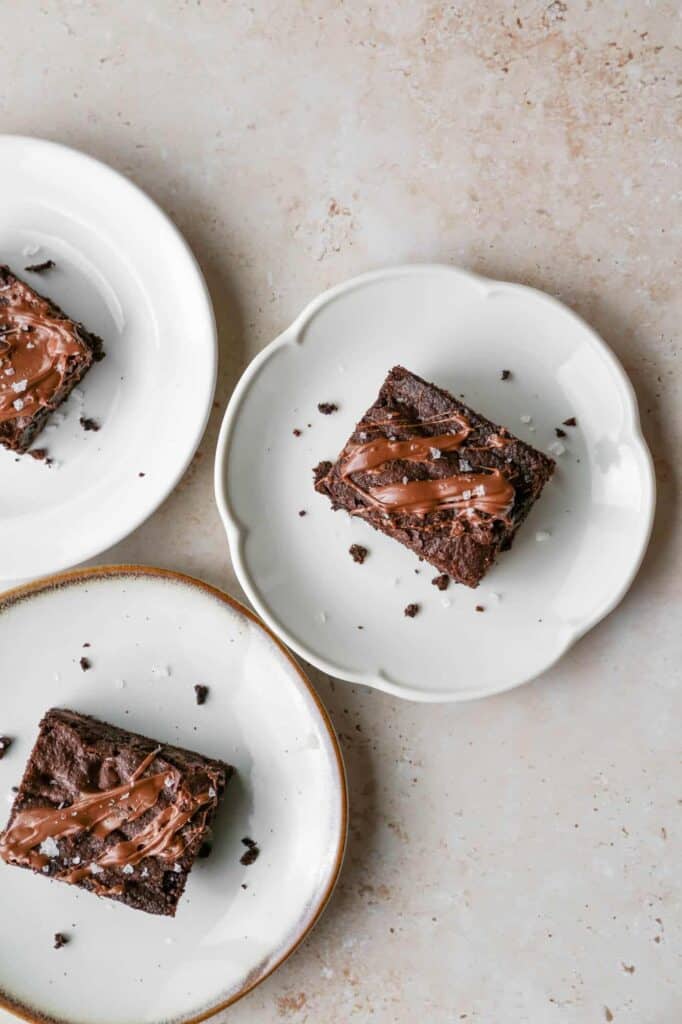
    three plates with gluten free triple chocolate brownies that are drizzled in milk chocolate
    [feast_advanced_jump_to]

    Ingredients

    Unsalted Butter
    Granulated Sugar
    Brown Sugar
    Cocoa Powder
    Eggs
    Vanilla Extract
    Gluten Free Flour
    Baking Powder
    White Chocolate Chips
    Semi-Sweet Chocolate Chips
    Milk Chocolate Chips

    Instructions

    Preheat your oven to 350 degrees.

    Grease a 9x13 baking dish with butter or coconut oil. Set aside.

    In a saucepan melt the butter, granulated sugar, brown sugar and cocoa powder. Stir constantly until completely melted. Pour into the bowl of your stand mixer and let cool for ten minutes.

    While the beater of your mixer is going add one egg at a time. Add vanilla extract and mix in.

    Add the gluten free flour and baking powder to the mixer and beat just until blended. Add the white chocolate chips and semi-sweet chocolate chips to the batter and mix in.

    Pour the batter into the greased 9x13 baking dish and bake at 350 degrees for 25-30 minutes. The brownies will be pulling slightly from the side of the pan and will bounce back when touched lightly.

    Let the brownies cool completely before drizzling the melted milk chocolate chips over top. Let the milk chocolate cool before cutting the brownies into bars.

    Supplies

    Frequently Asked Questions

    How long do gluten free brownies last?

    Once your brownies are cool you will want to store them in an air tight container. They will keep for 3-5 days. If they are going to last longer than that I like to freeze part of them for later.

    To freeze, place them in a freezer safe container or bag. Freeze in a flat layer so you can get one at a time out if you would like. This makes a quick dessert or treat to have on hand!

    Can I freeze these brownies?

    Yes! I like to freeze the baked and cooled brownies in a single row in a freezer safe container or freezer safe bag. Then after they are frozen I can get them all out or get one out at a time for a chocolate treat later.

    What do gluten free brownies taste like?

    I like to use a good dutch cocoa such as Rodelle Gourmet Baking Cocoa to make this recipe. The higher quality cocoa powder makes all of the difference in getting a rich chocolate flavor.
    More Recipes You Might Enjoy

    • Gluten Free Chocolate Mayonnaise Cake
    • Gluten Free Chocolate Pound Cake
    • Gluten Free Double Chocolate Chip Cookies
    • Gluten Free Double Chocolate Bundt Cake

    I get a lot of my ingredients from Thrive Market. Thrive Market has been a game changer for me eating gluten free. They have so many options I can't get at my rural grocery stores! Use this link to get 40% off your first order!

    Print
    clock clock iconcutlery cutlery iconflag flag iconfolder folder iconinstagram instagram iconpinterest pinterest iconfacebook facebook iconprint print iconsquares squares iconheart heart iconheart solid heart solid icon

    Gluten Free Triple Chocolate Brownies


    5 Stars 4 Stars 3 Stars 2 Stars 1 Star

    No reviews

    • Author: Elaine VanVleck
    • Total Time: 50 minutes
    • Yield: 15 bars 1x
    • Diet: Gluten Free
    Print Recipe
    Pin Recipe

    Description

    These simple gluten free triple chocolate brownies are made from scratch and make a perfect dessert. These chocolate chip brownies are so easy and moist! I think you will love this homemade recipe.


    Ingredients

    Scale
    • 1 cup Unsalted Butter
    • 1 cup Granulated Sugar
    • 1 cup Brown Sugar
    • 1 cup Cocoa Powder
    • 4 Large Eggs
    • 1 tsp. Vanilla Extract
    • 1 cup Gluten Free Flour
    • 1 tsp. Baking Powder
    • ⅓ cup White Chocolate Chips
    • ⅓ cup Semi-Sweet Chocolate Chips
    • ¼ cup Milk Chocolate Chips, melted

    Instructions

    Preheat your oven to 350 degrees.

    Grease a 9x13 baking dish with butter or coconut oil. Set aside.

    In a saucepan melt the butter, granulated sugar, brown sugar and cocoa powder. Stir constantly until completely melted. Pour into the bowl of your stand mixer and let cool for ten minutes.

    While the beater of your mixer is going add one egg at a time. Add vanilla extract and mix in.

    Add the gluten free flour and baking powder to the mixer and beat just until blended. Add the white chocolate chips and semi-sweet chocolate chips to the batter and mix in.

    Pour the batter into the greased 9x13 baking dish and bake at 350 degrees for 25-30 minutes. The brownies will be pulling slightly from the side of the pan and will bounce back when touched lightly.

    Let the brownies cool completely before drizzling the melted milk chocolate chips over top. Let the milk chocolate cool before cutting the brownies into bars.

    • Prep Time: 20 minutes
    • Cook Time: 30 minutes
    • Category: Dessert
    • Method: Baking
    • Cuisine: Gluten Free

    Did you make this recipe?

    Tag @smallfarmbiglife on Instagram and hashtag it #smallfarmbiglife

    Gluten Free Chocolate Glaze

    This gluten free chocolate glaze is easy to make and so delicious! It's great on donuts, cookies and other baked goods. Preparing your glaze from scratch is simple and allows you to control the consistency for each dessert you use it with.

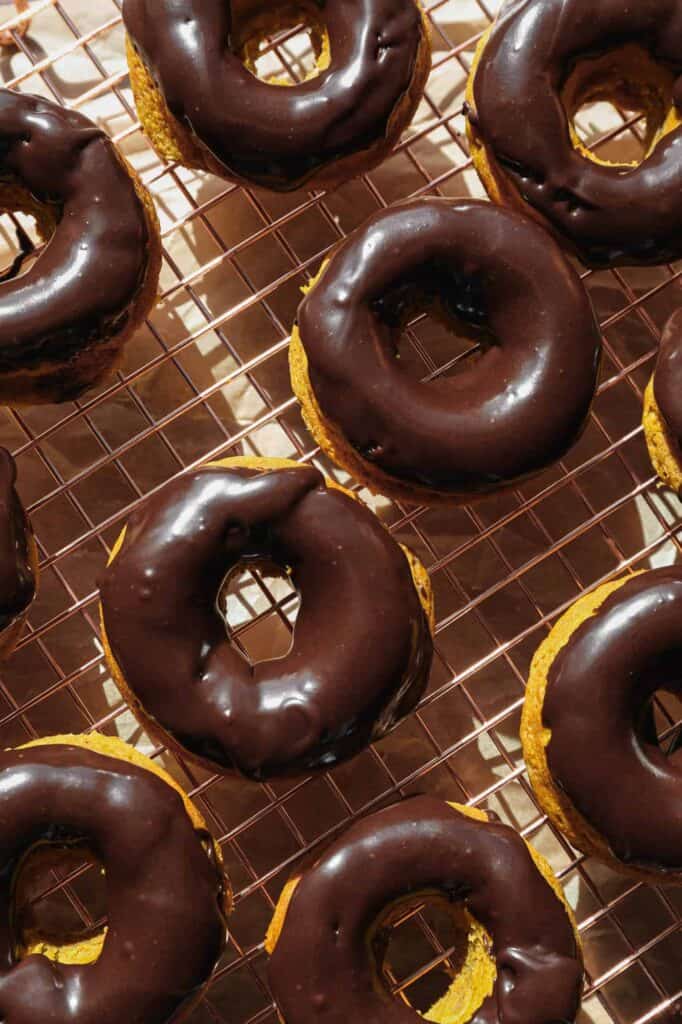
    a cooling rack of gluten free baked pumpkin donuts with gluten free chocolate glaze

    I like to dip the donuts in it and then swirl them as I lift them out to making frosting them with the gluten free chocolate glaze easy and less messy. You will still get some drips, so you will want to have parchment paper under the cooling rack for easy clean up.

    This gluten free chocolate glaze is also really easy to frost on sugar cookies. If the glaze is too runny for frosting add a tablespoon of confectioner's sugar at a time until you get the right consistency.

    The amazing dark brown color of this glaze comes from using really good cocoa powder. My favorite cocoa powder is Rodelle Gourmet Baking Cocoa Powder. It may be a bit more expensive than other cocoa powders, but it's completely worth the money!

    If you are looking for more chocolate recipes try my : 10 Gluten Free Chocolate Desserts

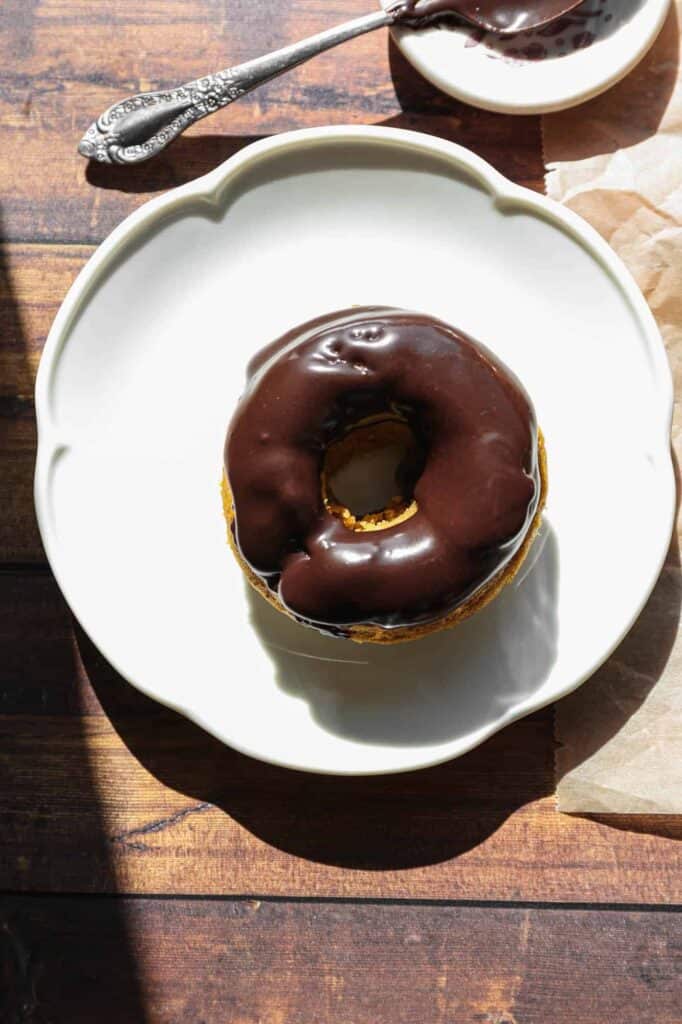
    a plate with a gluten free baked pumpkin donut with gluten free chocolate glaze on top
    [feast_advanced_jump_to]

    Ingredients

    Confectioner's Sugar
    Cocoa Powder
    Milk
    Vanilla Extract

    Instructions

    Sift the confectioner's sugar and cocoa powder into a bowl to remove any clumps. 

    Add the milk and vanilla extract. Using a hand whisk or the whisk attachment on your handheld mixer beat the glaze until it's thoroughly mixed and has a nice glossy sheen.

    Use immediately before it has a chance to harden. If the frosting does harden before you can use it whisk it again.

    Supplies

    Frequently Asked Questions

    Is cocoa powder gluten free?

    Pure cocoa beans are naturally gluten free. So, what you need to watch for is brands that process their cocoa powder along with other products that may contain gluten. Always check to see if the product says it's gluten free.

    I've found with most cocoa powders they don't actually say they are gluten free on the packaging. This means I need to go to the website to see how they process the cocoa powder and if they state online that they are a gluten free facility.

    If you can't find the information you are looking for reach out to the company. I've found most companies are happy to let you know whether there may be gluten contamination is their product.

    What type of milk do you use in gluten free chocolate glaze?

    This is all about personal preference. If you want this gluten free chocolate glaze recipe to be vegetarian you can use coconut milk or a nut milk.

    I don't typically have dairy milk on hand so I typically use almond milk in my baking and cooking. I love that it's shelf stable before being opened and comes in a smaller container since I don't use very much milk.

    More Recipes You Might Enjoy

    Gluten Free Chocolate Buttercream
    Gluten Free Pumpkin Cake with Cream Cheese Frosting
    Easy Vanilla Buttercream Frosting
    Gluten Free Chocolate Cake with Cream Cheese Frosting
    Gluten Free Pumpkin Oatmeal Cake with Vanilla Glaze

    I get my ingredients from Thrive Market. Thrive Market has been a game changer for me eating gluten free. They have so many options I can't get at my rural grocery stores! Use this link to get 25% off your first order!

    Print
    clock clock iconcutlery cutlery iconflag flag iconfolder folder iconinstagram instagram iconpinterest pinterest iconfacebook facebook iconprint print iconsquares squares iconheart heart iconheart solid heart solid icon

    Gluten Free Chocolate Glaze


    5 Stars 4 Stars 3 Stars 2 Stars 1 Star

    No reviews

    • Author: Elaine VanVleck
    • Total Time: 10 minutes
    • Yield: 1.5 cups 1x
    • Diet: Gluten Free
    Print Recipe
    Pin Recipe

    Description

    This gluten free chocolate glaze is easy to make and so delicious! It's great on donuts, cookies and other baked goods.


    Ingredients

    Scale

    1 ½ cups Confectioner's Sugar
    4 Tbsp. Cocoa Powder
    2 Tbsp. Milk
    2 tsp. Vanilla Extract


    Instructions

    Sift the confectioner's sugar and cocoa powder into a bowl to remove any clumps. 

    Add the milk and vanilla extract. Using a hand whisk or the whisk attachment on your handheld mixer beat the glaze until it's thoroughly mixed and has a nice glossy sheen.

    Use immediately before it has a chance to harden. If the frosting does harden before you can use it whisk it again.

    • Prep Time: 10 minutes
    • Category: Dessert
    • Method: Whisking
    • Cuisine: Gluten Free

    Did you make this recipe?

    Tag @smallfarmbiglife on Instagram and hashtag it #smallfarmbiglife

    Air Fryer Sweet and Salty Roasted Cashew Nuts

    These Air Fryer Sweet and Salty Roasted Cashews are the snack I make on repeat and the one that disappears fastest in our house. Raw cashews get tossed in a coating of honey, real maple syrup, coconut sugar, cinnamon, and a touch of nutritional yeast for a flavor that is so much more complex and delicious than anything you can buy in a store.

    The sweet and salty combination is completely irresistible and the air fryer makes the whole thing happen in just six minutes.

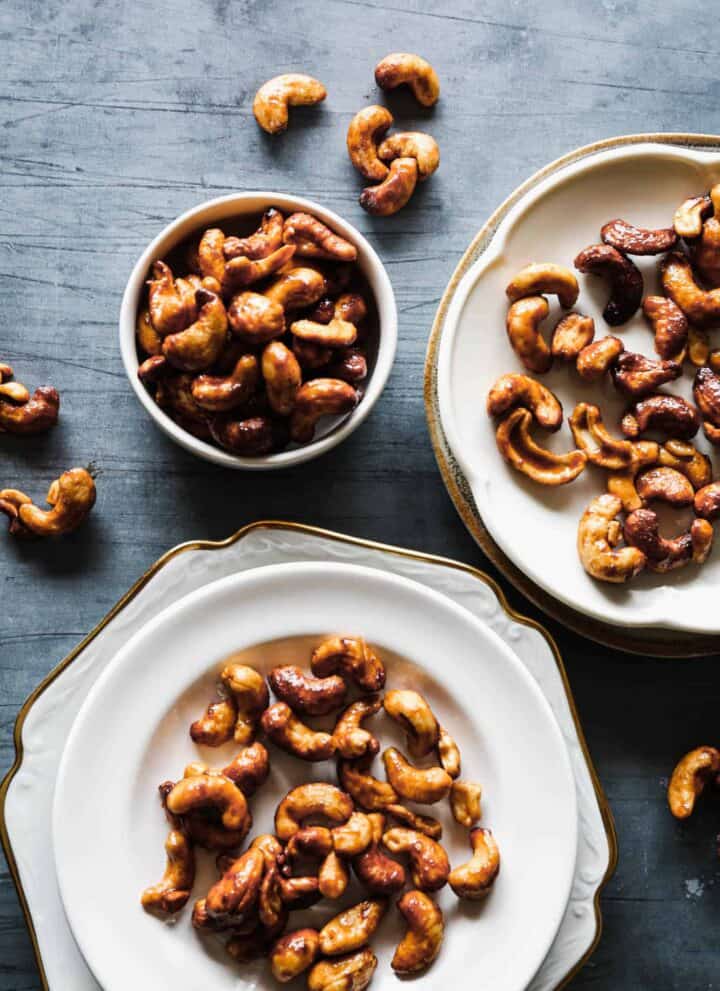
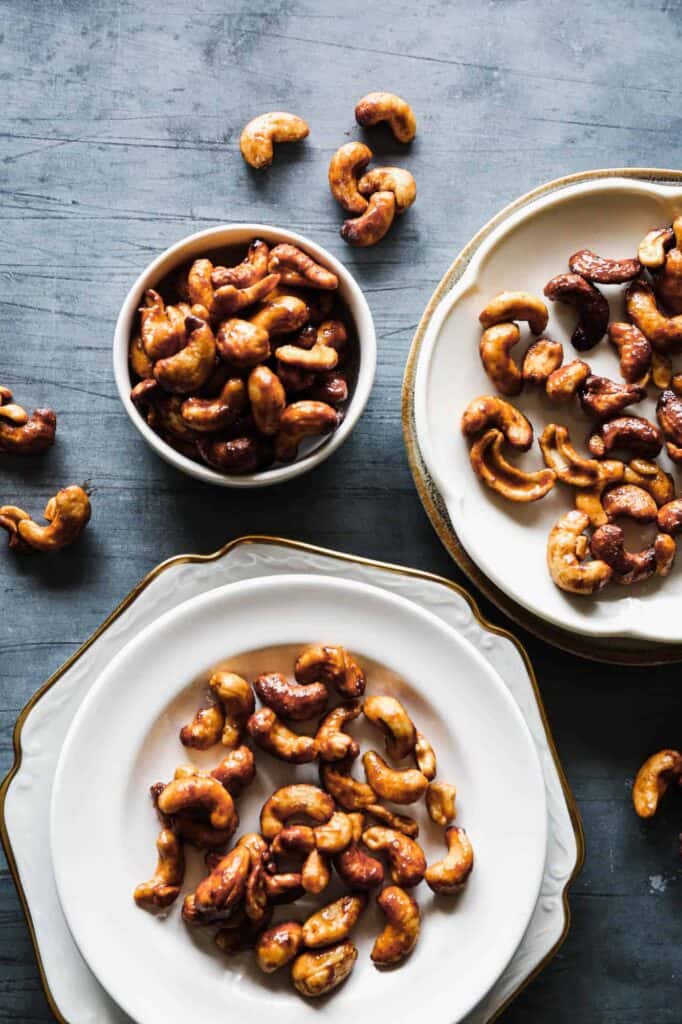
    plates and a bowl of air fryer sweet and salty cashew nuts

    What I love most about making my own roasted cashews is knowing exactly what goes into them. No preservatives, no hidden gluten, and no mystery ingredients. Just real food coated in real flavors.

    I make a big batch at the beginning of the week and we snack on them all week long.

    They also make a beautiful addition to a charcuterie board or a thoughtful homemade gift packed into a pretty jar.

    If you are looking for more air fryer snack recipes try my Gluten Free Air Fryer Chex Mix, my Air Fryer Spicy Roasted Peanuts, my Air Fryer Savory Herb Roasted Nuts or my Air Fryer Salt & Pepper Roasted Cashews.

    You can find all of my snack recipes here: Gluten Free Snack Recipes

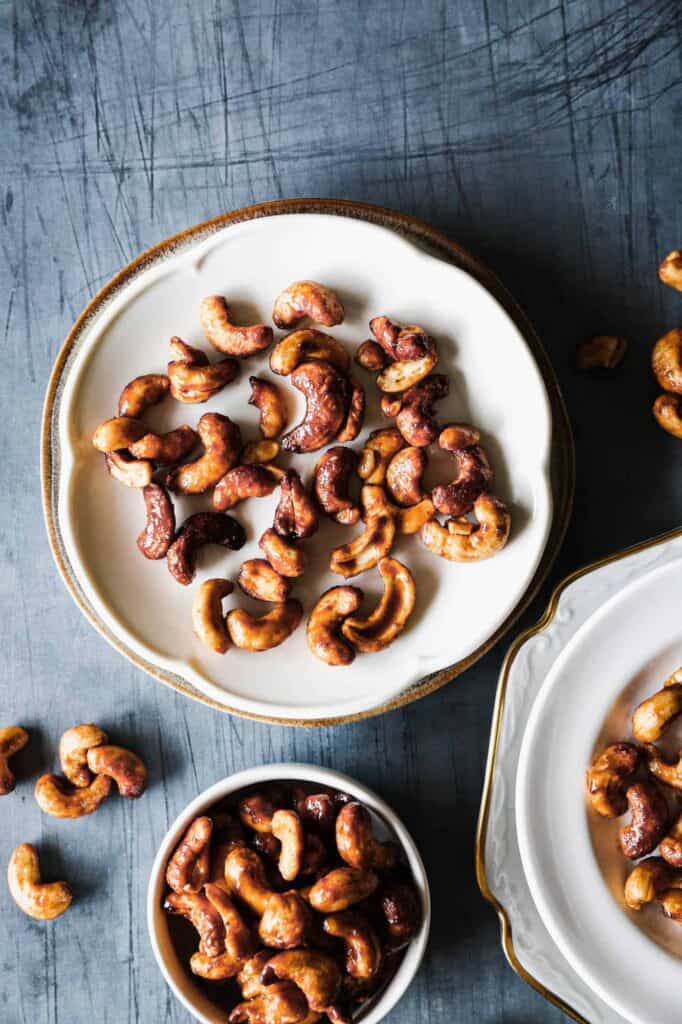
    a plate of air fryer sweet and salty roasted cashew nuts
    [feast_advanced_jump_to]

    Why Raw Unsalted Cashews Matter

    This is the most important ingredient note in this recipe and worth stating clearly. Always start with raw unsalted unroasted cashews. Here is why.

    • Raw cashews absorb the coating most effectively. The honey, maple syrup, and coconut sugar need a porous raw nut surface to adhere to. Pre-roasted cashews have a sealed exterior that the coating slides off of rather than soaking into.
    • Unsalted cashews allow you to control the salt level. This recipe uses half a teaspoon of sea salt which gives you the perfect sweet and salty balance. Starting with salted cashews would make the finished nuts too salty.
    • Roasted cashews will burn in the air fryer. They are already cooked once and a second round of heat at 350 degrees for six minutes will take them well past golden and into bitter and burnt territory.
    • You can find raw unsalted cashews at most grocery stores, at Costco in bulk, and online through retailers like Thrive Market.

    Why the Baking Sheet Step Matters

    Pouring the cashews onto a parchment lined baking sheet immediately after air frying is not optional. Here is why this step is so important.

    • Cashews continue cooking after they come out of the air fryer. If you leave them in the hot basket they will keep cooking from residual heat and can easily go from perfectly golden to overdone in just a minute or two. Spreading them on a cool baking sheet stops the cooking process immediately.
    • Spreading them out prevents clumping. The honey and maple syrup coating is still sticky and liquid when the cashews first come out of the air fryer. If you leave them piled together they will fuse into one big sticky clump as they cool and set. Spreading them out on the baking sheet lets each individual nut cool and set separately so you get perfectly individual coated cashews rather than one big clump.
    • The cashews will crisp up significantly as they cool. They may look slightly soft and underdone when you first pour them out. Do not panic. The coating hardens and crisps as it cools and the finished texture will be perfectly crunchy after about fifteen minutes at room temperature.

    Serving Suggestions

    These sweet and salty cashews are incredibly versatile. Here are some of my favorite ways to enjoy them.

    • Straight from the jar as a snack. This is the most dangerous option because it is almost impossible to eat just a handful. Keep them in a sealed container and grab a small portion when you want something sweet and crunchy.
    • On a charcuterie board. A small bowl of these cashews alongside your favorite gluten free crackers, cheeses, and fruits makes a beautiful and elevated board that guests always comment on.
    • On salads. Sprinkle a small handful over a green salad or grain bowl for a sweet and crunchy topping that takes it to the next level.
    • As a homemade gift. Pack them into a pretty mason jar with a ribbon for a thoughtful and delicious homemade gift for the holidays, hostess gifts, or any occasion.
    • In trail mix. Combine them with dried cranberries, dark chocolate chips, and your favorite seeds for a homemade trail mix that is so much better than anything store bought.

    Storage Instructions

    After the cashews have cooled completely on the baking sheet transfer them to an airtight container. They will stay fresh at room temperature for up to one week. For a longer shelf life store them in the refrigerator for up to six months. The coating may soften slightly in the refrigerator so let them come to room temperature before serving for the best texture.

    Top Tip

    Watch your cashews closely in the final minute of air frying. Cashews have a high natural fat content which makes them brown and caramelize quickly. The difference between perfectly golden and burnt can be less than sixty seconds in the air fryer.

    Start checking at the five minute mark and pull them out the moment they look golden. They will continue to cook slightly on the baking sheet and will darken a little more as they cool.

    Frequently Asked Questions

    Should cashews be roasted?

    Roasting cashews brings out their natural sweet flavor and adds a satisfying crunch. It also gives you the opportunity to coat them with a flavoring like this sweet and salty maple and honey coating. Once you try homemade roasted cashews you will never want to go back to plain store bought ones.

    How long do roasted cashews last?

    After the cashews have cooled completely store them in an airtight container at room temperature for up to one week. For a longer shelf life store them in the refrigerator for up to six months. We go through ours much faster than that!

    Do I have to use raw unsalted cashews?

    Yes. Always start with raw unsalted unroasted cashews for this recipe. Pre-roasted cashews will burn in the air fryer since they are already cooked once. Salted cashews will make the finished nuts too salty since this recipe already includes sea salt for the sweet and salty balance. Raw unsalted cashews are available at most grocery stores, Costco, and online retailers.

    Can I make these in the oven instead of the air fryer?

    Yes. Spread the coated cashews in a single layer on a parchment lined baking sheet and bake at 350 degrees for 8 to 10 minutes, stirring once halfway through. Watch them closely in the final minutes since cashews can go from golden to burnt very quickly. Pour them onto a fresh parchment lined baking sheet immediately after baking to stop the cooking process and let them cool completely before storing.

    Didn't find the answer you're looking for?

    Ask AI to answer based on this recipe:

    ChatGPT
    Google AI
    Perplexity
    Grok
    Claude

    Supplies

    More Recipes To Enjoy

    • Air Fryer Savory Herb Roasted Nuts
    • Gluten Free Air Fryer Chex Mix
    • Air Fryer Salt & Pepper Roasted Cashews
    • Air Fryer Spicy Roasted Peanuts

    I get a lot of my ingredients from Thrive Market. Thrive Market has been a game changer for me eating gluten free. They have so many options I can't get at my rural grocery stores! Use this link to get 40% off your first order!

    Print
    clock clock iconcutlery cutlery iconflag flag iconfolder folder iconinstagram instagram iconpinterest pinterest iconfacebook facebook iconprint print iconsquares squares iconheart heart iconheart solid heart solid icon

    Air Fryer Sweet and Salty Roasted Cashew Nuts


    5 Stars 4 Stars 3 Stars 2 Stars 1 Star

    No reviews

    • Author: Elaine VanVleck
    • Total Time: 16 minutes
    • Yield: 2 cups 1x
    • Diet: Gluten Free
    Print Recipe
    Pin Recipe

    Description

    Raw cashews tossed in a sweet and salty coating made with honey, maple syrup, coconut sugar, cinnamon, and nutritional yeast then air fried at 350 degrees for just six minutes. These gluten free air fryer sweet and salty roasted cashews are the most addictive homemade snack you will ever make.


    Ingredients

    Scale
    • 2 cups Raw Cashew Nuts
    • 2 Tbsp. Honey
    • 2 Tbsp. Real Maple Syrup
    • ¼ cup Coconut Sugar
    • ½ tsp. Sea Salt
    • ½ tsp. Ground Cinnamon
    • 1 tsp. Nutritional Yeast Flakes
    • 1 Tbsp. Brown Rice Flour

    Instructions

    In a large mixing bowl stir together the cashews, honey, maple syrup, coconut sugar, salt, cinnamon, nutritional yeast and brown rice flour. Stir until the nuts are completely coated in the mixture.

    Pour the nut mixture into your air fryer basket. Spread the nuts around to give room for air to circulate around them.

    Roast in your air fryer at 350 degrees for 6 minutes.

    While the nuts are roasting line a baking sheet with parchment paper.

    After the nuts are done roasting pour them onto the baking sheet and spread them around to let them cool.

    After the cashews are completely cooled store them in an air tight container.

    If you made this recipe please leave a star rating and comment below. It helps other readers find this recipe and means so much to me.

    Notes

    Spreading the nuts onto the baking sheet is important so you don't get a large clump of stuck together cashews.

    • Prep Time: 10 minutes
    • Cook Time: 6 minutes
    • Category: Snacks
    • Method: Air Fryer
    • Cuisine: American

    Did you make this recipe?

    Tag @smallfarmbiglife on Instagram and hashtag it #smallfarmbiglife

    If you make these Air Fryer Sweet and Salty Roasted Cashews I would love to hear what you think! Leave a comment below and let me know how they turned out or tag me on Instagram so I can see your batch.

    These are one of those snacks that is impossible to stop eating so save this recipe to your favorite Pinterest board so you always have it ready when you need a quick and easy gluten free snack!

    Ingredients

    Raw Cashew Nuts
    Honey
    Maple Syrup
    Coconut Sugar
    Sea Salt
    Ground Cinnamon
    Nutritional Yeast Flakes
    Brown Rice Flour

    Instructions

    In a large mixing bowl stir together the cashews, honey, maple syrup, coconut sugar, salt, cinnamon, nutritional yeast and brown rice flour. Stir until the nuts are completely coated in the mixture.

    Pour the nut mixture into your air fryer basket. Spread the nuts around to give room for air to circulate around them.

    Roast in your air fryer at 350 degrees for 6 minutes.

    While the nuts are roasting line a baking sheet with parchment paper.

    After the nuts are done roasting pour them onto the baking sheet and spread them around to let them cool.

    After the cashews are completely cooled store them in an air tight container.

    Gluten Free Pumpkin Pie Granola

    Fall mornings call for something warm, crunchy, and full of pumpkin spice, and this gluten free pumpkin pie granola delivers exactly that. It's simple to make from scratch with pantry staples like oats, nuts, and pumpkin puree, and it's completely vegan too. One batch makes enough for breakfast and snacking all week long.

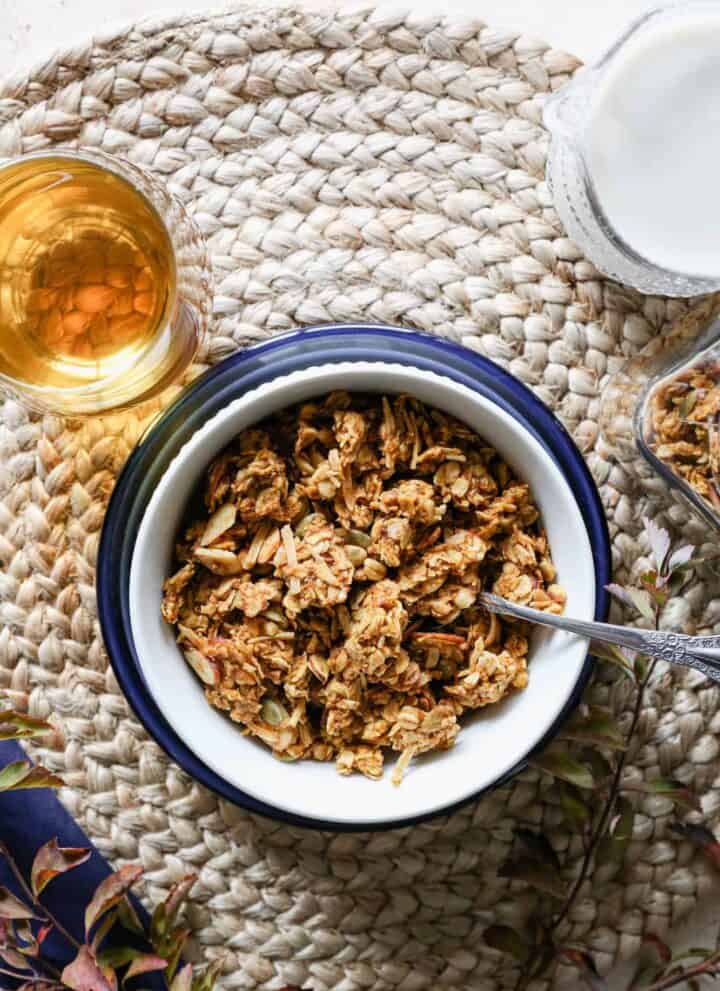
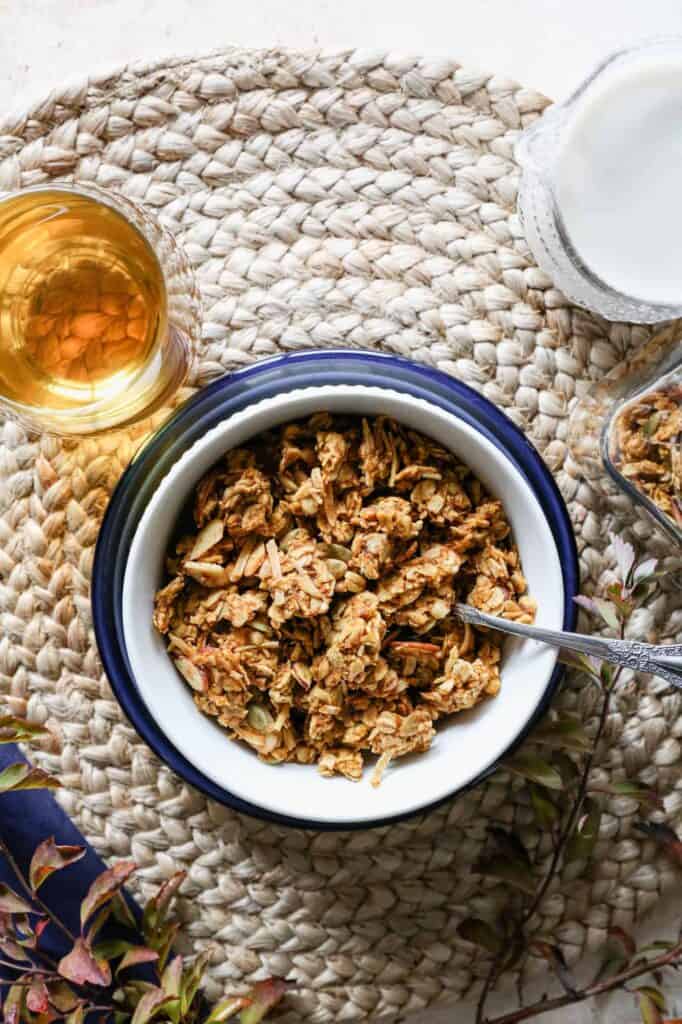
    a bowl of gluten free pumpkin pie granola with a glass of apple juice and a pitcher of milk

    This Gluten Free Pumpkin Pie Granola is the ultimate cozy snack or breakfast blend for fall, with warm pumpkin pie spices and satisfying crunch in every bite.

    Whether you're topping a smoothie bowl, sprinkling over yogurt, or snacking by the handful, this pumpkin spice granola delivers the nostalgic flavors of autumn in a wholesome, homemade way.

    If you are looking for more breakfast recipes try my Gluten Free Salty & Sweet Granola, my Gluten Free Chocolate Chip Oat Granola Bars, my Gluten Free Pumpkin Spice Pancakes or my Pumpkin Apple Baked Oatmeal with Streusel Topping.

    You can find all of my breakfast recipes here: Gluten Free Breakfast Recipes

    You can find all of my pumpkin recipes here: Gluten Free Pumpkin Recipes

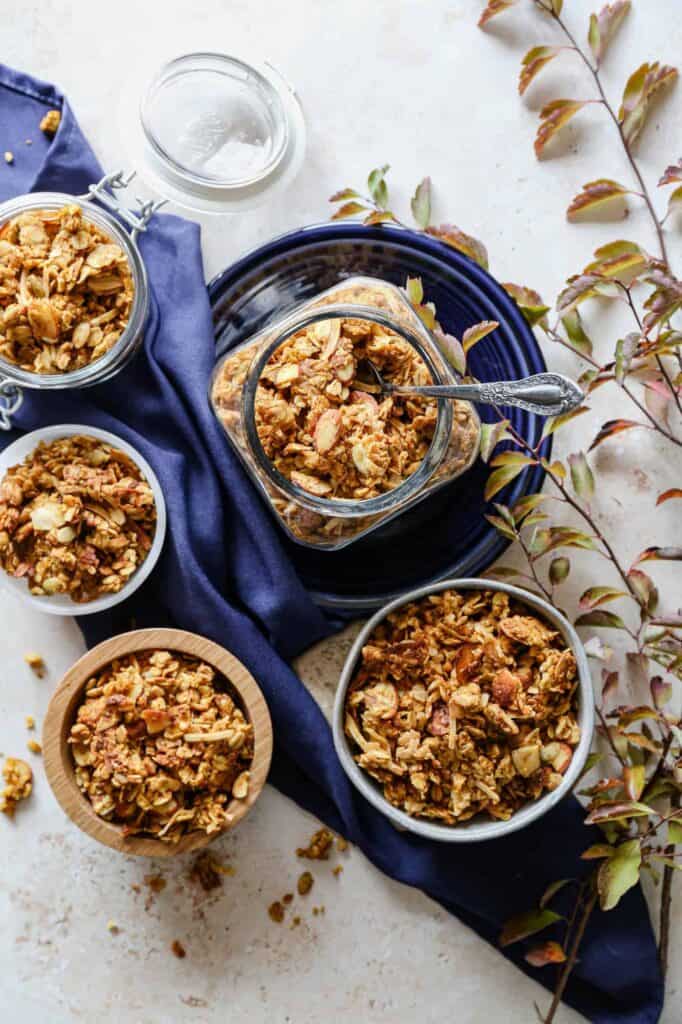
    jars and bowls of gluten free pumpkin pie granola
    [feast_advanced_jump_to]

    Why You'll Love This Recipe

    • It's a big batch that lasts all week
    • Naturally sweetened with maple syrup, no refined sugar
    • Completely vegan and gluten free
    • Simple pantry ingredients, no fancy equipment needed

    Ingredient Notes

    • Be sure to use certified gluten free rolled oats, since regular oats are often processed on the same equipment as wheat.
    • Feel free to swap the almonds or walnuts for pecans or hazelnuts, and the pumpkin seeds for sunflower seeds if that's what you have on hand.
    • Use pure pumpkin puree, not pumpkin pie filling, which contains added sugar and spices that will throw off the recipe.
    • Maple syrup keeps this granola vegan, so there's no need for honey.

    Ways to Enjoy This Granola

    This pumpkin pie granola is great served with milk or a dairy free alternative, sprinkled over yogurt with fresh berries, or layered into a smoothie bowl. It also makes a fun topping for baked oatmeal or a crunchy addition to a bowl of ice cream.

    Storage

    Store the granola in an airtight container at room temperature for up to 2 weeks. To freeze, place cooled granola in a freezer safe container or bag and freeze for up to 3 months. Let it thaw at room temperature before enjoying.

    Top Tip

    We like granola chunks, so I smash the granola down with a metal measuring cup before it goes into the oven. After the granola is browned and done I smash it down with the metal measuring cup again and let it cool completely before breaking it apart.

    I think the key is waiting until it's completely cool before breaking it into pieces. I typically let the gluten free pumpkin pie granola sit in the baking pan overnight and then break up and store in a container the next day.

    Frequently Asked Questions

    What is gluten free granola made of?

    Technically oats are gluten free. The reason you have to make sure the oats you purchase say they are certified gluten free is because most places process their oats on the same equipment as wheat and barley.

    Oats themselves don't contain gluten, but if they aren't processed on a dedicated gluten free equipment they can be contaminated. Thrive Market and Bob's Redmill both make really good gluten free rolled oats.

    Making gluten free granola really comes down to making sure everything you add in is certified gluten free. Since granola can be expensive it's amazing to make at home and really easy to make.

    Is it good to eat granola for breakfast?

    Granola can make an amazing breakfast! I like to mix mine with greek yogurt and some berries. Granola can be high in sugar so I like to stick to a smaller portion and add the yogurt and berries (or a banana) to get a complete breakfast.

    I also like granola as a dessert with some vanilla ice cream!

    Is this granola vegan?

    Yes. This recipe is sweetened with maple syrup instead of honey and contains no dairy or eggs, so it's completely vegan as well as gluten free.

    How long does this granola stay fresh?

    Stored in an airtight container at room temperature, this granola stays fresh for up to 2 weeks. You can also freeze it in a freezer safe bag or container for up to 3 months.

    Didn't find the answer you're looking for?

    Ask AI to answer based on this recipe:

    ChatGPT
    Google AI
    Perplexity
    Grok
    Claude

    Pumpkin Pie Granola Supplies

    More Recipes You Might Enjoy

    • Dunkin Copycat Pumpkin Cream Cold Brew
    • Gluten Free Baked Pumpkin Donuts with Chocolate Glaze
    • Gluten Free Pumpkin Spice Pancakes
    • Dairy Free Pumpkin Pie Smoothie

    I get a lot of my ingredients from Thrive Market. Thrive Market has been a game changer for me eating gluten free. They have so many options I can't get at my rural grocery stores! Use this link to get 40% off your first order!

    Print
    clock clock iconcutlery cutlery iconflag flag iconfolder folder iconinstagram instagram iconpinterest pinterest iconfacebook facebook iconprint print iconsquares squares iconheart heart iconheart solid heart solid icon

    Gluten Free Pumpkin Pie Granola


    5 Stars 4 Stars 3 Stars 2 Stars 1 Star

    No reviews

    • Author: Elaine VanVleck
    • Total Time: 40 minutes
    • Yield: 10 cups (approximately) 1x
    • Diet: Gluten Free
    Print Recipe
    Pin Recipe

    Description

    This gluten free pumpkin pie granola is crunchy, sweetened with maple syrup, and full of warm fall spice. It's completely vegan and comes together with simple pantry staples you can bake in one batch. Enjoy it all week long for breakfast or snacking.


    Ingredients

    Scale
    • 6 cups Gluten Free Rolled Oats
    • 1 cup Sliced Almonds
    • 1 cup Walnuts, roughly chopped
    • 1 cup Coconut Flakes
    • ½ cup Pumpkin Seeds
    • 1 cup Pumpkin Puree
    • 1 cup Maple Syrup
    • ½ cup Coconut Oil, melted
    • ¼ cup Avocado Oil
    • 2 tsp. Sea Salt
    • 2 tsp. Ground Cinnamon
    • ½ tsp. Ground Nutmeg
    • ½ tsp. Allspice

    Instructions

    Preheat your oven to 350 degrees. Line two baking sheets with parchment paper. Set aside.

    Stir together all of the ingredients in a large mixing bowl. Be sure to get the oats and nuts thoroughly coated with the wet ingredients and spices. 

    Spread the mixture between two baking sheets. Smash down with your hands or a metal measuring cup.

    Bake at 350 degrees for 15 minutes.

    Rotate the trays in your oven.

    Bake for another 15 minutes.

    Check to see if the granola is browned and slightly crisp. If the granola is still very wet bake for another 10-15 minutes.

    Remove the granola from the oven. Carefully press it down with a metal measuring cup or mug again. 

    Let the granola cool completely before breaking into chunks and storing in an air tight container. 

    The granola will keep for a week in the air tight container.

    If you made this recipe please leave a star rating and comment below. It helps other readers find this recipe and means so much to me.

    Notes

    I like to leave my granola on the baking sheet overnight to be sure it's completely cooled so it stays in nice chunks when I break it apart.

    • Prep Time: 10 minutes
    • Cook Time: 30 minutes
    • Category: Breakfast
    • Method: Baking
    • Cuisine: American

    Did you make this recipe?

    Tag @smallfarmbiglife on Instagram and hashtag it #smallfarmbiglife

    I'd love to hear what you think of this gluten free pumpkin pie granola! Leave a comment and star rating below, and let me know how you like to enjoy it. Don't forget to pin this recipe so you can find it again all fall long.

    Pumpkin Pie Granola Ingredients

    Gluten Free Rolled Oats
    Sliced Almonds
    Walnuts
    Coconut Flakes
    Pumpkin Seeds
    Pumpkin Puree
    Maple Syrup
    Coconut Oil
    Avocado Oil
    Sea Salt
    Ground Cinnamon
    Ground Nutmeg
    Allspice

    Instructions

    Preheat your oven to 350 degrees. Line two baking sheets with parchment paper. Set aside.

    Stir together all of the ingredients in a large mixing bowl. Be sure to get the oats and nuts thoroughly coated with the wet ingredients and spices. 

    Spread the mixture between two baking sheets. Smash down with your hands or a metal measuring cup.

    Bake at 350 degrees for 15 minutes.

    Rotate the trays in your oven.

    Bake for another 15 minutes.

    Check to see if the granola is browned and slightly crisp. If the granola is still very wet bake for another 10-15 minutes.

    Remove the granola from the oven. Carefully press it down with a metal measuring cup or mug again. 

    Let the granola cool completely before breaking into chunks and storing in an air tight container. 

    The granola will keep for a week in the air tight container.

    Instant Pot Chicken and Broccoli Casserole

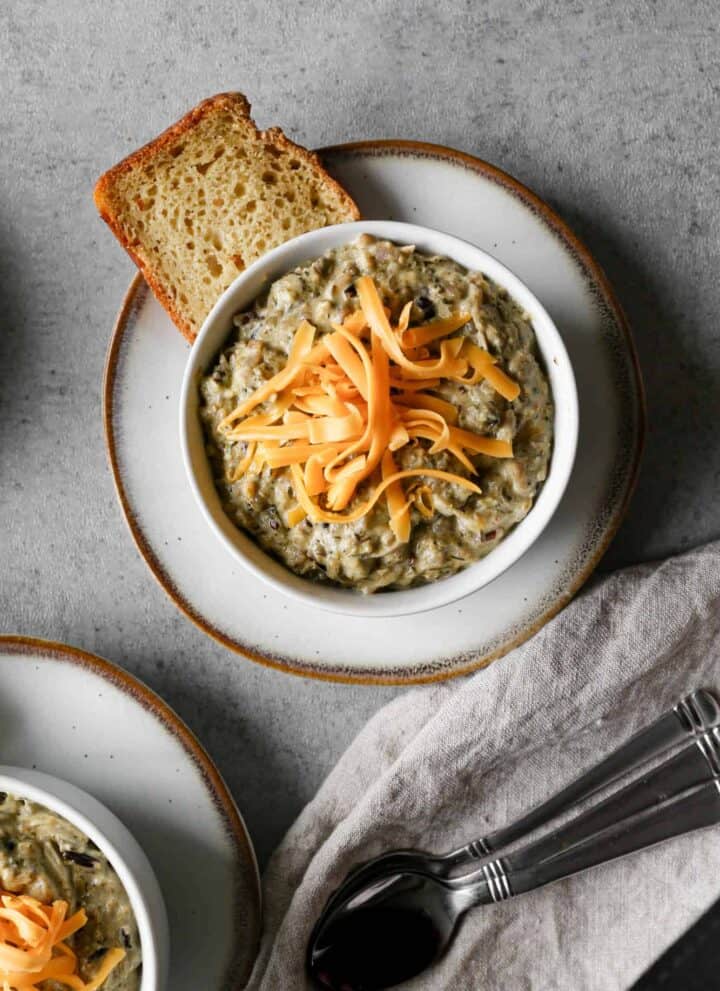
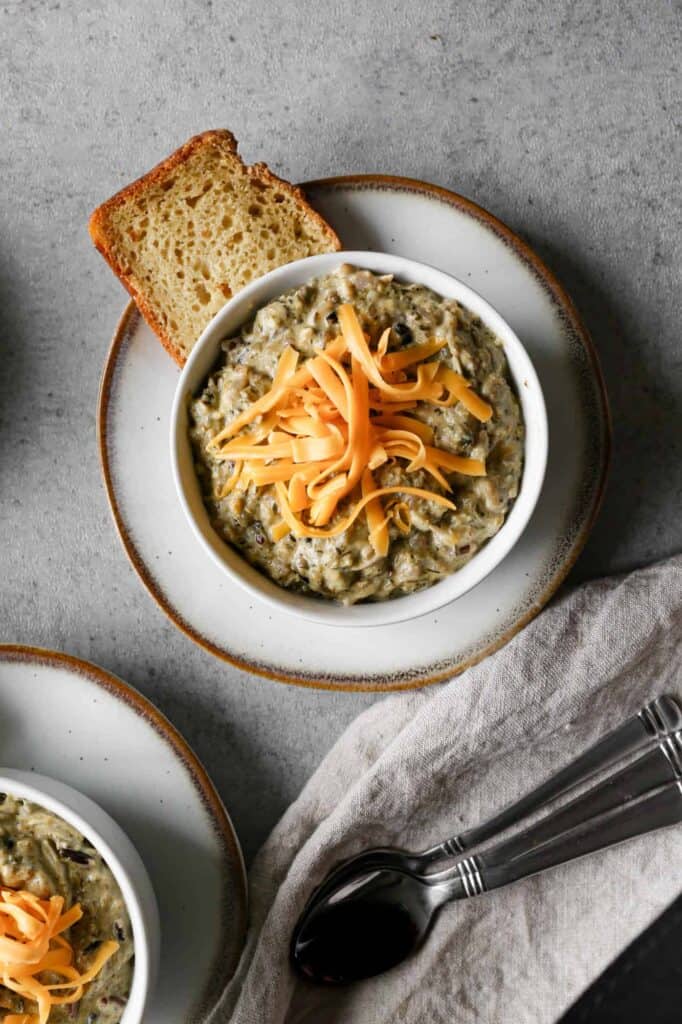
    a bowl of gluten free instant pot chicken and broccoli casserole topped with cheddar cheese and a piece of gluten free sourdough bread

    This healthy recipe for instant pot chicken and broccoli casserole uses rice and is super easy to make. This creamy casserole is a one pot meal made in under 30 minutes.

    I'm going to say that this isn't the prettiest casserole I've ever made, but it is delicious. I used canned chicken in the recipe for convenience, but you could use raw chicken. If you choose to use raw chicken you will need to add some cooking time.

    This recipe calls for wild rice. It is yummy in the recipe and I highly recommend you use it. If you choose to use white rice you may need to reduce the cooking time. Since the husk, bran and germ are removed from white rice it doesn't take as long to cook.

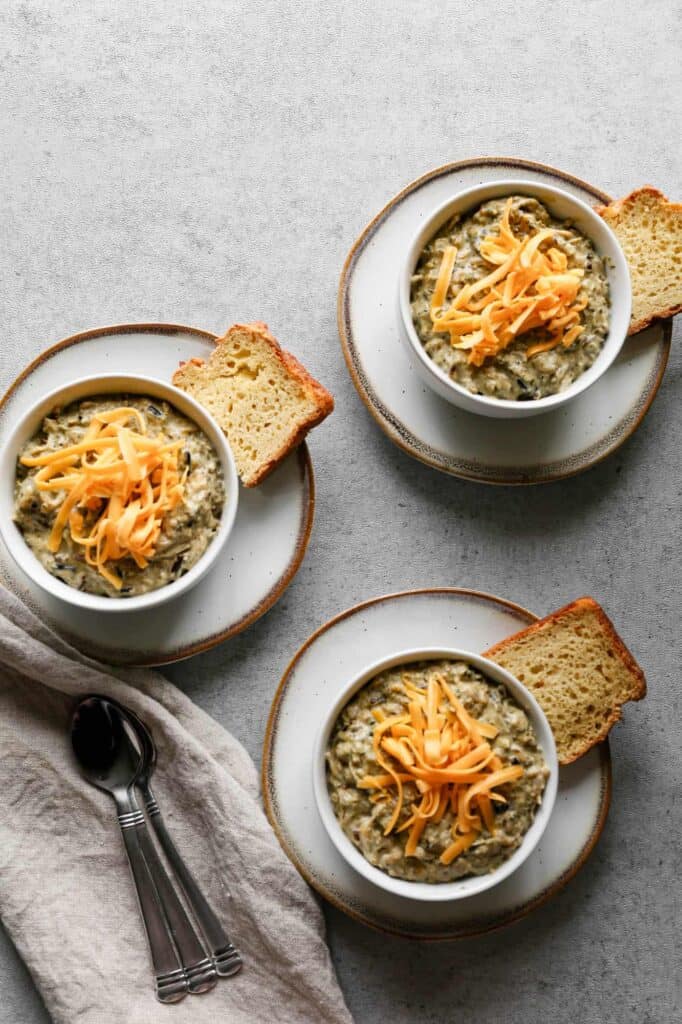
    three bowls of gluten free instant pot chicken and broccoli casserole with shredded cheddar cheese and gluten free sourdough bread

    How do I clean my instant pot after cooking savory dishes?

    After using your instant pot for savory dishes or in this case using broccoli you may notice that the silicone ring in the lid has an odor. This is simple to take care of!

    Wash the metal pot insert by hand or in the dishwasher. Remove the rubber seal from the lid and wash both the lid and the ring. Place the ring back into the lid.

    Put the metal pot into the pressure cooker. Add one cup water and one cup white vinegar to the metal pot. Place the lid on the pot and seal. Manually cook for 3 minutes. Let the steam release naturally.

    After the liquid has cooled, dump it out and rinse the pot, lid and seal. Your pot, lid and seal shouldn't have any lingering odors.

    Instant Pots and Accessories

    If you like this recipe you might also enjoy:

    Instant Pot Wild Rice, Chicken and Mushrooms
    Instant Pot Beef and Vegetable Soup
    Gluten Free Instant Pot Chicken and Dumplings
    Instant Pot Green Chicken Soup
    Instant Pot Mexican Beef and Rice

    I get my ingredients from Thrive Market. Thrive Market has been a game changer for me eating gluten free. They have so many options I can't get at my rural grocery stores! Use this link to get 25% off your first order!

    Print
    clock clock iconcutlery cutlery iconflag flag iconfolder folder iconinstagram instagram iconpinterest pinterest iconfacebook facebook iconprint print iconsquares squares iconheart heart iconheart solid heart solid icon

    Instant Pot Chicken and Broccoli Casserole


    5 Stars 4 Stars 3 Stars 2 Stars 1 Star

    No reviews

    • Author: Elaine VanVleck
    • Total Time: 25 minutes
    • Yield: 5 servings 1x
    • Diet: Gluten Free
    Print Recipe
    Pin Recipe

    Description

    This healthy recipe for instant pot chicken and broccoli casserole uses rice and is super easy to make. This creamy casserole is a one pot meal made in under 30 minutes.


    Ingredients

    Scale

    1 cup Wild Rice
    1 ½ cup Chicken Broth
    ¼ cup Unsalted Butter
    2 medium heads Broccoli cut into small florets
    1 medium Yellow Onion, chopped
    ½ tsp. Sea Salt
    ½ tsp. Ground Black Pepper
    1 tsp. Dried Thyme
    1 - 12.5 ounce Canned Chicken, drained
    1 cup Sour Cream
    ½ cup Milk
    1 cup Cheddar Cheese, shredded


    Instructions

    In the pot of your instant pot place the wild rice, chicken broth, butter, broccoli, onion, salt, pepper and thyme. Cook on manual for 15 minutes. Let the pressure release naturally.

    When the pressure releases remove the lid. Carefully stir in the chicken, sour cream, milk and cheese.

    Serve with extra shredded cheese on top.

    • Prep Time: 10 minutes
    • Cook Time: 15 minutes
    • Category: Meals
    • Method: Instant Pot
    • Cuisine: Gluten Free

    Did you make this recipe?

    Tag @smallfarmbiglife on Instagram and hashtag it #smallfarmbiglife

    • « Previous Page
    • 1
    • …
    • 71
    • 72
    • 73
    • 74
    • 75
    • …
    • 88
    • Next Page »

    Welcome! I'm Elaine

    I'm so glad you are here! I share easy gluten free recipes from my small farm in Washington.

    Be sure to sign up for my newsletter to stay up to date on all of my new recipes.

    More about me...
    • Instagram
    • Pinterest
    • Facebook
    • Twitter
    • Mail

    Free gluten free recipe ebook
    My most loved recipes in one download, plus new recipes every Friday.
    Check your inbox! Your ebook is on its way.

    Easy Meals Recipes

    • Gluten Free Instant Pot Chili Mac and Cheese
    • Gluten Free Taco Casserole
    • Gluten Free Cowboy Baked Beans
    • Gluten Free Walking Taco Casserole
    • Gluten Free Creamy Beef and Mushroom Pasta
    • Gluten Free Instant Pot Chicken and Dumplings
    • Instant Pot Mexican Style Beef and Rice
    • Gluten Free Chicken Parmesan Pasta Casserole
    • Gluten Free One Pot Hamburger Helper Copycat
    • Gluten Free Salisbury Steak with Mushroom Gravy
    • Gluten Free Air Fryer Fajitas
    • Gluten Free Sloppy Joe Casserole

    Footer

    back to top

    About

    • Privacy Policy
    • Shop my Amazon Page
    • Follow me on LTK

    Newsletter

    • Sign Up! for emails and updates

    Contact

    • Contact
    • Media Kit
    • About Me

    As an Amazon Associate I earn from qualifying purchases.

    I may get commissions for purchases made through links on this site.

    Copyright © 2026 Brunch Pro on the Brunch Pro Theme