Small Farm Big Life

  • Gluten Free Recipe Index
  • Subscribe
  • Resources
menu icon
go to homepage
  • Home
  • Gluten Free Recipe Index
  • Subscribe
  • My Story
  • Resources
  • Free Guides
    • Email
    • Facebook
    • Instagram
    • Pinterest
  • subscribe
    search icon
    Homepage link
    • Home
    • Gluten Free Recipe Index
    • Subscribe
    • My Story
    • Resources
    • Free Guides
    • Email
    • Facebook
    • Instagram
    • Pinterest
  • ×

    Gluten Free Pumpkin Spice Pancakes

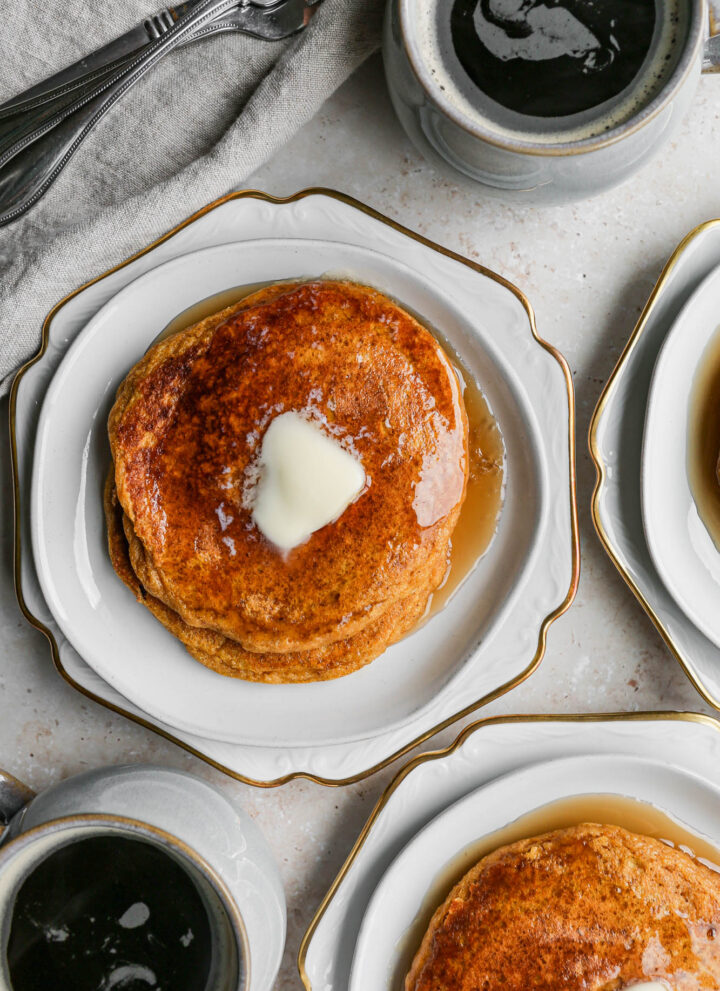
    These gluten free pumpkin spice pancakes are the perfect cozy start to a fall morning. Made with buttermilk, real pumpkin puree, and warm spice, they're soft, fluffy, and ready in just 15 minutes. Skip the boxed mix, this one comes together easily from scratch.
    a white plate trimmed in gold with two gluten free pumpkin spice pancakes with butter and maple syrup on top next to a mug of coffee

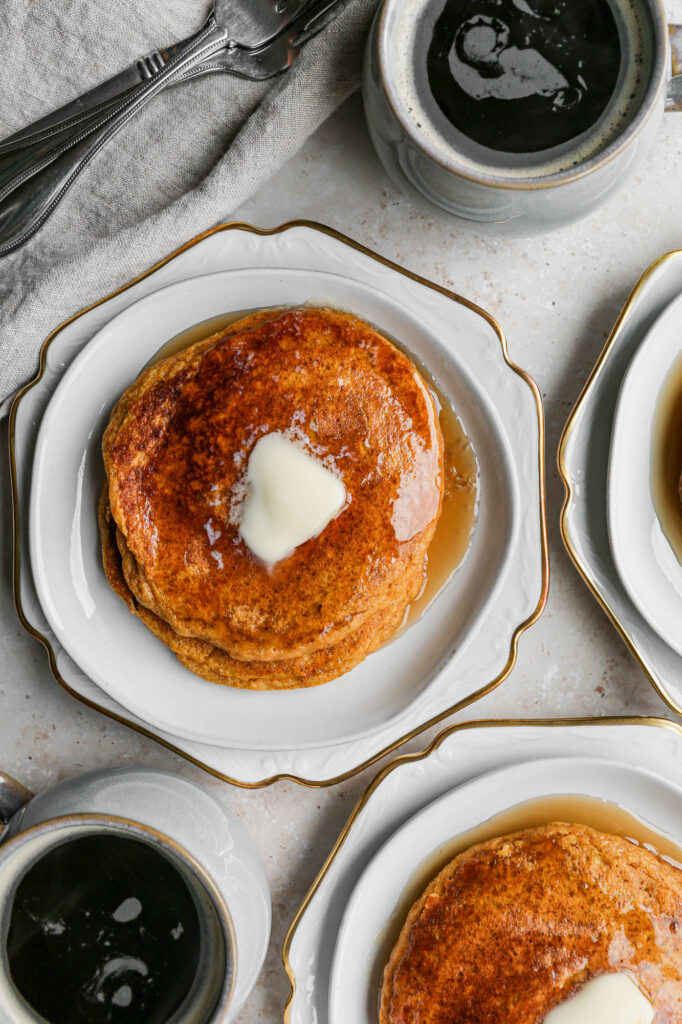
    These pancakes are a delicious way to bring autumn warmth to the breakfast table. With hints of pumpkin spice and a tender, fluffy texture, this quick pancake recipe is so good you'll want to make it every weekend this fall.

    They're easy enough for a weekday breakfast and special enough for a lazy weekend brunch.

    You might also like my Pumpkin Butter - Trader Joe's Copycat Recipe, my Dunkin Copycat Pumpkin Cream Cold Brew, my Gluten Free Baked Pumpkin Donuts with Chocolate Glaze or my Pumpkin Apple Baked Oatmeal with Streusel Topping.

    You can find all of my pumpkin recipes here: Gluten Free Pumpkin Recipes

    You can find all of my breakfast recipes here: Gluten Free Breakfast Recipes
    a white plate trimmed in gold with two gluten free pumpkin spice pancakes with butter and maple syrup on top next to a mug of coffee
    [feast_advanced_jump_to]

    Why You'll Love These Pancakes

    • Soft, fluffy texture from buttermilk and real pumpkin puree
    • Ready in just 15 minutes
    • Made completely from scratch, no boxed mix needed
    • Freezes and reheats beautifully for busy mornings

    Ingredient Notes

    • Buttermilk and eggs work together to give these pancakes their fluffy, tender texture, since gluten free batters need extra help rising without the structure that gluten normally provides.
    • Pumpkin puree adds moisture and warm fall flavor without weighing the batter down.
    • Be sure to use pure pumpkin puree, not pumpkin pie filling.

    Topping and Serving Ideas

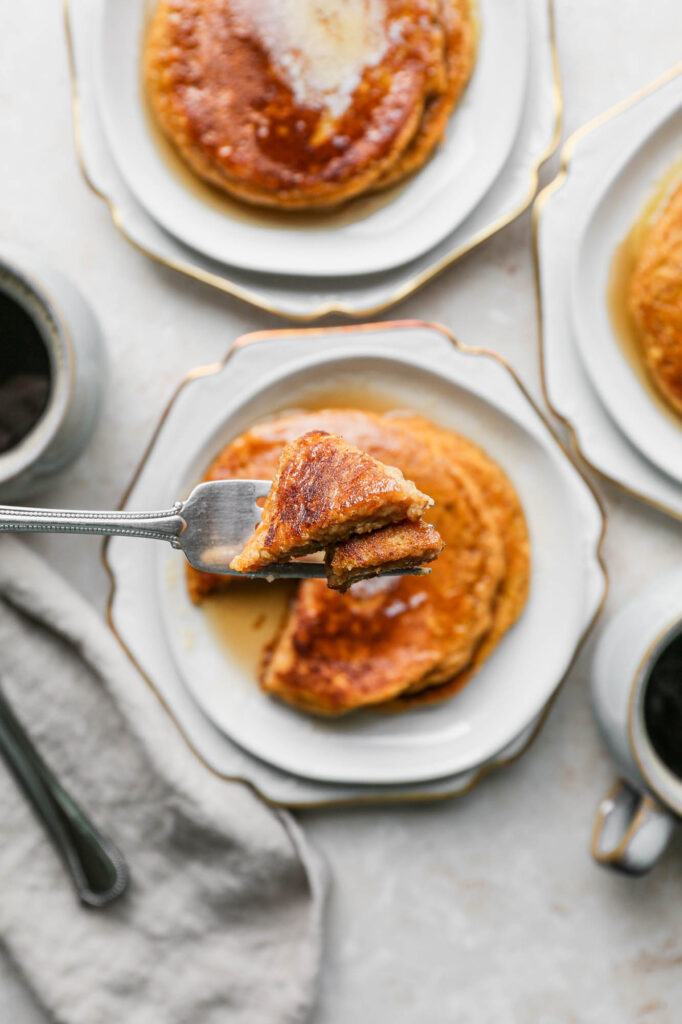
    These pancakes are delicious with a pat of butter and warm maple syrup. They're also wonderful topped with a dollop of whipped cream, a sprinkle of chopped pecans, or a spoonful of my Gluten Free Cranberry Jam.

    Storage and Freezing

    Let leftover pancakes cool completely, then store in an airtight container in the refrigerator for up to 3 days. To freeze, place cooled pancakes in a single layer on a baking sheet until firm, then transfer to a freezer safe bag for up to 2 months. Reheat straight from frozen in the toaster, oven, or microwave.

    Top Tip

    I set my oven to the lowest setting and then put my cooked pancakes on a plate or baking sheet to keep them warm until all the pancakes are cooked and ready to serve. I like to serve the pancakes with butter and maple syrup. They are also delicious served with my Gluten Free Cranberry Jam.

    Frequently Asked Questions

    What does egg do in pancakes?

    Since these are gluten free pancakes they lack the structure that gluten would provide. Adding eggs to the recipe lets the pancakes rise and get fluffy. Without eggs the pancakes may be dry and the batter more like a biscuit dough.

    Some try adding more oil, but the oil won't help the batter rise while you're cooking the pancakes and you will end up with flat pancakes. You can use ¼ cup of applesauce for each egg omitted but you will also need to add ½ teaspoon of baking powder so your pancakes will rise and get fluffy.

    Why do you use buttermilk in pancakes?

    The acid in buttermilk reacts with the baking soda and will add air bubbles and more fluffiness to your pancakes. Buttermilk pancakes will have a moist and fluffy texture.

    If you don't have buttermilk you can make it by adding one tablespoon of lemon juice or white vinegar to one cup of 2% milk. The lemon or vinegar adds the acid to the milk and will react to the baking soda.

    Can I freeze these pancakes and reheat them?

    Yes. Let them cool completely, then freeze in a single layer on a baking sheet before transferring to a freezer safe bag. Reheat straight from frozen in the toaster, oven, or microwave for a quick breakfast any morning.

    Didn't find the answer you're looking for?

    Ask AI to answer based on this recipe:

    ChatGPT
    Google AI
    Perplexity
    Grok
    Claude

    Pumpkin Spice Pancakes Supplies

    More Recipes You Might Enjoy

    • Gluten Free Gingerbread Pancakes
    • Gluten Free Gingerbread Scones
    • Pumpkin Apple Baked Oatmeal with Streusel Topping
    • Gluten Free Pumpkin Pie Granola

    I get a lot of my ingredients from Thrive Market. Thrive Market has been a game changer for me eating gluten free. They have so many options I can't get at my rural grocery stores! Use this link to get 40% off your first order!

    Print
    clock clock iconcutlery cutlery iconflag flag iconfolder folder iconinstagram instagram iconpinterest pinterest iconfacebook facebook iconprint print iconsquares squares iconheart heart iconheart solid heart solid icon

    Gluten Free Pumpkin Spice Pancakes


    5 Stars 4 Stars 3 Stars 2 Stars 1 Star

    5 from 1 review

    • Author: Elaine VanVleck
    • Total Time: 15 minutes
    • Yield: 10 pancakes 1x
    • Diet: Gluten Free
    Print Recipe
    Pin Recipe

    Description

    These gluten free pumpkin spice pancakes are soft, fluffy, and full of warm fall flavor. Made with buttermilk, maple syrup, and real pumpkin puree, they come together in just 15 minutes. Serve them for a cozy breakfast, brunch, or even breakfast for dinner.


    Ingredients

    Scale
    • 2 cups Gluten Free Flour
    • 2 tsp. Baking Powder
    • ½ tsp. Baking Soda
    • 2 tsp. Pumpkin Pie Spice
    • 1 tsp. Ground Cinnamon
    • ½ tsp. Sea Salt
    • ¼ cup Brown Sugar
    • ¼ cup Pure Maple Syrup
    • 3 large Eggs
    • 1 cup Buttermilk
    • 1 cup Milk
    • 1 cup Pumpkin Puree
    • 4 Tbsp. Unsalted Butter, melted

    Instructions

    In a mixing bowl whisk together the gluten free flour, baking powder, baking soda, pumpkin pie spice, cinnamon, sea salt and brown sugar.

    Add the maple syrup, eggs, buttermilk, milk, pumpkin puree and melted butter. Whisk by hand or blend together with a hand held mixer.

    Pour about ½ cup of batter at a time into your hot, oiled frying pan. Once the pancake starts to bubble flip them and cook the other side until both sides are light brown and the center of the pancake is done.

    Serve hot with maple syrup and butter.

    If you made this recipe please leave a star rating and comment below. It helps other readers find this recipe and means so much to me.

    • Prep Time: 10 minutes
    • Cook Time: 5 minutes
    • Category: Breakfast
    • Method: Frying
    • Cuisine: American

    Did you make this recipe?

    Tag @smallfarmbiglife on Instagram and hashtag it #smallfarmbiglife

    Pumpkin Spice Pancakes Ingredients

    • Gluten Free Flour
    • Baking Powder
    • Baking Soda
    • Pumpkin Pie Spice
    • Ground Cinnamon
    • Sea Salt
    • Brown Sugar
    • Pure Maple Syrup
    • Eggs
    • Buttermilk
    • Milk
    • Pumpkin Puree
    • Unsalted Butter

    Instructions

    In a mixing bowl whisk together the gluten free flour, baking powder, baking soda, pumpkin pie spice, cinnamon, sea salt and brown sugar.

    Add the maple syrup, eggs, buttermilk, milk, pumpkin puree and melted butter. Whisk by hand or blend together with a hand held mixer.

    Pour about ½ cup of batter at a time into your hot, oiled frying pan. Once the pancake starts to bubble flip them and cook the other side until both sides are light brown and the center of the pancake is done.

    Serve hot with maple syrup and butter.

    Easy Pumpkin Spice Hot Chocolate

    This pumpkin spice hot chocolate is rich, creamy, and made with real semi sweet chocolate chips instead of cocoa powder. Warm milk simmers with pumpkin puree, brown sugar, and a full blend of cinnamon, nutmeg, ginger, allspice, and cloves before the chocolate melts in for a smooth, glossy finish.

    It comes together in one saucepan in about 10 minutes.

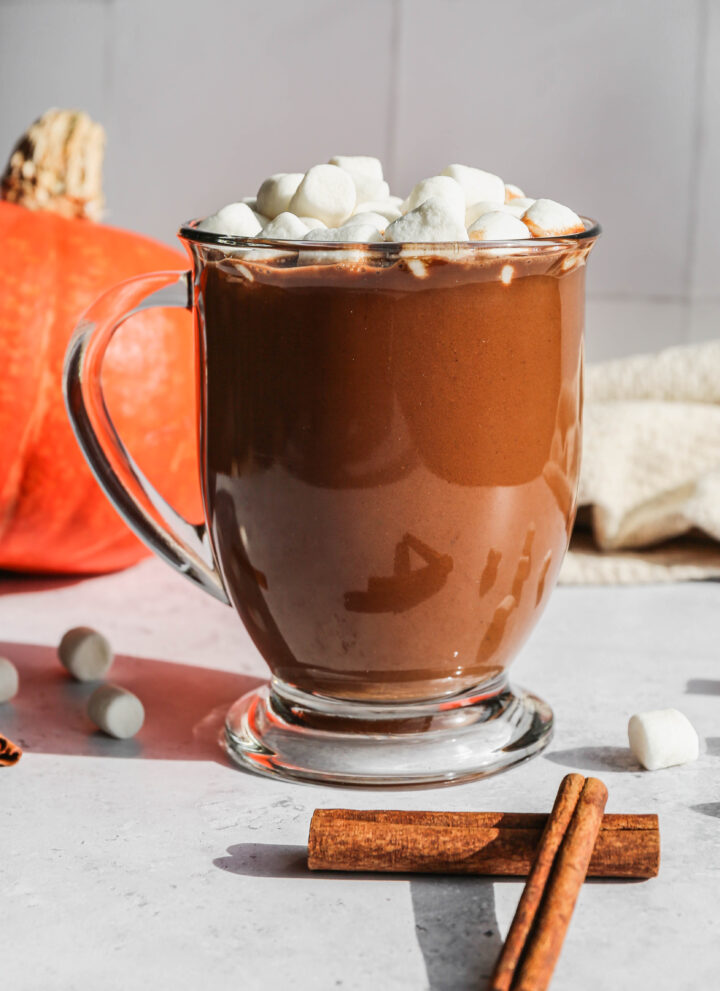
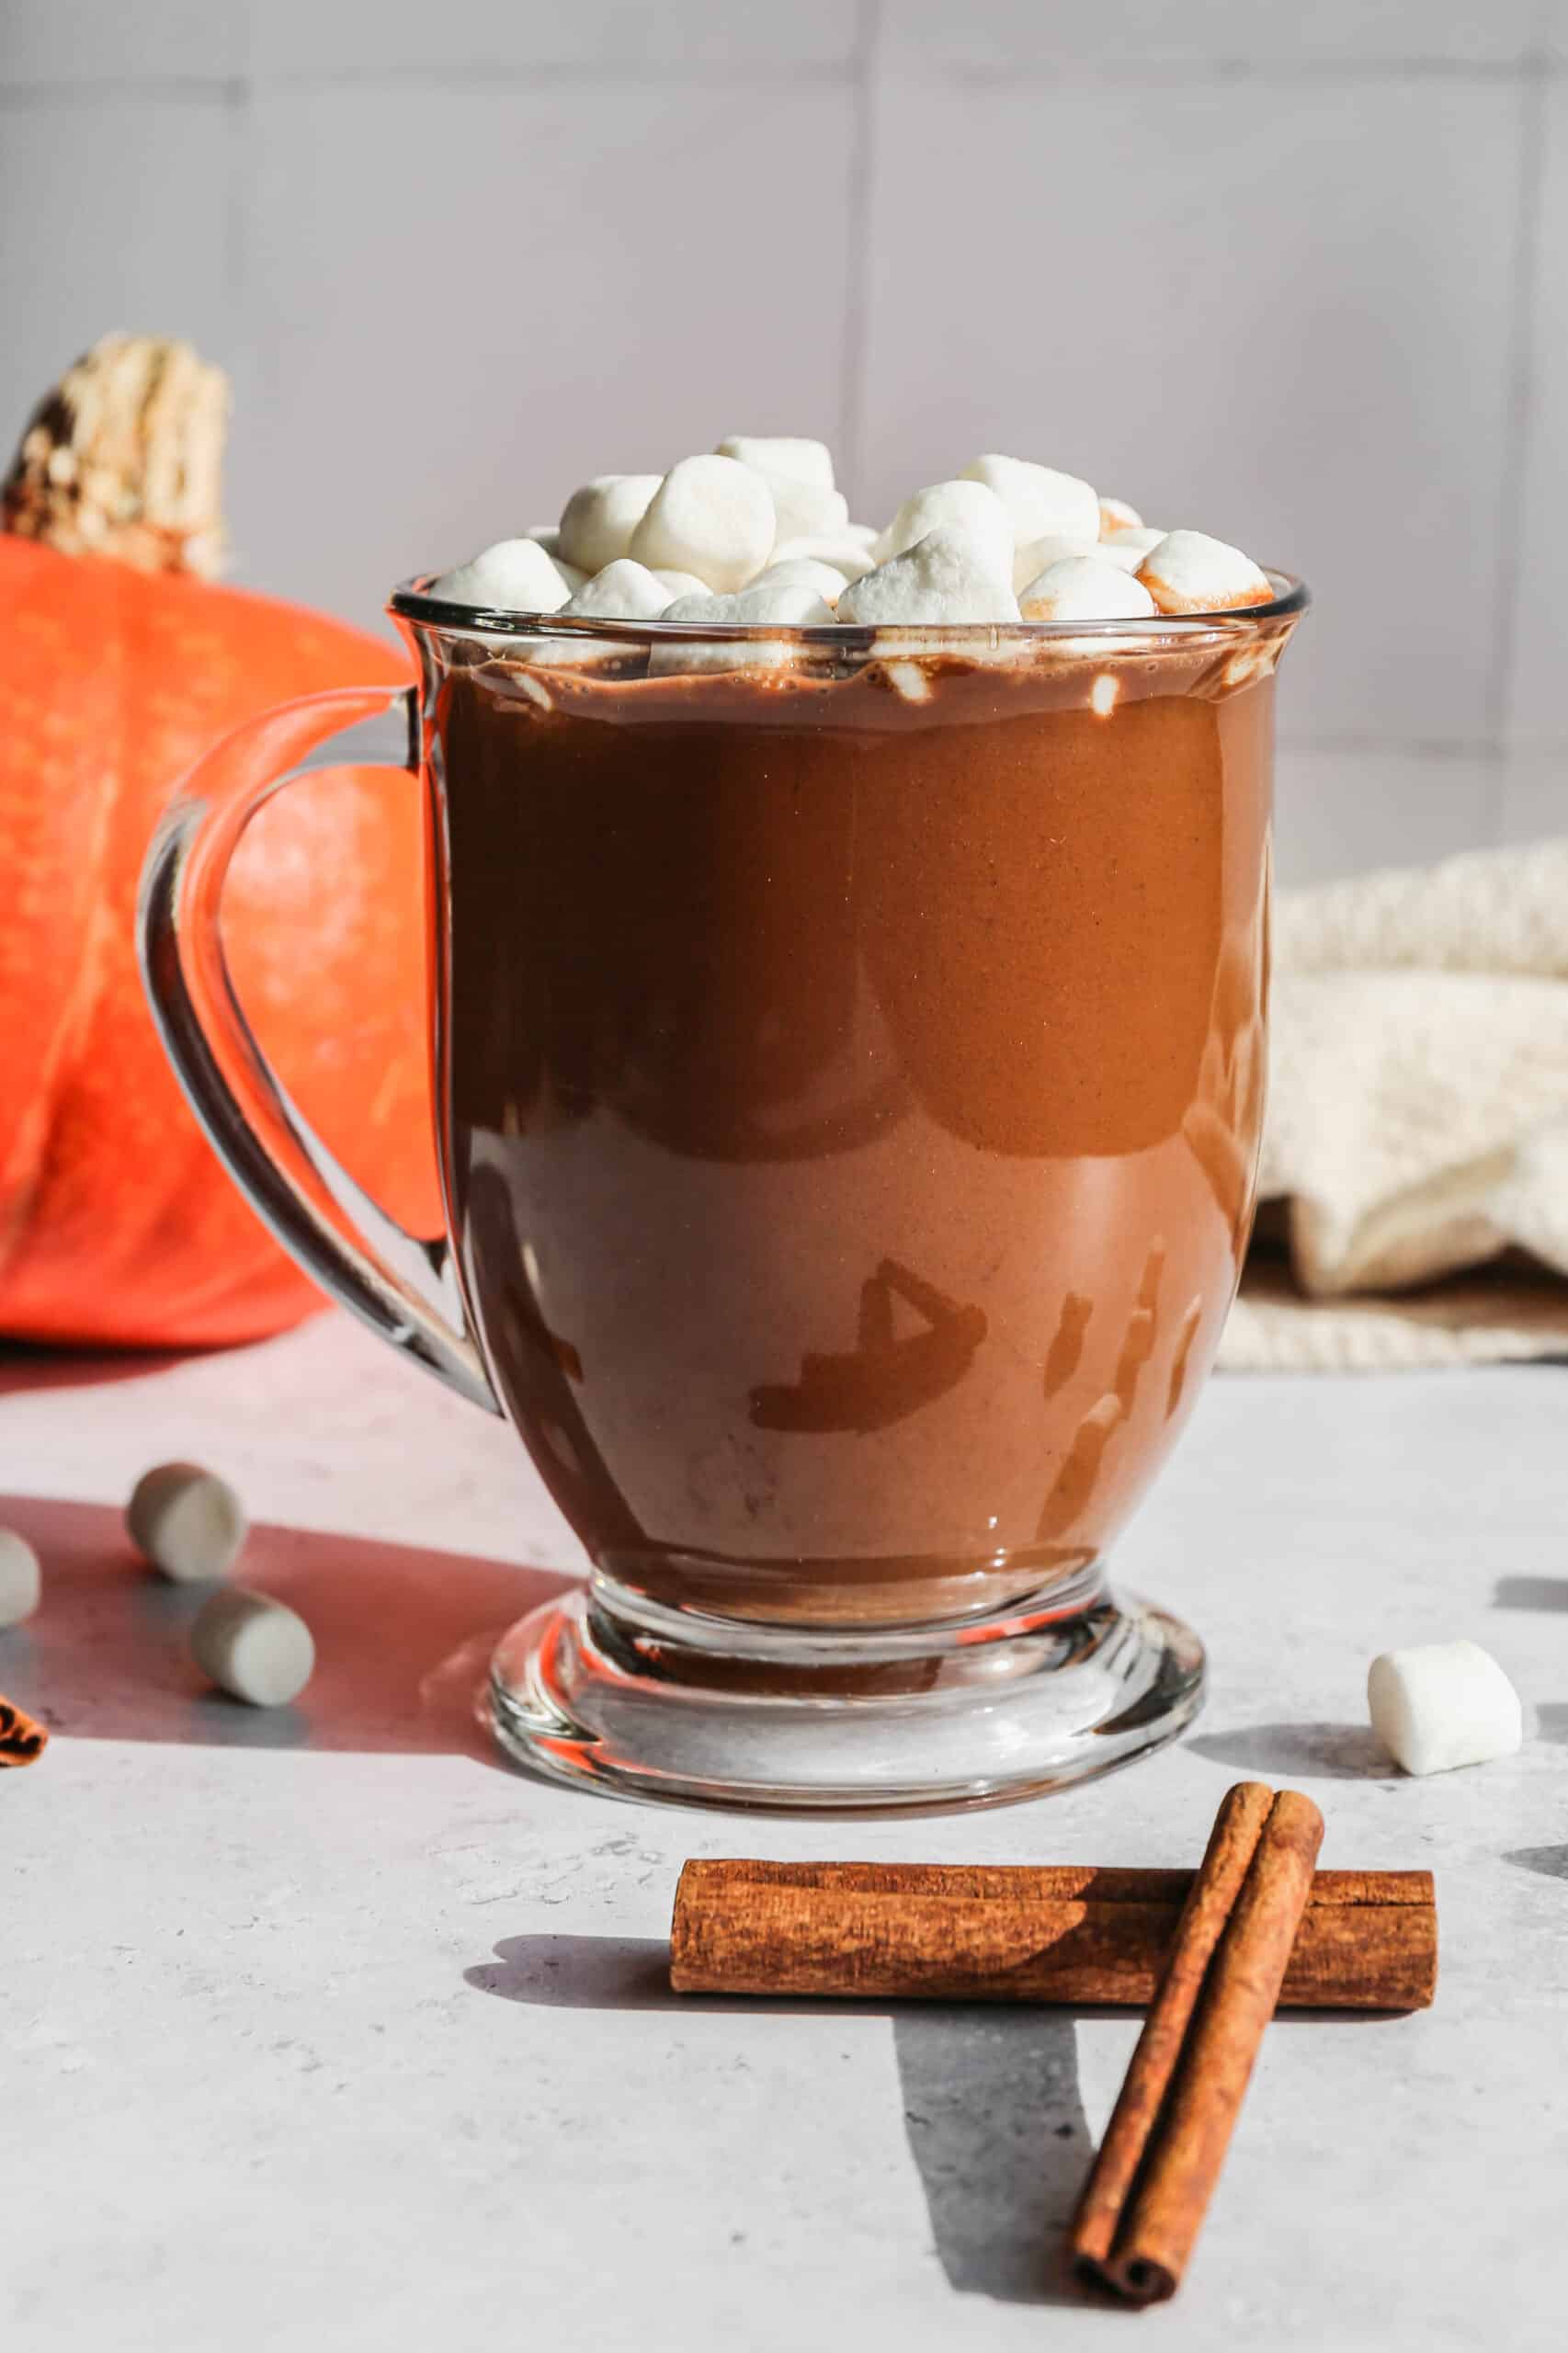
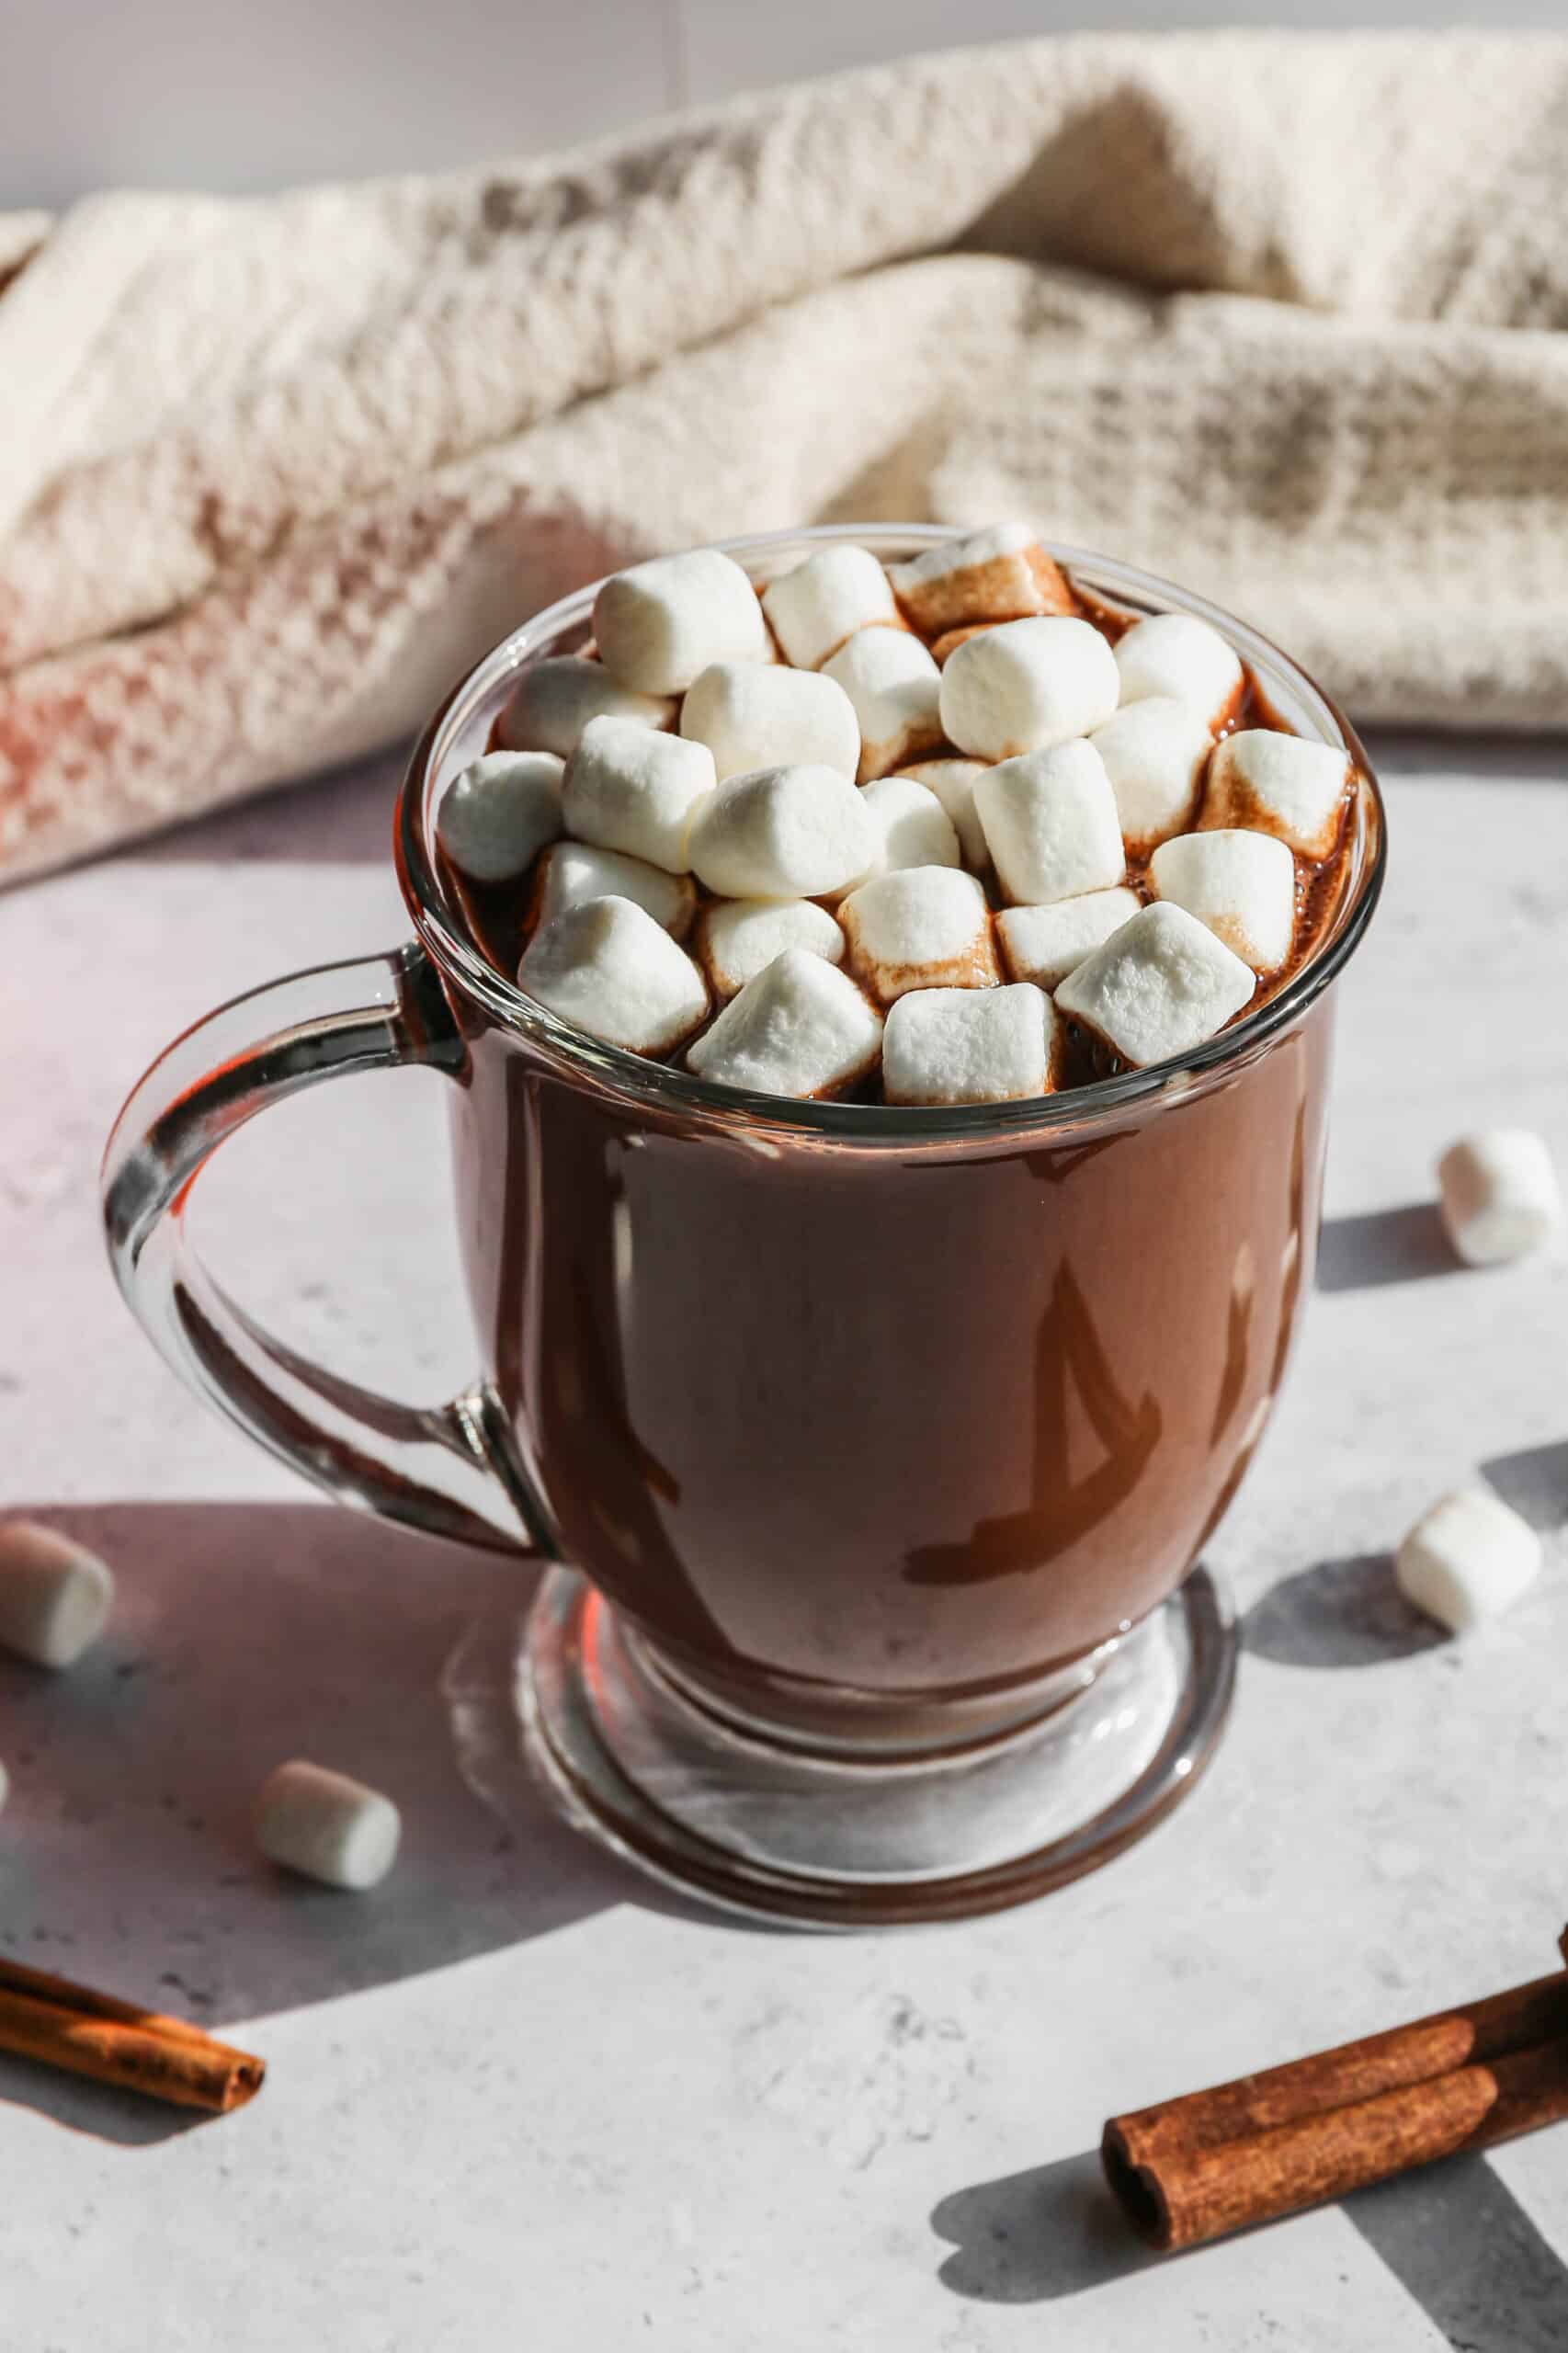
    a glass mug of easy pumpkin spice hot chocolate next to a pumpkin, cinnamon sticks and marshmallows.

    I make this on the coldest afternoons here on the farm, when a mug of something warm and chocolatey is exactly what the day calls for.

    Using real chocolate chips instead of cocoa powder means there is no clumping and no gritty texture, just a silky, rich hot chocolate every time.

    Top it with mini marshmallows or whipped cream and it feels like the coziest part of fall in a mug.

    If you are looking for more pumpkin recipes you might also enjoy my Pumpkin Apple Baked Oatmeal with Streusel Topping, this Trader Joe's Copycat Pumpkin Butter, my Dairy Free Pumpkin Pie Smoothie, this Dunkin Copycat Pumpkin Cream Cold Brew, or my Gluten Free Pumpkin Spice Pancakes recipes.

    You can find all of my pumpkin recipes here: Gluten Free Pumpkin Recipes

    a glass mug of easy pumpkin spice hot chocolate next to cinnamon sticks and mini marshmallows.
    [feast_advanced_jump_to]

    Why Real Chocolate Chips Instead Of Cocoa Powder

    This recipe uses melted semi sweet chocolate chips instead of cocoa powder, which gives you a smooth, glossy hot chocolate with no clumping. Cocoa powder can clump when it hits pumpkin puree, but melted chocolate chips blend in easily for a silky finish every time.

    Ways To Customize Your Hot Chocolate

    • Swap the milk for almond or oat milk for a dairy free version
    • Add a splash of brewed coffee for a mocha twist
    • Use white chocolate chips instead of semi sweet for a sweeter, lighter cup
    • Top with a sprinkle of cinnamon along with the marshmallows or whipped cream

    Substitutions

    • Pumpkin Pie Spice - instead of adding the cinnamon, nutmeg, ginger, allspice and cloves you can add 1 teaspoon of pumpkin pie spice
    • Whipped Cream - top with whipped cream instead of miniature marshmallows

    Storage

    If you are making this ahead of time or don't have time to drink it after you make it you can store it in a sealed jar or bottle in the refrigerator for up to 3 days.

    To reheat pour into a small saucepan and using medium heat warm until at your desired temperature.

    You can also reheat in the microwave in a microwave safe container for 1-2 minutes in 30 second intervals.

    Top Tip

    Keep whisking constantly once the chocolate chips go in. Since they're melting right in the simmering milk mixture, steady whisking is what keeps them from sticking to the bottom of the pan and gives you that smooth, glossy sheen in the full 3 to 4 minutes.

    Frequently Asked Questions

    What is the difference between pumpkin puree and pumpkin pie filling?

    Pumpkin puree is simply pumpkin without any added ingredients. Pumpkin pie filling has added spices and is usually sweetened.

    What are the benefits of eating pumpkin?

    Pumpkin is high in fiber and has potassium, iron and beta carotene. It is a healthy addition to fall recipes.

    What is pumpkin spice flavor?

    Pumpkin spice or pumpkin pie spice is a blend of cinnamon, nutmeg, ginger, allspice and cloves. It is used in many recipes to give pumpkin more flavor.

    Didn't find the answer you're looking for?

    Ask AI to answer based on this recipe:

    ChatGPT
    Google AI
    Perplexity
    Grok
    Claude

    Pumpkin Spice Hot Chocolate Supplies

    More Recipes You Might Enjoy

    • Dairy Free Pumpkin Pie Smoothie
    • Dunkin Copycat Pumpkin Cream Cold Brew
    • Iced Chai Tea Latte Concentrate
    • Dunkin Copycat Brown Sugar Cream Cold Brew

    I get a lot of my ingredients from Thrive Market. Thrive Market has been a game changer for me eating gluten free. They have so many options I can't get at my rural grocery stores! Use this link to get 40% off your first order!

    Print
    clock clock iconcutlery cutlery iconflag flag iconfolder folder iconinstagram instagram iconpinterest pinterest iconfacebook facebook iconprint print iconsquares squares iconheart heart iconheart solid heart solid icon

    Easy Pumpkin Spice Hot Chocolate


    5 Stars 4 Stars 3 Stars 2 Stars 1 Star

    No reviews

    • Author: Elaine VanVleck
    • Total Time: 10 minutes
    • Yield: 1 serving 1x
    • Diet: Gluten Free
    Print Recipe
    Pin Recipe

    Description

    This pumpkin spice hot chocolate gets its rich, glossy texture from real semi sweet chocolate chips, not cocoa powder. Warm milk, pumpkin puree, and a full blend of fall spices make this a cozy stovetop drink ready in just 10 minutes.


    Ingredients

    Scale
    • 1 ½ cups Milk
    • 2 Tbsp Pumpkin Puree
    • 2 Tbsp Brown Sugar
    • ½ tsp Vanilla Extract
    • ½ tsp Ground Cinnamon
    • ¼ tsp Ground Ginger
    • ⅛ tsp Ground Nutmeg
    • ⅛ tsp Allspice
    • ⅛ tsp Ground Cloves
    • ⅛ tsp Sea Salt
    • ½ cup Semi Sweet Chocolate Chips
      Miniature Marshmallows

    Instructions

    In a small saucepan over medium heat add the milk, pumpkin puree, brown sugar, vanilla, cinnamon, nutmeg, ginger, allspice, cloves and sea salt. Stir to combine.

    Let the mixture come to a simmer and then add the semi sweet chocolate chips. Whisk until the chocolate chips are melted and the mixture has a glossy sheen, about 3-4 minutes.

    Pour into a mug and enjoy with miniature marshmallows or whipped cream on top.

    If you made this recipe please leave a star rating and comment below. It helps other readers find this recipe and means so much to me.

    • Prep Time: 5 minutes
    • Cook Time: 5 minutes
    • Category: Drinks
    • Method: Stove Top
    • Cuisine: American

    Did you make this recipe?

    Tag @smallfarmbiglife on Instagram and hashtag it #smallfarmbiglife

    If you make this pumpkin spice hot chocolate, come back and leave a comment and a star rating below to let me know how it turned out. I love hearing how your mug came together.

    Pumpkin Spice Hot Chocolate Ingredients

    • Milk
    • Pumpkin Puree
    • Brown Sugar
    • Vanilla Extract
    • Ground Cinnamon
    • Ground Nutmeg
    • Ground Ginger
    • Allspice
    • Ground Cloves
    • Sea Salt
    • Semi Sweet Chocolate Chips
    • Miniature Marshmallows

    Instructions

    In a small saucepan over medium heat add the milk, pumpkin puree, brown sugar, vanilla, cinnamon, nutmeg, ginger, allspice, cloves and sea salt. Stir to combine.

    Let the mixture come to a simmer and then add the semi sweet chocolate chips. Whisk until the chocolate chips are melted and the mixture has a glossy sheen, about 3-4 minutes.

    Pour into a mug and enjoy with miniature marshmallows or whipped cream on top.

    Gluten Free Zucchini Squash and Corn Casserole

    This Gluten Free Zucchini Squash and Corn Casserole is one of my favorite summer side dishes and I love making it when the garden is overflowing with zucchini and yellow squash and I need a recipe that uses a lot of it in the most delicious way possible. Fresh zucchini, yellow squash, sweet onion, garlic, and frozen sweet corn are stirred together with cheddar cheese, sour cream, and mayonnaise and baked under a golden gluten free bread crumb and parmesan topping that gets perfectly crispy in the oven.

    Every bite is creamy, cheesy, and completely satisfying.

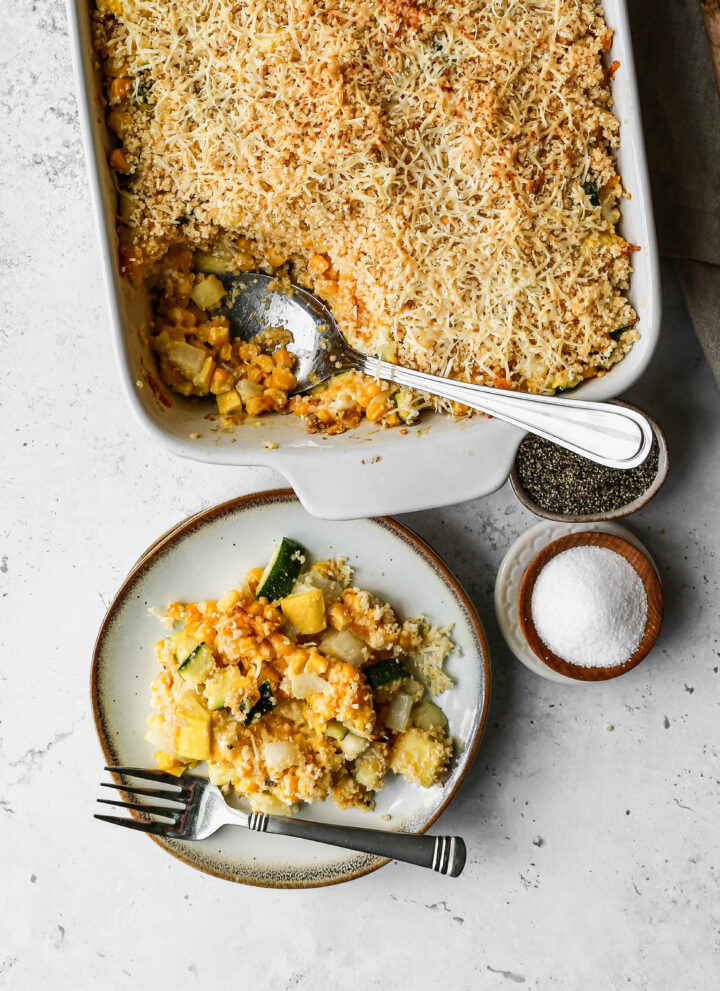
    a white baking dish of gluten free zucchini squash and corn casserole next to a plate of the casserole.

    One of the best things about this casserole is that it is a crowd pleaser for everyone at the table regardless of whether they eat gluten free.

    A reader made this for her gluten eating friends and said it was a big hit and a definite keeper. That kind of feedback is exactly why I love sharing this recipe.

    It works beautifully as a summer potluck dish, a barbecue side, or just a special weeknight vegetable side dish when the garden is at its peak.

    I also have recipes for Baked Kale and Zucchini Pilaf, Gluten Free Summer Squash Casserole and Gluten Free Zucchini Chocolate Chip Cookies that are all great options for your extra zucchini.

    You can find all of my side dish recipes here: Gluten Free Side Dish Recipes

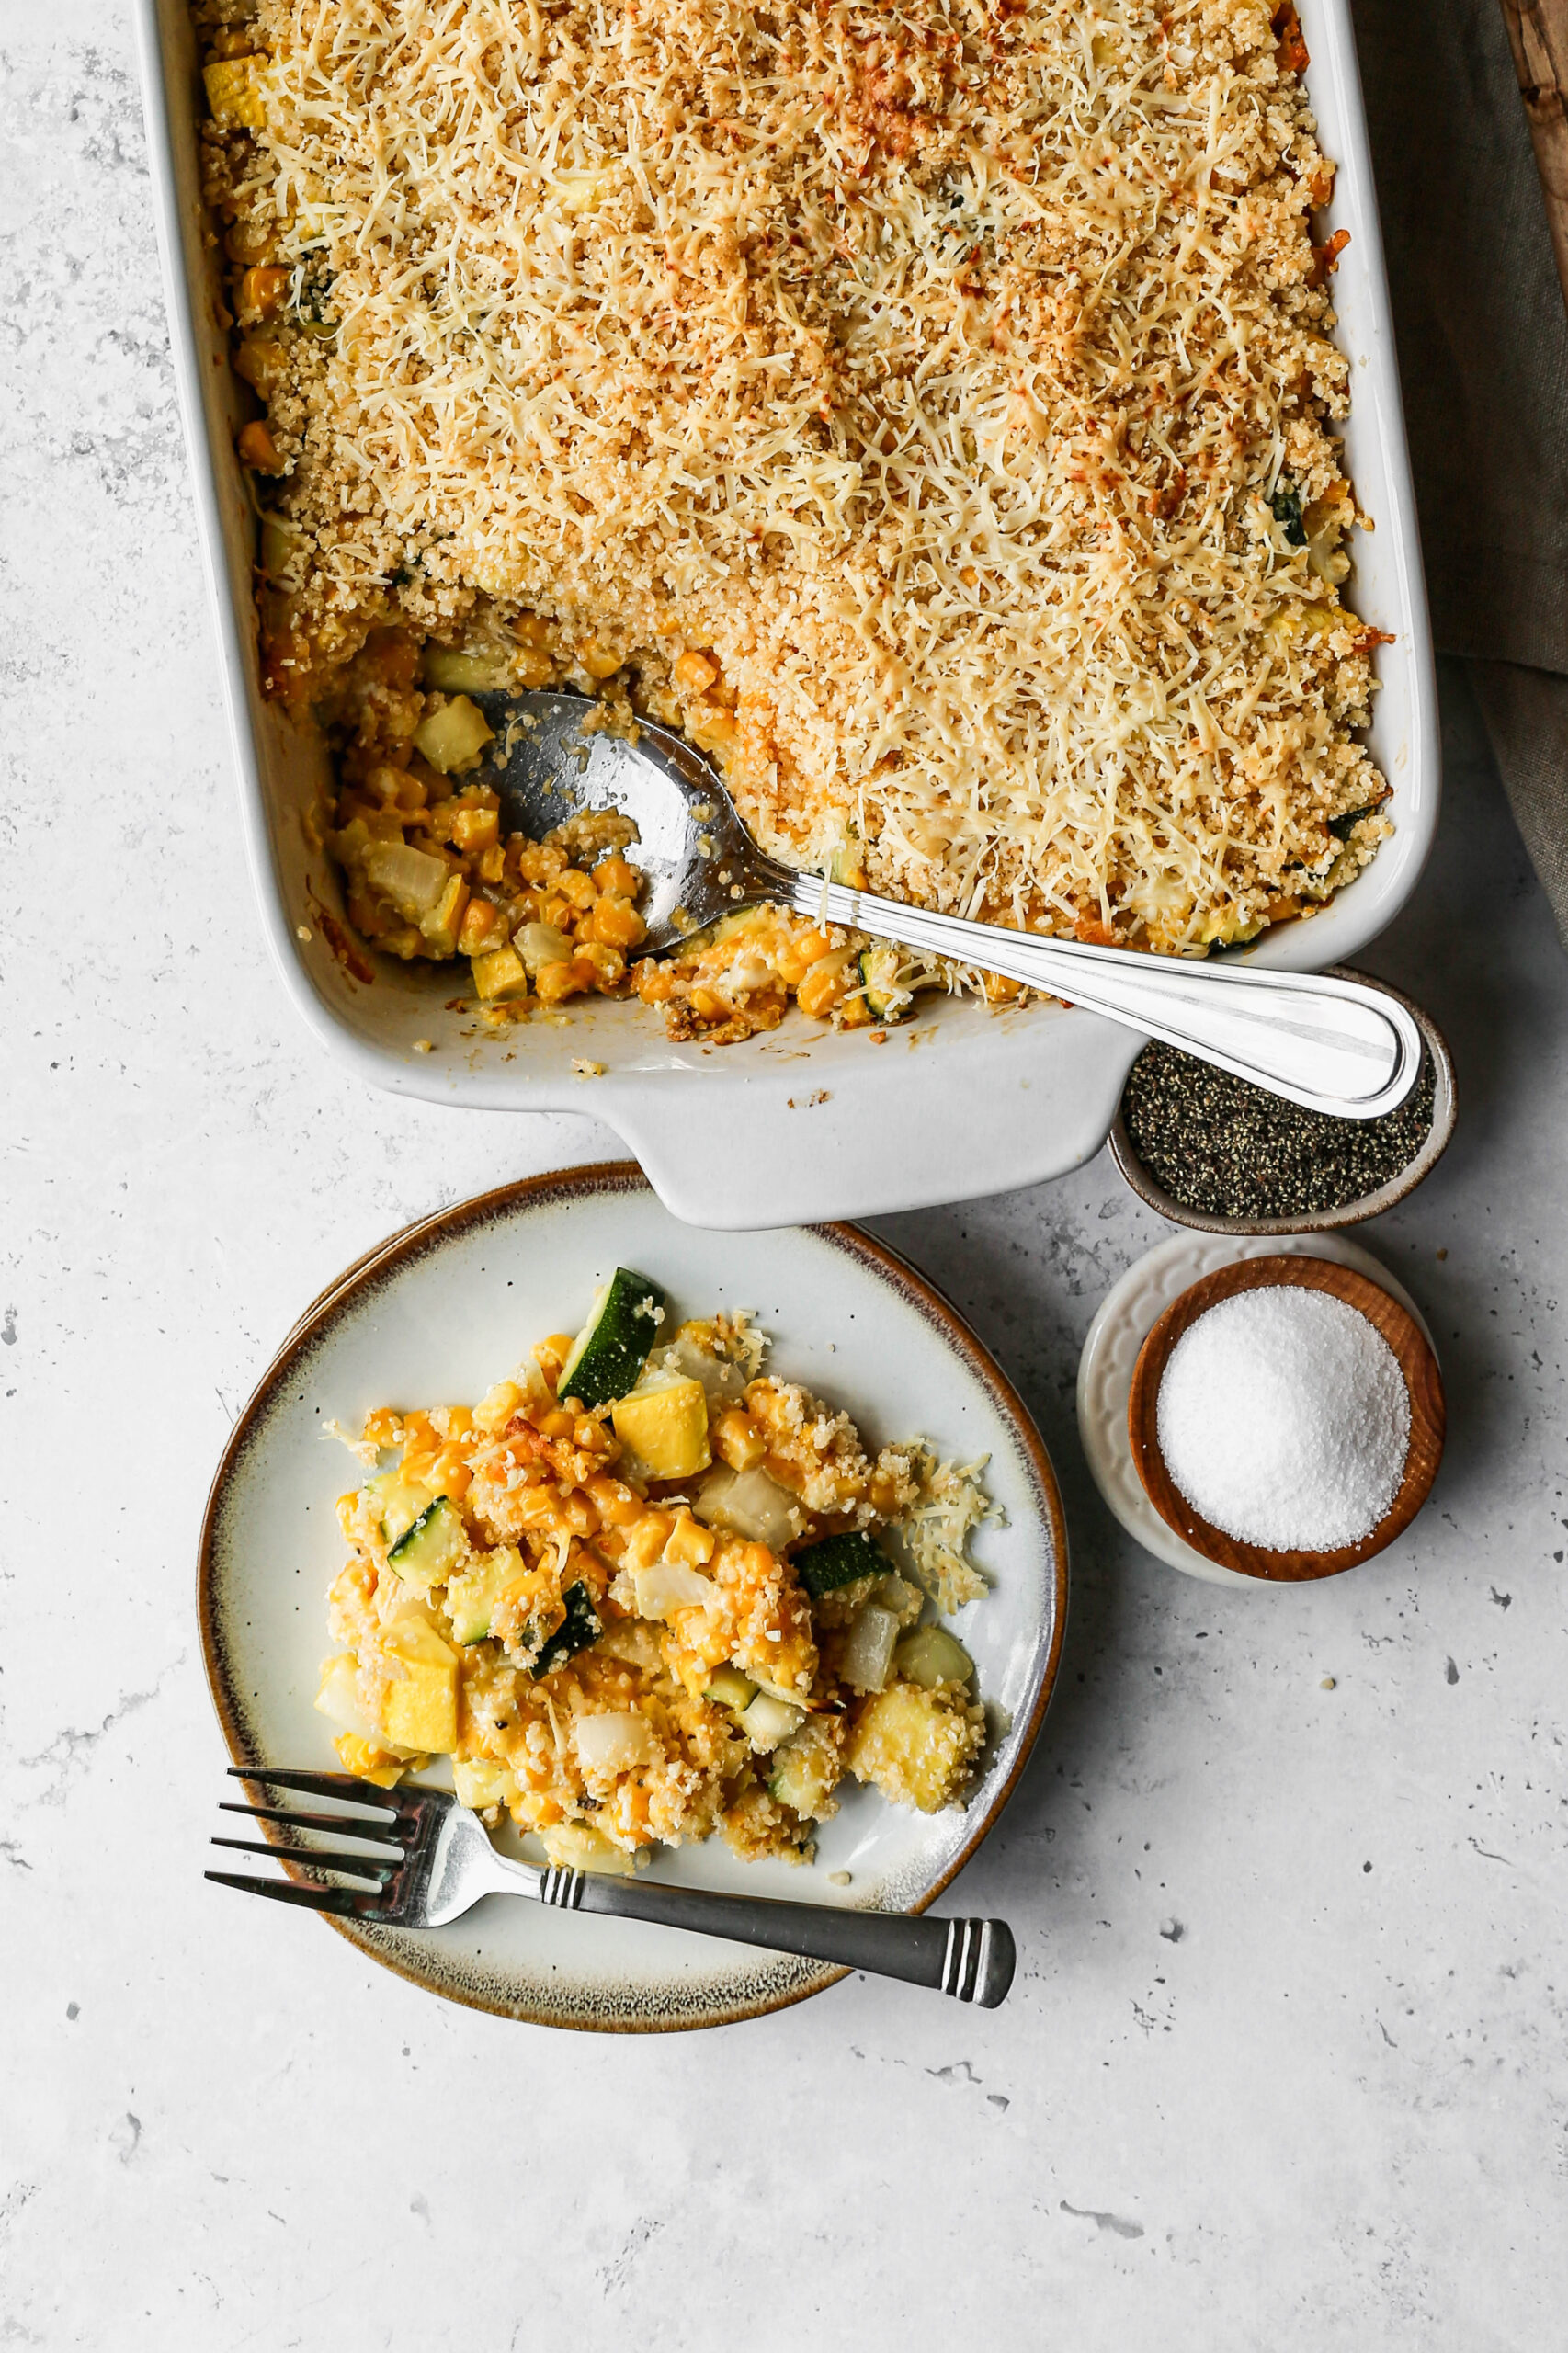
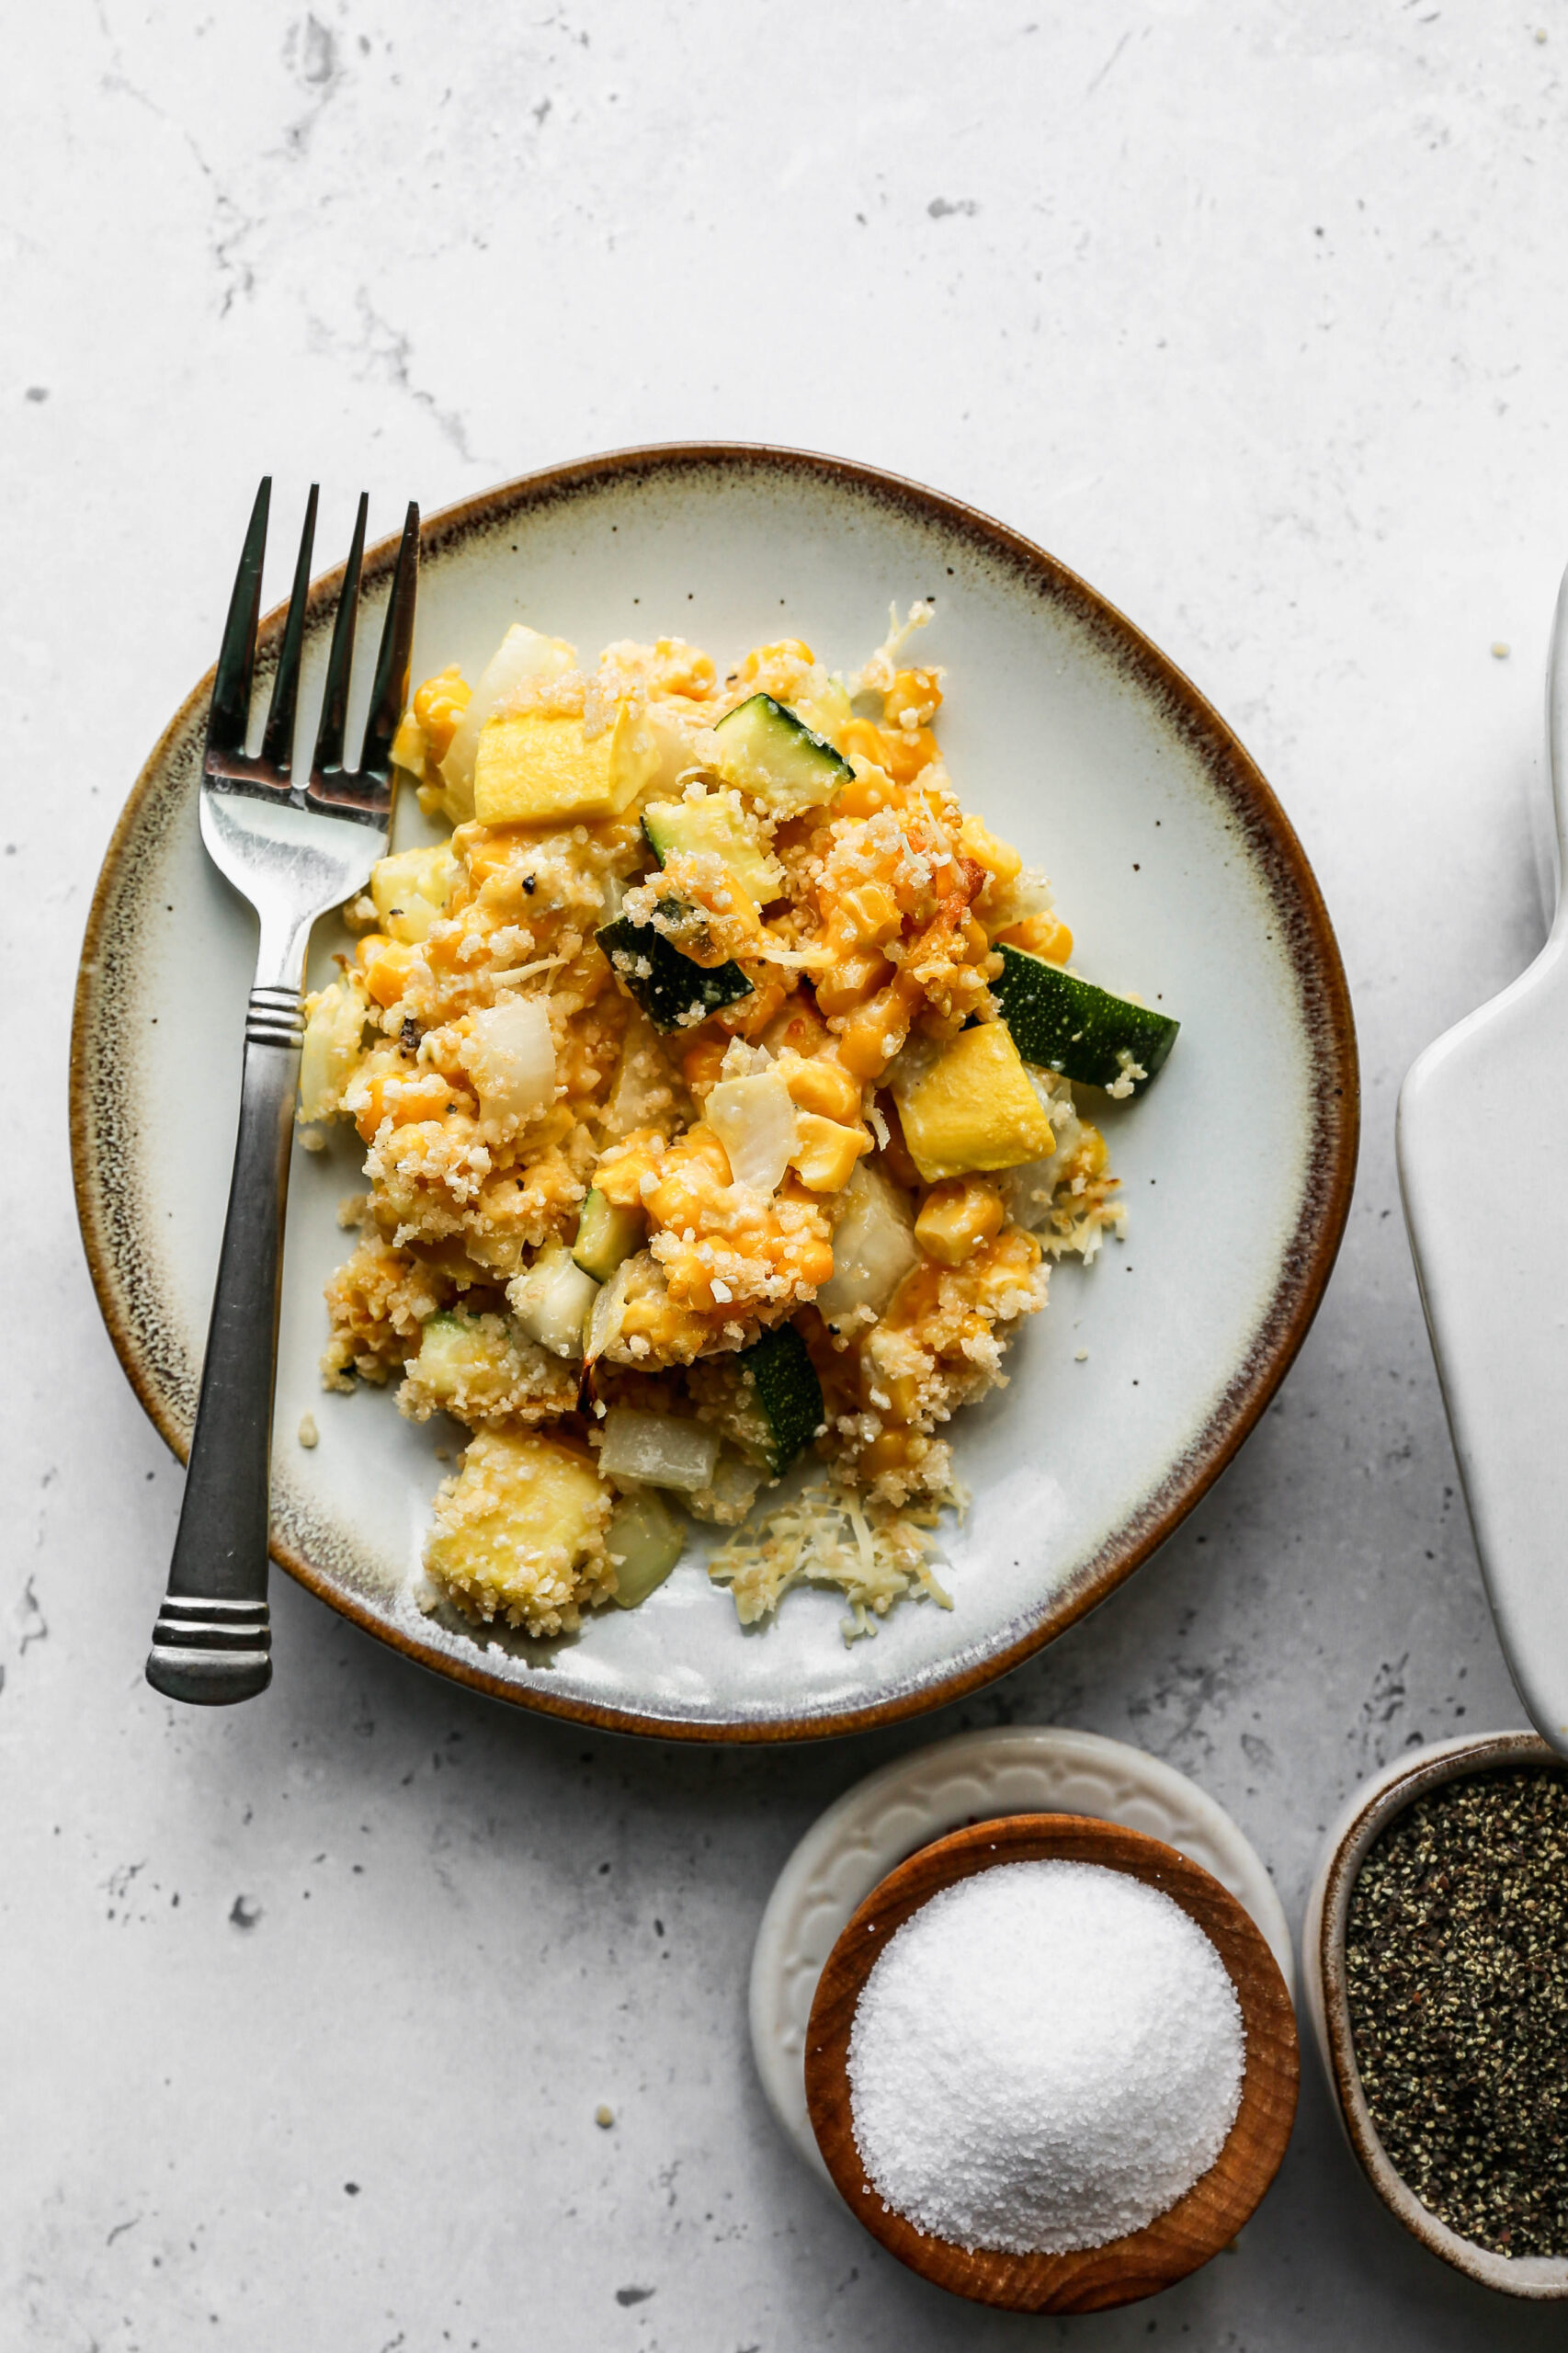
    a plate of gluten free zucchini squash and corn casserole next to a small wooden bowl of salt.
    [feast_advanced_jump_to]

    Ingredients

    • Yellow Squash
    • Zucchini
    • Sweet Onion
    • Minced Garlic
    • Frozen Corn
    • Cheddar Cheese
    • Sour Cream
    • Mayonnaise
    • Eggs
    • Sea Salt
    • Coarse Ground Black Pepper
    • Gluten Free Bread Crumbs
    • Unsalted Butter
    • Parmesan Cheese

    Instructions

    Preheat your oven to 350 degrees.

    In a large bowl stir together the yellow squash, zucchini, onion, garlic, corn, cheddar cheese, sour cream, mayonnaise, eggs, salt, pepper and 1 cup of gluten free bread crumbs.

    Pour the squash mixture into a 9x13 baking dish or 3 quart baking dish.

    Mix together 1 cup gluten free bread crumbs and melted butter. Sprinkle over the squash mixture in the baking dish. Top with finely grated parmesan cheese.

    Bake at 350 degrees for 45 minutes. The topping will be slightly browned when the casserole is done.

    Supplies

    More Recipes You Might Enjoy
    • Easy Gluten Free Zucchini Brownies
    • Air Fryer Roasted Zucchini Squash
    • Baked Kale and Zucchini Pilaf
    • Gluten Free Zucchini Chocolate Chip Cookies

    I get a lot of my ingredients from Thrive Market. Thrive Market has been a game changer for me eating gluten free. They have so many options I can't get at my rural grocery stores! Use this link to get 40% off your first order!

    Print
    clock clock iconcutlery cutlery iconflag flag iconfolder folder iconinstagram instagram iconpinterest pinterest iconfacebook facebook iconprint print iconsquares squares iconheart heart iconheart solid heart solid icon

    Gluten Free Zucchini Squash and Corn Casserole


    5 Stars 4 Stars 3 Stars 2 Stars 1 Star

    5 from 1 review

    • Author: Elaine VanVleck
    • Total Time: 1 hour
    • Yield: 8 servings 1x
    • Diet: Gluten Free
    Print Recipe
    Pin Recipe

    Description

    This Gluten Free Zucchini Squash and Corn Casserole is a rich, creamy, and cheesy baked side dish loaded with fresh yellow squash, zucchini, sweet corn, garlic, and onion baked with cheddar cheese, sour cream, and mayonnaise under the most beautiful golden gluten free bread crumb and parmesan topping. It is hearty enough to steal the show at any summer dinner table and so delicious that even your non gluten free guests will come back for seconds. Naturally gluten free and perfect for summer barbecues, potlucks, and family dinners!


    Ingredients

    Scale
    • 1 ½ pounds Yellow Squash, cut into ½-inch cubes
    • 1 ½ pounds Zucchini, cut into ½-inch cubes
    • 1 large Sweet Onion, chopped
    • 2 Tbsp Minced Garlic
    • 32 ounce bag Frozen Corn
    • 2 cups Cheddar Cheese, shredded
    • ½ cup Sour Cream
    • ½ cup Mayonnaise
    • 2 large Eggs, beaten
    • 1 ½ tsp Sea Salt
    • 1 tsp Coarse Ground Black Pepper
    • 2 cups Gluten Free Bread Crumbs
    • ¼ cup Unsalted Butter, melted
    • ½ cup Parmesan Cheese, finely grated

    Instructions

    Preheat your oven to 350 degrees.

    In a large bowl stir together the yellow squash, zucchini, onion, garlic, corn, cheddar cheese, sour cream, mayonnaise, eggs, salt, pepper and 1 cup of gluten free bread crumbs.

    Pour the squash mixture into a 9x13 baking dish or 3 quart baking dish.

    Mix together 1 cup gluten free bread crumbs and melted butter. Sprinkle over the squash mixture in the baking dish. Top with finely grated parmesan cheese.

    Bake at 350 degrees for 45 minutes. The topping will be slightly browned when the casserole is done.

    Notes

    If you don't have yellow squash you can substitute with zucchini and just use zucchini in this recipe.

    • Prep Time: 15 minutes
    • Cook Time: 45 minutes
    • Category: Side Dish, Vegetables
    • Method: Baking
    • Cuisine: American

    Did you make this recipe?

    Tag @smallfarmbiglife on Instagram and hashtag it #smallfarmbiglife

    If you made this Gluten Free Zucchini Squash and Corn Casserole I would love to hear what you thought! Please leave a star rating and a comment below. This is one of my favorite summer side dish recipes and I hope it becomes a staple in your kitchen too!

    Storage

    Store leftover gluten free zucchini squash and corn casserole covered in the refrigerator for up to 4 days. Reheat individual servings in the microwave covered with a damp paper towel in 30 second intervals until heated through or place the entire dish back in a 350 degree oven covered with foil for about 15 to 20 minutes until warmed through. Remove the foil for the last 5 minutes to crisp up the bread crumb topping. This casserole is not recommended for freezing as the sour cream and mayonnaise based filling does not hold up well to freezing and thawing.

    Top Tip

    This casserole does not require pre cooking the vegetables on the stovetop before baking unlike some squash casseroles. The zucchini and yellow squash release their moisture as they bake directly in the dish. However if your squash pieces are very large or very watery you can salt them lightly and let them sit in a colander for 15 to 20 minutes to draw out some of the excess moisture before mixing everything together.

    This is especially helpful if you are using very large garden zucchini which tends to hold more water than smaller zucchini.

    Didn't find the answer you're looking for?

    Ask AI to answer based on this recipe:

    ChatGPT
    Google AI
    Perplexity
    Grok
    Claude

    Frequently Asked Questions

    Should you peel zucchini?

    Fresh zucchini should have a very soft skin that doesn't need to be peeled. If your zucchini has a hard skin it is likely old or over ripe. If possible, I would choose a different zucchini to cook with and compost the over ripe zucchini with tough skin.

    Most of the nutrition is in the deep green skin of the zucchini squash, which makes it a great reason to leave the peel on.

    Can I make this casserole ahead of time?

    Yes! You can assemble the entire casserole the night before including the bread crumb topping and store it covered in the refrigerator overnight. When you are ready to bake simply take it out of the refrigerator while the oven preheats and then bake as directed adding 5 to 10 extra minutes if the casserole is going in cold. This is a great option for potlucks and holiday dinners when you want to minimize day of cooking.

    Do I need to pre cook the zucchini and squash before baking this casserole?

    No and that is one of the things I love most about this recipe. Unlike my Gluten Free Summer Squash Casserole which requires sauteing the squash first this recipe goes directly into the baking dish without any stovetop cooking. The vegetables release their moisture as they bake and the eggs, sour cream, and mayonnaise help absorb that liquid and create a creamy and set casserole. If your zucchini is very large and watery you can salt the cubes lightly and let them drain in a colander for 15 minutes before mixing everything together.

    Can I use all zucchini instead of a combination of zucchini and yellow squash?

    Absolutely! If you do not have yellow squash or cannot find it just use all zucchini and the recipe works perfectly. The yellow squash adds beautiful color contrast to the casserole but the flavor and texture are nearly identical. You can also use all yellow squash if that is what you have on hand.

    What can I serve with this zucchini squash and corn casserole?

    This casserole pairs beautifully with grilled chicken, BBQ ribs, pulled pork, grilled steak, or any summer main dish you can think of. It is hearty enough to hold its own as a vegetarian main dish as well served alongside a simple green salad. It is the perfect potluck and barbecue side dish because it feeds 8 people beautifully and travels well in the baking dish.

    Gluten Free Plum Cornmeal Cake

    This easy recipe for gluten free plum cornmeal cake is a great way to use the fruit in season. This simple corn flour cake is topped with fresh plums and makes a moist cake to serve as dessert or with coffee for brunch.

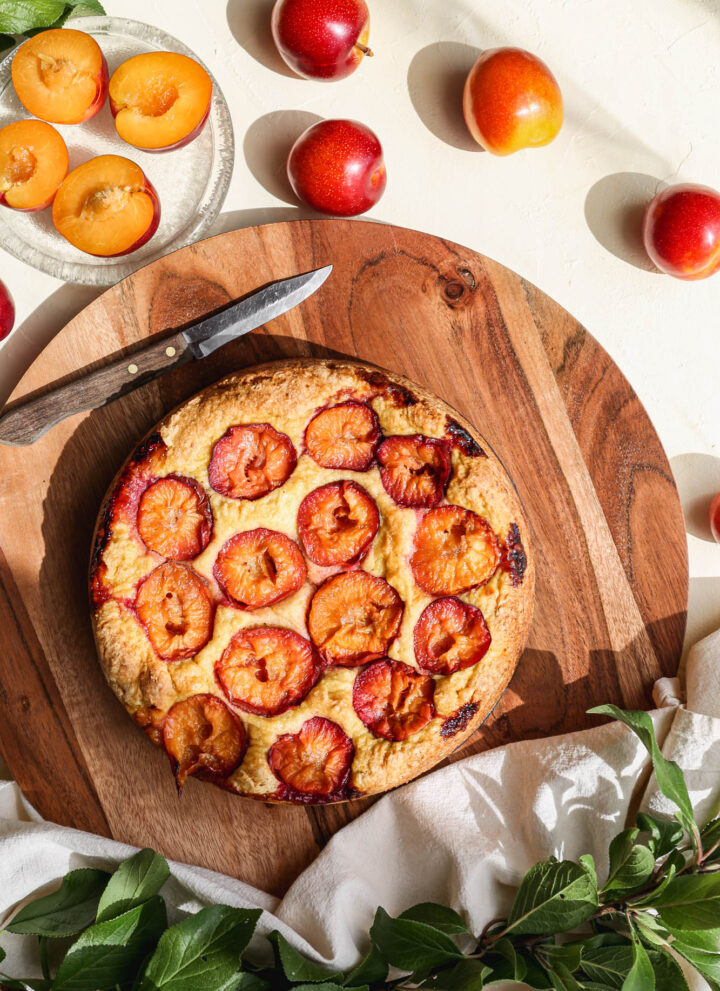
    a gluten free plum cornmeal cake on a round wooden platter with fresh yellow plums around it

    I used plums from our yellow plum tree in the yard, but you should be able to find delicious plums at the grocery store or farmer's market. Purple plums work well too, and since sizes vary, you may need a few more or fewer depending on what you find.

    I prefer cutting the plums in half and placing them cut side up on the batter, though slicing them into slivers works too. The plums will sink slightly into the cake as it bakes, and keeping them in halves helps the cake stay juicy when you slice it to serve.

    You can find all of my cake recipes here: Gluten Free Cake Recipes

    Not sure which gluten free flour to reach for? Check out my guide: Bob's Red Mill 1 to 1 vs King Arthur Measure for Measure: Which Gluten Free Flour to Use and When

    three slices of gluten free plum cornmeal cake on white plates with fresh yellow plums around them
    [feast_advanced_jump_to]

    Why You'll Love This Cake

    • Simple, one bowl batter
    • Naturally showcases fresh plums in season
    • Works for breakfast, brunch, or dessert
    • Freezer friendly for later

    Ingredient Notes

    • Gluten free yellow cornmeal: use a finely ground cornmeal or corn flour rather than a coarse grind, since a finer texture gives the cake a more tender, less gritty crumb.
    • Gluten free flour: a 1 to 1 gluten free blend like Bob's Red Mill 1 to 1 or King Arthur Measure for Measure works well here.
    • Coconut oil: this keeps the cake dairy free friendly in the fat department while still giving it a moist, tender texture, but melted butter works well too if you prefer.

    Tips for the Best Plum Cornmeal Cake

    • A little lemon or orange zest added to the batter brightens up the flavor if you want to switch things up.
    • Dust the cooled cake with powdered sugar just before serving for a simple, pretty finish.
    • Let the cake cool for the full 10 minutes before releasing the springform pan, so it doesn't fall apart while still warm.

    How to Store and Freeze

    Store the cooled cake in an airtight container at room temperature for up to 2 days, or in the fridge for up to 5 days, since the fresh plums make it more perishable than a typical cake.

    To freeze, wrap the cake tightly in plastic wrap, then foil, and freeze for up to 2 months. Thaw overnight in the fridge before serving.

    Top Tip

    Don't skip the 10 minute cooling time before releasing the springform pan. The cake needs those extra minutes to set up, or it can crack or fall apart when you take the sides off while it's still warm.

    Frequently Asked Questions

    How do I make my gluten free cakes more moist?

    Gluten free baking tends to require more moisture or oil than when you are using regular wheat flour. For this gluten free plum cornmeal cake recipe I added milk and coconut oil to make it moist and delicious.

    If you are using a cake recipe that isn't turning out moist I would suggest adding a bit more oil or butter. You can also add mashed banana or applesauce to help your baked goods have more moisture.

    Do gluten free cakes take longer to bake?

    Yes, gluten free baking in general takes a little bit longer to bake than a cake made with regular wheat flour. However, gluten free baked goods tend to brown faster. So you will want to test the cake with a tooth pick in the center to make sure it's actually done even if it looks browned. 

    Your cake should be a nice golden brown and a tooth pick inserted in the center of the cake should come out clean. You may need to bake your cake up to 5-8 minutes more. If your cake is already very brown, but not done in the center you will need to lower the oven temperature by 25 degrees and cook longer.

    Can I use a different fruit in this recipe?

    Yes. This same batter works well with other stone fruit like peaches, apricots, or nectarines if plums aren't in season.

    Should I use fine or coarse cornmeal?

    A finely ground cornmeal or corn flour gives the best texture here. A coarser cornmeal will still work, but the cake will have a slightly grittier crumb.

    Didn't find the answer you're looking for?

    Ask AI to answer based on this recipe:

    ChatGPT
    Google AI
    Perplexity
    Grok
    Claude

    Plum Cornmeal Cake Supplies

    More Recipes You Might Enjoy

    • Gluten Free Raspberry Cornmeal Cake
    • Gluten Free Plum Cake
    • Gluten Free Pineapple Upside Down Cake
    • Gluten Free Pear Bundt Cake

    I get a lot of my ingredients from Thrive Market. Thrive Market has been a game changer for me eating gluten free. They have so many options I can't get at my rural grocery stores! Use this link to get 40% off your first order!

    Print
    clock clock iconcutlery cutlery iconflag flag iconfolder folder iconinstagram instagram iconpinterest pinterest iconfacebook facebook iconprint print iconsquares squares iconheart heart iconheart solid heart solid icon

    Gluten Free Plum Cornmeal Cake


    5 Stars 4 Stars 3 Stars 2 Stars 1 Star

    No reviews

    • Author: Elaine VanVleck
    • Total Time: 1 hour 5 minutes
    • Yield: 8 slices 1x
    • Diet: Gluten Free
    Print Recipe
    Pin Recipe

    Description

    This gluten free plum cornmeal cake is a simple, one bowl way to use fresh plums while they're in season. Topped with plum halves that sink slightly into the batter as it bakes, it's moist enough for dessert and light enough to serve with coffee for brunch.


    Ingredients

    Scale
    • 7-8 medium Plums
    • 1 cup Gluten Free Flour
    • ½ cup Gluten Free Yellow Cornmeal
    • 2 tsp. Baking Powder
    • ½ tsp. Sea Salt
    • ¾ cup Granulated Sugar
    • 2 large Eggs
    • ½ cup Milk
    • 1 tsp. Vanilla Extract
    • ¼ cup Coconut Oil, melted

    Instructions

    Preheat your oven to 350 degrees. Grease a 9-inch springform pan with coconut oil or butter and set aside.

    In a bowl whisk together the gluten free flour, yellow cornmeal, baking powder and salt. Set aside.

    In the bowl of your stand mixer beat together the granulated sugar and eggs. Add the milk, vanilla and melted coconut oil. Beat until combined.

    Add the dry ingredients to the wet ingredients and beat just until they are combined.

    Pour the cake batter into the greased 9-inch springform pan. Place the plum halves on top of the cake batter to cover the entire top.

    Bake at 350 degrees for 45-50 minutes or until a toothpick in the middle of the cake comes out clean.

    Let the cake cool for at least 10 minutes before releasing the outside of the pan.

    Serve warm or cooled.

    If you made this recipe please leave a star rating and comment below. It helps other readers find this recipe and means so much to me.

    • Prep Time: 15 minutes
    • Cook Time: 50 minutes
    • Category: Cake
    • Method: Baking
    • Cuisine: American

    Did you make this recipe?

    Tag @smallfarmbiglife on Instagram and hashtag it #smallfarmbiglife

    If you make this gluten free plum cornmeal cake, I would love to hear how it turned out. Leave a comment and a star rating below, and snap a photo to tag me on Instagram @smallfarmbiglife. Looking for more ways to bake with seasonal fruit? Check out my other gluten free cake recipes for more inspiration.

    Plum Cornmeal Cake Ingredients

    • Fresh Plums
    • Gluten Free Flour
    • Gluten Free Yellow Cornmeal
    • Baking Powder
    • Sea Salt
    • Granulated Sugar
    • Eggs
    • Milk
    • Vanilla Extract
    • Coconut Oil

    Instructions

    Preheat your oven to 350 degrees. Grease a 9-inch springform pan with coconut oil or butter and set aside.

    In a bowl whisk together the gluten free flour, yellow cornmeal, baking powder and salt. Set aside.

    In the bowl of your stand mixer beat together the granulated sugar and eggs. Add the milk, vanilla and melted coconut oil. Beat until combined.

    Add the dry ingredients to the wet ingredients and beat just until they are combined.

    Pour the cake batter into the greased 9-inch springform pan. Place the plum halves on top of the cake batter to cover the entire top.

    Bake at 350 degrees for 45-50 minutes or until a toothpick in the middle of the cake comes out clean.

    Let the cake cool for at least 10 minutes before releasing the outside of the pan.

    Easy Frozen Watermelon Margarita Mocktail

    This easy recipe for frozen watermelon margarita mocktails makes a pitcher of this delicious drink. You chop the fresh watermelon into cubes and then freeze it on a baking sheet. Using lime juice, lemon juice and a little salt you get a non alcoholic watermelon slushie using your blender.

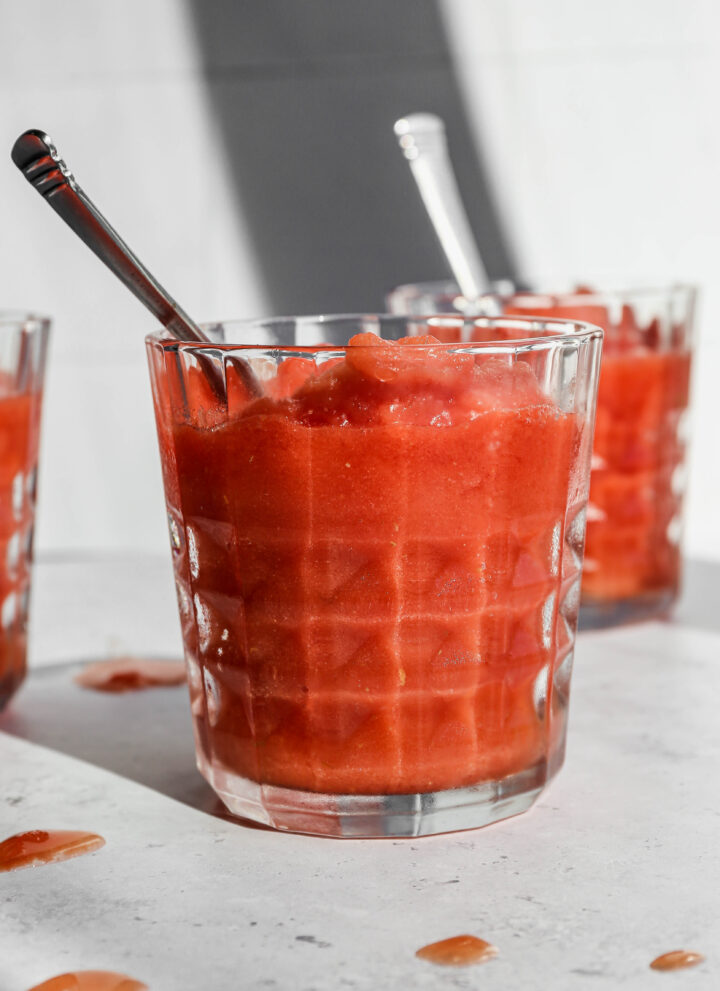
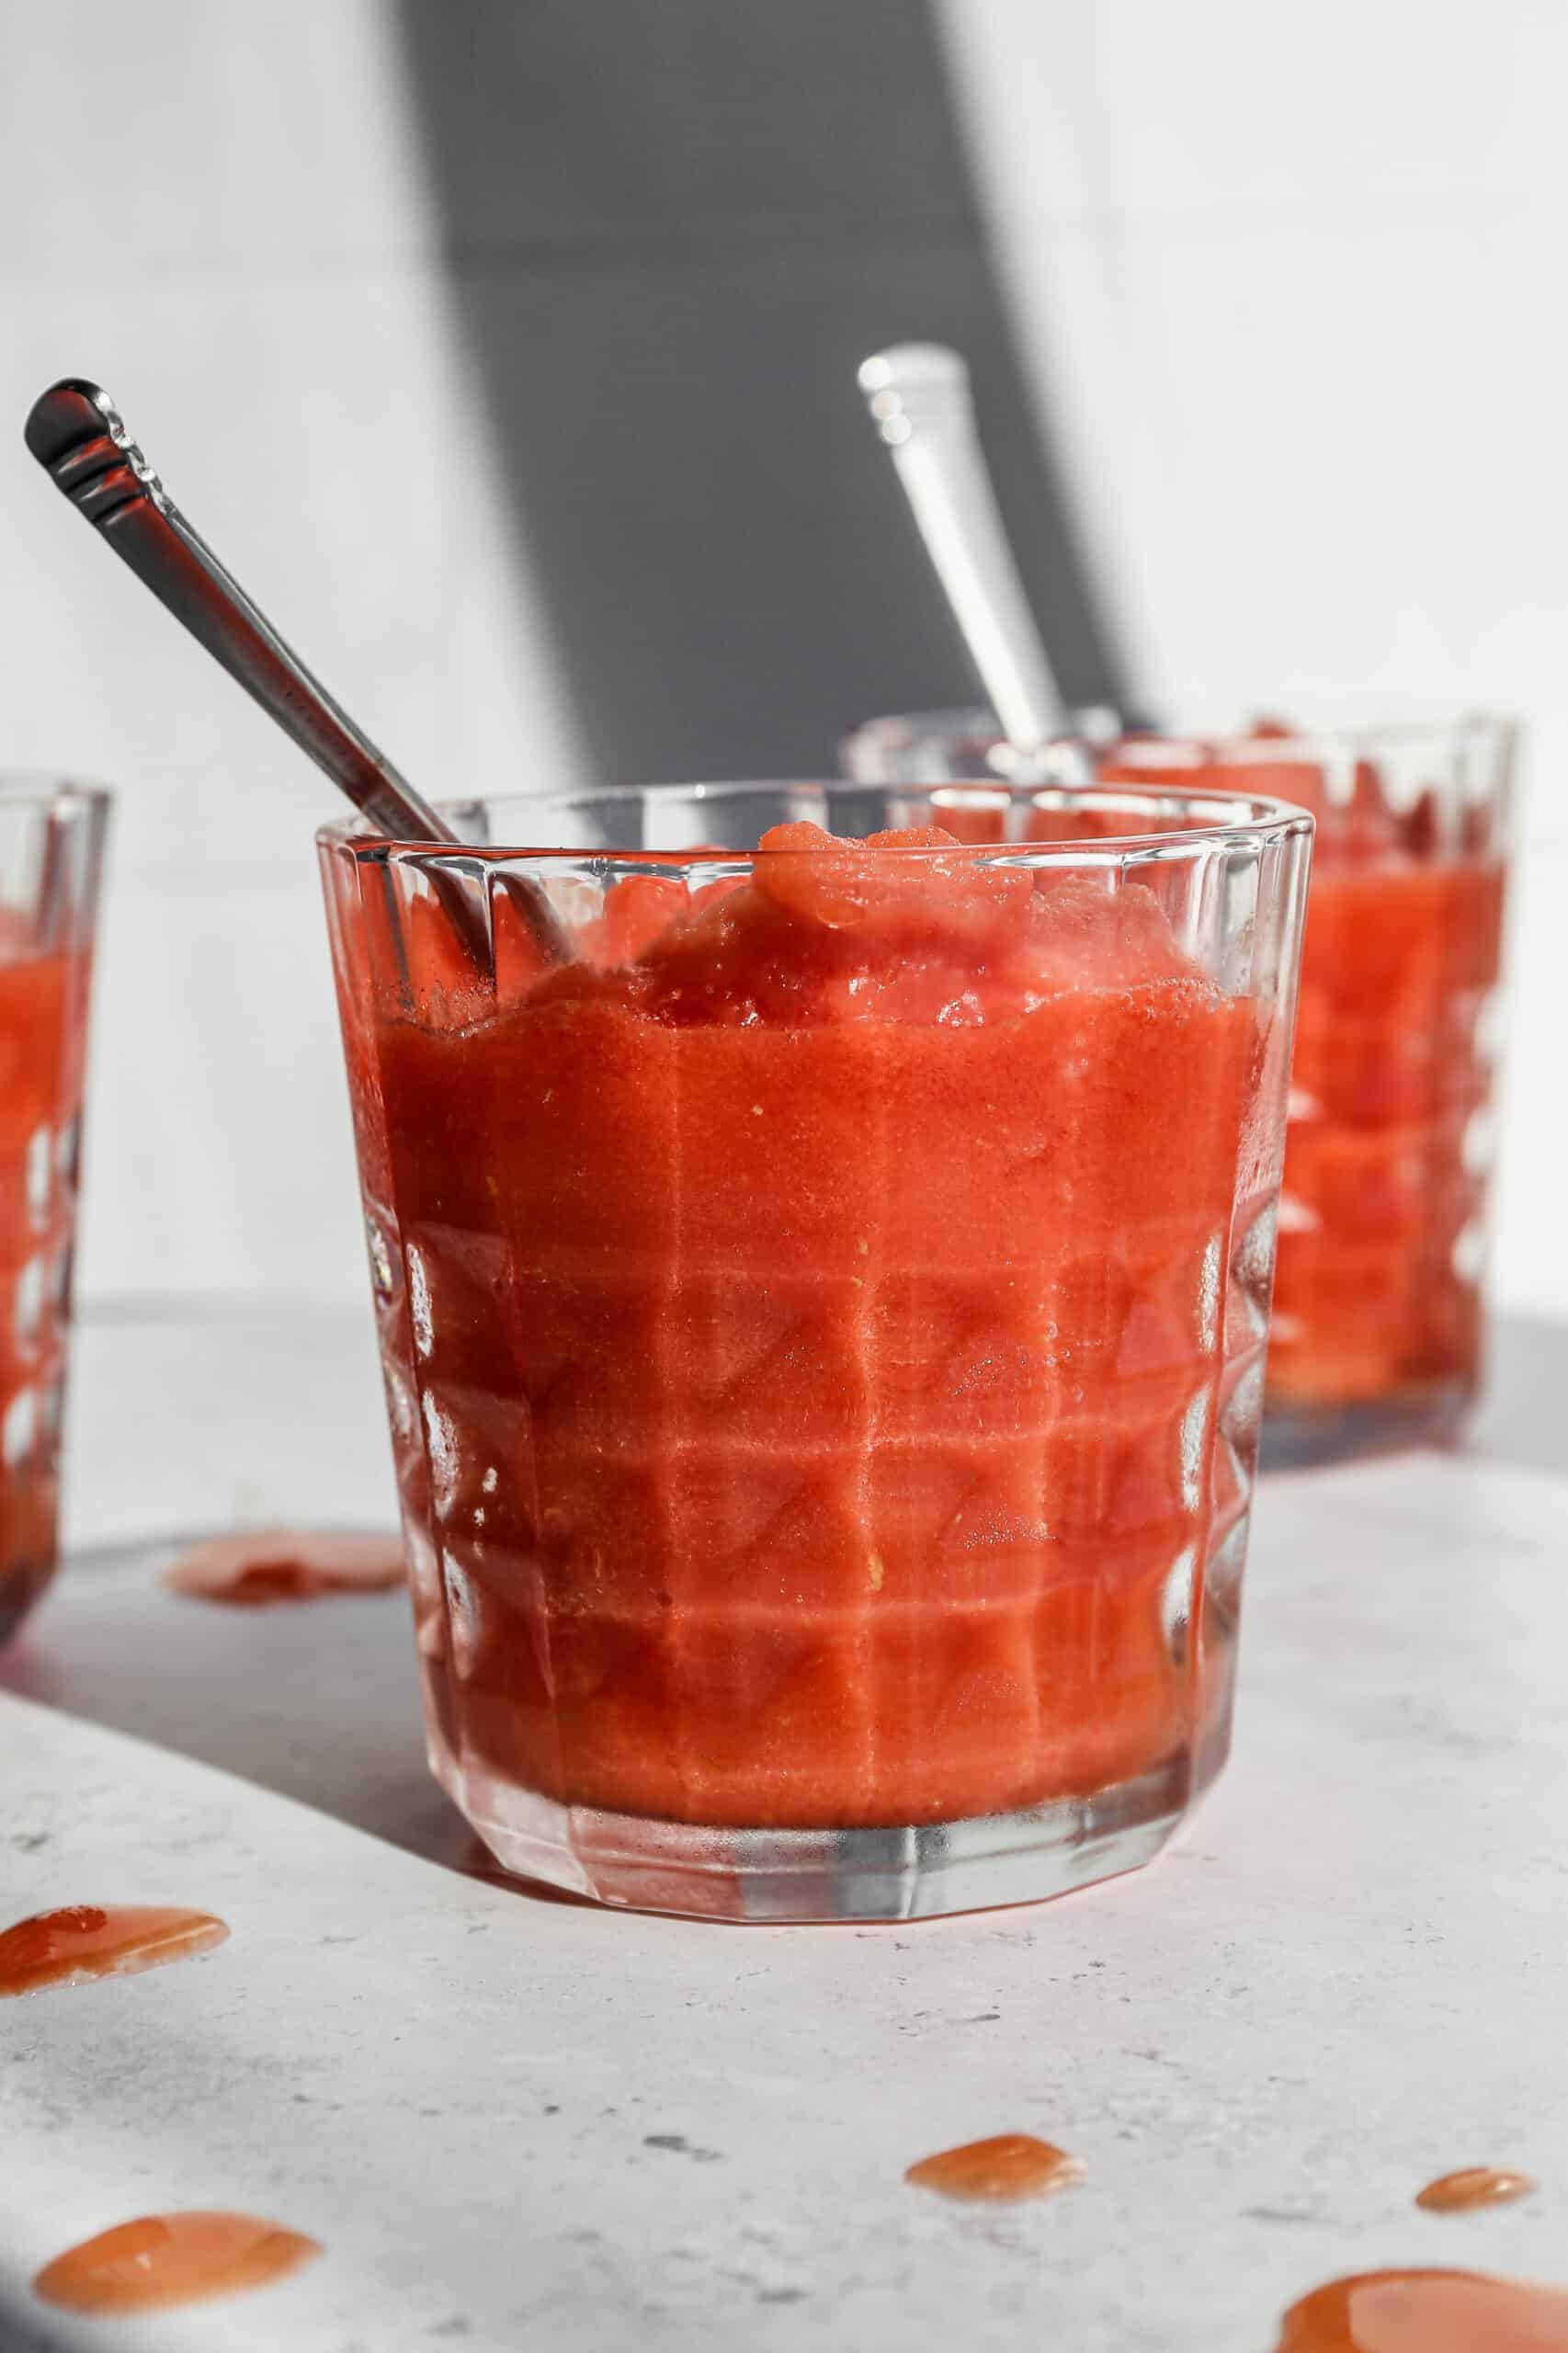
    a glass tumbler of easy frozen watermelon margarita mocktail with a silver spoon in it.

    I love to eat all the fresh watermelon that summer provides and I also like to turn it into this delicious frozen margaritas recipe!

    Ideal for backyard cookouts, summer parties, or simply cooling off on a hot day, this watermelon drink combines the vibrant taste of fresh fruit with the zesty flair of a margarita.

    Its bright color and frozen texture make it not only a delicious drink recipe but also a visually appealing one.

    Whether you're looking for the best mocktail idea or just a sweet and easy non-alcoholic treat, this watermelon margarita mocktail is a perfect choice for enjoying the flavors of summer.

    If you are looking for more non alcoholic mocktails you might also like my Strawberry Daiquiri Mocktail, this Long Island Iced Tea Mocktail or my Classic Margarita Mocktail recipes.

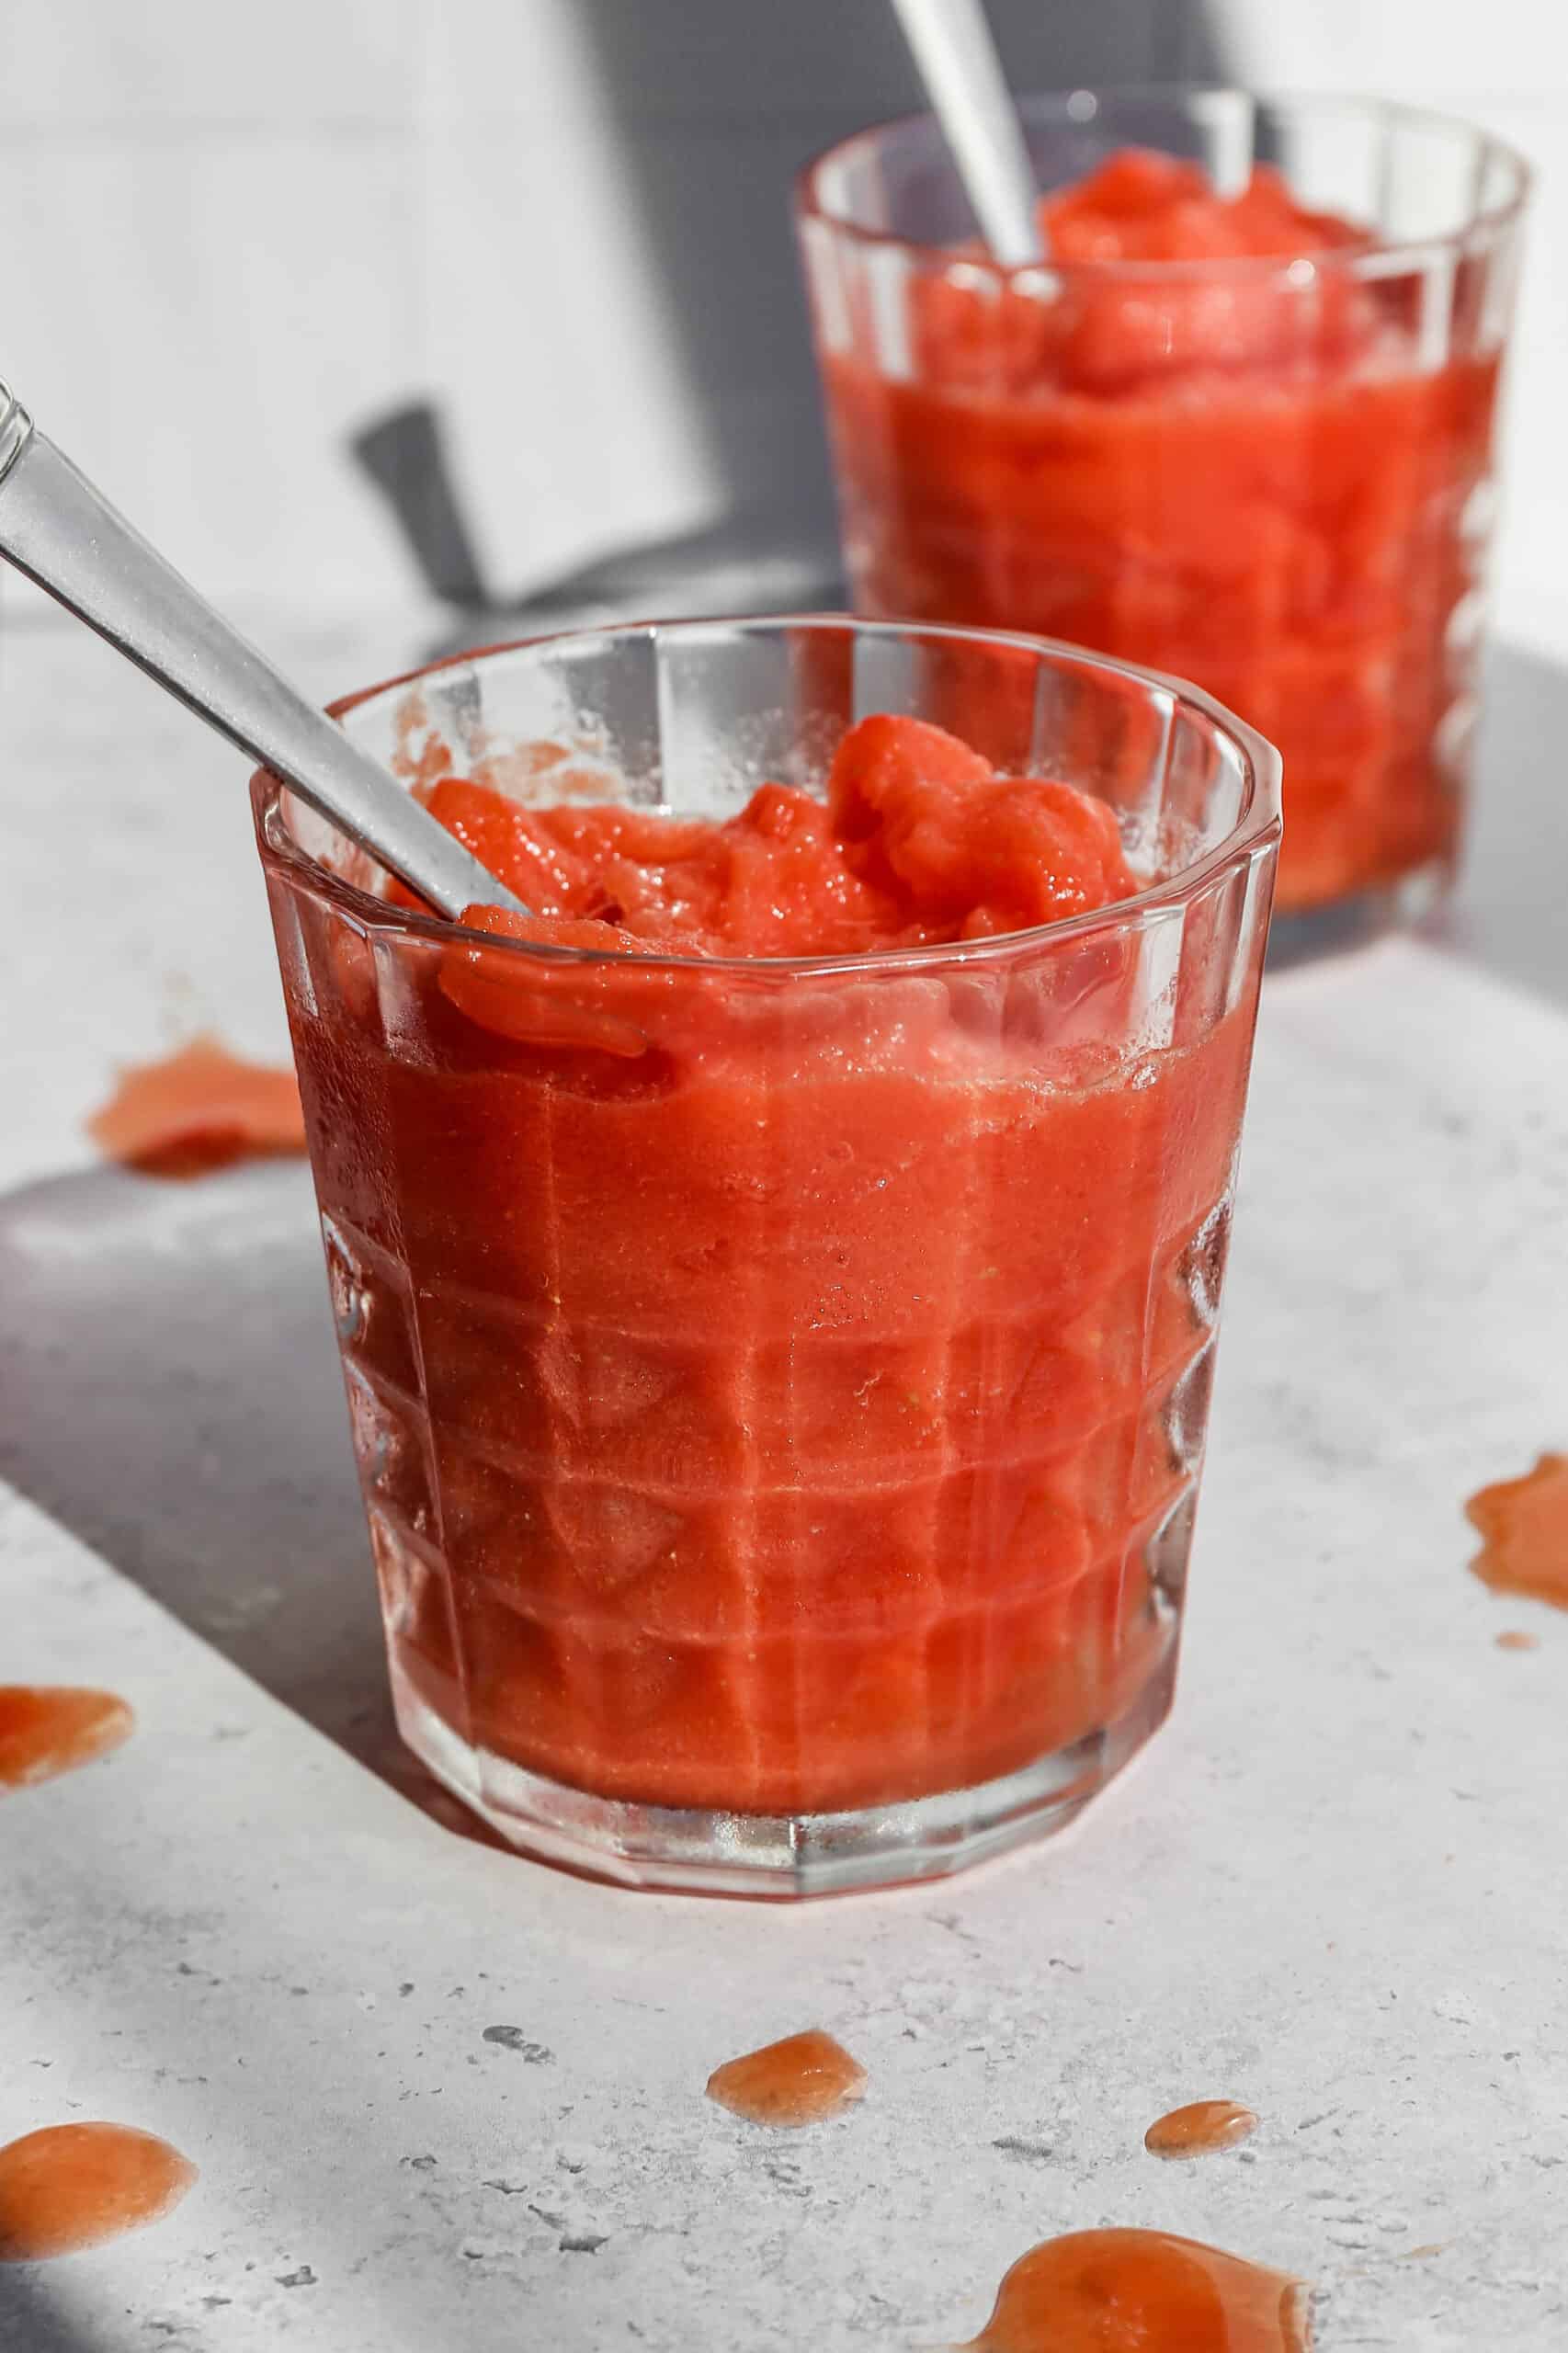
    a glass tumbler of easy frozen watermelon margarita mocktail with a silver spoon in it.
    [feast_advanced_jump_to]

    Ingredients

    • Seedless Watermelon
    • Simple Syrup
    • Lime Juice
    • Lemon Juice
    • Sea Salt
    • Water

    Instructions

    Cut the watermelon into cubes and remove the rind. Place the cubes on a baking sheet and freeze for at least one hour.

    You can purchase simple syrup or you can heat 1 cup water in the microwave for 3 minutes and then add 1 cup granulated sugar and stir until dissolved.

    In your blender add the frozen watermelon cubes, the simple syrup, lime juice, lemon juice and sea salt. Blend until smooth.

    If there isn't enough liquid to blend your mocktail add ¼ cup water and blend until smooth.

    Supplies

    I get a lot of my ingredients from Thrive Market. Thrive Market has been a game changer for me eating gluten free. They have so many options I can't get at my rural grocery stores! Use this link to get 40% off your first order!

    Print
    clock clock iconcutlery cutlery iconflag flag iconfolder folder iconinstagram instagram iconpinterest pinterest iconfacebook facebook iconprint print iconsquares squares iconheart heart iconheart solid heart solid icon

    Easy Frozen Watermelon Margarita Mocktail


    5 Stars 4 Stars 3 Stars 2 Stars 1 Star

    No reviews

    • Author: Elaine VanVleck
    • Total Time: 1 hour
    • Yield: 4 servings 1x
    • Diet: Gluten Free
    Print Recipe
    Pin Recipe

    Description

    This easy recipe for frozen watermelon margarita mocktails makes a pitcher of this delicious drink. You chop the fresh watermelon into cubes and then freeze it on a baking sheet. Using lime juice, lemon juice and a little salt you get a non alcoholic watermelon slushie using your blender.


    Ingredients

    Scale
    • 4 cups Seedless Watermelon, cubed and frozen
    • ½ cup Simple Syrup
    • 2 Tbsp Lime Juice
    • 2 Tbsp Lemon Juice
    • Pinch of Sea Salt
    • ¼ cup Water, if needed

    Instructions

    Cut the watermelon into cubes and remove the rind. Place the cubes on a baking sheet and freeze for at least one hour.

    You can purchase simple syrup or you can heat 1 cup water in the microwave for 3 minutes and then add 1 cup granulated sugar and stir until dissolved.

    In your blender add the frozen watermelon cubes, the simple syrup, lime juice, lemon juice and sea salt. Blend until smooth.

    If there isn't enough liquid to blend your mocktail add ¼ cup water and blend until smooth.

    • Prep Time: 1 hour
    • Category: Drinks, Frozen
    • Method: Blender
    • Cuisine: Gluten Free

    Did you make this recipe?

    Tag @smallfarmbiglife on Instagram and hashtag it #smallfarmbiglife

    Frequently Asked Questions

    How do I choose a ripe watermelon?

    You want a watermelon that has deep colored stripes and a dull rind. A yellow spot is ideal for getting a sweet flavor to your watermelon. It's best if it has a hollow sound when you knock on the rind with your hand.

    Do watermelon continue to ripen after picked?

    No, watermelon are not like cantaloupe that will continue to ripen on your counter. With a watermelon you want to get a sweet and ripe melon at the store. You can not count on it ripen up some at home.

    Can watermelon be frozen?

    Yes! Frozen watermelon cubes on a hot summer day are the best treat. You simply remove the rind from the watermelon and then chop the fruit into cubes. Place the cubes not touching on a baking sheet and freeze for at least one hour.

    After the watermelon cubes are frozen you can remove them from the baking sheet and place them in an air tight freezer safe container to enjoy for up to a week.

    • « Previous Page
    • 1
    • …
    • 32
    • 33
    • 34
    • 35
    • 36
    • …
    • 88
    • Next Page »

    Welcome! I'm Elaine

    I'm so glad you are here! I share easy gluten free recipes from my small farm in Washington.

    Be sure to sign up for my newsletter to stay up to date on all of my new recipes.

    More about me...
    • Instagram
    • Pinterest
    • Facebook
    • Twitter
    • email

    Free gluten free recipe ebook
    My most loved recipes in one download, plus new recipes every Friday.
    Check your inbox! Your ebook is on its way.

    Easy Meals Recipes

    • Gluten Free Instant Pot Chili Mac and Cheese
    • Gluten Free Taco Casserole
    • Gluten Free Cowboy Baked Beans
    • Gluten Free Walking Taco Casserole
    • Gluten Free Creamy Beef and Mushroom Pasta
    • Gluten Free Instant Pot Chicken and Dumplings
    • Instant Pot Mexican Style Beef and Rice
    • Gluten Free Chicken Parmesan Pasta Casserole
    • Gluten Free One Pot Hamburger Helper Copycat
    • Gluten Free Salisbury Steak with Mushroom Gravy
    • Gluten Free Air Fryer Fajitas
    • Gluten Free Sloppy Joe Casserole

    Footer

    back to top

    About

    • Privacy Policy
    • Shop my Amazon Page
    • Follow me on LTK

    Newsletter

    • Sign Up! for emails and updates

    Contact

    • Contact
    • Media Kit
    • About Me

    As an Amazon Associate I earn from qualifying purchases.

    I may get commissions for purchases made through links on this site.

    Copyright © 2026 Brunch Pro on the Brunch Pro Theme